ME 121 Engineering Practices Lecture 3 Precision Measuring



- Slides: 22

ME: 121 Engineering Practices Lecture 3 Precision Measuring Instruments

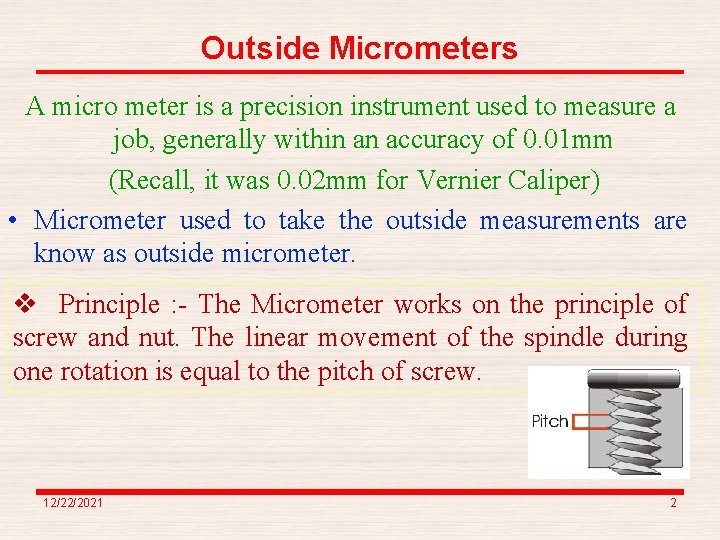
Outside Micrometers A micro meter is a precision instrument used to measure a job, generally within an accuracy of 0. 01 mm (Recall, it was 0. 02 mm for Vernier Caliper) • Micrometer used to take the outside measurements are know as outside micrometer. v Principle : - The Micrometer works on the principle of screw and nut. The linear movement of the spindle during one rotation is equal to the pitch of screw. 12/22/2021 2

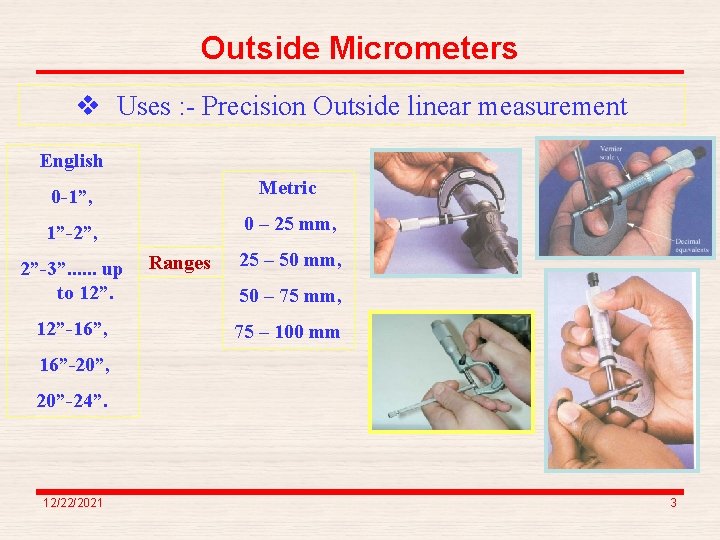
Outside Micrometers v Uses : - Precision Outside linear measurement English 0 -1”, Metric 1”-2”, 0 – 25 mm, 2”-3”. . . up to 12”-16”, Ranges 25 – 50 mm, 50 – 75 mm, 75 – 100 mm 16”-20”, 20”-24”. 12/22/2021 3

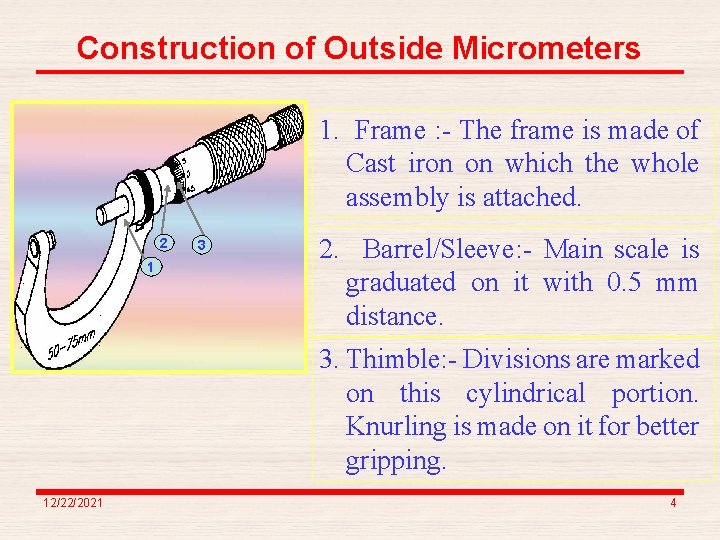
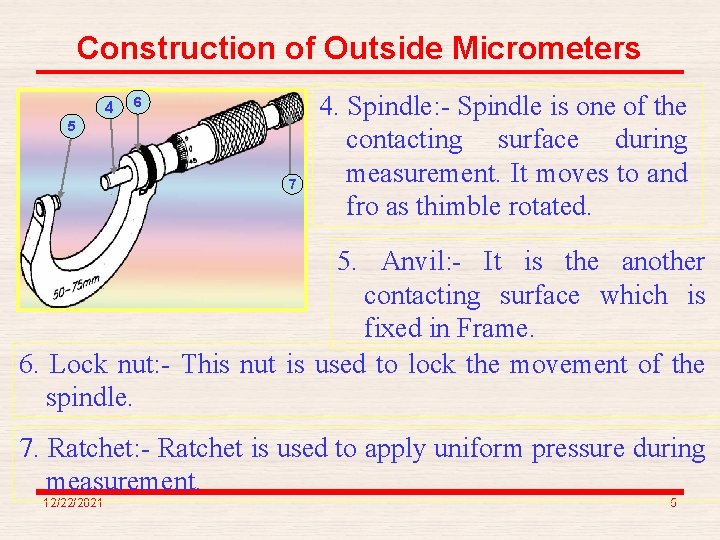
Construction of Outside Micrometers 1. Frame : - The frame is made of Cast iron on which the whole assembly is attached. 2 1 3 2. Barrel/Sleeve: - Main scale is graduated on it with 0. 5 mm distance. 3. Thimble: - Divisions are marked on this cylindrical portion. Knurling is made on it for better gripping. 12/22/2021 4

Construction of Outside Micrometers 4 6 5 7 4. Spindle: - Spindle is one of the contacting surface during measurement. It moves to and fro as thimble rotated. 5. Anvil: - It is the another contacting surface which is fixed in Frame. 6. Lock nut: - This nut is used to lock the movement of the spindle. 7. Ratchet: - Ratchet is used to apply uniform pressure during measurement. 12/22/2021 5

Construction of Outside Micrometers anvil spindle sleeve thimble ratchet frame 12/22/2021 6

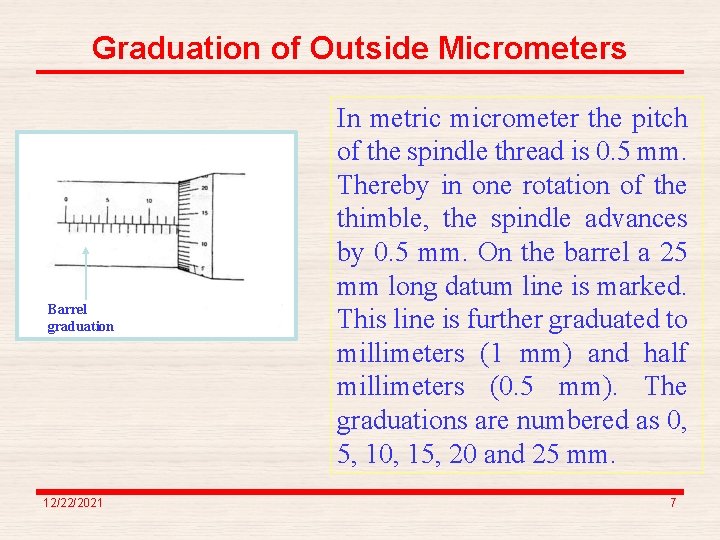
Graduation of Outside Micrometers Barrel graduation 12/22/2021 In metric micrometer the pitch of the spindle thread is 0. 5 mm. Thereby in one rotation of the thimble, the spindle advances by 0. 5 mm. On the barrel a 25 mm long datum line is marked. This line is further graduated to millimeters (1 mm) and half millimeters (0. 5 mm). The graduations are numbered as 0, 5, 10, 15, 20 and 25 mm. 7

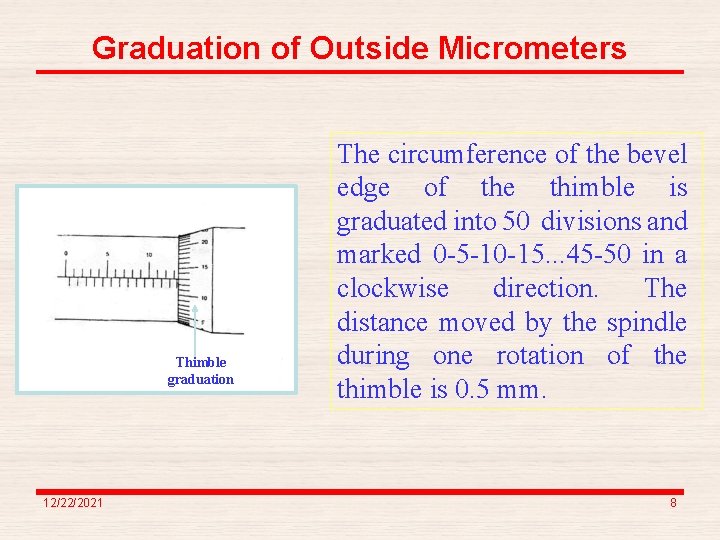
Graduation of Outside Micrometers Thimble graduation 12/22/2021 The circumference of the bevel edge of the thimble is graduated into 50 divisions and marked 0 -5 -10 -15. . . 45 -50 in a clockwise direction. The distance moved by the spindle during one rotation of the thimble is 0. 5 mm. 8

Reading of Outside Micrometers Least Count of Outside Micrometer The least count of a Metric Micrometer is 0. 01 mm. It is the ratio of value of 1 main scale division and total graduations on thimble. i. e. 0. 5/50 Zero Error of Outside Micrometer When the anvil and spindle of the micrometer touch each other, the scales should read zero. If not, there is a zero error in the micrometer. 12/22/2021 9

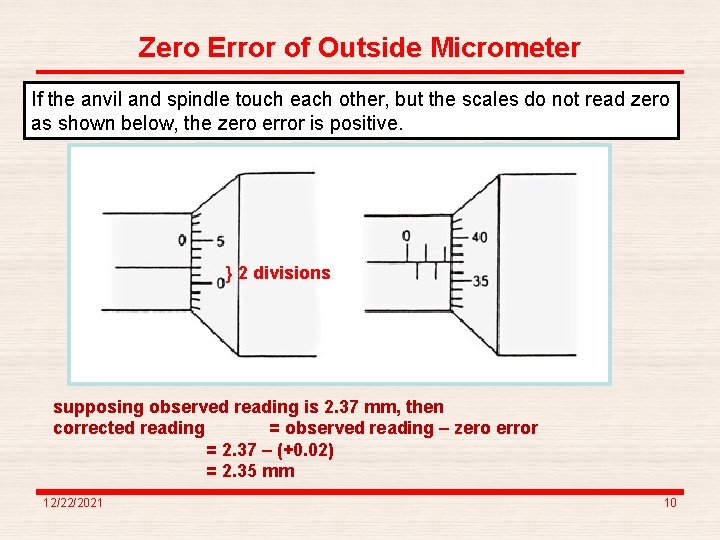
Zero Error of Outside Micrometer If the anvil and spindle touch each other, but the scales do not read zero as shown below, the zero error is positive. } 2 divisions supposing observed reading is 2. 37 mm, then corrected reading = observed reading – zero error = 2. 37 – (+0. 02) = 2. 35 mm 12/22/2021 10

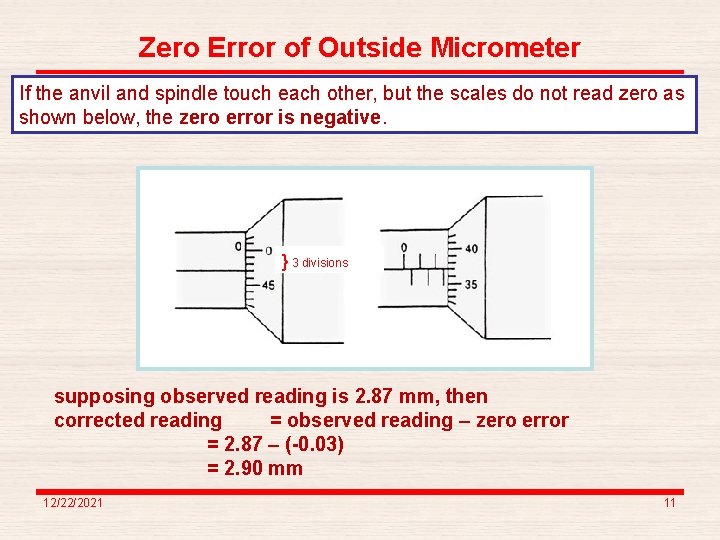
Zero Error of Outside Micrometer If the anvil and spindle touch each other, but the scales do not read zero as shown below, the zero error is negative. } 3 divisions supposing observed reading is 2. 87 mm, then corrected reading = observed reading – zero error = 2. 87 – (-0. 03) = 2. 90 mm 12/22/2021 11

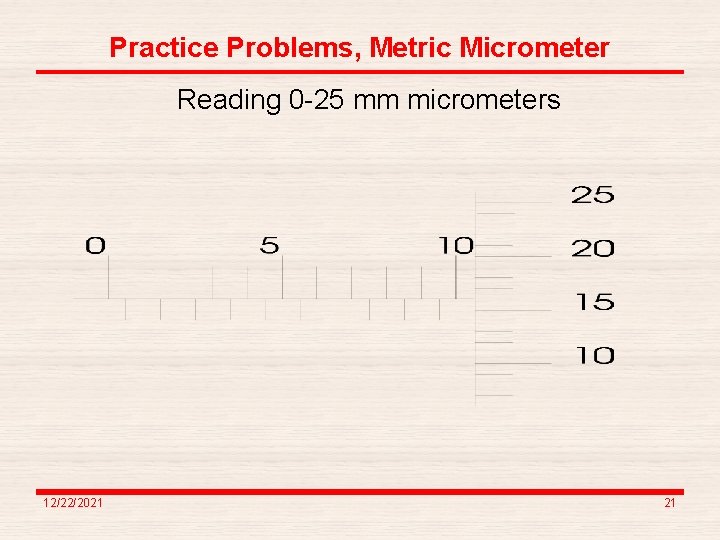
Reading of Outside Micrometers ØFirst note the minimum range of the outside micrometer. While measuring with a 50 to 75 mm micrometer, note it as 50 mm. ØThen read the barrel graduations. Read the value of the visible lines on the left of the thimble edge. ØThen read the thimble graduations. Multiply these graduations with least count. ØAdd all above reading together. The sum of these reading is the actual reading of the object. 12/22/2021 12

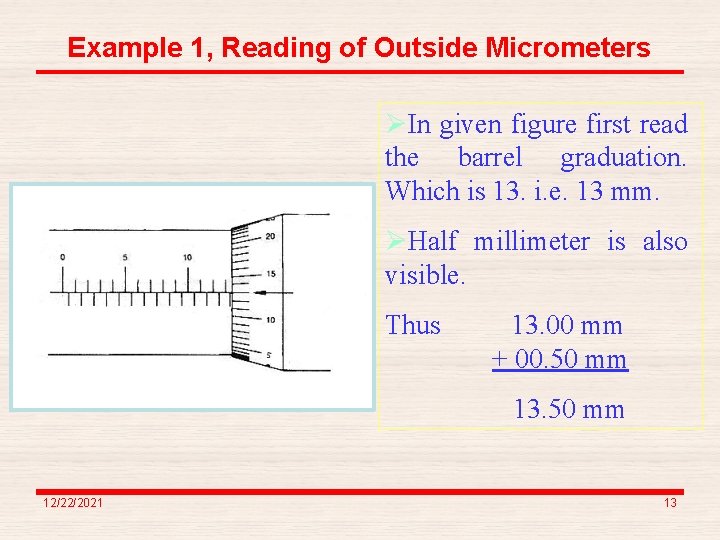
Example 1, Reading of Outside Micrometers ØIn given figure first read the barrel graduation. Which is 13. i. e. 13 mm. ØHalf millimeter is also visible. Thus 13. 00 mm + 00. 50 mm 13. 50 mm 12/22/2021 13

Example 1, Reading of Outside Micrometers Next read the thimble graduation, which is 13. Multiply it by L. C. which is 0. 01 mm. = 13 x 0. 01 mm = 0. 13 mm. ØSummation of all above readings, 13. 50 mm +0. 13 mm 13. 63 mm 12/22/2021 14

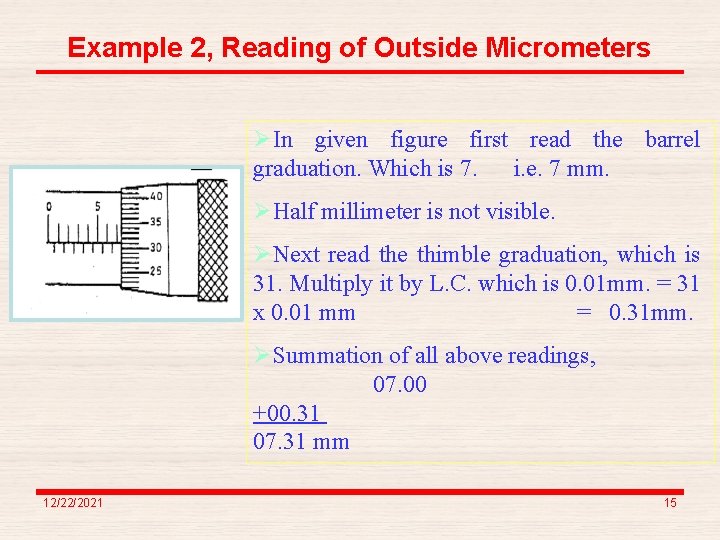
Example 2, Reading of Outside Micrometers ØIn given figure first read the barrel graduation. Which is 7. i. e. 7 mm. ØHalf millimeter is not visible. ØNext read the thimble graduation, which is 31. Multiply it by L. C. which is 0. 01 mm. = 31 x 0. 01 mm = 0. 31 mm. ØSummation of all above readings, 07. 00 +00. 31 07. 31 mm 12/22/2021 15

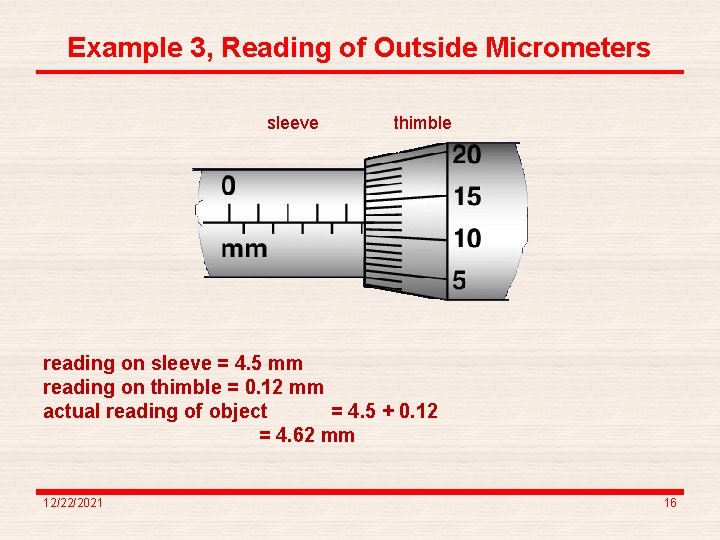
Example 3, Reading of Outside Micrometers sleeve thimble reading on sleeve = 4. 5 mm reading on thimble = 0. 12 mm actual reading of object = 4. 5 + 0. 12 = 4. 62 mm 12/22/2021 16

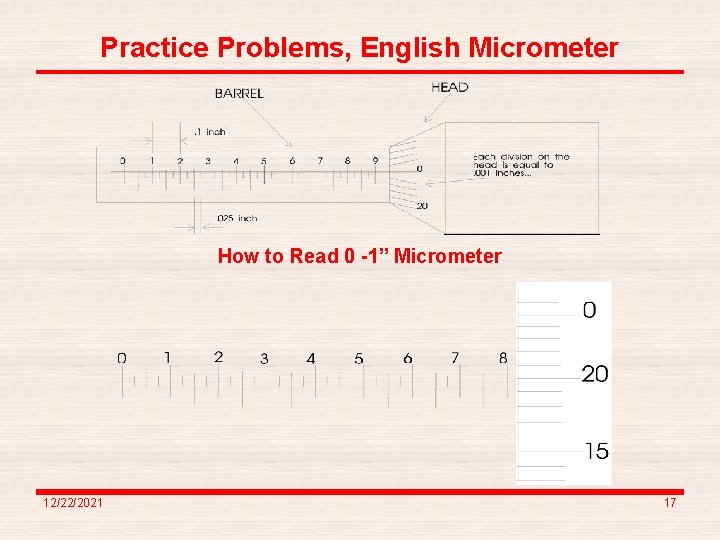
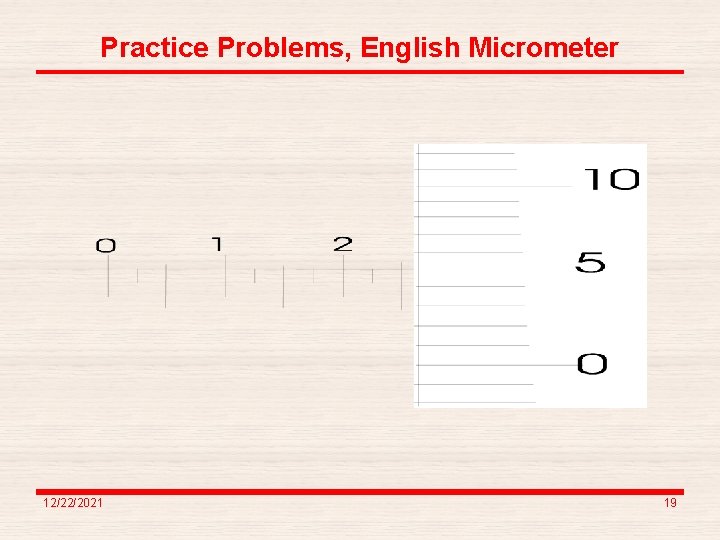
Practice Problems, English Micrometer How to Read 0 -1” Micrometer 12/22/2021 17

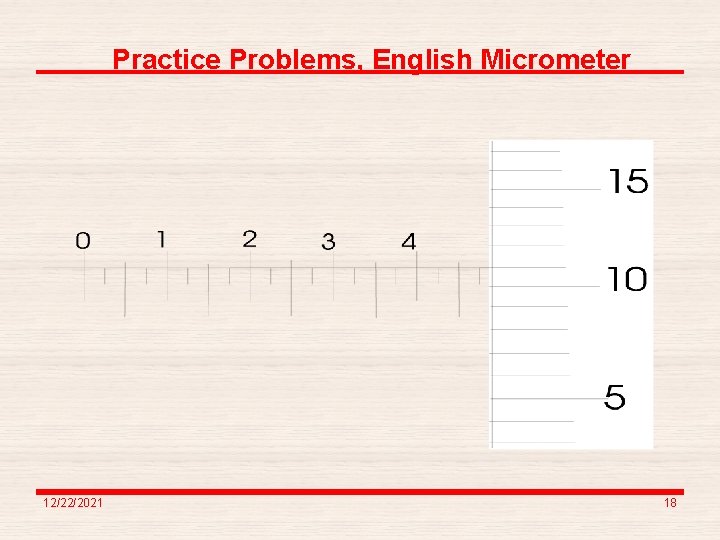
Practice Problems, English Micrometer 12/22/2021 18

Practice Problems, English Micrometer 12/22/2021 19

Practice Problems, Metric Micrometer Reading 0 -25 mm micrometers 12/22/2021 20

Practice Problems, Metric Micrometer Reading 0 -25 mm micrometers 12/22/2021 21

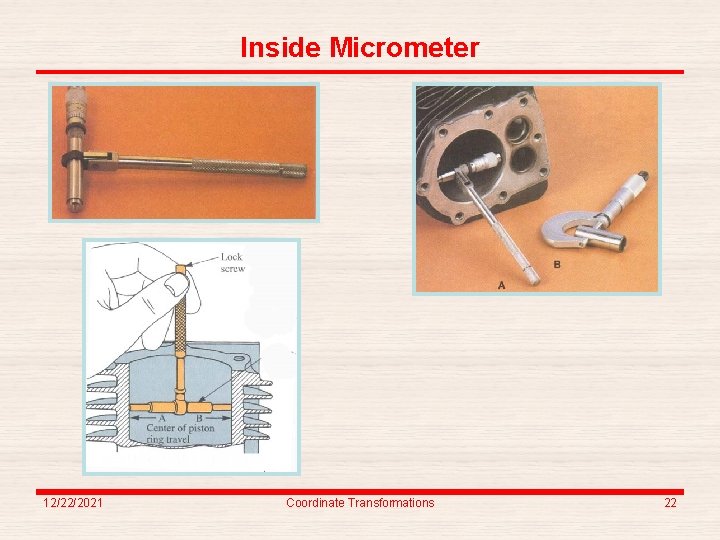
Inside Micrometer 12/22/2021 Coordinate Transformations 22