Materials Technology Material Testing Overview Testing Materials Hardness

- Slides: 12

Materials Technology Material Testing

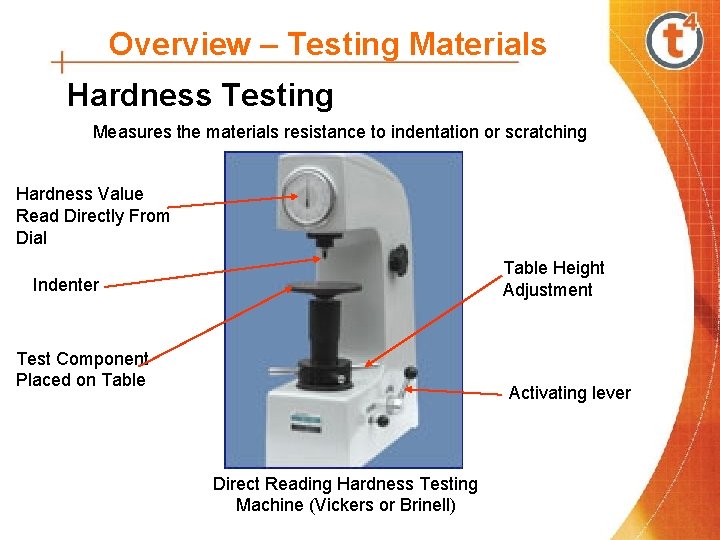
Overview – Testing Materials Hardness Testing Measures the materials resistance to indentation or scratching Hardness Value Read Directly From Dial Table Height Adjustment Indenter Test Component Placed on Table Activating lever Direct Reading Hardness Testing Machine (Vickers or Brinell)

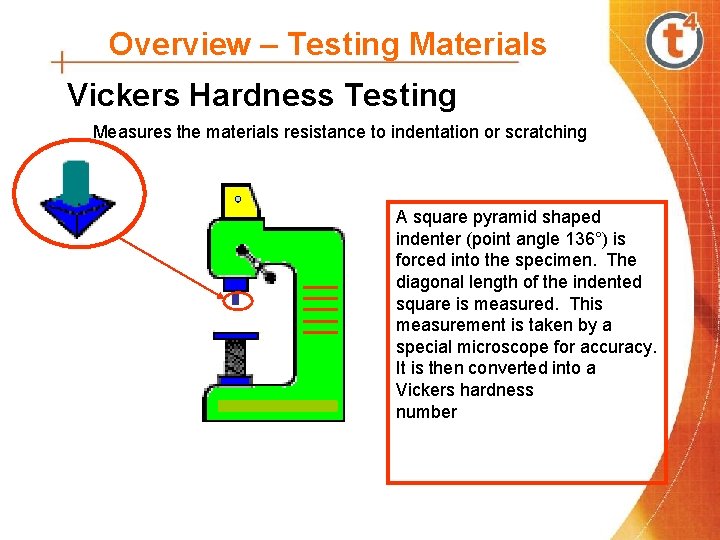
Overview – Testing Materials Vickers Hardness Testing Measures the materials resistance to indentation or scratching A square pyramid shaped indenter (point angle 136°) is forced into the specimen. The diagonal length of the indented square is measured. This measurement is taken by a special microscope for accuracy. It is then converted into a Vickers hardness number

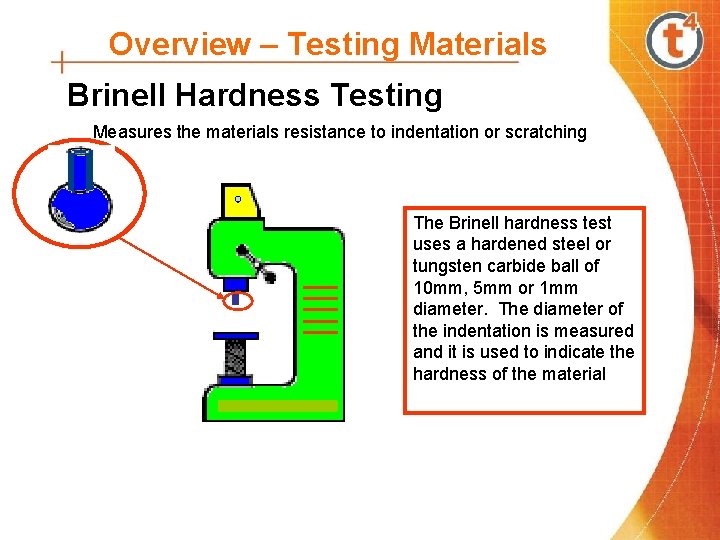
Overview – Testing Materials Brinell Hardness Testing Measures the materials resistance to indentation or scratching The Brinell hardness test uses a hardened steel or tungsten carbide ball of 10 mm, 5 mm or 1 mm diameter. The diameter of the indentation is measured and it is used to indicate the hardness of the material

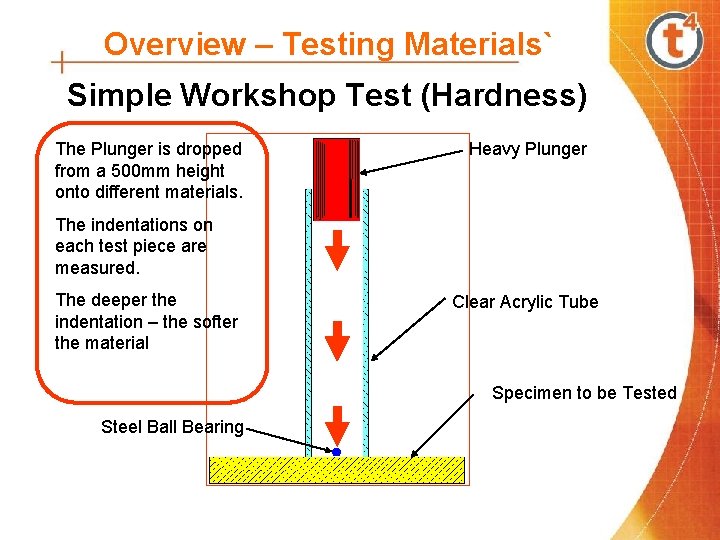
Overview – Testing Materials` Simple Workshop Test (Hardness) The Plunger is dropped from a 500 mm height onto different materials. Heavy Plunger The indentations on each test piece are measured. The deeper the indentation – the softer the material Clear Acrylic Tube Specimen to be Tested Steel Ball Bearing

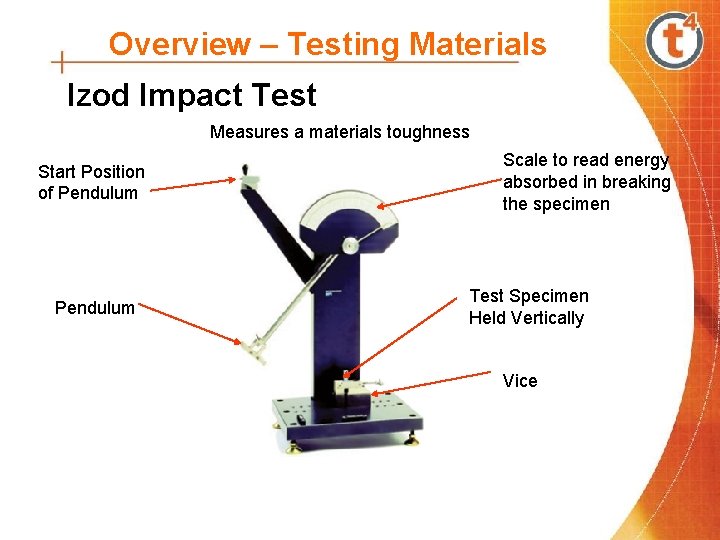
Overview – Testing Materials Izod Impact Test Measures a materials toughness Start Position of Pendulum Scale to read energy absorbed in breaking the specimen Test Specimen Held Vertically Vice

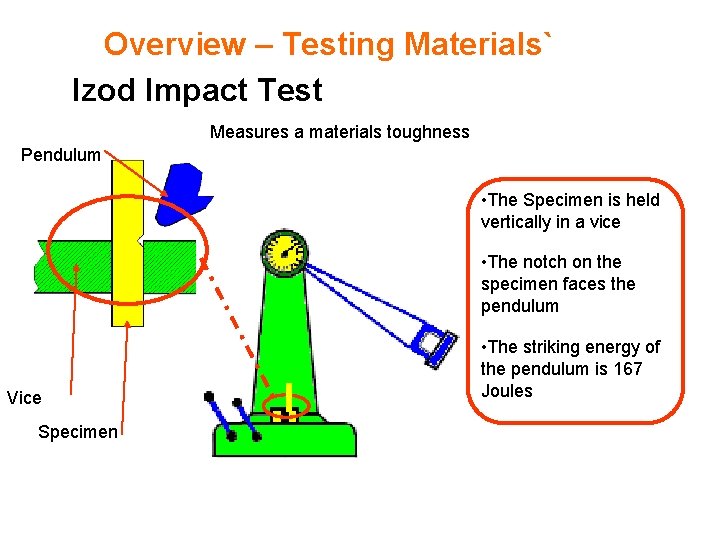
Overview – Testing Materials` Izod Impact Test Measures a materials toughness Pendulum • The Specimen is held vertically in a vice • The notch on the specimen faces the pendulum Vice Specimen • The striking energy of the pendulum is 167 Joules

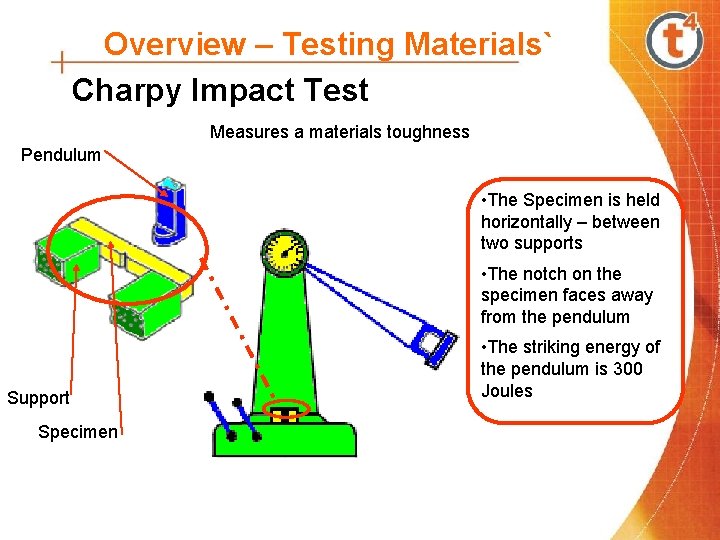
Overview – Testing Materials` Charpy Impact Test Measures a materials toughness Pendulum • The Specimen is held horizontally – between two supports • The notch on the specimen faces away from the pendulum Support Specimen • The striking energy of the pendulum is 300 Joules

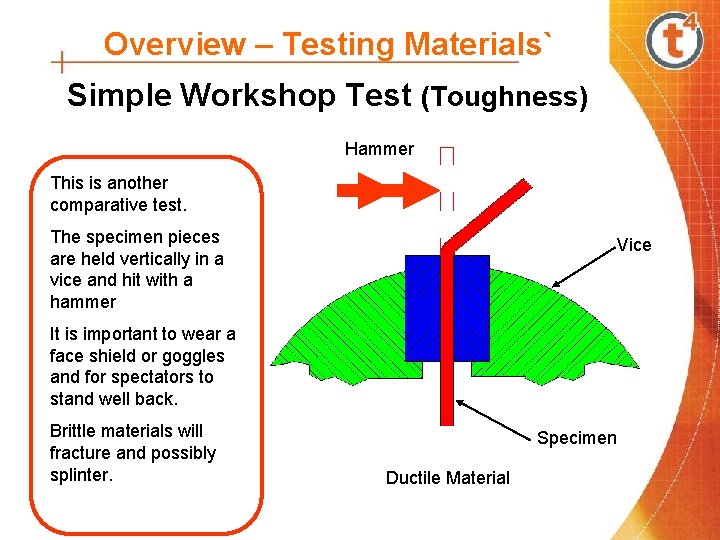
Overview – Testing Materials` Simple Workshop Test (Toughness) Hammer This is another comparative test. The specimen pieces are held vertically in a vice and hit with a hammer Vice It is important to wear a face shield or goggles and for spectators to stand well back. Brittle materials will fracture and possibly splinter. Specimen Ductile Material

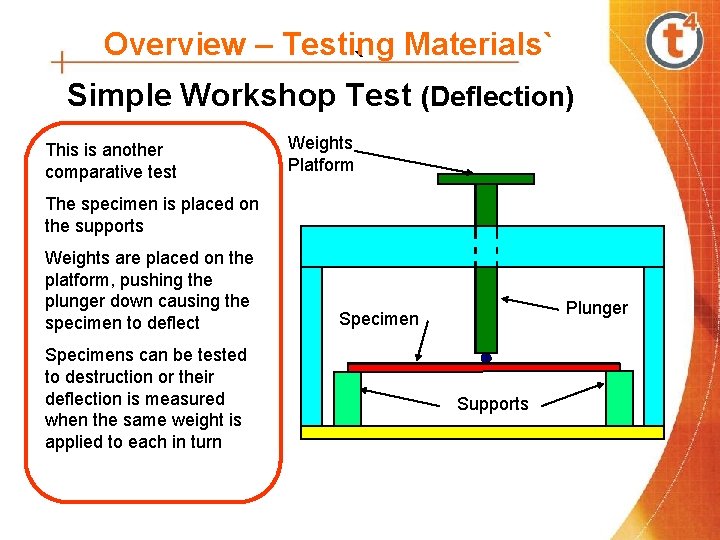
Overview – Testing Materials` ` Simple Workshop Test (Deflection) This is another comparative test Weights Platform The specimen is placed on the supports Weights are placed on the platform, pushing the plunger down causing the specimen to deflect Specimens can be tested to destruction or their deflection is measured when the same weight is applied to each in turn Plunger Specimen Supports

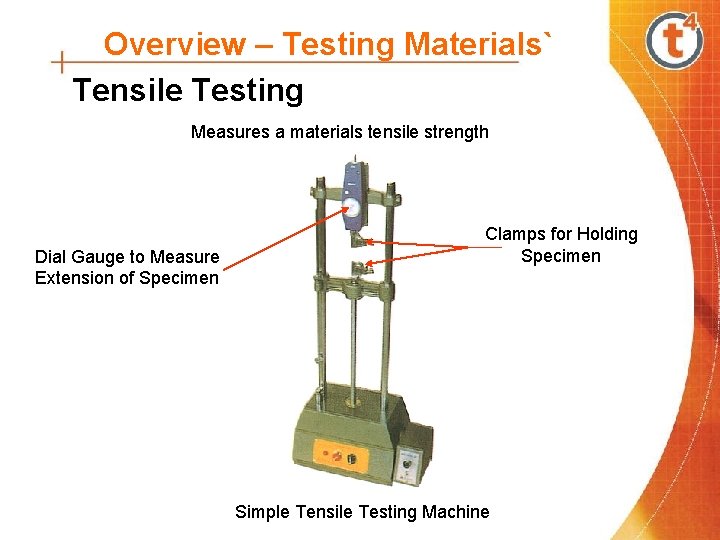
Overview – Testing Materials` Tensile Testing Measures a materials tensile strength Dial Gauge to Measure Extension of Specimen Clamps for Holding Specimen Simple Tensile Testing Machine

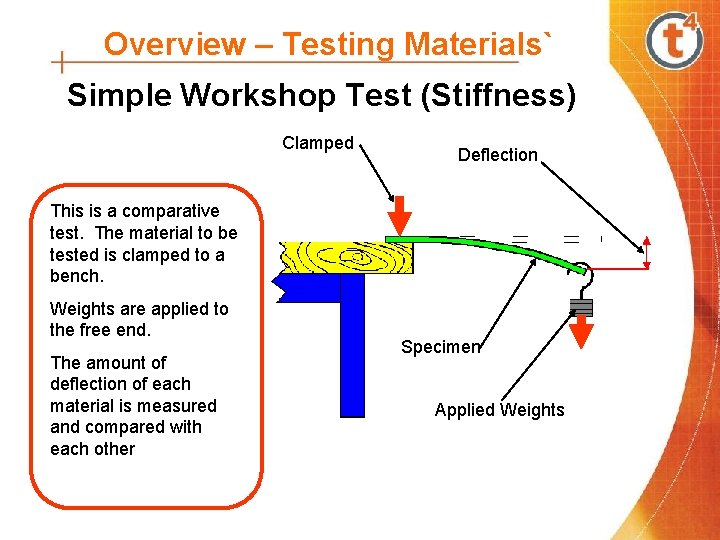
Overview – Testing Materials` Simple Workshop Test (Stiffness) Clamped Deflection This is a comparative test. The material to be tested is clamped to a bench. Weights are applied to the free end. The amount of deflection of each material is measured and compared with each other Specimen Applied Weights