Manufacturing Processes lab I Milling Machine 2 MPL

Manufacturing Processes lab I Milling Machine- 2 MPL I (MET 1321) Prof. Simin Nasseri

Operating the Vertical Mill In addition to the usual precautions that must be observed when getting a machine tool ready for a job, the spindle head alignment must be checked. Make sure that the spindle head is at an exact right angle (perpendicular) to the worktable. If the spindle is not perpendicular, it is not possible to machine a flat surface. MPL I (MET 1321) Prof. Simin Nasseri

Dial indicator A dial indicator can be employed to check whether the milling head is perpendicular to the table. MPL I (MET 1321) Prof. Simin Nasseri
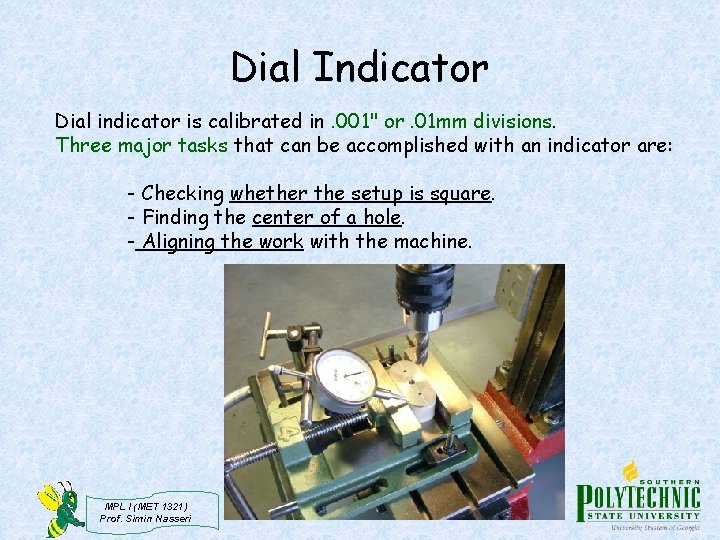
Dial Indicator Dial indicator is calibrated in. 001" or. 01 mm divisions. Three major tasks that can be accomplished with an indicator are: - Checking whether the setup is square. - Finding the center of a hole. - Aligning the work with the machine. MPL I (MET 1321) Prof. Simin Nasseri
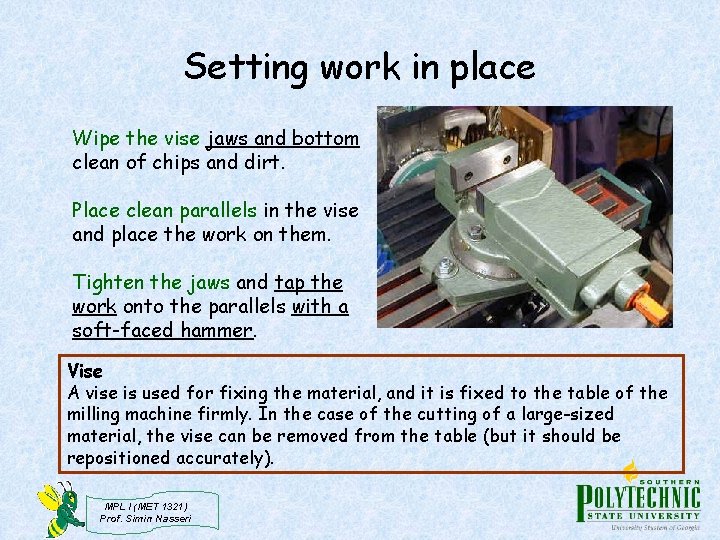
Setting work in place Wipe the vise jaws and bottom clean of chips and dirt. Place clean parallels in the vise and place the work on them. Tighten the jaws and tap the work onto the parallels with a soft-faced hammer. Vise A vise is used for fixing the material, and it is fixed to the table of the milling machine firmly. In the case of the cutting of a large-sized material, the vise can be removed from the table (but it should be repositioned accurately). MPL I (MET 1321) Prof. Simin Nasseri
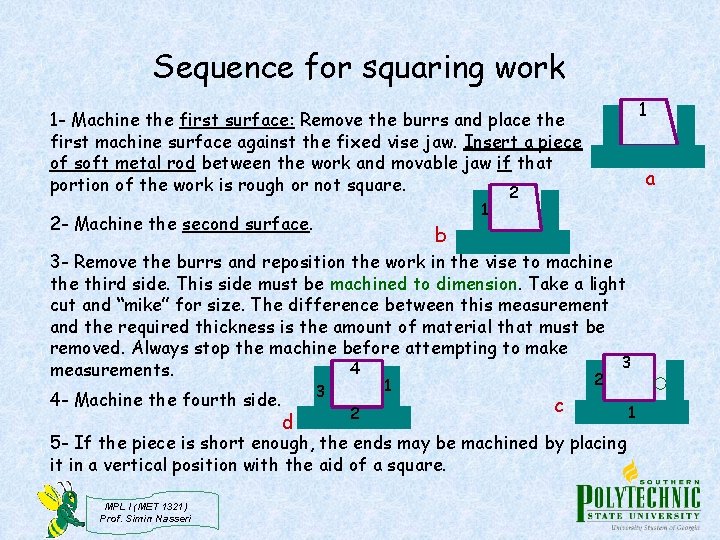
Sequence for squaring work 1 1 - Machine the first surface: Remove the burrs and place the first machine surface against the fixed vise jaw. Insert a piece of soft metal rod between the work and movable jaw if that portion of the work is rough or not square. 2 2 - Machine the second surface. b a 1 3 - Remove the burrs and reposition the work in the vise to machine third side. This side must be machined to dimension. Take a light cut and “mike” for size. The difference between this measurement and the required thickness is the amount of material that must be removed. Always stop the machine before attempting to make 3 4 measurements. 4 - Machine the fourth side. 1 3 d 2 c 2 5 - If the piece is short enough, the ends may be machined by placing it in a vertical position with the aid of a square. MPL I (MET 1321) Prof. Simin Nasseri 1
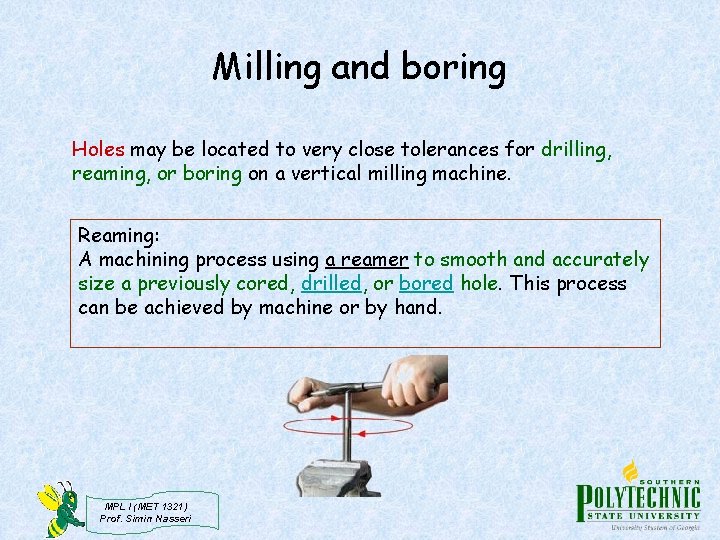
Milling and boring Holes may be located to very close tolerances for drilling, reaming, or boring on a vertical milling machine. Reaming: A machining process using a reamer to smooth and accurately size a previously cored, drilled, or bored hole. This process can be achieved by machine or by hand. MPL I (MET 1321) Prof. Simin Nasseri

Milling and boring The first hole can be located with a wiggler, a centering scope, or an edge finder. *** Wiggler: To ensure accuracy, align first hole with wiggler. Remaining holes can be located with micrometer dials on cross and longitudinal feeds of machine. MPL I (MET 1321) Prof. Simin Nasseri
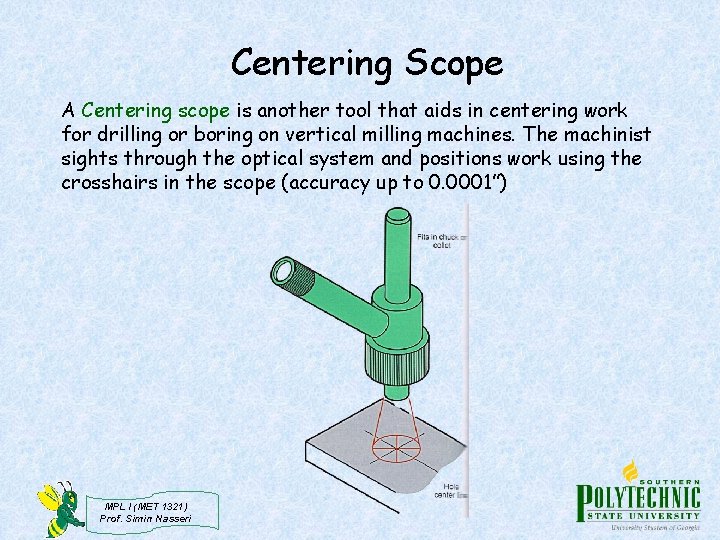
Centering Scope A Centering scope is another tool that aids in centering work for drilling or boring on vertical milling machines. The machinist sights through the optical system and positions work using the crosshairs in the scope (accuracy up to 0. 0001”) MPL I (MET 1321) Prof. Simin Nasseri
Edge Finder The edge finder is a precision positioning tool that will locate the edge of the work in relation to center of the spindle with 0. 0002” (0. 005 mm) accuracy! 1. With spindle rotating at moderate speed, slowly feed tip of tool against work. 2. Edge finder tip will gradually become centered with its shank. 3. When the tip becomes exactly centered, it will abruptly jump sideways about 1/32” (0. 8 mm). 4. When this occurs, stop table movement immediately. Center of the spindle will be exactly one-half tip diameter away from edge of work. 5. Set the micrometer dial to 0 and with edge finder clear of work, move table longitudinally the required distance plus onehalf the tip diameter. MPL I (MET 1321) Prof. Simin Nasseri

Edge finder MPL I (MET 1321) Prof. Simin Nasseri
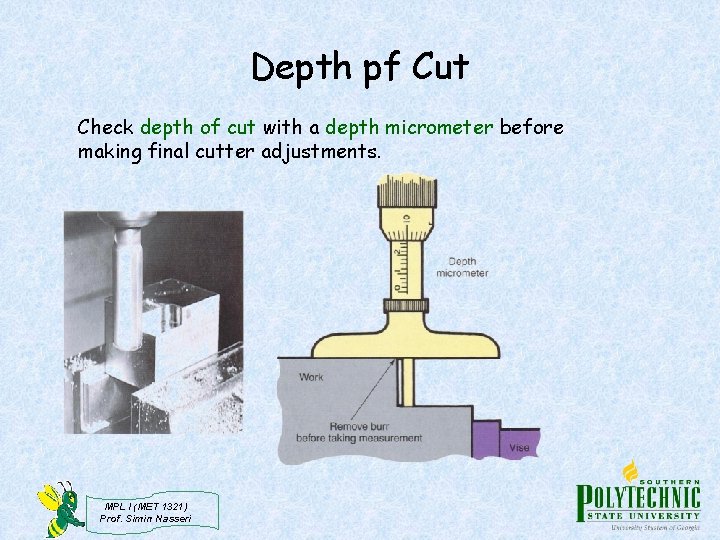
Depth pf Cut Check depth of cut with a depth micrometer before making final cutter adjustments. MPL I (MET 1321) Prof. Simin Nasseri
Thread Milling For years, threads have been milled on the lathe and special thread milling machines. Today, CNC machining centers with helical interpolation can mill high quality threads in holes ranging from 3/8” (9. 5 mm) diameter to diameters of almost any size. Helical interpolation creates tool movement in a helical path and requires simultaneous movement in the X, Y, and Z axes. Today, an estimated 80% to 90% of the milling machines in use have CNC capabilities. MPL I (MET 1321) Prof. Simin Nasseri
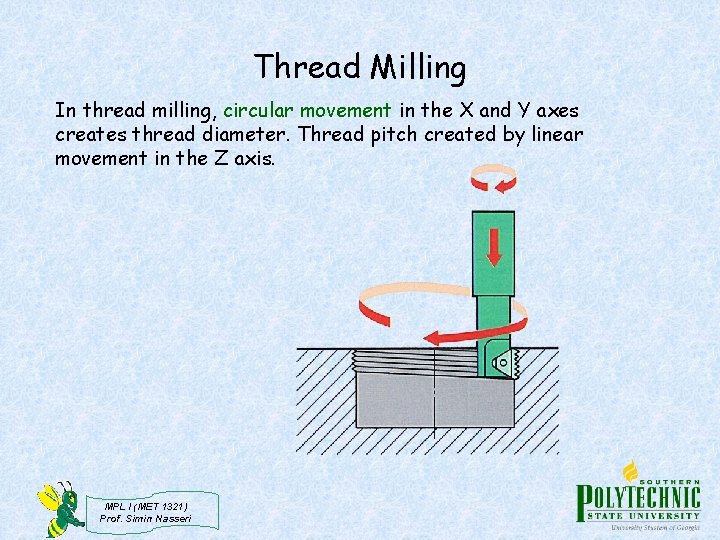
Thread Milling In thread milling, circular movement in the X and Y axes creates thread diameter. Thread pitch created by linear movement in the Z axis. MPL I (MET 1321) Prof. Simin Nasseri
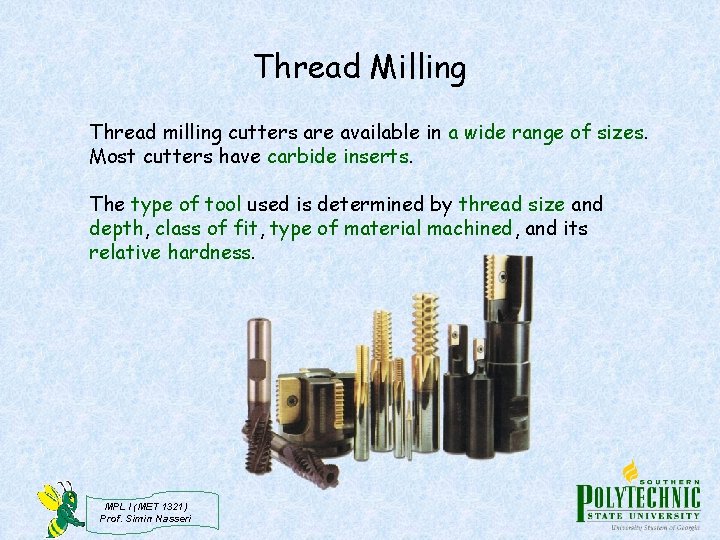
Thread Milling Thread milling cutters are available in a wide range of sizes. Most cutters have carbide inserts. The type of tool used is determined by thread size and depth, class of fit, type of material machined, and its relative hardness. MPL I (MET 1321) Prof. Simin Nasseri

Check this link! http: //www. sherline. com/millinst. htm MPL I (MET 1321) Prof. Simin Nasseri
- Slides: 16