MAIL MERGE Select the option preview in the


- Slides: 34
MAIL MERGE ___ Select the option preview in the word processor to generate all of the pages with different information. ___ Create the template of the letter or document that will receive the dataset in a word processor. ___ Create a dataset with title headings on a spreadsheet application. ___ Insert the label of customized detail in the word processor and insert the label that corresponds to the spreadsheet.
MAIL MERGE UTILIZATION ___ Create a new document. ___ Print the finished product. ___ Create a spreadsheet containing your information. ___ Indicate the source of information in your word processor. ___ Set up the rule. ___ Start writing or creating the template that you are going to use. ___ Implement rules. ___ Select which sheet in the file contains the information. ___ Check the result of label placement. ___ Select the spreadsheet file.
HYPERLINKING IN WORD PROCESSORS ___ Setting up the linked file ___ Editing the hyperlink ___ Linking with external Web sites ___ Creating your file to be hyperlinked ___ Checking the hyperlink
HYPERLINKING IN PRESENTATIONS ___ Creating your file to be hyperlinked ___ Setting up the page ___ Editing the hyperlink
PRODUCTIVITY TOOLS: APPLICATION TECHNIQUES LESSON 2
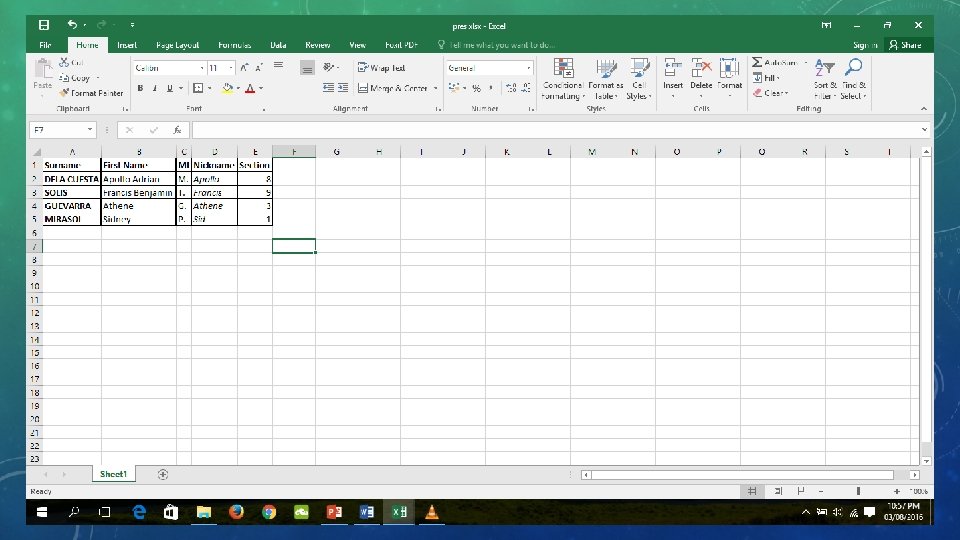
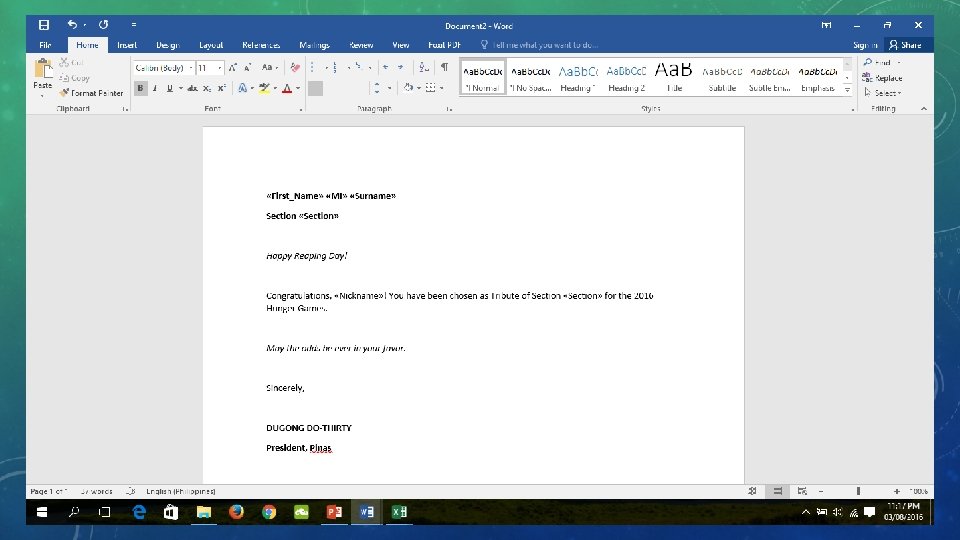
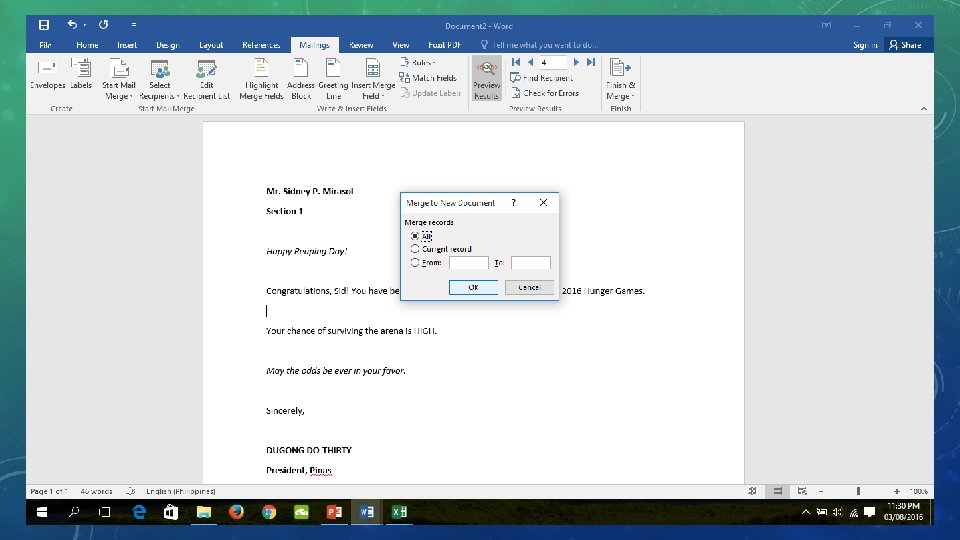
MAIL MERGE • A software toolkit used to produce multiple documents with a given template, editing the basic information that is supplied by a structured dataset. • Certificates of attendees in a seminar
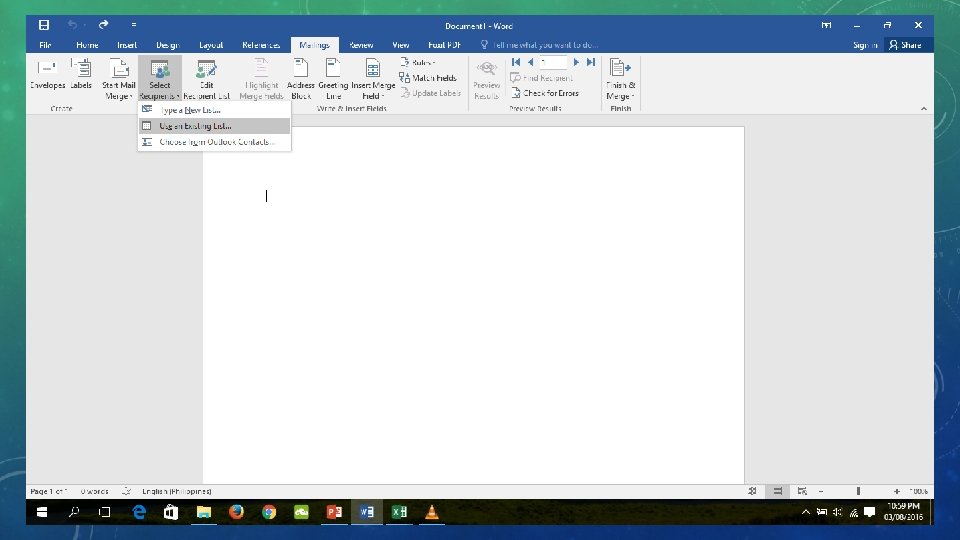
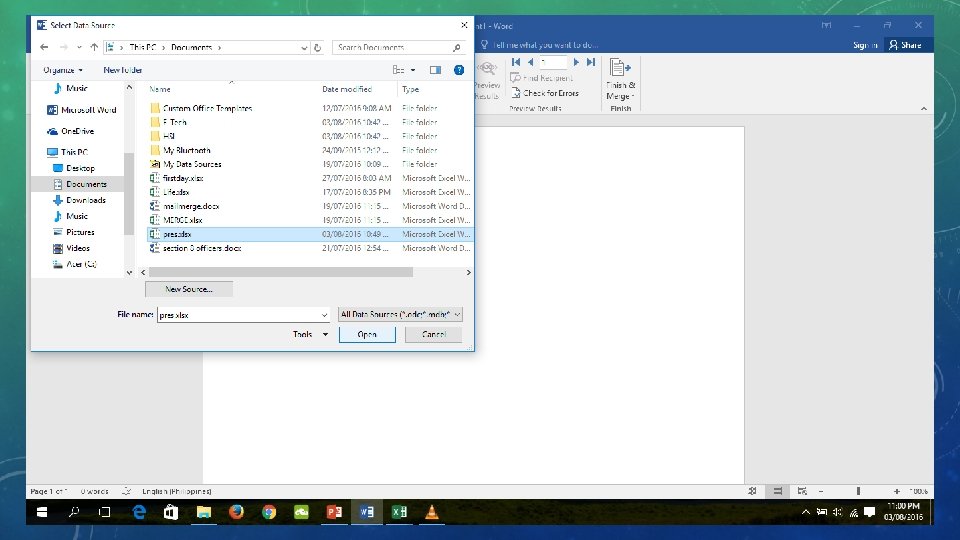
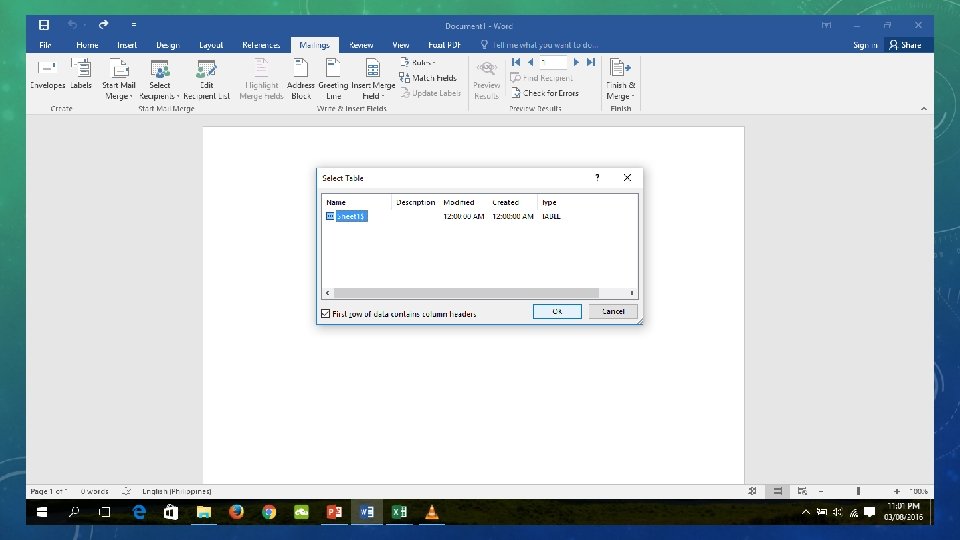
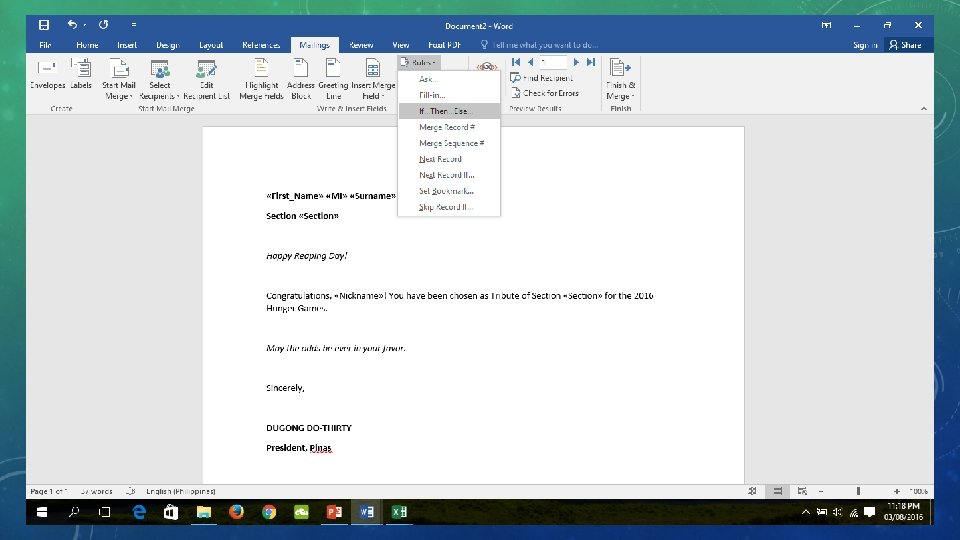
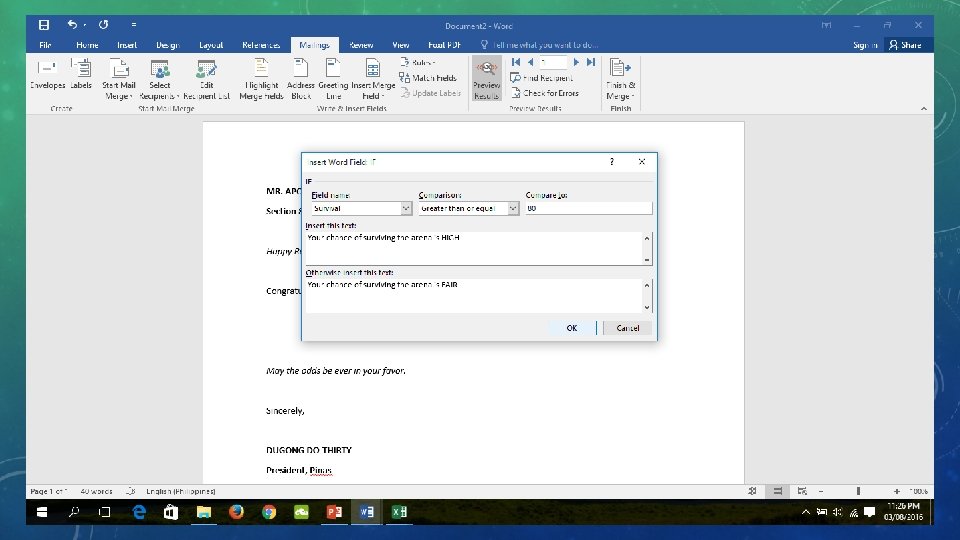
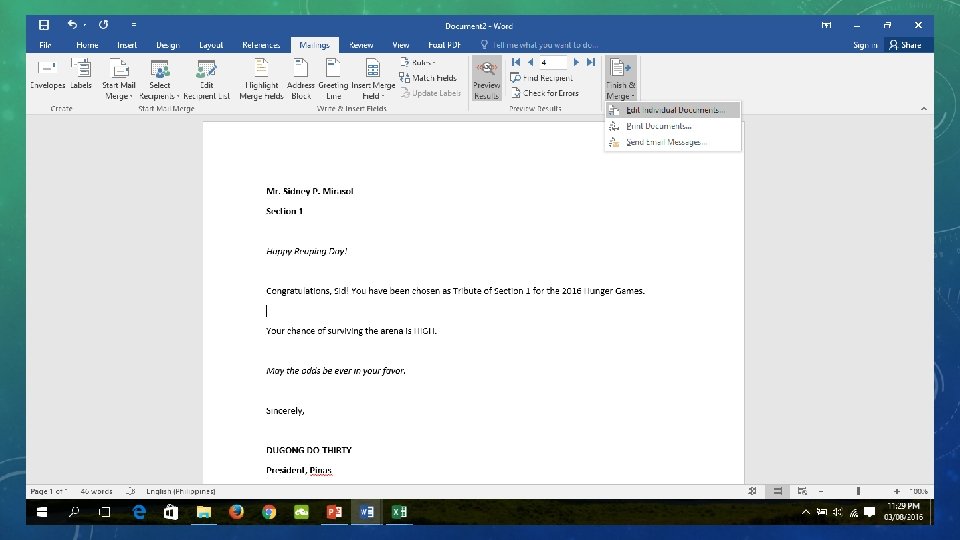
MAIL MERGE 1. Create a dataset with title headings on a spreadsheet application. 2. Create the template of the letter or document that will receive the dataset in a word processor. 3. Insert the label of customized detail in the word processor and insert the label that corresponds to the spreadsheet. 4. Select the option preview in the word processor to generate all of the pages with different information.
MAIL MERGE UTILIZATION 1. Create a spreadsheet containing your information. 2. Indicate the source of information in your word processor. 3. Select the spreadsheet file. 4. Select which sheet in the file contains the information. 5. Start writing or creating the template that you are going to use. 6. Check the result of label placement. 7. Implement rules. 8. Set up the rule. 9. Print the finished product. 10. Create a new document.
HYPERLINK • A reference to another file that is represented by a word, an image, or any document element on a document processor. • The file referred to by the hyperlink can be accessed by clicking or hovering the cursor on the hyperlink itself.
HYPERLINK • The source code is a term used to describe a document that contains hyperlinked elements. • Hyperlink texts are usually colored blue for distinction and noticeability.
HYPERLINK • Anchor Link – a hyperlink that points to a portion of the same document. • Inline Link – is a hyperlink wherein the content is located in other or remote files.
HYPERLINKING IN WORD PROCESSORS 1. Creating your file to be hyperlinked 2. Setting up the linked file 3. Checking the hyperlink 4. Editing the hyperlink 5. Linking with external Web sites
1. Creating your file to be hyperlinked
2. Setting up the linked file
3. Checking the hyperlink
4. Editing the hyperlink
5. Linking with external web sites
HYPERLINKING IN PRESENTATIONS 1. Creating your file to be hyperlinked 2. Setting up the page 3. Editing the hyperlink
1. Creating your file to be hyperlinked
2. Setting up the page
3. Editing the hyperlink
TIMINGS AND ANIMATION IN PRESENTATION
TIMINGS AND ANIMATION IN PRESENTATION
TIMINGS AND ANIMATION IN PRESENTATION 1. On Click 2. With Previous 3. After Previous
INSERTING AND EMBEDDING FILES ON DOCUMENTS