MachZehnder Interferometer for 2 D GRIN Profile Measurement
- Slides: 6

Mach-Zehnder Interferometer for 2 -D GRIN Profile Measurement Instrument Overview Sample Preparation Measurement Uncertainty University of Rochester Gradient-Index Research Group

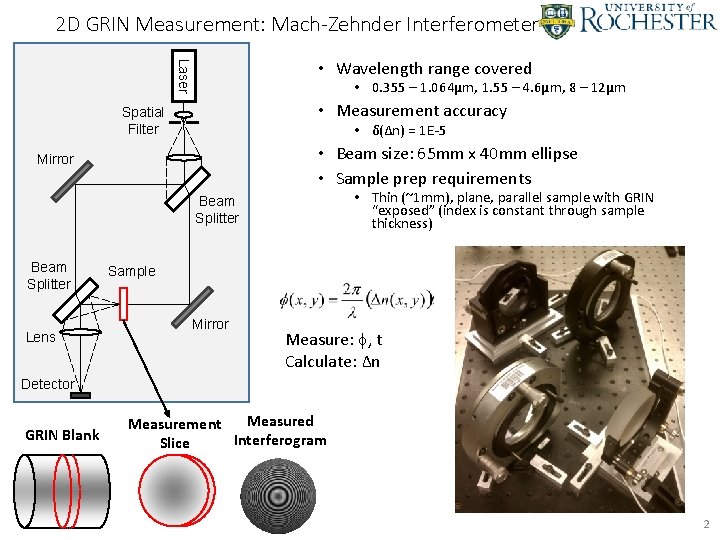
2 D GRIN Measurement: Mach-Zehnder Interferometer Laser • Wavelength range covered • 0. 355 – 1. 064μm, 1. 55 – 4. 6μm, 8 – 12μm • Measurement accuracy Spatial Filter • δ(Δn) = 1 E-5 • Beam size: 65 mm x 40 mm ellipse • Sample prep requirements Mirror • Thin (~1 mm), plane, parallel sample with GRIN “exposed” (index is constant through sample thickness) Beam Splitter Lens Sample Mirror Measure: , t Calculate: Δn Detector GRIN Blank Measured Measurement Interferogram Slice 2

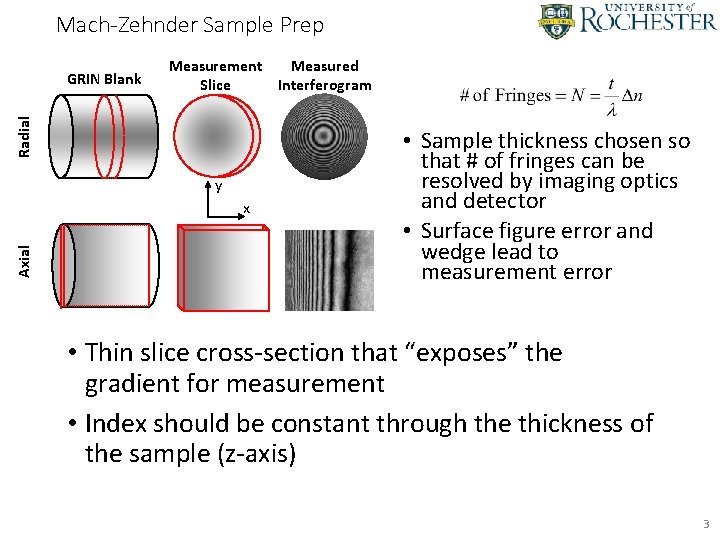
Mach-Zehnder Sample Prep Radial GRIN Blank Measurement Measured Slice Interferogram y Axial x • Sample thickness chosen so that # of fringes can be resolved by imaging optics and detector • Surface figure error and wedge lead to measurement error • Thin slice cross-section that “exposes” the gradient for measurement • Index should be constant through the thickness of the sample (z-axis) 3

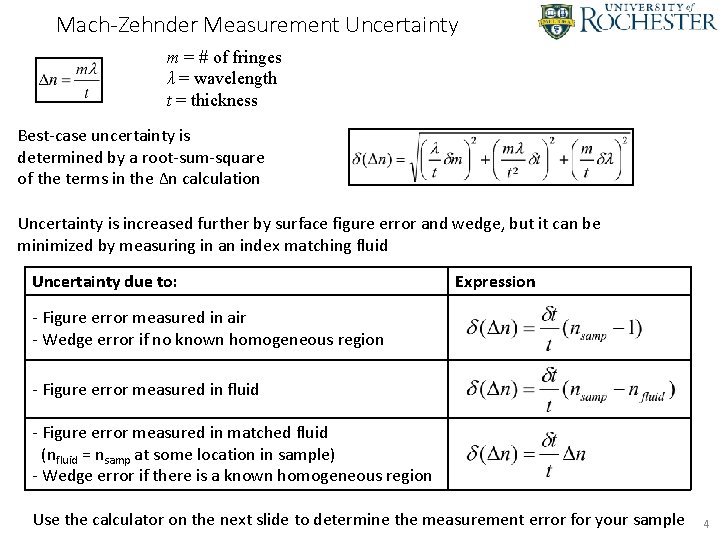
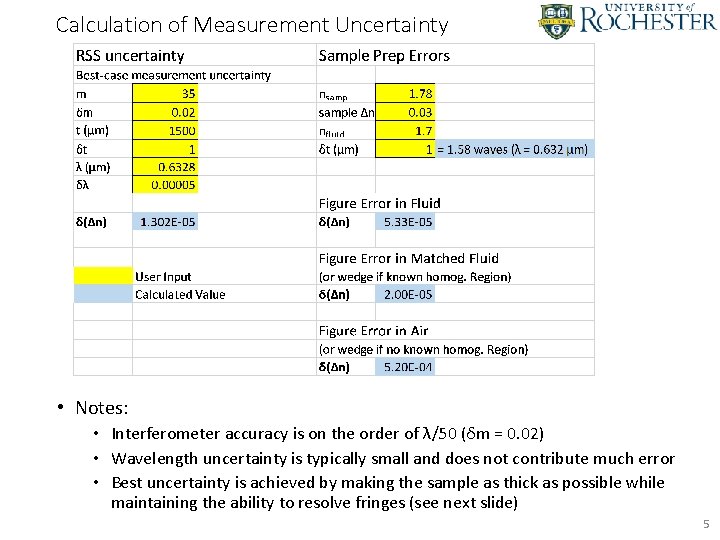
Mach-Zehnder Measurement Uncertainty m = # of fringes λ = wavelength t = thickness Best-case uncertainty is determined by a root-sum-square of the terms in the Δn calculation Uncertainty is increased further by surface figure error and wedge, but it can be minimized by measuring in an index matching fluid Uncertainty due to: Expression - Figure error measured in air - Wedge error if no known homogeneous region - Figure error measured in fluid - Figure error measured in matched fluid (nfluid = nsamp at some location in sample) - Wedge error if there is a known homogeneous region Use the calculator on the next slide to determine the measurement error for your sample 4

Calculation of Measurement Uncertainty • Notes: • Interferometer accuracy is on the order of λ/50 (δm = 0. 02) • Wavelength uncertainty is typically small and does not contribute much error • Best uncertainty is achieved by making the sample as thick as possible while maintaining the ability to resolve fringes (see next slide) 5

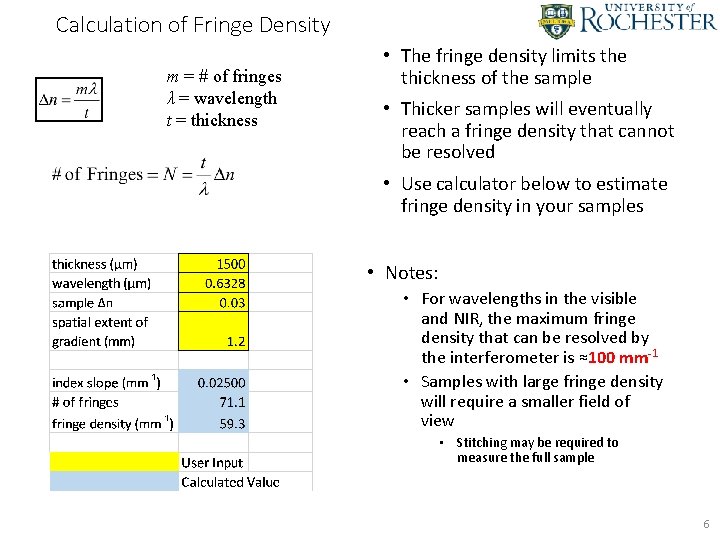
Calculation of Fringe Density m = # of fringes λ = wavelength t = thickness • The fringe density limits the thickness of the sample • Thicker samples will eventually reach a fringe density that cannot be resolved • Use calculator below to estimate fringe density in your samples • Notes: • For wavelengths in the visible and NIR, the maximum fringe density that can be resolved by the interferometer is ≈100 mm-1 • Samples with large fringe density will require a smaller field of view • Stitching may be required to measure the full sample 6