MACAN BT531 Instruction manual for baby stroller MACAN

ИНСТРУКЦИИ ЗА УПОТРЕБА НА ДЕТСКА КОЛИЧКА MACAN Артикулен номер BT-531 Instruction manual for baby stroller MACAN Item No. BT-531 ΟΔΗΓΙΕΣ ΧΡΗΣΕΩΣ ΠΑΙΔΙΚΟΥ ΚΑΡΟΤΣΙΟΥ MACAN Κωδικός προϊόντος BT-531 INSTRUCȚIUNI PENTRU UTILIZAREA CARUCIOR DE COPII MACAN Număr articol BT-531 BEDIENUNGSANLEITUNG FÜR KINDERWAGEN MACAN Artikelnummer BT-531 POUSSETTE D’ENFANT « MACAN» Mode d’emploi et montage Numéro d’article : BT-531 ИНСТРУКЦИЯ ПО ИСПОЛЬЗОВАНИЮ О ДЕТСКА КОЛЯСКА MACAN НОМЕР-BT 531 EN 1888: 2018 Maximum - 22 kg 0 – 4 years Моля, прочетете внимателно тази инструкция преди употребата на продукта, за да осигурите правилното използване на количката и я запазете за бъдеща справка. Please, read this instruction carefully before using the product in order to ensure the correct use of the stroller and keep it for future reference. Παρακαλούμε διαβάστε προσεκτικά αυτές τις οδηγίες αυτές πριν χρησιμοποιήσετε το προϊόν, για να διασφαλιστεί η σωστή χρήση του καροτσιού, και διαφυλάξτε τις οδηγίες για μελλοντική αναφορά. Vă rugăm să citiți cu atenție aceste instrucțiuni înainte de a utiliza produsul, pentru a asigura utilizarea corectă a căruciorului, păstrați-le pentru a le consulta în viitor. Bitte diese Anleitung sorgfältig lesen, bevor Sie das Lisez soigneusement ce mode d’emploi avant de commencer l’utilisation du produit pour pouvoir l’utiliser correctement. Gardez-le pour des questions supplémentaires. Пожалуйста, внимательно прочитайте это руководство перед использованием продукта, чтобы обеспечить правильное использование корзины и сохранить ее для дальнейшего использования.

СЪДЪРЖАНИЕ / CONTENT BG Инструкция за употреба. . . . . 5 EN Manual Instruction……………………………………. 11 Achtung! Stellen Sie beim Schließen des Kinderwagens sicher, dass sich Ihr oder andere Kinder in sicherem Abstand befinden. Stellen Sie sicher, dass die beweglichen Teile des Kinderwagens während dieser Vorgänge nicht mit Ihrem Kind in Berührung kommen. Stellen Sie vor dem Schließen des Wagens sicher, dass der Vorratsbehälter leer ist. HINWEISE FÜR INSTANDHALTUNG UND PROPHYLAXE GR Εγχειρίδιο οδηγιών………………………. . . . ……. . . 17 RO Instrucțiune manual…………………………………. . 23 ES Manual de instrucciones………………………. ……. . . . 29 DE Handbuch…………………………………………. … 36 1. Überprüfen Sie regelmäßig Verriegelungsvorrichtungen, Bremsen, Sicherheitsgurte und -befestigungen, Verbindungen und Verriegelungsmechanismen, um sicherzustellen, dass sie nicht beschädigt oder abgenutzt sind. 2. Wenn Sie lose, zerrissene oder beschädigte Teile feststellen, müssen diese von einer autorisierten Werkstatt repariert oder durch Originalteile ersetzt werden. Andernfalls erlischt die Garantie für den Wagen. 3. Verändern Sie nicht die Konstruktion und ersetzen Sie verschlissene Teile nicht durch solche, die nicht geeignet oder original sind. Dies kann zu Fehlfunktionen des Kinderwagens führen und Ihr Kind verletzen, sowie zur Erlöschen der Garantie. 4. Verwenden Sie zum Reinigen des Gewebes, kontaminierter Kunststoff- oder Metallteile des Produkts ein weiches Baumwolltuch oder einen mit Wasser angefeuchteten Schwamm. 5. Niemals mit Scheuermitteln, Ammoniak, Bleichmittel oder Alkohol reinigen. Waschen Sie keine abnehmbaren Teile und Zubehörteile - Sonnenschutz usw. in der Waschmaschine, da diese beschädigt werden könnten. Andernfalls erlischt die Garantie. 6. Lassen Sie den Wagen nach der Reinigung immer vollständig trocknen und verwenden oder lagern Sie ihn erst danach. Nicht an feuchten Orten oder in direktem Sonnenlicht lagern! 7. Bewahren Sie den Wagen in geschlossenen Räumen auf, aber reinigen Sie ihn immer nach Gebrauch. Der Wagen ist nicht für den Heimgebrauch geeignet. Wenn Sie die Reifen des Wagens nicht gereinigt haben, können sie den Bodenbelag, auf dem sie liegen, verschmutzen. 8. Lagern Sie den Wagen nicht in feuchter Umgebung. Wenn Sie den Wagen in einer gefährlichen Umgebung benutzt haben, sollten Sie ihn aufklappen, mit einem trockenen Tuch abwischen und ganz natürlich trocknen lassen. 9. Zu viel Sonnenlicht wirkt sich auf die Alterung des Wagens und der Stoffteile aus. 10. Legen Sie KEINE anderen Gegenstände in den Kinderwagen, Gepäck, Einkaufstaschen usw. , wenn Sie diesen verwenden oder lagern, weil es den Wagen beschädigen kann und das Schäden am Kind verursachen kann. HERGESTELLT FÜR CANGAROO Importeur: Moni Trade Ltd. Adresse: Bulgarien, Sofia, Wohnviertel Trebich, Dolo Str. 1 Telefon: +359 2/838 04 59 2 41

1 2 3 6 7 8 5 4 9 10 11 12 16 17 18 3 19 20 21 22 23 24 25 3 13 14 15

31 36 41 4 28 27 26 42 32 33 37 38 43 29 34 39 44 30 35 40 45


EN This stroller is suitable for babies and children aged 0 to 4 years or up to 22 kg (whichever comes first). A five-point belt ensures the safety of the child. The positions of the child's backrest, the footrest and the sun visor are adjustable. The seat is installed in two positions, allowing the child to be facing the direction or the direction of travel. The fuse is adjustable and can be removed if desired. The handle is also adjustable and you can adjust it to the desired position. The front wheel rotates 360 °. The canopy can be removed, making your stroller a summer option. A child car seat can be fitted on the structure. The stroller has been manufactured in accordance with the requirements of European standard EN 1888 -1 - 'Childcare articles. Wheeled means for moving children. Part 1: Baby strollers and prams. " EN 1888 -2 'Products for raising young children. Wheeled means for moving children. Part 2: Strollers for children weighing 0 kg to 22 kg ATTENTION! Your child will be protected as much as possible, provided you follow the instructions and recommendations in the instructions! Observe the warnings and take all necessary precautions to prevent the risk of injury or injury to the child and to ensure his or her safety! You are responsible for the safety of your child if you do not follow or comply with these instructions and recommendations! Make sure everyone who uses the stroller is familiar with and obeys the manual. Do not use parts or accessories for a stroller that are not approved by the manufacturer or distributor, as this may put your child at risk and void the stroller's warranty. Warnings for safe use IMPORTANT! READ CAREFULLY AND SAVE FOR FUTURE REFERENCES. WARNINGS • NEVER LEAVE THE CHILD WITHOUT OBSERVATION! • USE THE BASKET FOR A CHILD THAT CANNOT SIT WITHOUT SOMEONE`S HELP, TO ROLL AND STAND UP ON ITS OWN, USING YOUR HANDS AND KNEE SUPPORT! • USE THE SEAT ONLY ON A RIGID, HORIZONTAL AND DRY SURFACE! • NEVER USE A THE SEAT ON A STAND! • FOR A NEWBORN BABY USE THE LOWEST POSITION OF THE BACKREST! • USE THE POSITION OF THE BACKREST IN SEATING POSITION FOR CHILDREN AFTER 6 MONTHS AGE! • KEEP OUT OF FIRE! • DO NOT LIFT THE STROLLER BY THE SAFETY BOARD! • ALWAYS USE A SAFETY BELT! • BEFORE USE, MAKE SURE THAT ALL BLOCKING DEVICES ARE ACTIVATED! • TO AVOID INJURY, MAKE SURE THAT YOUR CHILD IS AT A SAFETY DISTANCE WHEN ADJUSTING, OPENING AND FOLDING THIS PRODUCT! • DON'T ALLOW YOUR CHILD TO PLAY WITH THIS PRODUCT! • BEFORE USE, CHECK THE ASSEMBLY OF THE SEAT TROLLEY, WHETHER THE SEAT OR THE CAR SEAT ARE CORRECTLY AND PROPERLY FITTED TO THE FRAME. • THIS PRODUCT IS NOT SUITABLE FOR RUNNING AND SLIDING! • Use the product for a child weighing less than 22 kg. • Use the seat or a child weighing less than 22 kg! • The assembly of the product is only to be done by an adult! • Do not put an extra mattress thicker than 20 mm in the seat! • Always activate the rear brake when placing and removing the child from the stroller! • Before use, make sure that the seat belts are properly fitted and adjusted. • The maximum load on the luggage basket should not exceed 3 kg! • The maximum load of the luggage bag (if used) should not exceed 2 kg! 11

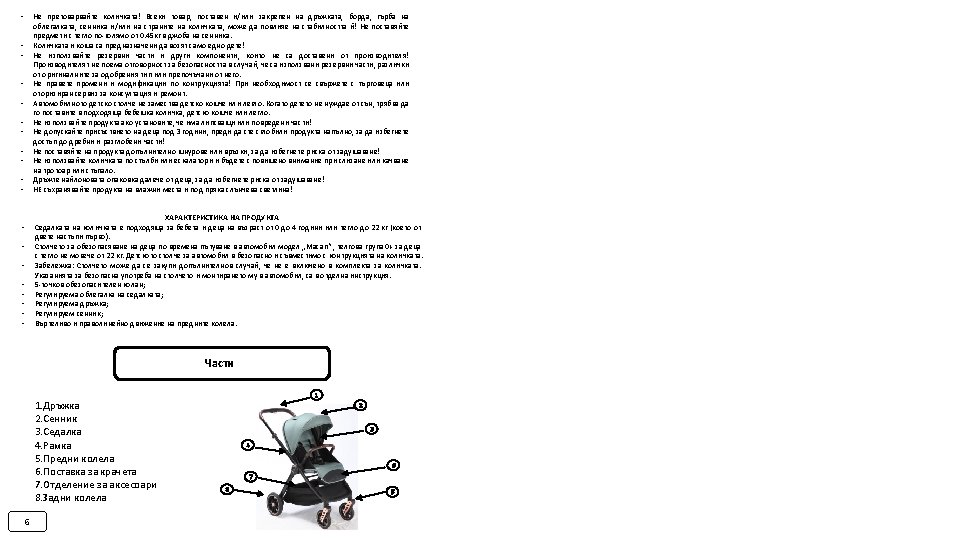
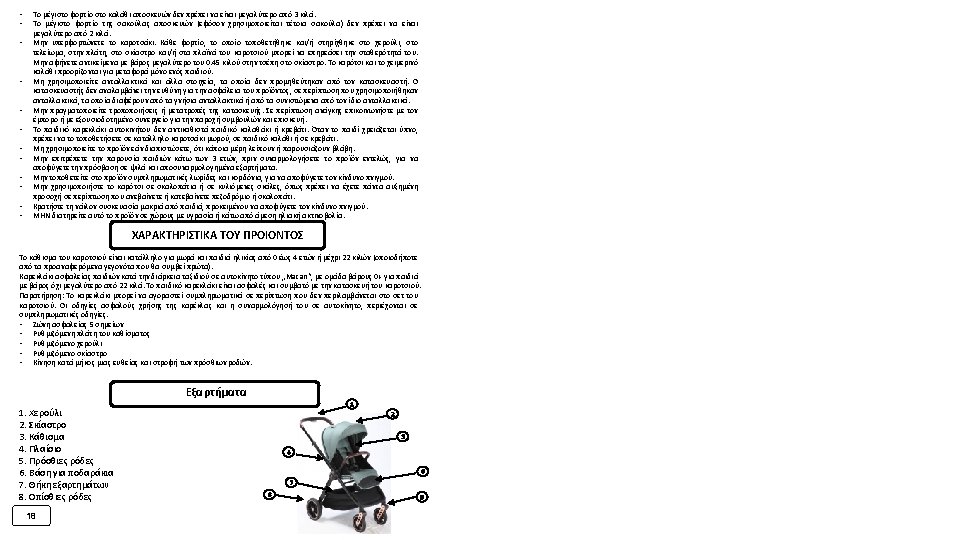
• • • Do not overload the stroller! Any load placed and / or attached to the handle, board, backrest, canopy and / or sides of the stroller can affect its stability! Do not place objects weighing more than 0. 45 kg in the canopy pocket. The stroller and the seat are designed to carry only one child! Do not use spare parts and other components not supplied by the manufacturer! The manufacturer accepts no liability for safety if used spare parts, different from the original ones or approved by the approved type. Do not make changes or modifications to the construction! If necessary, contact your supplier or an authorized service centre for advice and repair. The car seat does not replace the baby seat or crib. When the baby does not need sleep, it should be placed in a suitable baby stroller, seat or crib. Do not use the product if you find any missing or damaged parts! Do not allow children under 3 years of age to fully assemble the product to avoid access to small and disassembled parts! Do not place additional cords or ties on the product to avoid the risk of suffocation! Do not use the stroller on escalator and be careful when getting down or up on the sidewalk. Keep the plastic packaging away from children to avoid the risk of suffocation! DO NOT store the product in humid places and in direct sunlight! CHARACTERISTICS OF THE PRODUCT The stroller seat is suitable for babies and children aged 0 to 4 years or weighing up to 22 kg (whichever comes first). Child restraint system while traveling in a Macan car, weight group 0+ for children weighing not more than 22 kg. The car seat in a safe and compatible with the construction of the stroller. Note: The car seat can be purchased as an extra if it is not included in the stroller. Instructions for the safe use of the seat and its installation in a car are in separate instructions. • 5 -point seat belt; • Adjustable seat back; • Adjustable handle; • Adjustable sunshade; • Rotary and straight forward movement of the front wheels. Parts 1 1. Handle 2. Canopy 3. Car seat 4. Adapters 5. Front wheels 6. Adjustable footrest 7. Buttons for adjustment of the front wheels 12 2 3 4 6 7 8 5

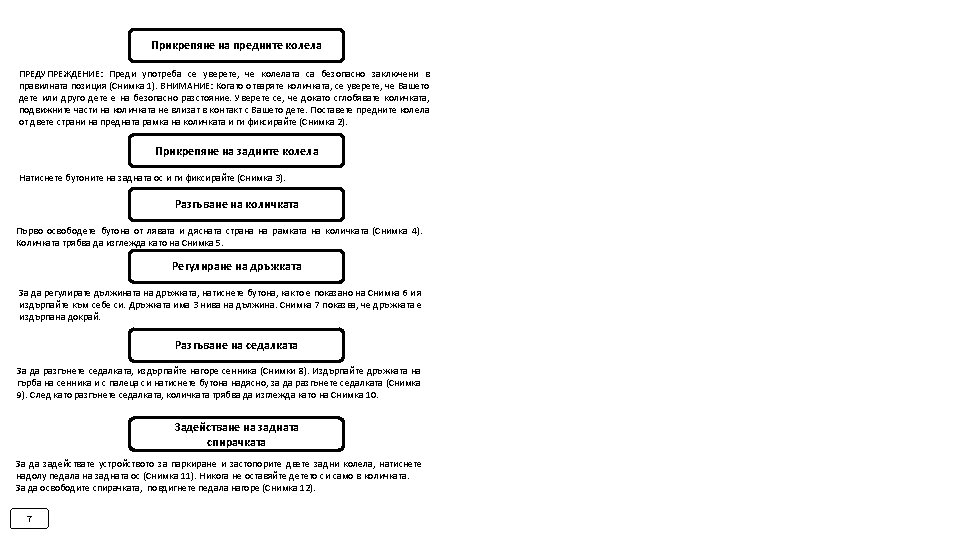
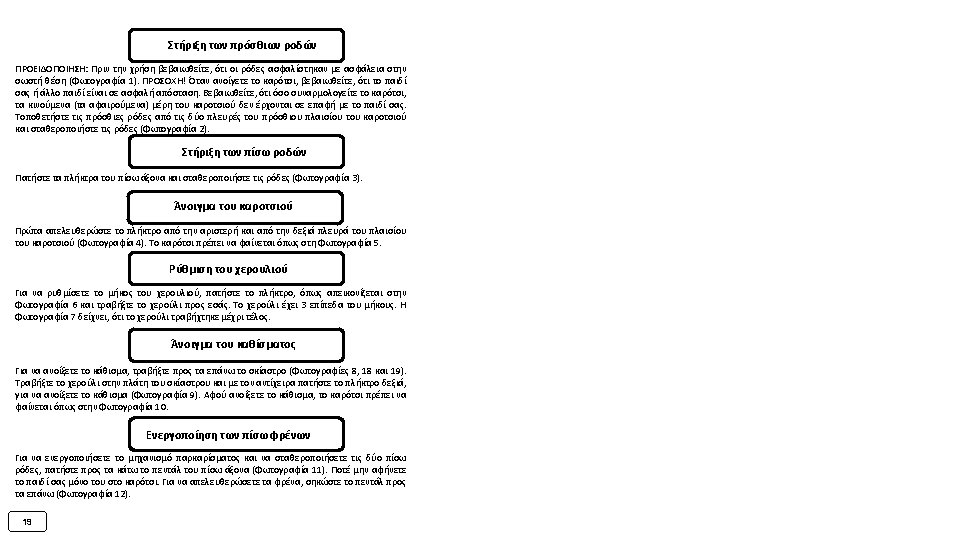
Installing the front wheels WARNING: Before use, ensure that the wheels are safely locked into position (Picture 1). WARNING: When opening the stroller, ensure that your child or other child is at a safe distance. Ensure that during these operations, the movable parts of the stroller do not come into contact with your child. Place the front wheels on both sides of the front frame of the stroller and fix them (Picture 2). Installing the rear wheels Place the rear wheels on both sides of the rear frame of the stroller and fix them (Picture 3). Unfolding the stroller First release the button on the left and right sides of the stroller frame (Picture 4). The stroller should look like Picture 5. Adjusting the handle To adjust the length of the handle, press the button as shown in Picture 6 and pull it towards you. The handle has 3 levels of length. Photo 7 shows that the handle is fully pulled. Folding the seat To fold the seat, pull up the canopy (Pictures 8). Pull the handle on the back of the canopy and with your thumb press the button to the right to unfold the seat (Picture 9). Once you unfold the seat, the stroller should look like Picture 10. Rear brake To activate the parking device and lock the two rear wheels, press the pedal down the rear axle (Picture 11). Never leave your child alone in the stroller. To release the brake, lift the pedal up (Picture 12). 13

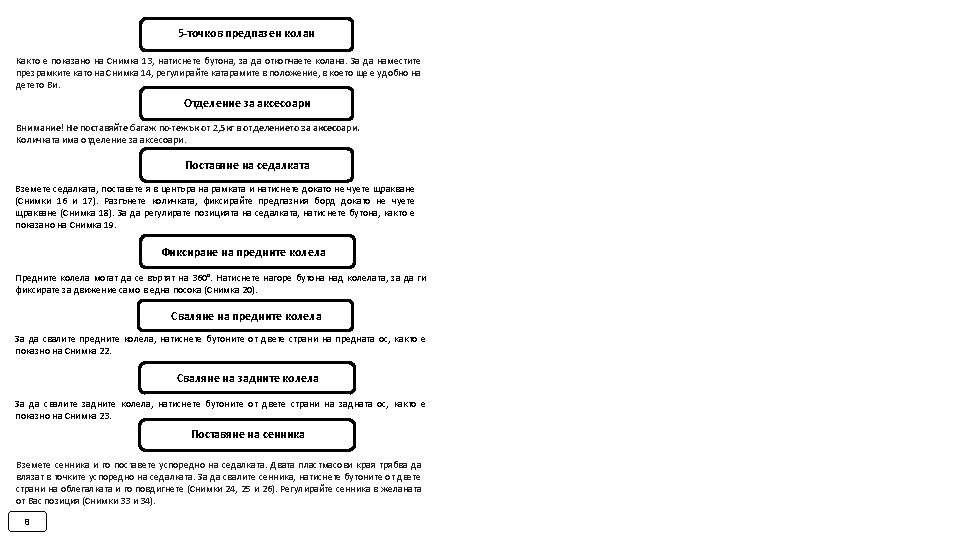
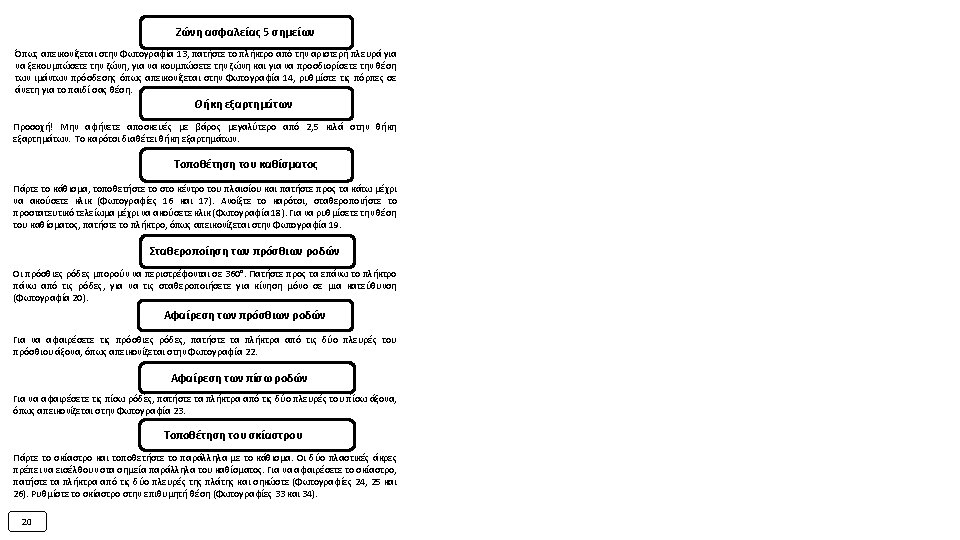
5 -point safety belt As shown in Picture 13, press the button on the left side to unfasten the belt. To adjust the straps as shown in Picture 14, adjust the straps to a position that is comfortable for your child. Accessories section Attention! Do not place luggage heavier than 2. 5 kg in the accessory compartment. The cart has an accessory compartment. Installing the seat Take the seat, place it in the centre of the frame and press until you hear a click (Pictures 16 and 17). Unfold the stroller; lock the safety board until it clicks (Picture 18). To adjust the seat position, press the button as shown in Picture 19. Fixing the front wheels The front wheels can rotate 360 °. Press the button above the wheels to lock them in one direction only (Picture 20). Removing the front wheels To remove the front wheels, press the buttons on either side of the front axle, as shown in Picture 22. Removing the rear wheels To remove the rear wheels, press the buttons on either side of the rear axle, as shown in Picture 23. Installing the canopy Take the canopy and place it parallel to the seat. The two plastic ends should fit into the points parallel to the seat. To remove the canopy, push the buttons on both sides of the backrest and lift it (Pictures 24, 25 and 26). Adjust the canopy in the desired position (Pictures 33 and 34). 14

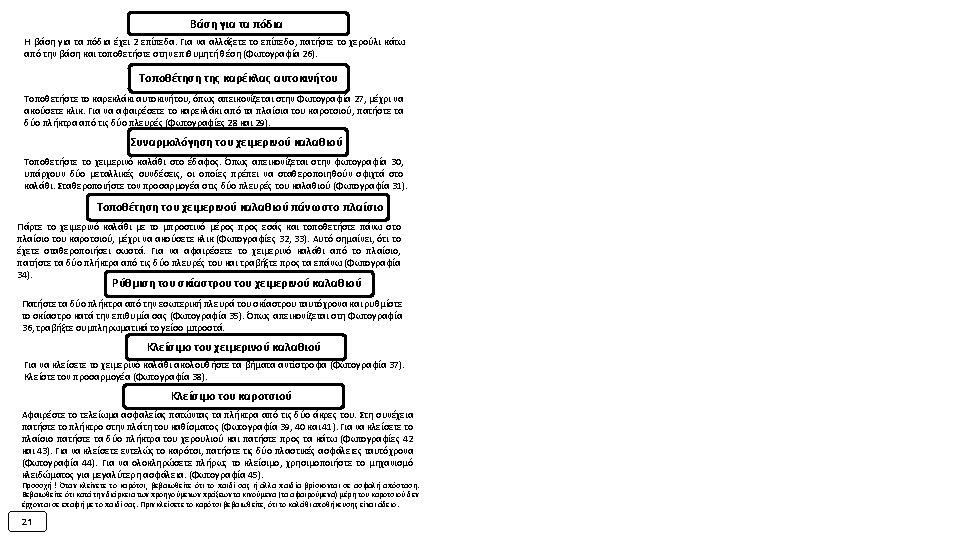
Footrest The footrest has 2 levels. To change the level, push the handle under the footrest and place it in the position you want (Picture 26). Installing the car seat Insert the car seat as shown in Picture 27 until you hear a click. To remove the seat from inside the stroller, press the two buttons on either side (Pictures 28 and 29). Assembly the carrycot Put the carrycot on the ground. As shown in Picture 30, there are two metal stripes that must be secured to the carrycot. Secure the adapter to both sides of the basket (Picture 31). Installing the carrycot on the frame Take the carrycot facing you and place it on the stroller frame until you hear a click (Pictures 32 and 33). This means that you have fixed it correctly. To remove the carrycot from the frame, push the two buttons on both sides of the frame and pull it up (Picture 34). Adjusting the canopy of the carrycot Press the two buttons on the inside of the canopy simultaneously and adjust the canopy to your preferred position (Picture 35). As shown in Picture 36, pull the additional visor forward. Closing the carrycot To close the carrycot, follow the steps in reverse (Picture 37). Fold the adapter (Picture 38). Folding the stroller Remove the guard board by pressing the buttons on both ends. Then press the button on the back of the seat (Pictures 39, 40 and 41). To fold the frame, press the two knobs on the handle and press down (Pictures 42 and 43). To fully fold the stroller, press the two plastic guards at the same time (Picture 44). To complete folding, use the locking mechanism for greater security (Picture 45). 15

Attention! When closing the trolley, make sure your child or other children are kept at a safe distance. Make sure the moving parts of the trolley do not come in contact with your child during these operations. Before closing the cart, make sure the storage bin is empty. RECOMMENDATIONS FOR MAINTENANCE AND CLEANING 1. Regularly check the locking devices, brakes, safety belts and buckles, connectors and fixing mechanisms in order to be sure that they are in good working order and are not worn or damaged. 2. If you find loose, broken and damaged parts, they should be repaired by an authorized service or replaced with original parts. Otherwise the warranty of the stroller will be annulled. 3. Do not make modifications on the construction and do not replace the work parts with ones that are поt suitable and are not original. This may lead to incorrect functioning of the stroller and to injury of your child. And also to annulment of your warranty of the stroller. 4. In order to clean the cover, the dirty plastic and metal parts of the product, use soft cotton cloth or sponge, wetted with water. 5. Never clean with agents containing abrasive particles, ammonia, bleach or alcohol. DO NOT wash in the laundry the removable and accessories – parts and accessories – canopy, etc. , because this may lead to their damage. Otherwise the warranty will be annulled. 6. Always after cleaning leave the stroller to dry completely and afterwards use it or store it. 7. Store the stroller indoors. The effects of the environment – sea air, roads sprinkled with salt, acid rains, etc. , as well as the storage outdoors lead to the emergence of corrosion. 8. Do not store the stroller in a humid environment. In case you have used the stroller in a humid environment, you should unfold it, wipe it with a dry cloth and let it dry completely naturally. It is possible for mold to appear, if you store it while wet. 9. Too much sunlight will affect the aging of the stroller parts and the fabric. 10. Do NOT place other objects inside the stroller – luggage , bags with goods, handbags etc. when you use it or storage it, because this could damage the stroller and may lead to harm your child inside of it. Not following this instruction will lead to guarantee cancel. MADE FOR CANGAROO Importer: Moni Trade LTD Address: 1 Dolo str. , Trebich, Sofia, Bulgaria Tel. : +359 2/ 838 04 59 16


RO Acest carucior este potrivit pentru bebelusii si copiii in varsta cuprinsa intre 0 si 4 ani sau pana la 22 kg (oricare dintre acestea va survine mai intai). Centura in cinci puncte asiguranta copilului. Pozitiile spatarului pentru spatele copilului, suportul pentru picioare si copertina sunt reglabile. Scaunul se monteaza in doua pozitii, asigurandu-se posibilitatea copilul sa fie orientat cu fata catre directia sau invers directiei de deplasare. Protectorul este reglabil si poate fi demontat, daca este cazul. Manerul, deasemenea, este reglabil si poate fi reglat in pozitia dorita. Roata din fata se roteste la 360°. Copertina poate fi inlaturata, astfel caruciorul transformandu-se in varianta de vara. Pe constructie se poate monta scaun auto pentru copii. Caruciorul este fabricat in conformitate cu cerintele Standardului european EN 1888 -1 – “Obiecte pentru cresterea copiilor mici. Mijloace de transport cu rotile pentru copii. Partea 1: Carucioare de copii si cos pentru carucior de copii”. EN 1888 -2 “Articole pentru cresterea copiilor mici. Mijloace de transport cu rotile pentru copii. Partea 2: Carucioare pentru copii cu greutate de la 0 la 22 kg” ATENTIE! Copilul dumneavoastra va fi protejat la maxim daca respectati sfaturile si recomandarile continute in instructiune! Acordati atentie avertismentelor si asigurati toate masurile necesare de precautie, pentru a preveni riscul de ranire sau vatamare a copilului si pentru a asiguranta si securitatea acestuia! Dumneavoastra sunteti responsabil pentru siguranta copilului, daca nu respectati si nu va conformati cu aceste instructiuni si recomandari! Asigurati-va ca persoana care utilizeaza caruciorul cunoaste si respecta instructiunile. Nu folositi componente sau accesorii pentru carucior, care nu sunt aprobate de catre producator sau distribuitor, deoarece acest lucru poate pune in pericol copilul dumneavoastra si poate duce la anularea garantiei caruciorului. AVERTISMENTE PRINCIPALE IMPORTANT: CITITI CU ATENTIE SI PASTRATI PENTRU CONSULTATII VIITOARE. AVERTISMENTE • NICIODATA NU LASATI COPILUL FARA SUPRAVEGHERE! • FOLOSITI COSUL PENTRU COPIL, CARE NU POATE STA SINGUR FARA AJUTORUL ADULTULUI, CARE SE POATE ROSTOGOLI SAU RIDICA SINGUR, FOLOSINDU-SE DE MAINILE SAU GENUNCHI SAI! • UTILIZATI COSUL NUMAI SI DOAR PE SUPRAFETE RIGIDE, ORIZONTALE SI USCATE! • NICIODATA NU FOLOSITI COSUL PE SUPORT! • PENTRU COPIL NOU-NASCUT, UTILIZATI POZITIA CEA MAI INCLINATA A SPATARULUI! • FOLOSITI POZITIA SPATARULUI SCAUNULUI PENTRU POZITIA DE SEDERE A COPILULUI DUPA IMPLINIREA VARSTEI DE 6 LUNI! • FERITI DE FOC! • NU RIDICATI PRODUSUL PRIN CADRUL BAREI DE PROTECTIE! • FOLOSITI INTOTDEAUNA CENTURA DE SIGURANTA! • INAINTE DE UTILIZARE, ASIGURATI-VA CA TOATE DISPOZITIVELE DE FIXARE SUNT ACTIONATE CORECT! • PENTRU A EVITA VATAMARE, ASIGURATI-VA CA COPILUL DVS. SE AFLA LA DISTANTA CORESPUNZATOARE LA REGLAREA, DEPLIEREA SI PLIEREA ACESTUI PRODUS! • NU LASATI COPIII SA SE JOACE CU ACEST PRODUS! • INAINTE DE UTILIZARE VERIFICATI DACA DISPOZITIVELE DE FIXARE A SEZUTULUI, COSULUI SAU SCAUNULUI AUTO DE CARUCIOR SUNT FIXATE IN MOD CORECT SI STABIL DE CADRU. • ACEST PRODUS NU ESTE POTRIVIT PENTRU ALERGARE SI ALUNECARE! • Utilizati produsul pentru copii cu greutate mai mica de 22 kg. • Utilizati cosul pentru copii cu greutate mai mica de 22 kg. • Asamblarea produsului trebuie efectuata numai de catre adult! • Nu asezati in cos saltea suplimentara cu grosime de peste 20 mm! • Dispozitivul de parcare trebuie actionat intotdeauna la asezarea si scoaterea copilului din carucior! • Inainte de utilizare, asigurati-va ca centurile de siguranta sunt montate si reglate in mod corespunzator. • Sarcina maxima a cosului de bagaj nu trebuie sa depaseasca 3 kg! • Sarcina maxima a gentii pentru bagaj (in cazul in care astfel se foloseste) nu trebuie sa depaseasca 2 kg! • Nu supraincarcati caruciorul! 23

• • • Orice greutate, agatata si/sau fixata de maner, bara, spatele spatarului, coperina si/sau partile laterale caruciorului, poate reflecta asupra stabilitatii caruciorului! Nu asezati obiecte cu greutate mai mare de 0, 45 kg in buzunarul copertinei. Caruciorul si cosul de iarna sunt destinate pentru a transporta un singur copil! Nu utilizati piese de schimb si alte componente, care nu sunt livrate de catre producator! Producatorul nu isi asuma responsabilitate pentru siguranta, in cazul in care sunt folosite piese de schimb, altele decat cele originale sau recomandate de producator. Nu face schimbari si modificari pe structura! Daca este necesar, contactati distribuitorul sau centrul de service autorizat pentru consultanta si reparatii. Scaunul auto pentru copii nu inlocuieste cosul sau patul pentru copii. Daca copilul are nevoie de somn, acesta trebuie asezat in carucior de copii potrivit, cos sau patut pentru copii. Nu utilizati produsul la depistarea unor piese defectate sau lipsa! Nu permiteti prezenta copiilor sub 3 ani, inainte de asamblarea completa a produsului, pentru a evita accesul la piesele mici si dezasamblate! Nu amplasati pe produs cabluri sau conexiuni suplimentare, pentru a evita riscul de sufocare! Nu folositi caruciorul pe trepte sau scari rulante si aveti mare grija atunci cand coborati sau urcati pe trotuar sau trepte. Pastrati ambalajele din nailon departe de copii, pentru a evita riscul de sufocare! NU depozitati produsul in locuri umede si la lumina directa a soarelui! CARACTERISTICILE PRODUSULUI Scaunul caruciorului este potrivit pentru bebelusii si copii in varsta cuprinsa intre 0 si 4 ani sau pana la 22 kg (oricare dintre acestea va survine mai intai). Scaunul pentru protectia copiilor in timpul deplasarilor intr-un automobil model “Macan”, grupa de greutate 0+ pentru copii cu greutate de cel mult 22 kg. Scaunul auto pentru copii este sigur si compatibil cu constructia caruciorului. Mentiune: Scaunul poate fi achizitionat suplimentar, in cazul in care nu este inclus in setul caruciorului. Instructiunile privind utilizarea in siguranta a scaunului si montarea acestuia in automobil, se afla in instructiune separata. • Centura de siguranta in 5 puncte; • Spatar reglabil al scaunului; • Maner reglabil; • Copertina reglabila; • Miscare rotativa si rectiliniara a rotilor din fata. Componente 1 1. Maner 2. Copertina 3. Scaun 4. Cadru 5. Roti fata 6. Suport pentru picioare 7. Compartiment pentru accesorii 8. Roti spate 2 3 4 6 7 8 5 24

Montarea rotilor din fata AVERTISMENT: Inainte de utilizare, asigurati-va ca rotile sunt blocate in pozitie corecta (Poza 1). ATENTIE: Atunci cand depliati caruciorul, asigurati-va ca copilul dumneavoastra sau alt copil se afla la o distanta sigura. Asigurati-va ca atunci cand asamblati caruciorul, componentele mobile ale caruciorului nu intra in contact cu copilul dumneavoastra. Pozitionati rotile din fata pe ambele parti ale cadrului frontal al caruciorului si fixati (Poza 2). Montarea rotilor din spate Apasati butoanele aflate la axa din spate si fixati (Poza 3). Deplierea caruciorului In primul rand eliberati butonul din partea stanga si dreapta a cadrului caruciorului (Poza 4). Caruciorul trebuie sa arate la fel ca in Poza 5. Reglarea manerului Pentru a regla lungimea manerului, apasati butonul, asa cum este prezentat in Poza 6 si trageti catre dumneavoastra. Manerul are 3 nivele de lungime. Poza 7 arata ca manerul este tras in totalitate. Deplierea scaunului Pentru a deplia scaunul trageti in sus copertina (Poza 8, 18 si 19). Trageti de manerul din spatele copertinei si cu degetul mare apasati butonul spre dreapta, pentru a deplia scaunul (Poza 9). Dupa deplierea scaunului, caruciorul trebuie sa arate asa cum este prezentat in Poza 10. Actionarea franei din spate Pentru a actiona dispozitivul de parcare si pentru a bloca ambele roti din spate, apasati in jos pedala aflata pe axa din spate (Poza 11). Nu lasati niciodata copilul dumneavoastra singur in carucior. Pentru a elibera frana, ridicati pedala in sus (Poza 12). 25

Centura de siguranta in 5 puncte Asa cum este prezentat in Poza 13, apasati butonul din partea stanga pentru a elibera centura, pentru a fixa centura si pentru a regla curelele asa cum este prezentat la Poza 14, reglati cataramele in pozitie care sa fie confortabila pentru copilul dumneavoastra. Compartiment pentru accesorii Atentie! Nu amplasati bagaje mai grele de 2, 5 kg in compartimentul pentru accesorii. Caruciorul are compartiment pentru accesorii. Montarea scaunului Luati scaunul, asezati-l in centrul cadrului si apasati pana cand veti auzi un clic (Poza 16 si 17). Depliati caruciorul, fixati bara de siguranta, pana cand veti auzi un clic (Poza 18). Pentru a regla pozitia scaunului, apasati butonul, asa cum este prezentat in Poza 19. Fixarea rotilor din fata Rotile din fata se pot roti la 360°. Apasati in sus butonul aflat deasupra rotilor, pentru a le fixa pentru deplasare numai intr-o singura directie (Poza 20). Demontarea rotilor din fata Pentru a demonta rotile din fata, apasati butoanele aflate pe ambele parti ale axei din fata, asa cum este arat in Poza 22. Demontarea rotilor din spate Pentru a demonta rotile din spate, apasati butoanele aflate pe ambele parti ale axei din spate, asa cum este arat in Poza 23. Montarea copertinei Luati copertina si asezati-o in pozitie paralela scaunului. Cele doua capete din plastic trebuie sa intre in punctele paralele scaunului. Pentru a demonta copertina, apasati butoanele de pe ambele parti ale spatarului si ridicati in sus (Poza 24, 25 si 26). Reglati copertina in pozitia dorita de catre dumneavoastra (Poze 33 si 34). 26

Suport pentru picioare Suportul pentru picioare 2 nivele. Pentru a schimba nivelul, apasati manerul sub suport si asezati in pozitia dorita de catre dumneavoastra (Poza 26). Montarea scaunului auto Pozitionati scaunul auto, asa cum este aratat in poza 27, pana cand veti auzi un clic. Pentru a inlatura scaunul din cadru, apasati cele doua butoane de pe ambele parti (Poza 28 si 29). Asamblarea cosului de iarna Asezati cosul de iarna pe sol. Asa cum este aratat in poza 30, exista doua conexiuni metalice care trebuie fixate foarte bine de cos. Fixati adaptorul de ambele parti ale cosului (Poza 31). Montarea cosului de iarna pe cadru Luati cosul de iarna indreptat cu fata catre dvs. si amplasati pe cadrul cosului, pana cand veti auzi un clic (Poza 32, 33). Acest lucru inseamna ca ati fixat in mod corect. Pentru a indeparta cosul de iarna din cadru, apasati cele doua butoane de pe ambele parti ale cadrului si trageti in sus (Poza 34). Reglarea copertinei la cosul de iarna Apasati simultan cele doua butoane aflate pe interiorul copertinei si reglati copertina asa cum doriti (Poza 35). Asa cum este aratat in Poza 36, trageti viziera suplimentar . inainte Inchiderea cosului de iarna Pentru a inchide cosul de iarna, urmati pasii in sens invers (Poza 37). Pliati adaptorul (poza 38). Plierea caruciorului Indepartati bara de protectie prin apasarea butoanele aflate la ambele capete ale acesteia. Dupa care apasati butonul aflat in partea din spate a scaunului (Poza 39, 40 si 41). Pentru a plia cadrul, apasati cele doua butoane de pe maner si apasati in jos (Poza 42 si 43). Pentru a plia cosul in mod complet, apasati simultan cele doua sigurante de plastic (Poza 44). Pentru a termina in mod complet cu plierea, utilizati mecanismul de blocare pentru o mai mare siguranta (Poza 45). Atentie! Atunci cand pliati caruciorul, asigurati-va ca copilul dvs. sau alti copii se afla la o distanta sigura. Asigurati-va ca componentele mobile ale caruciorului nu intra in contact cu copilul dvs. in timpul acestor operatii. Inainte de a plia caruciorul, asigurati-va ca cosul de depozitare este gol. 27

INSTRUCTIUNI DE INTRETINERE SI PREVENIRE 1. Verificati in mod regulat dispozitivele de blocare, franele, centurile de siguranta si inchizatoarele, imbinarile si mecanismele de fixare pentru a va asigura ca acestea se afla in stare buna de functionare, ca nu sunt uzate sau defectate. 2. La constatarea unor piese slabite, rupte sau defecte, acestea trebuie sa fie reparate de catre un service autorizat sau schimbate cu piese originale. In caz contrar, garantia caruciorului va fi anulata. 3. Nu aduceti modificari pe constructie si nu inlocuiti piesele uzate cu piese care nu sunt potrivite sau nu sunt originale. Acest lucru poate duce la functionarea incorecta a caruciorului si la vatamarea copilului dumneavoastra, deasemenea si la anularea garantiei caruciorului. 4. Pentru a curata de murdarie tapiteria, componentele metalice sau din plastic, folositi o carpa moale din bumbac sau burete, umezite cu apa. 5. Niciodata nu curatati cu preparate care contin particule abrazive, amoniac, albitor sau spirt. NU spalati in masina de spalat componentele si accesoriile detasabile – copertina, etc. , deoarece acest lucru poate duce la defectarea lor. In caz contrar, garantia va fi anulata. 6. Intotdeauna dupa curatare, lasati caruciorul sa se usuce in mod complet si numai dupa aceea folositi sau pliati pentru depozitare. Nu depozitati in locuri umede sau la lumina directa a soarelui! 7. Depozitati caruciorul in incaperi acoperite, dar sa fie curatata imediat dupa utilizare. Caruciorul nu este potrivit pentru uz casnic, daca nu ati curatat rotile caruciorului exista posibilitatea ca acestea sa murdareasca pavajul pe care se afla. 8. Nu depozitati caruciorul in mediu umed. In cazul in care ati folosit caruciorul in mediu umed, acesta trebuie depliat, uscat cu o carpa uscata si lasat sa se usuce in mod complet si natural. 9. Expunerea excesiva la razele solare contribuie la invechirea componentelor din plastic si a tapiteriei. 10. NU asezati alte obiecte in interiorul caruciorului – bagaj, genti cu bunuri etc. , atunci cand il utilizati sau depozitati, deoarece acest lucru poate duce la deteriorarea caruciorului si poate provoca vatamarea copilului. FABRICAT PENTRU CANGAROO Importator: Moni trade SRL Adresă: Stopanski dvor (Curtea industrială) – Trebich, Sofia, Bulgaria Tel. : +359 2/ 838 04 59 28

ES Este cochecito es adecuado para bebés y niños de 0 a 4 años o de 22 kg (lo que ocurra primero). Un cinturón de cinco puntos garantiza la seguridad del niño. Las posiciones del respaldo para la espalda del niño, del reposapiés y de la visera son ajustables. El asiento puede ser instalado en dos posiciones, lo que permita que el niño mire en la dirección de desplazamiento o en la dirección opuesta. El mecanismo de seguridad es ajustable y se puede retirar si lo desea. El mango también es ajustable y puede ajustarlo a la posición deseada. La rueda anterior gira a 360°. La visera se puede bajar y su cochecito tiene una opción de verano. Se puede instalar un asiento de niños para automóvil en la estructura. El cochecito ha sido fabricado de conformidad con los requisitos de la norma europea EN 1888 -1 - Artículos de cuidado infantil. Medios a ruedas para desplazar a los niños. Parte 1: Cochecitos y canasta para cochecito “. EN 1888 -2 „Artículos de cuidado infantil. Medios a ruedas para desplazar a los niños. Parte 2: Cochecitos para niños con un peso de 0 kg a 22 kg“ ¡ATENCIÓN! ¡Su hijo estará protegido tanto como sea posible, siempre que siga las instrucciones y las recomendaciones en las instrucciones! Observar las advertencias y tomar todas las medidas necesarias para evitar el riesgo de lesiones al niño y para garantizar su seguridad. ¡Si no siga estas instrucciones y recomendaciones, Ud. asume la responsabilidad de la seguridad de su hijo! Asegurarse de que cada persona que usa el cochecito esté familiarizada con las instrucciones y los respeta. No usar piezas o accesorios para el cochecito que no estén aprobados por el fabricante o el distribuidor, porque esto puede poner en riesgo a su hijo y anular la garantía del cochecito. ADVERTENCIAS PRINCIPALES ¡IMPORTANTE! LEER CUIDADOSAMENTE Y GUARDAR PARA FUTURAS REFERENCIAS. ADVERTENCIAS • ¡NUNCA DEJAR AL NIÑO SIN OBSERVACIÓN! • UTILIZAR LA CANASTA PARA UN NIÑO QUE NO PUEDE SENTIRSE Y LEVANTARSE SOLO, UTILIZANDO SUS MANOS Y RODILLAS DE SOPORTE. • ¡UTILIZAR LA CANASTA SOLAMENTE EN UNA SUPERFICIE RÍGIDA, HORIZONTAL Y SECA! • ¡NUNCA UTILIZAR LA CANASTA EN UN SOPORTE! • PARA UN BEBÉ RECIÉN NACIDO UTILIZAR LA POSICIÓN MÁS BAJA DEL RESPALDO! • ¡UTILIZAR LA POSICIÓN SENTADA DEL RESPALDO DEL ASIENTO DESPUÉS DE LA EDAD DE 6 MESES DEL NIÑO! • ¡MANTENER FUERA DEL FUEGO! • ¡NO LEVANTAR EL PRODUCTO A TRAVÉS DEL BORDO DE SEGURIDAD! • ¡SIEMPRE UTILIZAR UN CINTURÓN SE SEGURIDAD! • ¡ANTES DE UTILIZAR, ASEGURARSE DE QUE TODOS LOS DISPOSITIVOS DE BLOQUEO FUNCIONAN! • PARA EVITAR LESIONES, ASEGURARSE DE QUE SU HIJO ESTÁ A DISTANCIA SEGURA AL AJUSTAR, ABRIR Y PLEGAR ESTE PRODUCTO • ¡NO PERMITIR A LOS NIÑOS A JUGAR CON ESTE PRODUCTO! • ANTES DE UTILIZAR COMPROBAR SI LOS DISPOSITIVOS DE AJUSTE DEL ASIENTO, DE LA CANASTA AL COCHECITO ESTÁN CORRECTAMENTE Y ESTABLEMENTE FIJADOS AL MARCO. • ¡ESTE PRODUCTO NO ES APTO PARA CORRER O DESLIZARSE! • Usar el producto para un niño que pese menos de 22 kg. • ¡Usar la canasta para un niño que pese menos de 22 kg! • ¡El montaje del producto solo se debe realizar por un adulto! • ¡No colocar en la canasta un colchón extra más grueso que 20 mm! • ¡Siempre activar el dispositivo de estacionamiento al colocar y retirar al niño del cochecito! • Antes de usar, asegurarse que los cinturones de seguridad son correctamente colocados y ajustados. • ¡La carga máxima de la cesta para equipaje no debe exceder los 3 kg! • ¡La carga máxima de la bolsa de equipaje (en su caso) no debe exceder los 2 kg! 29

• • • ¡No sobrecargar el cochecito! ¡Cada carga, colocada y/o fijada en el mango, el bordo, el respaldo, la visera y/o los lados del cochecito, puede afectar su estabilidad! No colocar objetos que pesan más de 0. 45 kg en el bolsillo de la visera. ¡El cochecito y la canasta son diseñados para llevar a un solo niño! ¡No utilizar repuestos u otros componentes que no son suministrados por el fabricante! El fabricante no acepta ninguna responsabilidad por la seguridad en el caso de que se utilicen piezas de repuesto diferentes de las originales o de las recomendadas por él. ¡No hacer cambios o modificaciones a la estructura! Si es necesario contactar al distribuidor o un centro de servicio autorizado para obtener asesoramiento y reparación. La silla de coche para niños no reemplaza la canasta de bebé o la cama. Cuando el niño necesita dormir, debe colocarlo en un cochecito, canasta o cama apropiados. ¡No utilizar el producto si encuentra piezas faltantes o dañadas! ¡No permitir la presencia de niños menores de 3 años antes del ensamblaje completo del producto para evitar el acceso a piezas pequeñas y desmontadas! ¡No colocar en el producto cordones adicionales para evitar el riesgo de asfixia! No utilizar el cochecito en escaleras ordinarias y mecánicas y tener cuidado al subir a y bajar de aceras y escalones. ¡Mantener los envases de plástico fuera del alcance de niños para evitar el riesgo de asfixia! ¡No almacenar el producto en lugares húmedos y bajo la luz solar directa! CARACTERÍSITCAS DEL PRODUCTO El asiento del cochecito es apropiado para bebés y niños de 0 a 4 años o de 22 kg (lo que ocurra primero). La silla de seguridad para niños durante el viaje en coche, modelo „Macan“ , grupo de peso 0+ para niños de peso hasta 22 kg. La silla de niños para coche es seguro y compatible con la estructura del cochecito. Nota: La silla se puede comprar adicionalmente si no está incluida en el cochecito. Las instrucciones para el uso seguro de la silla y su instalación en el coche se encuentran en instrucciones separadas. • cinturón de seguridad de 5 puntos; • Respaldo ajustable del asiento; • Mango ajustable; • Visera ajustable; • Movimiento rotatorio y recto de las ruedas delanteras. Piezas 1 1. Mango 2. Visera 3. Asiento 4. Cuadro 5. Ruedas delanteras 6. Reposapiés 7. Compartimento para accesorios 8. Ruedas traseras 2 3 4 6 7 8 5 30

Fijación de las ruedas delanteras ADVERTENCIA: Antes de usar, asegurarse de que las ruedas estén bloqueadas de manera segura en la posición correcta (Foto 1). ATENCIÓN: Al abrir el cochecito, asegurarse de que su hijo o un otro niño están en distancia segura. Asegurarse de que al ensamblar el cochecito sus partes móviles no estén en contacto con su hijo. Colocar las ruedas delanteras de los ambos lados del cuadro delantero del cochecito y fijarlas (Foto 2), Fijación de las ruedas traseras Presionar los botones del eje trasero y fijarlos (Foto 3). Desplegar el cochecito Primero, liberar el botón del lado izquierdo y derecho del cuadro del cochecito (Foto 4). El cochecito debe verse como a la Foto 5. Ajustar el mango Para ajustar la longitud del mango, presionar el botón como es indicado en la Foto 6 y tirar el mango hacia Ud. El mango tiene 3 niveles de longitud. La Foto 7 muestra que el mango es extraído por completo. Desplegado del asiento Para desplegar el asiento, tirar hacia arriba la visera (Fotos 8, 18 y 19). Tirar el mango al reverso de la visera y con su pulgar presionar el botón hacia la derecha para desplegar el asiento (Foto 9). Tras haber desplegado el asiento, el cochecito debe verse como a la Foto 10. 31

Activación el freno trasero Para activar el dispositivo de estacionamiento y bloquear las ambas ruedas traseras, presionar hacia abajo el pedal del eje trasero (Foto 11). Nunca dejar a su hijo solo en el cochecito. Para liberar el freno, levantar el pedal hacia arriba (Foto 12). Cinturón de seguridad de 5 puntos Como es mostrado en la Foto 13, presionar el botón del lado izquierdo para desabrochar el cinturón, para abrocharlo o para ajustar las correas como es mostrado en la Foto 14, ajustar las hebillas en una posición confortable para su hijo. Compartimento para accesorios ¡Atención! No colocar equipaje de más de 2. 5 kg en el compartimento para accesorios. El cochecito tiene un compartimento para accesorios. Colocación del asiento Tomar el asiento, colocarlo en el centro del cuadro y presionar hasta que se entienda CLIC (Fotos 16 y 17). Desplegar el cochecito, fijar el bordo de seguridad hasta que se escuche un CLIC (Foto 18). Para ajustar la posición del asiento, presionar el botón como es indicado en la Foto 19. Fijación de las ruedas delanteras Las ruedas delanteras pueden girar a 360°. Presionar hacia arriba el botón por arriba de las ruedas para fijarlas para movimiento solo en una dirección (Foto 20). 32

Bajada de las ruedas delanteras Para bajar las ruedas delanteras, presionar los botones de los ambos lados del eje delantero, como es indicado en la Foto 22. Bajada de las ruedas traseras Para bajar las ruedas traseras, presionar los botones de los ambos lados del eje trasero, como es indicado en la Foto 23. Colocación de la visera Tomar la visera y colocarla paralelo al asiento. Los dos extremos de plástico deben insertarse en los puntos paralelos al asiento. Para retirar la visera, presionar los botones de los ambos lados del respaldo y levantarla (Fotos 24, 25 y 26). Ajustar la visera en la posición deseada (Fotos 33 y 34). Reposapiés El reposapiés tiene 2 niveles. Para cambiar el nivel, presionar el mango por debajo del reposapiés y colocarlo en la posición deseada (Foto 26). Colocar la silla para coche como es indicado en la foto 27, hasta que se escuche un clic. Para retirar la silla de los cuadros del cochecito, presionar los ambos botones de los ambos lados (Fotos 28 y 29). 33

Ensamblaje de la canasta de invierno Colocar la canasta de invierno en el suelo. Como se indica en la foto 30 hay dos conexiones metálicas que se deben fijar firmemente a la canasta. Fijar el adaptador a los ambos lados de la canasta (Foto 31). Colocación de la canasta de invierno sobre el cuadro Tomar la canasta de invierno hacia Ud. y colocarla en el cuadro del cochecito hasta entender un clic (Fotos 32, 33). Esto significa que la ha fijado correctamente. Para retirar la canasta de invierno del cuadro, presionar los ambos botones de los ambos lados y tirarla hacia arriba (Foto 34). Ajuste de la visera para la canasta de invierno Presionar los ambos botones del lado interno de la visera al mismo tiempo y ajustar la visera como desea (Foto 35). Tirar hacia adelante la visera adicional, como es mostrado en la Foto 36. Cierre de la canasta de invierno Para cerrar la canasta de invierno, seguir los pasos en orden inverso (Fotos 37). Plegar el adaptador (Foto 38). Plegado del cochecito Retirar el bordo de seguridad presionando los botones en sus ambos extremos. Luego presionar el botón al reverso del asiento (Fotos 39, 40 y 41). Para plegar el cuadro pulsar los ambos botones en el mango y presionar hacia abajo (Fotos 42 y 43). Para plegar el cochecito por completo, presionar a la vez los dispositivos de seguridad de plástico (Foto 44). Para terminar completamente con el plegado, usar el mecanismo de bloqueo para mayor seguridad. (Foto 45). ¡Atención! Al cerrar el cochecito, asegurarse de que su hijo u otros niños estén a una distancia segura. Asegurarse de que durante estas operaciones las partes móviles del cochecito no estén en contacto con su hijo. Antes de cerrar el cochecito, asegurar se de que la cesta de almacenamiento está vacía. 34

INSTRUCCIONES DE MANTENIMIENTO Y PROFILAXIA 1. Verificar reguladamente los dispositivos de bloqueo, los frenos, los cinturones de seguridad y los sujetadores, las juntas y los mecanismos de fijación para asegurarse de que funcionan correctamente, no estén desgastados o dañados. 2. Si encuentra piezas sueltas, rotas o dañadas, ellas deben ser reparadas por un taller autorizado o reemplazadas por piezas originales. De lo contrario, la garantía del cochecito será nula. 3. No hacer modificaciones en la estructura y no reemplazar las piezas desgastadas por aquellas que no sean adecuadas u originales. Esto puede provocar el funcionamiento incorrecto del cochecito y lesionar a su hijo. Así como a la anulación de la garantía del cochecito. 4. Para limpiar la tela, las partes metálicas o de plástico del producto, usar un paño de algodón suave o una esponja humedecida con agua. 5. Nunca limpiar con detergentes que contienen partículas abrasivas, amoniaco, lejía o alcohol. NO lavar las piezas y accesorios amovibles en la lavadora - tales como visera, etc. , ya que esto puede dañarlas. De lo contrario, la garantía será nula. 6. Siempre después de limpiar el cochecito le deberá dejarlo secar por completo y luego de eso usarlo o almacenarlo. ¡No almacenar el producto en lugares húmedos y bajo la luz solar directa! 7. Almacenar el cochecito adentro, pero siempre limpiado tras el uso. El cochecito no es apropiado para uso doméstico, si no ha limpiado los neumáticos ellos pueden manchar el recubrimiento sobre el cual se encuentran. 8. No almacenar el cochecito en ambiente húmedo. Si ha usado el cochecito en un ambiente peligroso, Ud. Deberá desplegarlo, limpiarlo con un paño seco y dejarlo secar completamente de forma natural. 9. Demasiada luz solar afectará el envejecimiento del cochecito y de sus piezas de tela. 10. NO colocar otros objetos en el cochecito - equipaje, bolsos conteniendo mercancías, etc. al usarlo o almacenarlo, ya que esto puede dañarlo o puede provocar lesiones al niño dentro del cochecito. MADE FOR CANGAROO Importer: Moni Trade LTD Address: 1 Dolo str. , Trebich, Sofia, Bulgaria Tel. : +359 2/ 838 04 59 35

DE Dieser Kinderwagen ist für Babys und Kinder von 0 bis 4 Jahren, oder bis zu 22 kg (je nachdem, was zuerst eintritt) geeignet. Ein Fünfpunktgurt sorgt für die Sicherheit des Kindes. Die Positionen der Rückenlehne, der Fußstütze und der Sonnenblende sind einstellbar. Der Sitz kann in zwei Positionen montiert werden, so dass das Kind in Fahrtrichtung oder gegen die Fahrtrichtung positioniert werden kann. Die Sicherung ist einstellbar und kann bei Bedarf entfernt werden. Der Griff ist ebenfalls einstellbar, Sie können ihn in die gewünschte Position bringen. Das Vorderrad ist um 360 ° drehbar. Der Sonnenschutz ist abnehmbar, sodass Ihr Kinderwagen in eine Sommeroption übergehen kann. Der Kinderautositz kann an der Struktur montiert werden. Der Kinderwagen wurde gemäß den Anforderungen der europäischen Norm EN 1888 -1 - „Artikel für die Betreuung von Kleinkindern“ hergestellt. Fahrbare Mittel zum Fortbewegen von Kindern. Teil 1: Kinderwagen und Korb für Kinderwagen. " EN 1888 -2 „Produkte für die Betreuung von Kleinkindern. Fahrbare Mittel zum Fortbewegen von Kindern. Teil 2: Kinderwagen für Kinder von 0 kg bis 22 kg. ACHTUNG! Ihr Kind wird am besten geschützt, wenn Sie die Anweisungen und Empfehlungen in der Anleitung befolgen! Beachten Sie die Warnhinweise und treffen Sie alle notwendigen Vorkehrungen, um die Gefahr von Verletzungen oder Schäden des Kindes zu vermeiden und seine Sicherheit zu gewährleisten! Sie sind für die Sicherheit Ihres Kindes verantwortlich, wenn Sie diese Anweisungen und Empfehlungen nicht befolgen! Stellen Sie sicher, dass jeder, der den Wagen benutzt, mit dem Handbuch vertraut ist und es befolgt. Verwenden Sie keine Teile oder Zubehörteile für Kinderwagen, die nicht vom Hersteller oder Händler genehmigt wurden, da dies Ihr Kind gefährden und die Garantie des Kinderwagens ungültig machen kann. GRUNDLEGENDE WARNUNGEN WICHTIG! SORGFÄLTIG DURCHLESEN UND FÜR ZUKÜNFTIGE HINWEISE AUFBEWAHREN. WARNUNGEN • LASSEN SIE DAS KIND NIEMALS UNBEAUFSICHTIGT! • BENUTZEN SIE DEN KORB FÜR KINDER, DIE OHNE FREMDUNTERSTÜTZUNG NICHT SITZEN KÖNNEN, SICH NICHT IM LIEGEN WENDEN UND SELBSTSTӒNDIG AUFSTEHEN KÖNNEN, INDEM SIE HӒNDE UND KNIE ALS STÜTZE BENUTZEN! • BENUTZEN SIE DEN KORB NUR AUF EINER FESTEN, HORIZONTALEN UND TROCKENEN OBERFLÄCHE! • NIEMALS DEN KORB AUF EINEN STӒNDERVER WENDEN! • FÜR EIN NEUGEBORENES BABY NUTZEN SIE DIE NIEDRIGSTEN LIEGEPOSITION DER RÜCKENLEHNE! • BENUTZEN SIE DIE POSITION DER LEHNE DES SITZES FÜR SITZPOSITION NACH EINEM ALTER DES KINDES VON 6 MONATEN! • VOR FEUER SCHÜTZEN! • DAS PRODUKTS NICHT AN DER SICHERHEITSTAFEL HEBEN! • BENUTZEN SIE IMMER EINEN SICHERHEITSGURT! • STELLEN SIE VOR DEM GEBRAUCH SICHER, DASS ALLE BLOCKIEREINRICHTUNGEN IN BETRIEB SIND! • UM VERLETZUNGEN ZU VERMEIDEN, STELLEN SIE SICHER, DASS IHR KIND BEI DER EINSTELLUNG, BEIM EINUND AUSKLAPPEN DIESES PRODUKTS IN SICHERER ENTFERNUNG IST! • LASSEN SIE NICHT ZU, DASS KINDER MIT DIESEM PRODUKT SPIELEN! • PRÜFEN SIE VOR DEM GEBRAUCH, OB DIE VORRICHTUNGEN ZUR BEFESTIGUNG AM WAGEN DES SITZES, AM KORB ODER FAHRZEUGSITZ, ORDENTLICH UND STABIL AM RAHMEN BEFESTIGT SIND. • DIESES PRODUKT IST NICHT ZUM LAUFEN UND RUTSCHEN GEEIGNET! • Verwenden Sie das Produkt für Kinder unter 22 kg. • Verwenden Sie den Korb für Kinder unter 22 kg! • Das Produkt darf nur von einem Erwachsenen zusammengebaut werden! • Legen Sie keine zusätzliche Matratze mit einer Dicke von mehr als 20 mm in den Korb! • Aktivieren Sie immer die Parkvorrichtung, wenn Sie das Kind in den Kinderwagen setzen oder aus dem Kinderwagen nehmen! 36

• • • • Vergewissern Sie sich vor dem Gebrauch, dass die Sicherheitsgurte richtig angelegt und eingestellt sind. Die maximale Belastung des Gepäckkorbs sollte 3 kg nicht überschreiten! Die maximale Zuladung der Gepäcktasche (falls verwendet) sollte 2 kg nicht überschreiten! Überladen Sie den Wagen nicht! Jede Last, die am Griff, an der Tafel, an der Rückenlehne, an der Sonnenblende und / oder an den Seiten des Wagens angebracht wird, kann dessen Stabilität beeinträchtigen! Legen Sie keine Gegenstände mit einem Gewicht von mehr als 0, 45 kg in die Haubentasche. Der Kinderwagen und der Korb sind nur für ein Kind ausgelegt! Verwenden Sie keine Ersatzteile und sonstige Komponenten, die nicht vom Hersteller geliefert wurden! Der Hersteller übernimmt keine Haftung für Sicherheit, wenn andere als die Originalersatzteile oder vom Hersteller verwendete Teile verwendet werden. Nehmen Sie keine Änderungen oder Modifikationen an der Konstruktion vor! Wenden Sie sich bei Bedarf an Ihren Händler oder an ein autorisiertes Servicecenter, um Rat und Reparatur zu erhalten. Der Autositz ersetzt nicht den Babykorb oder -bett. Wenn Ihr Baby schlafen muss, sollten Sie es in einen geeigneten Kinderwagen, ein Kinderkorb oder ein Kinderbett legen. Verwenden Sie das Produkt nicht, wenn Sie fehlende oder beschädigte Teile feststellen! Lassen Sie den Zugang von Kindern unter 3 Jahren nicht zu, bevor das Produkt vollständig zusammenbaut ist, damit diese keinen Zugang zu kleinen und zerlegten Teilen haben! Benutzen Sie keine zusätzlichen Kabel oder Anschlüsse für das Produkt, um Erstickungsgefahr zu vermeiden! Benutzen Sie den Kinderwagen nicht auf Treppen oder Rolltreppen und seien Sie vorsichtig, wenn Sie einen Bürgersteig oder Stufen besteigen. Halten Sie Plastikverpackungen von Kindern fern, um Erstickungsgefahr zu vermeiden! Lagern Sie das Produkt NICHT an feuchten Orten und in direktem Sonnenlicht! PRODUKTEIGENSCHAFTEN Der Kinderwagensitz eignet sich für Babys und Kinder im Alter von 0 bis 4 Jahren, oder bis zu 22 kg (je nachdem, was zuerst eintritt). Kindersicherheitssitz für Fahrzeuge, Modell „Macan“, Gewichtsgruppe 0+ für Kinder mit einem Gewicht von nicht mehr als 22 kg. Der Kindersicherheitssitz für Fahrzeuge ist sicher und kompatibel mit der Konstruktion des Kinderwagens. Bemerkung: Der Sitz kann zusätzlich erworben werden, wenn er nicht im Set des Wagens enthalten ist. Anweisungen zur sicheren Verwendung des Sitzes und zum Einbau in ein Fahrzeug sind in separaten Anweisungen enthalten. • 5 -Punkt-Sicherheitsgurt; • Verstellbare Rückenlehne; • Verstellbarer Griff; • Einstellbarer Sonnenschutz; • Dreh- und Geradeauslauf der Vorderräder. Teile 1. Griff 2. Sonnenschutz 3. Sitz 4. Rahmen 5. Vorderräder 6. Fußstütze 7. Abteilung für Zubehör 8. Hinterräder 1 2 3 4 6 7 8 5 37

Vorderräder anbringen WARNUNG: Vergewissern Sie sich vor dem Gebrauch, dass die Räder sicher in der richtigen Position verriegelt sind (Abbildung 1). ACHTUNG: Achten Sie beim Öffnen des Kinderwagens darauf, dass sich Ihr oder andere Kinder in sicherem Abstand befinden. Stellen Sie sicher, dass bei Bewegung des Kinderwagens seine beweglichen Teile nicht mit Ihrem Kind in Berührung kommen. Platzieren Sie die Vorderräder auf beiden Seiten des Vorderrahmens des Wagens und sichern Sie diese (Abbildung 2). Anbringen der Hinterräder Drücken Sie die Knöpfe an der Hinterachse und verriegeln Sie diese (Abbildung 3). Kinderwagen aufklappen Setzen Sie zuerst die Taste auf der linken und rechten Seite des Wagenrahmens frei (Abbildung 4). Der Wagen sollte wie in Abbildung 5 aussehen. Griffverstellung Um die Länge des Griffs anzupassen, drücken Sie die Taste wie auf Abbildung 6 angezeigt und ziehen Sie sie in Ihre Richtung. Der Griff hat 3 Längenstufen. Abbildung 7 zeigt an, dass der Griff vollständig herausgezogen ist. Sitz aufklappen Ziehen Sie den Sonnenschutz nach oben, um den Sitz aufzuklappen (Abbildungen 8, 18 und 19). Ziehen Sie den Griff an der Rückseite des Sonnenschutzes und drücken Sie mit dem Daumen den Knopf nach rechts, um den Sitz aufzuklappen (Abbildung 9). Sobald Sie den Sitz ausgeklappt haben, sollte der Kinderwagen wie auf Abbildung 10 aussehen. Betätigung der Hinterradbremse Um die Parkvorrichtung zu aktivieren und die beiden Hinterräder zu verriegeln, drücken Sie das Hinterachspedal nach unten (Abbildung 11). Lassen Sie Ihr Kind niemals unbeaufsichtigt im Kinderwagen. Um die Bremse zu lösen, heben Sie das Pedal an (Abbildung 12). 38

5 -Punkt-Sicherheitsgurt Wie in Abbildung 13 gezeigt, drücken Sie die Taste auf der linken Seite, um den Gurt zu lösen, um den Gurt festzuschnallen und die einzelnen Gurte wie in Abbildung 14 einzustellen, passen Sie die Schnallen in einer Position an, die für Ihr Kind bequem ist. Abteilung für Zubehör Packungsbeilage beachten. Legen Sie kein Gepäck mit einem Gewicht von mehr als 2, 5 kg in die Abteilung für Zubehör. Der Wagen hat eine Abteilung für Zubehör. Sitz montieren Nehmen Sie den Sitz, platzieren Sie ihn in der Mitte des Rahmens und drücken Sie, bis Sie ein Klicken hören (Abbildungen 16 und 17). Klappen Sie den Kinderwagen auf und verriegeln Sie die Sicherheitstafel, bis sie einrastet (Abbildung 18). Drücken Sie zum Einstellen der Sitzposition die Taste wie in Abbildung 19. Vorderräder befestigen Die Vorderräder sind um 360 ° drehbar. Drücken Sie den Knopf über den Rädern nach oben, um sie nur in eine Fahrrichtung zu fixieren (Abbildung 20). Vorderräder ausbauen Drücken Sie zum Entfernen der Vorderräder die Knöpfe auf beiden Seiten der Vorderachse, wie in Abbildung 22 gezeigt. Hinterräder ausbauen Drücken Sie zum Entfernen der Hinterräder die Knöpfe auf beiden Seiten der Hinterachse (siehe Abbildung 23). Montage des Sonnenschutzes Nehmen Sie den Sonnenschutz und platzieren Sie ihn parallel zum Sitz. Die beiden Kunststoffenden sollten in die Punkte parallel zum Sitz passen. Drücken Sie zum Entfernen des Sonnenschutzes auf die Knöpfe an beiden Seiten der Rückenlehne und heben Sie sie an (Abbildungen 24, 25 und 26). Stellen Sie die Sonnenblende in die gewünschte Position ein (Abbildungen 33 und 34). 39

Fußstütze Die Fußstütze hat 2 Ebenen. Um die Ebene zu ändern, schieben Sie den Griff unter die Stütze und bringen Sie ihn in die gewünschte Position (Abbildung 26). Den Autositz montieren Setzen Sie den Autositz wie in Abbildung 27 gezeigt ein, bis Sie ein Klicken hören. Drücken Sie beide Knöpfe auf beiden Seiten, um den Stuhl aus dem Wagen zu entfernen (Abbildungen 28 und 29). Montage des Winterkorbs Stellen Sie den Winterkorb auf den Boden. Wie in Abbildung 30 dargestellt, müssen zwei Metallverbindungen dicht am Korb befestigt werden. Befestigen Sie den Adapter an beiden Seiten des Korbs (Abbildung 31). Den Winterkorb auf einen Rahmen stellen Nehmen Sie den Ihnen zugewandten Winterkorb, und legen Sie ihn auf den Wagenrahmen, bis Sie ein Klicken hören (Abbildungen 32, 33). Dies bedeutet, dass Sie ihn richtig befestigt haben. Um den Winterkorb aus dem Rahmen zu nehmen, drücken Sie die beiden Knöpfe an beiden Seiten des Rahmens und ziehen Sie ihn nach oben (Abbildung 34). Einstellung des Sonnenschutzes am Winterkorb Drücken Sie gleichzeitig beide Knöpfe an der Innenseite des Sonnenschutzes und stellen Sie ihn nach Ihren Wünschen ein (Abbildung 35). Ziehen Sie, wie in Abbildung 36 gezeigt, die zusätzliche Blende nach vorne. Winterkorb schlieβen Um den Winterkorb zu schlieβen, gehen Sie in umgekehrter Reihenfolge vor (Abbildung 37). Falten Sie den Adapter (Abbildung 38). Wagen einklappen Entfernen Sie die Sicherheitstafel, indem Sie die Knöpfe an beiden Enden drücken. Drücken Sie dann den Knopf auf der Rückseite des Sitzes (Abbildungen 39, 40 und 41). Drücken Sie zum Zusammenklappen des Rahmens auf die beiden Knöpfe am Griff und nach unten (Abbildungen 42 und 43). Zum vollständigen Zusammenklappen des Wagens drücken Sie gleichzeitig auf beiden Plastikschutzvorrichtungen (Abbildung 44). Verwenden Sie zum Abschluss des Einklappens den Verriegelungsmechanismus für mehr Sicherheit. (Abbildung 45). 40
- Slides: 40