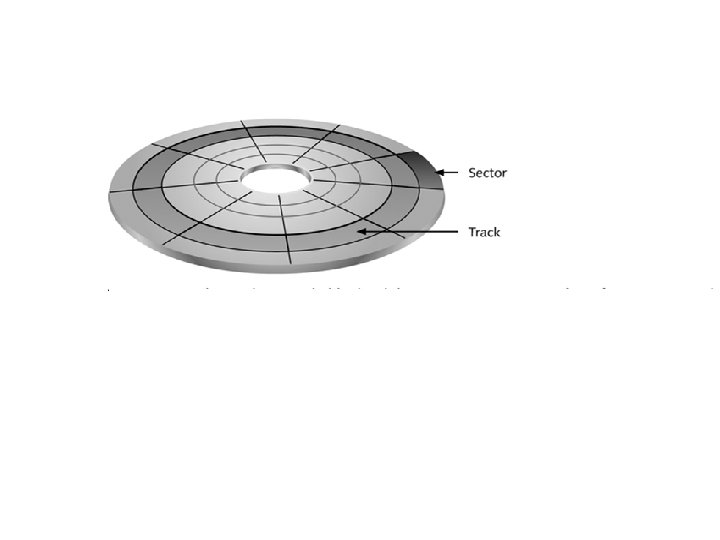
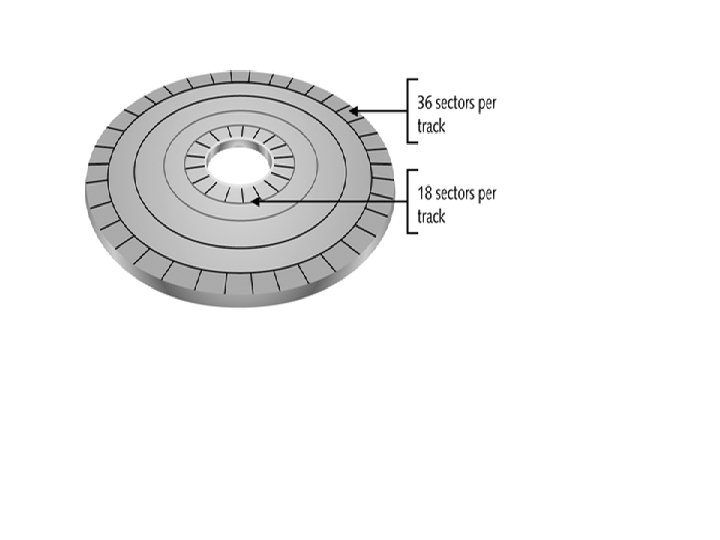
LowLevel Formatting Tracks and sector markings are written


- Slides: 38
Low-Level Formatting Tracks and sector markings are written on the hard drive at the factory
EIDE Standards • Support two IDE connections, a primary and a secondary – Each connection can support up to two IDE devices for a total of four devices on a system – Possible configurations • • Primary IDE channel, master device Primary IDE channel, slave device Secondary IDE channel, master device Secondary IDE channel, slave device
Motherboard with Two IDE Connectors
Hard Drive Technologies • How the hard drive reads and writes data to the drive • How the hard drive interfaces with the system
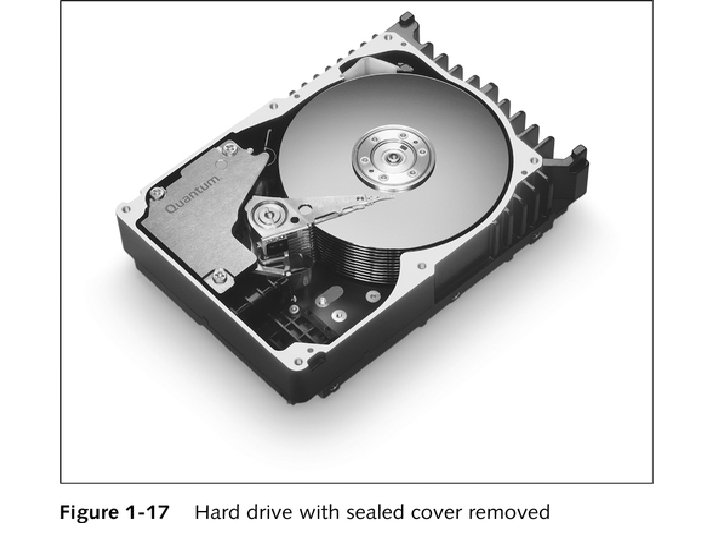
How Hard Drives Work • One, two, or more platters are stacked together and spin in unison • Read/write heads – Controlled by an actuator – Move in unison across disk surfaces as disks rotate on a spindle • Require a hard drive controller
A Hard Drive with Four Platters
How a Hard Drive Is Logically Organized to Hold Data • Drive must have track and sector markings written on it • A file system must be installed • Files needed to boot the PC must be copied to the root directory of the drive
Installing a Hard Drive 1. Set jumpers/DIP switches on drive; physically install drive inside case; attach power cord and data cable 2. Inform CMOS setup of new drive, or verify that auto detect correctly detected the drive 3. Use Fdisk to create partition(s) on the drive and divide extended partition into logical drives 4. Use Format command to high-level format each logical drive 5. Install the OS and other software
Prepare for Installation • Keep notes • Have a good bootable disk or Windows 9 x rescue disk available • Read documentation • Plan drive configuration • Prepare work area and take precautions
Prepare for Installation
Set Jumpers and DIP Switches
Set Jumpers and DIP Switches
Set Jumpers and DIP Switches
Mount the Drive in the Bay
Mount the Drive in the Bay
Mount the Drive in the Bay
Mount the Drive in the Bay
Mount the Drive in the Bay
Mount the Drive in the Bay
Mount the Drive in the Bay
If the Bay Is Too Large
Using Windows to Partition and Format a New Drive • Boot from Windows setup CD and follow directions on the screen to install Windows on the new drive • Setup process partitions and formats the new drive before it begins Windows installation
Hard Drives
Hard Drive
Hard Drive
Hard Drive
Hard Drive