LOGO LCD Display LCD ControllerHD 44780 LCD ControllerHD
의 이해 § LCD Controller(HD 44780) 구조 § LCD Controller(HD")
 Dongyang Mirae University 센서활용프로그래밍/IOT소프트웨어개발 3 prepared by Choon Woo Kwon")
 LOGO □ 손목시계, TV, 핸드폰 등 우리 생활의 많은 부분에서 사용")
 LOGO v Hitachi HD 44780 LCD controller § § § data")
 사용 LOGO v Interface MPU - LCD controller - LCD(Liquid Crystal")
 사용 LOGO v MPU - LCD controller Interface Dongyang Mirae University")


 § 8 -bit 문자코드로")
 : 8")
 : 8")
 § 240 characters patterns(8")
 LOGO v Character Codes")
 LOGO v Dongyang Mirae University 센서활용프로그래밍/IOT소프트웨어개발 15 prepared by Choon Woo")
 LOGO v Instructions Dongyang Mirae University 센서활용프로그래밍/IOT소프트웨어개발 16 prepared by Choon")
 LOGO v Instructions (cont) Dongyang Mirae University 센서활용프로그래밍/IOT소프트웨어개발 17 prepared by")


 LOGO v 8 -bit Interface Dongyang Mirae University 센서활용프로그래밍/IOT소프트웨어개발 29 prepared")
 LOGO v 4 -bit Interface Dongyang Mirae University 센서활용프로그래밍/IOT소프트웨어개발 30 prepared")

 LOGO v 패럴렐 LCD 디스플레이(4 -bit 모드) § Character")
 Pin # Symbol 비고 1 Vss GND 2")
 - 배선도 LOGO LCD-Arudino UNO 핀 연결 LCD UNO 1")
 - 회로도(Schematic) Dongyang Mirae University 센서활용프로그래밍/IOT소프트웨어개발 35 prepared by")

 – 스케치(1) // include the library code; // 참조 :")
 – 스케치(2) // include the library code: #include <Liquid. Crystal.")
 – 스케치(3) Cursor. Blink LOGO // include the library code:")
 – 스케치(3) // include the library code: #include <Liquid. Crystal.")
 – 스케치(5) // include the library code: #include <Liquid. Crystal.")
 - 배선도 LOGO LCD-Arudino UNO 핀 연결 LCD UNO 1")
 - 회로도(Schematic) Dongyang Mirae University 센서활용프로그래밍/IOT소프트웨어개발 44 prepared by")
 - 스케치 int int int DI = 12; RW =")
 - 스케치 // this is the function used to send")
 : UART § Serial LCD Module(2)")
 - 배선도 LOGO D 1 Serial LCD Module (LCD 1602/LCD 1604/LCD")
 $lcd")
 - 스케치 // 스케치 예시(1) – Serial LCD Display LCD 1602/1604/2004")
 - 스케치 // 스케치 예시(2) – Serial LCD Display LCD 1602/1604/2004")
 – 변수값 표시 // 스케치 예시(3) – Serial LCD Display :")
 - 배선도 LOGO D 1 Serial LCD Module (LCD 1602/LCD 1604/LCD")
 Dongyang Mirae University 센서활용프로그래밍/IOT소프트웨어개발 56 prepared by Choon Woo Kwon")
 LOGO v I²C(Inter-Integrated Circuit, Inter IC) • ‘I-squared-C’로 읽음 : I 2")
 § 설계 ü 7 비트의 주소 공간(16개는 예약)이 있어,")


 LOGO v Serial LCD의 onboard microcontroller chip ü")

")
 - i 2 c_scanner // -------------------// i 2 c_scanner")
 - i 2 c_scanner // i 2 c_scanner #include")
 #include <Wire. h> #include <Liquid. Crystal_I 2 C.")
 Serial LCD의 onboard microcontroller")

- Slides: 70
목차 LOGO Ø LCD 디스플레이(Display)의 이해 § LCD Controller(HD 44780) 구조 § LCD Controller(HD 44780) 동작과 이해 Ø LCD 사용 § 아두이노 프로그램 : Liquid. Crystal Library § Parallel LCD 디스플레이 • Parallel LCD 디스플레이 : 4 -bit 모드, 8 -bit 모드 § Serial LCD 디스플레이 • Tx. D, Rx. D 이용 Serial LCD Module : UART • I²C 이용 Serial LCD Module : I²C Dongyang Mirae University 센서활용프로그래밍/IOT소프트웨어개발 2 prepared by Choon Woo Kwon
LOGO LCD(Liquid Crystal Display) Dongyang Mirae University 센서활용프로그래밍/IOT소프트웨어개발 3 prepared by Choon Woo Kwon
LCD(Liquid Crystal Display) LOGO □ 손목시계, TV, 핸드폰 등 우리 생활의 많은 부분에서 사용 됨 □ 그래픽 LCD, TFT LCD, Character LCD 등 종류가 다양 □ 아두이노 Character LCD 지원 □ 시리얼(Serial) 방식 □ 패럴렐(Parallel) 방식 Dongyang Mirae University 센서활용프로그래밍/IOT소프트웨어개발 4 prepared by Choon Woo Kwon
LCD Controller(HD 44780) LOGO v Hitachi HD 44780 LCD controller § § § data sheet download (click!) alphanumeric dot matrix liquid crystal display (LCD) controller(Hitachi 개발) Max addressing : 80 chars : 80 x 8 bit display RAM MPU interface : 4 -bit or 8 -bit Size : 8 characters x 1 row, 8 x 2, 16 x 1, 16× 2, 20× 4 등 가능 Custom size : (32, 40, 80) characters x (1, 2, 4 or 8 lines) ASCII characters, Japanese Kana characters, some symbols : 240 character fonts ü 208 character fonts (5 x 8 dot), 32 character fonts (5 x 10 dot) Backlight 지원 HD 44780 U Dongyang Mirae University 센서활용프로그래밍/IOT소프트웨어개발 5 prepared by Choon Woo Kwon
LCD Controller(HD 44780) 사용 LOGO v Interface MPU - LCD controller - LCD(Liquid Crystal Display) LCD MPU / Arduino / etc. HD 44780 U LCD Dongyang Mirae University 센서활용프로그래밍/IOT소프트웨어개발 6 prepared by Choon Woo Kwon
LCD Controller(HD 44780) 사용 LOGO v MPU - LCD controller Interface Dongyang Mirae University 센서활용프로그래밍/IOT소프트웨어개발 7 prepared by Choon Woo Kwon
HD 44780 U Block Diagram & Pin Functions Dongyang Mirae University 센서활용프로그래밍/IOT소프트웨어개발 8 LOGO prepared by Choon Woo Kwon
HD 44780 U - 기능 설명 LOGO v Dongyang Mirae University 센서활용프로그래밍/IOT소프트웨어개발 9 prepared by Choon Woo Kwon
HD 44780 U – DDRAM LOGO v DDRAM(Display Data RAM) § 8 -bit 문자코드로 된 Display 데이터를 저장 § 저장 용량 : 80 character or 80 x 8 bits ü Display로 사용되지 않은 경우 일반 데이터 RAM으로 사용 가능 § DDRAM 주소는 ADD는 AC(address counter)에 16값으로 설정 v 1 -line Display 경우 (N=0) § DDRAM Address § 1 -Line Display § 1 -Line x 8 -Character Display Dongyang Mirae University 센서활용프로그래밍/IOT소프트웨어개발 10 prepared by Choon Woo Kwon
HD 44780 U – DDRAM LOGO v 2 -line Display 경우 (N=1) : 8 -char x 2 -line 표시 경우 (Case 1) § 2 -Line Display § 2 -Line x 8 -Character Display Dongyang Mirae University 센서활용프로그래밍/IOT소프트웨어개발 11 prepared by Choon Woo Kwon
HD 44780 U – DDRAM LOGO v 2 -line Display 경우 (N=1) : 8 -char x 2 -line 표시 경우(Case 2) § 2 -Line Display § 2 -Line x 8 -Character Display Dongyang Mirae University 센서활용프로그래밍/IOT소프트웨어개발 12 prepared by Choon Woo Kwon
HD 44780 U – CGROM/CGRAM LOGO v CGROM(Character Generator ROM) § 240 characters patterns(8 -bit character code) ü 208 5 x 8 dot character patterns ü 32 5 x 10 dot character patterns § User-defined character patterns by mask-programmed ROM § Character Pattern(5 x 8) 예 ü A 11 -A 4 : character code ü A 3 -A 0 : character patterns의 line position ü O 4 -O 0 : character pattern data ü O 5 -O 7 : ‘ 0’ ü Line 9 – line 15 : ‘ 0’ § Character Pattern(5 x 10) 예 ü ü ü A 11 -A 4 : character code A 3 -A 0 : character patterns의 line position O 4 -O 0 : character pattern data O 5 -O 7 : ‘ 0’ Line 11 – line 15 : ‘ 0’ Dongyang Mirae University 센서활용프로그래밍/IOT소프트웨어개발 13 prepared by Choon Woo Kwon
HD 44780 U – CGROM/CGRAM v CGRAM (Character Generator RAM) LOGO v Character Codes & Character Patterns (ROM Code : A 00) § 사용자가 저장하여 사용할 수 있는 character patterns § Character Codes Table의 첫째 열에 해당 하는 코드 ü Character code : 0000 xxxx / 0001 xxxx ü 8 5 x 8 dot character patterns ü 4 5 x 10 dot character patterns Dongyang Mirae University 센서활용프로그래밍/IOT소프트웨어개발 14 prepared by Choon Woo Kwon
HD 44780 Instruction(명령어) LOGO v Dongyang Mirae University 센서활용프로그래밍/IOT소프트웨어개발 15 prepared by Choon Woo Kwon
HD 44780 Instruction(명령어) LOGO v Instructions Dongyang Mirae University 센서활용프로그래밍/IOT소프트웨어개발 16 prepared by Choon Woo Kwon
HD 44780 Instruction(명령어) LOGO v Instructions (cont) Dongyang Mirae University 센서활용프로그래밍/IOT소프트웨어개발 17 prepared by Choon Woo Kwon
HD 44780 명령어 설명 v v v LOGO Clear Display Return Home Entry Mode Set Display On/Off Control Cursor/Display Shift Function Set CGRAM Address Set DDRAM Address Read Busy Flag and Address Write Data to CG or DDRAM Read Data from CG/DDRAM Dongyang Mirae University 센서활용프로그래밍/IOT소프트웨어개발 18 prepared by Choon Woo Kwon
HD 44780 명령어 설명 LOGO v Instruction Codes Dongyang Mirae University 센서활용프로그래밍/IOT소프트웨어개발 19 prepared by Choon Woo Kwon
HD 44780 명령어 설명 LOGO v Instruction Codes Dongyang Mirae University 센서활용프로그래밍/IOT소프트웨어개발 20 prepared by Choon Woo Kwon
HD 44780 Instruction-Display 연관성 LOGO v 8 -bit operation, 8 -digit x 1 -line display with internal reset § The HD 44780 U functions must be set by the function set instruction prior to the display. Since the display data RAM can store data for 80 characters, the RAM can be used for displays such as for advertising when combined with the display shift operation. Since the display shift operation changes only the display position with DDRAM contents unchanged, the first display data entered into DDRAM can be output when the return home operation is performed. v 4 -bit operation, 8 -digit x 1 -line display with internal reset § The program must set all functions prior to the 4 -bit operation. When the power is turned on, 8 -bit operation is automatically selected and the first write is performed as an 8 -bit operation. Since DB 0 to DB 3 are not connected, a rewrite is then required. However, since one operation is completed in two accesses for 4 -bit operation, a rewrite is needed to set the functions (see Table 12). Thus, DB 4 to DB 7 of the function set instruction is written twice. nstruction. Dongyang Mirae University 센서활용프로그래밍/IOT소프트웨어개발 21 prepared by Choon Woo Kwon
HD 44780 Instruction-Display 연관성 LOGO v 8 -bit operation, 8 -digit x 2 -line display § For a 2 -line display, the cursor automatically moves from the first to the second line after the 40 th digit of the first line has been written. Thus, if there are only 8 characters in the first line, the DDRAM address must be again set after the 8 th character is completed. Note that the display shift operation is performed for the first and second lines. In the example of Table 13, the display shift is performed when the cursor is on the second line. However, if the shift operation is performed when the cursor is on the first line, both the first and second lines move together. If the shift is repeated, the display of the second line will not move to the first line. The same display will only shift within its own line for the number of times the shift is repeated. § Note: When using the internal reset, the electrical characteristics in the Power Supply Conditions Using Internal Reset Circuit table must be satisfied. If not, the HD 44780 U must be initialized by instructions. See the section, Initializing by Instruction. Dongyang Mirae University 센서활용프로그래밍/IOT소프트웨어개발 22 prepared by Choon Woo Kwon
HD 44780 Instruction-Display 프로그램 예시 LOGO v 8 -Bit Operation, 8 -Digit x 1 -Line Display Example with Internal Reset Dongyang Mirae University 센서활용프로그래밍/IOT소프트웨어개발 23 prepared by Choon Woo Kwon
HD 44780 Instruction-Display 프로그램 예시 LOGO v 8 -Bit Operation, 8 -Digit x 1 -Line Display Example with Internal Reset (cont) Dongyang Mirae University 센서활용프로그래밍/IOT소프트웨어개발 24 prepared by Choon Woo Kwon
HD 44780 Instruction-Display 프로그램 예시 LOGO v 8 -Bit Operation, 8 -Digit x 1 -Line Display Example with Internal Reset (cont) Dongyang Mirae University 센서활용프로그래밍/IOT소프트웨어개발 25 prepared by Choon Woo Kwon
HD 44780 Instruction-Display 프로그램 예시 LOGO v 4 -Bit Operation, 8 -Digit x 1 -Line Display Example with Internal Reset Dongyang Mirae University 센서활용프로그래밍/IOT소프트웨어개발 26 prepared by Choon Woo Kwon
HD 44780 Instruction-Display 프로그램 예시 LOGO v 8 -Bit Operation, 8 -Digit x 2 -Line Display Example with Internal Reset Dongyang Mirae University 센서활용프로그래밍/IOT소프트웨어개발 27 prepared by Choon Woo Kwon
HD 44780 Instruction-Display 프로그램 예시 LOGO v 8 -Bit Operation, 8 -Digit x 2 -Line Display Example with Internal Reset (cont) Dongyang Mirae University 센서활용프로그래밍/IOT소프트웨어개발 28 prepared by Choon Woo Kwon
HD 44780 초기화(Initializing) LOGO v 8 -bit Interface Dongyang Mirae University 센서활용프로그래밍/IOT소프트웨어개발 29 prepared by Choon Woo Kwon
HD 44780 초기화(Initializing) LOGO v 4 -bit Interface Dongyang Mirae University 센서활용프로그래밍/IOT소프트웨어개발 30 prepared by Choon Woo Kwon
LOGO Parallel LCD 디스플레이 § 4 -bit 모드 § 8 -bit 모드 Dongyang Mirae University 센서활용프로그래밍/IOT소프트웨어개발 31 prepared by Choon Woo Kwon
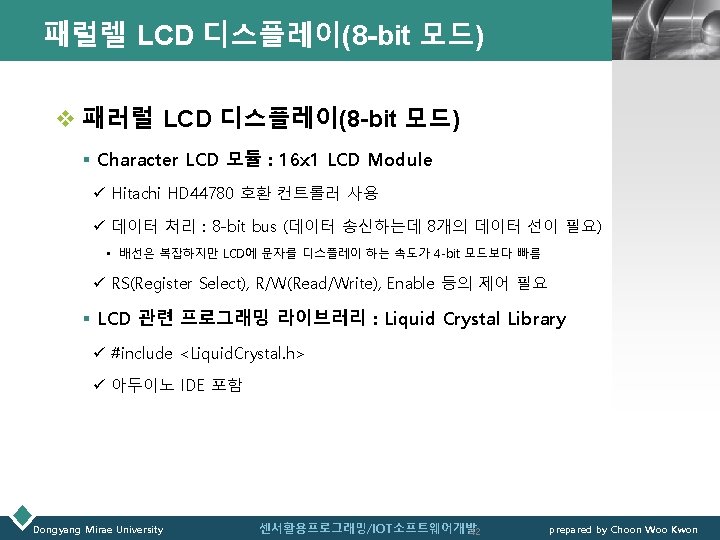
패럴렐 LCD 디스플레이(4 -bit 모드) LOGO v 패럴렐 LCD 디스플레이(4 -bit 모드) § Character LCD 모듈 : 16 x 1 LCD Module ü Hitachi HD 44780 호환 컨트롤러 사용 ü 데이터 처리 : 4 -bit bus • 회로 측면에서 배선이 용이 § LCD 관련 프로그래밍 라이브러리 : Liquid Crystal Library ü #include <Liquid. Crystal. h> ü 아두이노 IDE 포함 Dongyang Mirae University 센서활용프로그래밍/IOT소프트웨어개발 32 prepared by Choon Woo Kwon
Character LCD Module (Hitachi HD 44780) Pin # Symbol 비고 1 Vss GND 2 Vdd LCD 전원 3 V 0 LCD 밝기 조절 4 RS Register Selector 5 R/W Read/Write 6 Enable Clock Enable 7 Data Bit 0 8 Data Bit 1 9 Data Bit 2 10 Data Bit 3 11 Data Bit 4 12 Data Bit 5 13 Data Bit 6 14 Data Bit 7 15 LCD+/A Backlight Anode 백라이트 전원 (5 V) 16 LCD-/K Backlight Cathode 백라이트 GND (0 V) Dongyang Mirae University LOGO LCD GND (0 V) LCD 전원 (+3. 3~5 V) 16 가변저항(보통 10 KΩ)으로 표시 글자의 밝기 조절 RS=0 명령 레지스터 선택, RS=1 데이터 레지스터 선택 R/W=0 레지스터 쓰기 모드, R/W=1 레지스터 읽기 모드 falling-edge trigger (신호 1/HIGH) -> 0/LOW) Data I/O 4 -bit 모드 경우 사용 않음 Data I/O 4 -bit/8 -bit 모드 경우 사용 (4 -bit 모드를 많이 사용 센서활용프로그래밍/IOT소프트웨어개발 33 prepared by Choon Woo Kwon 1
패럴렐 LCD 디스플레이(4 bit) - 배선도 LOGO LCD-Arudino UNO 핀 연결 LCD UNO 1 Vss GND 2 Vdd 5 V 3 V 0 Contrast 5 4 RS D 12 7 5 R/W GND 9 6 Enable D 11 11 7 Data Bit 0 NC 13 8 Data Bit 1 NC 15 9 Data Bit 2 NC 10 Data Bit 3 NC 11 Data Bit 4 D 5 12 Data Bit 5 D 4 13 Data Bit 6 D 3 14 Data Bit 7 D 2 15 LCD+/A 5 V 16 LCD-/K GND Dongyang Mirae University 1 3 센서활용프로그래밍/IOT소프트웨어개발 34 prepared by Choon Woo Kwon
LOGO 패럴렐 LCD 디스플레이(4 bit) - 회로도(Schematic) Dongyang Mirae University 센서활용프로그래밍/IOT소프트웨어개발 35 prepared by Choon Woo Kwon
아두이노 프로그램 – Liquid. Crystal Library v Liquid. Crystal Library LOGO #include <Liquid. Crystal. h> § Arduino 보드가 Hitachi HD 44780 (or a compatible) chipset 기반 LCD 제어 § LCD 모듈과 4 -bit 또는 8 -bit mode에 동작 § 함수(function) (https: //www. arduino. cc/en/Reference/Liquid. Crystal) • Liquid. Crystal() • no. Blink() • begin() • display() • clear() • no. Display() • home() • scroll. Display. Left() • set. Cursor() • scroll. Display. Right() • write() • autoscroll() • print() • no. Autoscroll() • cursor() • left. To. Right() • no. Cursor() • right. To. Left() • peek() • create. Char() • blink() Dongyang Mirae University 센서활용프로그래밍/IOT소프트웨어개발 36 prepared by Choon Woo Kwon
패럴렐 LCD 디스플레이(4 bit) – 스케치(1) // include the library code; // 참조 : https: //www. Arduino. cc/en/Reference/Liquid. Crystal #include<Liquid. Crystal. h> // initialize the library with the numbers of the interface pins // LCD (RS, Enable, D 4, D 5, D 6, D 7) 핀에 대응하는 아두이노 핀 Liquid. Crystal lcd(12, 11, 5, 4, 3, 2); void setup() { // setup the LCD’s number of columns and rows; lcd. begin(16, 2); } void loop() { lcd. set. Cursor(0, 0); LCD 에 텍스트를 표시 Hello. LOGO world 아두이노의 LCD 라이브러리를 사용하기 위해 헤더 파일을 추 가 라이브러리 사용을 위해 초기화 (rs, rw, enable, data bit) Liquid. Crystal lcd(RS, Enable, D 4, D 5, D 6, D 7) Liquid. Crystal lcdl(rs, rw, enable, d 4, d 5, d 6, d 7) Liquid. Crystal lcd(rs, enable, d 0, d 1, d 2, d 3, d 4, d 5, d 6, d 7) Liquid. Crystal lcd(rs, rw, enable, d 0, d 1, d 2, d 3, d 4, d 5, d 6, d 7) LCD 스크린 디스플레이의 폭과 높이 설정 LCD 라이브러리 명령어에 앞서 호출 LCD 커서 위치를 결정(LCD에 Display할 좌표) - 이어서 쓰는 글자가 표시되는 위치 - 시작 위치 값 : 0 LCD의 2번째 행, 1번째 열에 글자 표시 (0이 시작점이기 때문) // print a message to the LCD lcd. print("Hello, world!!"); // set the cursor to column 0, line 1 // note : line 1 is the second row, since counting begins with 0 lcd. set. Cursor(0, 1); lcd. print(“My name is Kwon!"); } delay(1000); Dongyang Mirae University (Hello world) 1번째 행에 “Hello, world!” 2번째 행에 “My name is Kwon!”를 표 시 센서활용프로그래밍/IOT소프트웨어개발 37 prepared by Choon Woo Kwon
패럴렐 LCD 디스플레이(4 bit) – 스케치(2) // include the library code: #include <Liquid. Crystal. h> char a; int start=0; // initialize the library with the numbers of the interface pins Liquid. Crystal lcd(12, 11, 5, 4, 3, 2); void setup() { // set up the LCD's number of columns and rows: lcd. begin(16, 2); // initialize the serial communications: Serial. begin(9600); } void loop() { if (start == 0) { lcd. set. Cursor(0, 0); lcd. clear(); lcd. print("+ -"); delay(700); lcd. clear(); lcd. print("- +"); delay(700); } Dongyang Mirae University LCD 스크린을 지우고 커서를 좌-상 에 위치 시킴 } Serial. Display LOGO // when characters arrive over the serial port. . . if (Serial. available()) { // wait a bit for the entire message to arrive start = 1; 직렬포트 데이터 도착 delay(100); - 리턴 값 : 읽을 수 있는 바이트 수 // clear the screen - 수신버퍼에 저장(64 byte) lcd. clear(); // read all the available characters while (Serial. available() > 0) { // display each character to the LCD lcd. write(a=Serial. read()); Serial. write(a); 입력되는 직렬 데이터를 읽음 } - 리턴 값 : 입력되는 직렬 데이터(int) (데이터 입력 없는 경우 -1 리턴) } LCD 스크린에 1개 글자를 표시 지우 고 커서를 좌-상에 위치 시킴 (Serial. Display) Serial 모니터 창에 입력한 글 자를 LCD에 표시 센서활용프로그래밍/IOT소프트웨어개발 38 prepared by Choon Woo Kwon
패럴렐 LCD 디스플레이(4 bit) – 스케치(3) Cursor. Blink LOGO // include the library code: #include <Liquid. Crystal. h> // initialize the library with the numbers of the interface pins Liquid. Crystal lcd(12, 11, 5, 4, 3, 2); void setup() { // set up the LCD's number of columns and rows: lcd. begin(16, 2); } // Print a message to the LCD. lcd. print("Dongyang Mirae"); lcd. set. Cursor(2, 1); lcd. print("University!"); void loop() { // Turn off the blinking cursor: lcd. no. Blink(); delay(3000); // Turn on the blinking cursor: lcd. blink(); delay(3000); } LCD 커서 깜박임을 ON blink() , OFF no. Blink() (Cursor. Blink) LCD에 Cursor가 3초 간격으로 Blink 상태가 변경 : ON-OFF Dongyang Mirae University 센서활용프로그래밍/IOT소프트웨어개발 39 prepared by Choon Woo Kwon
패럴렐 LCD 디스플레이(4 bit) – 스케치(3) // include the library code: #include <Liquid. Crystal. h> // initialize the library with the numbers of the interface pins Liquid. Crystal lcd(12, 11, 5, 4, 3, 2); int this. Char = 'a'; void setup() { // set up the LCD's number of columns and rows: lcd. begin(16, 2); // turn on the cursor: lcd. cursor(); } // reset at 'z': if (this. Char > 'z') { delay(2000); lcd. clear(); // go to (0, 0): lcd. home(); // start again at 0 this. Char = 'a'; LCD 커서를 상-좌에 위치 } // print the character lcd. write(this. Char); // wait a second: delay(500); // increment the letter: this. Char++; void loop() { } // reverse directions at 'h': if (this. Char == 'h' || this. Char == 'v') { // go right for the next letter lcd. right. To. Left(); LCD에 표시하는 텍스트의 방향을 설정 } - left. To. Right() : 왼쪽-> 오른쪽 (default) // reverse again at 'o': - right. To. Left() : 오른쪽->왼쪽 if (this. Char == 'o') { // go left for the next letter lcd. left. To. Right(); } Dongyang Mirae University Text. Direction LOGO (Text. Direction) LCD에 알파벳이 a-z까지 표시하 는데 입력 방향이 변경 : Left>Right, Right->Left 센서활용프로그래밍/IOT소프트웨어개발 40 prepared by Choon Woo Kwon
패럴렐 LCD 디스플레이(4 bit) – 스케치(5) // include the library code: #include <Liquid. Crystal. h> // set the cursor to (16, 1): lcd. set. Cursor(16, 1); // initialize the library with the numbers of the interface pins Liquid. Crystal lcd(12, 11, 5, 4, 3, 2); // set the display to automatically scroll: lcd. autoscroll(); void setup() { // set up the LCD's number of columns and rows: lcd. begin(16, 2); } void loop() { // set the cursor to (0, 0): lcd. set. Cursor(0, 0); // print from 0 to 9: for (int this. Char = 0; this. Char < 10; this. Char++) { lcd. print(this. Char); delay(100); } // set the cursor to (0, 1): lcd. set. Cursor(0, 1); // print from a to k: for (char this. Char = 'a'; this. Char <= 'k'; this. Char++) { lcd. write(this. Char); delay(100); } Dongyang Mirae University Auto. Scroll LOGO // print from 0 to 9: for (int this. Char = 0; this. Char < 10; this. Char++) { lcd. print(this. Char); delay(500); } // turn off automatic scrolling lcd. no. Autoscroll(); } // clear screen for the next loop: lcd. clear(); LCD의 자동 스크롤 기능 ON Ø 표시되는 글자가 이전 글자를 한 칸 밀어내는 효 과 ü left-to-right 방향(default) : 왼쪽으로 스크롤 ü right-to-left 방향 : 오른쪽으로 스크롤 센서활용프로그래밍/IOT소프트웨어개발 41 (Auto. Scroll) 입력한 글자가 자동으로 Scroll하도록 LCD에 표시 prepared by Choon Woo Kwon
패럴렐 LCD 디스플레이(8 bit) - 배선도 LOGO LCD-Arudino UNO 핀 연결 LCD UNO 1 Vss GND 2 Vdd 5 V 1 3 V 0 Contrast 3 4 RS D 12 5 5 R/W D 11 7 6 Enable D 2 9 7 Data Bit 0 D 3 11 8 Data Bit 1 D 4 9 Data Bit 2 D 5 10 Data Bit 3 D 6 11 Data Bit 4 D 5 12 Data Bit 5 D 4 13 Data Bit 6 D 3 14 Data Bit 7 D 2 15 LCD+/A 5 V 16 LCD-/K GND Dongyang Mirae University 13 15 센서활용프로그래밍/IOT소프트웨어개발 43 prepared by Choon Woo Kwon
LOGO 패럴렐 LCD 디스플레이(8 bit) - 회로도(Schematic) Dongyang Mirae University 센서활용프로그래밍/IOT소프트웨어개발 44 prepared by Choon Woo Kwon
패럴렐 LCD 디스플레이(8 bit) - 스케치 int int int DI = 12; RW = 11; DB[] = {3, 4, 5, 6, 7, 8, 9, 10}; Enable = 2; void Lcd. Command. Write(int value){ // poll all the pins int i=0; for(i=DB[0]; i<=DI; i++){ digital. Write(i, value & 01); value >>= 1; } LCD 라이브러리를 사용하지 않 은 관 계 로 , HD 44780 Controller 초기화나 DDRAM 데이터 쓰기 등을 위해서는 직접 컨트롤러에 접근 (Access)하여야 함. 이러한 처리로 Sketch code 가 복잡하며 HD 44780 Data Sheet의 참조가 필요 // send a pulse to enable digital. Write(Enable, HIGH); delay. Microseconds(1); // pause 1 ms according to datasheet digital. Write(Enable, LOW); delay. Microseconds(1); // pause 1 ms according to datasheet void Lcd. Data. Write(int value){ // poll all the pins int i = 0; digital. Write(DI, HIGH); digital. Write(RW, LOW); for(i=DB[0]; i<=DB[7]; i++){ digital. Write(i, value & 01); value >>= 1; } Dongyang Mirae University digital. Write(Enable, LOW); delay. Microseconds(1); } // send a pulse to enable digital. Write(Enable, HIGH); delay. Microseconds(1); digital. Write(Enable, LOW); delay. Microseconds(1); // pause 1 ms according to datasheet void init. LCD(){ delay(100); digital. Write(Enable, LOW); delay. Microseconds(1); } LOGO // initiatize LCD after a short pause // needed by the LCDs controller Lcd. Command. Write(0 x 3 A); // function set; // 8 -bit interface, 2 display lines, display ON delay(10); Lcd. Command. Write(0 x 0 E); // display control; // turn display ON, cursor ON, no blinking delay(10); Lcd. Command. Write(0 x 01); // clear display, set cursor position to zero delay(10); Lcd. Command. Write(0 x 06); // entry mode set; // increment automatically, no display shift delay(10); } // continue to the next slide 센서활용프로그래밍/IOT소프트웨어개발 45 prepared by Choon Woo Kwon
패럴렐 LCD 디스플레이(8 bit) - 스케치 // this is the function used to send data to the // LCD screen in the proper format, the others are // working at lower level void print. LCD(const char *s){ int count = 0; while(*s){ if(count == 8){ Lcd. Command. Write(0 x. C 0); // jump to the second part of the display; delay(5); } if(count>=16){ break; } Lcd. Data. Write(*s++); count++; } } LOGO void loop() { // put your main code here, to run repeatedly: Lcd. Command. Write(0 x 02); delay(10); } // write the welcome message print. LCD("Dept of Computer"); delay(500); void setup() { // put your setup code here, to run once: int i = 0; for(i=Enable; i<=DI; i++){ pin. Mode(i, OUTPUT); } init. LCD(); } Dongyang Mirae University 센서활용프로그래밍/IOT소프트웨어개발 46 prepared by Choon Woo Kwon
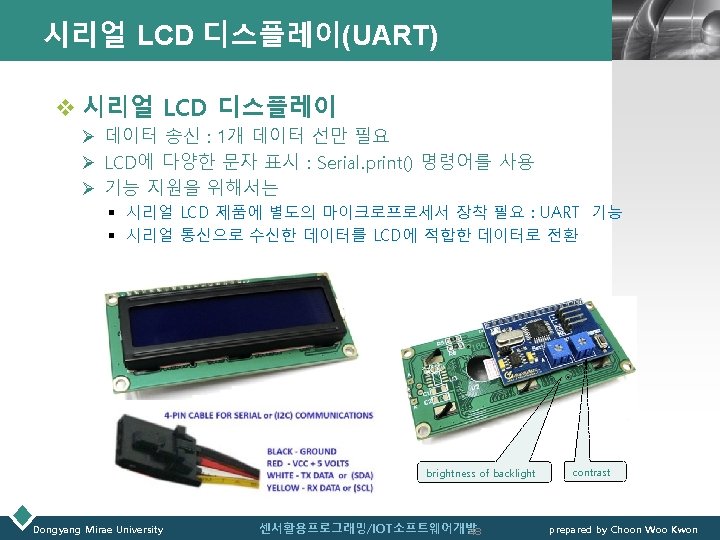
LOGO Serial LCD 디스플레이 § Serial LCD Module(1) : UART § Serial LCD Module(2) : I²C 버스 Dongyang Mirae University 센서활용프로그래밍/IOT소프트웨어개발 47 prepared by Choon Woo Kwon
시리얼 LCD 디스플레이(UART) - 배선도 LOGO D 1 Serial LCD Module (LCD 1602/LCD 1604/LCD 2004) Dongyang Mirae University 센서활용프로그래밍/IOT소프트웨어개발 49 Serial LCD Arduino 5 V 5 V GND Tx. D Rx(Pin 0) Rx. D Tx(Pin 1) prepared by Choon Woo Kwon
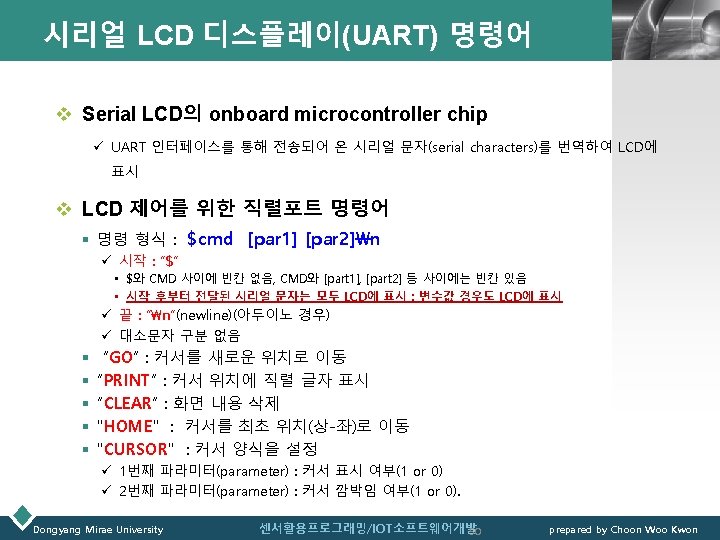
시리얼 LCD 명령어 - LCD 1602/1604/2004 명령어 LCD 1602 형식 설명 LOGO 예제(Arduino) $lcd 1602n LCD 선택 : LCD 1602 LCD 1604 LCD 2004 - 명령어 1회 실행 필요 Serial. print("$LCD 1602 n"); Serial. print("$LCD 1604 n"); Serial. print("$LCD 2004 n"); LCD 1604 $lcd 1604n LCD 2004 $lcd 2004n HOME $homen 커서를 LCD의 시작위치(0, 0)로 이동 Serial. print("$HOMEn"); GO $GO x yn 커서를 LCD 좌표 (x, y)로 이동. - x : 행, y : 열 (1부터 시작) Serial. print("$GO 2 10n"); CLEAR $clearn LCD 상의 모든 글자를 지우고 커서를 시작위 치 (0, 0)로 이동 Serial. print("$CLEARn"); PRINT $print [para]n 글자 [para]를 현재 커서 위치에 표시 Serial. print("$PRINT Hello World!n"); CURSOR $cursor [status]n 커서 상태를 설정 : ON/OFF, 또는 깜박임 - 1번째 Parameter : 커서 ON(1), OFF(0) - 2번째 Parameter : 커서 BLINKING(1) 여부 Serial. print("$CURSORONn"); Serial. print("$CURSOROFFn"); Serial. print("$CURSORBLINKINGn"); CLOSE $closen LCD 표시 끔 Serial. print("$CLOSE n"); OPEN $openn LCD 표시 켬 Serial. print("$OPEN n"); Dongyang Mirae University 센서활용프로그래밍/IOT소프트웨어개발 51 prepared by Choon Woo Kwon
시리얼 LCD 디스플레이(1) - 스케치 // 스케치 예시(1) – Serial LCD Display LCD 1602/1604/2004 void setup() { Serial. begin(9600); } Serial. print("$Go 2 5n"); delay(3000); Serial. print("$CURSOR 1 0n"); // 커서 켜기 깜박이지 않음 delay(3000); Serial. print("$CURSOR 1 1n"); // 커서 켜기 깜박임 delay(3000); void loop() { Serial. print("$CLEARn"); // rn도 가능 r(0 x 0 D, CR), n(0 x 0 A, LF) // 커서 상태 : 켜기/끄기, 깜박이기/깜박이지 않기 Serial. print("$CURSOR 1 1n"); // 커서 켜기 깜박이기 LOGO Serial. print("$CURSOR 0 0n"); // 커서 끄기 깜박이지 않음 delay(3000); } Serial. print("$GO 1 4n"); Serial. print("$PRINT DONGYANGn"); delay(3000); Serial. print("$GO 2 1n"); Serial. print("$PRINT Mirae Univ !!n"); delay(3000); Dongyang Mirae University 센서활용프로그래밍/IOT소프트웨어개발 52 prepared by Choon Woo Kwon
시리얼 LCD 디스플레이(2) - 스케치 // 스케치 예시(2) – Serial LCD Display LCD 1602/1604/2004 void setup(void) { Serial. begin(9600); // baud 9600 /** set LCD type LCD 1602, LCD 1604 and LCD 2004 are supported**/ Serial. print("$LCD 1602n"); delay(2000); Serial. print("$clearn"); // clear screen Serial. print("$Homen"); // go home (top left corner) delay(2000); Serial. print("$CURSOR BLINKINGn"); // cursor on and blinking delay(2000); Serial. print("$go 0 0n"); // move cursor delay(500); Serial. print("$go 1 0n"); delay(500); Serial. print("$go 0 1n"); delay(500); Serial. print("$go 1 1n"); delay(500); Dongyang Mirae University LOGO Serial. print("$c. URSor OFfn"); // cursor off delay(100); Serial. print("$go 0 0n"); } void loop(void) { Serial. print("$go 1 3n"); Serial. print("$prin. T DONGYANG n"); // write to LCD */ Serial. print("$go 2 1n"); Serial. print("$prin. T MIRAE n"); Serial. print("$prin. T Univ. !!n"); delay(2000); Serial. print("$clearn"); delay(1000); } 센서활용프로그래밍/IOT소프트웨어개발 53 prepared by Choon Woo Kwon
시리얼 LCD 디스플레이(3) – 변수값 표시 // 스케치 예시(3) – Serial LCD Display : 변수를 LCD 표시 int age 1=55; int age 2=33; LOGO // String 개체 활용 LCD에 표시 Serial. print(String(bom 1 + bom 2 + String(age 2, DEC))); // 다음 명령으로 동일 결과 가능 // Serial. print(bom 1); // Serial. print(bom 2); // Serial. print(String(age 2, DEC)); 혹은 Serial. print(ages 2); char prt[] = "$PRINT MY AGE = "; String bom 1 = "$PRINT "; //만약 $가 빠지면 LCD에 표시 안됨 String bom 2 = "your age = "; void setup() { Serial. begin(9600); } Serial. print(" n"); // 직렬 데이터 LCD 표시하는 현 상태 종료 Serial. print("$CURSOR 1 1n"); // 커서 켜기 깜박임 delay(2000); void loop() { Serial. print("$Cursor. Offn"); // 커서 깜박거리기 } Serial. print("$CLEARn"); // r(0 x 0 D, CR), n(0 x 0 A, LF) Serial. print("$GO 1 2n"); // 1번째 행에 표시 명령 // 직렬 데이터를 LCD에 표시하기 위해서는 $[cmd] 로 시작 Serial. print(prt); // $[cmd] 를 prt 문자열로 출력해도 됨 Serial. print(age 1); // 변수값 age 1을 표시 Serial. print(" n"); // n가 전달되면 LCD 표시 종료 Serial. print("$GO 2 1n"); // 2번째 행에 표시 명령 Dongyang Mirae University 센서활용프로그래밍/IOT소프트웨어개발 54 prepared by Choon Woo Kwon
시리얼 LCD 디스플레이(UART) - 배선도 LOGO D 1 Serial LCD Module (LCD 1602/LCD 1604/LCD 2004) Dongyang Mirae University 센서활용프로그래밍/IOT소프트웨어개발 55 Serial LCD Arduino 5 V 5 V GND Tx. D Rx(Pin 0) Rx. D Tx(Pin 1) prepared by Choon Woo Kwon
LOGO I²C(I-squared-C) Dongyang Mirae University 센서활용프로그래밍/IOT소프트웨어개발 56 prepared by Choon Woo Kwon
I²C 버스(1) LOGO v I²C(Inter-Integrated Circuit, Inter IC) • ‘I-squared-C’로 읽음 : I 2 C(I-two-C) 또는 IIC(I-I-C)라고도 함 § 직렬 컴퓨터 버스(serial computer bus) • • • multi-master, multi-slave, packet switched serial data line (SDA) + serial clock line (SCL) Bitrate : 1 / 0. 4 / 1. 0 / 3. 4 / 5. 0 Mbit/s (depending on mode) Protocol : Serial, half-duplex 동작 전압 : +3. 3 V(일반적), +5 V(최대), 다른 전압도 가능 ü Philips Semiconductor(현 NXP Semiconductors)가 개발(1982년) § I²C 통신 ü Two Wire serial Inteface(TWI)로 여러 개의 디바이스(device)를 제어 • SDA : 전송하는 데이터 신호 • SCL : Master와 Slave를 동기화하는 클럭(clock) ü 장점 : 단 두 개 신호로 여러 개 디바이스 제어 • I/O핀을 적게 쓰면서, 많은 디바이스와 통신 • 디바이스 : 고유 주소(7 비트)를 보유 • 주소를 결정한 후 해당 주소에 데이터 전송 Dongyang Mirae University (I²C - 1 - 3 - 2 BUS 회로 예시) master (microcontroller) slave nodes(ADC, DAC, microcontroller) pull-up resistors R p 센서활용프로그래밍/IOT소프트웨어개발 57 prepared by Choon Woo Kwon
I²C 버스 LOGO v I²C(계속) § 설계 ü 7 비트의 주소 공간(16개는 예약)이 있어, 동일한 버스에 최대 112개 노드 연결 ü I²C 버스의 모드 : 표준 모드 100 kbit/s, 저속 모드 10 kbit/s를 주로 사용 ü 패스트(fast) 모드인 400 kbit/s, 고속(high-speed) 모드 3. 4 Mbit/s를 지원 ü 확장 기능 지원 : 최대 1008 노드까지 연결 가능한 10 비트 주소 지정 v Specification History : Revision • 1982(the original 100 k. Hz I²C system) : a simple internal bus system for building control electronics with various Philips chips • 1992(Version 1) : added 400 k. Hz Fast-mode (Fm), and a 10 -bit addressing mode to increase capacity to 1008 nodes. (the first standardized version) • 1998(Version 2) : added 3. 4 MHz High-speed mode (Hs) with power-saving requirements • 2007(Version 3) : added 1 MHz Fast-mode plus (Fm+), and a device ID mechanism • 2012(Version 4) : added 5 MHz Ultra Fast-mode (UFm) for new USDA (data) and USCL (clock) lines, and added an assigned manufacturer ID table. It is only a unidirectional bus. • 2012(Version 5) : corrected mistakes. 2014(Version 6) : corrected two graphs. This is the most recent standard. Dongyang Mirae University 센서활용프로그래밍/IOT소프트웨어개발 59 prepared by Choon Woo Kwon
LOGO I²C LCD 디스플레이 Dongyang Mirae University 센서활용프로그래밍/IOT소프트웨어개발 60 prepared by Choon Woo Kwon
I²C LCD 디스플레이 – 실습 LOGO v Arduino Uno에서 I²C LCD Display 동작 Ø 순서 § I²C LCD Display와 Arduino Uno 연결 § I²C LCD Display를 위한 라이브러리 설치 : Liquid. Crystal_I 2 C (download) Liquid. Crystal_I 2 C : Liquid. Crystal_I 2 C. zip (click!) § I²C 버스에 연결된 LCD Display 주소(slave 주소) 찾기 : i 2 c Scanner (download) i 2 c Scanner : http: //playground. arduino. cc/Main/I 2 c. Scanner • I²C 버스에 접속된 장치를 스캔하여 아두이노 시리얼 모니터를 통해 7 -bit주소 를 알려주는 간단한 스케치 - I²C 통신을 위한 첫 단계 • (예시) 0 x 27 또는 0 x 3 F § I²C LCD 디스플레이 스케치 작성 #include <Wire. h> #include <Liquid. Crystal_I 2 C. h> • 스케치에 Wire. h 및 Liquid. Crystal_I 2 C. h 라이브러리를 include Dongyang Mirae University 센서활용프로그래밍/IOT소프트웨어개발 61 prepared by Choon Woo Kwon
I²C LCD 디스플레이 - 배선도 LOGO v I²C LCD Display와 Arduino Uno 연결 LCD Contrast 조절 I²C LCD Arduino Uno GND VCC 5 V SDA A 4 SCL A 5 Arduino Uno R 3와 I²C LCD Module (LCD 1602) 연결 Dongyang Mirae University 센서활용프로그래밍/IOT소프트웨어개발 62 prepared by Choon Woo Kwon
I²C LCD Display와 Arduino Uno 연결(유튜브) LOGO v Serial LCD의 onboard microcontroller chip ü How to Connect an I 2 C Lcd Display to an Arduino Uno Tutorial https: //youtu. be/x. VC 0 X_PE_XE Arduino RFID Kit: http: //goo. gl/BRvfi. H Newliquid. Crystal library: https: //bitbucket. org/fmalpartida/new-liquidcrystal/wiki/Home i 2 c Scanner: http: //playground. arduino. cc/Main/I 2 c. Scanner Arduino IDE software: https: //www. arduino. cc/ SUBSCRIBE TECHYDIY CHANNEL: http: //bit. ly/2 des 2 sq SUBSCRIBE TECHYDIY REVIEWS CHANNEL: http: //bit. ly/2 d. Gw. UCl techydiy ► http: //www. techydiy. org Facebook ► http: //facebook. com/techydiy Twitter ► http: //twitter. com/techydiy Pinterest ► http: //www. pinterest. com/techydiy Dongyang Mirae University 센서활용프로그래밍/IOT소프트웨어개발 63 prepared by Choon Woo Kwon
I²C LCD 디스플레이 - 라이브러리 LOGO v I²C LCD Display를 위한 라이브러리 : Liquid. Crystal_I 2 C § 라이브러리 파일 다운로드 : Liquid. Crystal_I 2 C. zip (click!) § 설치 방법 ü Arduino IDE 메뉴 사용 • 스케치 > 라이브러리 포함하기 >. ZIP 라이브러리 추가 • 다운로드 파일을 선택 ü 강의자료 참조 • 강의자료 게시판 “ 3. 1 (참고) Arduino Libraries” (http: //home. dongyang. ac. kr/~cwkwon/bombbs/read. cgi? board=lec_sensor_appl_2017&y_number=12&nnew=2) § TWI/ I²C로 디바이스(device, sensor 등)와 통신하기 위한 라이브러리 : Wire • TWI(Two Wire Interface), I²C(Inter-Integrated Circuit, Inter IC) Arduino Board ü 함수(Function) • begin() request. From() begin. Transmission() • end. Transmission() write() available() • read() Set. Clock() on. Receive() on. Request() Dongyang Mirae University I 2 C/TWI 핀 Uno, Ethernet A 4 (SDA), A 5 (SCL) Mega 2560 20 (SDA), 21 (SCL) Leonardo 2 (SDA), 3 (SCL) Due 20 (SDA), 21 (SCL), SDA 1, SCL 1 센서활용프로그래밍/IOT소프트웨어개발 64 prepared by Choon Woo Kwon
I²C LCD 디스플레이 – 라이브러리 함수 LOGO v Liquid. Crystal_I 2 C 라이브러리 함수(Function) 함수 Function 동작 동작 lcd. init(); LCD 초기화 lcd. blink(); lcd. no. Blink(); 커서 깜빡이기 끄기 lcd. backlight(); lcd. no. Backlight(); LCD 백라이트 ON LCD 백라이트 OFF lcd. write(ASCII 값); (예) lcd. write(36); LCD 화면에 ASCII 코드 문자 출력 (예) LCD에 '$' 출력 lcd. no. Display(); lcd. display(); LCD 표시 숨기기 LCD 표시 보이기 lcd. print(“character"); LCD 화면에 문자 출력 lcd. cursor(); lcd. no. Cursor(); 커서 표시 커서 끄기 lcd. clear(); LCD 모든 내용 지움 lcd. set. Cursor(x, y); 커서를 LCD 해당 좌표로 이 동 lcd. scroll. Display. Right(); 커서를 홈 좌표 (0, 0)로 이동 lcd. scroll. Display. Left(); lcd 내용을 좌측으로 1칸 스크롤 lcd. autoscroll(); 출력내용을 자동으로 우에서 좌로 스크롤 lcd. home(); lcd 내용을 우측으로 1칸 스크롤 1602 LCD 좌표(col, row) (16 Columns x 2 Rows) Dongyang Mirae University 센서활용프로그래밍/IOT소프트웨어개발 65 prepared by Choon Woo Kwon
I²C BUS 주소 스캔용 스케치(1) - i 2 c_scanner // -------------------// i 2 c_scanner // // 원본 위치 <http: //playground. arduino. cc/Main/I 2 c. Scanner> // // Version 1 // This program (or code that looks like it) // can be found in many places. // For example on the Arduino. cc forum. // The original author is not know. // Version 2, Juni 2012, Using Arduino 1. 0. 1 // Adapted to be as simple as possible by Arduino. cc user Krodal // Version 3, Feb 26 2013 // V 3 by louarnold // Version 4, March 3, 2013, Using Arduino 1. 0. 3 // by Arduino. cc user Krodal. // Changes by louarnold removed. // Scanning addresses changed from 0. . . 127 to 1. . . 119, // according to the i 2 c scanner by Nick Gammon // http: //www. gammon. com. au/forum/? id=10896 // Version 5, March 28, 2013 // As version 4, but address scans now to 127. // A sensor seems to use address 120. // Version 6, November 27, 2015. // Added waiting for the Leonardo serial communication. // Dongyang Mirae University LOGO // This sketch tests the standard 7 -bit addresses // Devices with higher bit address might not be seen properly. // // (Skech Source는 다음 슬라이드에 …) // 센서활용프로그래밍/IOT소프트웨어개발 66 prepared by Choon Woo Kwon
I²C BUS 주소 스캔용 스케치(2) - i 2 c_scanner // i 2 c_scanner #include <Wire. h> void setup() { Wire. begin(); if (error == 0) { Serial. print("I 2 C device found at address 0 x"); if (address<16) Serial. print("0"); Serial. print(address, HEX); Serial. println(" !"); if(Serial) > returns true if the specified serial port is available Serial. begin(9600); while (!Serial); // Leonardo: wait for serial monitor Serial. println("n. I 2 C Scanner"); n. Devices++; } else if (error==4) { Serial. print("Unknown error at address 0 x"); if (address<16) Serial. print("0"); Serial. println(address, HEX); } } void loop() { byte error, address; int n. Devices; Serial. println("Scanning. . . "); n. Devices = 0; for(address = 1; address < 127; address++ ) { // The i 2 c_scanner uses the return value of // the Write. end. Transmisstion to see if // a device did acknowledge to the address. Wire. begin. Transmission(address); error = Wire. end. Transmission(); Dongyang Mirae University LOGO } if (n. Devices == 0) Serial. println("No I 2 C devices foundn"); else Serial. println("donen"); delay(5000); // wait 5 seconds for next scan } 센서활용프로그래밍/IOT소프트웨어개발 67 prepared by Choon Woo Kwon
I²C LCD 디스플레이 – 예제 스케치(1) #include <Wire. h> #include <Liquid. Crystal_I 2 C. h> // Set the LCD address to 0 x 27 for a 16 chars and 2 line display Liquid. Crystal_I 2 C lcd(0 x 27, 16, 2); void setup() { // initialize the LCD lcd. init(); // initialize the lcd // ------- Quick 3 blinks of backlight ------for(int i = 0; i< 3; i++) { lcd. backlight(); delay(250); lcd. no. Backlight(); delay(250); } lcd. backlight(); } Dongyang Mirae University // finish with backlight on LOGO void loop() { bool blinking = true; lcd. cursor(); while (1) { if (blinking) { lcd. clear(); lcd. set. Cursor(0, 0); lcd. print("No cursor blink"); lcd. set. Cursor(0, 1); lcd. print("(3 seconds)"); lcd. no. Blink(); blinking = false; } else { lcd. clear(); lcd. set. Cursor(0, 0); lcd. print("Cursor blink"); lcd. set. Cursor(0, 1); lcd. print("(3 seconds)"); lcd. blink(); blinking = true; } delay(3000); } } 센서활용프로그래밍/IOT소프트웨어개발 68 prepared by Choon Woo Kwon
I²C LCD 디스플레이 - 참고 동영상 LOGO v (참고 동영상) Serial LCD의 onboard microcontroller chip ü How to Connect an I 2 C Lcd Display to an Arduino Uno Tutorial (Arduino Uno-I 2 C LCD Display 연결) (Arduino Uno-LCD Display 연결) https: //youtu. be/x. VC 0 X_PE_XE Newliquid. Crystal library: https: //bitbucket. org/fmalpartida/new-liquidcrystal/wiki/Home i 2 c Scanner: http: //playground. arduino. cc/Main/I 2 c. Scanner Dongyang Mirae University 센서활용프로그래밍/IOT소프트웨어개발 69 prepared by Choon Woo Kwon
LOGO Dongyang Mirae University 센서활용프로그래밍/IOT소프트웨어개발 70 prepared by Choon Woo Kwon