Lines used in drafting are lines whose appearance
- Slides: 27

Lines used in drafting are lines whose appearance and meaning are determined by international agreements. GEOMETRIC LINES

Technical Drawing – Part of the Design Process • Before something can be produced, it needs to be imagined by someone. • A drawing is a graphic representation of the real thing or idea to be produced. 2

Three Ways of Producing Technical Drawings • Sketch – freehand showing as much detail as possible • Drafting Instruments – precise drawings done entirely by hand with manual drafting instruments • CAD – Computer Assisted Design, softwares created starting in the 1960’s

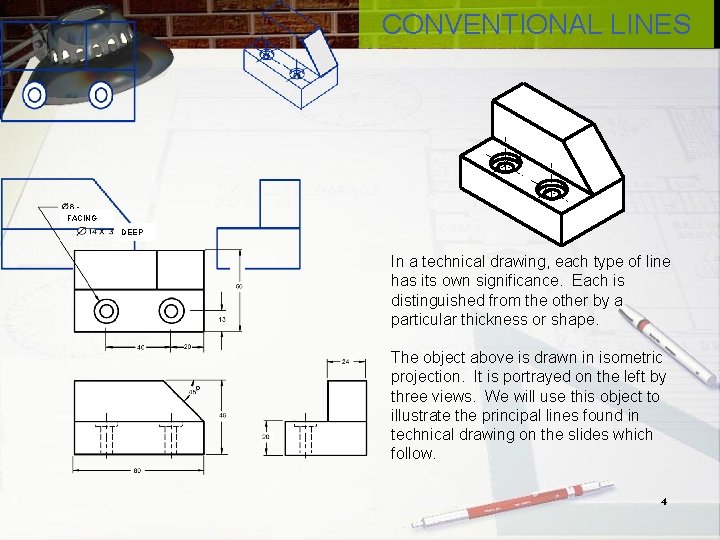
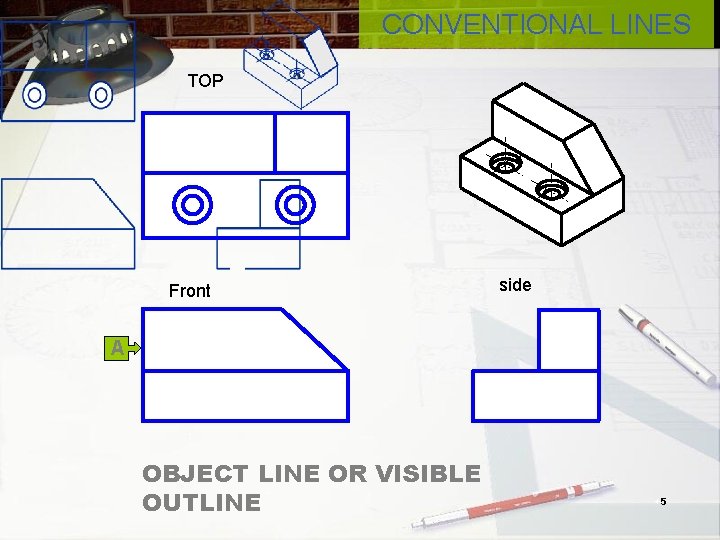
CONVENTIONAL LINES FACING DEEP In a technical drawing, each type of line has its own significance. Each is distinguished from the other by a particular thickness or shape. The object above is drawn in isometric projection. It is portrayed on the left by three views. We will use this object to illustrate the principal lines found in technical drawing on the slides which follow. 4

CONVENTIONAL LINES TOP Front side A OBJECT LINE OR VISIBLE OUTLINE 5

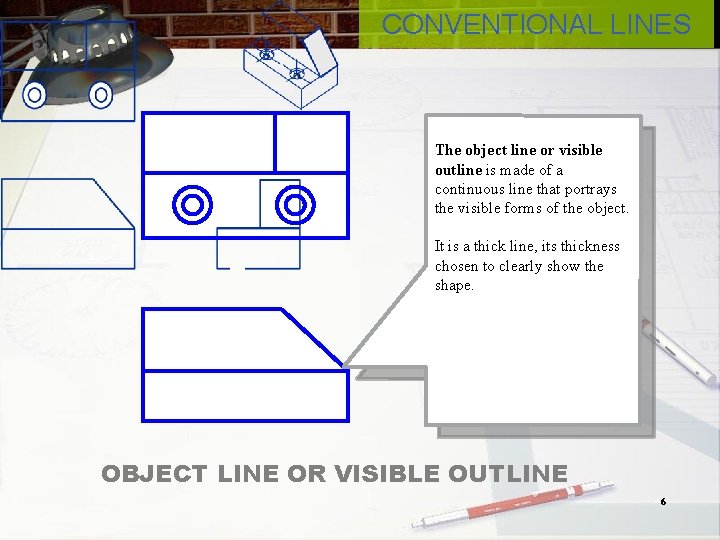
CONVENTIONAL LINES The object line or visible outline is made of a continuous line that portrays the visible forms of the object. It is a thick line, its thickness chosen to clearly show the shape. OBJECT LINE OR VISIBLE OUTLINE 6

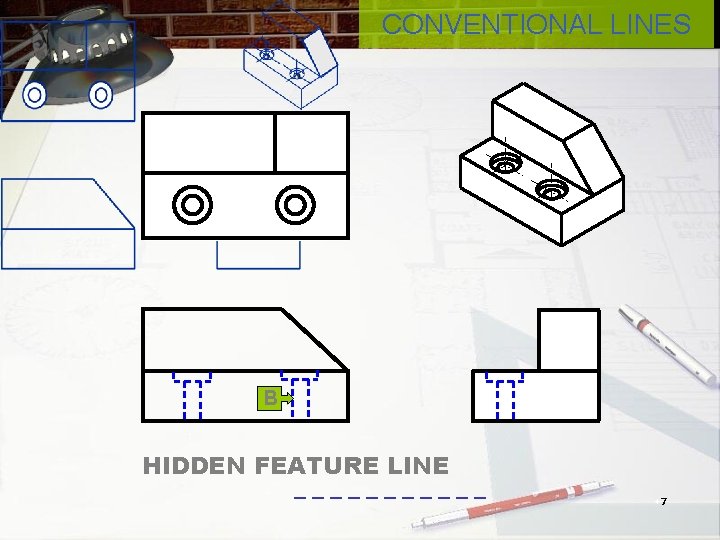
CONVENTIONAL LINES B B HIDDEN FEATURE LINE 7

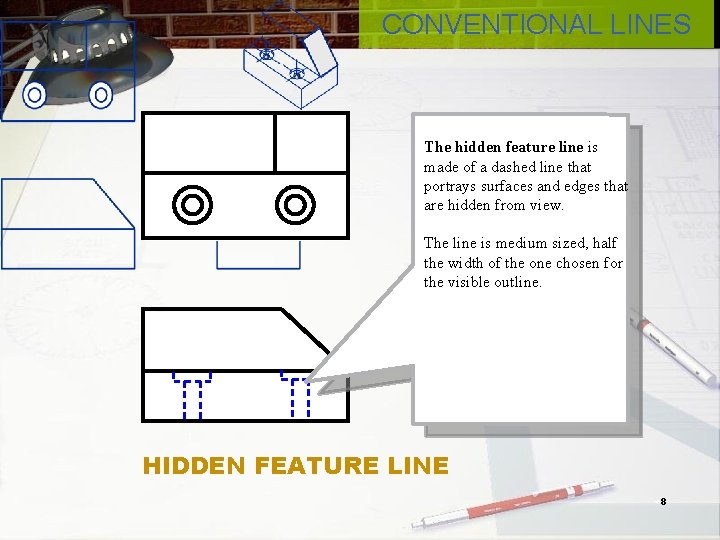
CONVENTIONAL LINES The hidden feature line is made of a dashed line that portrays surfaces and edges that are hidden from view. The line is medium sized, half the width of the one chosen for the visible outline. B HIDDEN FEATURE LINE 8

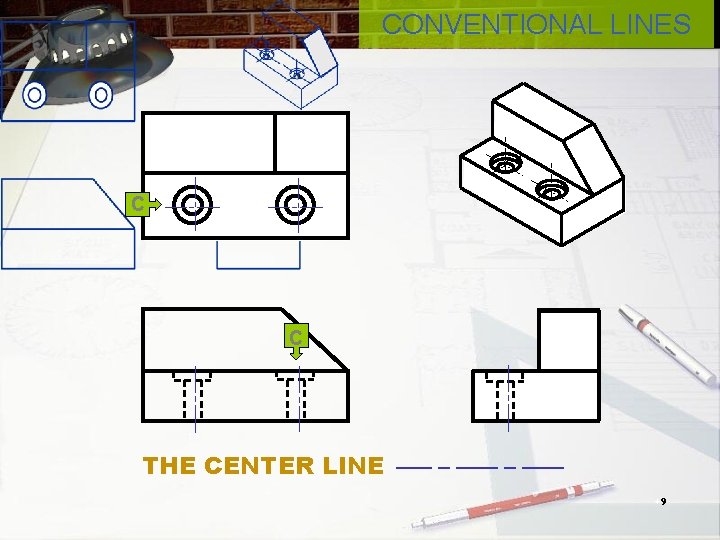
CONVENTIONAL LINES C C THE CENTER LINE 9

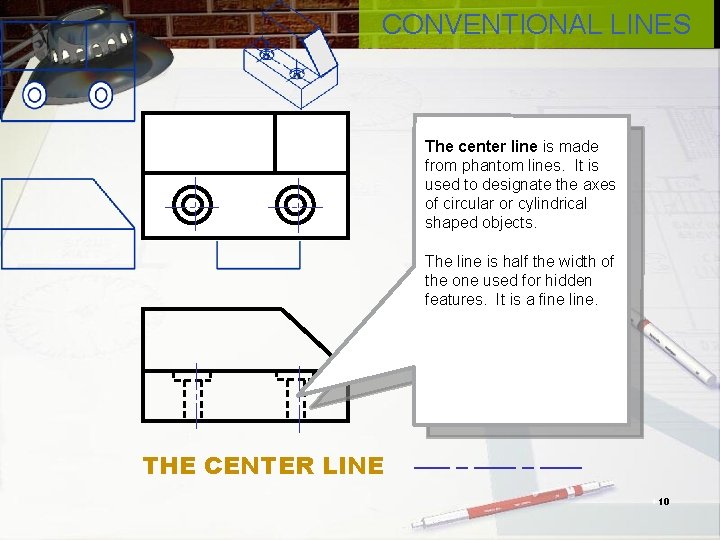
CONVENTIONAL LINES The center line is made from phantom lines. It is used to designate the axes of circular or cylindrical shaped objects. The line is half the width of the one used for hidden features. It is a fine line. THE CENTER LINE 10

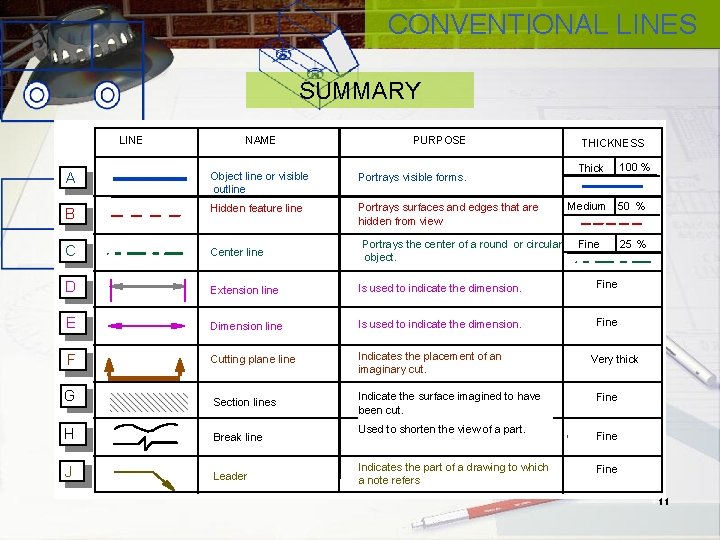
CONVENTIONAL LINES SUMMARY LINE NAME PURPOSE THICKNESS Thick A Object line or visible outline Portrays visible forms. B Hidden feature line Portrays surfaces and edges that are hidden from view C Center line D Extension line Is used to indicate the dimension. Fine E Dimension line Is used to indicate the dimension. Fine F Cutting plane line Indicates the placement of an imaginary cut. G Section lines Indicate the surface imagined to have been cut. H Break line J Leader Portrays the center of a round or circular object. Used to shorten the view of a part. Indicates the part of a drawing to which a note refers 100 % Medium 50 % Fine 25 % Very thick Fine 11

DIMENSIONING

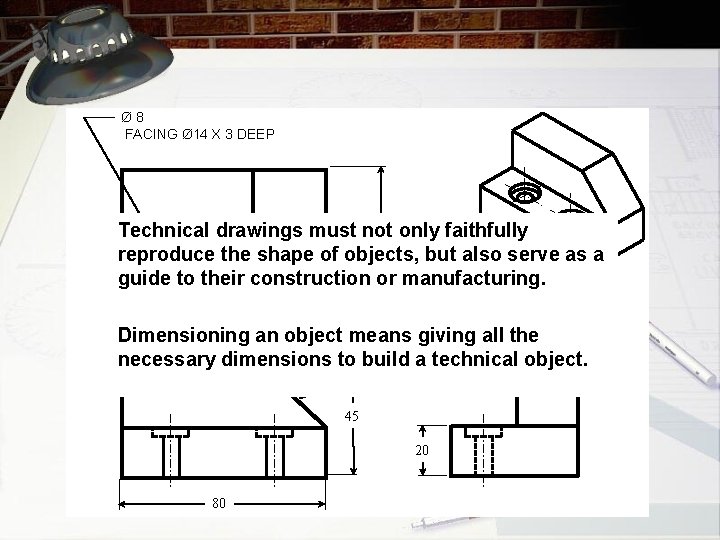
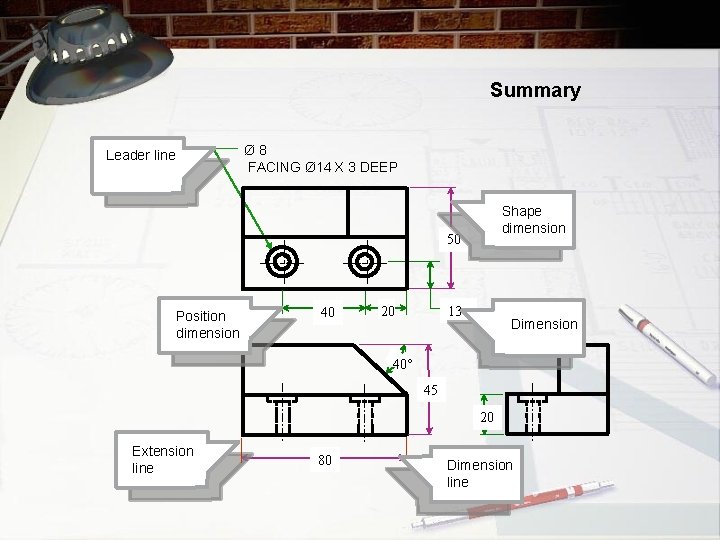
Ø 8 FACING Ø 14 X 3 DEEP 50 only faithfully Technical drawings must not reproduce the shape of objects, but also serve as a guide to their construction or manufacturing. 40 13 20 Dimensioning an object means giving all the necessary dimensions to build a technical object. 40° 45 20 80

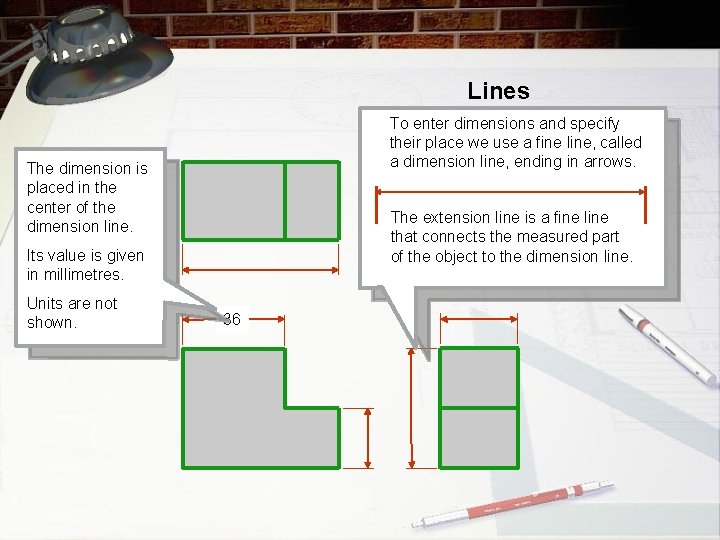
Lines To enter dimensions and specify their place we use a fine line, called a dimension line, ending in arrows. The dimension is placed in the center of the dimension line. The extension line is a fine line that connects the measured part of the object to the dimension line. Its value is given in millimetres. Units are not shown. 36

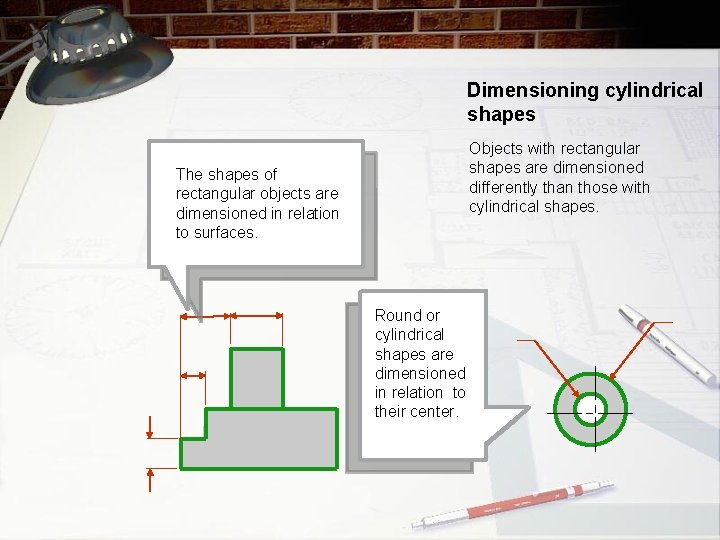
Dimensioning cylindrical shapes Objects with rectangular shapes are dimensioned differently than those with cylindrical shapes. The shapes of rectangular objects are dimensioned in relation to surfaces. Round or cylindrical shapes are dimensioned in relation to their center.

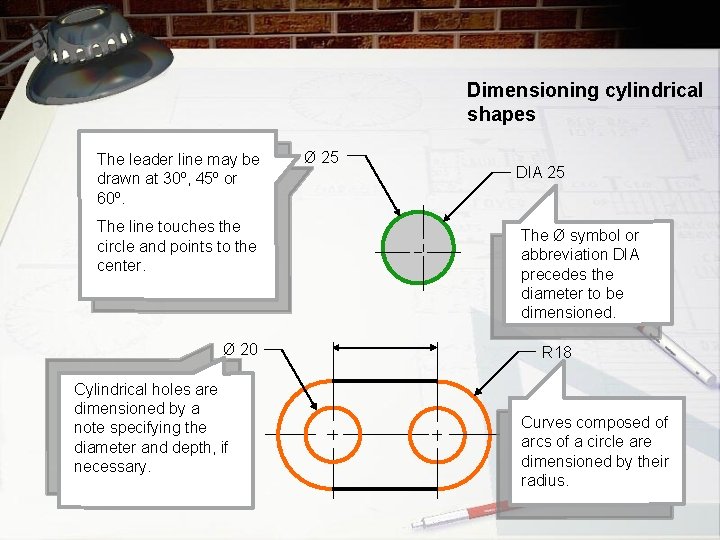
Dimensioning cylindrical shapes The leader line may be drawn at 30º, 45º or 60º. The line touches the circle and points to the center. Ø 20 Cylindrical holes are dimensioned by a note specifying the diameter and depth, if necessary. Ø 25 DIA 25 The Ø symbol or abbreviation DIA precedes the diameter to be dimensioned. R 18 Curves composed of arcs of a circle are dimensioned by their radius.

Summary Ø 8 FACING Ø 14 X 3 DEEP Leader line Shape dimension 50 Position dimension 40 13 20 Dimension 40° 45 20 Extension line 80 Dimension line

Representations of 3 -D objects as two dimensional. PROJECTIONS

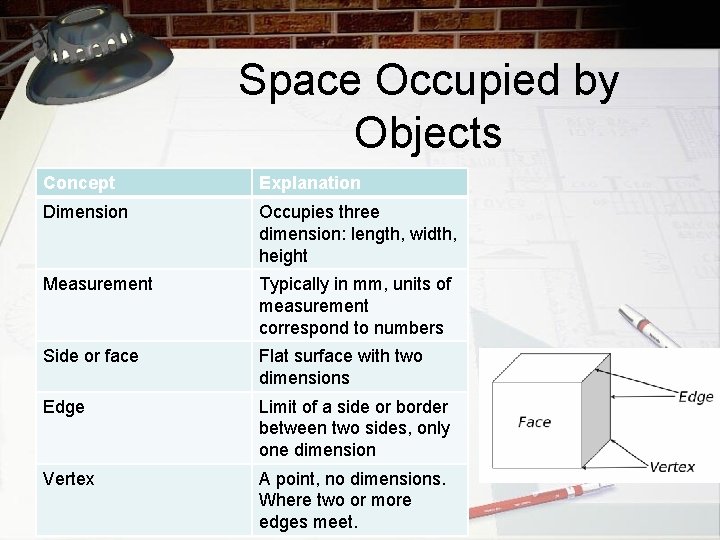
Space Occupied by Objects Concept Explanation Dimension Occupies three dimension: length, width, height Measurement Typically in mm, units of measurement correspond to numbers Side or face Flat surface with two dimensions Edge Limit of a side or border between two sides, only one dimension Vertex A point, no dimensions. Where two or more edges meet.

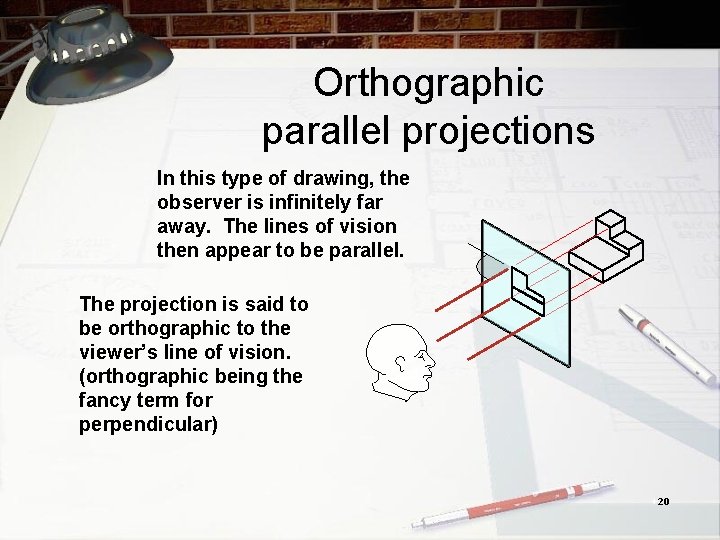
Orthographic parallel projections In this type of drawing, the observer is infinitely far away. The lines of vision then appear to be parallel. The projection is said to be orthographic to the viewer’s line of vision. (orthographic being the fancy term for perpendicular) 20

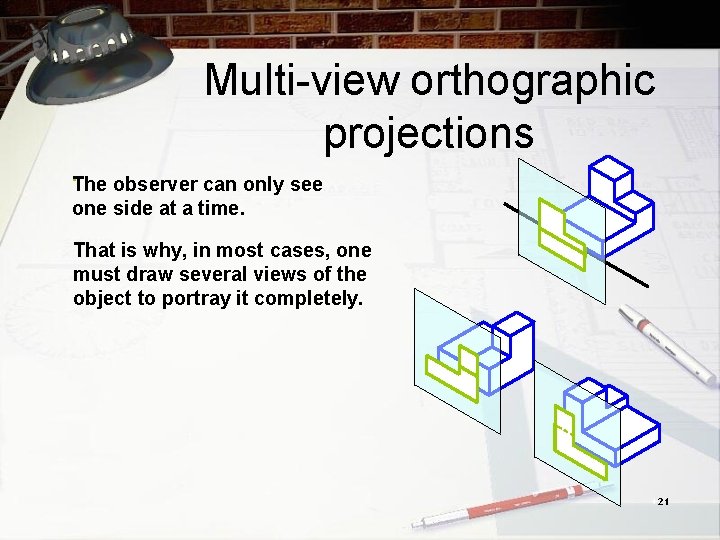
Multi-view orthographic projections. The observer can only see one side at a time. That is why, in most cases, one must draw several views of the object to portray it completely. 21

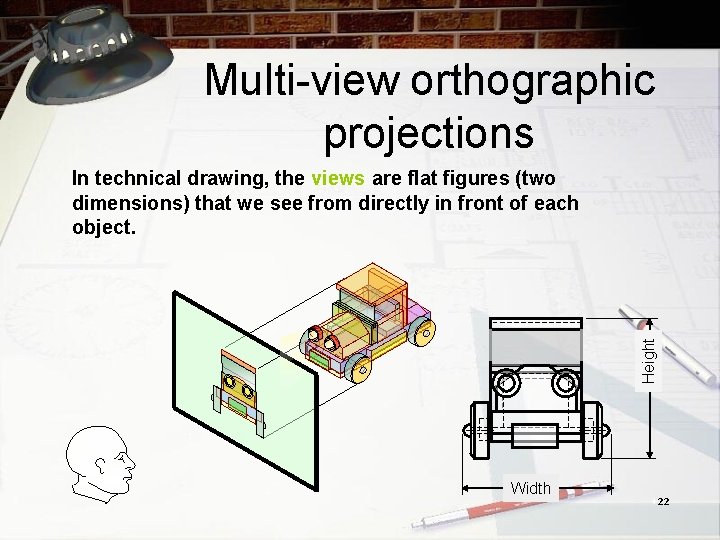
Multi-view orthographic projections Height In technical drawing, the views are flat figures (two dimensions) that we see from directly in front of each object. Width 22

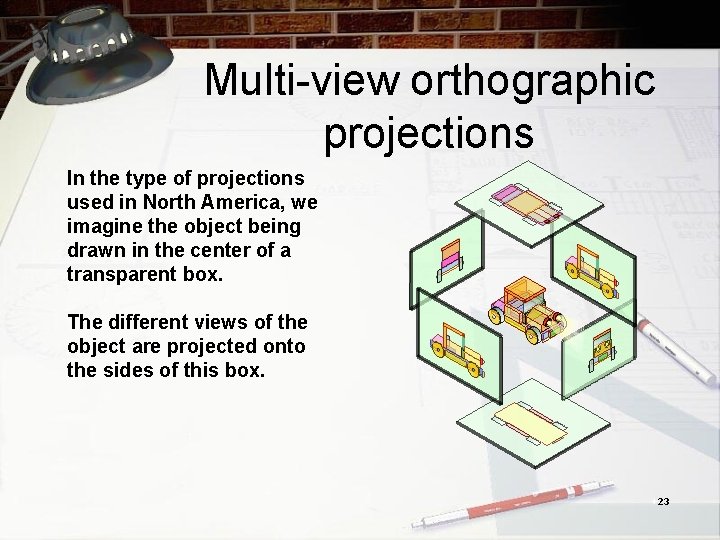
Multi-view orthographic projections In the type of projections used in North America, we imagine the object being drawn in the center of a transparent box. The different views of the object are projected onto the sides of this box. 23

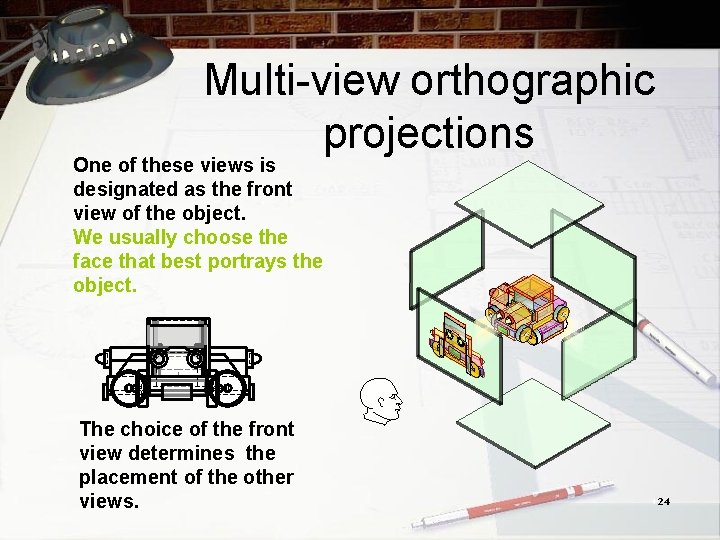
Multi-view orthographic projections One of these views is designated as the front view of the object. We usually choose the face that best portrays the object. The choice of the front view determines the placement of the other views. 24

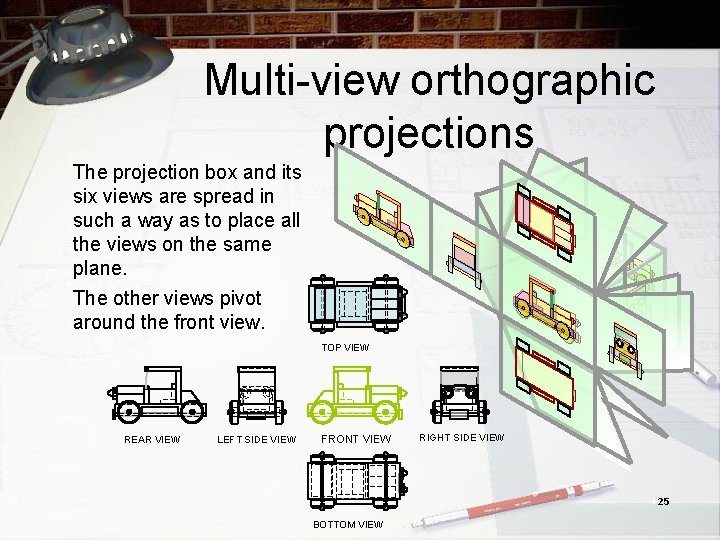
Multi-view orthographic projections The projection box and its six views are spread in such a way as to place all the views on the same plane. The other views pivot around the front view. TOP VIEW REAR VIEW LEFT SIDE VIEW FRONT VIEW RIGHT SIDE VIEW 25 BOTTOM VIEW

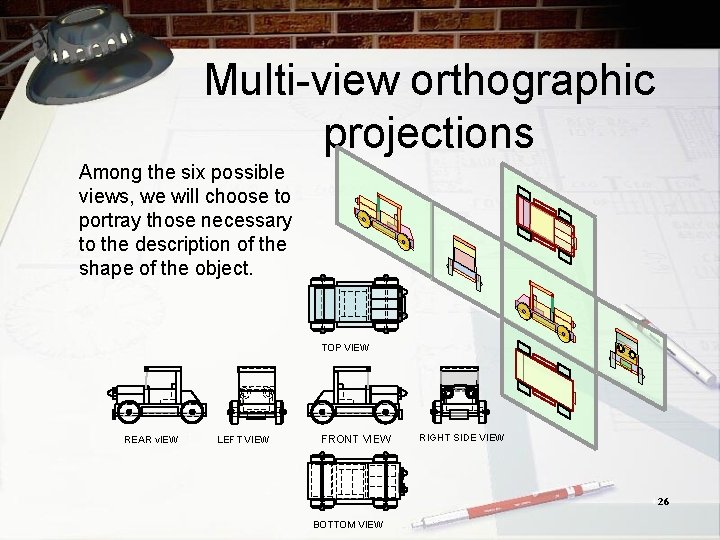
Multi-view orthographic projections Among the six possible views, we will choose to portray those necessary to the description of the shape of the object. TOP VIEW REAR v. IEW LEFT VIEW FRONT VIEW RIGHT SIDE VIEW 26 BOTTOM VIEW

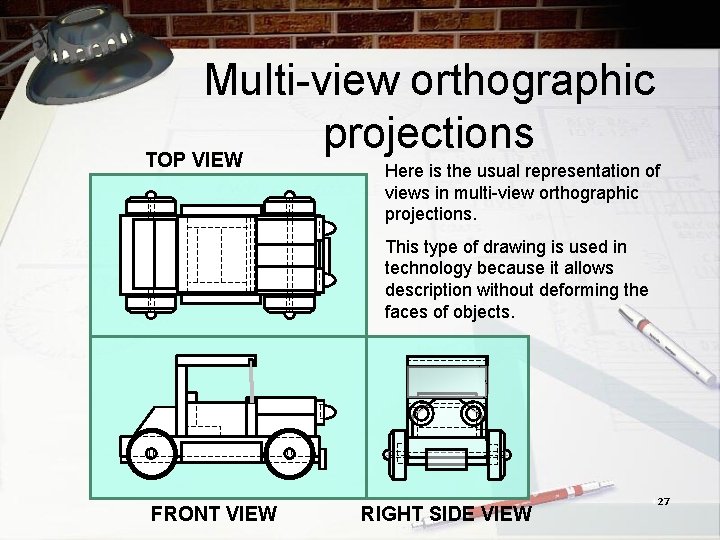
Multi-view orthographic projections TOP VIEW Here is the usual representation of views in multi-view orthographic projections. This type of drawing is used in technology because it allows description without deforming the faces of objects. FRONT VIEW RIGHT SIDE VIEW 27