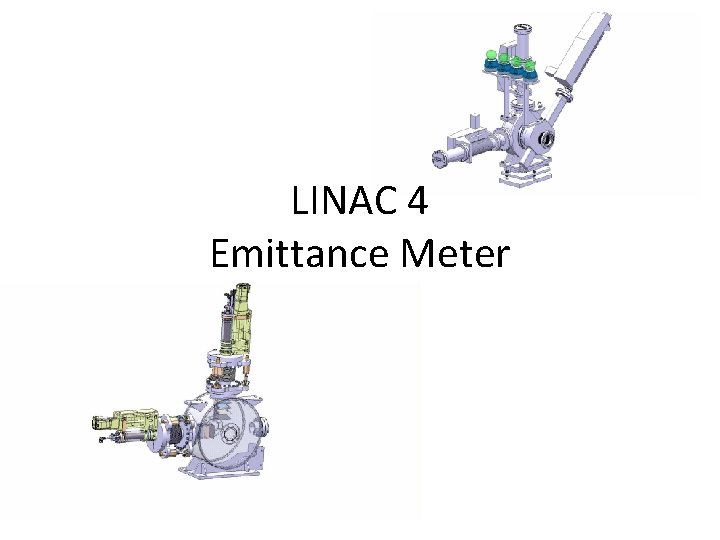
LINAC 4 Emittance Meter Linac 4 Emittance Meter
![Specification 3 Me. V 12 Mev 0. 1 1 H- range in Carbon [mm] Specification 3 Me. V 12 Mev 0. 1 1 H- range in Carbon [mm]](https://slidetodoc.com/presentation_image_h2/e2bf259e6eceeda06398ea48cd2fcd2f/image-19.jpg)

- Slides: 45

LINAC 4 Emittance Meter

Linac 4 Emittance Meter • 1 er design for commissioning of the source q. Slit q. Sem-grid q. Measurement plate (F. C. ) q. Emittance meter • Upgrade of the slit for 3 Mev q. New slit D. GERARD BE/BI/ML LINAC 4 Beam Instrumentation Review - 18 -19 October 2011 2

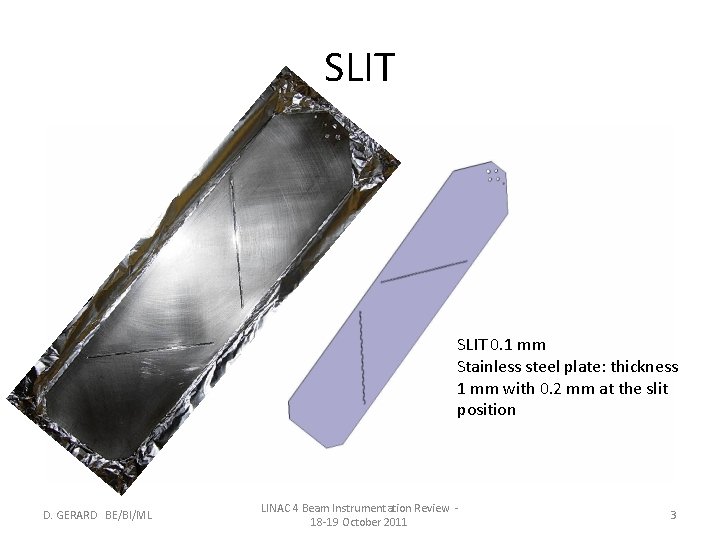
SLIT 0. 1 mm Stainless steel plate: thickness 1 mm with 0. 2 mm at the slit position D. GERARD BE/BI/ML LINAC 4 Beam Instrumentation Review 18 -19 October 2011 3

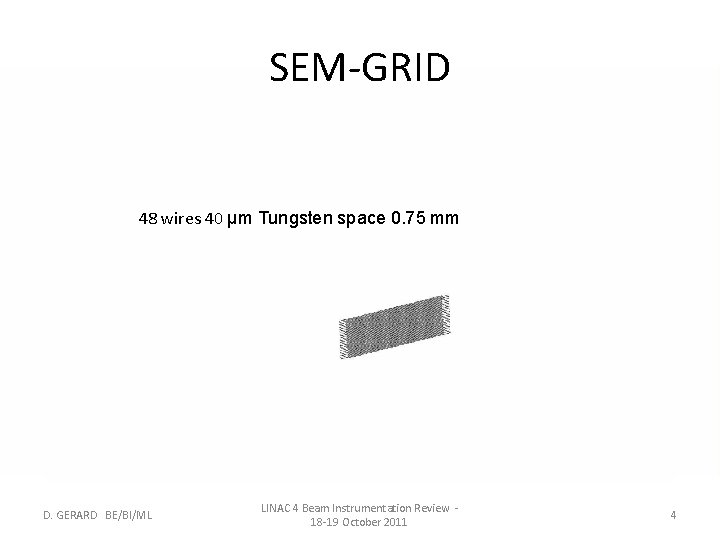
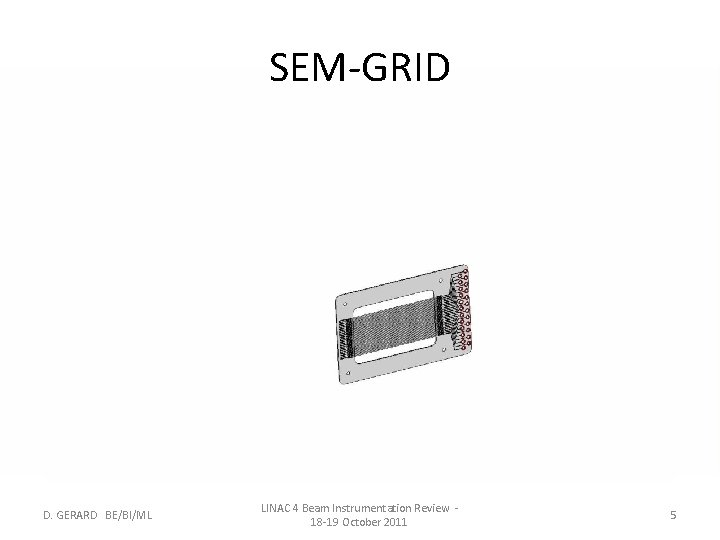
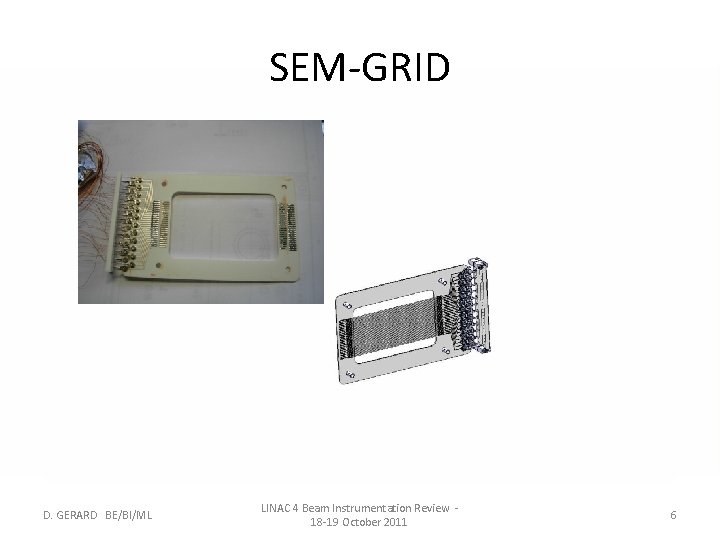
SEM-GRID 48 wires 40 µm Tungsten space 0. 75 mm D. GERARD BE/BI/ML LINAC 4 Beam Instrumentation Review 18 -19 October 2011 4

SEM-GRID D. GERARD BE/BI/ML LINAC 4 Beam Instrumentation Review 18 -19 October 2011 5

SEM-GRID D. GERARD BE/BI/ML LINAC 4 Beam Instrumentation Review 18 -19 October 2011 6

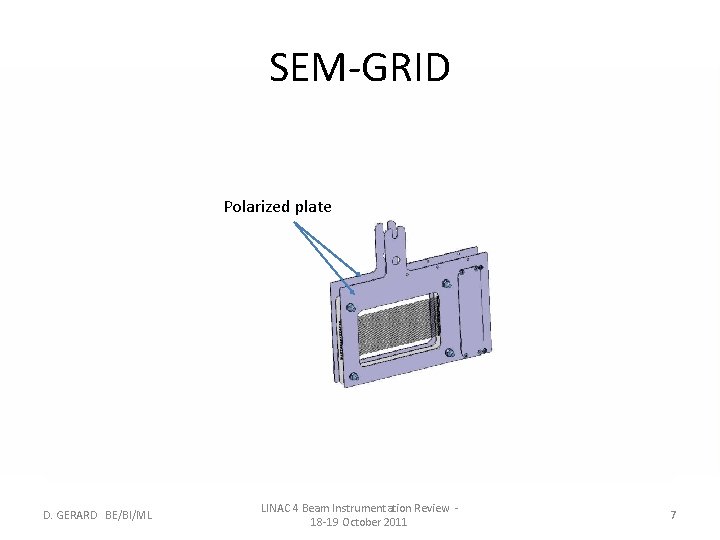
SEM-GRID Polarized plate D. GERARD BE/BI/ML LINAC 4 Beam Instrumentation Review 18 -19 October 2011 7

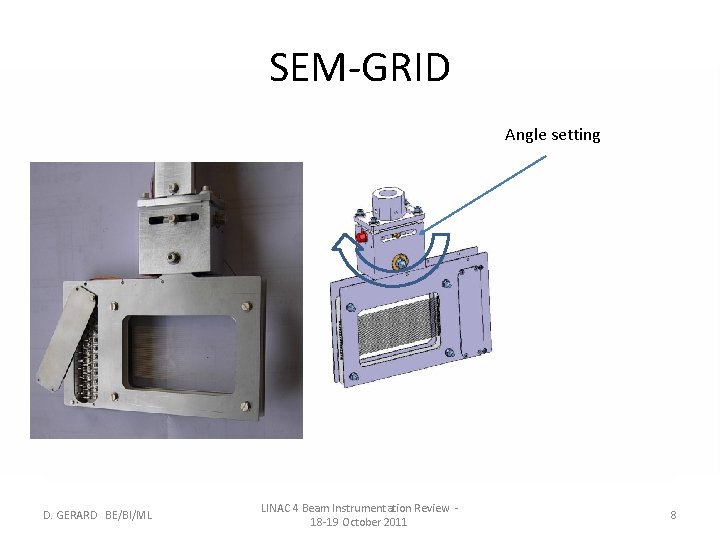
SEM-GRID Angle setting D. GERARD BE/BI/ML LINAC 4 Beam Instrumentation Review 18 -19 October 2011 8

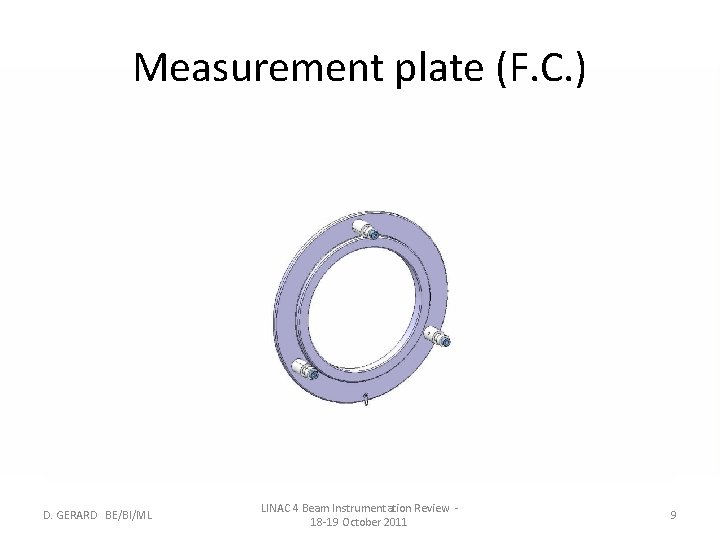
Measurement plate (F. C. ) D. GERARD BE/BI/ML LINAC 4 Beam Instrumentation Review 18 -19 October 2011 9

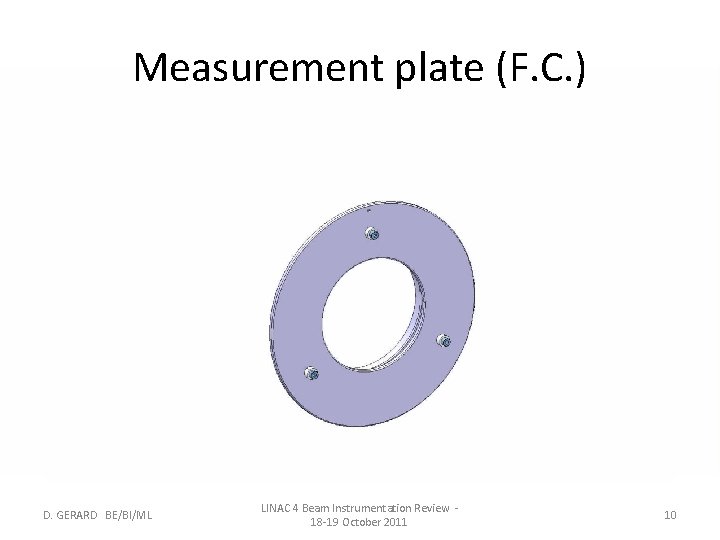
Measurement plate (F. C. ) D. GERARD BE/BI/ML LINAC 4 Beam Instrumentation Review 18 -19 October 2011 10

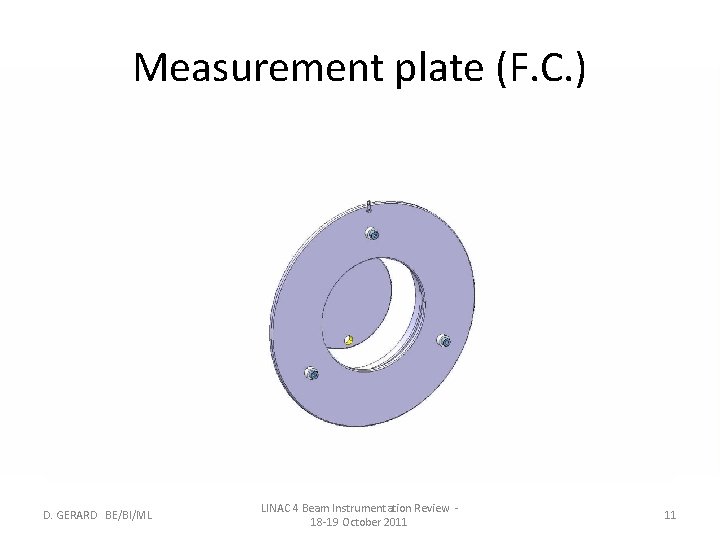
Measurement plate (F. C. ) D. GERARD BE/BI/ML LINAC 4 Beam Instrumentation Review 18 -19 October 2011 11

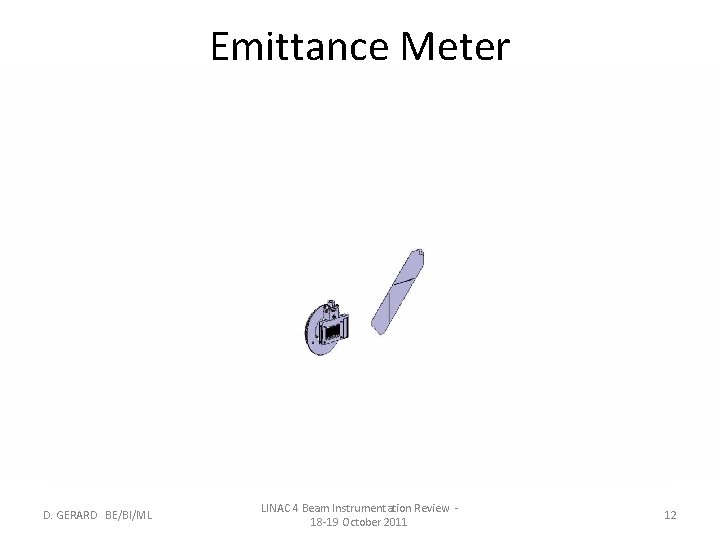
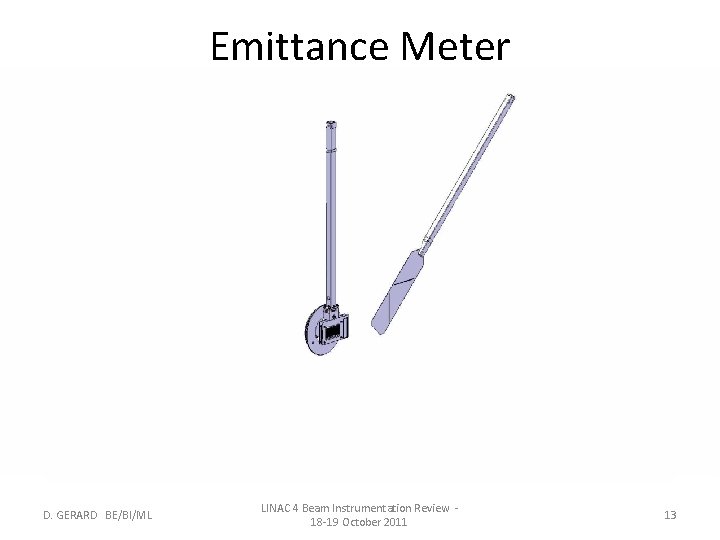
Emittance Meter D. GERARD BE/BI/ML LINAC 4 Beam Instrumentation Review 18 -19 October 2011 12

Emittance Meter D. GERARD BE/BI/ML LINAC 4 Beam Instrumentation Review 18 -19 October 2011 13

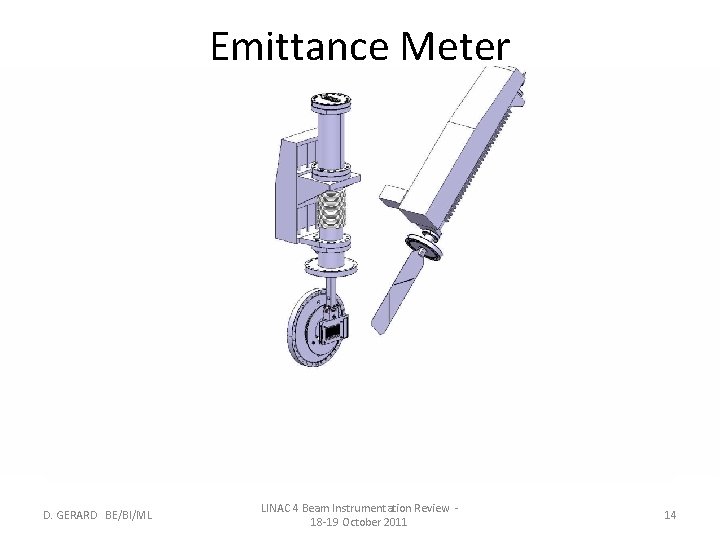
Emittance Meter D. GERARD BE/BI/ML LINAC 4 Beam Instrumentation Review 18 -19 October 2011 14

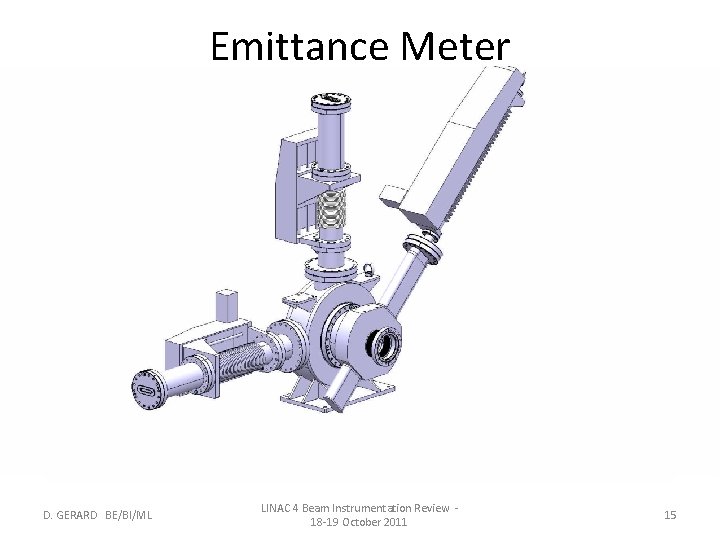
Emittance Meter D. GERARD BE/BI/ML LINAC 4 Beam Instrumentation Review 18 -19 October 2011 15

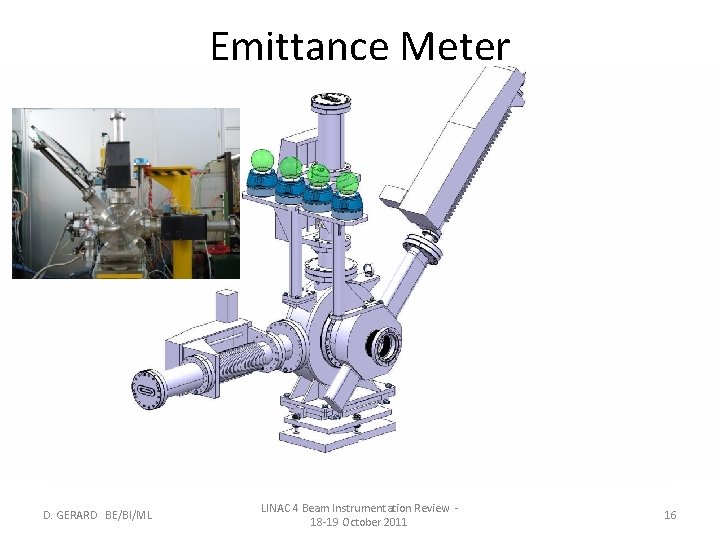
Emittance Meter D. GERARD BE/BI/ML LINAC 4 Beam Instrumentation Review 18 -19 October 2011 16

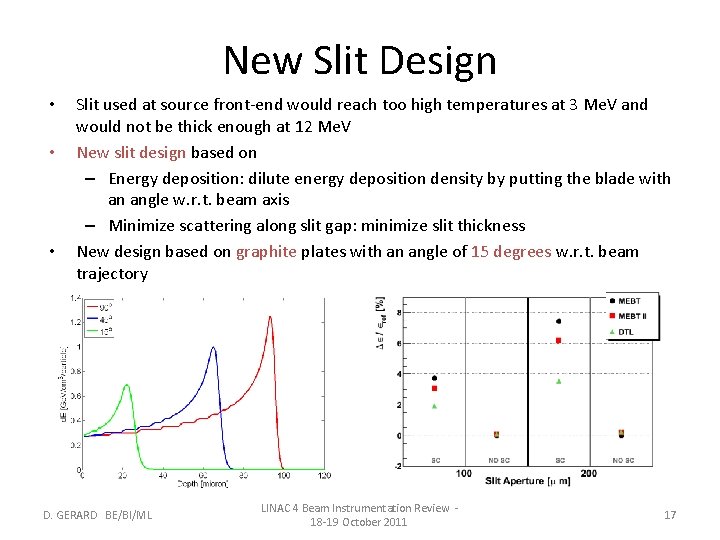
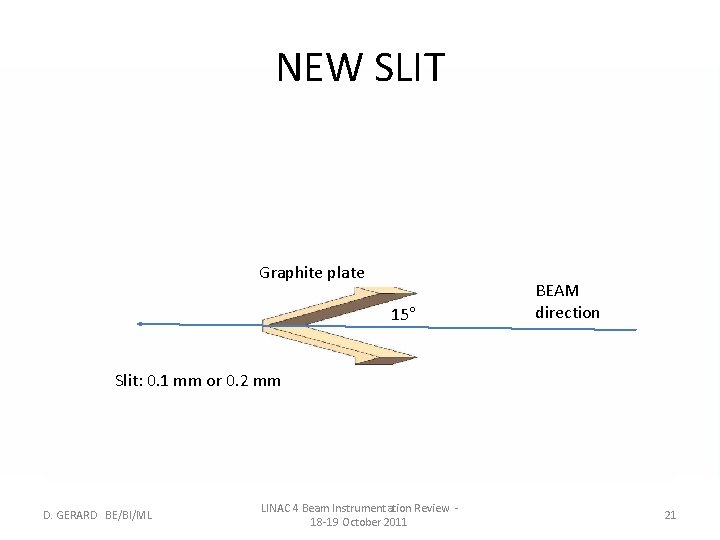
New Slit Design • • • Slit used at source front-end would reach too high temperatures at 3 Me. V and would not be thick enough at 12 Me. V New slit design based on – Energy deposition: dilute energy deposition density by putting the blade with an angle w. r. t. beam axis – Minimize scattering along slit gap: minimize slit thickness New design based on graphite plates with an angle of 15 degrees w. r. t. beam trajectory D. GERARD BE/BI/ML LINAC 4 Beam Instrumentation Review 18 -19 October 2011 17

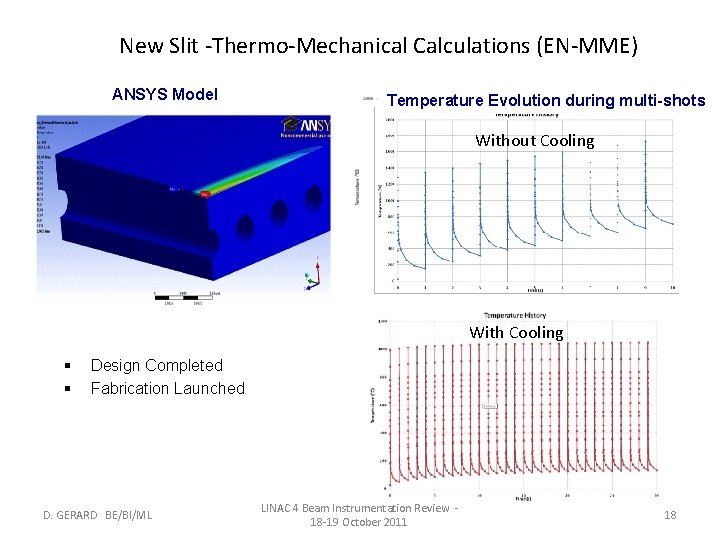
New Slit -Thermo-Mechanical Calculations (EN-MME) ANSYS Model Temperature Evolution during multi-shots Without Cooling With Cooling § § Design Completed Fabrication Launched D. GERARD BE/BI/ML LINAC 4 Beam Instrumentation Review 18 -19 October 2011 18
![Specification 3 Me V 12 Mev 0 1 1 H range in Carbon mm Specification 3 Me. V 12 Mev 0. 1 1 H- range in Carbon [mm]](https://slidetodoc.com/presentation_image_h2/e2bf259e6eceeda06398ea48cd2fcd2f/image-19.jpg)
Specification 3 Me. V 12 Mev 0. 1 1 H- range in Carbon [mm] Min/Max Slit thickness [mm] 2/5 Min single blade width [mm] 67 Min single blade height [mm] 67 Min slit fullstroke [mm] 134 Blade distance (slit gap) all along the slit thickness [µm] 100, adjustable to 200 D. GERARD BE/BI/ML LINAC 4 Beam Instrumentation Review 18 -19 October 2011 19

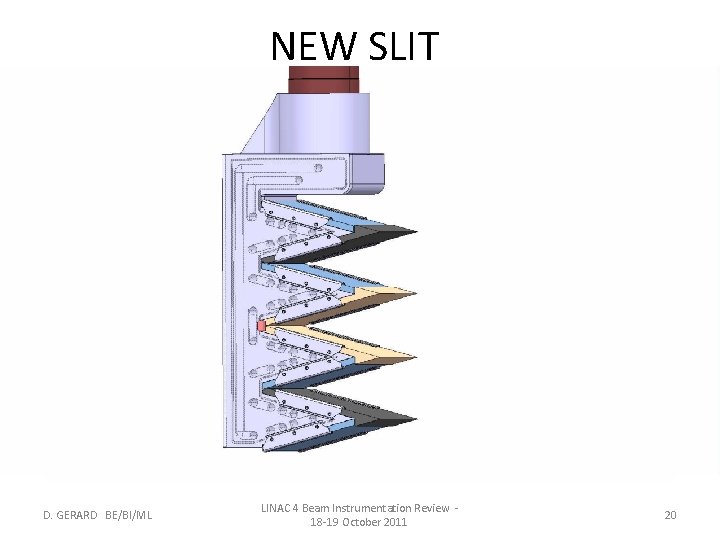
NEW SLIT D. GERARD BE/BI/ML LINAC 4 Beam Instrumentation Review 18 -19 October 2011 20

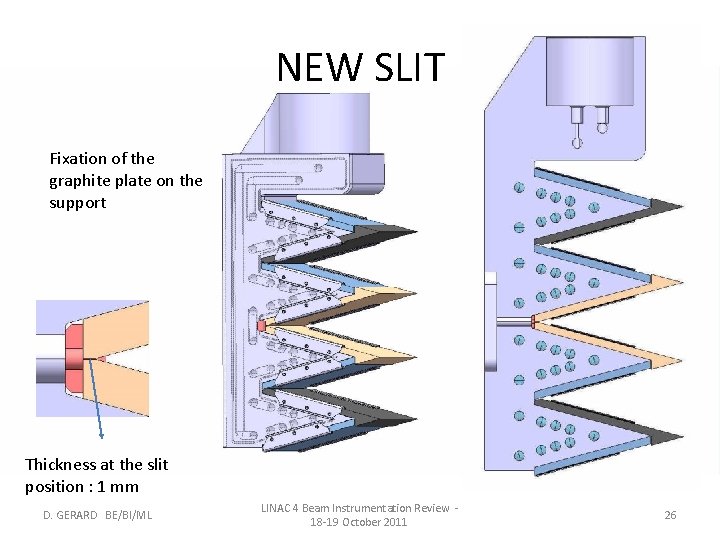
NEW SLIT Graphite plate 15° BEAM direction Slit: 0. 1 mm or 0. 2 mm D. GERARD BE/BI/ML LINAC 4 Beam Instrumentation Review 18 -19 October 2011 21

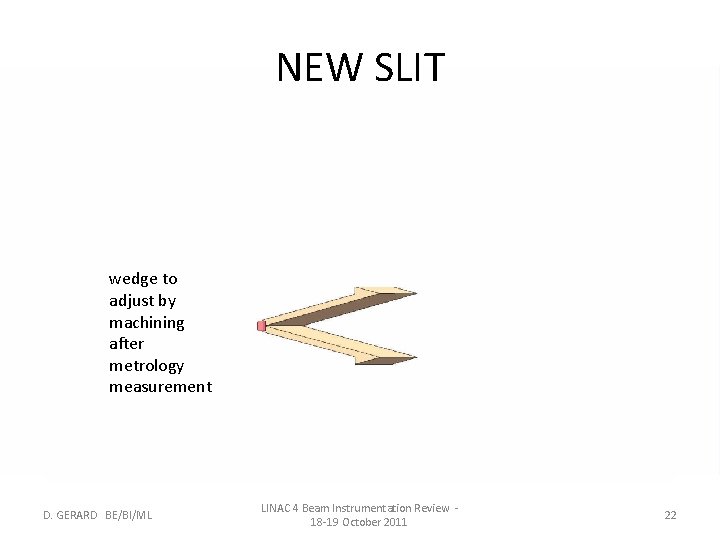
NEW SLIT wedge to adjust by machining after metrology measurement D. GERARD BE/BI/ML LINAC 4 Beam Instrumentation Review 18 -19 October 2011 22

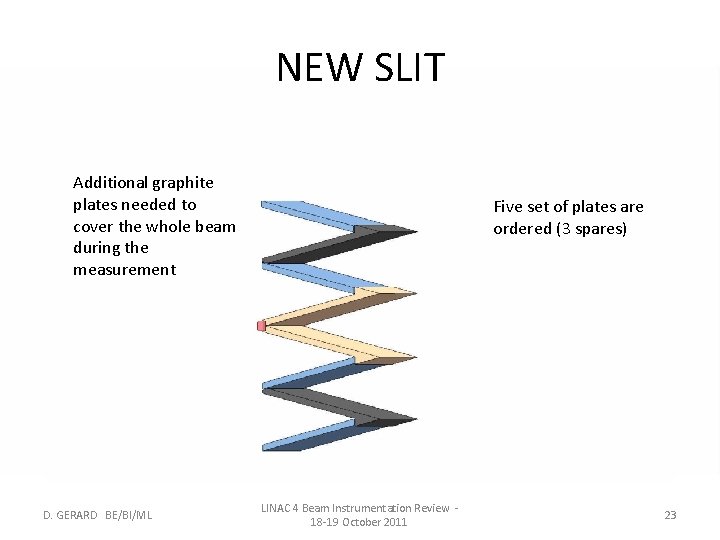
NEW SLIT Additional graphite plates needed to cover the whole beam during the measurement D. GERARD BE/BI/ML Five set of plates are ordered (3 spares) LINAC 4 Beam Instrumentation Review 18 -19 October 2011 23

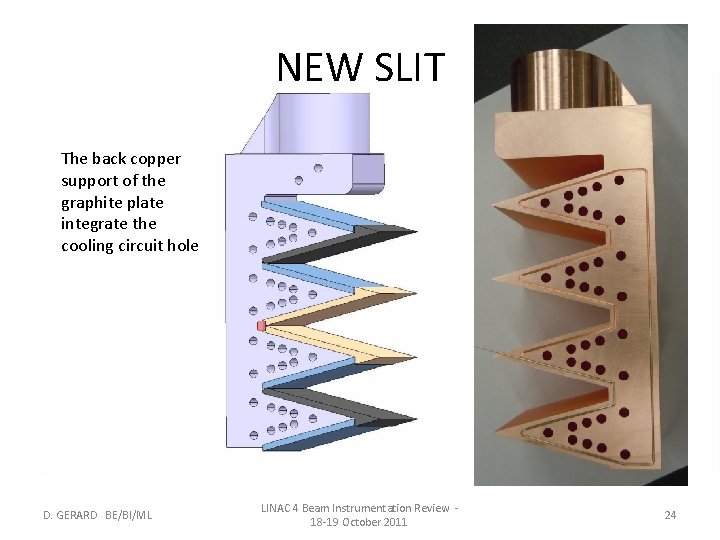
NEW SLIT The back copper support of the graphite plate integrate the cooling circuit hole D. GERARD BE/BI/ML LINAC 4 Beam Instrumentation Review 18 -19 October 2011 24

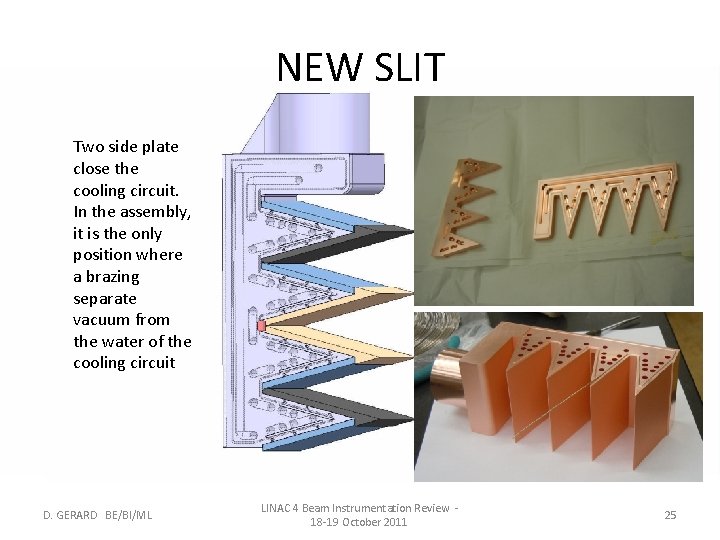
NEW SLIT Two side plate close the cooling circuit. In the assembly, it is the only position where a brazing separate vacuum from the water of the cooling circuit D. GERARD BE/BI/ML LINAC 4 Beam Instrumentation Review 18 -19 October 2011 25

NEW SLIT Fixation of the graphite plate on the support Thickness at the slit position : 1 mm D. GERARD BE/BI/ML LINAC 4 Beam Instrumentation Review 18 -19 October 2011 26

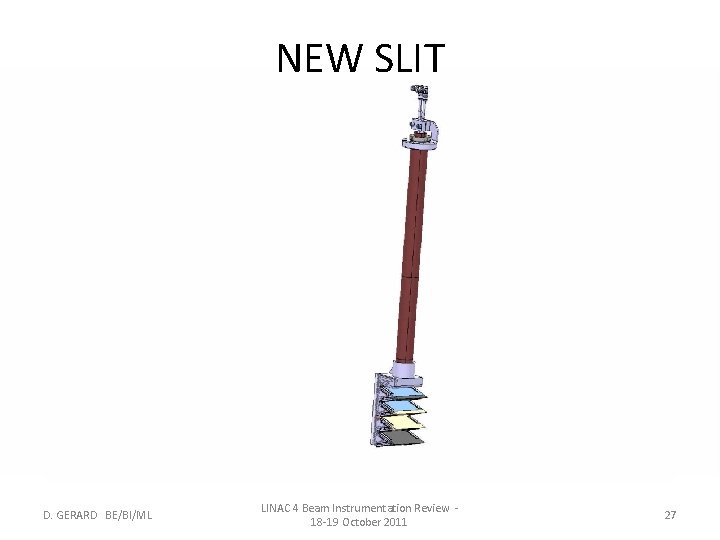
NEW SLIT D. GERARD BE/BI/ML LINAC 4 Beam Instrumentation Review 18 -19 October 2011 27

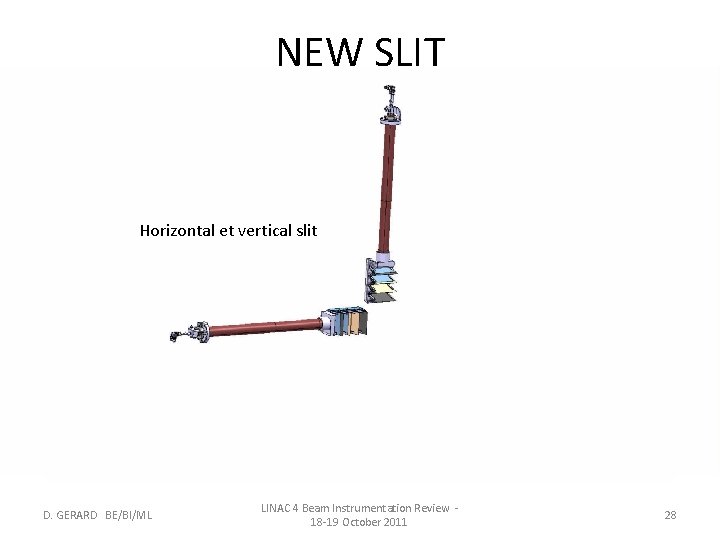
NEW SLIT Horizontal et vertical slit D. GERARD BE/BI/ML LINAC 4 Beam Instrumentation Review 18 -19 October 2011 28

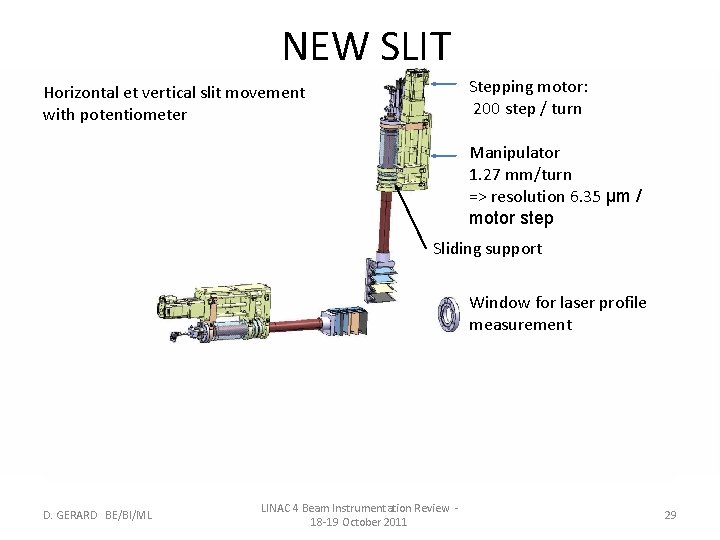
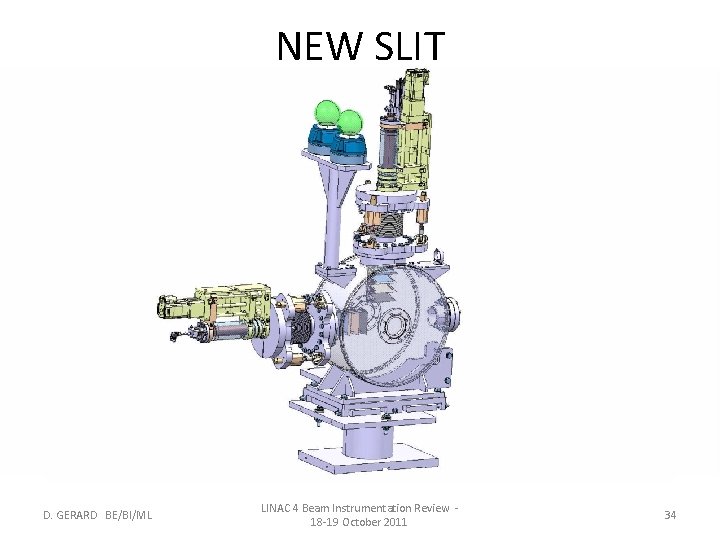
NEW SLIT Stepping motor: 200 step / turn Horizontal et vertical slit movement with potentiometer Manipulator 1. 27 mm/turn => resolution 6. 35 µm / motor step Sliding support Window for laser profile measurement D. GERARD BE/BI/ML LINAC 4 Beam Instrumentation Review 18 -19 October 2011 29

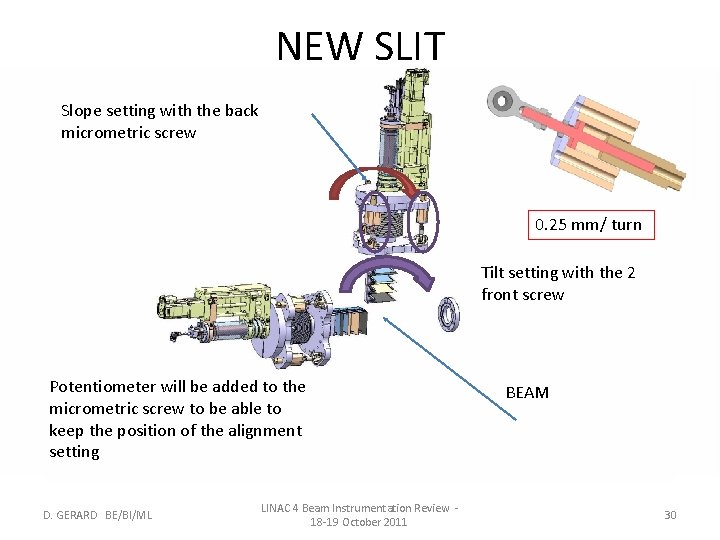
NEW SLIT Slope setting with the back micrometric screw 0. 25 mm/ turn Tilt setting with the 2 front screw Potentiometer will be added to the micrometric screw to be able to keep the position of the alignment setting D. GERARD BE/BI/ML LINAC 4 Beam Instrumentation Review 18 -19 October 2011 BEAM 30

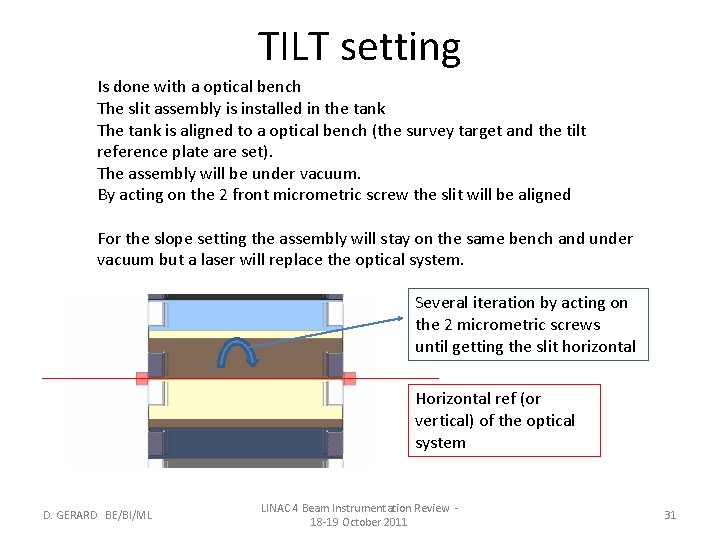
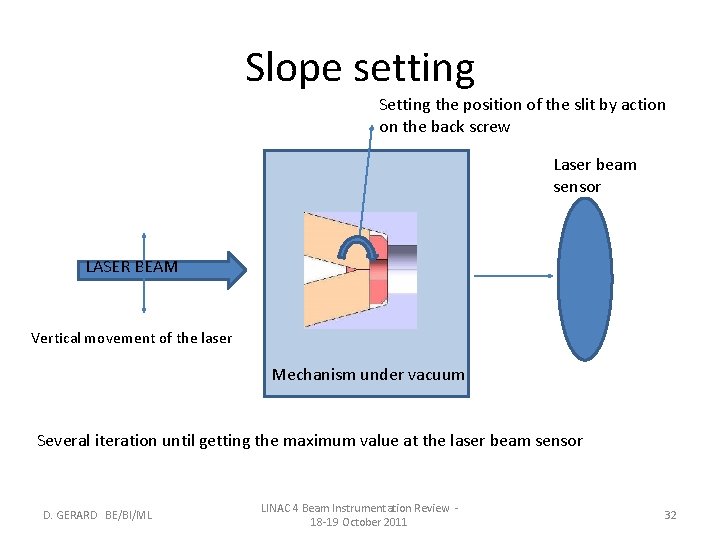
TILT setting Is done with a optical bench The slit assembly is installed in the tank The tank is aligned to a optical bench (the survey target and the tilt reference plate are set). The assembly will be under vacuum. By acting on the 2 front micrometric screw the slit will be aligned For the slope setting the assembly will stay on the same bench and under vacuum but a laser will replace the optical system. Several iteration by acting on the 2 micrometric screws until getting the slit horizontal Horizontal ref (or vertical) of the optical system D. GERARD BE/BI/ML LINAC 4 Beam Instrumentation Review 18 -19 October 2011 31

Slope setting Setting the position of the slit by action on the back screw Laser beam sensor LASER BEAM Vertical movement of the laser Mechanism under vacuum Several iteration until getting the maximum value at the laser beam sensor D. GERARD BE/BI/ML LINAC 4 Beam Instrumentation Review 18 -19 October 2011 32

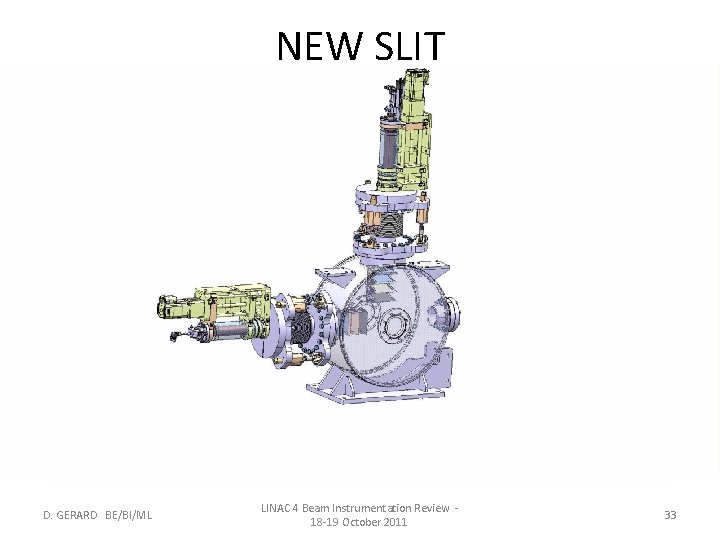
NEW SLIT D. GERARD BE/BI/ML LINAC 4 Beam Instrumentation Review 18 -19 October 2011 33

NEW SLIT D. GERARD BE/BI/ML LINAC 4 Beam Instrumentation Review 18 -19 October 2011 34

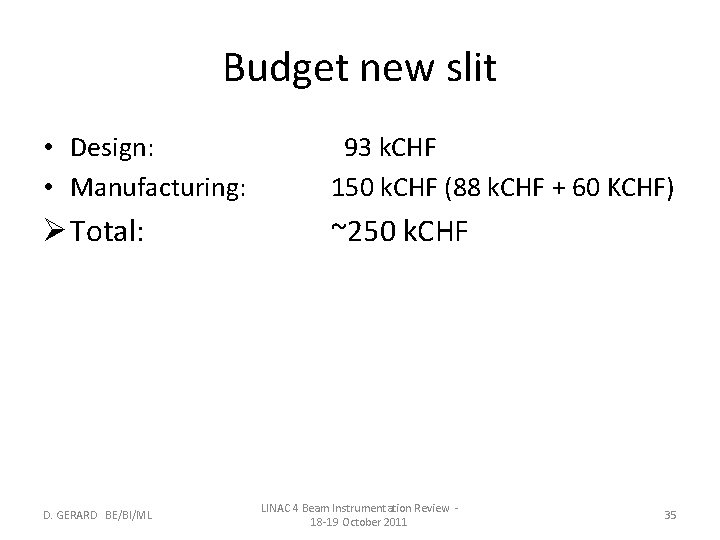
Budget new slit • Design: • Manufacturing: 93 k. CHF 150 k. CHF (88 k. CHF + 60 KCHF) Ø Total: ~250 k. CHF D. GERARD BE/BI/ML LINAC 4 Beam Instrumentation Review 18 -19 October 2011 35

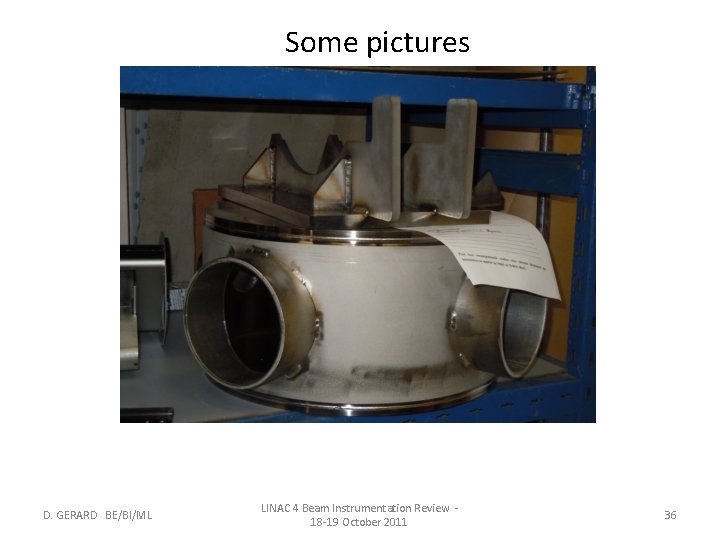
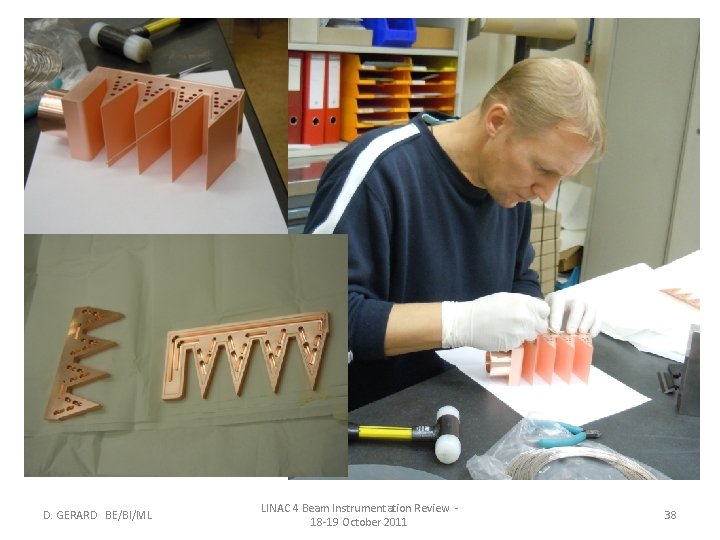
Some pictures D. GERARD BE/BI/ML LINAC 4 Beam Instrumentation Review 18 -19 October 2011 36

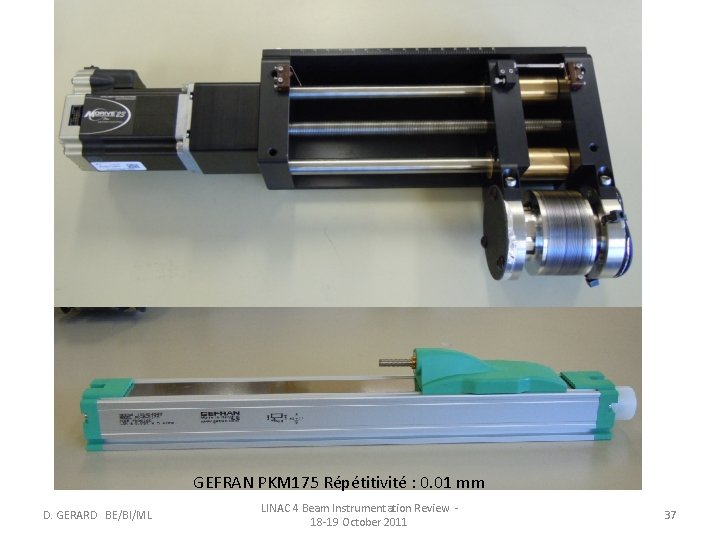
GEFRAN PKM 175 Répétitivité : 0. 01 mm D. GERARD BE/BI/ML LINAC 4 Beam Instrumentation Review 18 -19 October 2011 37

D. GERARD BE/BI/ML LINAC 4 Beam Instrumentation Review 18 -19 October 2011 38

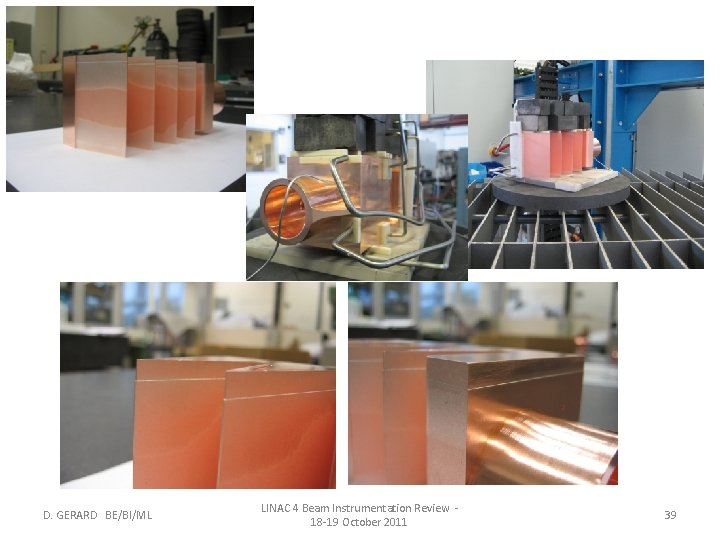
D. GERARD BE/BI/ML LINAC 4 Beam Instrumentation Review 18 -19 October 2011 39

Planning • AP : delivery of the mechanical part earliest end of November. • The supply parts are already at CERN except water flow, screw. . . • Planning (working days): see next slide D. GERARD BE/BI/ML LINAC 4 Beam Instrumentation Review 18 -19 October 2011 40

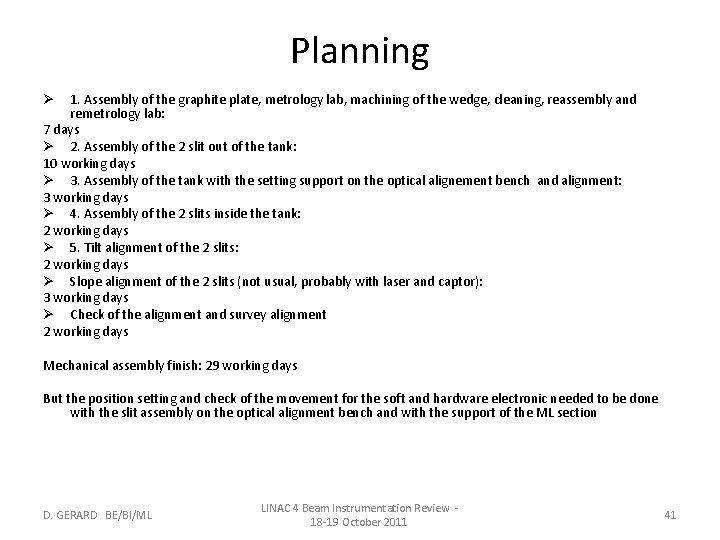
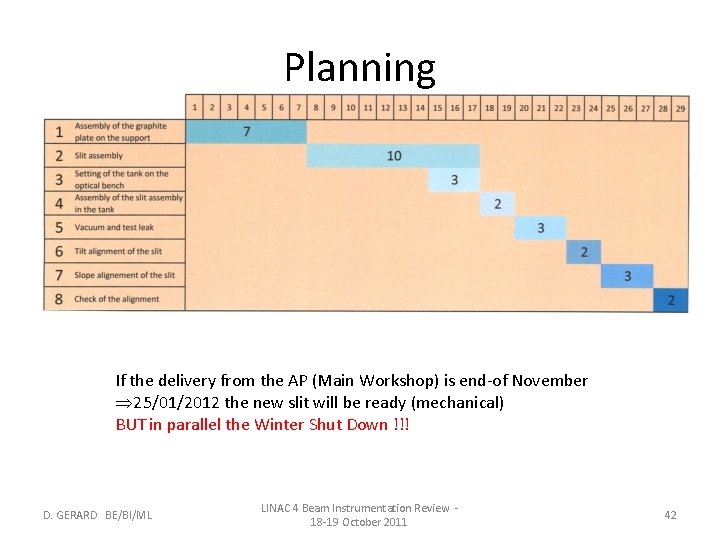
Planning 1. Assembly of the graphite plate, metrology lab, machining of the wedge, cleaning, reassembly and remetrology lab: 7 days Ø 2. Assembly of the 2 slit out of the tank: 10 working days Ø 3. Assembly of the tank with the setting support on the optical alignement bench and alignment: 3 working days Ø 4. Assembly of the 2 slits inside the tank: 2 working days Ø 5. Tilt alignment of the 2 slits: 2 working days Ø Slope alignment of the 2 slits (not usual, probably with laser and captor): 3 working days Ø Check of the alignment and survey alignment 2 working days Ø Mechanical assembly finish: 29 working days But the position setting and check of the movement for the soft and hardware electronic needed to be done with the slit assembly on the optical alignment bench and with the support of the ML section D. GERARD BE/BI/ML LINAC 4 Beam Instrumentation Review 18 -19 October 2011 41

Planning If the delivery from the AP (Main Workshop) is end-of November Þ 25/01/2012 the new slit will be ready (mechanical) BUT in parallel the Winter Shut Down !!! D. GERARD BE/BI/ML LINAC 4 Beam Instrumentation Review 18 -19 October 2011 42

• Thanks to: Ø F. Roncarolo, B. Cheymol Ø B. Riffaud, E. Berthome, D. Steyaert, A. Dallochio Ø G. Favre, S. Mathot Ø M. Duraffourg, G. J. Focker Ø. . and all other people involved in this project D. GERARD BE/BI/ML LINAC 4 Beam Instrumentation Review 18 -19 October 2011 43

Question? • Thank for your attention • Question? D. GERARD BE/BI/ML LINAC 4 Beam Instrumentation Review 18 -19 October 2011 44

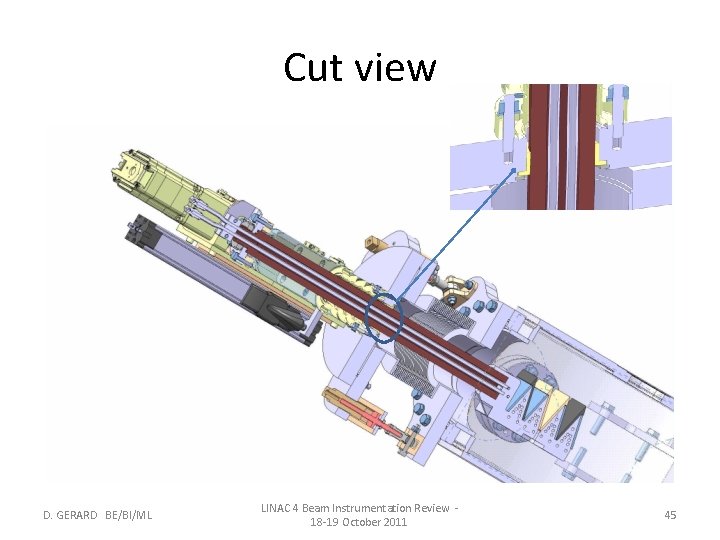
Cut view D. GERARD BE/BI/ML LINAC 4 Beam Instrumentation Review 18 -19 October 2011 45