LIMITS FITS AND TOLERANCES NEED OF LIMITS FITS



- Slides: 19

® LIMITS FITS AND TOLERANCES

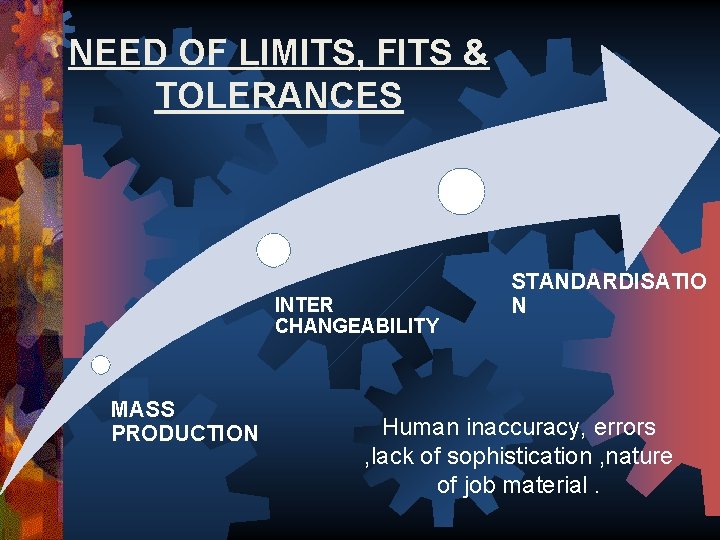
NEED OF LIMITS, FITS & TOLERANCES INTER CHANGEABILITY MASS PRODUCTION STANDARDISATIO N Human inaccuracy, errors , lack of sophistication , nature of job material.

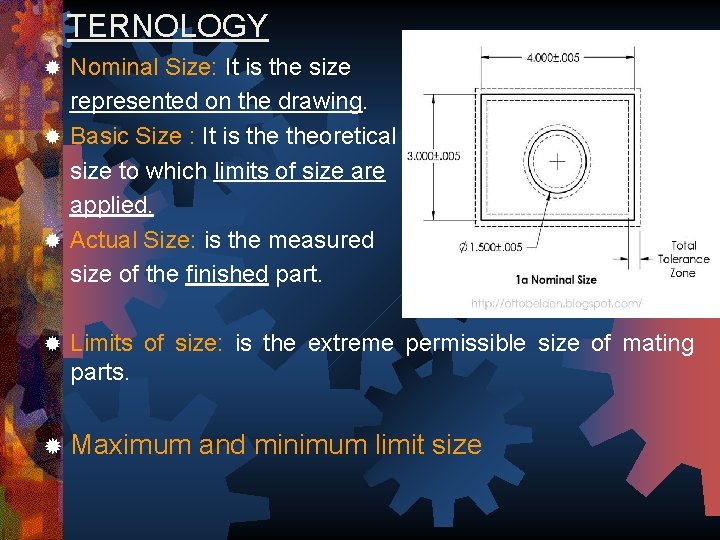
TERNOLOGY Nominal Size: It is the size represented on the drawing. ® Basic Size : It is theoretical size to which limits of size are applied. ® Actual Size: is the measured size of the finished part. ® ® Limits of size: is the extreme permissible size of mating parts. ® Maximum and minimum limit size

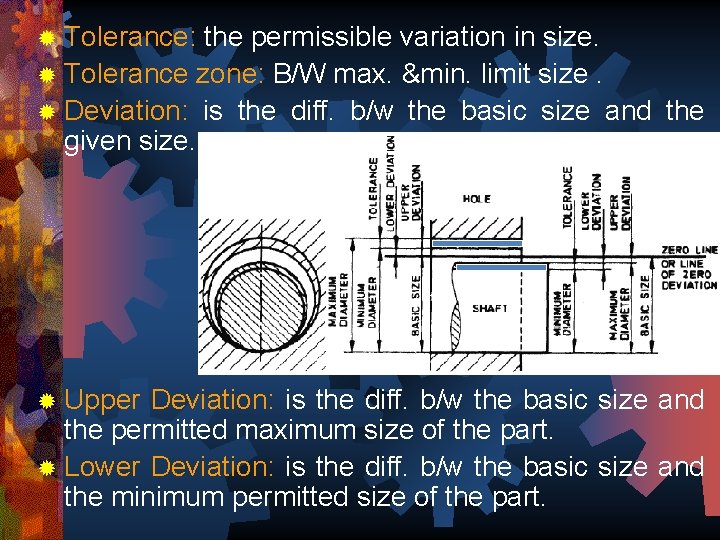
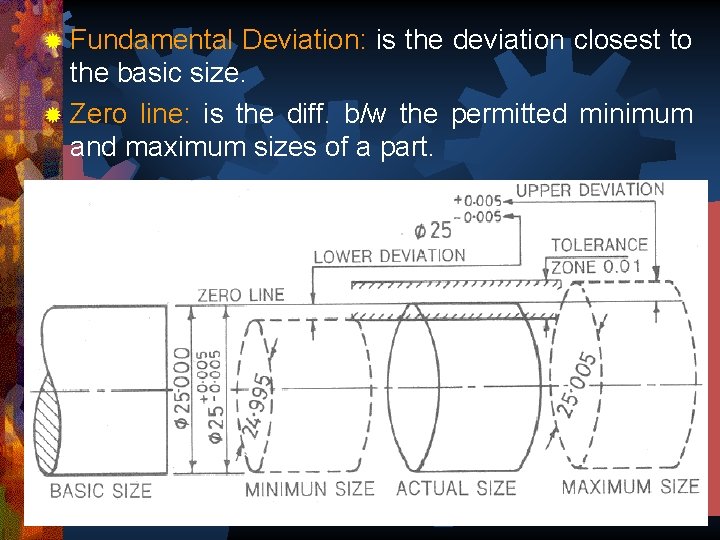
® Tolerance: the permissible variation in size. ® Tolerance zone: B/W max. &min. limit size. ® Deviation: is the diff. b/w the basic size and the given size. ® Upper Deviation: is the diff. b/w the basic size and the permitted maximum size of the part. ® Lower Deviation: is the diff. b/w the basic size and the minimum permitted size of the part.

® Fundamental Deviation: is the deviation closest to the basic size. ® Zero line: is the diff. b/w the permitted minimum and maximum sizes of a part.

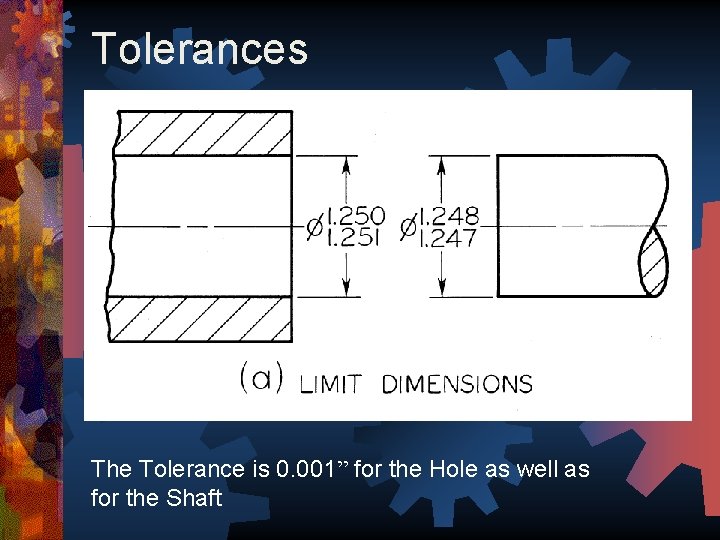
Tolerances The Tolerance is 0. 001” for the Hole as well as for the Shaft

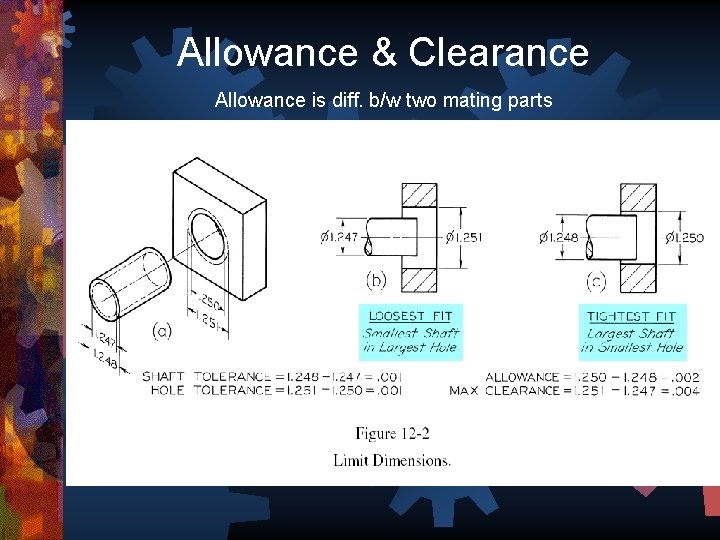
Allowance & Clearance Allowance is diff. b/w two mating parts

Fits Between Mating Parts Fit : Degree of tightness or looseness b/w two mating parts. 1. Three types Clearance Fit: clearance is left between the parts. Minimum air space is 0. 002”. This is the allowance and is always positive in a clearance fit

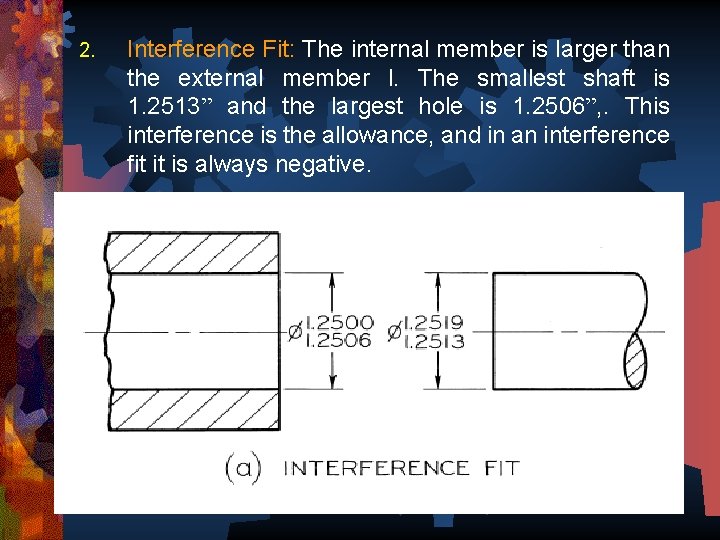
2. Interference Fit: The internal member is larger than the external member l. The smallest shaft is 1. 2513” and the largest hole is 1. 2506”, . This interference is the allowance, and in an interference fit it is always negative.

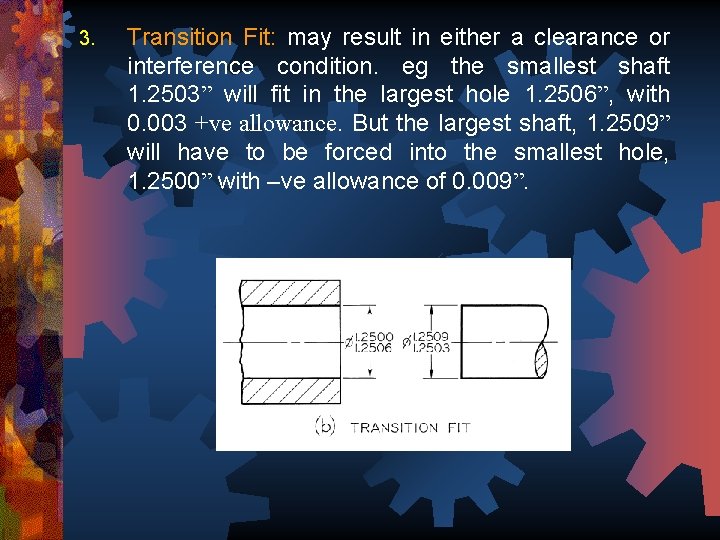
3. Transition Fit: may result in either a clearance or interference condition. eg the smallest shaft 1. 2503” will fit in the largest hole 1. 2506”, with 0. 003 +ve allowance. But the largest shaft, 1. 2509” will have to be forced into the smallest hole, 1. 2500” with –ve allowance of 0. 009”.

Push fit Running fit Forced fit Driving fit Other.

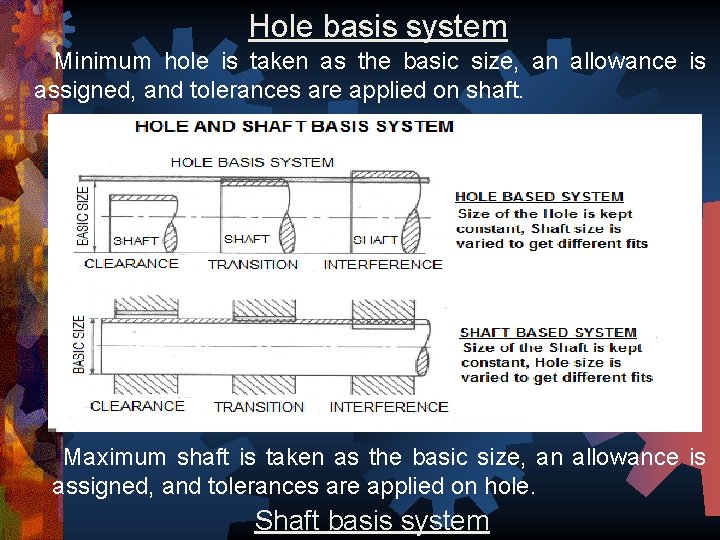
Hole basis system Minimum hole is taken as the basic size, an allowance is assigned, and tolerances are applied on shaft. Maximum shaft is taken as the basic size, an allowance is assigned, and tolerances are applied on hole. Shaft basis system


Specifications of Tolerances 1. Limit Dimensioning The high limit is placed above the low limit. In single-line note form, the low limit precedes the high limit separated by a dash

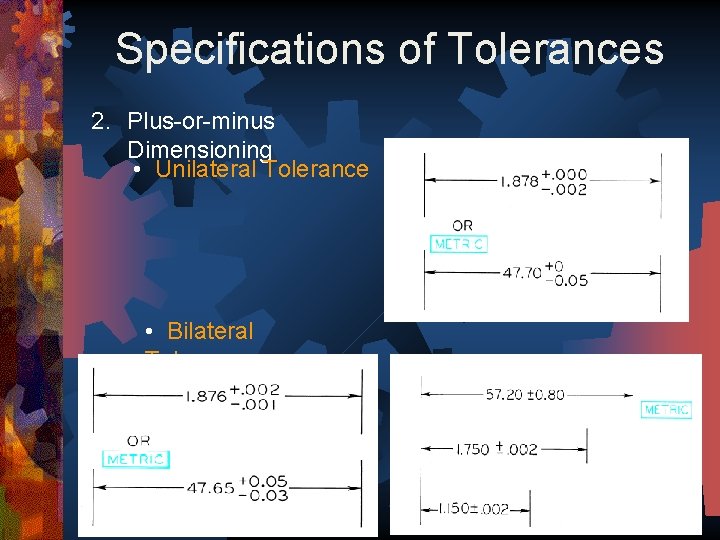
Specifications of Tolerances 2. Plus-or-minus Dimensioning • Unilateral Tolerance • Bilateral Tolerance

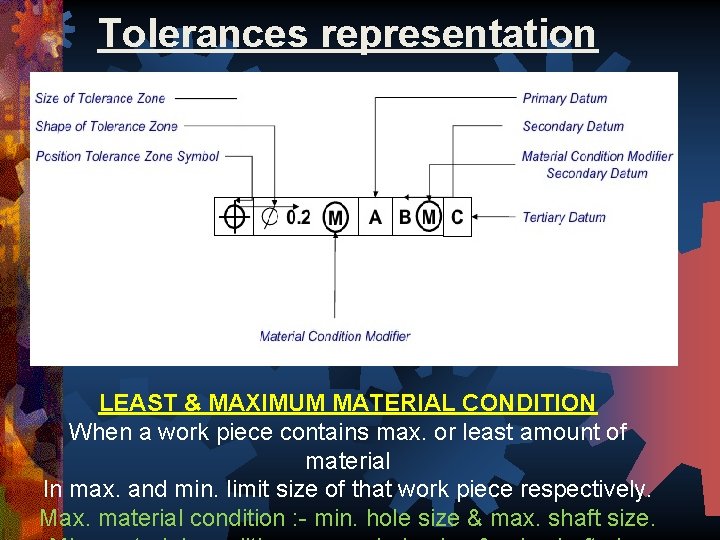
Tolerances representation LEAST & MAXIMUM MATERIAL CONDITION When a work piece contains max. or least amount of material In max. and min. limit size of that work piece respectively. Max. material condition : - min. hole size & max. shaft size.

® International Tolerance Grade (IT): They are a set of tolerances that varies according to the basic size and provides a uniform level of accuracy within the grade.

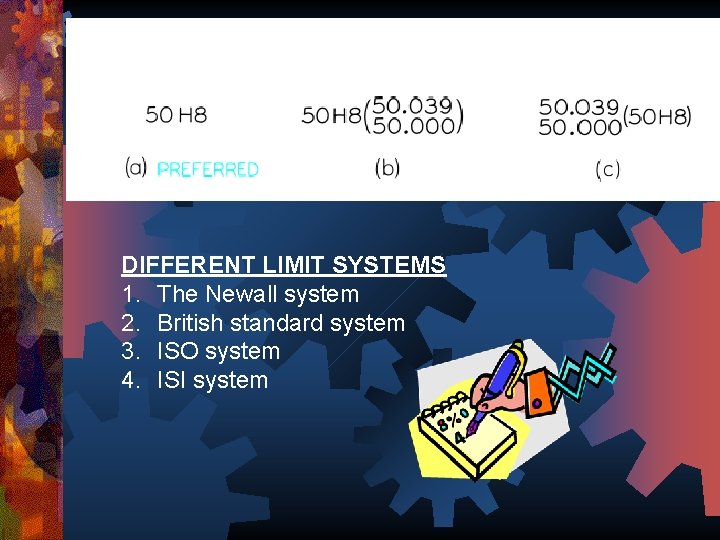
DIFFERENT LIMIT SYSTEMS 1. The Newall system 2. British standard system 3. ISO system 4. ISI system

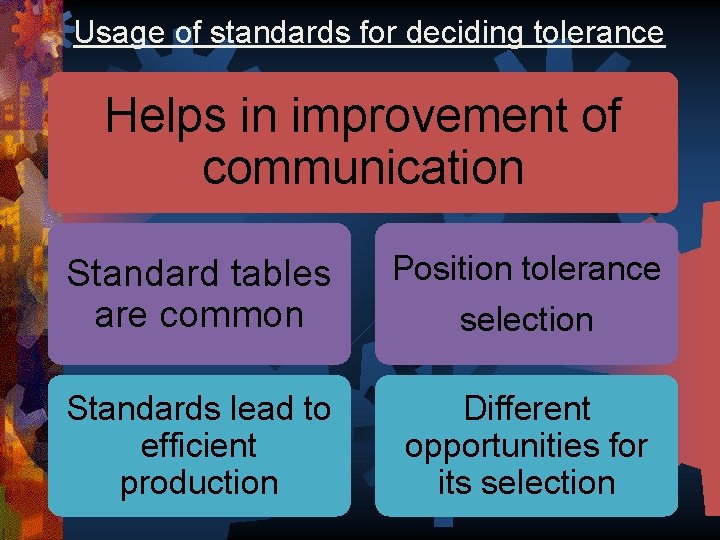
Usage of standards for deciding tolerance Helps in improvement of communication Standard tables are common Position tolerance selection Standards lead to efficient production Different opportunities for its selection