LENGTH ASSESSMENT IN INFANTS 0 2 YEARS Aim


 designed for the purpose:")


- Slides: 22
LENGTH ASSESSMENT IN INFANTS 0 -2 YEARS
Aim • To correctly measure, interpret and monitor the recumbent length of infants and children up to 2 years of age.
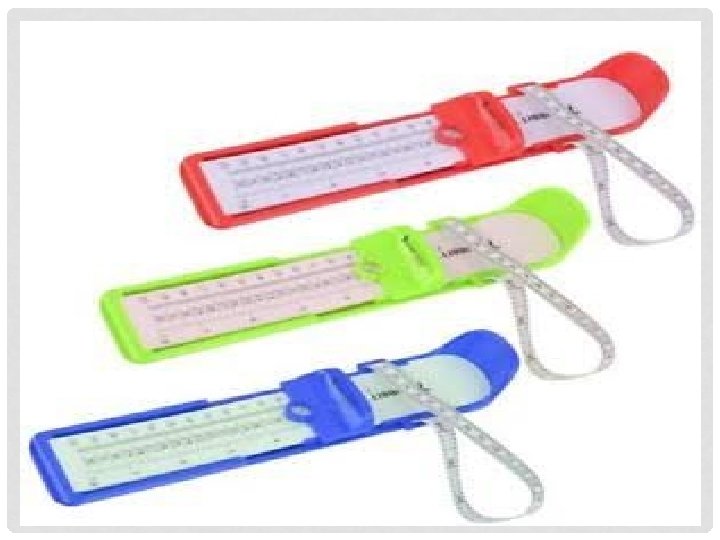
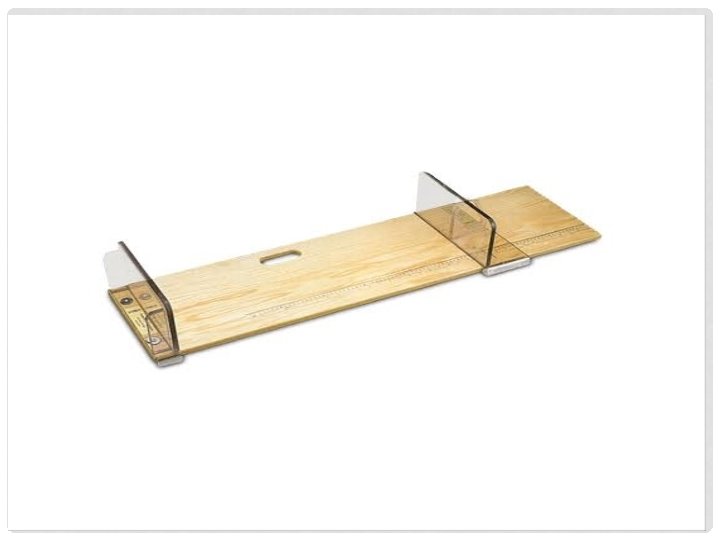
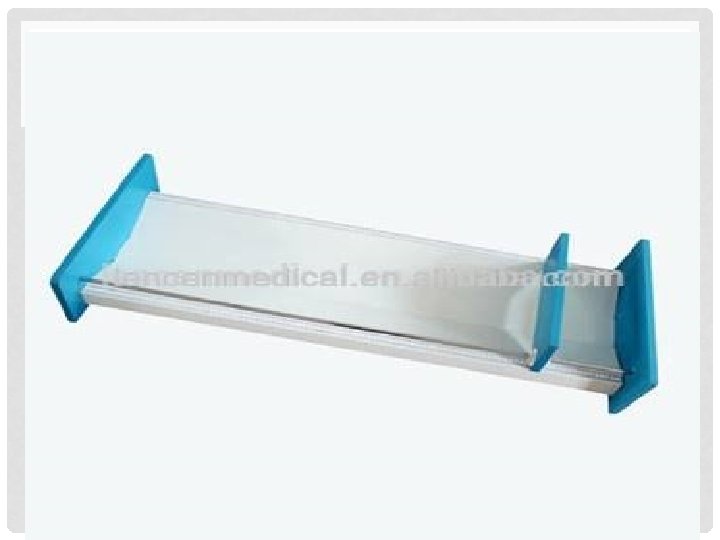
Equipment Recumbent length board or infant meter (infant length board) designed for the purpose: -The board should have a firm, flat horizontal surface with a measuring tape in 1 mm (0. 1 cm) increments. -The tape or measurements should be fixed, and easily read. -The measuring board should have a fixed, stationary headpiece at right angles to the tape. -A movable foot board vertical to the tape.
PROCEDURE Steps 1. Wash hands before procedure. Rational Maintain clean procedure 2. Engagement and consent: Gain cooperation and allow sufficient time for discussion of parent concerns. Explain the procedure to the parent/carer, and child where appropriate. Allow sufficient time for discussion of concerns. Ensure verbal parental consent has been obtained 3. Preparation: Remove the infant/child’s shoes and socks if applicable. For greater accuracy
4. Measuring: Ask the parent/ carer to lay the infant in a supine position on the lengthboard. The crown of the head must touch the stationary, vertical headboard. The infant’s line of vision should face vertically upwards. Ensure the child’s body and pelvis is straight along the measuring device. Extend the infant’s legs gently at the hips and knees and lie them flat against the length-board with toes pointing directly up. Move the foot board into position against the infant’s feet. Have accurate results
5. Recording: Plot the length on the appropriate age for length and gender chart. Record the length to the nearest 0. 1 cm Plot exact age, to the nearest week. Document that recumbent length has been measured. Use dots to plot and do not join the Standardized reading
6. Explain growth plotting to parent/ carer. Interpret the growth chart with regard to the pattern of growth trajectory. Identify if there any tracking changes within or across percentiles. Explain the pattern of growth to the parent/ carer. Detect any abnormality/Monitor normal growth
HEIGHT ASSESSMENT IN CHILDREN 2 -5 YEARS
Aim • To correctly measure, interpret and monitor the standing height of children 2 - 5 years of age.
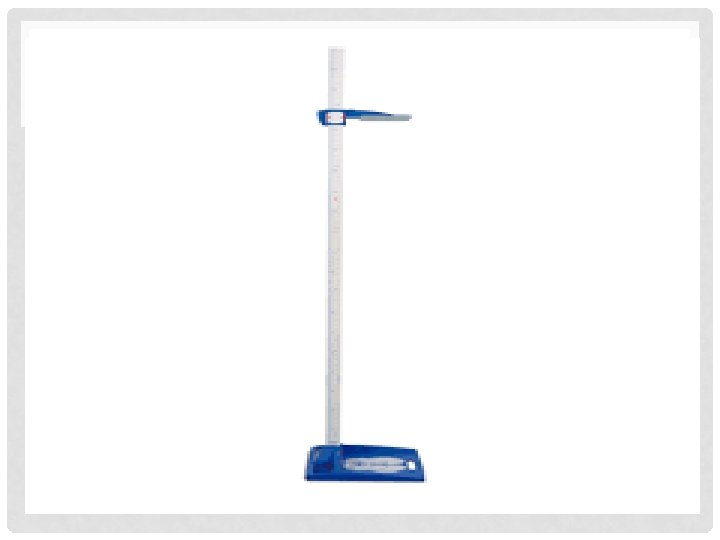
Equipment 1 -Height measurer consisting of a vertical metric rule or a correctly installed ‘pull down’ measure designed for the intended purpose : -A height measurer consists of a vertical board with an attached metric ruler and a moveable horizontal headboard. -Height measurer must have a 0. 5 kg weight on top of the horizontal headboard to apply sufficient pressure to compress hair. Ideally the headboard should be spring loaded. -There should be a non-compressible flat even floor base (uncarpeted) on which the child stands.
-The graduations on the height measurer should be at 1 mm intervals and the metric rule should be at least 220 cm. -Equipment should be accurately and firmly mounted to the wall with an easy to read, stable tape or digital readout in 0. 1 cm increments.
-The height measurer should be checked prior to each measurement session to ensure that both the headboard and floor are at 90 degrees to the vertical rule. -Calibration should be performed according to manufacturer recommendations. -For portable stand meters, it is necessary to check the correct alignment of the headboard during each measurement, according to manufacturer recommendations. •
Procedure Steps Rational 1. Wash hands before Maintain clean procedure. 2. Engagement and consent: Encourage parent/carer support and involvement with the procedure where -Explain the procedure to possible. the parent/carer, and child where appropriate. -Allow sufficient time for discussion of concerns. -Ensure verbal parental consent has been obtained
3. Preparation: -Explain the stand meter/height measurer to the child and how you are going to use it to see how tall they are. -Assist the child in removing their hat, shoes, socks, hair/head accessories. -Take the child over to the stand meter and make sure they face away from the equipment or wall. For greater cooperation (If the child is hesitant, measure the parent first where possible).
4. Measuring: Have accurate -Ask or assist the child to stand; results With bare feet close together, legs straight, arms at sides, eyes straight ahead and shoulders relaxed. -Ask the child to take a big breath in and out to relax. -Check that their arms are still by their sides, knees straight, heels on the floor and shoulders relaxed. -Check there are three contact points between the body and the stand meter; shoulder blades, bottom and heels. -Bring the measuring device down to rest on the child’s head. -Ensure your eyes are in line with the height.
5. Recording: Standardized -Record the height to the nearest reading 0. 1 cm. -Plot the height on the appropriate height for age and gender chart. -Record that standing height/stature has been measured. -Ensure documentation of any factors which may have interfered with accuracy in measurement.
6. Explain growth plotting to Detect any abnormality/Monitor parent/carer. normal growth -Interpret the growth chart with regard to the pattern of growth trajectory. -Identify if there any tracking changes within or across percentiles. -Explain the pattern of growth to the parent/carer.