Lecture 4 TA 101 A Engineering Graphics 2018

- Slides: 21

Lecture 4 TA 101 A Engineering Graphics 2018 -19 -I By Dr. Mukesh Sharma Professor DEPARTMENT OF CIVIL ENGINEERING INDIAN INSTITUTE OF TECHNOLOGY KANPUR-208016, INDIA

Class on Saturday 11. 8. 2018 ?


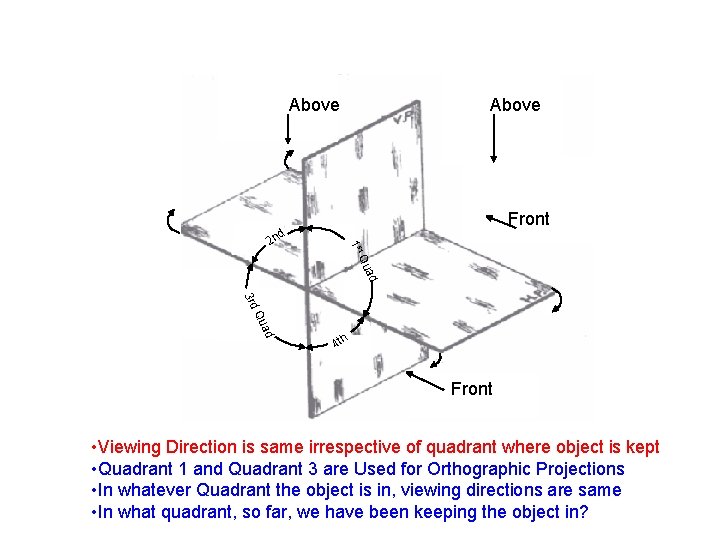
Above st 2 Front 1 nd Above ad Qu 3 rd ad Qu 4 th Front • Viewing Direction is same irrespective of quadrant where object is kept • Quadrant 1 and Quadrant 3 are Used for Orthographic Projections • In whatever Quadrant the object is in, viewing directions are same • In what quadrant, so far, we have been keeping the object in?

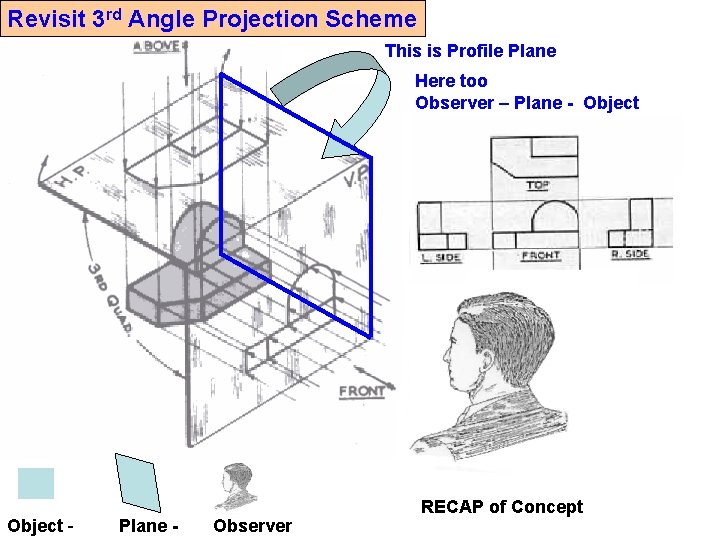
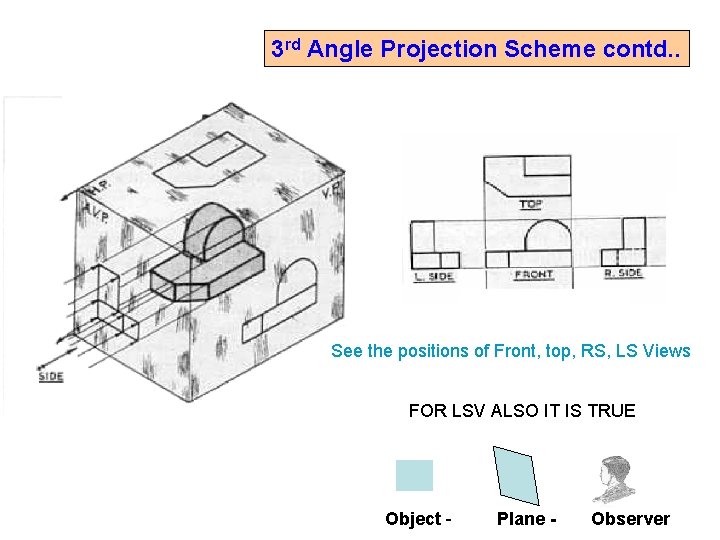
Revisit 3 rd Angle Projection Scheme This is Profile Plane Here too Observer – Plane - Object - Plane - Observer RECAP of Concept

3 rd Angle Projection Scheme contd. . See the positions of Front, top, RS, LS Views FOR LSV ALSO IT IS TRUE Object - Plane - Observer

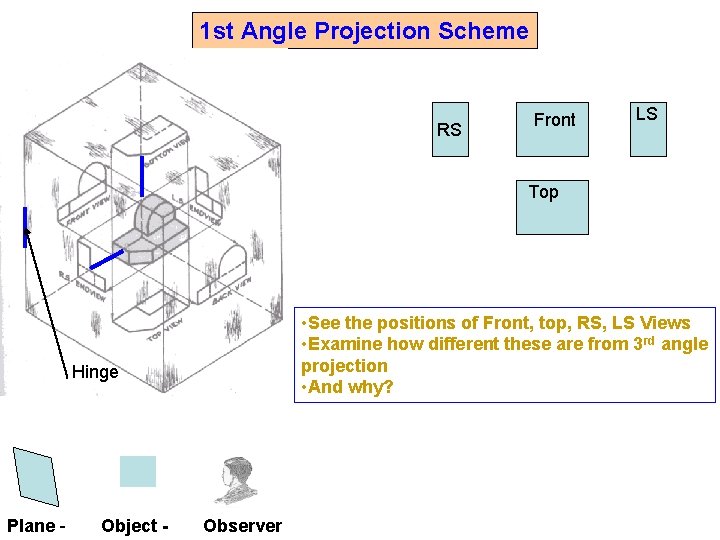
1 st Angle Projection Scheme RS Front LS Top • See the positions of Front, top, RS, LS Views • Examine how different these are from 3 rd angle projection • And why? Hinge Plane - Object - Observer

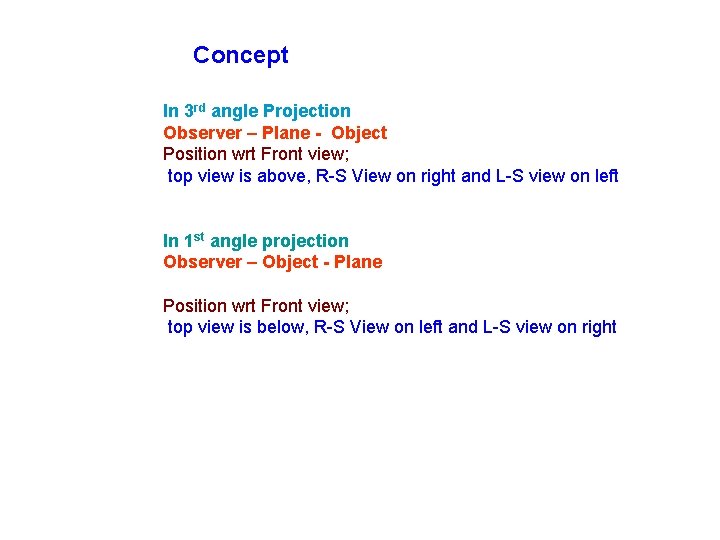
Concept In 3 rd angle Projection Observer – Plane - Object Position wrt Front view; top view is above, R-S View on right and L-S view on left In 1 st angle projection Observer – Object - Plane Position wrt Front view; top view is below, R-S View on left and L-S view on right

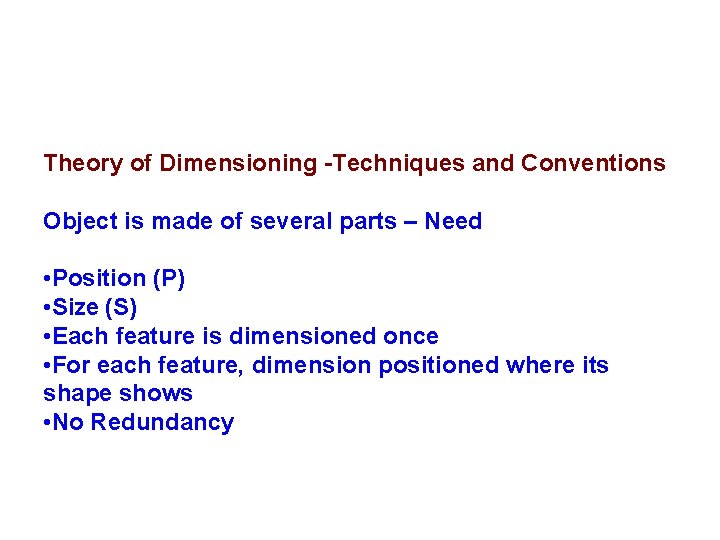
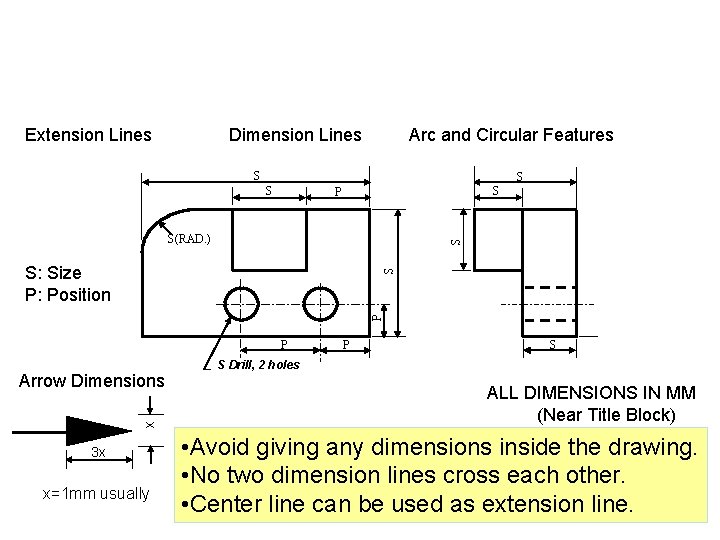
Theory of Dimensioning -Techniques and Conventions Object is made of several parts – Need • Position (P) • Size (S) • Each feature is dimensioned once • For each feature, dimension positioned where its shape shows • No Redundancy

Extension Lines Dimension Lines Arc and Circular Features S S P S S(RAD. ) P S S: Size P: Position P Arrow Dimensions x 3 x x=1 mm usually P S S Drill, 2 holes ALL DIMENSIONS IN MM (Near Title Block) • Avoid giving any dimensions inside the drawing. • No two dimension lines cross each other. • Center line can be used as extension line.

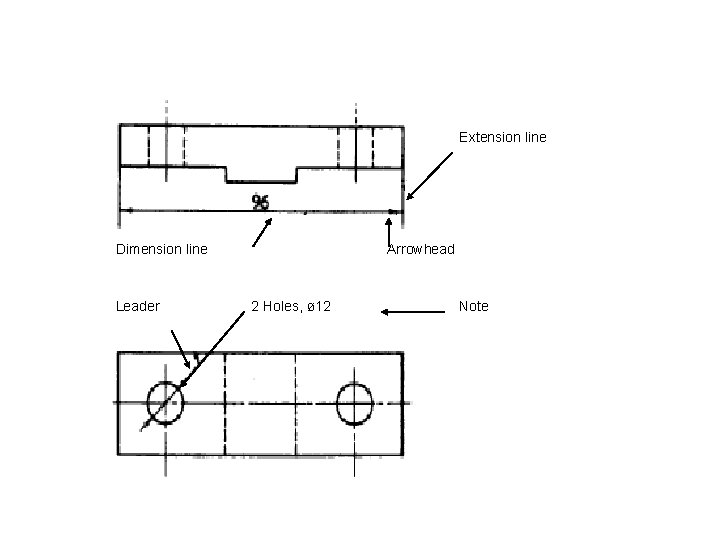
Extension line Dimension line Leader Arrowhead 2 Holes, ø 12 Note

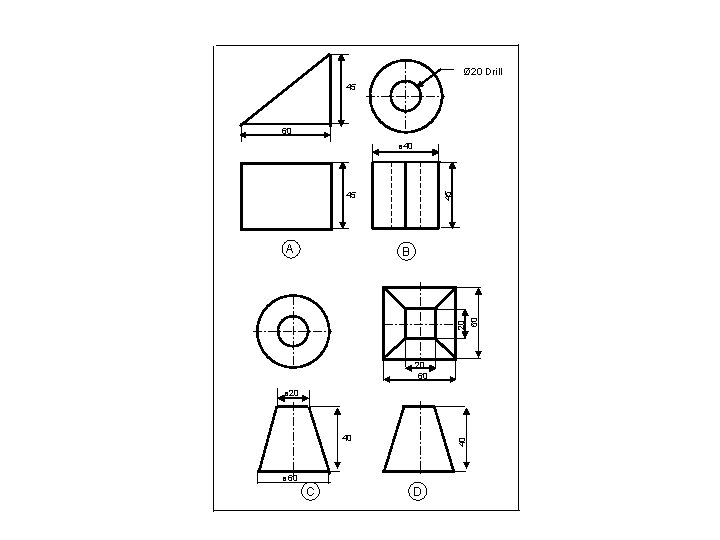
Ø 20 Drill 45 60 ø 40 A 45 45 20 60 B 20 60 ø 20 40 40 ø 60 C D

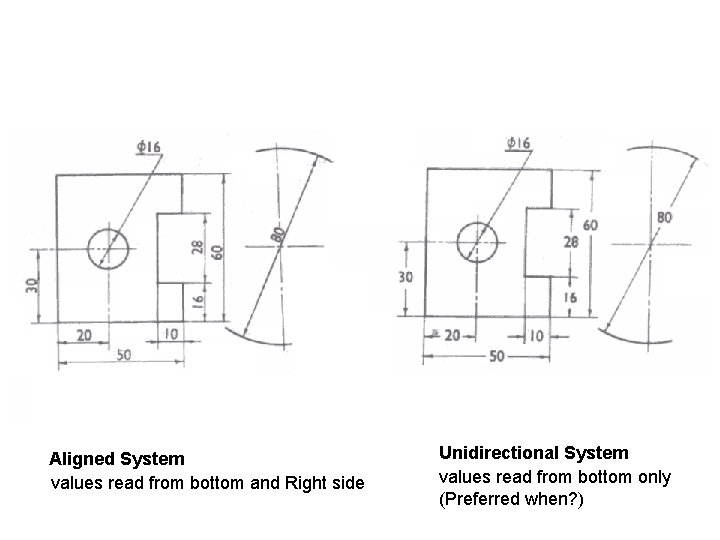
Aligned System values read from bottom and Right side Unidirectional System values read from bottom only (Preferred when? )

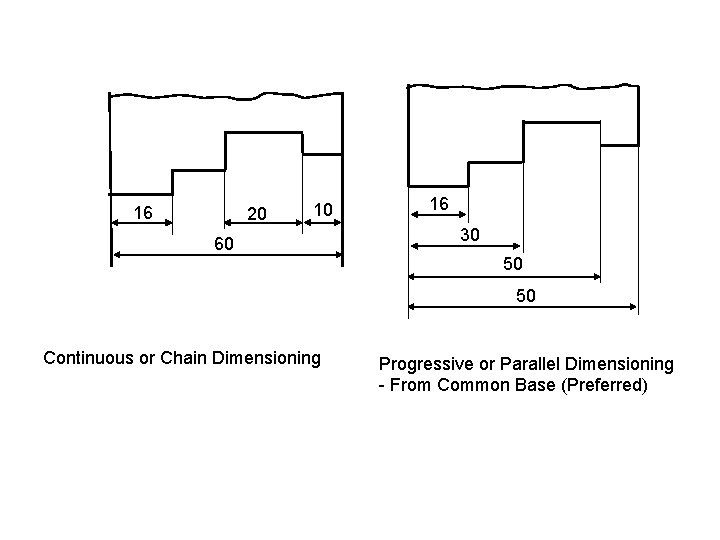
16 20 10 60 16 30 50 50 Continuous or Chain Dimensioning Progressive or Parallel Dimensioning - From Common Base (Preferred)

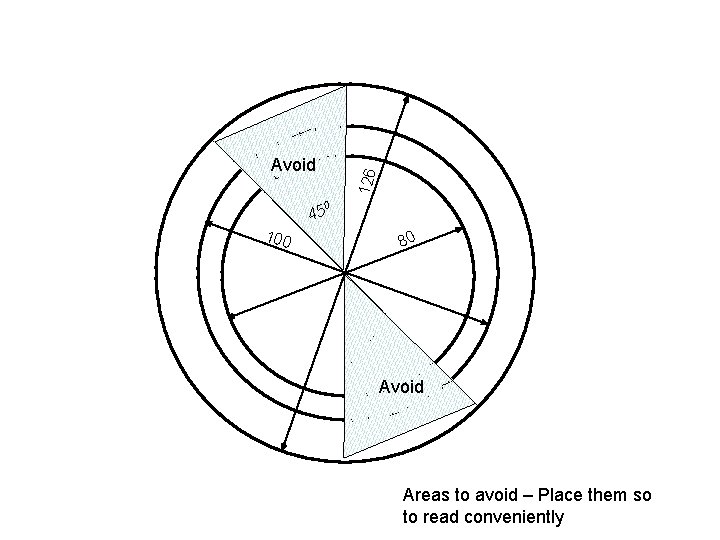
126 Avoid 0 45 100 80 Avoid Areas to avoid – Place them so to read conveniently

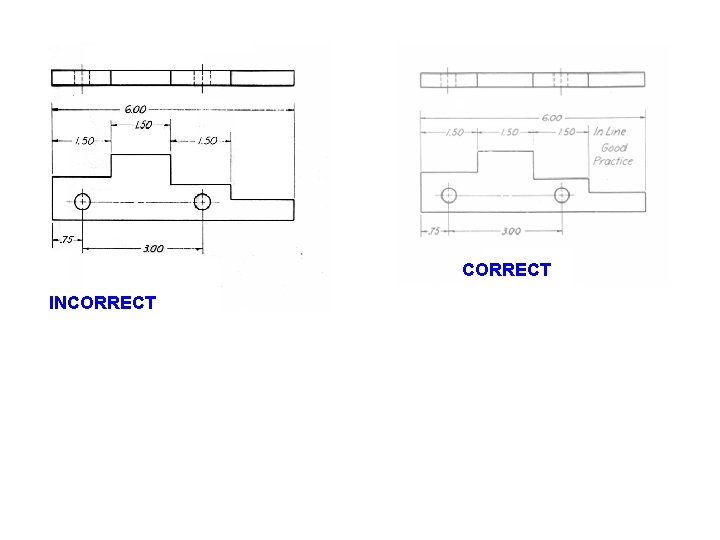
CORRECT INCORRECT

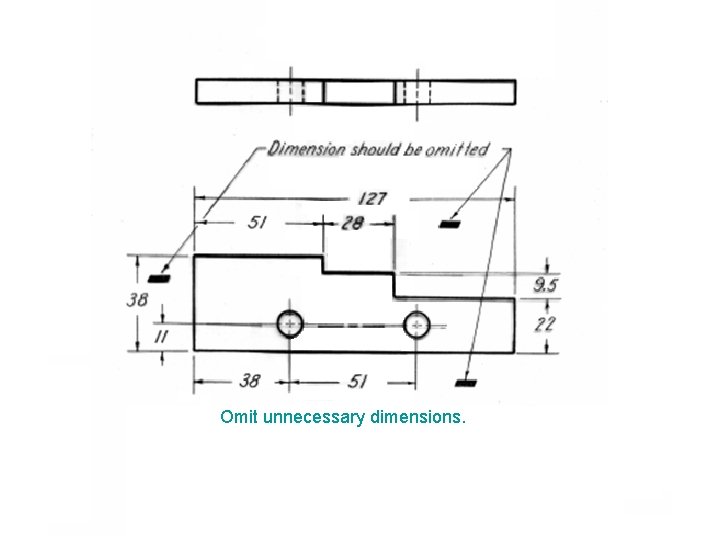
Omit unnecessary dimensions.

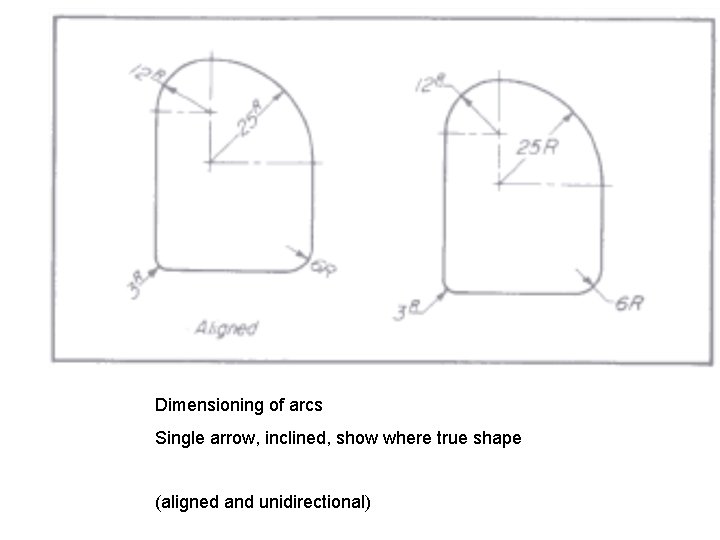
Dimensioning of arcs Single arrow, inclined, show where true shape (aligned and unidirectional)

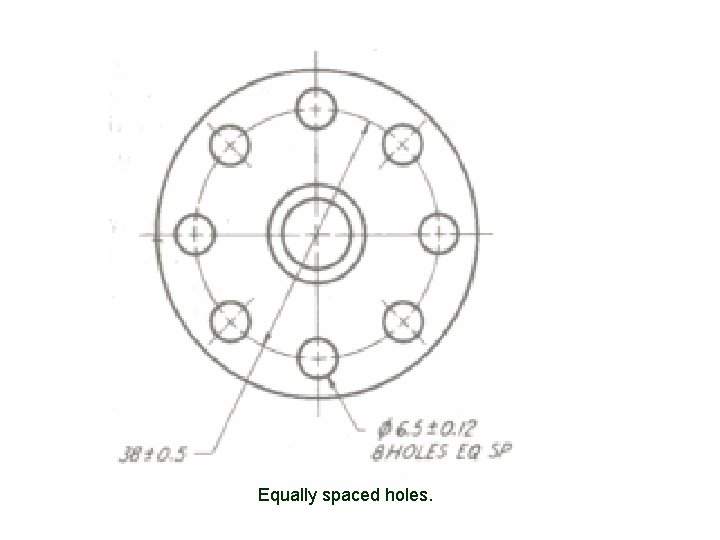
Equally spaced holes.

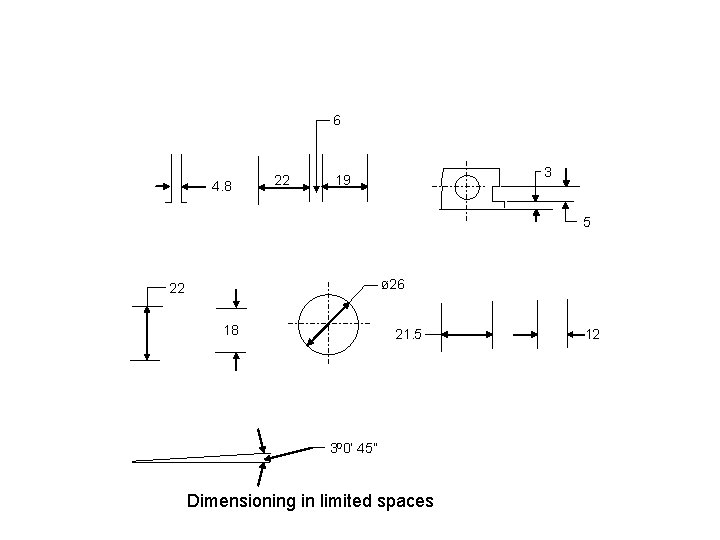
6 4. 8 22 3 19 5 ø 26 22 18 21. 5 300’ 45” Dimensioning in limited spaces 12

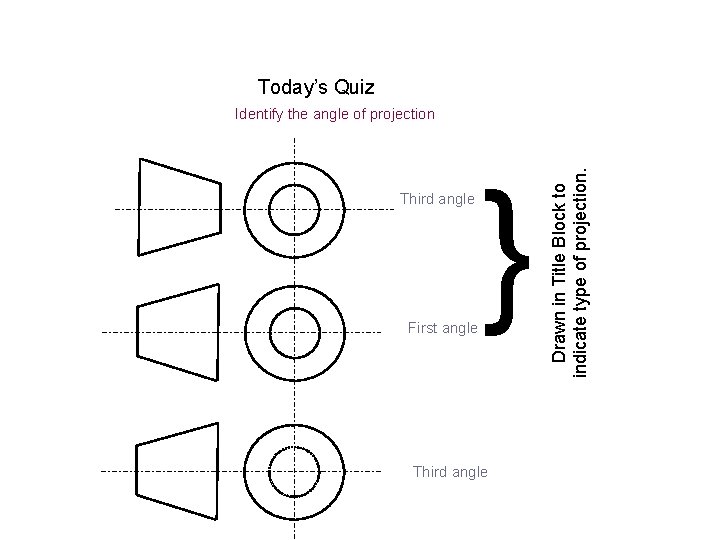
Today’s Quiz Third angle First angle } Third angle Drawn in Title Block to indicate type of projection. Identify the angle of projection