Lecture 17 Solid Works LOFT REVOLVE SWEEP Canada
- Slides: 37

Lecture 17: Solid. Works LOFT, REVOLVE, SWEEP Canada College Engr 210

Loft Feature Overview Blends multiple profiles together. A Loft feature can be a base, boss, or cut. To Create a Simple Loft Feature: 1. 2. Create the planes required for the profile sketches. Each sketch should be on a different plane. Sketch a profile on the first plane.

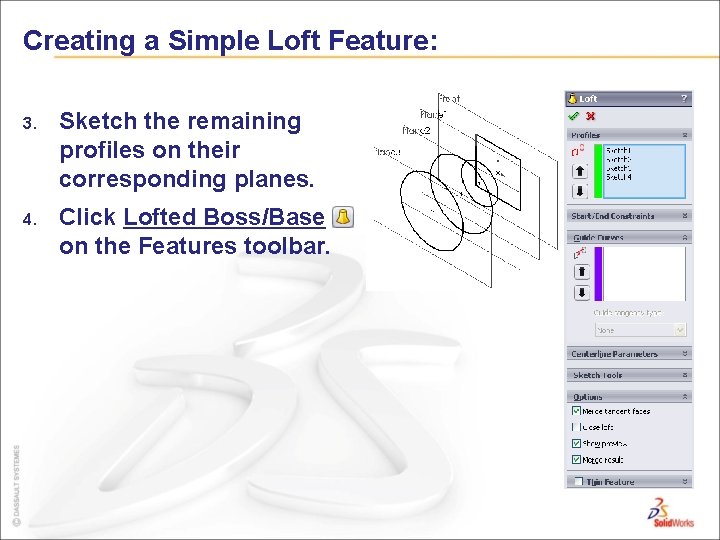
Creating a Simple Loft Feature: 3. Sketch the remaining profiles on their corresponding planes. 4. Click Lofted Boss/Base on the Features toolbar.

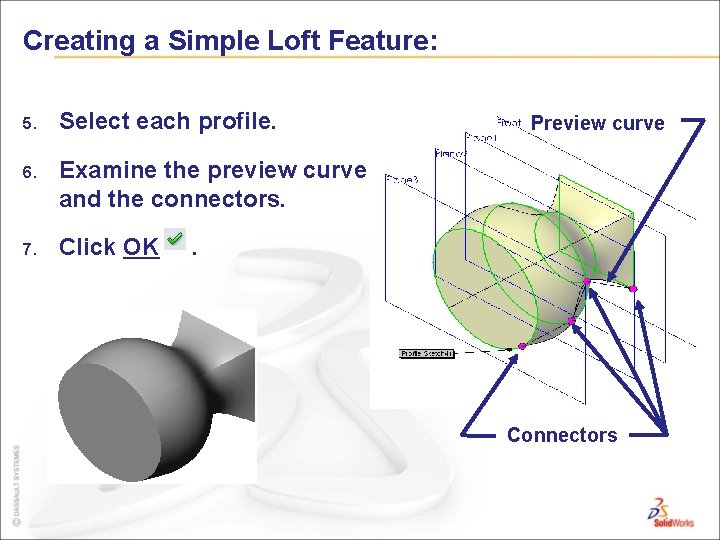
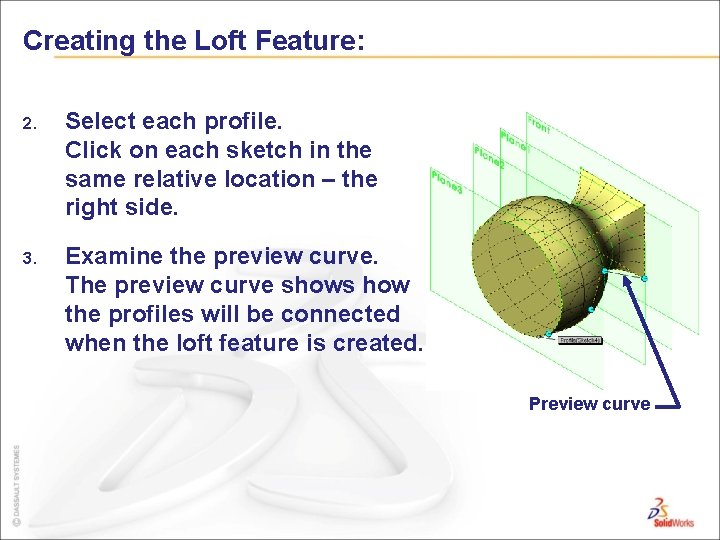
Creating a Simple Loft Feature: 5. Select each profile. 6. Examine the preview curve and the connectors. 7. Click OK Preview curve . Connectors

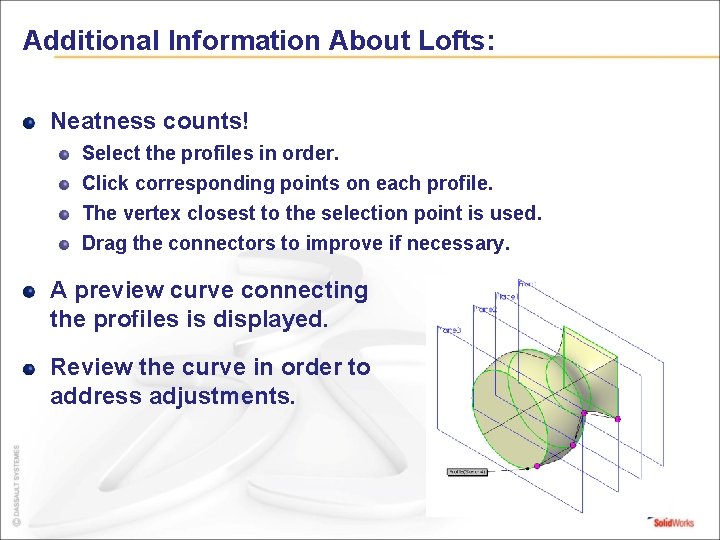
Additional Information About Lofts: Neatness counts! Select the profiles in order. Click corresponding points on each profile. The vertex closest to the selection point is used. Drag the connectors to improve if necessary. A preview curve connecting the profiles is displayed. Review the curve in order to address adjustments.

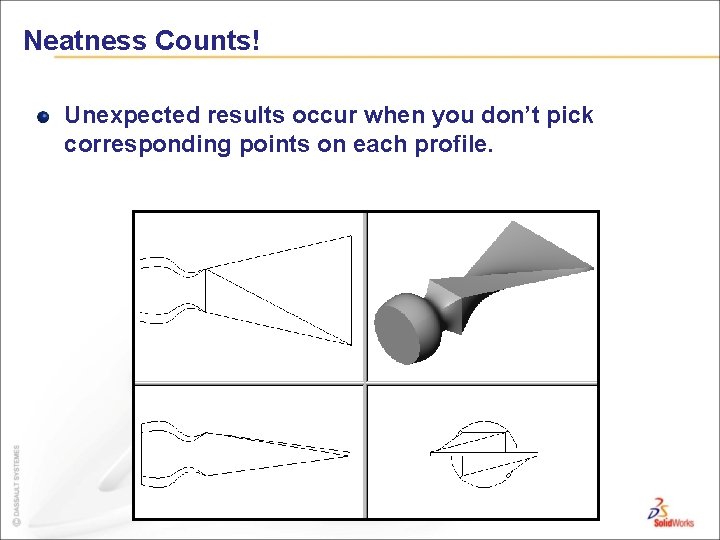
Neatness Counts! Unexpected results occur when you don’t pick corresponding points on each profile.

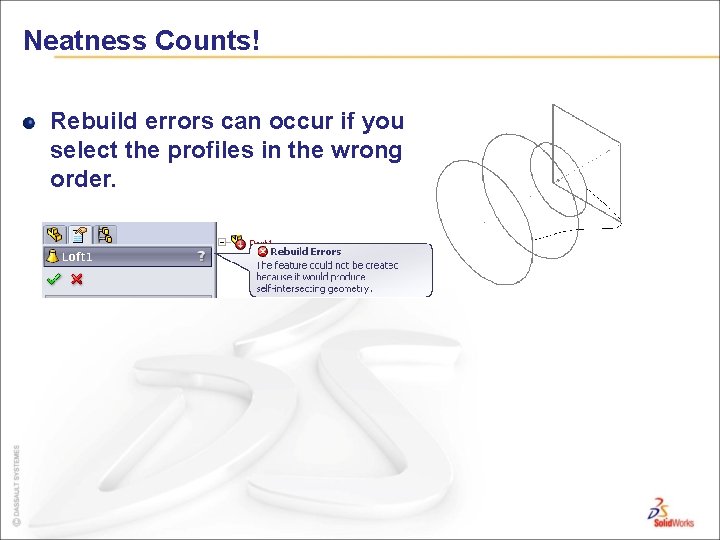
Neatness Counts! Rebuild errors can occur if you select the profiles in the wrong order.

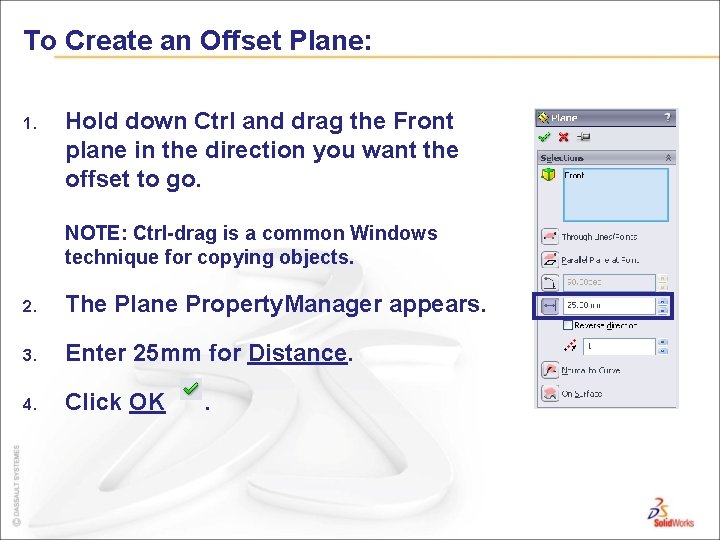
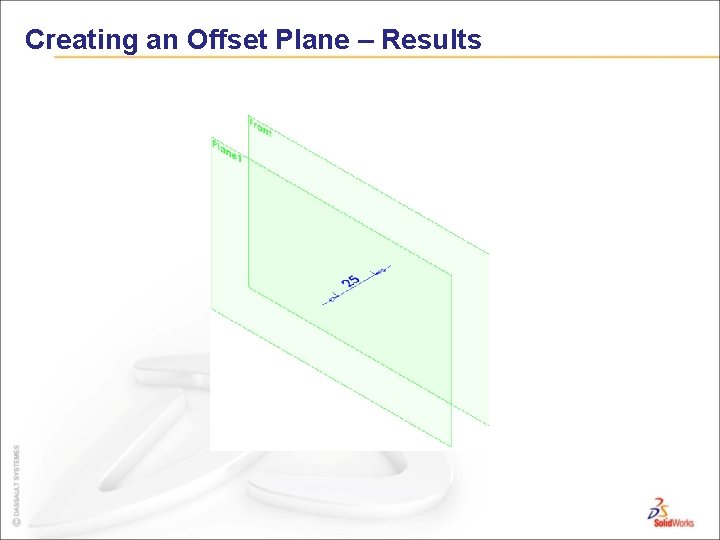
To Create an Offset Plane: 1. Hold down Ctrl and drag the Front plane in the direction you want the offset to go. NOTE: Ctrl-drag is a common Windows technique for copying objects. 2. The Plane Property. Manager appears. 3. Enter 25 mm for Distance. 4. Click OK .

Creating an Offset Plane – Results

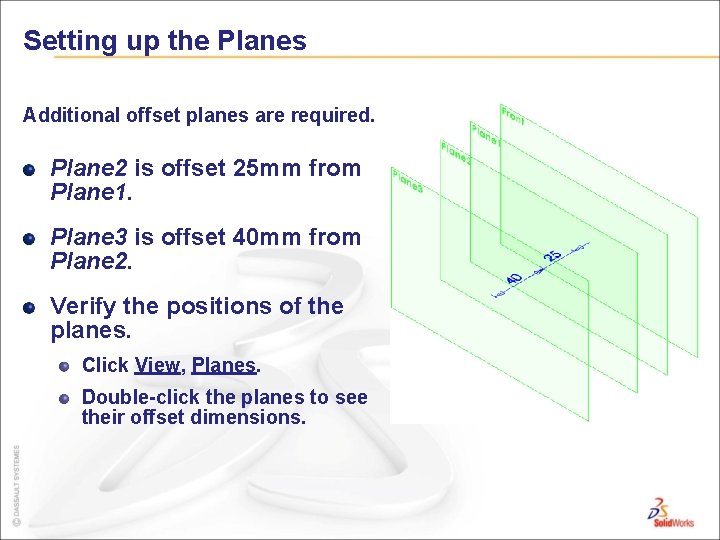
Setting up the Planes Additional offset planes are required. Plane 2 is offset 25 mm from Plane 1. Plane 3 is offset 40 mm from Plane 2. Verify the positions of the planes. Click View, Planes. Double-click the planes to see their offset dimensions.

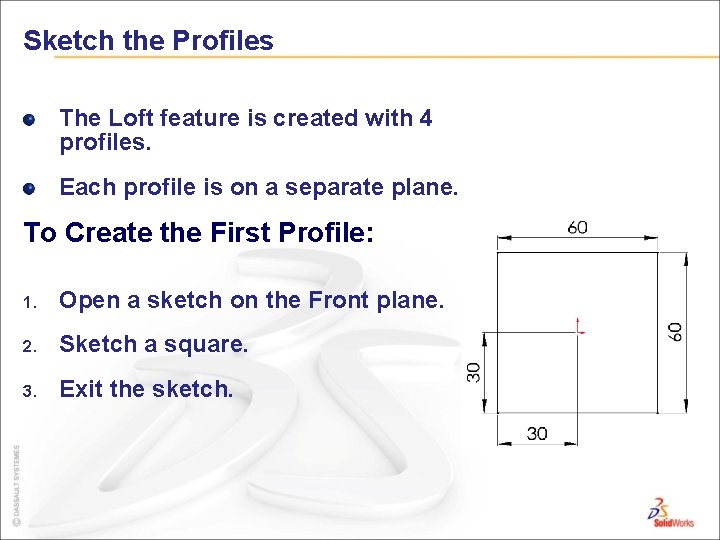
Sketch the Profiles The Loft feature is created with 4 profiles. Each profile is on a separate plane. To Create the First Profile: 1. Open a sketch on the Front plane. 2. Sketch a square. 3. Exit the sketch.

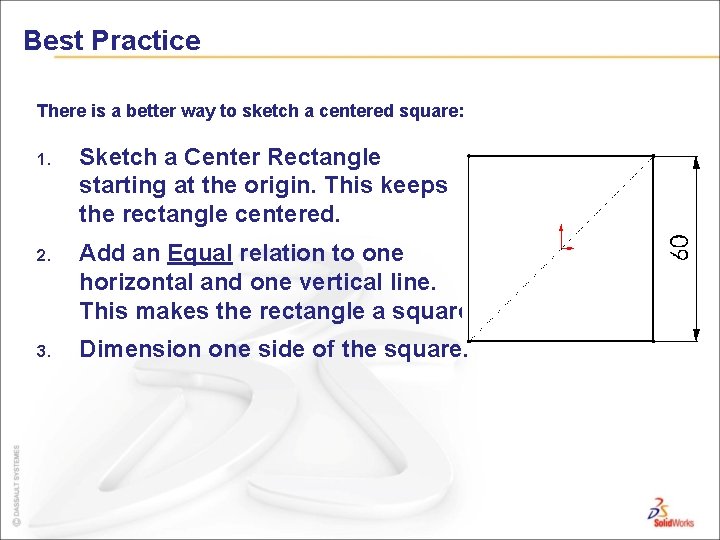
Best Practice There is a better way to sketch a centered square: 1. Sketch a Center Rectangle starting at the origin. This keeps the rectangle centered. 2. Add an Equal relation to one horizontal and one vertical line. This makes the rectangle a square. 3. Dimension one side of the square.

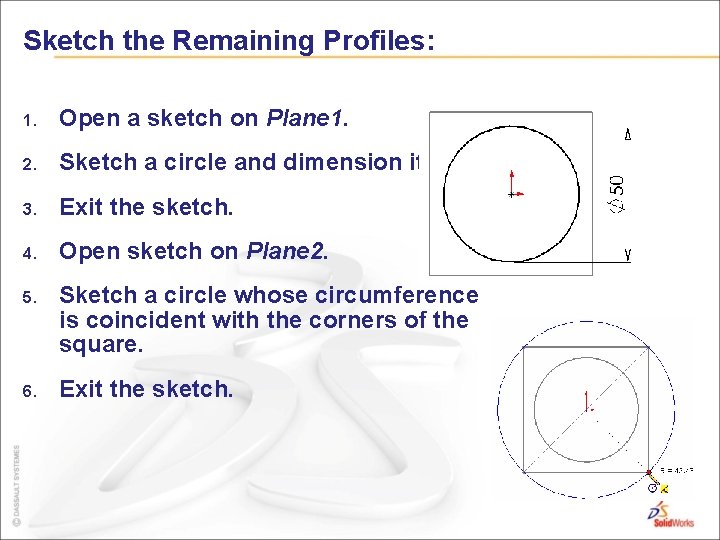
Sketch the Remaining Profiles: 1. Open a sketch on Plane 1. 2. Sketch a circle and dimension it. 3. Exit the sketch. 4. Open sketch on Plane 2. 5. Sketch a circle whose circumference is coincident with the corners of the square. 6. Exit the sketch.

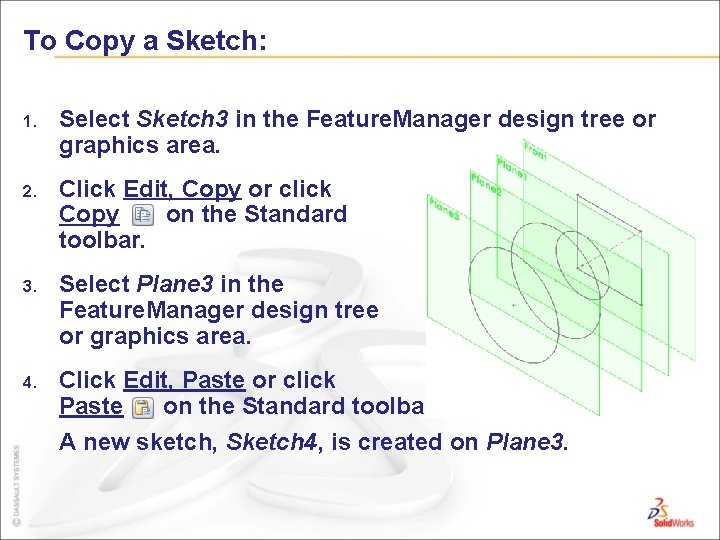
To Copy a Sketch: 1. Select Sketch 3 in the Feature. Manager design tree or graphics area. 2. Click Edit, Copy or click Copy on the Standard toolbar. 3. Select Plane 3 in the Feature. Manager design tree or graphics area. 4. Click Edit, Paste or click Paste on the Standard toolbar. A new sketch, Sketch 4, is created on Plane 3.

More About Copying Sketches External relations are deleted. For example, when you copied Sketch 3, the geometric relations locating the center and defining the circumference were deleted. Therefore, Sketch 4 is underdefined. To fully define Sketch 4, add a Coradial relation between the copied circle and the original. If you sketch a profile on the wrong plane, move it to the correct plane using Edit Sketch Plane. Do not copy it.

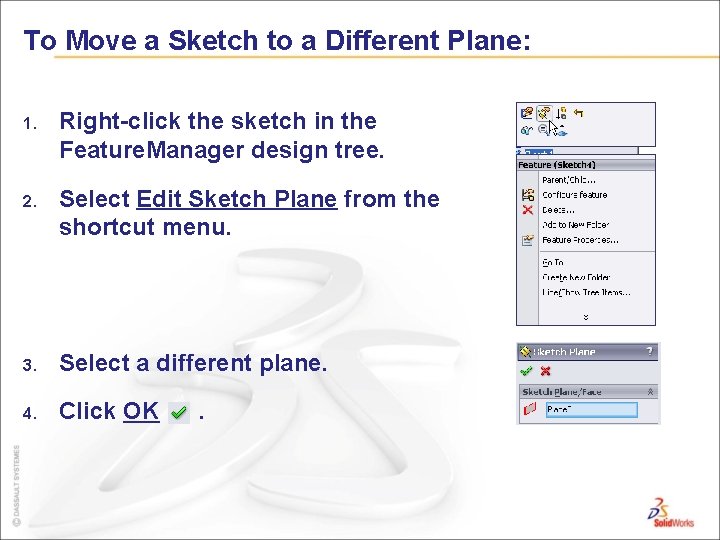
To Move a Sketch to a Different Plane: 1. Right-click the sketch in the Feature. Manager design tree. 2. Select Edit Sketch Plane from the shortcut menu. 3. Select a different plane. 4. Click OK .

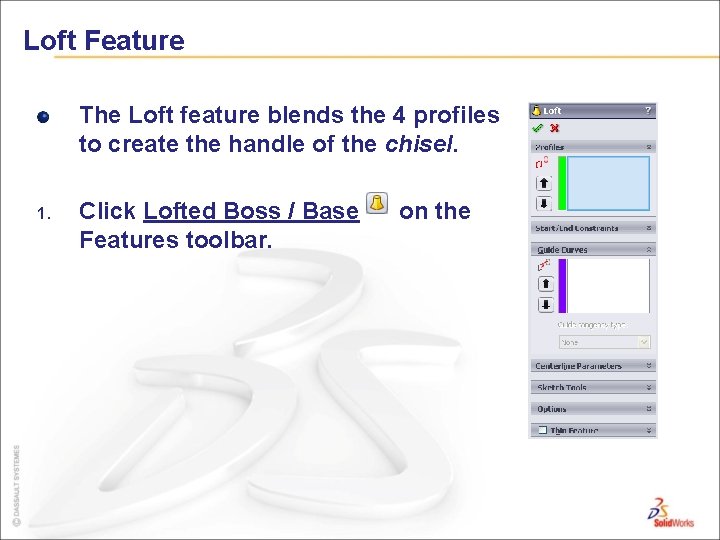
Loft Feature The Loft feature blends the 4 profiles to create the handle of the chisel. 1. Click Lofted Boss / Base Features toolbar. on the

Creating the Loft Feature: 2. Select each profile. Click on each sketch in the same relative location – the right side. 3. Examine the preview curve. The preview curve shows how the profiles will be connected when the loft feature is created. Preview curve

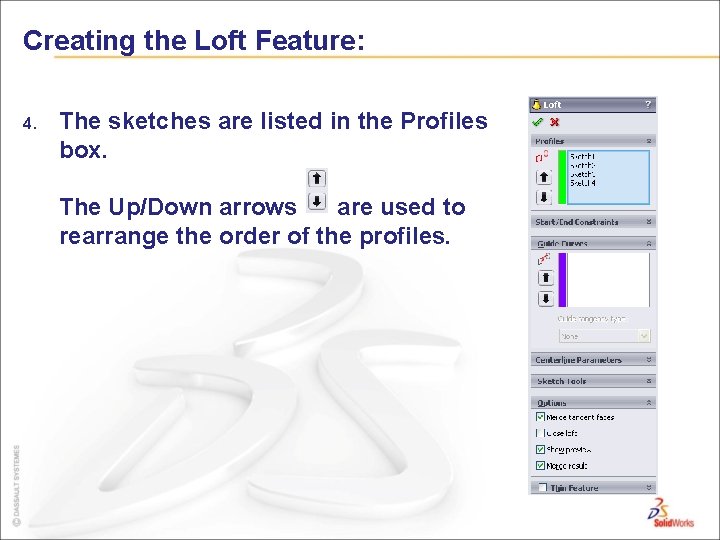
Creating the Loft Feature: 4. The sketches are listed in the Profiles box. The Up/Down arrows are used to rearrange the order of the profiles.

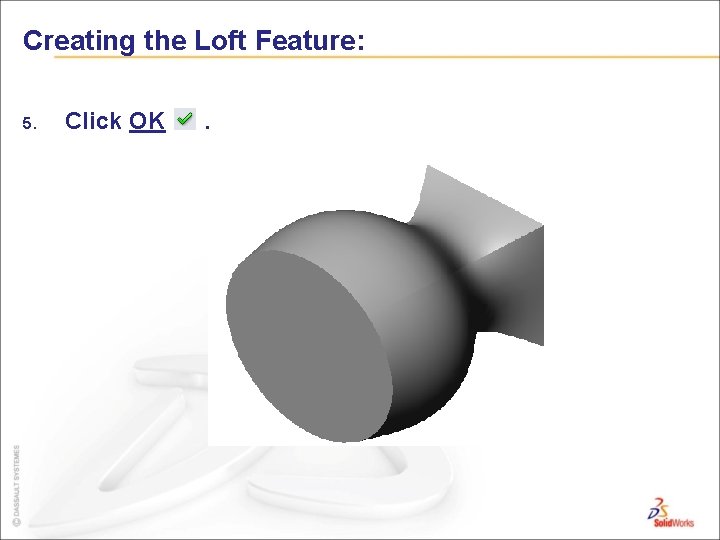
Creating the Loft Feature: 5. Click OK .

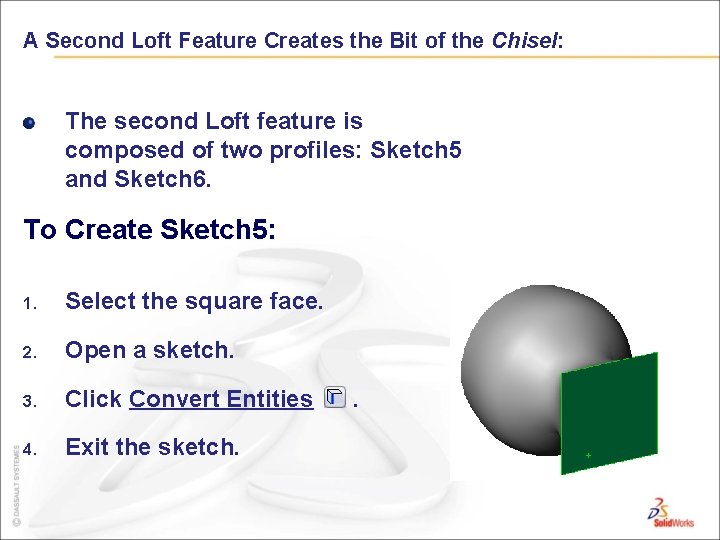
A Second Loft Feature Creates the Bit of the Chisel: The second Loft feature is composed of two profiles: Sketch 5 and Sketch 6. To Create Sketch 5: 1. Select the square face. 2. Open a sketch. 3. Click Convert Entities 4. Exit the sketch. .

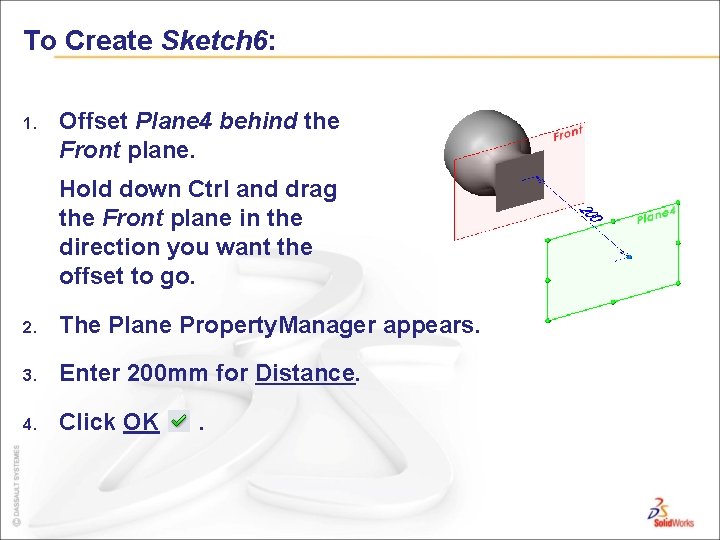
To Create Sketch 6: 1. Offset Plane 4 behind the Front plane. Hold down Ctrl and drag the Front plane in the direction you want the offset to go. 2. The Plane Property. Manager appears. 3. Enter 200 mm for Distance. 4. Click OK .

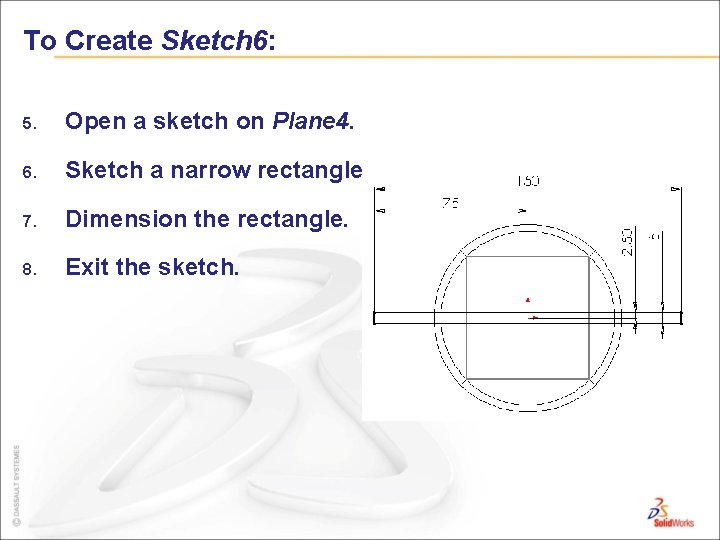
To Create Sketch 6: 5. Open a sketch on Plane 4. 6. Sketch a narrow rectangle. 7. Dimension the rectangle. 8. Exit the sketch.

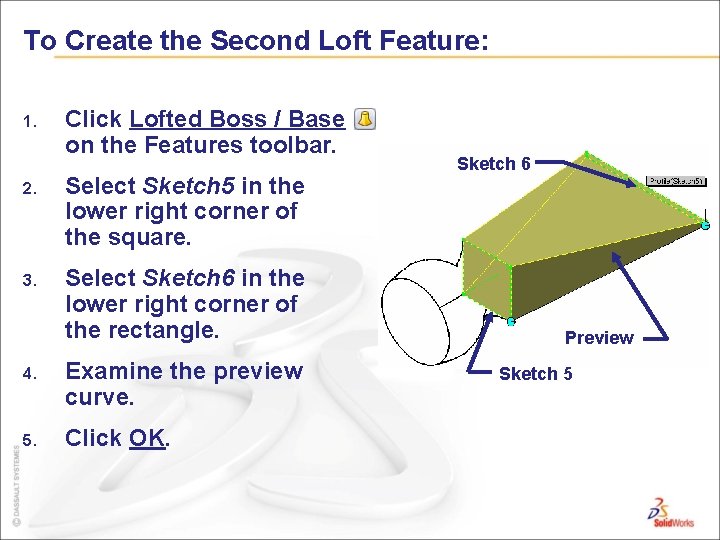
To Create the Second Loft Feature: 1. Click Lofted Boss / Base on the Features toolbar. 2. Select Sketch 5 in the lower right corner of the square. 3. Select Sketch 6 in the lower right corner of the rectangle. 4. Examine the preview curve. 5. Click OK. Sketch 6 Preview Sketch 5

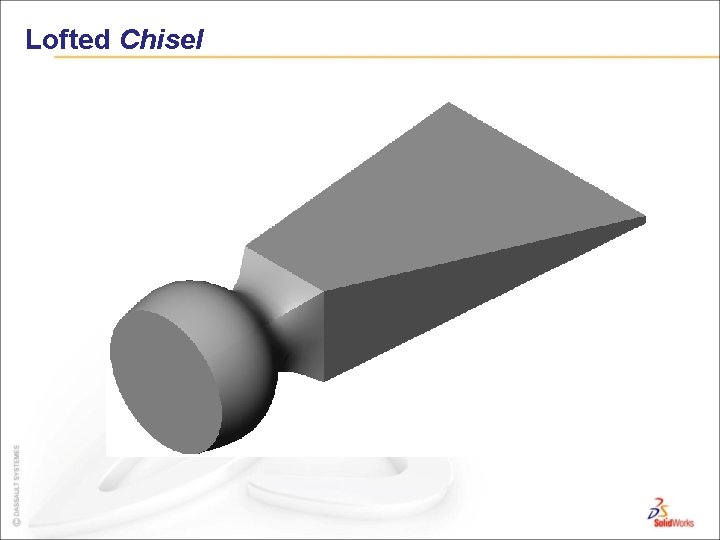
Lofted Chisel

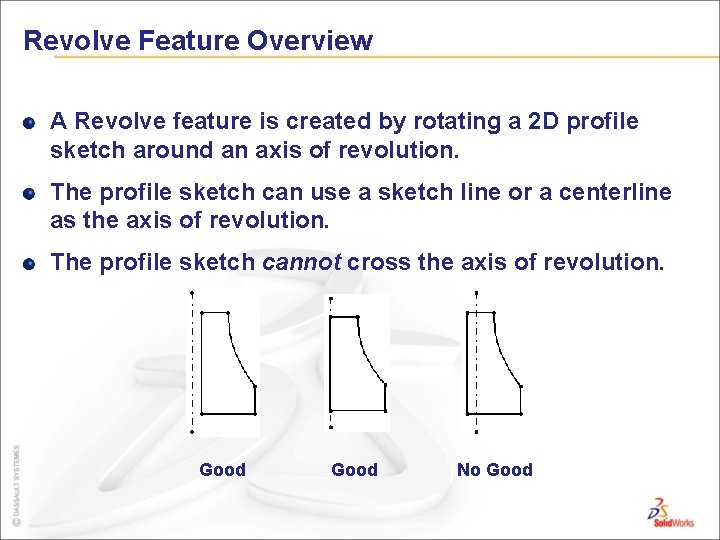
Revolve Feature Overview A Revolve feature is created by rotating a 2 D profile sketch around an axis of revolution. The profile sketch can use a sketch line or a centerline as the axis of revolution. The profile sketch cannot cross the axis of revolution. Good No Good

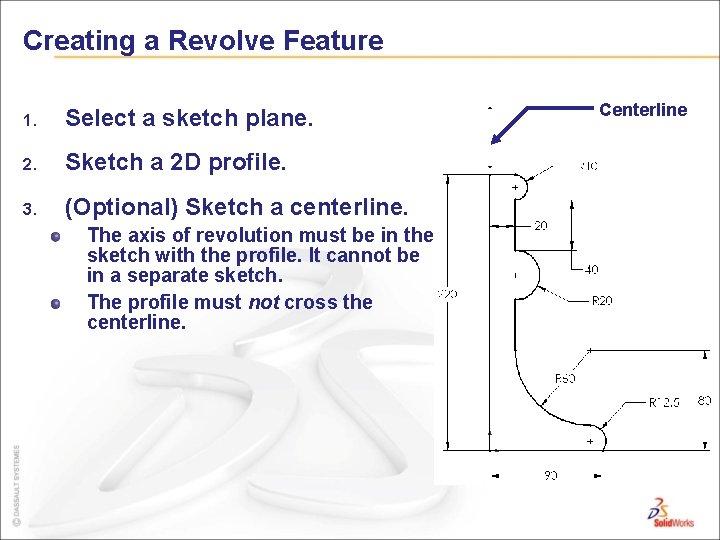
Creating a Revolve Feature 1. Select a sketch plane. 2. Sketch a 2 D profile. 3. (Optional) Sketch a centerline. The axis of revolution must be in the sketch with the profile. It cannot be in a separate sketch. The profile must not cross the centerline. Centerline

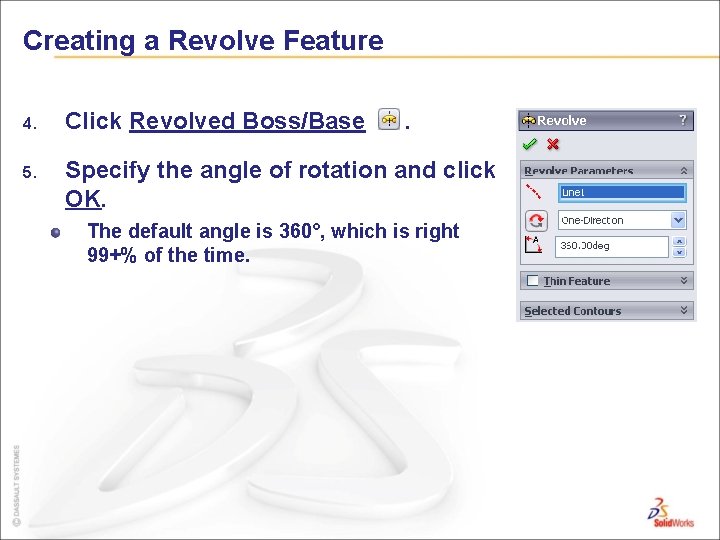
Creating a Revolve Feature 4. Click Revolved Boss/Base . 5. Specify the angle of rotation and click OK. The default angle is 360°, which is right 99+% of the time.

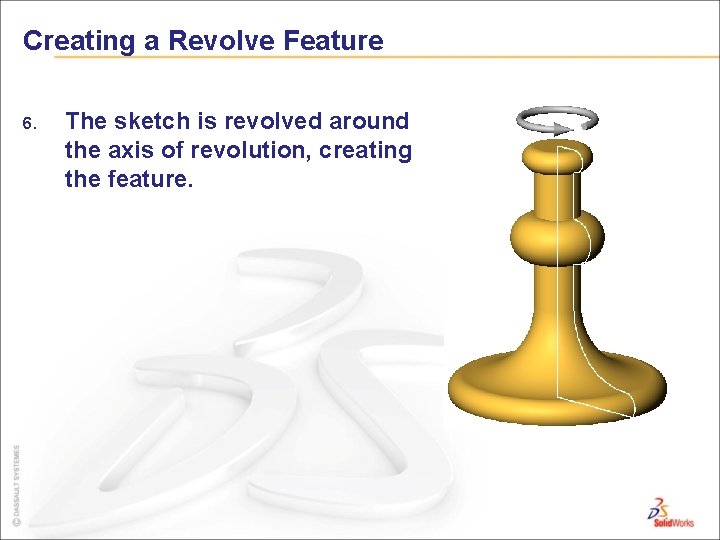
Creating a Revolve Feature 6. The sketch is revolved around the axis of revolution, creating the feature.

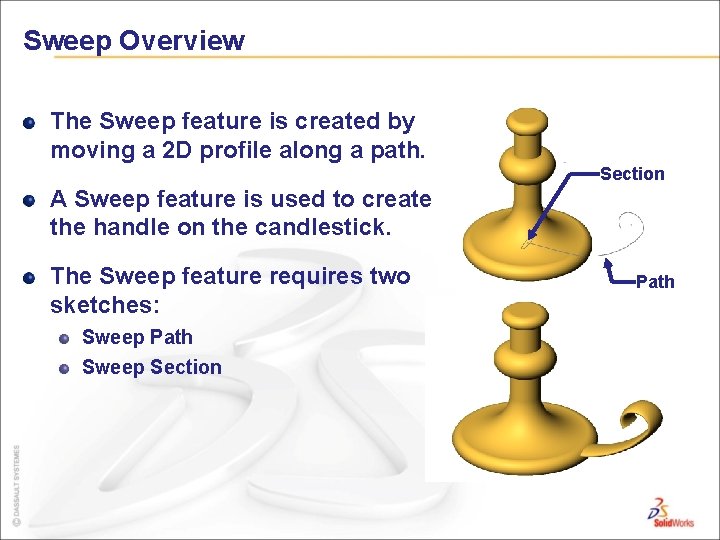
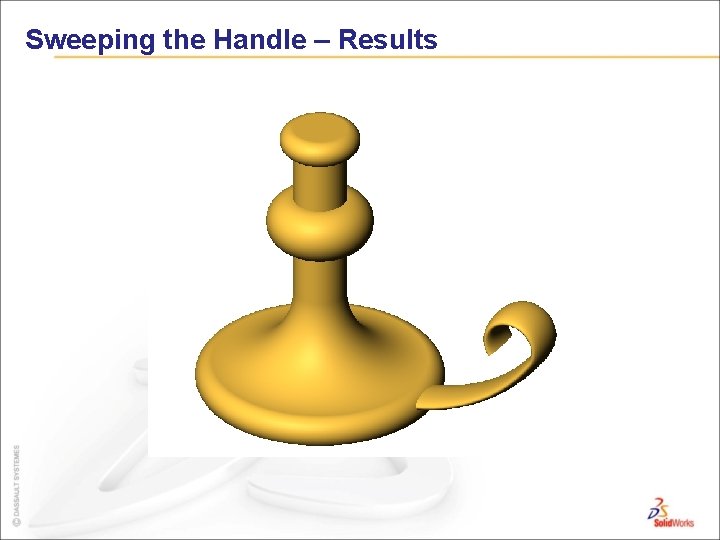
Sweep Overview The Sweep feature is created by moving a 2 D profile along a path. Section A Sweep feature is used to create the handle on the candlestick. The Sweep feature requires two sketches: Sweep Path Sweep Section Path

Sweep Overview – Rules The sweep path is a set of sketched curves contained in a sketch, a curve, or a set of model edges. The sweep section must be a closed contour. The start point of the path must lie on the plane of the sweep section. The section, path or the resulting solid cannot be self-intersecting.

Sweep Overview – Tips Make the sweep path first. Then make the section. Create small cross sections away from other part geometry. Then move the sweep section into position by adding a Coincident or Pierce relation to the end of the sweep path.

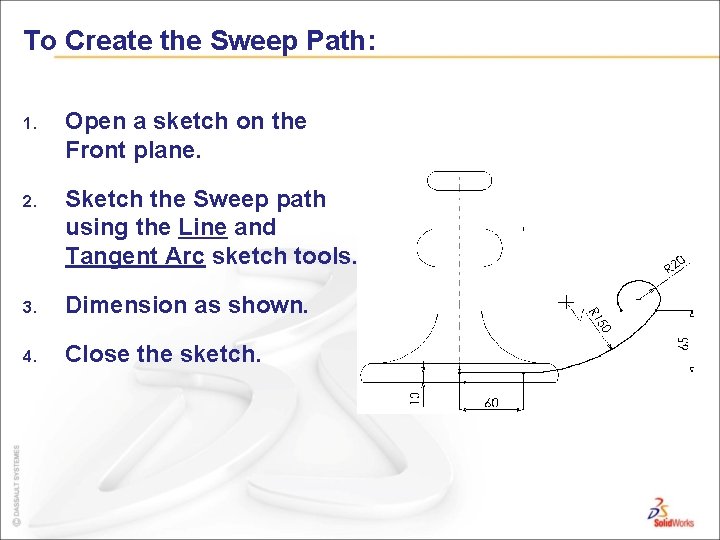
To Create the Sweep Path: 1. Open a sketch on the Front plane. 2. Sketch the Sweep path using the Line and Tangent Arc sketch tools. 3. Dimension as shown. 4. Close the sketch.

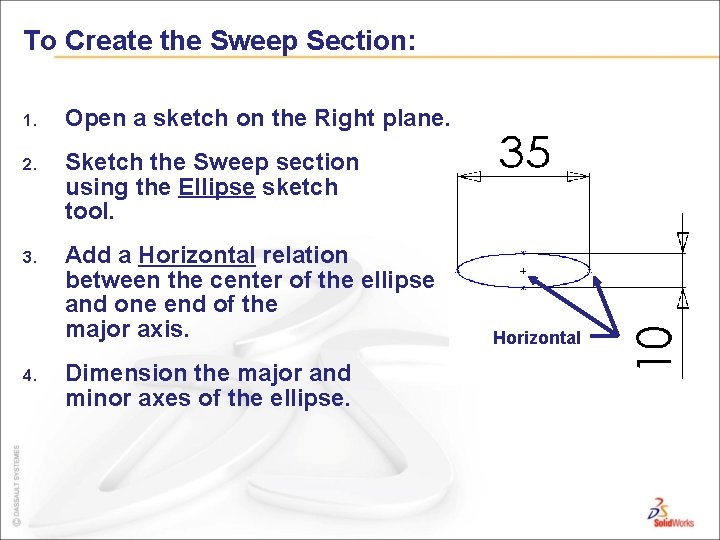
To Create the Sweep Section: 1. Open a sketch on the Right plane. 2. Sketch the Sweep section using the Ellipse sketch tool. 3. Add a Horizontal relation between the center of the ellipse and one end of the major axis. 4. Dimension the major and minor axes of the ellipse. Horizontal

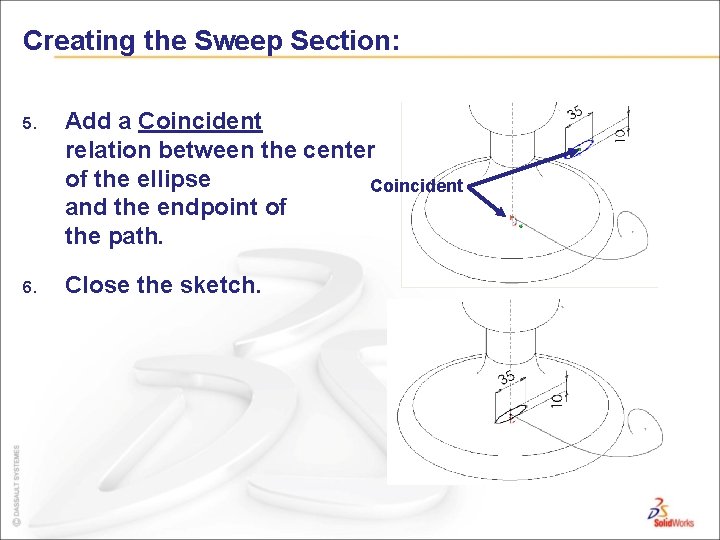
Creating the Sweep Section: 5. Add a Coincident relation between the center of the ellipse Coincident and the endpoint of the path. 6. Close the sketch.

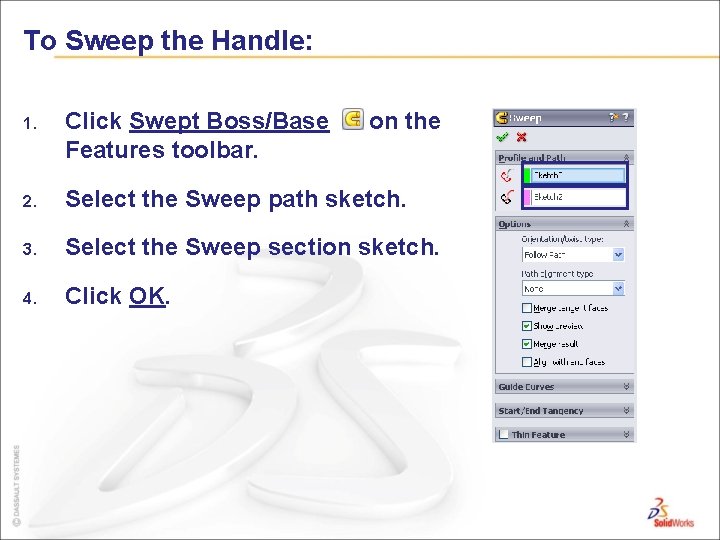
To Sweep the Handle: 1. Click Swept Boss/Base Features toolbar. on the 2. Select the Sweep path sketch. 3. Select the Sweep section sketch. 4. Click OK.

Sweeping the Handle – Results