Lecture 16 TA 101 A Engineering Graphics 2018
- Slides: 18

Lecture 16 TA 101 A Engineering Graphics 2018 -19 -I By Dr. Mukesh Sharma Professor DEPARTMENT OF CIVIL ENGINEERING INDIAN INSTITUTE OF TECHNOLOGY KANPUR-208016, INDIA

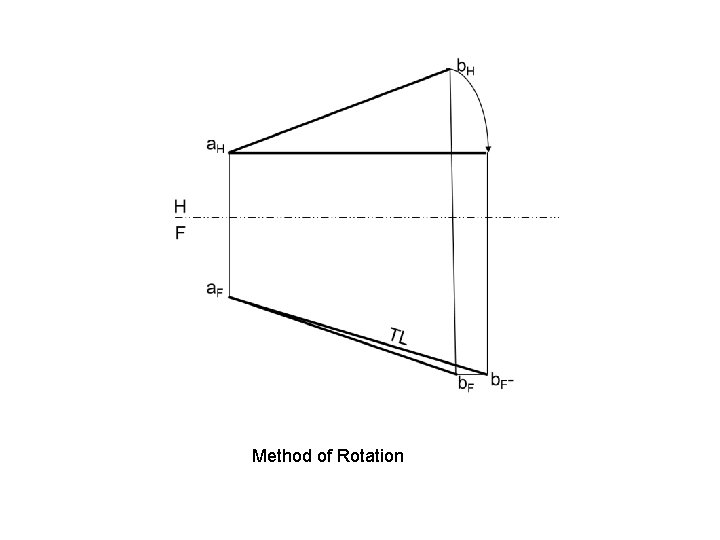
Method of Rotation

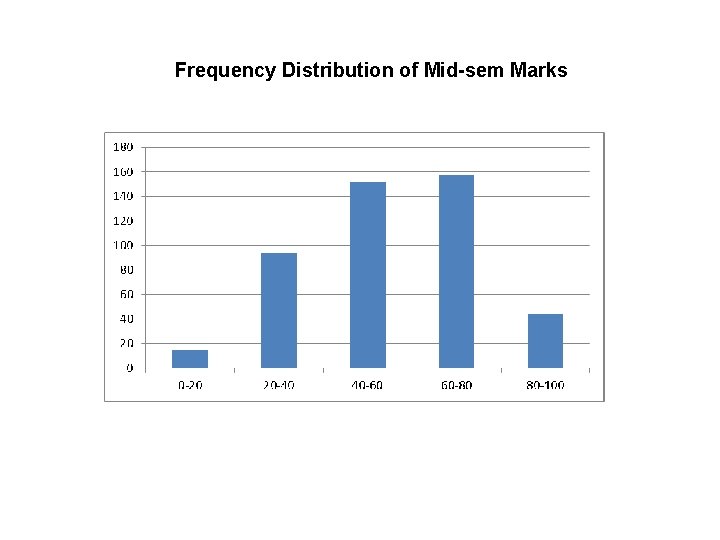
Frequency Distribution of Mid-sem Marks

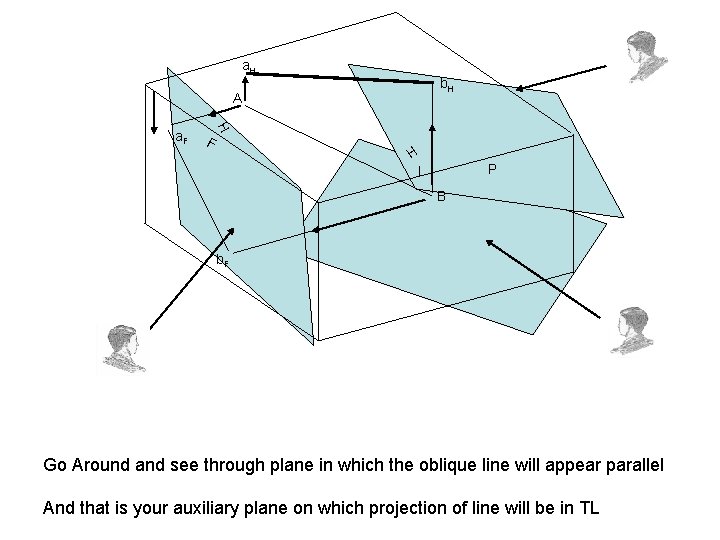
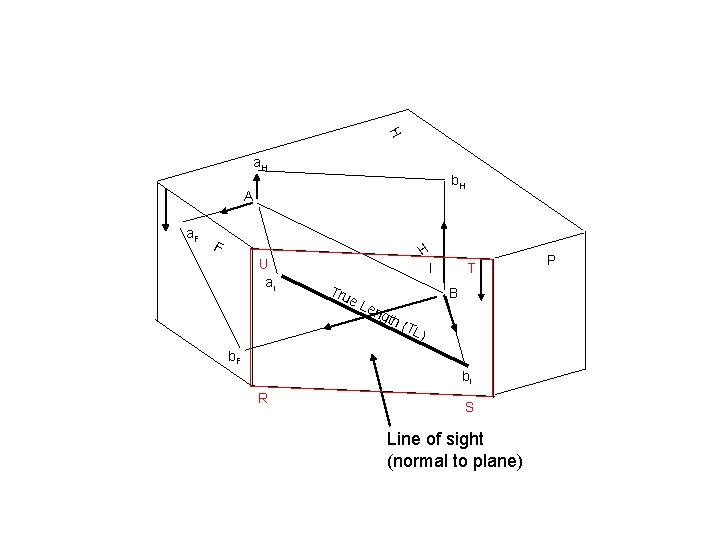
a. H b. H A H a. F F H I P B b. F Go Around and see through plane in which the oblique line will appear parallel And that is your auxiliary plane on which projection of line will be in TL

H a. H b. H A a. F F U ai H I Tru e. L eng T B th ( TL ) b. F bi R S Line of sight (normal to plane) P

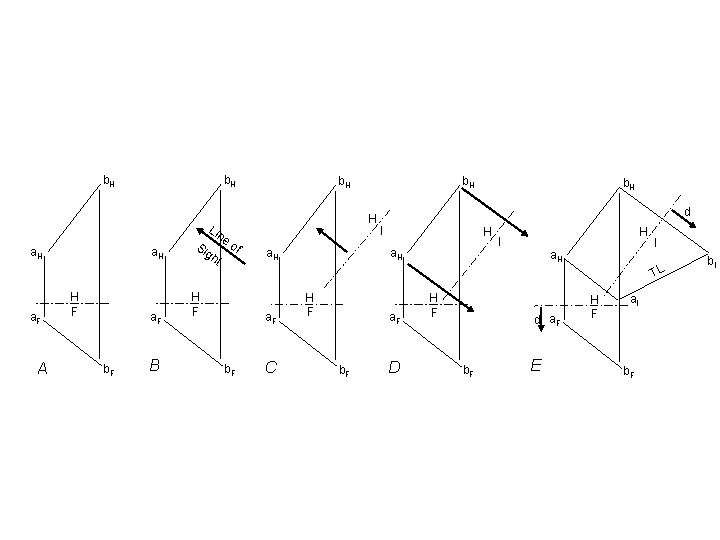
b. H a. F A b. H a. H H F a. F b. F B Lin eo Si f gh t H F b. H H a. H b. H d I H a. H H I a. H I TL a. F b. H C H F a. F b. F D H F d a. F b. F E H F a. I b. F b. I

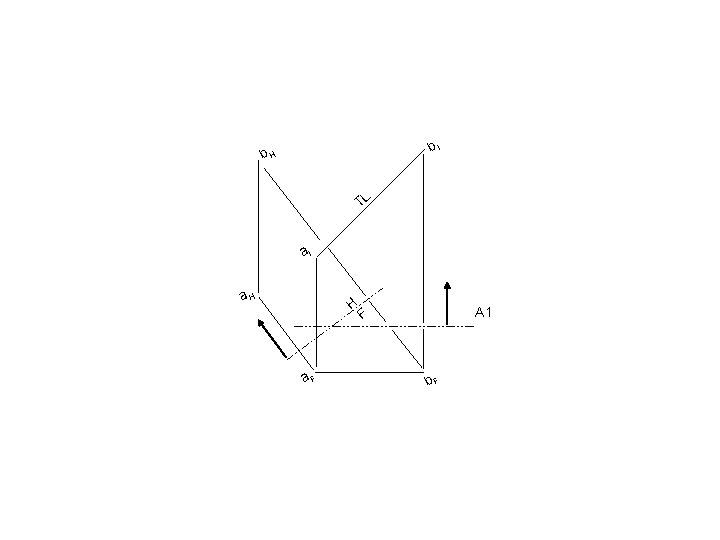
b. I b. H TL a. I a. H H a. F A 1 F b. F

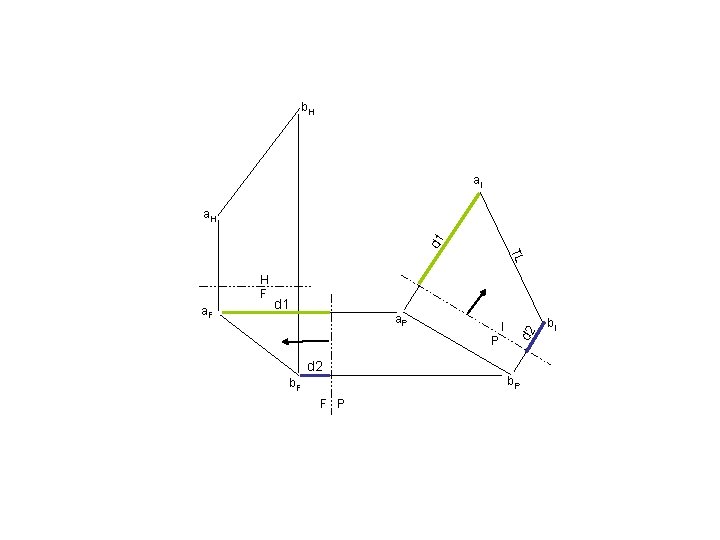
b. H a. I d 1 a. H a. F d 1 a. P I P d 2 b. F F P d 2 TL H F b. P b. I

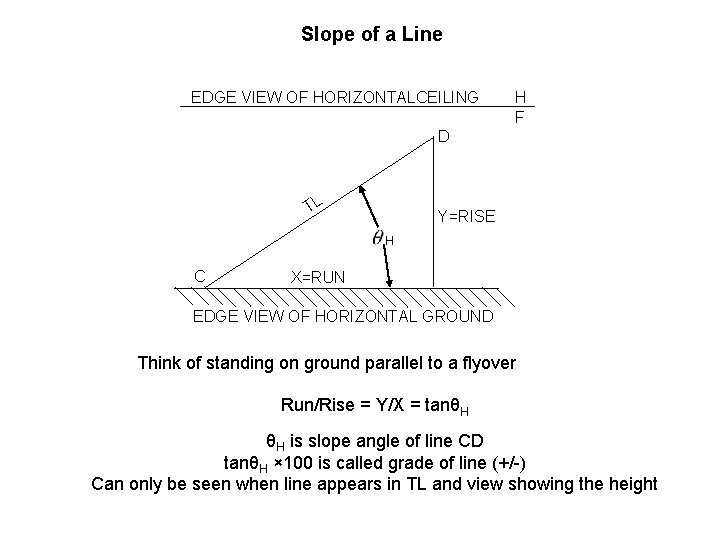
Slope of a Line EDGE VIEW OF HORIZONTALCEILING H F D TL Y=RISE H C X=RUN EDGE VIEW OF HORIZONTAL GROUND Think of standing on ground parallel to a flyover Run/Rise = Y/X = tanθH θH is slope angle of line CD tanθH × 100 is called grade of line (+/-) Can only be seen when line appears in TL and view showing the height

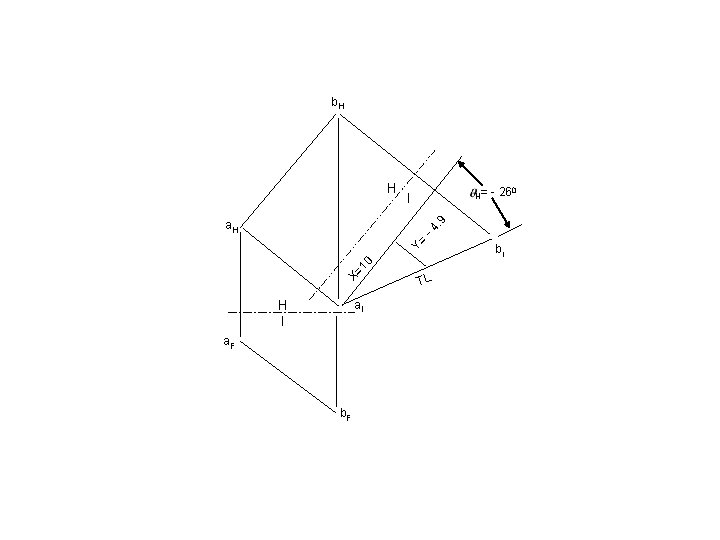
b. H H - 260 X= 10 Y= -4 . 9 a. H H= I a. I H I a. F b. F TL bi

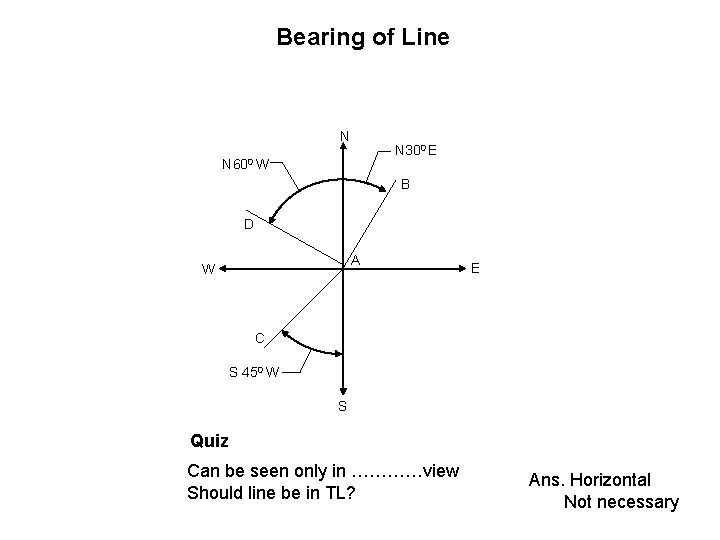
Bearing of Line N N 300 E N 600 W B D A W E C S 450 W S Quiz Can be seen only in …………view Should line be in TL? Ans. Horizontal Not necessary

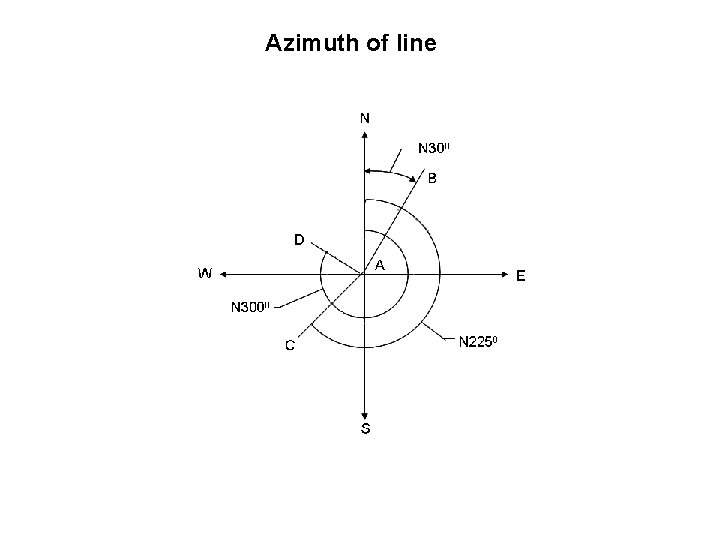
Azimuth of line

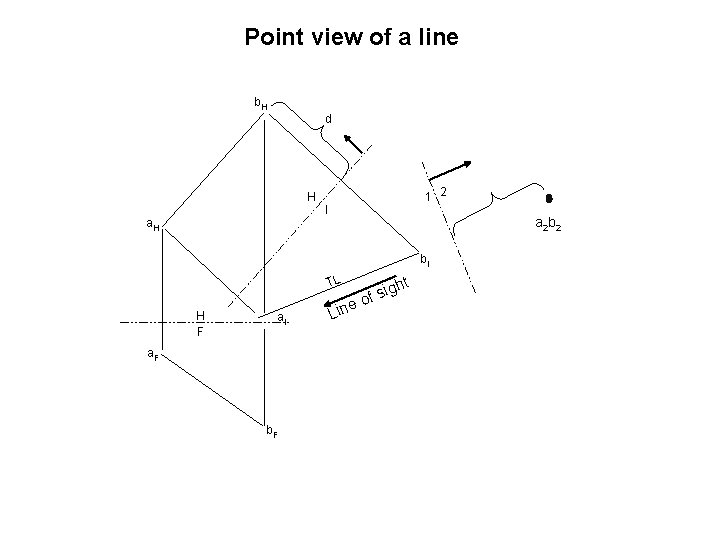
Point view of a line b. H d H a. H 1 2 I a 2 b 2 b. I TL H F a. I a. F b. F e Lin ht g i s of

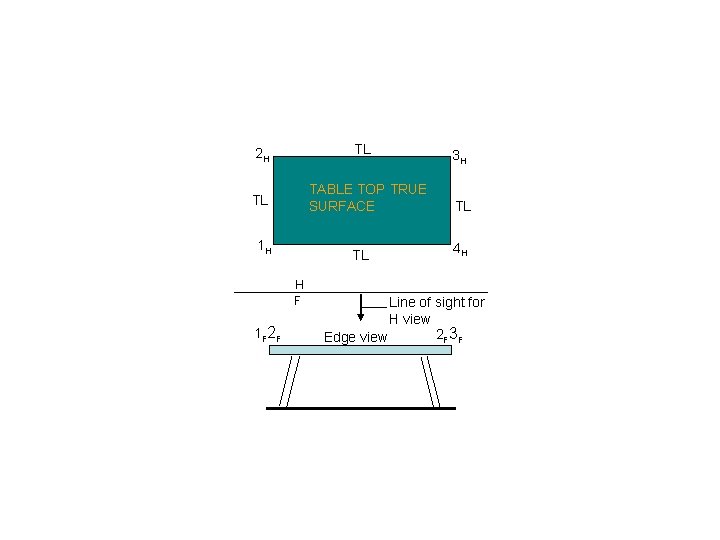
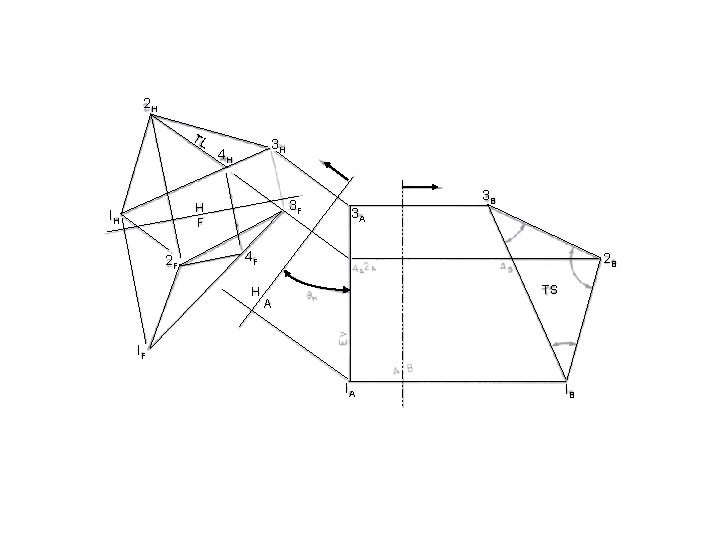
TL 2 H TABLE TOP TRUE SURFACE TL 1 H TL H F 1 F 2 F 3 H TL 4 H Line of sight for H view 2 F 3 F Edge view

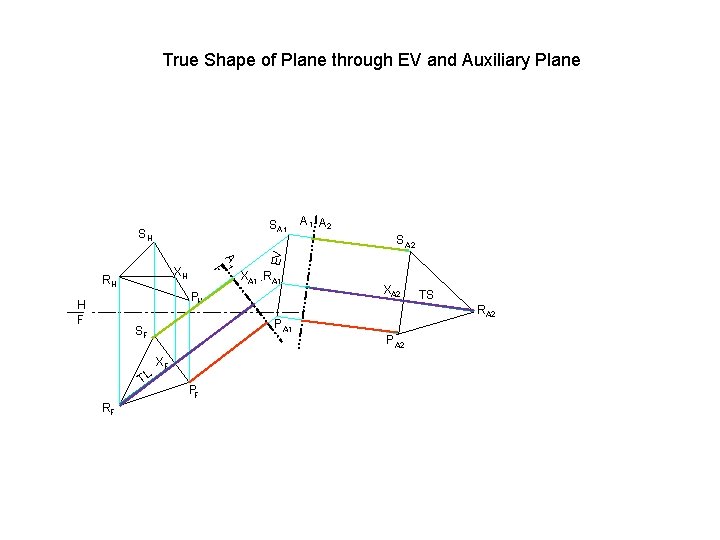
True Shape of Plane through EV and Auxiliary Plane A 1 F XH RH XA 1 , RA 1 PH H F RF S A 2 XA 2 P A 2 XF PF TS RA 2 P A 1 SF TL A 1 A 2 EV SA 1 SH

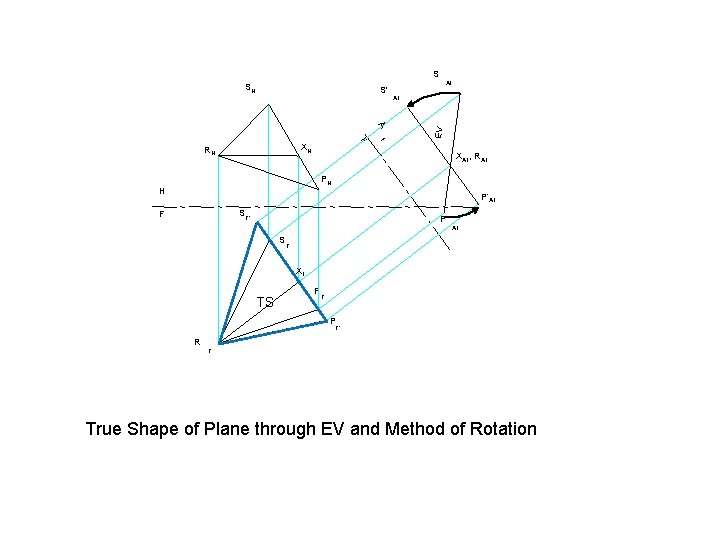
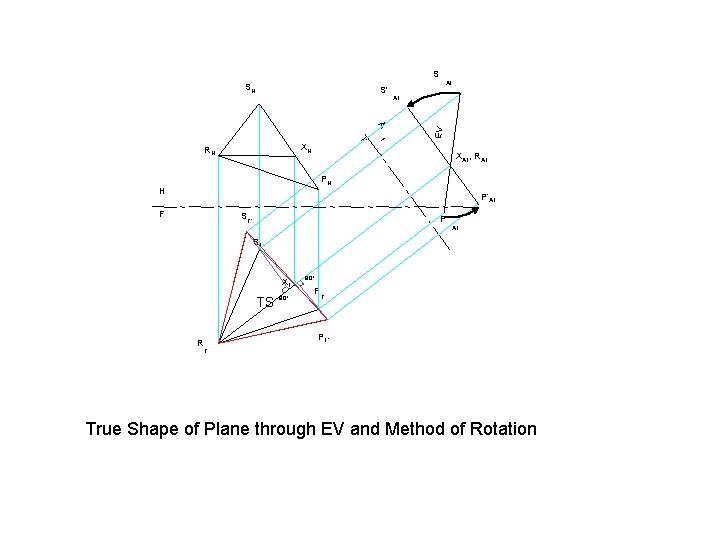
S SH A 1 S' A 1 F XH RH EV A 1 XA 1, RA 1 PH H P‘A 1 S F' F P A 1 S F XF TS P F' R F True Shape of Plane through EV and Method of Rotation

S SH A 1 S' A 1 F XH RH EV A 1 XA 1, RA 1 PH H P‘A 1 F S F' P A 1 SF XF TS R 90˚ P F PF’ F True Shape of Plane through EV and Method of Rotation

2 H TL 3 H 4 H 3 F H F IH 2 F 3 A 3 B 4 F H 2 B TS A IF IA IB