Leander Technique A method of introducing a patients
")

 •")


 • Locate lumbar LAF • Lateral flex table right")


 Field Method #2) Institutional")


")

 Activate the same side pad. Adjust 3 times if")


")


- Slides: 52
Leander Technique A method of introducing a patient’s spine to continuous passive motion (CPM) for a short period of time for the purpose of analyzing the degree of motion or fixation of a spinal motion unit, augmenting the manual adjustment, and then re-checking to ascertain the efficacy of the adjustment.
During motorized flexion/distraction, there should be a small yet palpable separation occurring between two adjacent vertebrae. Long Axis Distraction (LAD)
Loss of the normal movement between spinous processes: • Long Axis Fixation (LAF) • Primary Fixation
TMAP the spine • Start in the thoracic spine. Work your way down the spine via the spinous tips or spaces to find a L. A. F.
TMAP the spine • At the point of fixation…Have the patient to rotate their head to the left and to the right…remember, one direction will increase the movement at the site of the L. A. F. • Head rotation will cause the spinous processes to rotate to the opposite side down to about L 2
TMAP Locate LAF: Name the side of head rotation that restores some movement…as the posterior T. V. P. Write down that letter… Either “L” or “R” Add a “P” i. e. LP or RP Adjust the appropriate TVP
Thoracic Listing continued • Determine body listing • LP = BL and RP = BR • Determine spinous listing • LP / BL = SP-R and RP / BR = SP-L • Determine orthogonal listing • LP / BL (SP-R) = + Y • RP / BR (SP-L) = - Y
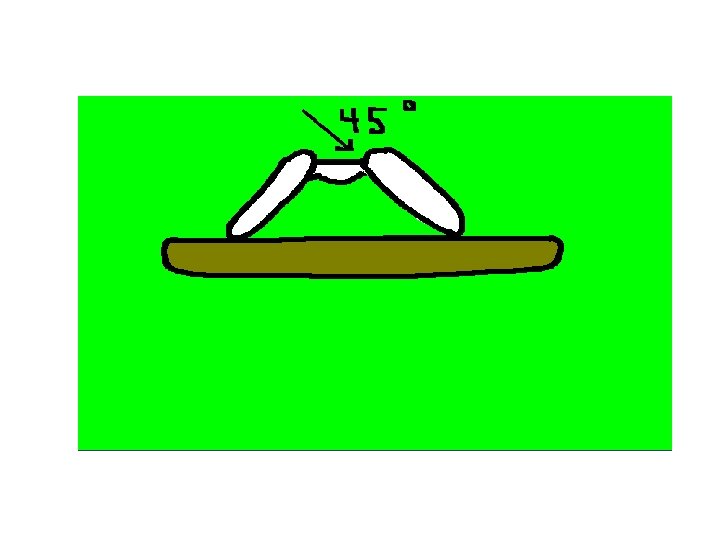
Thoracic Adjustments • Patient rotates head to opposite side. . . away from side that restored motion. • In general, stand on side of the posterior TVP. • LOC: P-A, I-S through the plane line of the disc at full flexion. • Adjust accordingly…I. e. , Diversified; Gonstead; Activator; etc. . . • Recheck listing
LMAP • After clearing the thoracic spine, move on to the Lumbar region for assessment of the Lumbar spine. • Perform the same analysis technique as above…use the lack of motion between the spinous tips or spaces as an indicator of L. A. F.
LMAP Lack of movement of the spinous processes during lateral flexion indicates an open wedge on the side of lateral bending…usually!
Lateral Flexion • From C 2 to T 6, the spinous processes will tend to rotate away from the direction of lateral flexion (toward the convexity) • From T 6 to L 5, the spinous processes will tend to rotate towards the direction of lateral flexion (toward the concavity)
Lumbar Motion Assisted Palpation (LMAP) • Locate lumbar LAF • Lateral flex table right and left. • The side that restores some motion is the side of spinous rotation
LMAP • Determine body listing • LP = BL and RP = BR • Determine spinous listing • LP / BL = SP-R and RP / BR = SP-L • Determine orthogonal listing • LP / BL (SP-R) = + Y • RP / BR (SP-L) = - Y
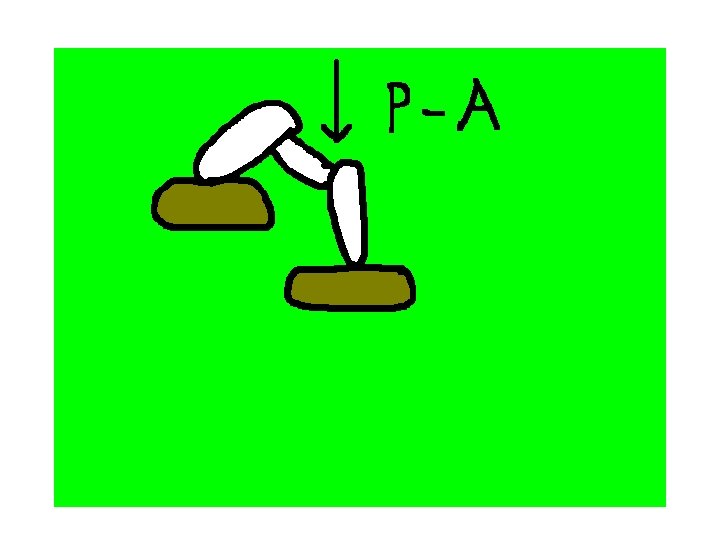
Lumbar Adjusting • Laterally flex table away from the side that restored movement • Stand on convex side • Spinous contact…Gonstead technique. • Superior hand L 1 -L 2 • Inferior hand L 3, L 4, L 5 • LOC is P-A through the plane line of the disc at full flexion • Recheck listing
Lumbar Adjusting • Correct SCP • Lateral flex the table away from the side that restored some motion • Adjust when table is in full flexion • Re-assess LAF
Side Posture Alternate • Stop the table! • Leave abdominal piece down • Raise the cervical piece to match the abdominal piece. • Position patient and find SCP • Now lateral flex the table to take the segment to tension and adjust • Re-assess initial listing
L 5 Spondylolisthesis • Do not treat if asymptomatic! • For Grade 3 - 5 leave the abdominal piece up • Position top of iliac crest about in middle of abdominal pad • If patient still experiences discomfort, move the patient superior. • Decrease speed of table by 50%
L 5 Spondylolisthesis • Contact L 4 spinous and exert superior stabilization • Contact S 2 with increasing caudal pressure as the table flexes and let up when it returns to horizontal. • Cycle 5 times
L 5 Spondylolisthesis On each visit, gradually place the patient lower and lower on the table until the top of the iliac crest is at the top of the pelvic pad and gradually increase the number of cycles and table speed.
Spondylolisthesis--Adjusting • Table Off: Pt. supine • Adjustments: Two Types…#1) Field Method #2) Institutional Method. • Field Method: No Thrust---Only pressure until table drops. • Institutional Method: 3 Thrust!!!
P. P. I. Ilium • Analysis…Thompson, Activator, A. K. , etc. . . • Short Leg…usually the side of posterior Ilium. Check in position #1 and position #2…Short leg that lengthens. • Challenge…Motion the joint via static and motion palpation (spring test; pressure / stress test; etc…)
P. I. Ilium • Table off • Analysis: Short leg in extension-lengthens to some degree upon flexion. • Reference point: P. S. I. S. • Pivot point: Acetabulum
P. I. Ilium • “True” P. I. Ilium • Look for an I. N. Ilium on the same side. • Resistance may be felt in the legs with knee flexion, with a possible jerky motion when flexed.
Table / Patient settings • P. I. Ilium: – Set the Patient: Patient Prone. Align the top aspect of the Iliac crest with the top of the pelvic pad.
Table / Patient settings • P. I. Ilium: – Set the table: Turn the table on. Elevate the pelvic pad opposite P. I. listing. Activate the directional drop on the PI side.
Table / Patient settings • P. I. Ilium: – Set the Doctor: Dr. stands on same side -Right P. I. …Right Thenar. – Stabilize with other hand--mid heel or M. C. P of the index finger.
Table / Patient settings • P. I. Ilium: – S. C. P. ’s: Medial & inferior aspect of the P. S. I. S. on the involved side. Posterior & inferior aspect of the ischial tuberosity on the uninvolved side. – Adjust: Adjust in full flexion… 3 times if needed!
P. I. / I. N. Ilium • • • No leg length analysis “Toe out” foot flare Wide gluteal and “Flattened” P. S. I. S. Wider Ilium on X-ray Narrow obturator foramen on X-ray
I. N. Ilium • Table on – Adjustment procedure: Activate the directional drop on the involved side. – Iliac crest in alignment with top of the pelvic pad. – S. C. P. : Medial aspect of the Ischial tuberosity on the involved side.
I. N. Ilium • Table on – Superior hand contact (S. C. P. Pisiform) – L. O. D. : Medial to Lateral, slight P-A with an axial torque. – Adjust in full flexion.
A. S. Ilium • Usually on the long leg side. – Identified by palpation of a taut and tender gastrocnemius on the involved side. Opposite the side of a P. I. Ilium. – Challenges…Pressure / stress test; x-ray analysis; spring test; Motion Palpation; etc… – X-ray analysis
A. S. (Posterior Ischium Adjustment) Activate the same side pad. Adjust 3 times if needed. Look for an E. X. Ilium on the same side. • Stand on side of posterior ischium • Set drop piece on this side • Contact ischial tuberosity with superior hand…Fingers running down the thigh…Toggle grip!!! • Adjust in full extension.
E. X. Ilium • • • No leg length analysis for the EX Ilium “Toe in” foot flare Narrow gluteal and prominent P. S. I. S Narrow ilium on X-ray Wide obturator foramen on X-ray
E. X. Ilium • Lateral aspect of the involved PSIS…contact w/superior hand • Shallow L. O. C. L - M • Involved side…set drop piece
Exception to the rule. . . For the Posterior Ischium, make the adjustment when the table comes back to neutral … full extension. re-check listing.
Sacral Analysis • Table off: Pt. prone • No leg length analysis • Stabilized, prone leg raiser test to identify the Left or Right Sacral subluxation or the Base posterior
Sacral Analysis • Table off – Patient is prone – Doctor assumes a straight away stance – Places heel of the superior hand on the sacral base with fingers pointing inferior
Sacral Analysis • Table off – Apply P - A pressure…appropriate amount to stabilize the sacrum – Instruct the patient to raise the left or right leg of the table, while maintaining a straight leg
Sacral Analysis – Observe the elevation of the leg being raised…then have the patient to raise the opposite leg…compare the two heights – The leg that does not raise as high is considered the side of sacral subluxation – The sacrum should be listed and adjusted on the low leg side
Sacral Analysis • List the sacral subluxation on the low leg side: – A) 4 inch or > difference between the left and right leg – B) Less than 4 inch height difference; difficulty and or pain when raising the low leg – C) If neither leg raises off the table and there is pain and/or difficulty -- Base Posterior.
Sacral Adjustment • Table On: Activate the table prior to adjusting – Set the table: Drop pieces activated
Sacral Adjustment • Table On: Activate the table prior to adjusting – Set the Patient: Prone; Iliac crest in line with the pelvic pad; cross the involved leg over the uninvolved leg at the popliteal fossa
Sacral Adjustment • Table On: Activate the table prior to adjusting – Set the Doctor: Facing the feet; Superior hand on the uninvolved P. S. I. S (pisiform/knife edge contact); Inferior hand (pisiform/knife edge contact) on the uninvolved sacral notch
Sacral Adjustment • Table On: Activate the table prior to adjusting – Adjust in full flexion: – L. O. C. : Rt. --CCW torque; Lt. --CW torque; Scissor action to create a torquing of the sacrum…slight P - A
Base Posterior--Analysis • If neither leg raises off the table and there is pain and / or difficulty when raising the legs, the sacrum should be listed and adjusted as a Base posterior subluxation.
Base Posterior • Table On: Pt. prone – Set the table: Drop pieces activated – Set the Patient: Iliac crest in line with pelvic pad – Set the Doctor: Inferior hand contact…Mid heel contact on Superior aspect of the sacral base--in midline – L. O. C. : P - A, S - I through the lumbo sacral angle
Sacrum • Sacral nodding…Information may be obtained while performing stretches. » Post/inferior--flexion » Ant/superior--extension
Coccyx • Radiographic analysis • Localized pain • Challenge • Palpation • List Apex: A, A-R, A-L • Covered thumb contact • Adjust at full flexion with drop on side of listing
Practice Notes • Pain at the Sacroiliac articulation may be due to sacral or lumbar involvement • Base posterior and L 5 spondylolisthesis will mimic each other with similar findings…Hard to raise either leg and painful--Base posterior. However, Rule out spondylolisthesis via lateral pelvic films. • If patient continually bends the knee when performing the leg raiser test, a lumbar subluxation may be present and will need to be corrected. • A post adjustment, prone leg raise test should demonstrate an equal raising of both legs, with a decrease or elimination of any pain and / or difficulty. If the legs are not equal…they may have a lumbar subluxation.
Post-treatment Protocol • Stop table in horizontal position • Have patient roll up on side opposite major involvement/treatment and swing legs off table to front while they push up with their hands.