Layer Styles Filters Photoshop Styles Filters Overview Layer
- Slides: 14

Layer Styles & Filters Photoshop Styles & Filters

Overview • • • Layer Styles Filter Overview Filter Effects from the Filter Menu Sharpening Images Photo Filters Fixing old Pictures

Layer Styles • These are a little different from standard PS Filters. • Styles are attached to the layer itself and are editable as you work. • We can control Layer Styles from the Layers Panel • These are great when working with Text/Shapes in PS.

Layer Styles • To access the Layer Styles: • Right click on a layer and select Layer Styles to bring up the options menu, or • At the bottom of the Layer’s panel – the FX button will allow you to work with the layer styles and apply them to your active selected layer. • Note the eye next to the layer style – allows you to show/hide effects if already added to the layer.

Filter Overview • On the main menu bar – An entire drop down dedicated to Filters • One of the more fun areas of PS, but also very overused • Do Not make the Filter the focal point of the project • Two ways to add a filter to your project: • Highlight the layer you want to apply the filter to in the Layer Panel, or • Using a Selection Tool – Select a portion of an image to apply the filter to, this will ‘protect’ the rest of the image.

Sharpening Images • Begin with the Giz. jpg and open it in Photoshop • Turn the background layer into a standard Layer • Name it Gizmo

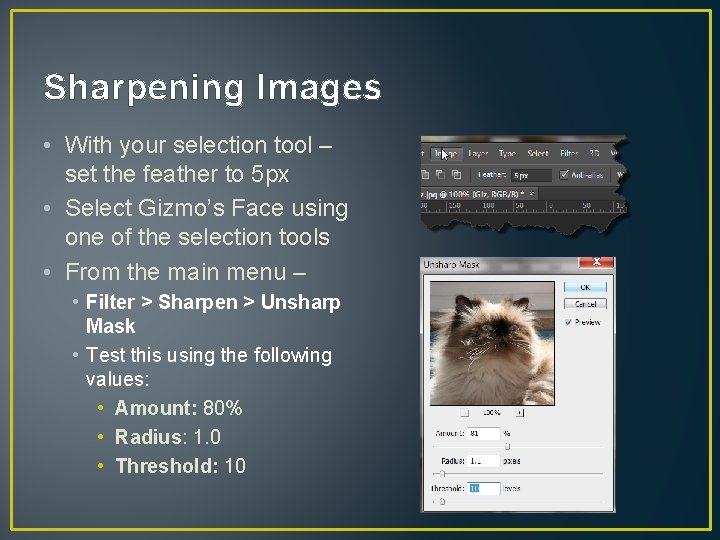
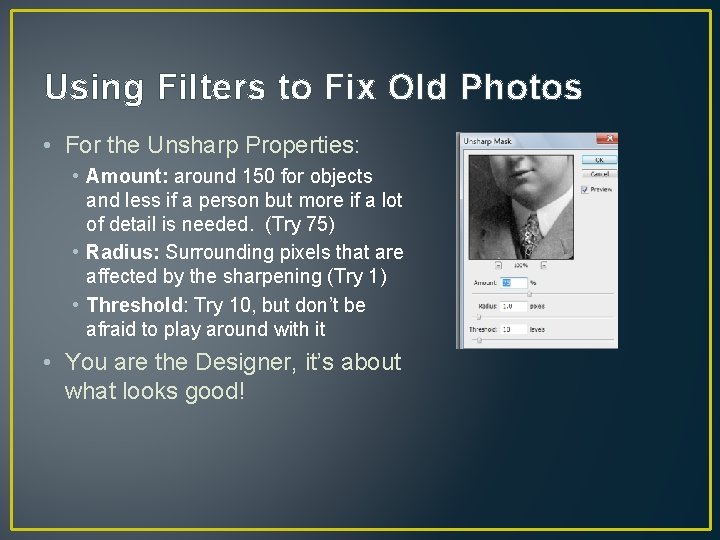
Sharpening Images • With your selection tool – set the feather to 5 px • Select Gizmo’s Face using one of the selection tools • From the main menu – • Filter > Sharpen > Unsharp Mask • Test this using the following values: • Amount: 80% • Radius: 1. 0 • Threshold: 10

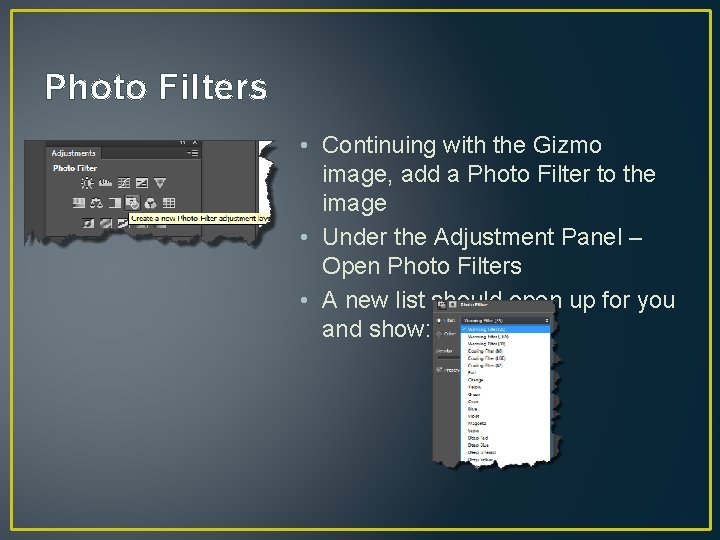
Photo Filters • Continuing with the Gizmo image, add a Photo Filter to the image • Under the Adjustment Panel – Open Photo Filters • A new list should open up for you and show:

Photo Filters • A note on these Photo Filters: • These carry over from actual Film Era – We would actually screw the filters onto the front of the camera • Try some of these filters on Gizmo • Can save and close your image

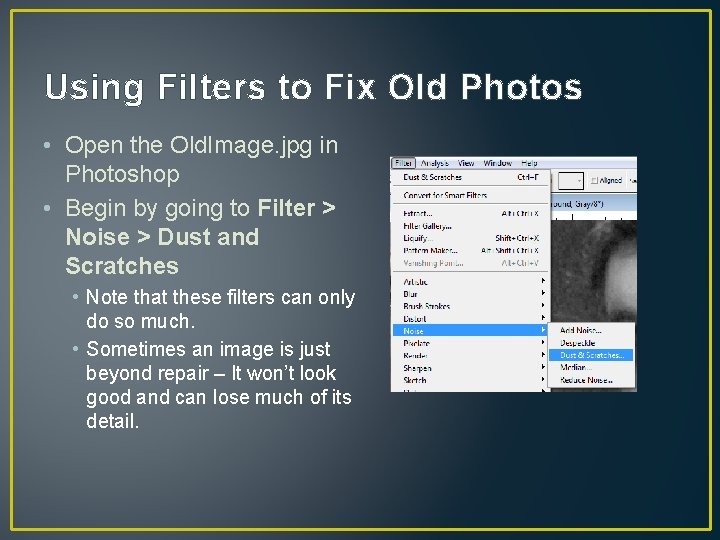
Using Filters to Fix Old Photos • Open the Old. Image. jpg in Photoshop • Begin by going to Filter > Noise > Dust and Scratches • Note that these filters can only do so much. • Sometimes an image is just beyond repair – It won’t look good and can lose much of its detail.

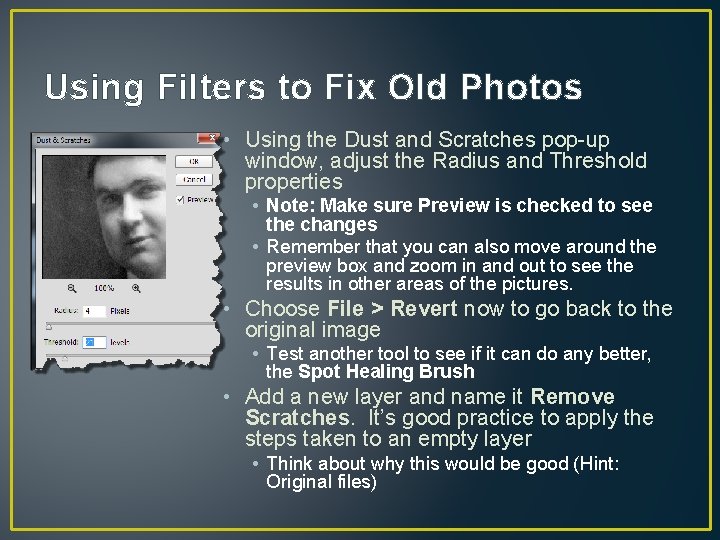
Using Filters to Fix Old Photos • Using the Dust and Scratches pop-up window, adjust the Radius and Threshold properties • Note: Make sure Preview is checked to see the changes • Remember that you can also move around the preview box and zoom in and out to see the results in other areas of the pictures. • Choose File > Revert now to go back to the original image • Test another tool to see if it can do any better, the Spot Healing Brush • Add a new layer and name it Remove Scratches. It’s good practice to apply the steps taken to an empty layer • Think about why this would be good (Hint: Original files)

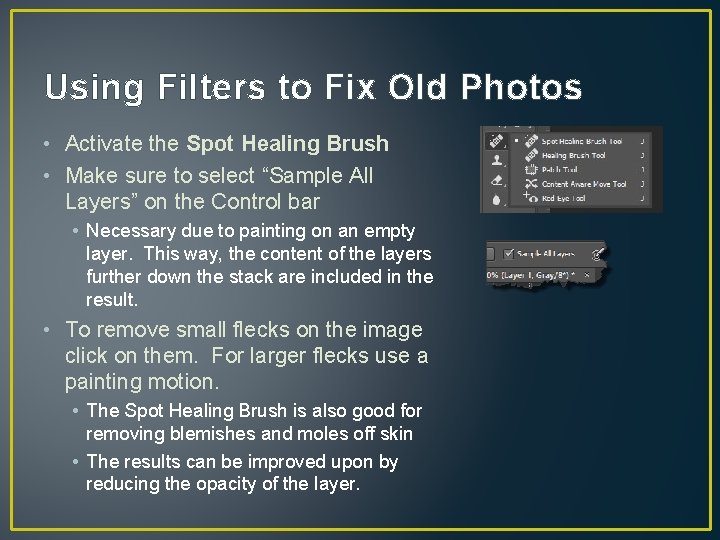
Using Filters to Fix Old Photos • Activate the Spot Healing Brush • Make sure to select “Sample All Layers” on the Control bar • Necessary due to painting on an empty layer. This way, the content of the layers further down the stack are included in the result. • To remove small flecks on the image click on them. For larger flecks use a painting motion. • The Spot Healing Brush is also good for removing blemishes and moles off skin • The results can be improved upon by reducing the opacity of the layer.

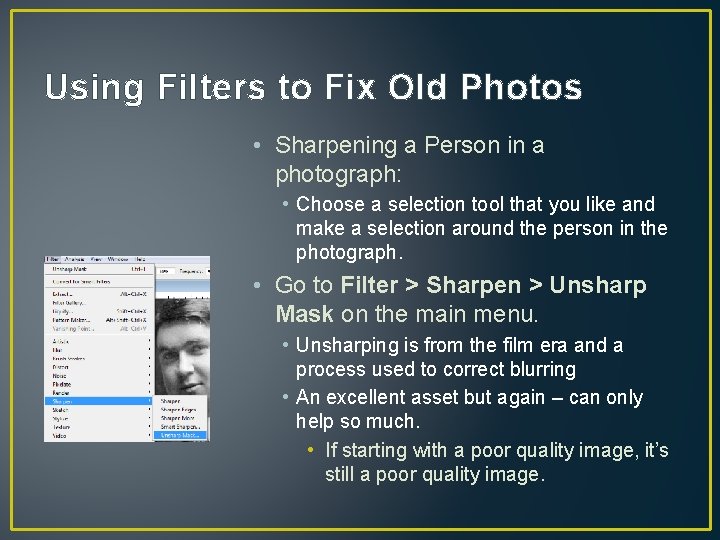
Using Filters to Fix Old Photos • Sharpening a Person in a photograph: • Choose a selection tool that you like and make a selection around the person in the photograph. • Go to Filter > Sharpen > Unsharp Mask on the main menu. • Unsharping is from the film era and a process used to correct blurring • An excellent asset but again – can only help so much. • If starting with a poor quality image, it’s still a poor quality image.

Using Filters to Fix Old Photos • For the Unsharp Properties: • Amount: around 150 for objects and less if a person but more if a lot of detail is needed. (Try 75) • Radius: Surrounding pixels that are affected by the sharpening (Try 1) • Threshold: Try 10, but don’t be afraid to play around with it • You are the Designer, it’s about what looks good!