Jump Starting a Vehicle Fluid Check Fluid Color


 n You cannot make a K-Turn on a highway,")


- Slides: 40
Jump Starting a Vehicle
Fluid Check Fluid Color
Oil Change
Chapter 3 Driver Safety & Rules Pg 37
Seat Belt Law Pg 38 All front seat occupants are required by law to wear a seat belt. n The driver is responsible for enforcing seat belt law for passengers under 18. n Front seat passengers older then 18 are responsible for themselves. n Drivers with GDL permits must require all passengers seated anywhere in the vehicle to use seat belts. n
Seat Belts Pg 38 Improve chances of surviving a crash by 60 percent. n Chance of surviving a collision 3 to 4 times better when wearing a seat belt and shoulder strap. n Only takes 3 seconds to put on. n
How Seat Belts Help Pg 38 n n Keep passengers from being thrown from a car in a collision. Prevent passengers from hitting the dashboard or windshield during severe breaking or collision. n Hitting the dashboard at 30 mph = falling from the top of a 3 story building n Keep passengers from sliding on the seat. Prevent the driver from sliding off the seat and losing control of the vehicle. n Do you wear a seat belt?
Tips For Seat Belt Use Pg 39 n n n Buckle up on every trip. Wear lap belt under the abdomen and low across the hips. Shoulder belt should come over the collar bone away from the neck. Never put more than one person in one seat belt. Never sit closer than 10 inches from the steering wheel.
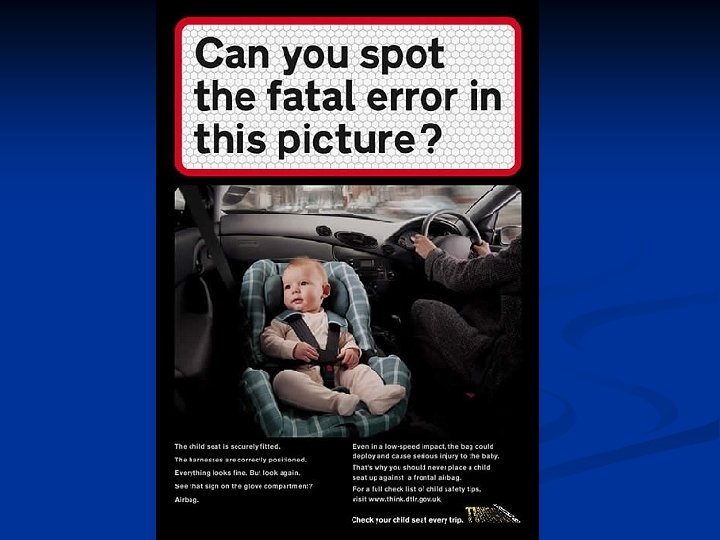
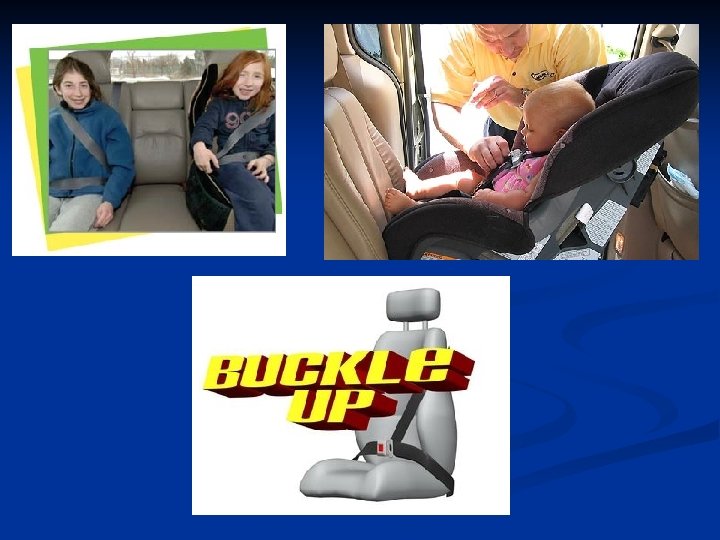
Car Seats Pg 39 Traffic accidents are a leading killer of children. n Child car safety seats should be placed in the backseat. n If no backseat, move front seat as far back as possible. n Infant rear-facing seats must never face forward. n Children 12 and under should ride in the backseat. n
Child Restraint Law Children up to age 8 or 80 lbs. must ride in a car seat. n Children under age 8 and over 80 lbs. must be in back seat and wear seat belt n Every passenger between the ages of 8 and 18 must use a seat belt – no matter where they sit in the vehicle. n Pg 40 n
Air Bags pg 40 -41 Inflate at speeds up to 200 mph. n Can seriously injure or kill children. n They are identified on steering wheel and dashboard panel. n SRS (Supplemental Restraint System) n Air Bag n SIR (Supplemental Inflatable Restraint) n n Some vehicles have air bag cut off switches for car seats and medical conditions
Safety Points Children of any age are safest when belted properly in the back seat. n Always put rear-facing infant safety seats in the back seat n 12 years old and younger ride in the backseat. n Make sure everyone is buckled up n
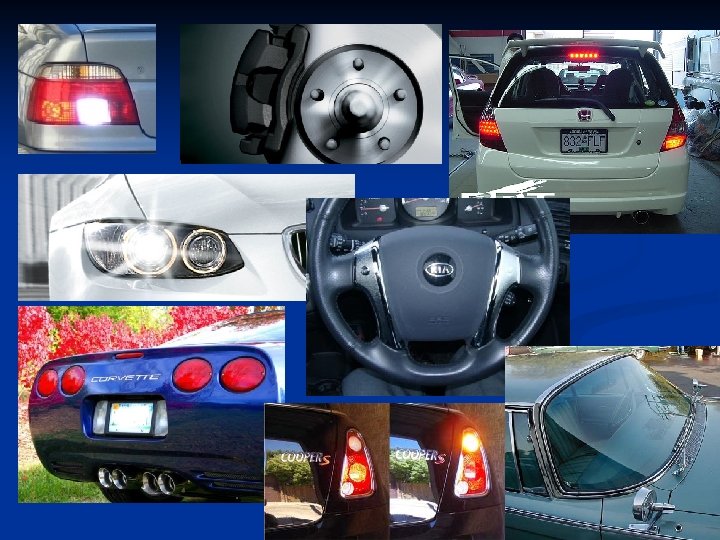
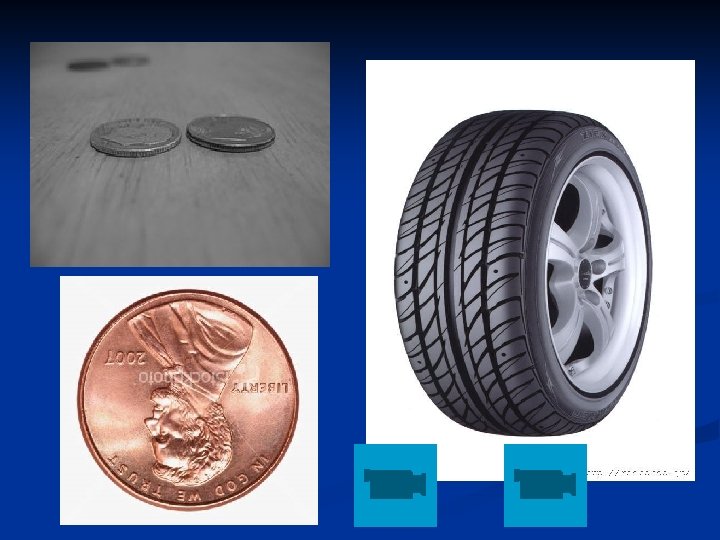
Car Conditions Pg 42 -43 n n Back Up/Reverse lights Brakes n n n Smoothly and quickly ABS – never pump Brake lights Headlights Horn n Signal when passing or coming out of a blind alley n Steering n n n Taillights Tires n n n 1/16 inch of tread (dime) Turn Signals Windshield n n Front end should not “shimmy” No tint Snow/Ice
Starting a Parked Car Pg 44 n Look behind and in front for: Children playing n Animals n Bottles n Anything else that could be injured or broken n n Check for less conspicuous vehicles, such as bicycles and mopeds.
Starting a Parked Car Make sure windows are clean and nothing is blocking the line of sight. n Adjust the seat, so all pedals and controls are easily reached. n Adjust inside and outside mirrors to reduce blind spots. n Fasten seat belts n Make sure the car is in park or neutral. n Doors locked n
Blind Spots Pg 44 -45 95% of all information necessary for safe driving is visual information! n Blind spots areas hidden from the drivers view. n Adjust mirrors to help reduce blind spots. n Check by turning your head. n Outside mirrors – tip of the driver-side front door handle is in view in the lower right corner of the mirror. n
Steering Pg 46 n n n Keep both hands on the upper half of the wheel. 9 o’clock left hand, 3 o’clock right hand Keep a firm but not too tight grip Keep both hands on wheel at all times except when shifting gears, or giving hand signals When driving around a curve, your vehicle will tend to keep going straight
Steering Pg 47 Hand-Over-Hand – allow a driver to make minor turns to half wheel turns, while keeping both hands on the wheel. For precision maneuvers, steering through curves, intersection entry and exit, and skid recovery n Controlled Slipping – when coming out of a turn, allowing the wheel to slip through fingers n
Hand-Over-Hand 1 2 3
1 2 3 4 Push Pull Steering
Speed Control Pg 47 Start slowly n Gradually increase speed until safely within legal speed limit and flow of traffic n Maintain steady speeds n Press the gas pedal slowly n Press the brake pedal lightly n Check speedometer n
Stopping Distances Pg 47 n Factors: Individual reaction time n Weather and road conditions n Vehicle weight n Brake conditions n Condition and type of tire n Roadway conditions n Speed n v The faster a vehicle is going, the longer it will take to stop.
Proper Braking Pg 48 n Types of brakes: Conventional drum and disc system n Anti-lock Brake System (ABS) n New drivers often violently push the brake pedal n Steady, gentle pressure should be applied to brakes for a controlled stop. n Use the right foot for brake and accelerator. n Use the left foot for the clutch. n
Hand Signals n Right Turn
Driver Signals n Left Turn
Hand Signals n Slow Down or Stop *Use Signals 100 feet before turn.
Driving in Reverse Pg 49 Check all mirrors n Turn head and body back to the right n Place right arm over the back of the passenger seat. n Grasp top of the steering wheel with left hand n
Driving in Reverse Pg 49 -50 Steering the wheel to the right, moves the car to the right n Steering the wheel to the left, moves the car to the left. n The front of the car will swing in the opposite direction of a turn. n
Making a Three-Point Turn (K-Turn) n You cannot make a K-Turn on a highway, turnpike or parkway. Pg 50 -51
Three-Point Turn 1. Signal left and move forward slowly, turning the wheel to the left. Stop inches from the left curb. 2 Back slowly, turning the wheel to the right. Stop inches from the right curb. 3. Move forward turning the wheel to the left. Straighten the vehicle out. Pg 50 -51
Parking pg 51 Parking on a Decline facing Downhill – Turn the wheels toward the curb n Parking on an Incline facing Uphill – Turn the wheels away from the curb n No curbs – Turn the wheels toward the edge of the road n Angle parking – common in parking lots and at curbs n
Parallel Parking Pg 52 -53 Most common in city streets. n Legal space n Large enough space n Use your signal n ü For practice use flags or markers 25 feet apart.
Parallel Parking Pg 52 -53 n Steps: n n n n n Properly signal Pull alongside (parallel) about 2 -4 feet from the parked car in front (back bumper to back bumper) Turn the wheel to the right. Begin to back into the space. Line up the center of the car with the right front bumper of the car behind you. Back straight into space until the front bumper clears the rear bumper of the car in front. Turn the wheel to the left. Back the car into the space. Pull forward to straighten out the car. 6 inches from the curb.