
JOINT EXAMINATIONS DR DILSHAN MUNIDASA Must not forget



- Slides: 97
JOINT EXAMINATIONS DR DILSHAN MUNIDASA
Must not forget…. There are two sides Look – from front, sides , behind Feel – Look at the patients face Move - Active, Passive, Abnormal
What to look for ? Deformities Inflammation/ infection - Warmth Movement ranges Strength of movements Tender points Abnormal sounds – crepitus Fluid in the joints Ligament stability
Start examinatiom Explain examination: “Today I need to examine your hip joints, this will involve looking, feeling and moving the joints. ” Check understanding and gain consent: “Does everything I’ve said make sense? Are you happy for me to examine your hips? ” Ask if the patient has had a joint replacements Expose patient appropriately Position patient accordingly Ask if the patient currently has any pain
Hip Joint
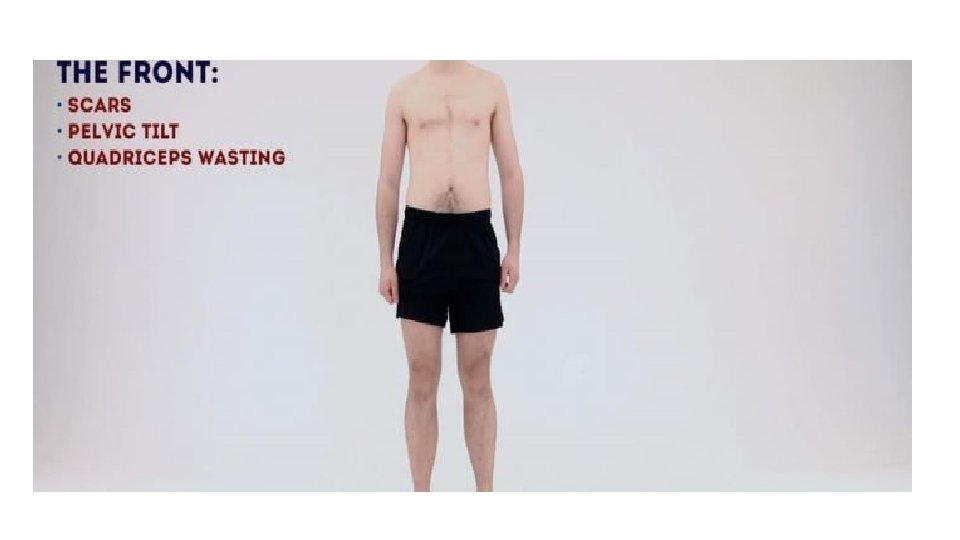
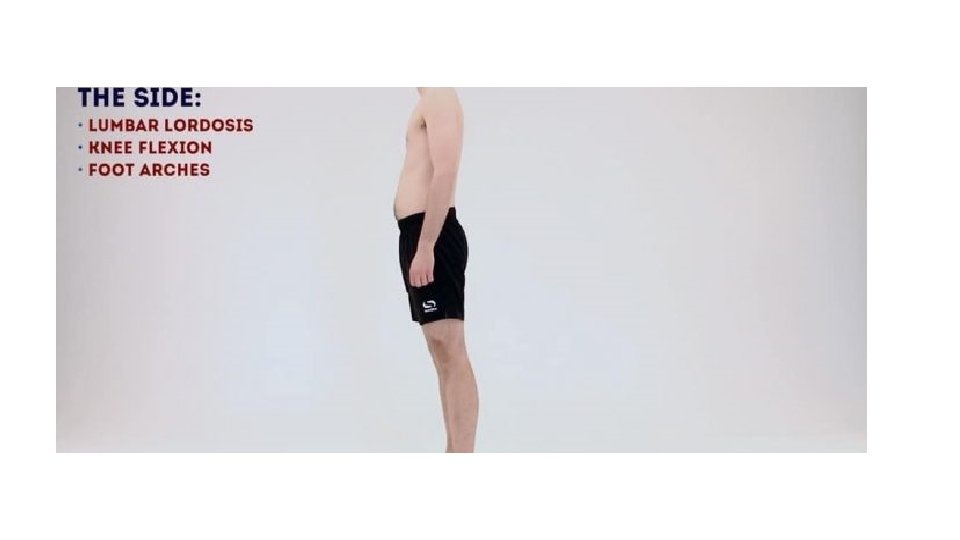
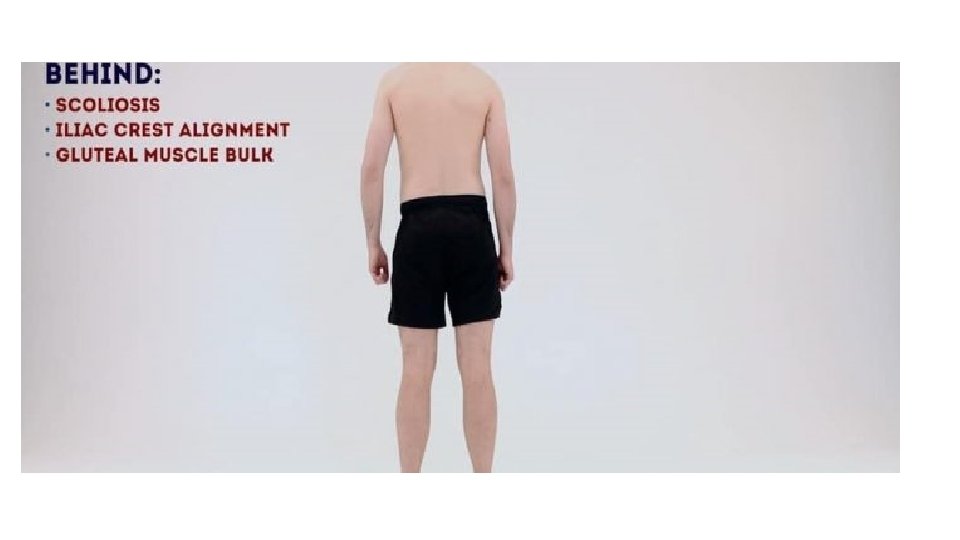
Look • Look around bed for any aids or adaptations – walking stick / wheelchair • Inspect patient from all angles • Front – scars / pelvic tilt /quadriceps wasting / foot deformity • Side – assess lumbar lordosis – normal / hyperlordosis • Behind – scoliosis / gluteal wasting / pelvic tilt
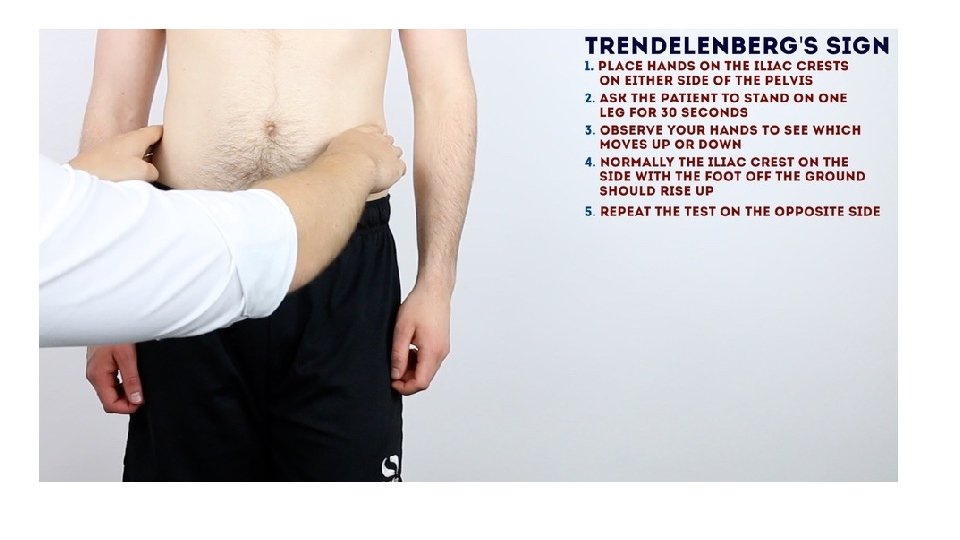
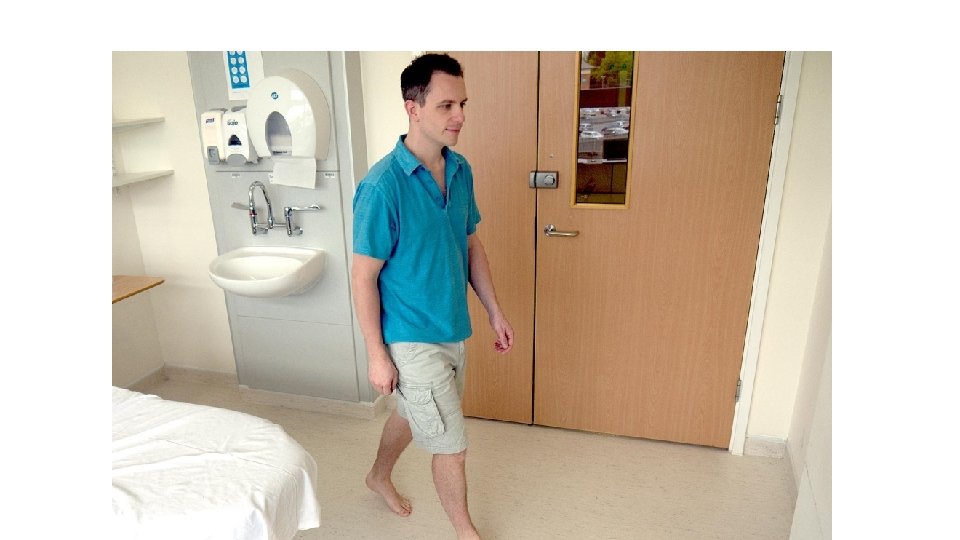
Gait • Observe the patient’s gait from multiple angles • Assess speed /smoothness /turning • Note any evidence of antalgic gait or Trendelenburg gait • Assess the patient’s footwear – unequal sole wearing – abnormal gait
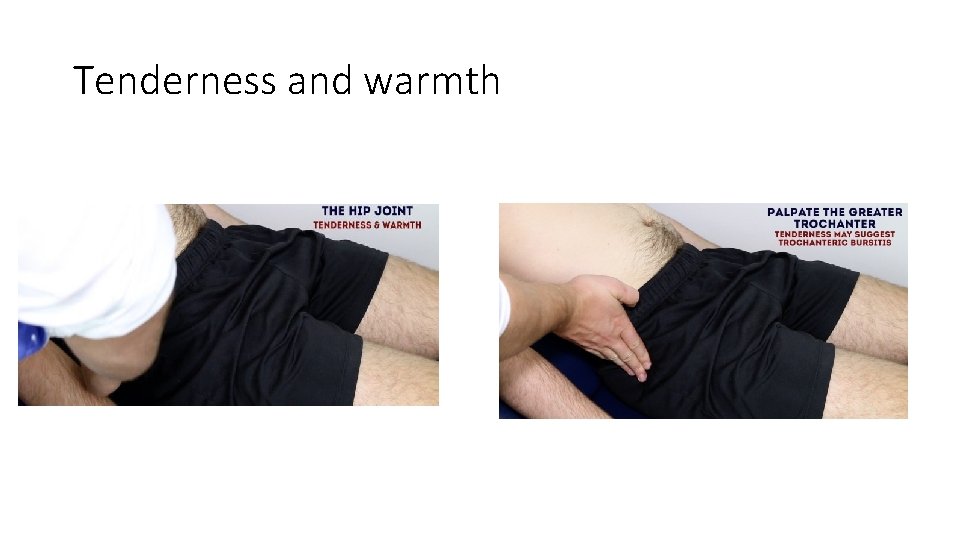
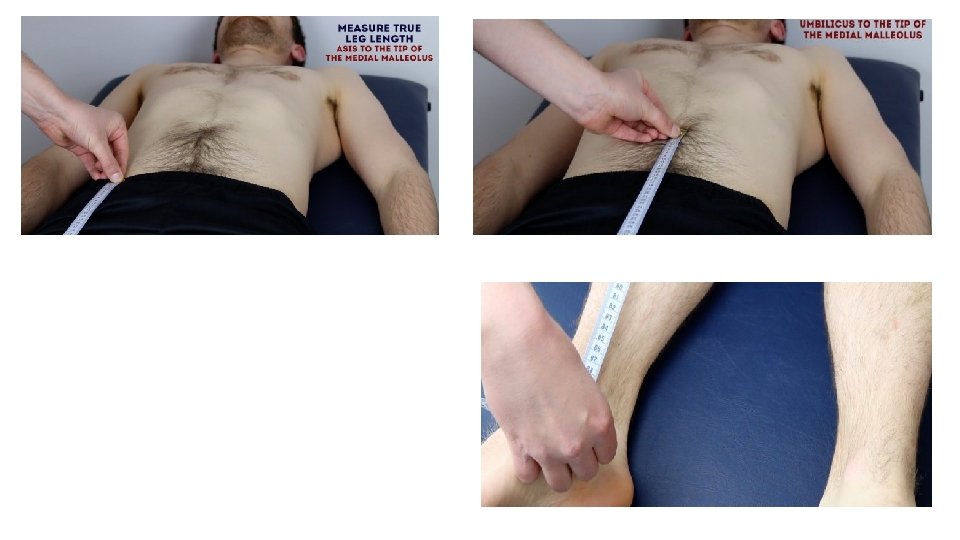
Feel • Ask patient to lay down on the examination couch • Palpate the tissues overlying the hip joint for tenderness/warmth – inflammation/infection • Palpate the greater trochanter – tenderness (often indicative of greater trochanteric bursitis) • Assess leg length • Measure apparent leg length – umbilicus to the tip of the medial malleolus • Measure true leg length – anterior superior iliac spine to the tip of the medial malleolus
Tenderness and warmth
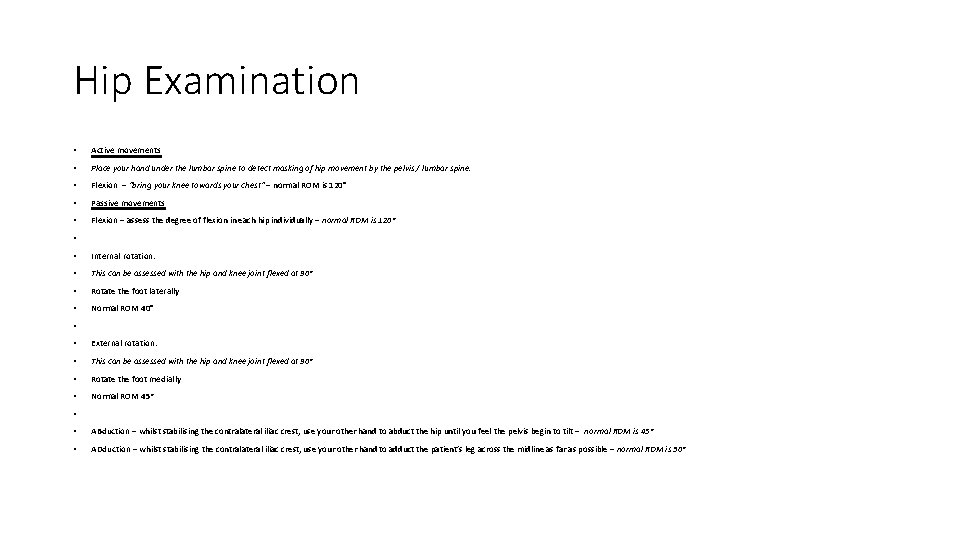
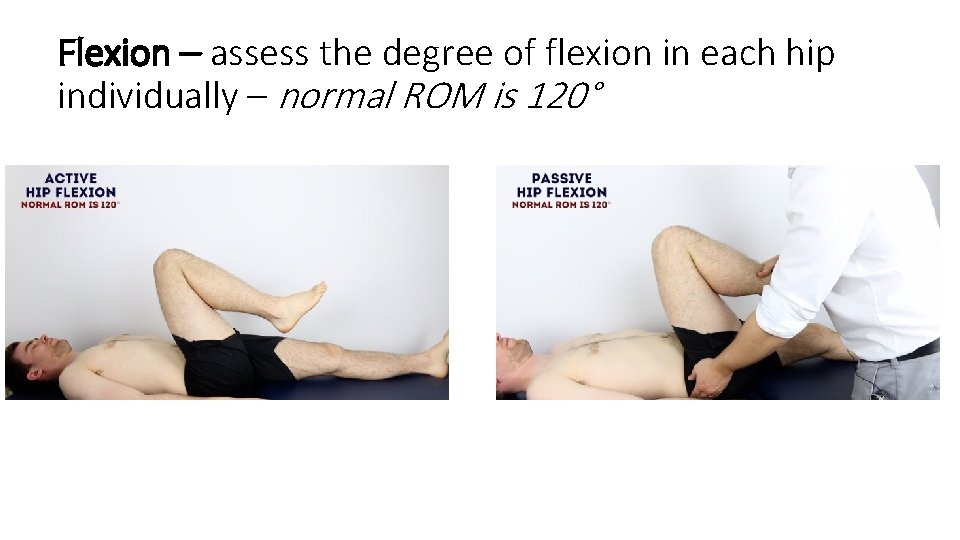
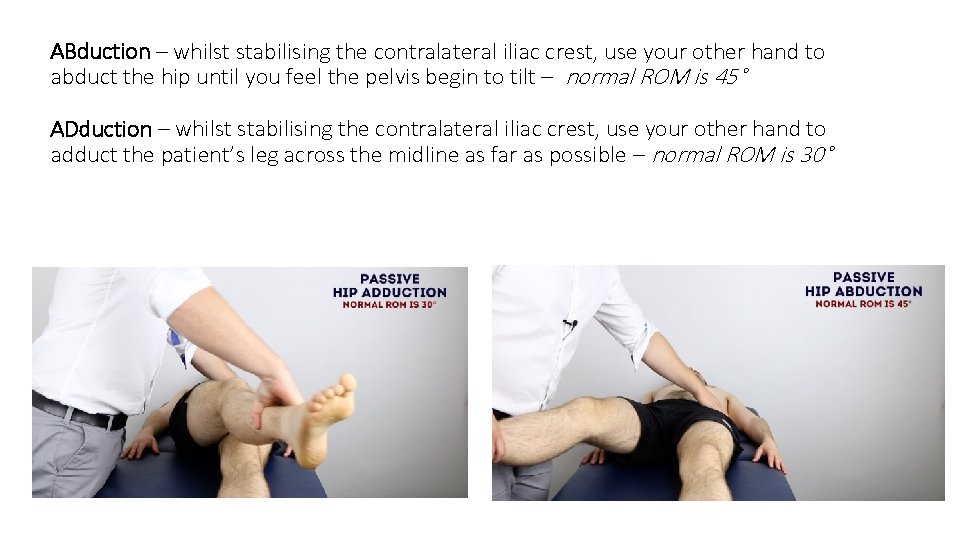
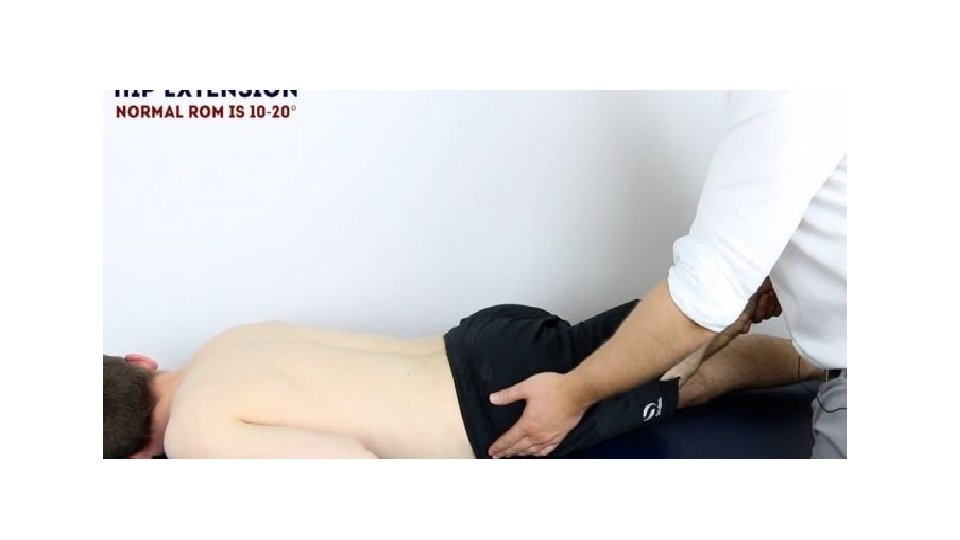
Hip Examination • Active movements • Place your hand under the lumbar spine to detect masking of hip movement by the pelvis / lumbar spine. • Flexion – “bring your knee towards your chest” – normal ROM is 120° • Passive movements • Flexion – assess the degree of flexion in each hip individually – normal ROM is 120° • • Internal rotation: • This can be assessed with the hip and knee joint flexed at 90° • Rotate the foot laterally • Normal ROM 40° • • External rotation: • This can be assessed with the hip and knee joint flexed at 90° • Rotate the foot medially • Normal ROM 45° • • ABduction – whilst stabilising the contralateral iliac crest, use your other hand to abduct the hip until you feel the pelvis begin to tilt – normal ROM is 45° • ADduction – whilst stabilising the contralateral iliac crest, use your other hand to adduct the patient’s leg across the midline as far as possible – normal ROM is 30°
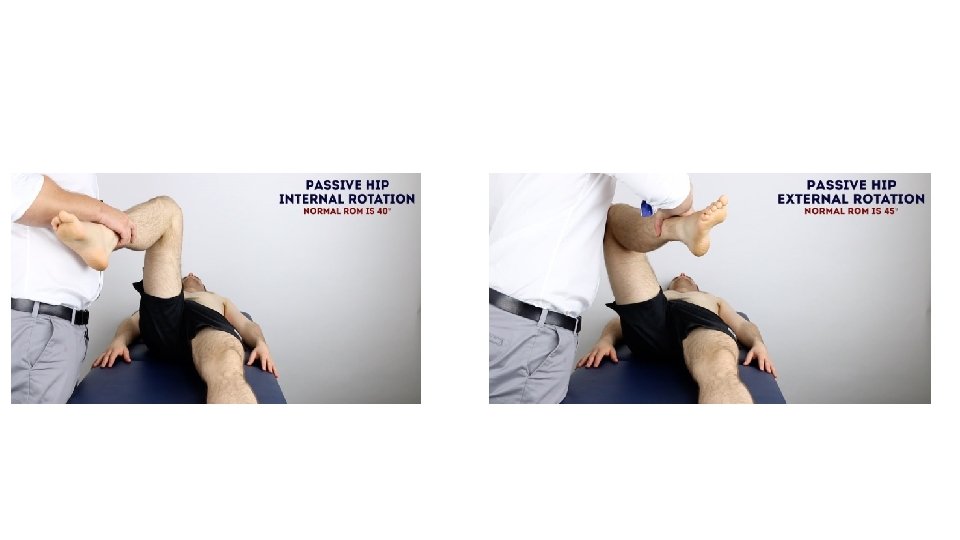
• Internal rotation: • This can be assessed with the hip and knee joint flexed at 90° • Rotate the foot laterally • Normal ROM 40° • • External rotation: • This can be assessed with the hip and knee joint flexed at 90° • Rotate the foot medially • Normal ROM 45°
Flexion – assess the degree of flexion in each hip individually – normal ROM is 120°
ABduction – whilst stabilising the contralateral iliac crest, use your other hand to abduct the hip until you feel the pelvis begin to tilt – normal ROM is 45° ADduction – whilst stabilising the contralateral iliac crest, use your other hand to adduct the patient’s leg across the midline as far as possible – normal ROM is 30°
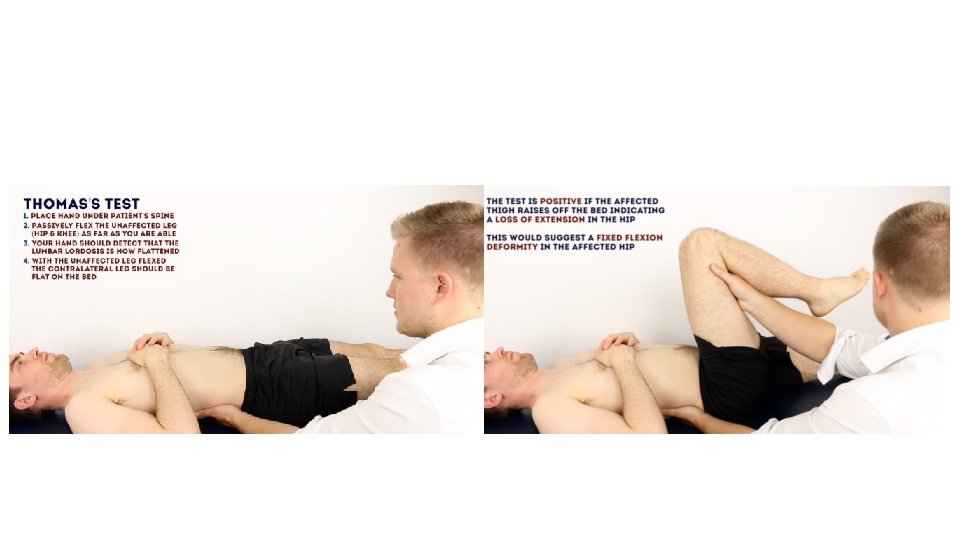
Special tests - Thomas’s test Place a hand under the patient’s spine. Passively flex the unaffected leg (hips/knees) as far as you are able to. Your hand should detect that the lumbar lordosis is now flattened. With the unaffected leg flexed, the contralateral leg should be flat on the bed • Repeat the test to assess the contralateral hip joint. • The test is positive (abnormal) if the affected thigh raises off the bed, indicating a loss of extension in the hip. This would suggest a fixed flexion deformity in the affected hip. • DO NOT PERFORM ON PATIENTS WITH HIP REPLACEMENTS – can cause dislocation! • •
Knee Joint
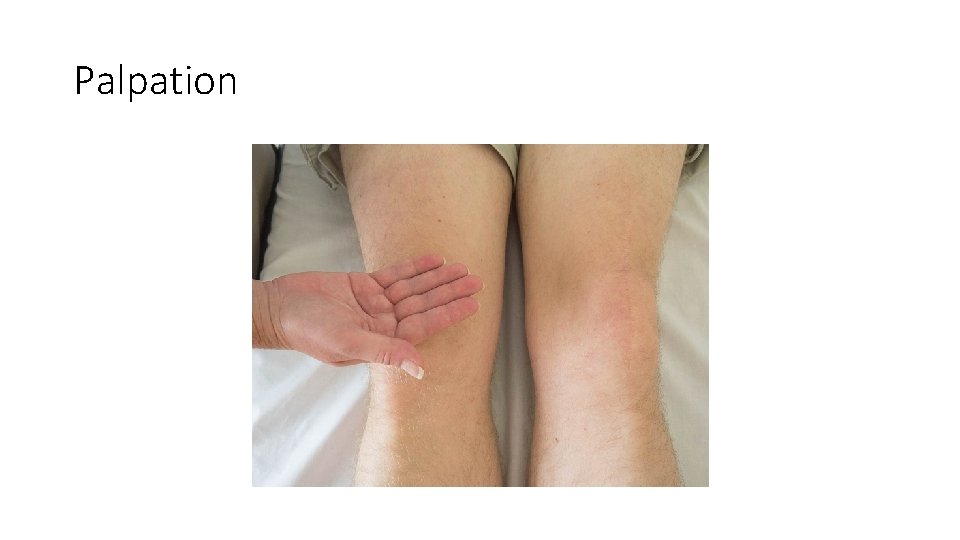
Inspection
Palpation
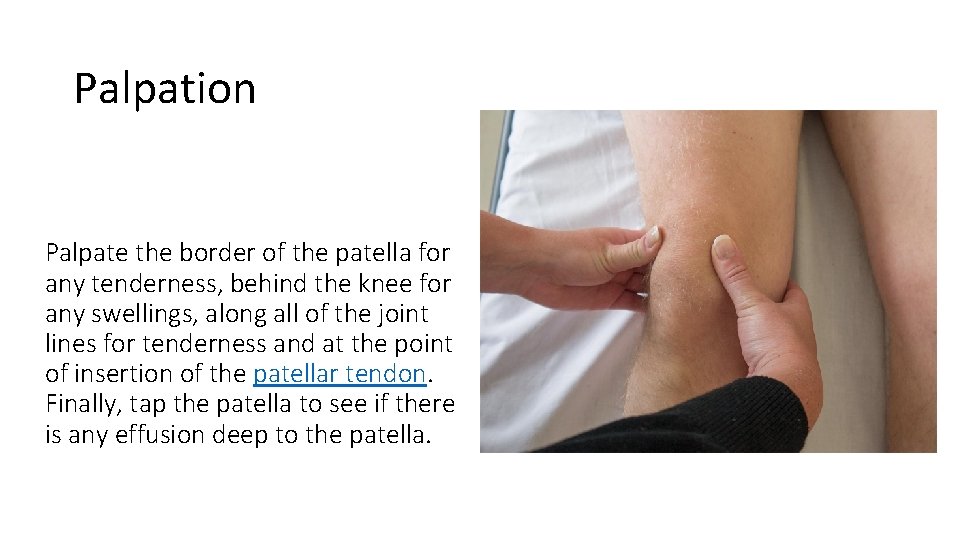
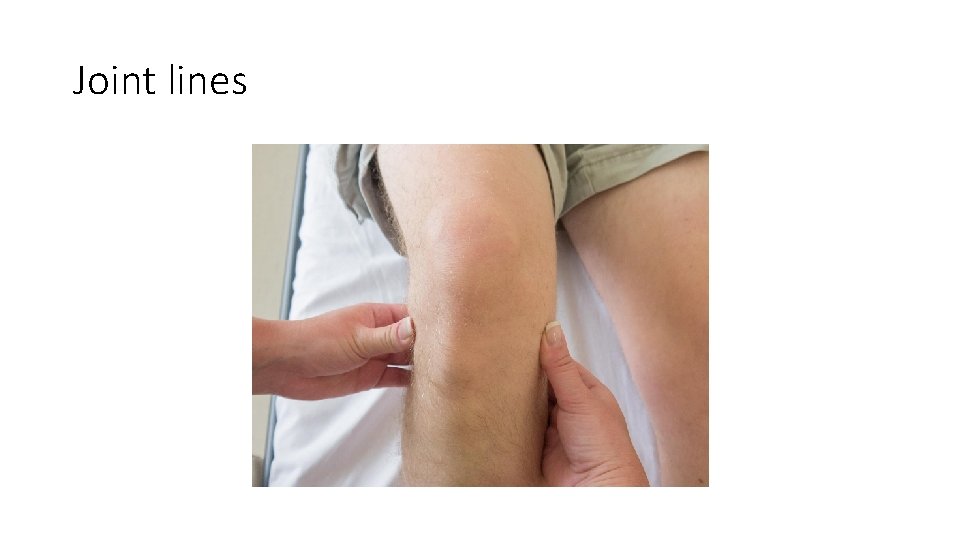
Palpation Palpate the border of the patella for any tenderness, behind the knee for any swellings, along all of the joint lines for tenderness and at the point of insertion of the patellar tendon. Finally, tap the patella to see if there is any effusion deep to the patella.
Joint lines
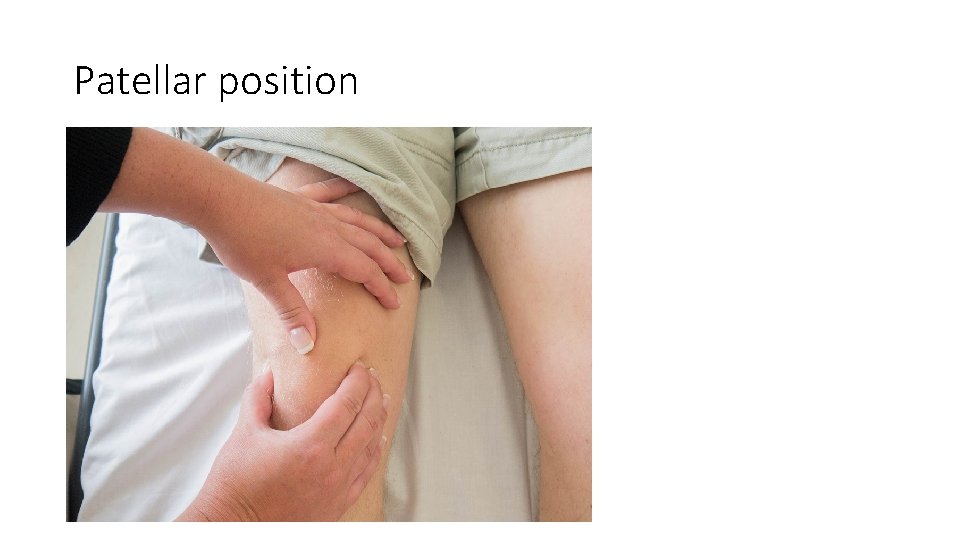
Patellar position
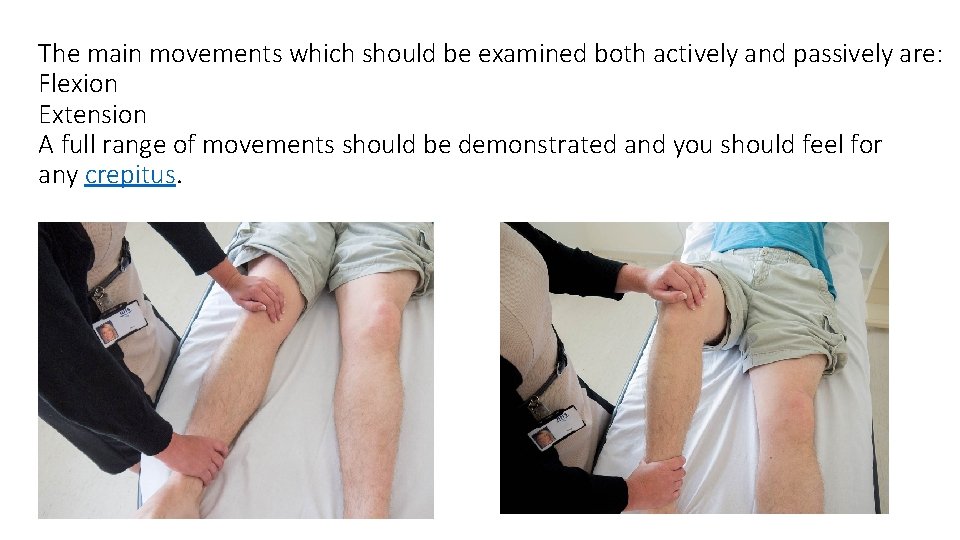
The main movements which should be examined both actively and passively are: Flexion Extension A full range of movements should be demonstrated and you should feel for any crepitus.
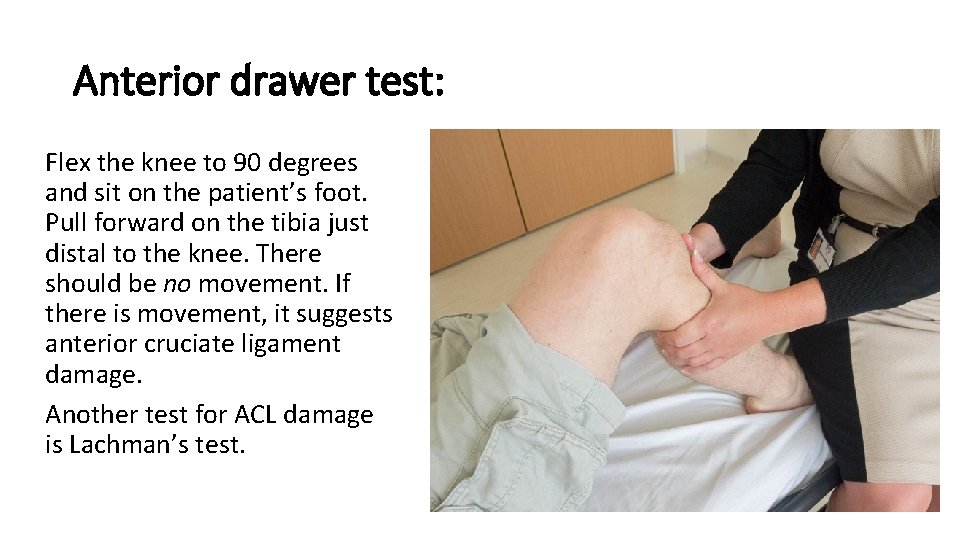
Anterior drawer test: Flex the knee to 90 degrees and sit on the patient’s foot. Pull forward on the tibia just distal to the knee. There should be no movement. If there is movement, it suggests anterior cruciate ligament damage. Another test for ACL damage is Lachman’s test.
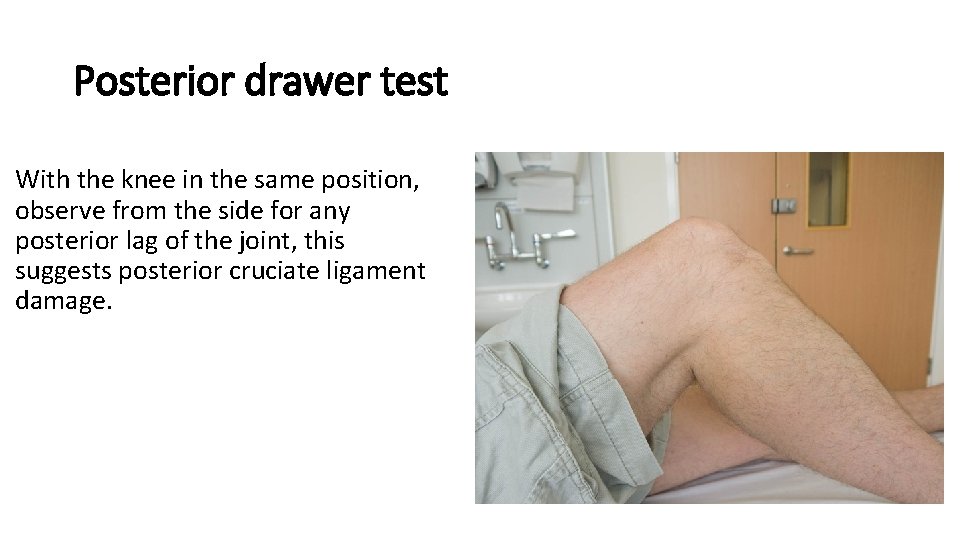
Posterior drawer test With the knee in the same position, observe from the side for any posterior lag of the joint, this suggests posterior cruciate ligament damage.
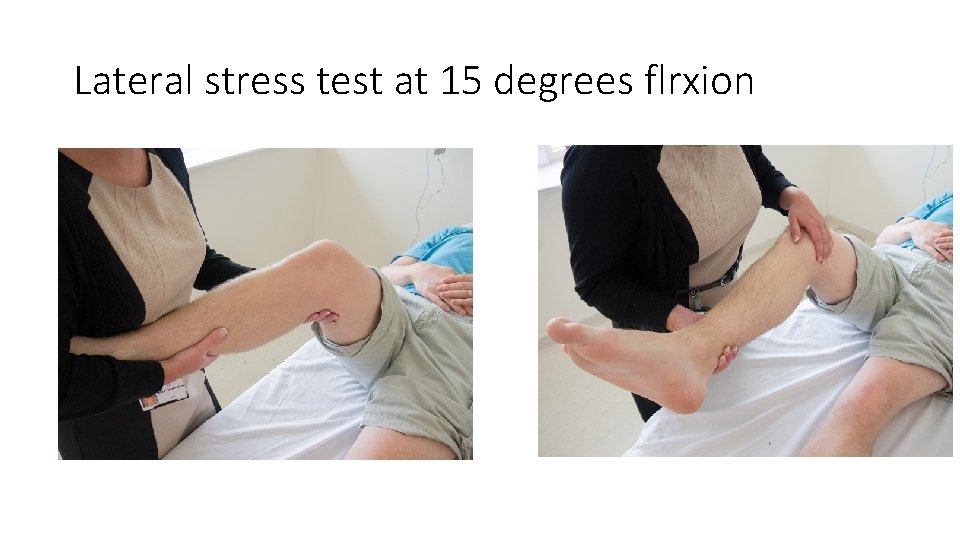
Lateral stress test at 15 degrees flrxion
Shoulder
Prepare • Check understanding and gain consent: • “Does everything I’ve said make sense? Are you happy for me to examine your shoulders? ” • Expose patient’s upper body appropriately • Position the patient standing • Ask if the patient currently has any pain
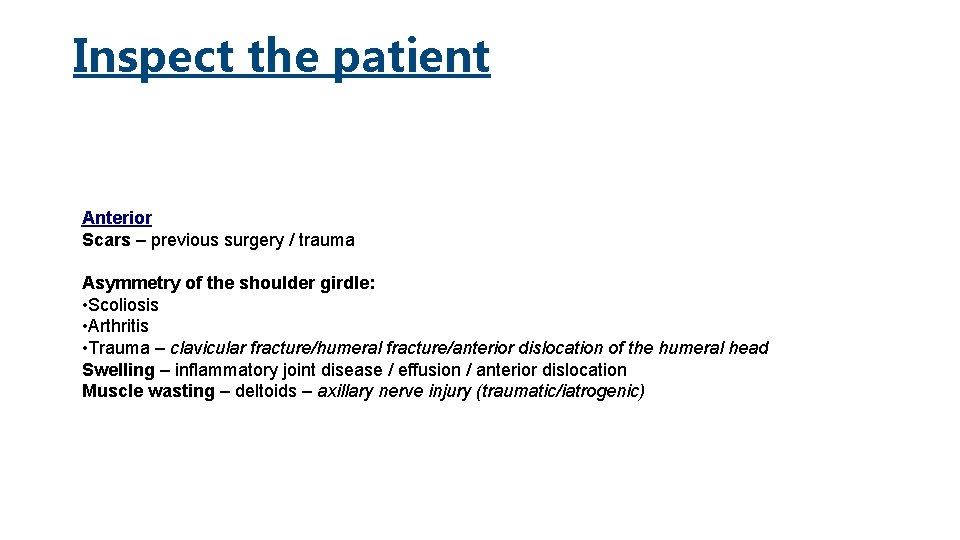
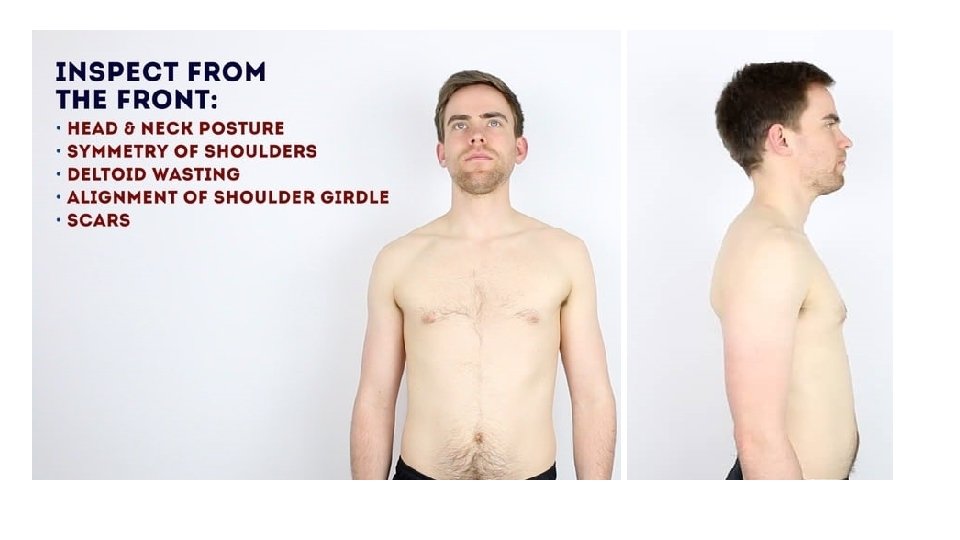
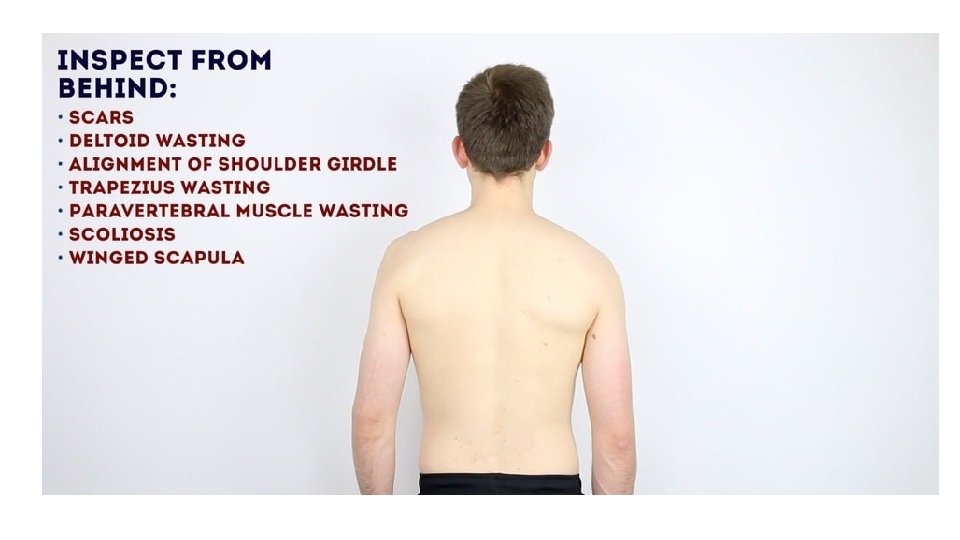
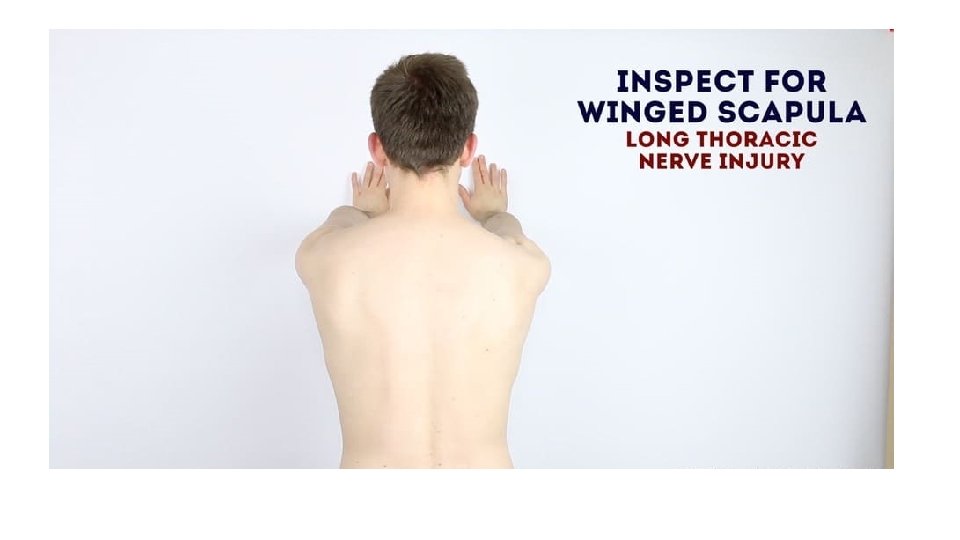
Inspect the patient Anterior Scars – previous surgery / trauma Asymmetry of the shoulder girdle: • Scoliosis • Arthritis • Trauma – clavicular fracture/humeral fracture/anterior dislocation of the humeral head Swelling – inflammatory joint disease / effusion / anterior dislocation Muscle wasting – deltoids – axillary nerve injury (traumatic/iatrogenic)
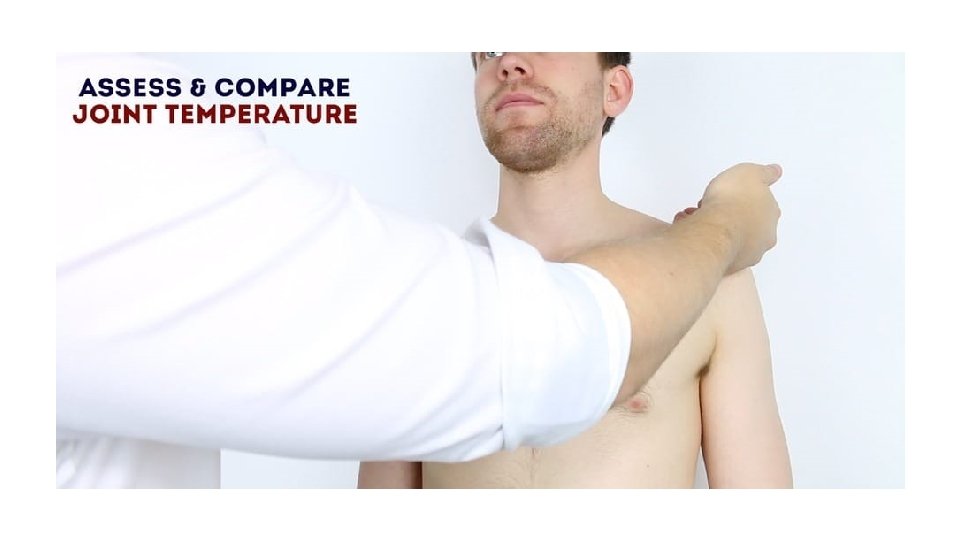
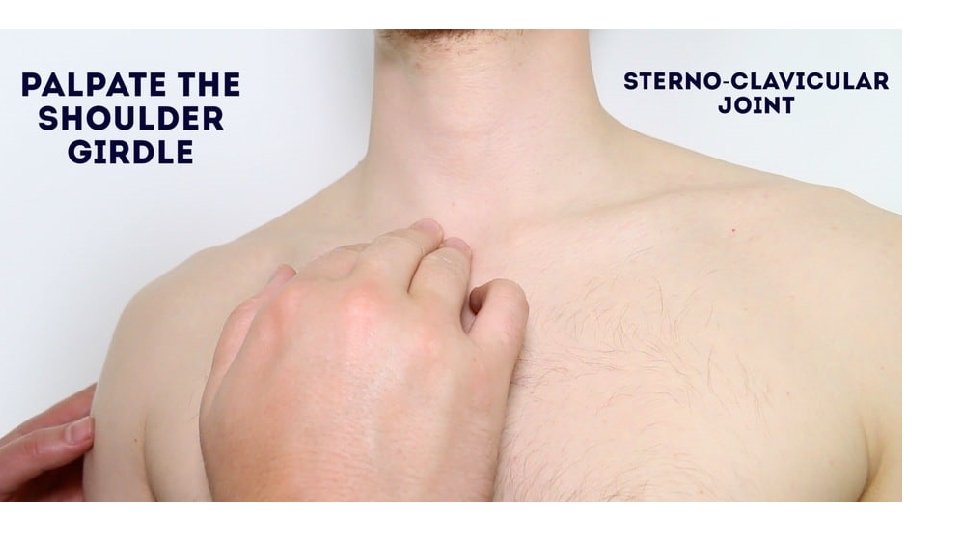
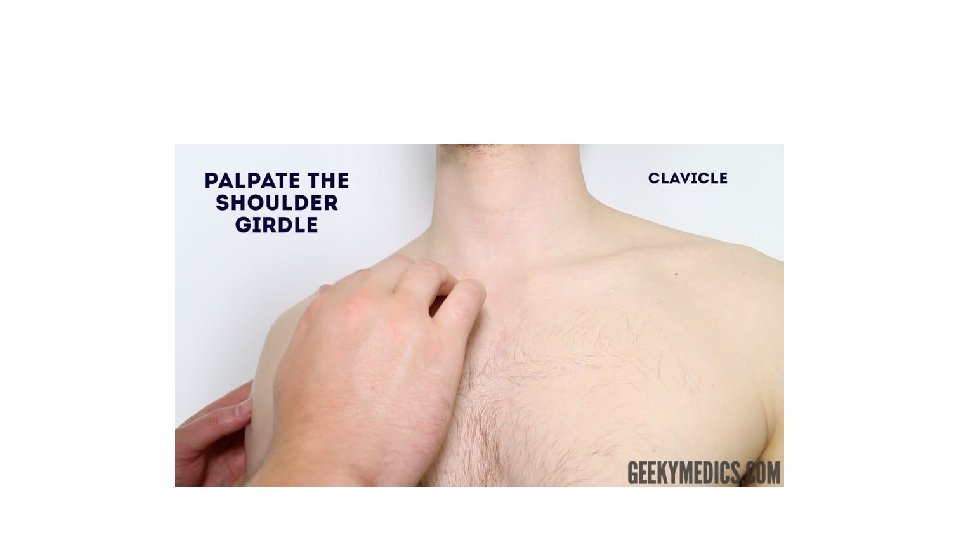
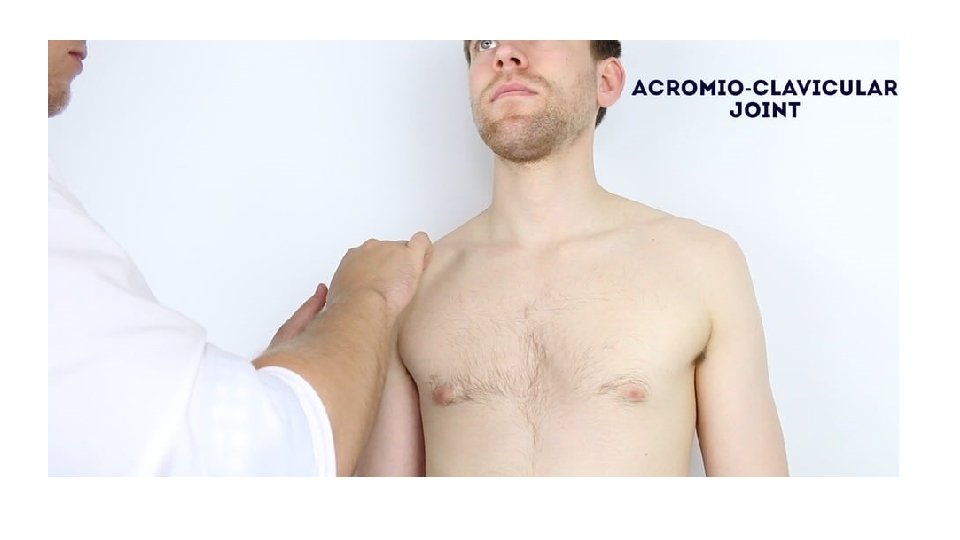
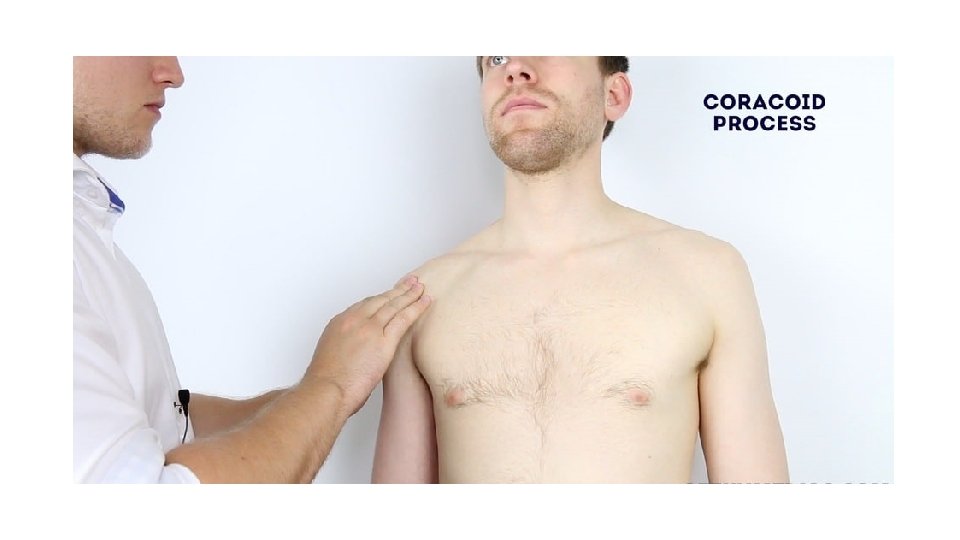
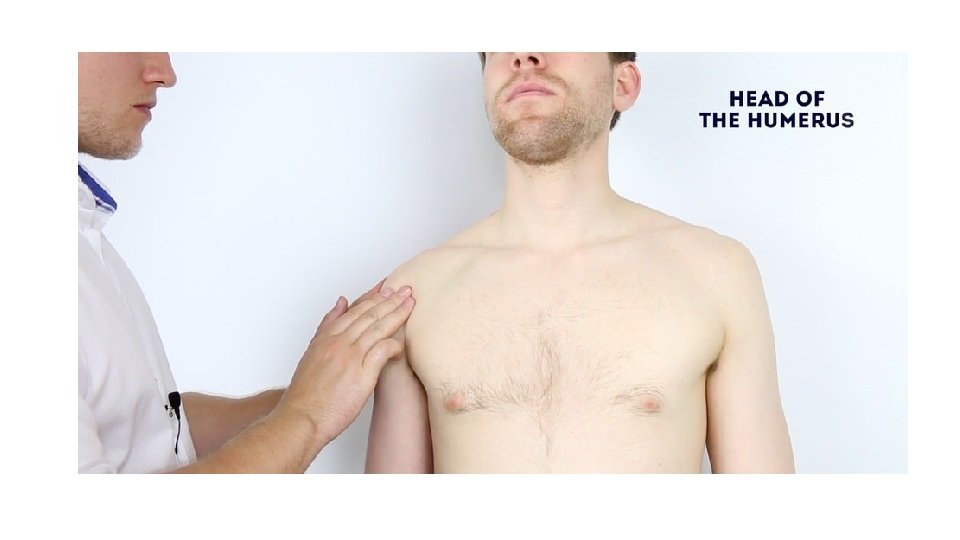
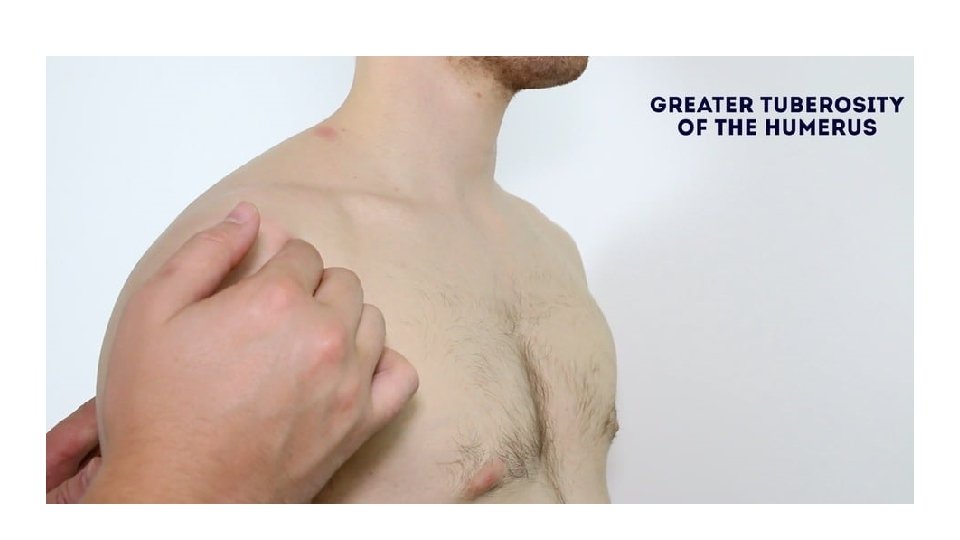
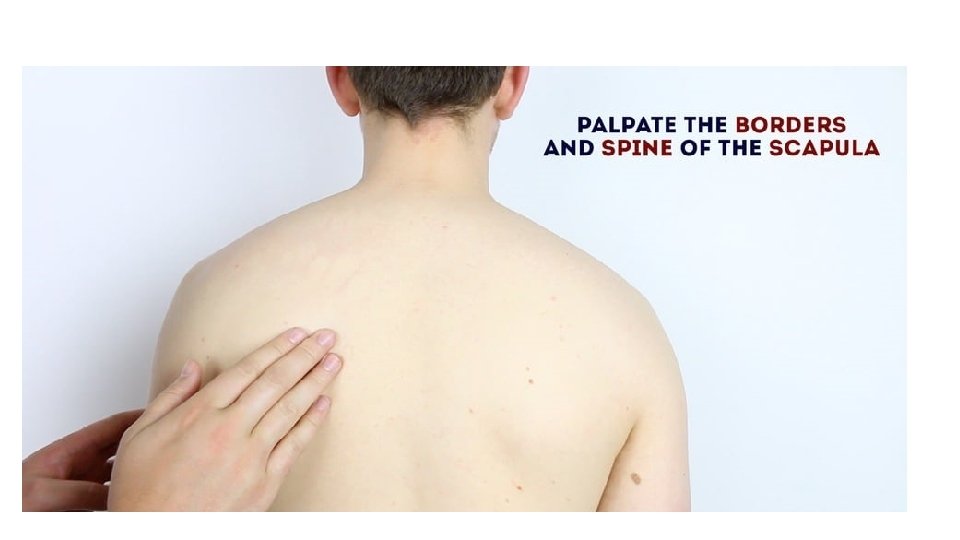
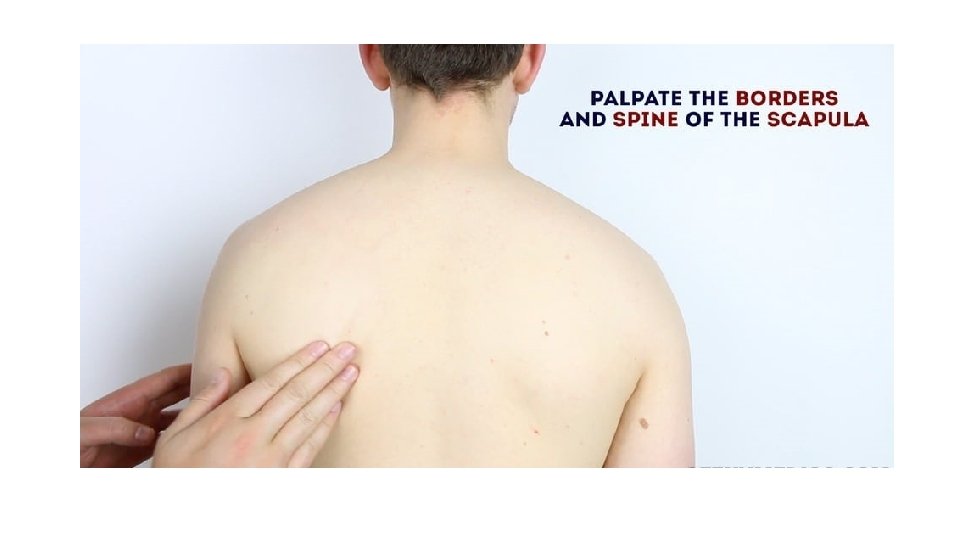
Feel • Assess temperature of shoulder joints – warmth may suggest inflammatory arthropathy/infection • Palpate the various components of the shoulder girdle (note any swelling / tenderness) • Sterno-clavicular joint • Clavicle • Acromio-clavicular joint • Coracoid process – 2 cm inferior and medial to the clavicular tip • Head of humerus • Greater tuberosity of humerus • Spine of scapula
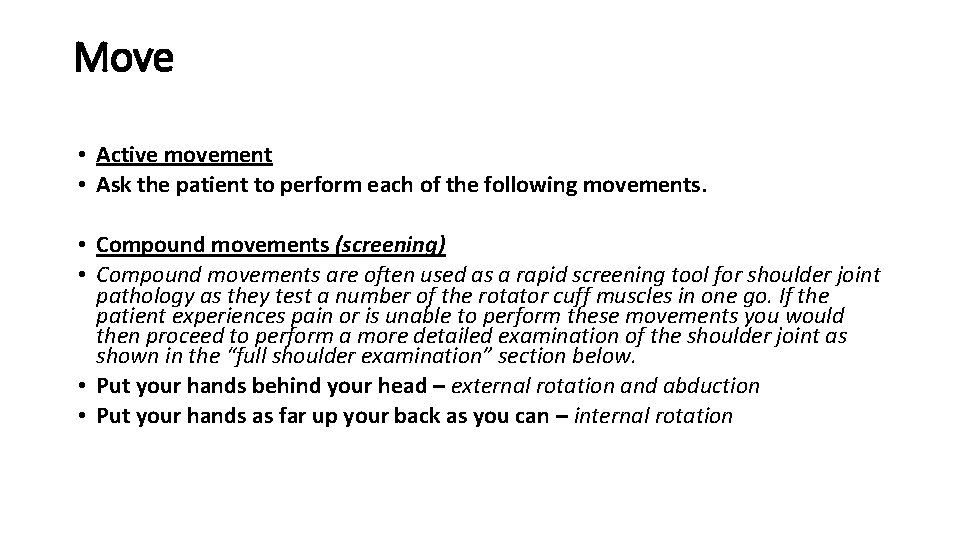
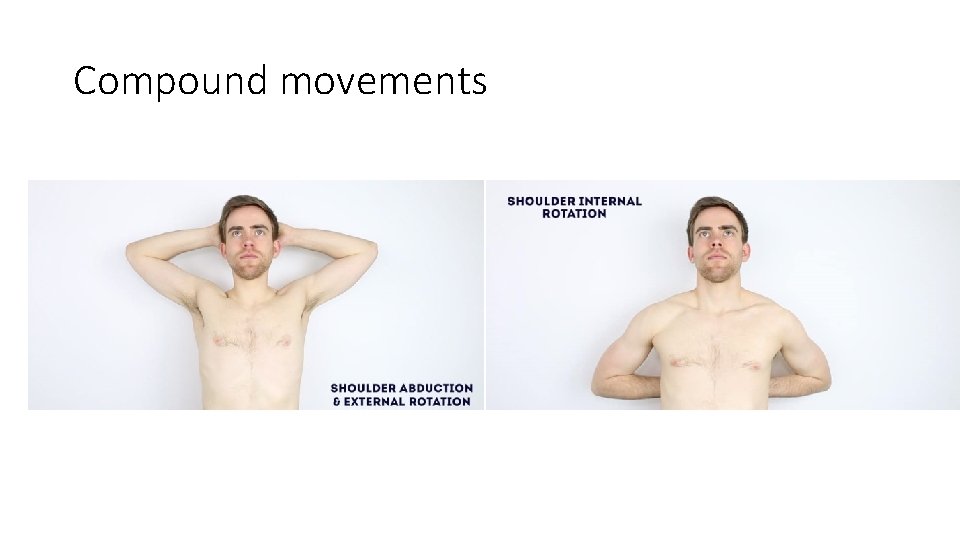
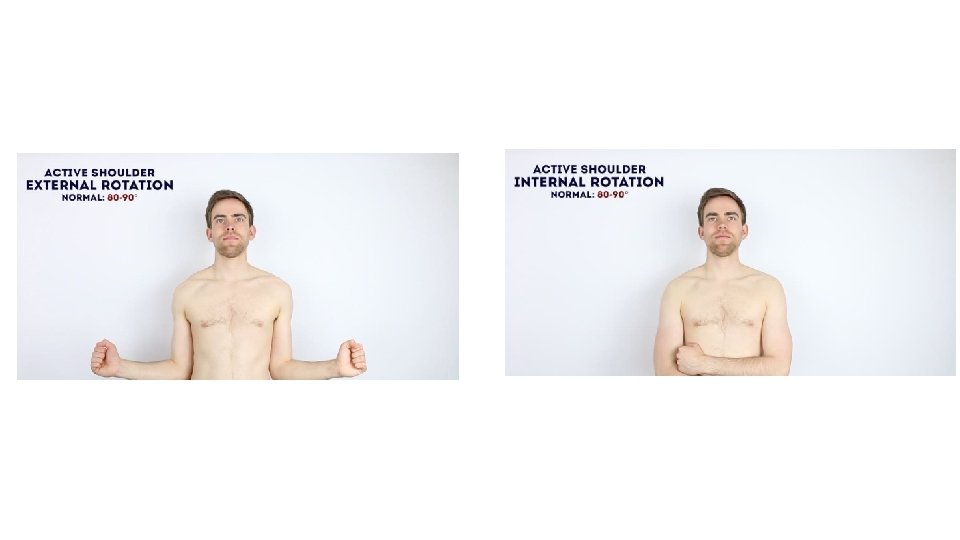
Move • Active movement • Ask the patient to perform each of the following movements. • Compound movements (screening) • Compound movements are often used as a rapid screening tool for shoulder joint pathology as they test a number of the rotator cuff muscles in one go. If the patient experiences pain or is unable to perform these movements you would then proceed to perform a more detailed examination of the shoulder joint as shown in the “full shoulder examination” section below. • Put your hands behind your head – external rotation and abduction • Put your hands as far up your back as you can – internal rotation
Compound movements
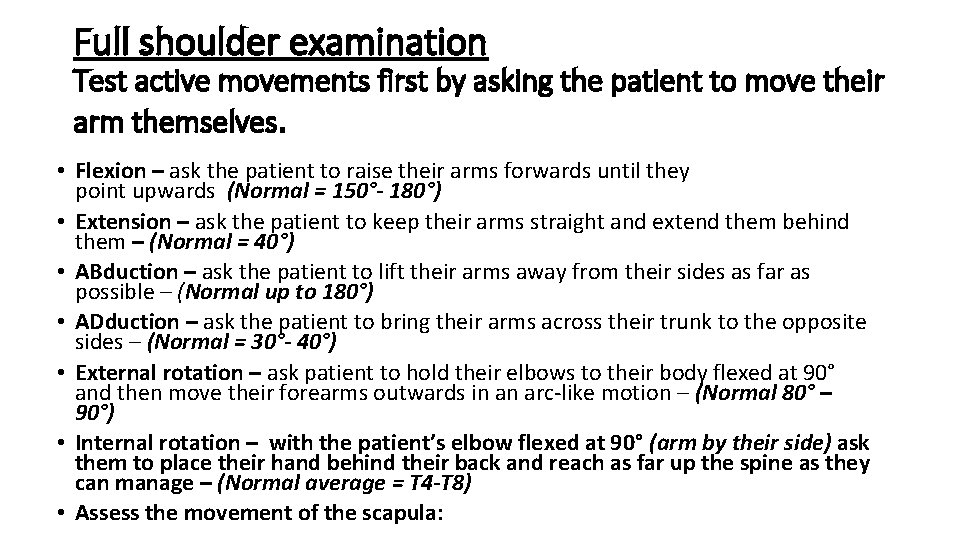
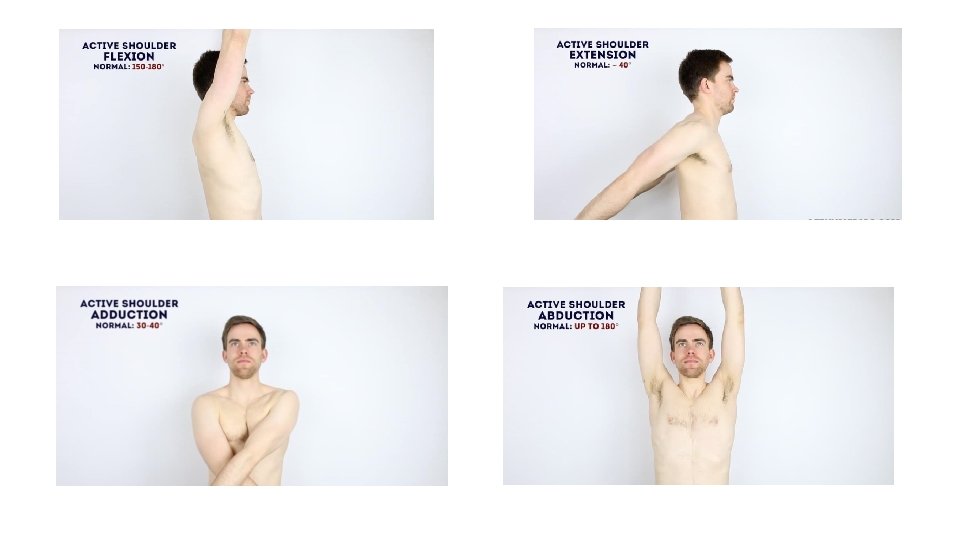
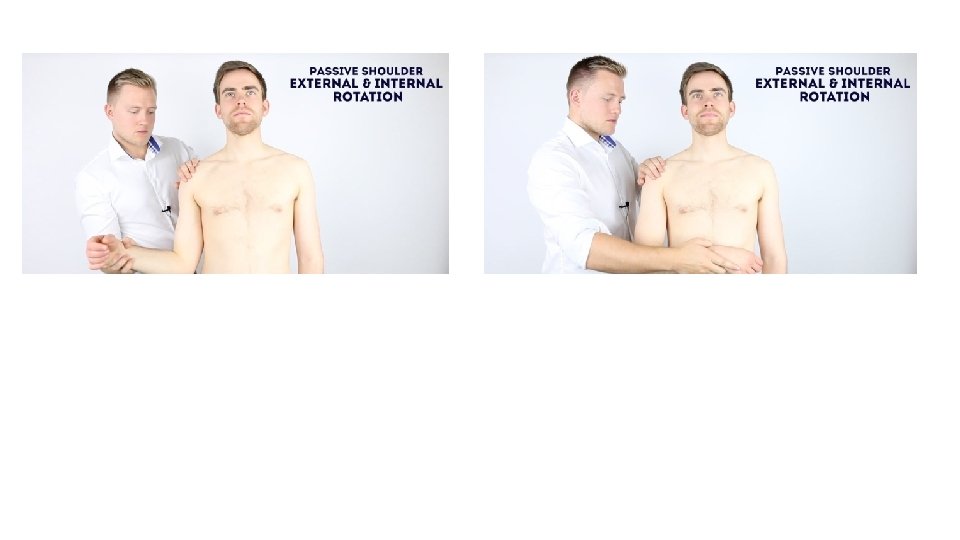
Full shoulder examination Test active movements first by asking the patient to move their arm themselves. • Flexion – ask the patient to raise their arms forwards until they point upwards (Normal = 150°- 180°) • Extension – ask the patient to keep their arms straight and extend them behind them – (Normal = 40°) • ABduction – ask the patient to lift their arms away from their sides as far as possible – (Normal up to 180°) • ADduction – ask the patient to bring their arms across their trunk to the opposite sides – (Normal = 30°- 40°) • External rotation – ask patient to hold their elbows to their body flexed at 90° and then move their forearms outwards in an arc-like motion – (Normal 80° – 90°) • Internal rotation – with the patient’s elbow flexed at 90° (arm by their side) ask them to place their hand behind their back and reach as far up the spine as they can manage – (Normal average = T 4 -T 8) • Assess the movement of the scapula:
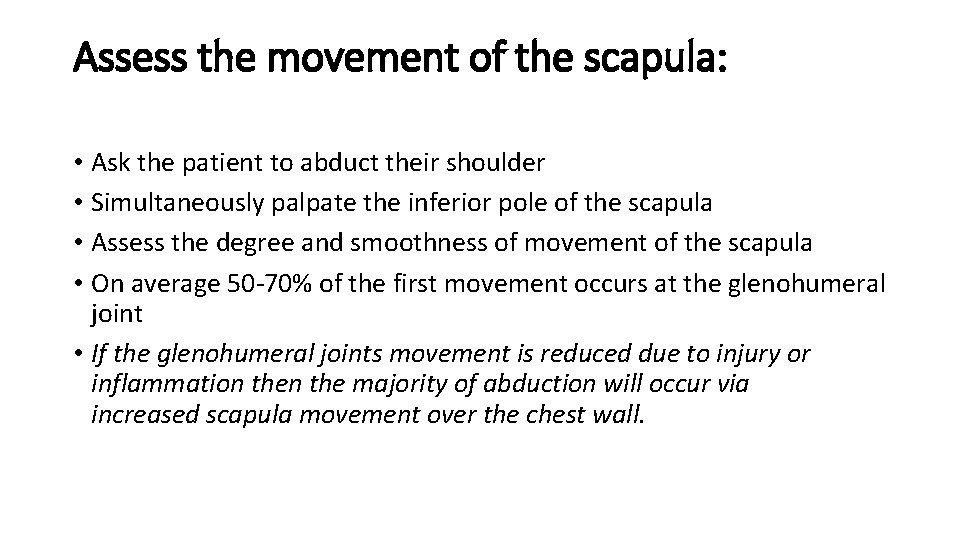
Assess the movement of the scapula: • Ask the patient to abduct their shoulder • Simultaneously palpate the inferior pole of the scapula • Assess the degree and smoothness of movement of the scapula • On average 50 -70% of the first movement occurs at the glenohumeral joint • If the glenohumeral joints movement is reduced due to injury or inflammation the majority of abduction will occur via increased scapula movement over the chest wall.
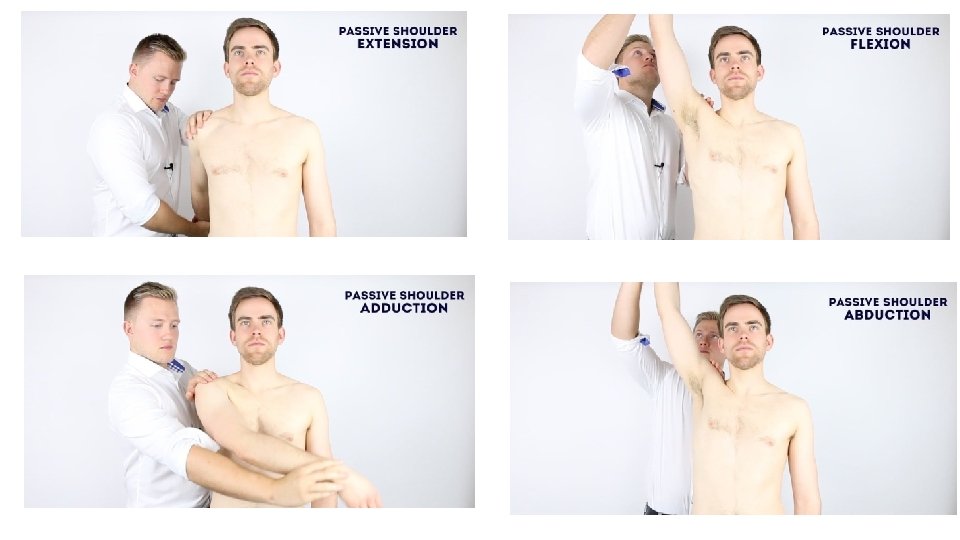
Passive movement If abnormalities are noted on active movements (e. g. restricted range of movement), assess joint movements passively. • Ask the patient to fully relax and allow you to move their arm for them. • Warn them that should they experience any pain they should let you know immediately. • Repeat the above movements passively – feel for any crepitus during movement of the joint
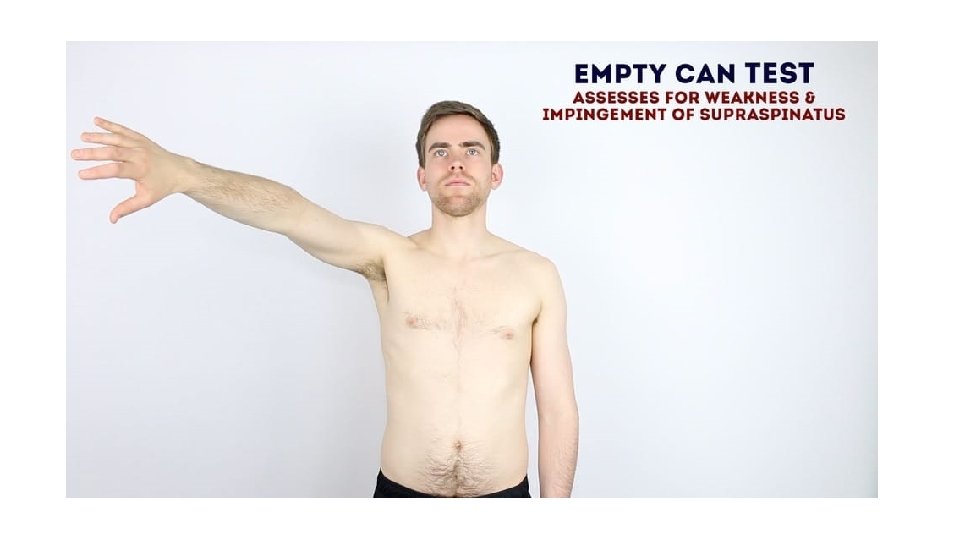
Supraspinatus assessment – “Empty Can Test” This clinical test assesses the function of supraspinatus. • Abduct the arm to 90° and angle the arm forward by ~30 ° (so that the shoulder is in the plane of the scapula). • Internally rotate the arm so that the thumb points down toward the floor. Now push down on the arm whilst the patient resists the pressure. • Repeat the assessment on the other arm. • This test assesses for weakness in the supraspinatus and/or impingement. Weakness may represent a tear in the supraspinatus or pain due to impingement.
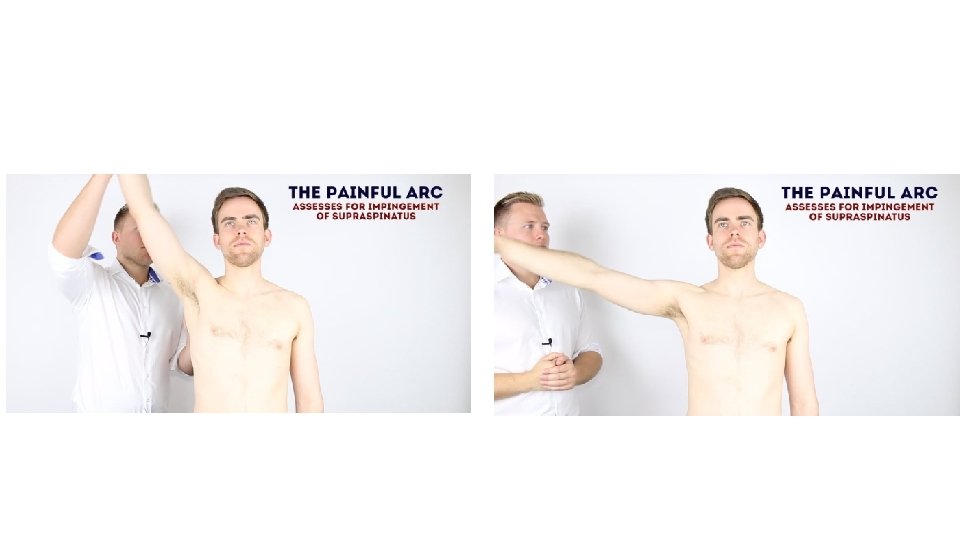
The painful arc (impingement syndrome) This clinical test assesses for impingement of supraspinatus. • 1. Passively abduct the patient’s arm to its maximum point of abduction. • 2. Ask the patient to lower their arm slowly back to a neutral position. • Impingement/supraspinatus tendonitis typically causes pain between 60 -120° of abduction, however this test is not specific as many other conditions can cause pain in this arc of motion and therefore it should not be used in isolation for diagnosis.
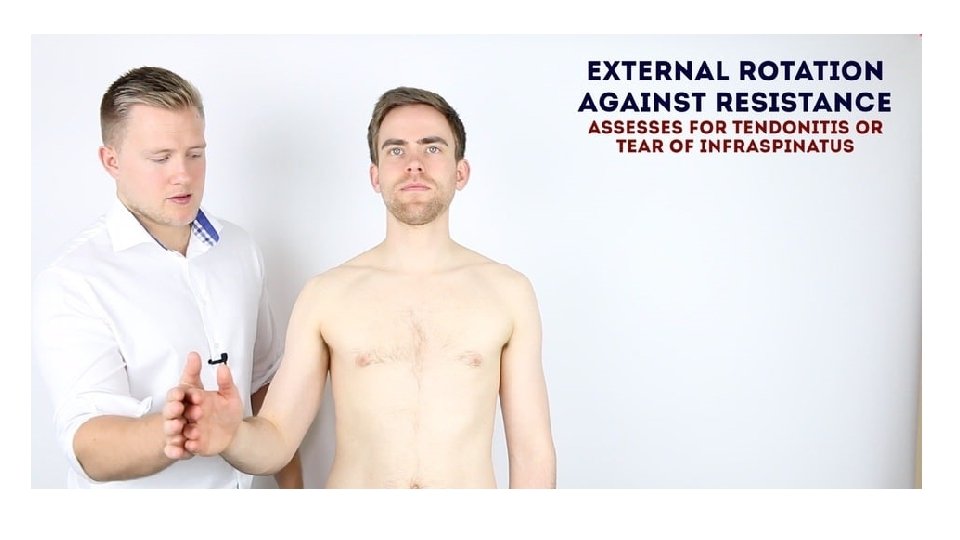
External rotation against resistance This clinical test assesses the function of infraspinatus. • Position the patient’s arm with the elbow flexed at 90°and in slight abduction (the abduction tests whether the patient can keep the arm externally rotated against gravity). • Passively externally rotate the arm to its maximum. • Pain on resisted external rotation may suggest infraspinatus tendonitis. • If the arm falls back to internal rotation or there is a loss of power it may suggest a tear in the infraspinatus tendon or muscle wasting.
External rotation in abduction This clinical test assesses the function of teres minor. • Position the arm in 90° of abduction and bend the elbow to 90° • Passively externally rotate the shoulder to its maximum degree • If the patient is unable to keep the arm in this position (i. e the arm falls back to internal rotation) this may represent a positive “hornblower’s” sign (pathology in the teres minor).
Internal rotation against resistance (“Gerber liftoff test”) This clinical test assesses the function of the subscapularis muscle. • Ask the patient to place the dorsum of their hand on their lower back. • Apply light resistance to the hand (pressing it towards their back). • Ask the patient to move their hand off their back. • An inability to do this (loss of power) indicates pathology of the subscapularis (e. g. tendonitis/tear).
Elbow Examination
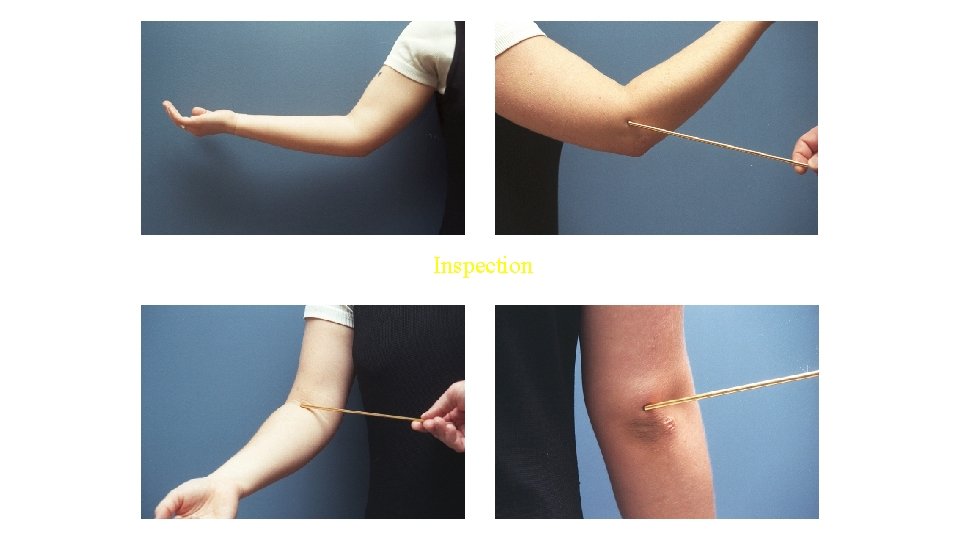
Inspection Normal carrying angle in adult Male = 10 -11 degrees valgus Female = 13 degrees valgus Not uncommon for throwers to have > 15 degrees valgus at elbow Person with large elbow effusion will tend to hold elbow flexed 70 -80 degrees as this corresponds to greatest volume of elbow joint capsule
Inspection 13 degrees Valgus
Inspection
Inspection Olecranon bursa should be insepected If enlarged may represent bursitis Aseptic vs. septic Ulnar nerve subluxation may be visible
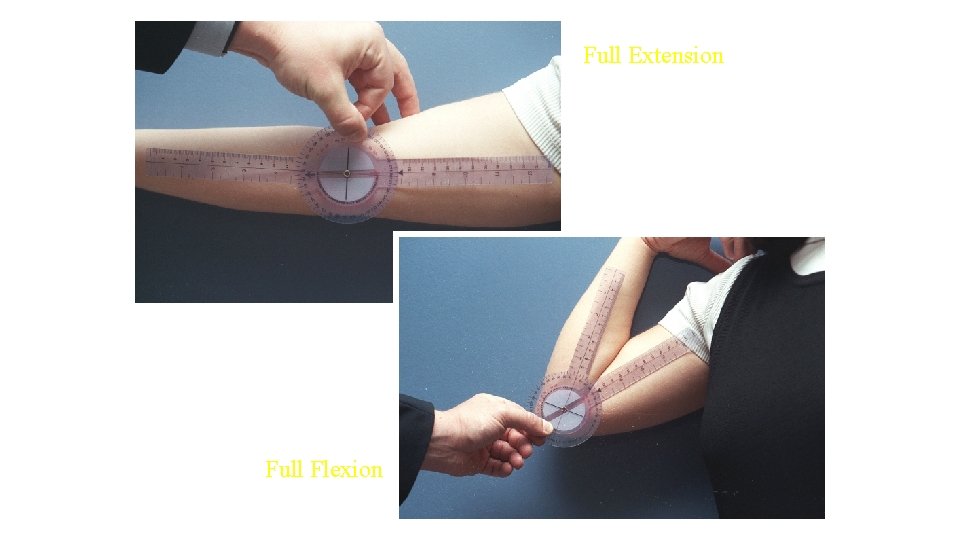
Range of Motion Active followed by passive ROM Normal ROM in adult 0 – 140 degrees +/- 10 degrees in sagittal plane 80 -90 degrees of forearm rotation in each direction With progressive flexion, elbow moves into increasing valgus
Full Extension Full Flexion
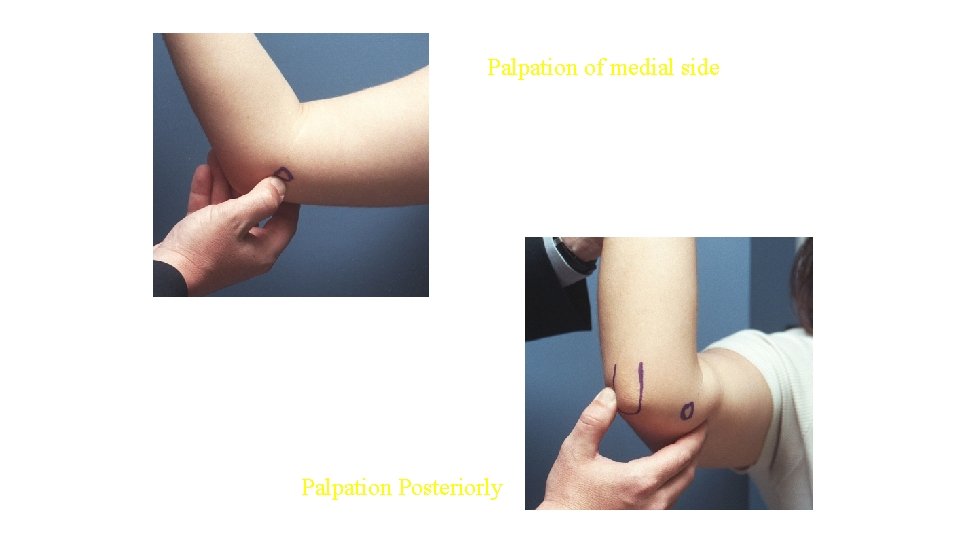
Palpation Bony Palpation Olecranon Posteromedial tip (impingement) Proximal shaft (stress fractures) Epicondyles Fractures Epicondylitis Radial Head Fractures Dislocations
Palpation of medial side Palpation Posteriorly
Epicondylitis Medial Epicondylitis (Golfer’s Elbow) Palpate medial muslce mass/epicondyle while resisting active pronation Pain either within muscle belly or directly over epicondyle Lateral Epicondylitis (Tennis Elbow) Palpate mobile wad while resisting active supination (ECRB most common offender) Pain within muscle belly or over epicondyle
Ulnar Nerve Instability Ulnar nerve held in cubital tunnel by overlying and investing fascia Rupture or stretch of this tissue may lead to subluxation of nerve Paresthesias Pain with subluxation May have pain with palpation Ulnar nerve subluxes anteriorly with increasing flexion of elbow Nerve “snaps” back with rapid active extension
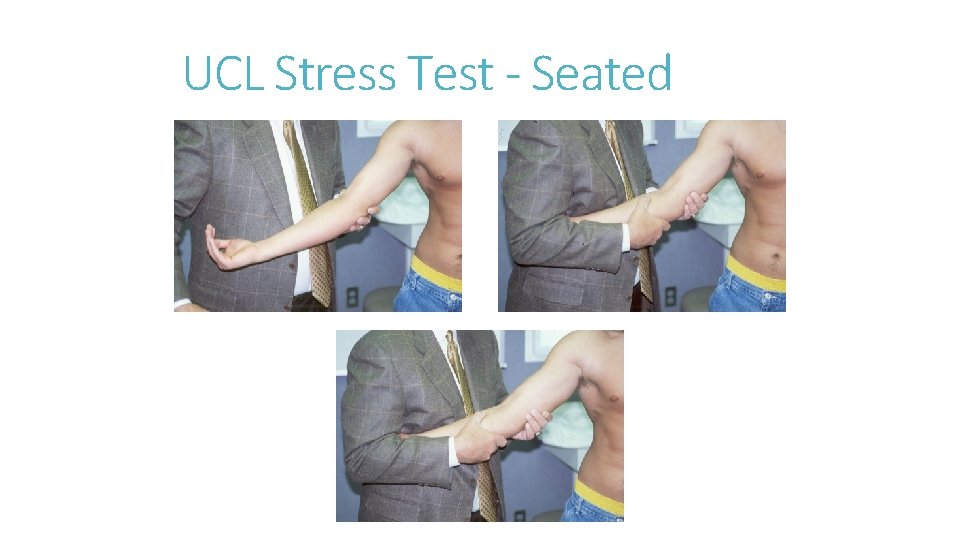
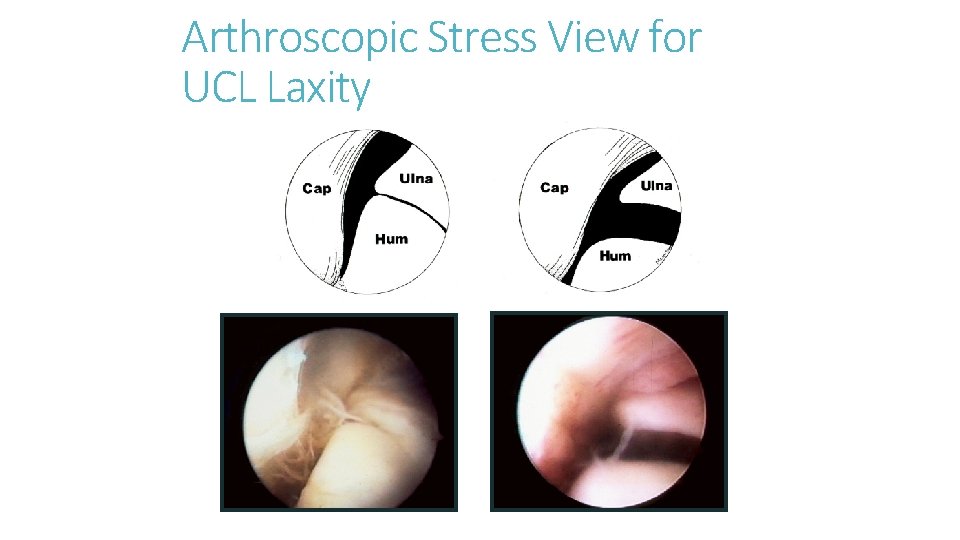
Testing the UCL With patient supine or prone, abduct and maximally externally rotate shoulder Elbow flexed 25 degrees Apply valgus stress Assess for end-feel and amount of opening Should not induce any pain in normal elbow
UCL Stress Test - Seated
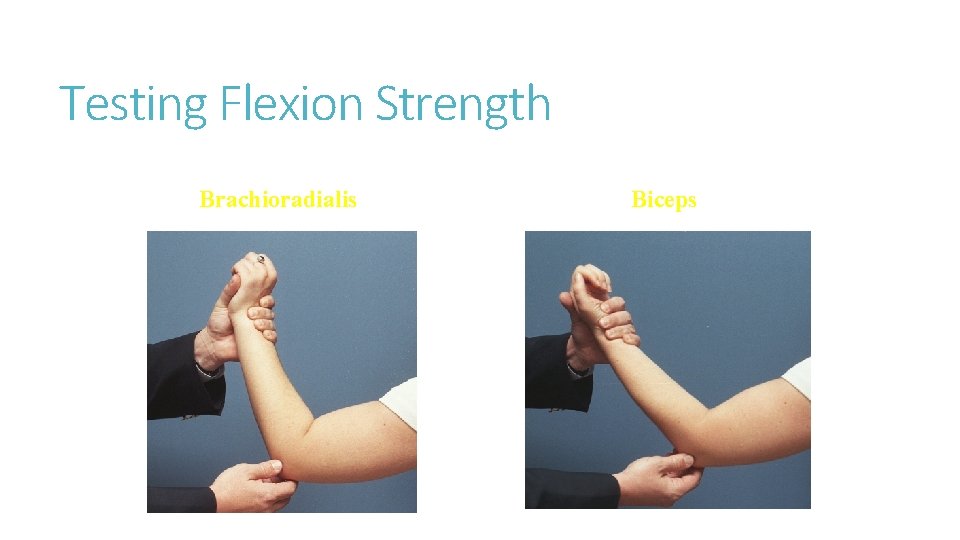
Testing Flexion Strength Brachioradialis Biceps
Lateral Ligamentous Exam Radial Collateral Ligament make up lateral ligament complex Apply varus stress with elbow flexed 15 -20 degrees Arm is internally rotated to prevent shoulder rotation Assess any pain or increased varus laxity
Arthroscopic Stress View for UCL Laxity
Examination of Foot and Ankle
Inspection. Palpation. Movements. Special tests.
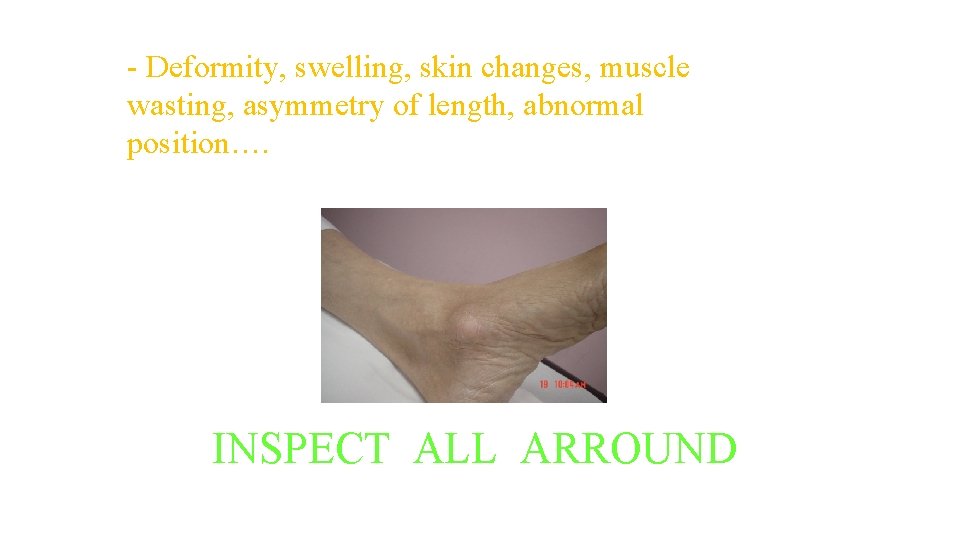
INSPECTION: - Deformity, swelling, skin changes, muscle wasting, asymmetry of length, abnormal position…. INSPECT ALL ARROUND
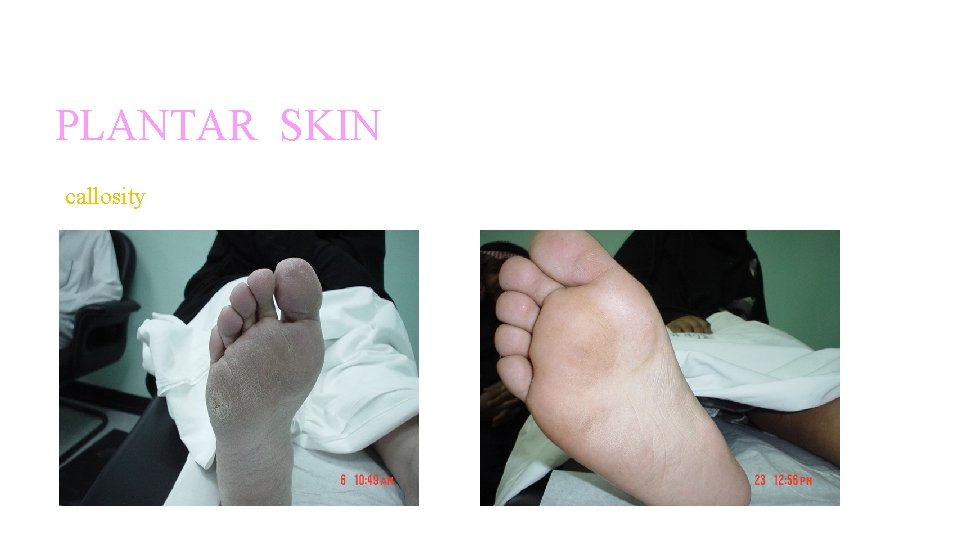
INSPECTION: PLANTAR SKIN callosity
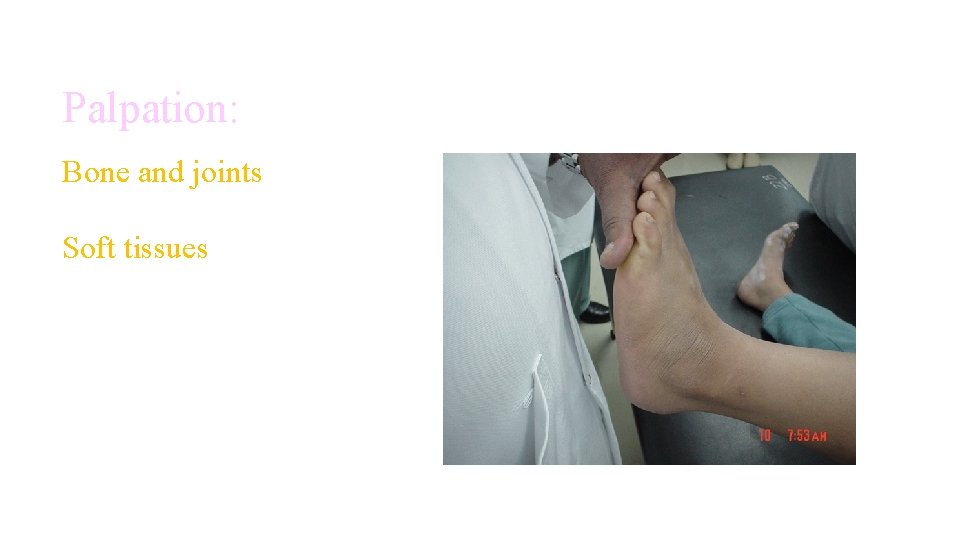
Palpation: Bone and joints Soft tissues
Begin with inspecting the joint whilst the patient is standing • Watch the patient walk, observing for a normal heel strike, toe-off gait. • Look at the alignment of the toes for any valgus or varusdeformities. • Examine the foot arches, checking for pes cavus (high arches) or pes planus (flat feet). • Feel the Achilles tendon for any thickening or swelling. • Inspect the patient’s shoes and note any uneven wear on either sole and the presence of any insoles.
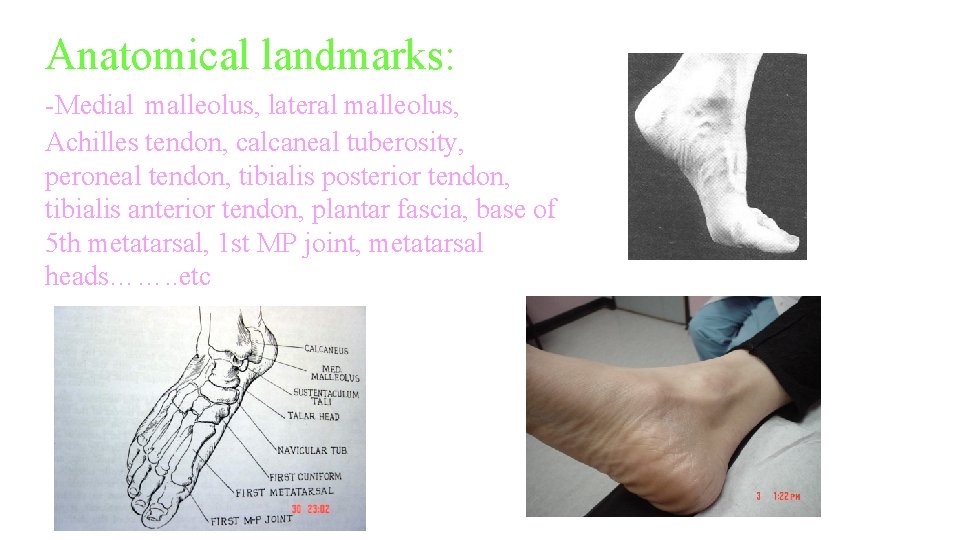
Anatomical landmarks: -Medial malleolus, lateral malleolus, Achilles tendon, calcaneal tuberosity, peroneal tendon, tibialis posterior tendon, tibialis anterior tendon, plantar fascia, base of 5 th metatarsal, 1 st MP joint, metatarsal heads……. . etc
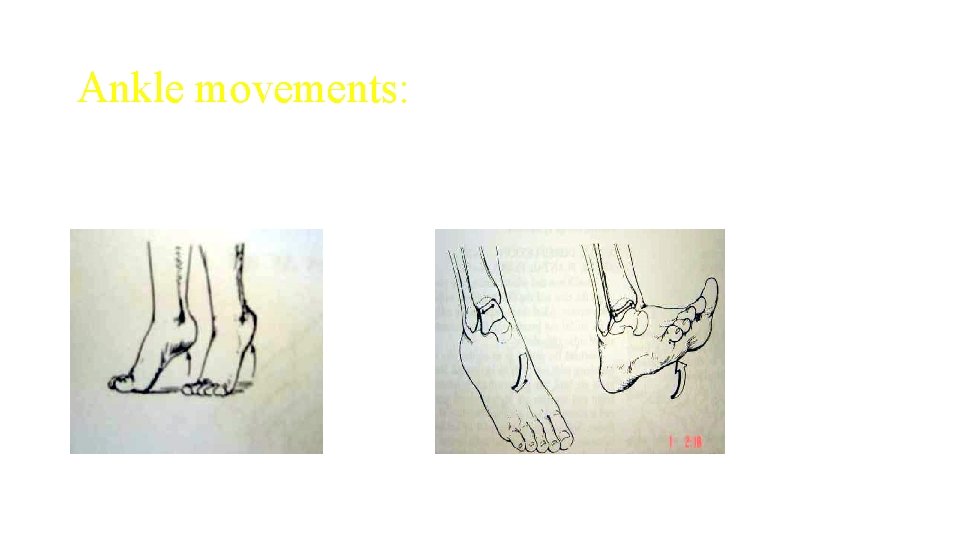
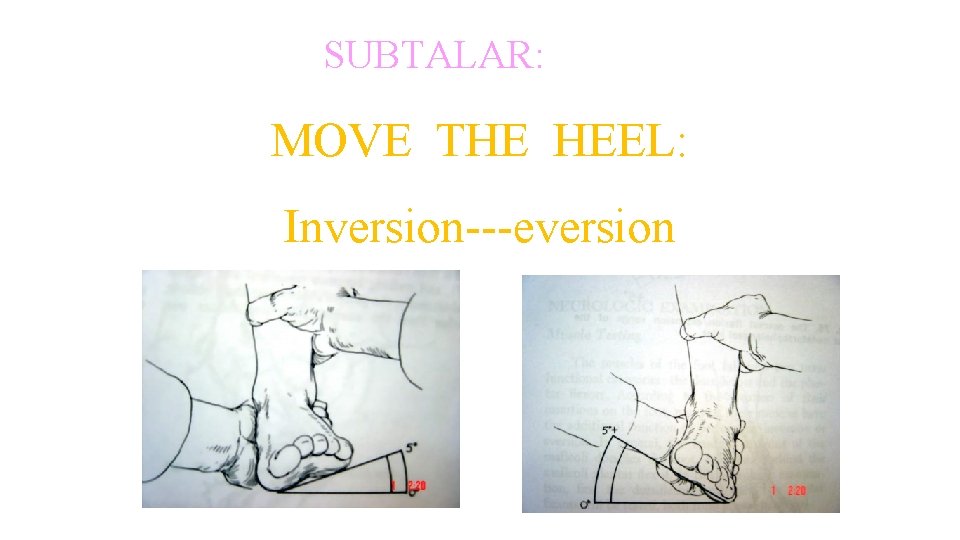
MOVEMENTS: Ankle: -dorsiflection -plantar flection. Subtalar: -inversion -eversion. Midtarsal: -pronation -supination Tarso-metatarsals: move the metatarsals one by one. Toes:
Ankle movements:
MOVEMENT: SUBTALAR: MOVE THE HEEL: Inversion---eversion
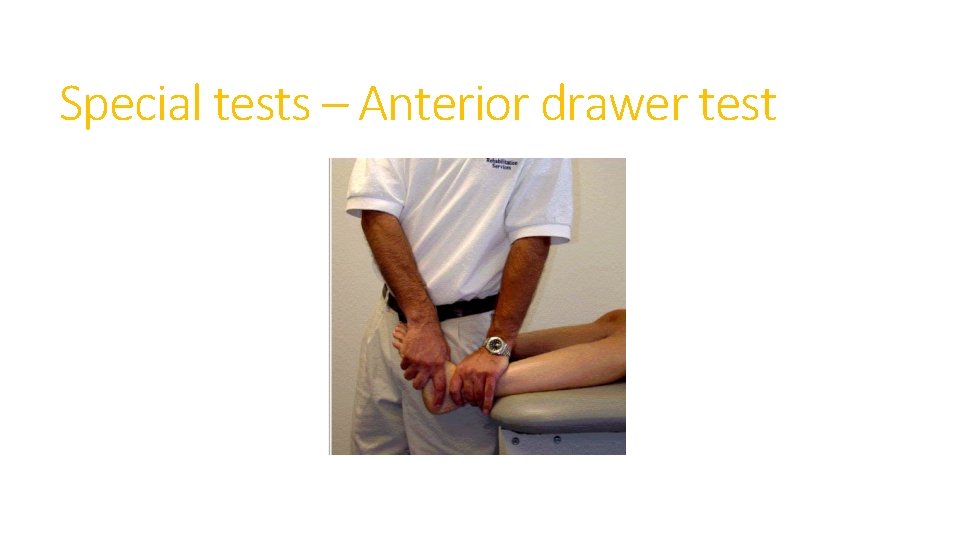
Special tests – Anterior drawer test
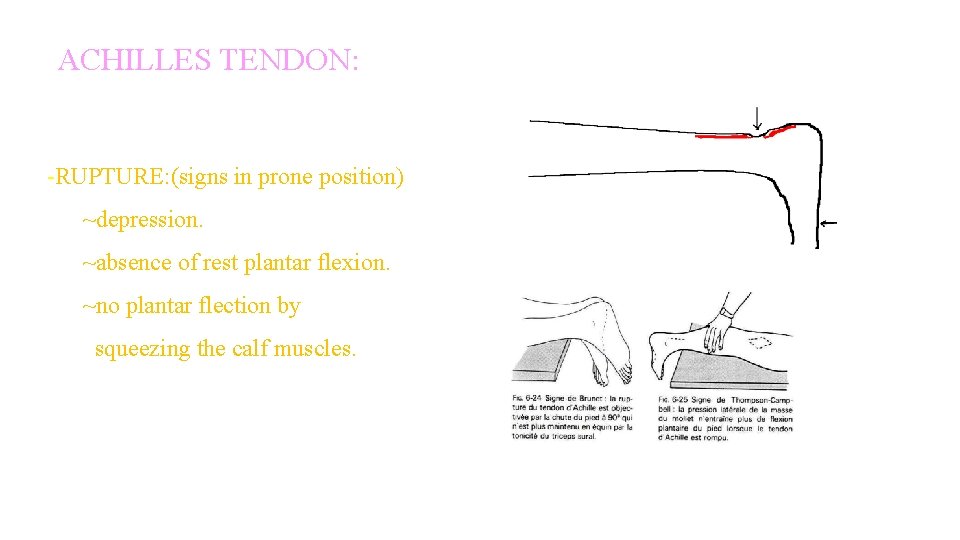
ACHILLES TENDON: -RUPTURE: (signs in prone position) ~depression. ~absence of rest plantar flexion. ~no plantar flection by squeezing the calf muscles.
Perform other relevant evaluations • Full neurovascular examination of the relavent limbs • Perform further imaging if indicated – e. g. X-ray / MRI • Say , Thank you to the patient
Thank You