JAVA Essential 1 import 7 47 import import


")


 작성 26 47 Point 클래스에 Point")
와 equals() 메소드 27 47 == 연산자 � 객체 레퍼런스 비교 Point a")
 작성 28 47 Point 클래스에 x, y")
 메소드 만들기 연습 29 47 int 타입의")


- Slides: 47
명품 JAVA Essential 1
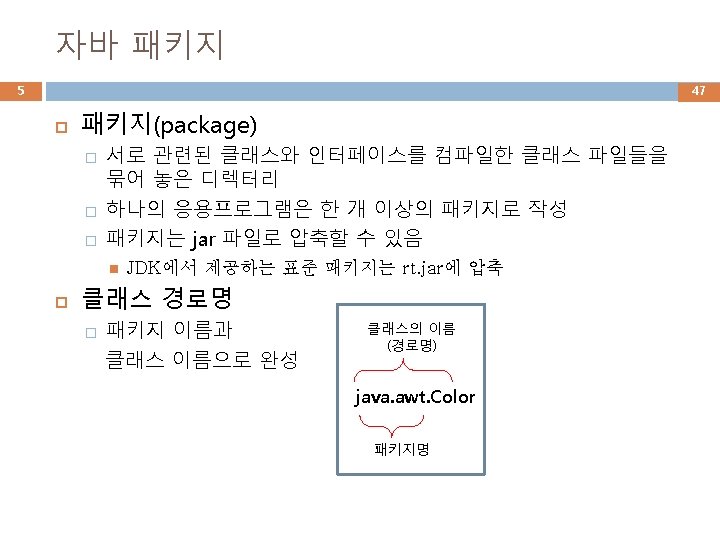
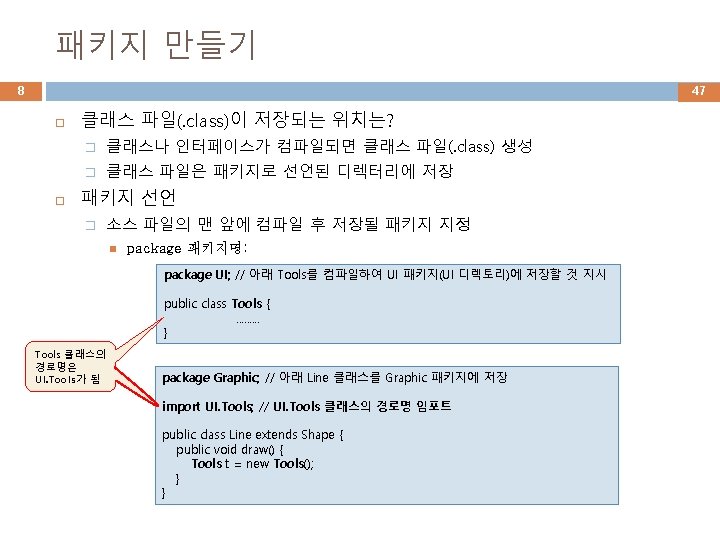
패키지 사용하기, import문 7 47 다른 패키지에 작성된 클래스 사용 � import를 이용하지 않는 경우 � 필요한 클래스만 import � 소스에 클래스 이름의 완전 경로명 사용 소스 시작 부분에 클래스의 경로명 import 패키지. 클래스 소스에는 클래스 명만 명시하면 됨 패키지 전체를 import 소스 시작 부분에 패키지의 경로명. * import 패키지. * 소스에는 클래스 명만 명시하면 됨 import java. util. *; java. util 패키지 내의 모든 클래스만을 지정, 하 위 패키지의 클래스는 포함하지 않음 public class Import. Example { public static void main(String[] args) { java. util. Scanner scanner = new java. util. Scanner(System. in); } } import java. util. Scanner; public class Import. Example { public static void main(String[] args) { Scanner scanner = new Scanner(System. in); } } import java. util. *; public class Import. Example { public static void main(String[] args) { Scanner scanner = new Scanner(System. in); } }
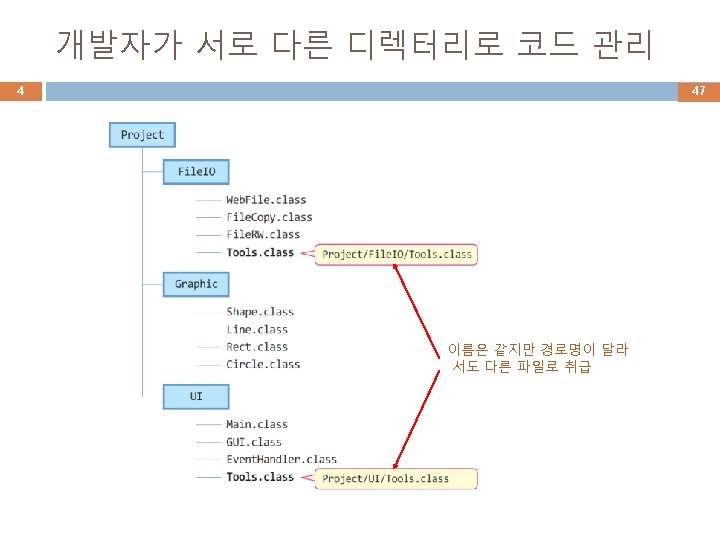
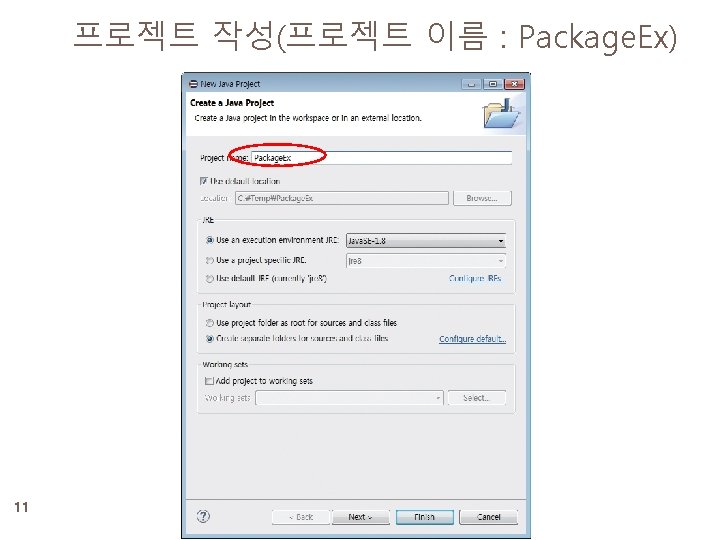
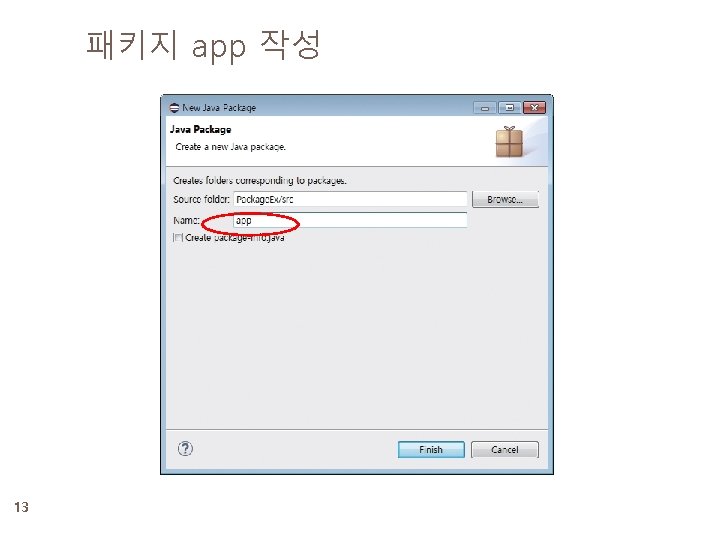
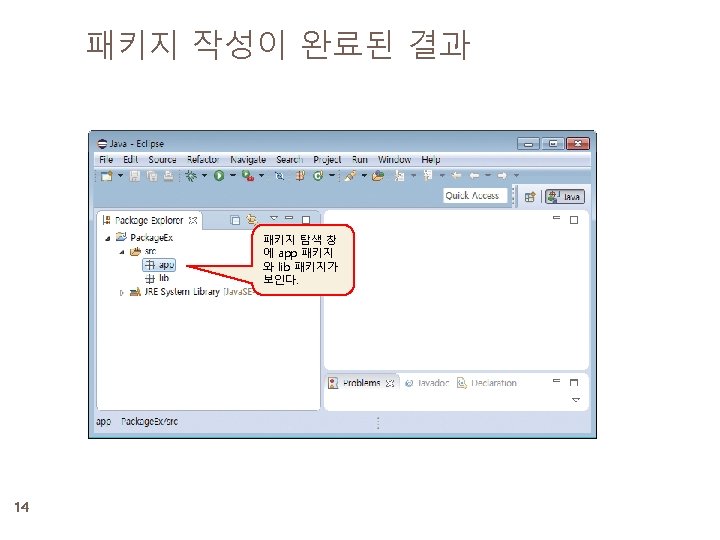
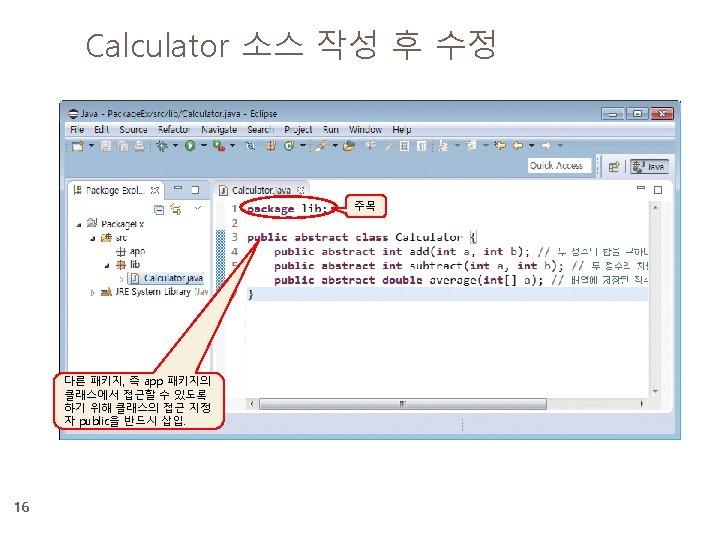
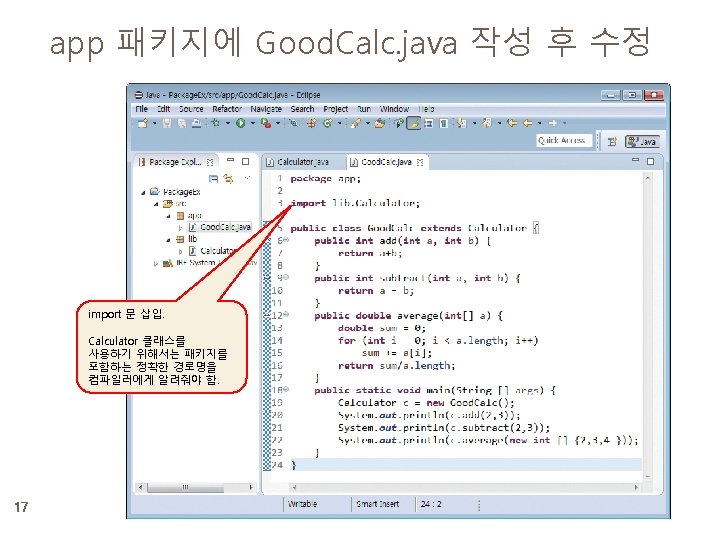
이클립스로 쉽게 패키지 만들기 10 47 � 예제로 사용할 샘플 소스(5장의 예제 5 -5) abstract class Calculator { public abstract int add(int a, int b); public abstract int subtract(int a, int b); public abstract double average(int[] a); } lib 패키지에 class Good. Calc extends Calculator { app 패키지에 public int add(int a, int b) { return a+b; } public int subtract(int a, int b) { return a - b; } public double average(int[] a) { double sum = 0; for (int i = 0; i < a. length; i++) sum += a[i]; return sum/a. length; } public static void main(String [] args) { Calculator c = new Good. Calc(); System. out. println(c. add(2, 3)); System. out. println(c. subtract(2, 3)); System. out. println(c. average(new int [] {2, 3, 4 })); } } Calculator 클래스는 lib 패키지에 Good. Calc 클래스는 app 패키지에 나누어 저장하는 응용프로그램을 이클립스를 이용하여 만들기
lib 패키지에 클래스 Calculator 만들기 Calculator 클래스를 public abstract 속성 으로 생성한다. 15
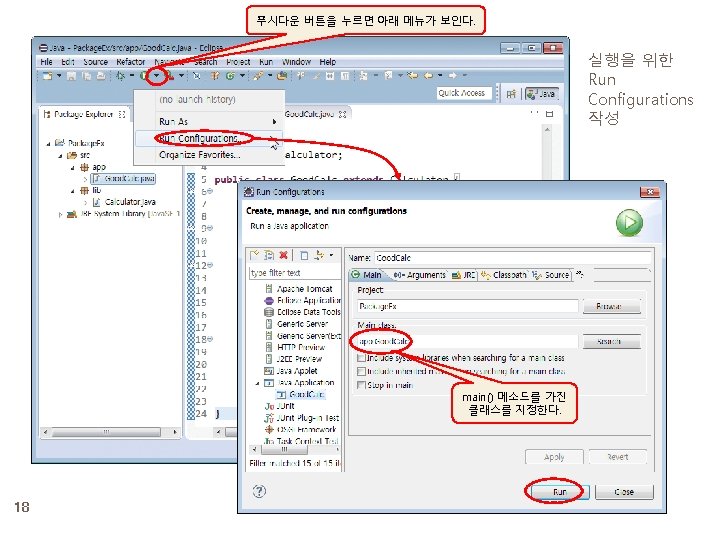
프로젝트 Package. Ex 실행 19 47
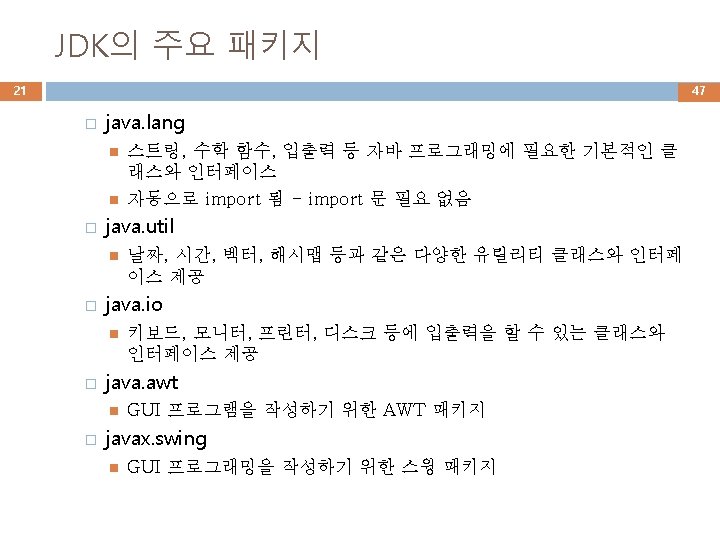
JDK 표준 자바 패키지 구조 : rt. jar java applet awt beans io lang math net nio rmi security sql beancontext color datatransfer dnd dgc event font registry server geom instrument im image print spi renderable managemen t acl cert ref channel s charset spi reflect spe c interfaces concurre nt 20 util spi annotation activation text atomic locks jar loggin g prefs regex spi zip
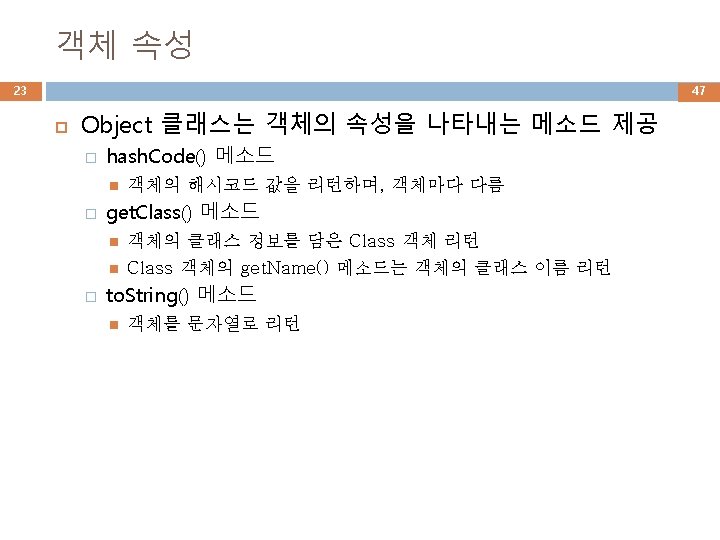
예제 6 -1 : Object 클래스로 객체 속성 알아내기 24 47 Object 클래스를 이용하여 객체의 클래스명, 해시 코드 값, 객체의 문자 열을 출력해보자. class Point { int x, y; public Point(int x, int y) { this. x = x; this. y = y; } } public class Object. Property. Ex { public static void main(String [] args) { Point p = new Point(2, 3); System. out. println(p. get. Class(). get. Name()); // 클래스 이름 System. out. println(p. hash. Code()); // 해시 코드 값 System. out. println(p. to. String()); // 객체의 문자열 } } Point 22279806 Point@153 f 67 e 해시 코드의 16진수 값. 이 값은 실행할 때마다 달라질 수 있음.
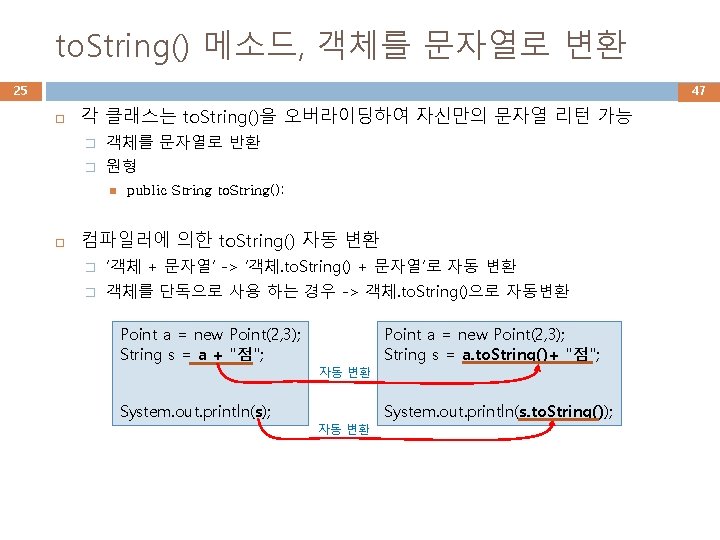
예제 6 -2 : Point 클래스에 to. String() 작성 26 47 Point 클래스에 Point 객체를 문자열로 리턴하는 to. String() 메소드를 작 성하라. class Point { int x, y; public Point(int x, int y) { this. x = x; this. y = y; } public String to. String() { return "Point(" + x + ", " + y + ")"; } } public class To. String. Ex { public static void main(String [] args) { Point a = new Point(2, 3); System. out. println(a. to. String()); System. out. println(a); // a는 a. to. String()으로 자동 변환됨 } } Point(2, 3)
객체 비교(==)와 equals() 메소드 27 47 == 연산자 � 객체 레퍼런스 비교 Point a = new Point(2, 3); Point b = new Point(2, 3); Point c = a; if(a == b) // false System. out. println("a==b"); if(a == c) // true System. out. println("a==c"); a==c boolean equals(Object obj) � 두 객체의 내용물 비교 � 객체의 내용물을 비교하기 위해 클래스의 멤버로 작성
예제 6 -3 : Point 클래스의 equals() 작성 28 47 Point 클래스에 x, y 점 좌표가 같으면 true를 리턴하는 equals()를 작 성하라. class Point { int x, y; public Point(int x, int y) { this. x = x; this. y = y; } public boolean equals(Point p) { if(x == p. x && y == p. y) return true; else return false; } } public class Equals. Ex { public static void main(String[] args) { Point a = new Point(2, 3); Point b = new Point(2, 3); Point c = new Point(3, 4); if(a == b) System. out. println("a==b"); if(a. equals(b)) System. out. println("a is equal to b"); if(a. equals(c)) System. out. println("a is equal to c"); } } 이 Point 객체와 객체 p가 같은지 비교 a is equal to b
예제 6 -4 : Rect 클래스와 equals() 메소드 만들기 연습 29 47 int 타입의 width(너비), height(높이) 필드를 가지는 Rect 클래스를 작성하고, 면적이 같으면 두 Rect 객체가 같은 것으로 판별하는 equals()를 작성하라. class Rect { int width, height; public Rect(int width, int height) { this. width = width; this. height = height; 이 사각형과 객체 p의 면 } 적 비교 public boolean equals(Rect p) { if (width*height == p. width*p. height) return true; else return false; } } public class Rect. Ex { public static void main(String[] args) { Rect a = new Rect(2, 3); // 면적 6 Rect b = new Rect(3, 2); // 면적 6 Rect c = new Rect(3, 4); // 면적 12 } } if(a. equals(b)) System. out. println("a is equal to b"); if(a. equals(c)) System. out. println("a is equal to c"); if(b. equals(c)) System. out. println("b is equal to c"); a와 b는 면적이 같으므로 equals()는 같다고 판단 a is equal to b
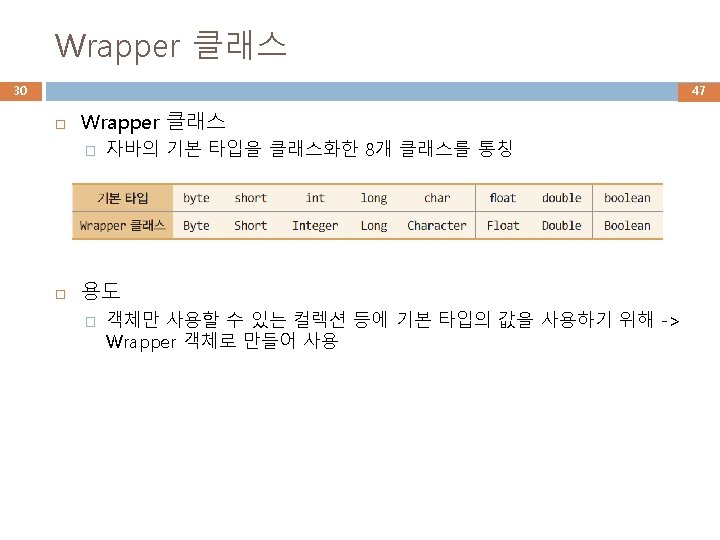
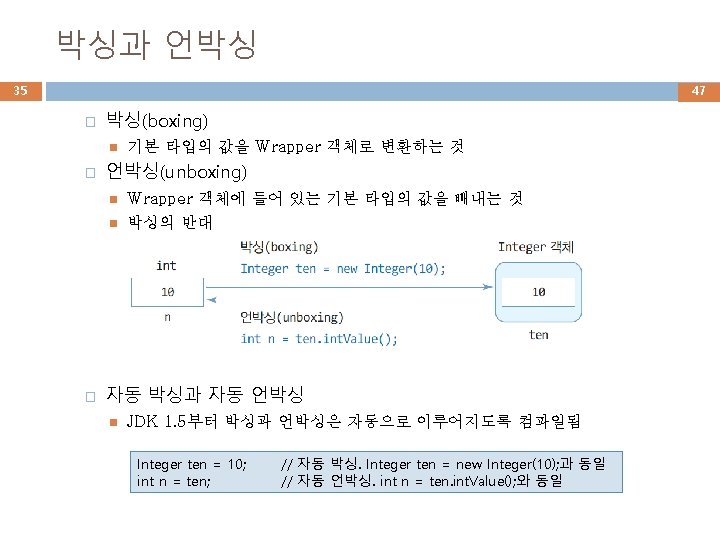
Wrapper 클래스의 객체 생성 31 47 Wrapper 객체로 생성하는 방법 Integer i = new Integer(10); Character c = new Character('c'); Boolean b = new Boolean(true); Boolean b = new Boolean("false"); Integer I = new Integer("10"); Double d = new Double("3. 14");
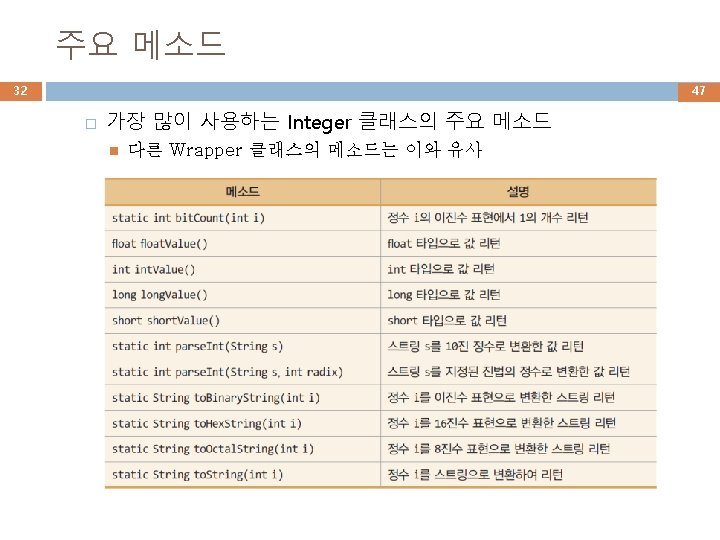
Wrapper 클래스의 활용 33 47 Wrapper 객체에 들어 있는 기본 타입 값 알아내기 Integer i = new Integer(10); int ii = i. int. Value(); Character c = new Character('c'); char cc = c. char. Value(); Boolean b = new Boolean(true); boolean bb = b. boolean. Value(); // ii = 10 // cc = 'c' // bb = true 문자열을 기본 타입으로 변환 int i = Integer. parse. Int("123"); boolean b = Boolean. parse. Boolean("true"); double d = Double. parse. Double("3. 141592"); // i = 123 // b = true // d = 3. 141592 기본 타입 값을 문자열로 변환 String String s 1 s 2 s 3 s 4 s 5 = = = Integer. to. String(123); Integer. to. Hex. String(123); Double. to. String(3. 14); Charater. to. String('a'); Boolean. to. String(true); // // // 정수 정수 실수 문자 불린 123을 문자열 "123" 으로 변환 123을 16진수의 문자열 "7 b"로 변환 3. 141592를 문자열 "3. 141592"로 변환 ‘a’를 문자열 "a"로 변환 값 true를 문자열 "true"로 변환
예제 6 -5 : Wrapper 클래스 활용 34 47 다음은 Wrapper 클래스를 활용하는 예이다. 다음 프로그램의 결과는 무엇인가? public class Wrapper. Ex { public static void main(String[] args) { // Character 사용 System. out. println(Character. to. Lower. Case('A')); // 'A'를 소문자로 변환 char c 1='4', c 2='F'; if(Character. is. Digit(c 1)) // 문자 c 1이 숫자이면 true System. out. println(c 1 + "는 숫자"); if(Character. is. Alphabetic(c 2)) // 문자 c 2가 영문자이면 true System. out. println(c 2 + "는 영문자"); // Integer 사용 System. out. println(Integer. parse. Int("28")); // 문자열 "28"을 10진수로 변환 System. out. println(Integer. to. String(28)); // 정수 28을 2진수 문자열로 변환 System. out. println(Integer. to. Binary. String(28)); // 28을 16진수 문자열로 변환 System. out. println(Integer. bit. Count(28)); // 28에 대한 2진수의 1의 개수 Integer i = new Integer(28); System. out. println(i. double. Value()); // 정수를 double 값으로 변환. 28. 0 // Double 사용 Double d = new Double(3. 14); System. out. println(d. to. String()); // Double을 문자열 "3. 14"로 변환 System. out. println(Double. parse. Double("3. 14")); // 문자열을 실수 3. 14로 변환 } } // Boolean 사용 boolean b = (4>3); // b는 true System. out. println(Boolean. to. String(b)); // true를 문자열 "true"로 변환 System. out. println(Boolean. parse. Boolean("false")); // 문자열을 false로 변환 a 4는 숫자 F는 영문 자 28 28 11100 3 28. 0 3. 14 true false
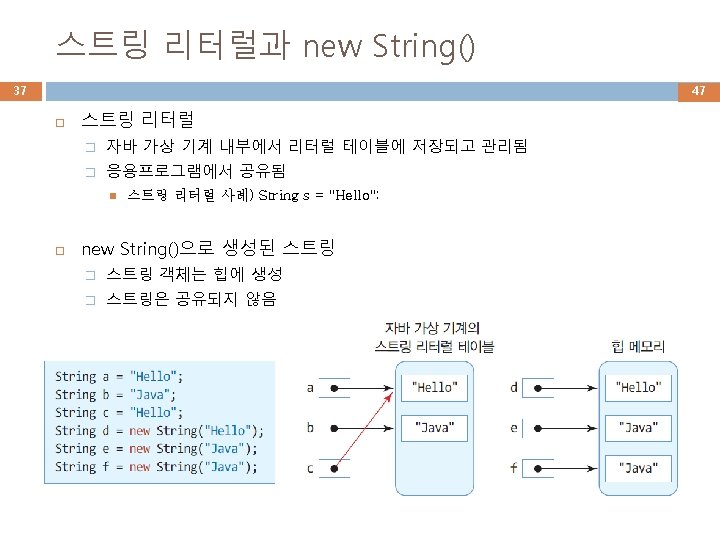
예제 6 -6 : String을 활용하여 문자열 다루기 41 47 public class String. Ex { public static void main(String[] args) { String a = new String(" C#"); String b = new String(", C++ "); 3 System. out. println(a + "의 길이는 " + a. length()); // 문자열의 길이(문자 개수) System. out. println(a. contains("#")); // 문자열의 포함 관계 true a = a. concat(b); // 문자열 연결 System. out. println(a); a = " C#, C++ " a = a. trim(); // 문자열 앞 뒤의 공백 제거 System. out. println(a); a = a. replace("C#", "Java"); // 문자열 대치 System. out. println(a); a = "C#, C++" a = "Java, C++" s[0] = "Java" String s[] = a. split(", "); // 문자열 분리 s[1] = "C++" for (int i=0; i<s. length; i++) System. out. println("분리된 문자열" + i + ": " + s[i]); a = a. substring(5); // 인덱스 5부터 끝까지 서브 스트링 리턴 System. out. println(a); } } char c = a. char. At(2); // 인덱스 2의 문자 리턴 System. out. println(c); + a = "C++" C#의 길이는 3 true C#, C++ Java, C++ 분리된 문자열 0: Java 분리된 문자열 1: C++ +
String. Buffer 클래스 42 47 � 가변 스트링을 다루는 클래스 � String. Buffer 객체 생성 String. Buffer sb = new String. Buffer("java"); � � String 클래스와 달리 문자열 변경 가능 가변 크기의 버퍼를 가지고 있어 문자열 수정 가능 문자열의 수정이 많은 작업에 적합 스트링 조작 사례 String. Buffer sb = new String. Buffer("This"); sb. append(" is pencil. "); sb. insert(7, " my"); sb. replace(8, 10, "your"); System. out. println(sb); // // sb = "This is pencil. " sb = "This is my pencil. " sb = "This is your pencil. " 출력
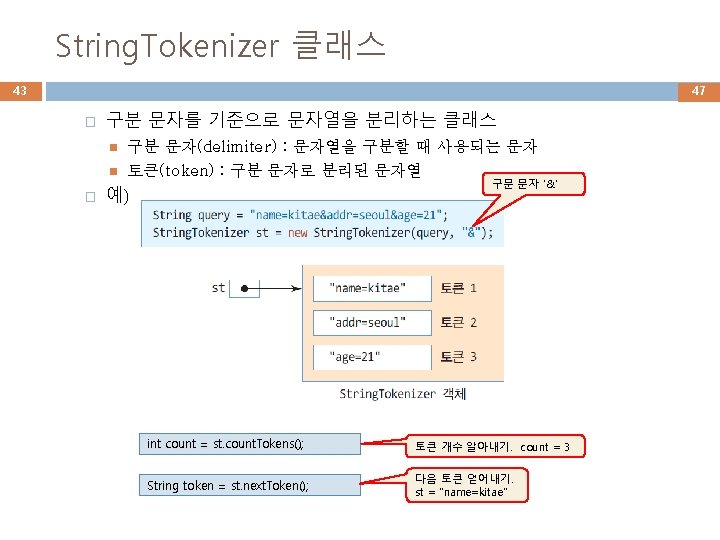
String. Tokenizer로 문자열 분리 사례 44 47 구문 문자는 2개 '&'와 '=' int count = st. count. Tokens(); 토큰 개수 알아내기. count = 6 String token = st. next. Token(); 다음 토큰 얻어내기. st = "name"
예제 6 -7 : String. Tokenizer를 이용한 문자열분리 45 47 "name=kitae&addr=seoul&age=21"를 '&'문자를 기준으로 분리하는 코드를 작성하라. import java. util. String. Tokenizer; public class String. Tokenizer. Ex { public static void main(String[] args) { String query = "name=kitae&addr=seoul&age=21"; String. Tokenizer st = new String. Tokenizer(query, "&"); int n = st. count. Tokens(); // 분리된 토큰 개수 System. out. println("토큰 개수 = " + n); } } while(st. has. More. Tokens()) { String token = st. next. Token(); // 토큰 얻기 System. out. println(token); // 토큰 출력 } 토큰 개수 = 3 name=kitae addr=seoul age=21
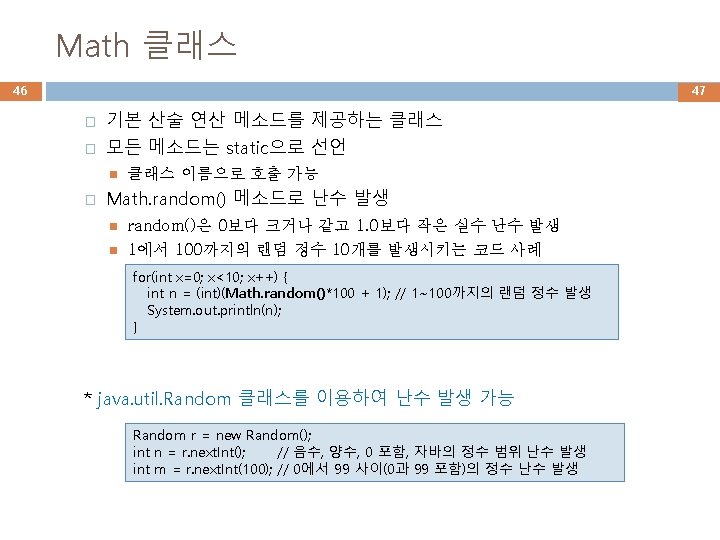
예제 6 -8 : Math 클래스 활용 47 47 Math 클래스의 메소드 활용 예를 보인다. public class Math. Ex { public static void main(String[] args) { System. out. println(Math. abs(-3. 14)); // 절댓값 구하기 System. out. println(Math. sqrt(9. 0)); // 9의 제곱근 = 3 System. out. println(Math. exp(2)); // e 2 System. out. println(Math. round(3. 14)); // 반올림 } // [1, 45] 사이의 정수형 난수 5개 발생 System. out. print("이번주 행운의 번호는 "); for (int i=0; i<5; i++) System. out. print((int)(Math. random()*45 + 1) + " "); // 난수 발생 } 3. 14 3. 0 7. 38905609893065 3 이번주 행운의 번호는 14 44 21 36 17