Isometric projections Characteristics of isometric projections All lines




- Slides: 13

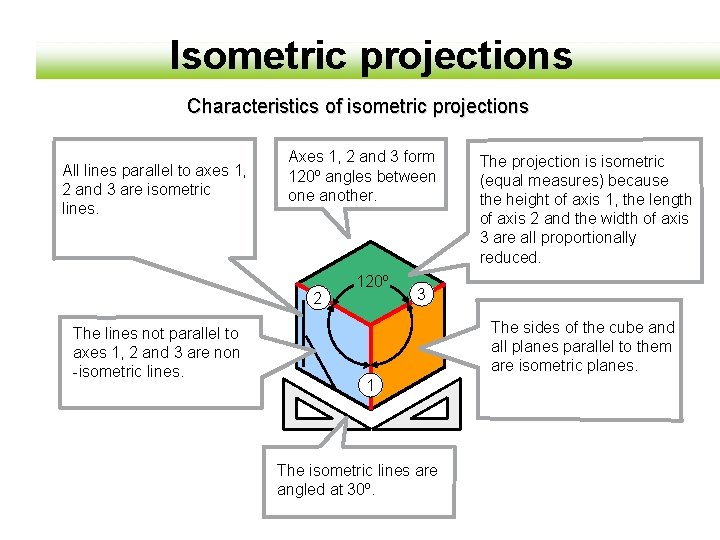
Isometric projections Characteristics of isometric projections All lines parallel to axes 1, 2 and 3 are isometric lines. Axes 1, 2 and 3 form 120º angles between one another. 2 The lines not parallel to axes 1, 2 and 3 are non -isometric lines. 120º The projection is isometric (equal measures) because the height of axis 1, the length of axis 2 and the width of axis 3 are all proportionally reduced. 3 The sides of the cube and all planes parallel to them are isometric planes. 1 The isometric lines are angled at 30º.

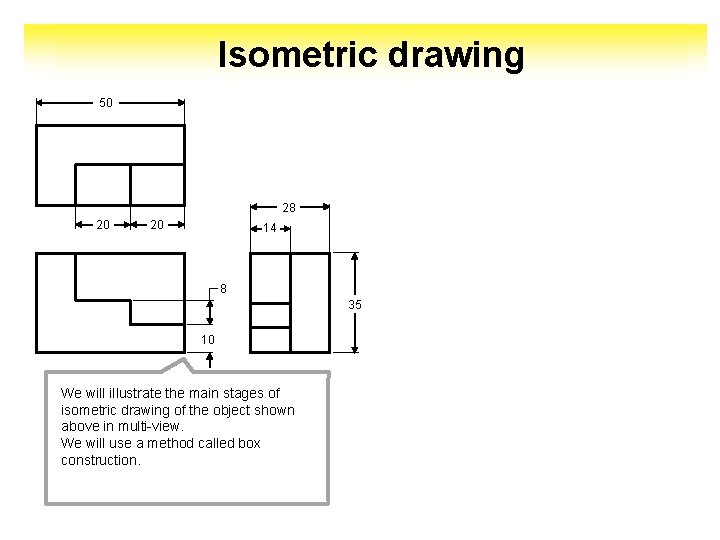
Isometric drawing 50 28 20 20 14 8 35 10 We will illustrate the main stages of isometric drawing of the object shown above in multi-view. We will use a method called box construction.

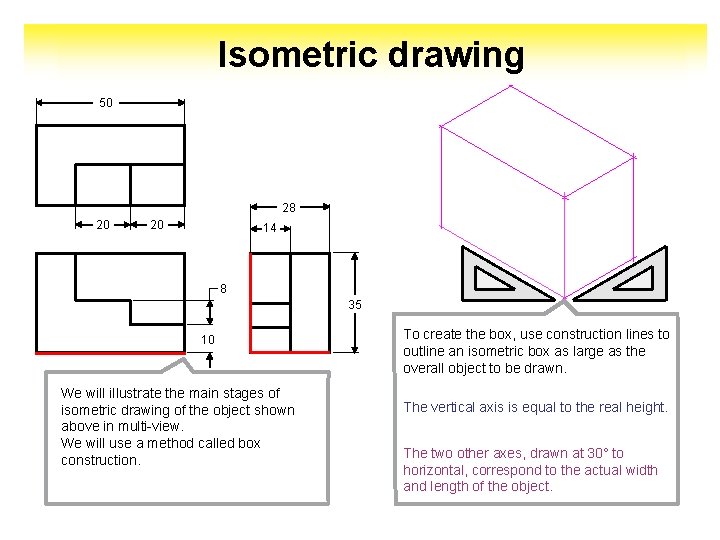
Isometric drawing 50 28 20 20 14 8 35 10 We will illustrate the main stages of isometric drawing of the object shown above in multi-view. We will use a method called box construction. To create the box, use construction lines to outline an isometric box as large as the overall object to be drawn. The vertical axis is equal to the real height. The two other axes, drawn at 30° to horizontal, correspond to the actual width and length of the object.

Isometric drawing 50 28 20 20 14 8 35 10 We will illustrate the main stages of isometric drawing of the object shown above in multi-view. We will use a method called box construction. To create the box, use construction lines to outline an isometric box as large as the overall object to be drawn. The vertical axis is equal to the real height. The two other axes, drawn at 30° to horizontal, correspond to the actual width and length of the object.

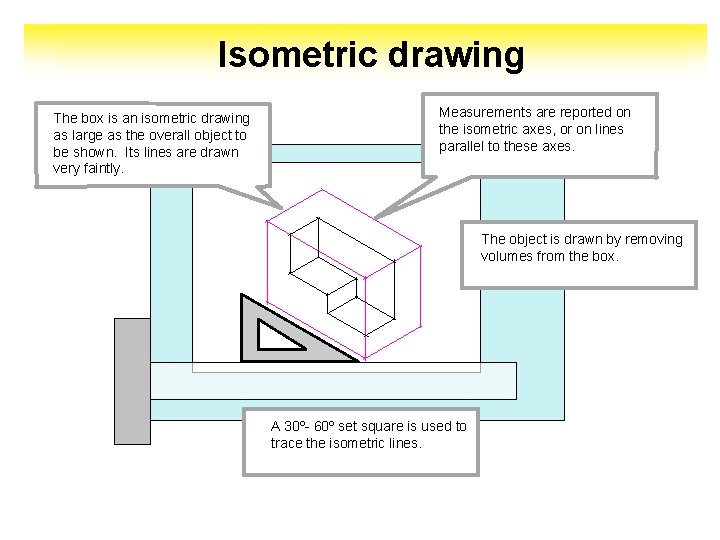
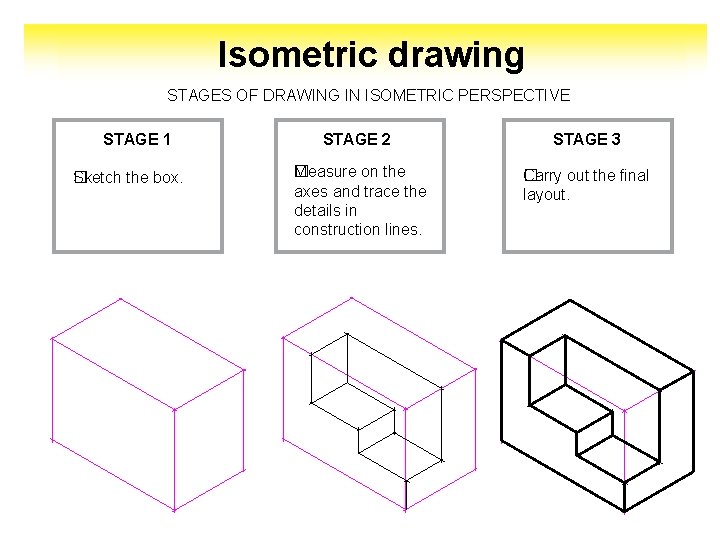
Isometric drawing The box is an isometric drawing as large as the overall object to be shown. Its lines are drawn very faintly. Measurements are reported on the isometric axes, or on lines parallel to these axes. The object is drawn by removing volumes from the box. A 30º- 60º set square is used to trace the isometric lines.

Isometric drawing The box is an isometric drawing as large as the overall object to be shown. Its lines are drawn very faintly. Measurements are reported on the isometric axes, or on lines parallel to these axes. The object is drawn by removing volumes from the box. A 30º- 60º set square is used to trace the isometric lines.

Isometric drawing STAGES OF DRAWING IN ISOMETRIC PERSPECTIVE STAGE 1 Sketch the box. � STAGE 2 STAGE 3 �easure on the M axes and trace the details in construction lines. �arry out the final C layout.

Isometric drawing STAGES OF DRAWING IN ISOMETRIC PERSPECTIVE STAGE 1 Sketch the box. � STAGE 2 STAGE 3 �easure on the M axes and trace the details in construction lines. �arry out the final C layout.

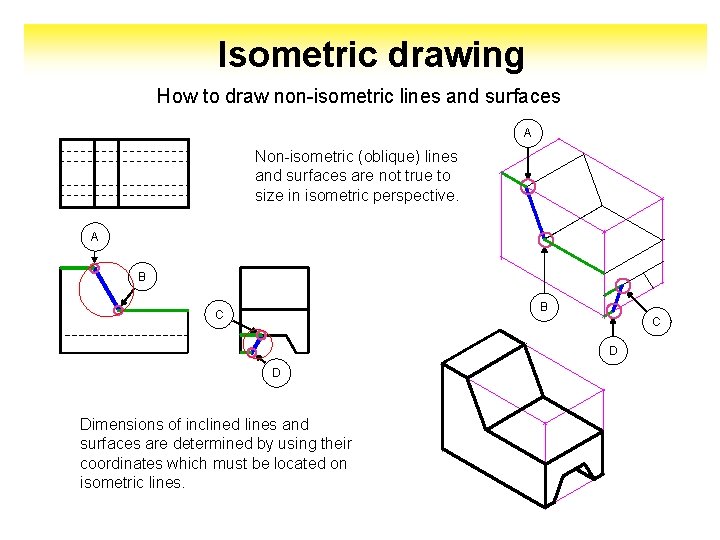
Isometric drawing How to draw non-isometric lines and surfaces A Non-isometric (oblique) lines and surfaces are not true to size in isometric perspective. A B B C C D D Dimensions of inclined lines and surfaces are determined by using their coordinates which must be located on isometric lines.

Isometric drawing How to draw non-isometric lines and surfaces A Non-isometric (oblique) lines and surfaces are not true to size in isometric perspective. A B B C C D D Dimensions of inclined lines and surfaces are determined by using their coordinates which must be located on isometric lines.

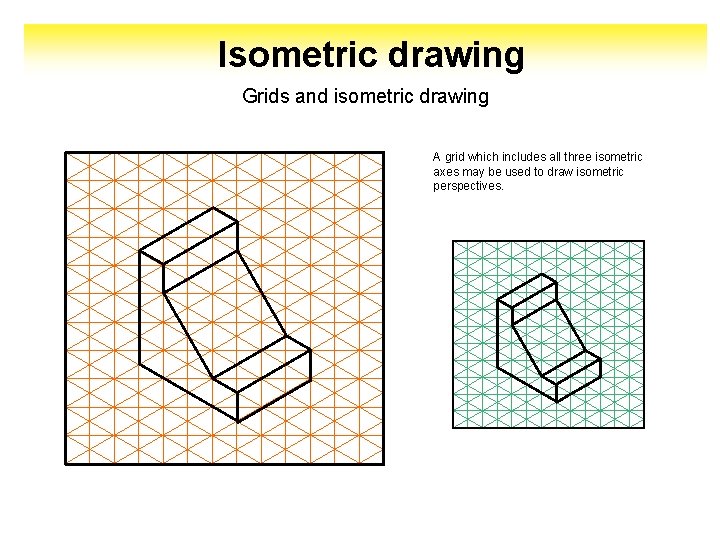
Isometric drawing Grids and isometric drawing A grid which includes all three isometric axes may be used to draw isometric perspectives.

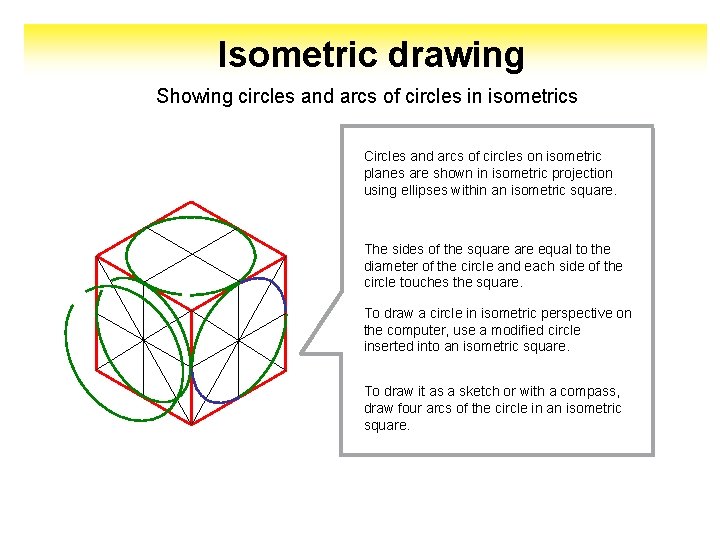
Isometric drawing Showing circles and arcs of circles in isometrics Circles and arcs of circles on isometric planes are shown in isometric projection using ellipses within an isometric square. The sides of the square equal to the diameter of the circle and each side of the circle touches the square. To draw a circle in isometric perspective on the computer, use a modified circle inserted into an isometric square. To draw it as a sketch or with a compass, draw four arcs of the circle in an isometric square.

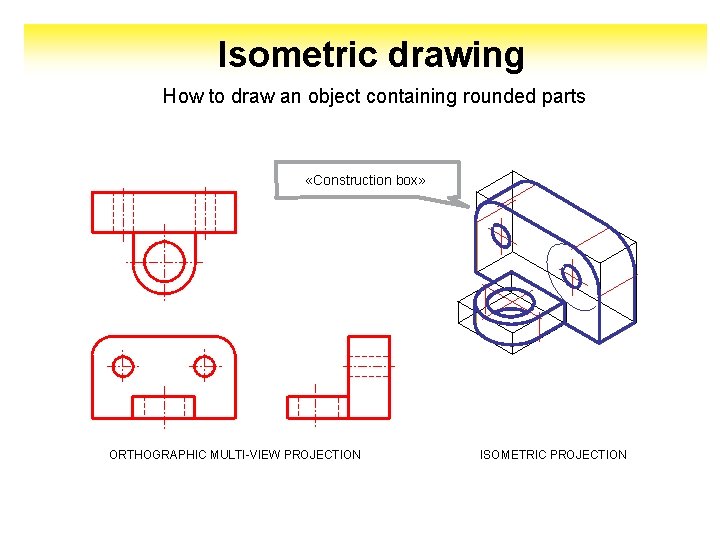
Isometric drawing How to draw an object containing rounded parts «Construction box» ORTHOGRAPHIC MULTI-VIEW PROJECTION ISOMETRIC PROJECTION