Isometric projection Projection on a plane such that
- Slides: 11

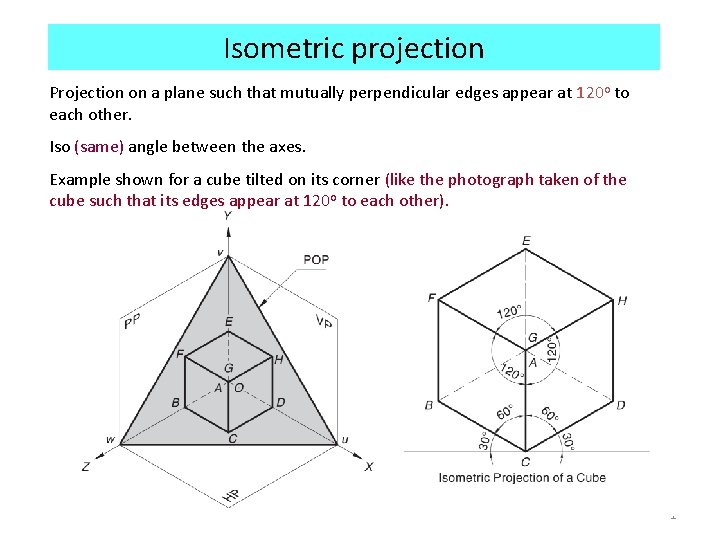
Isometric projection Projection on a plane such that mutually perpendicular edges appear at 120 o to each other. Iso (same) angle between the axes. Example shown for a cube tilted on its corner (like the photograph taken of the cube such that its edges appear at 120 o to each other). 1

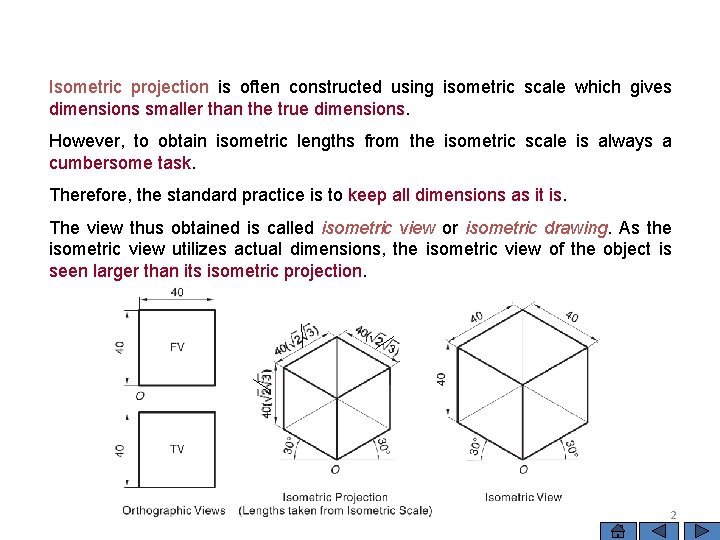
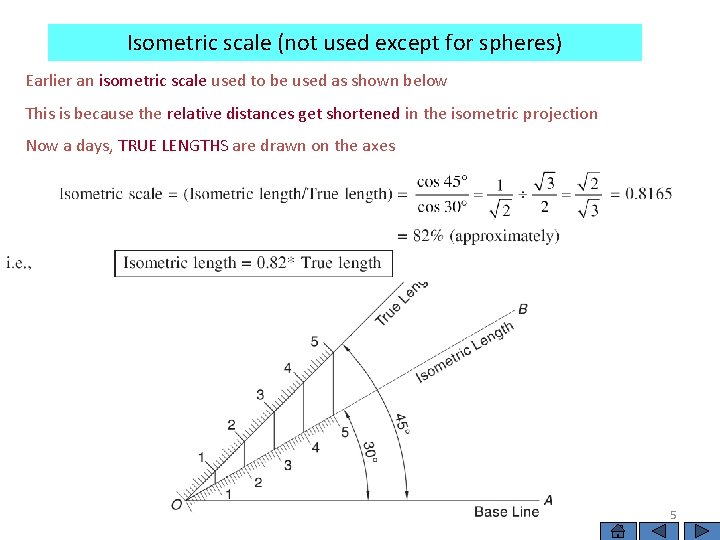
Isometric projection is often constructed using isometric scale which gives dimensions smaller than the true dimensions. However, to obtain isometric lengths from the isometric scale is always a cumbersome task. Therefore, the standard practice is to keep all dimensions as it is. The view thus obtained is called isometric view or isometric drawing. As the isometric view utilizes actual dimensions, the isometric view of the object is seen larger than its isometric projection. 2

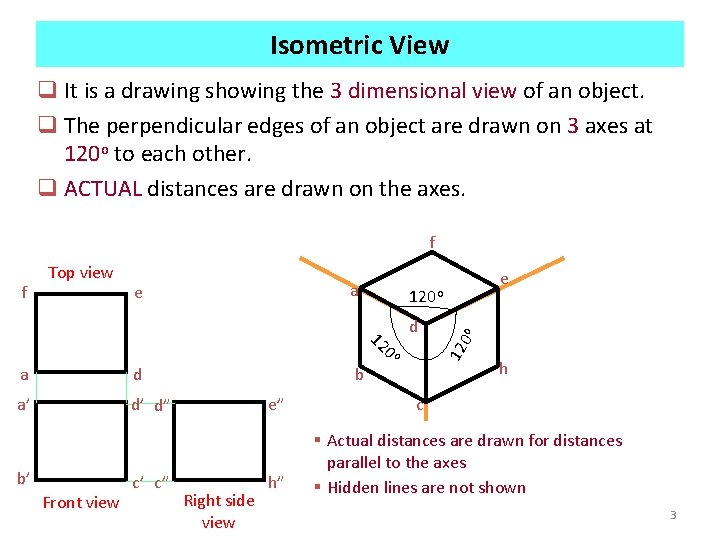
Isometric View q It is a drawing showing the 3 dimensional view of an object. q The perpendicular edges of an object are drawn on 3 axes at 120 o to each other. q ACTUAL distances are drawn on the axes. f a e d o 0 12 12 a d a’ d’ d” b’ Front view c’ c” b e” Right side view h” e 120 o 0 o f Top view h c § Actual distances are drawn for distances parallel to the axes § Hidden lines are not shown 3

10 mm mm 0 1 4

Isometric scale (not used except for spheres) Earlier an isometric scale used to be used as shown below This is because the relative distances get shortened in the isometric projection Now a days, TRUE LENGTHS are drawn on the axes 5

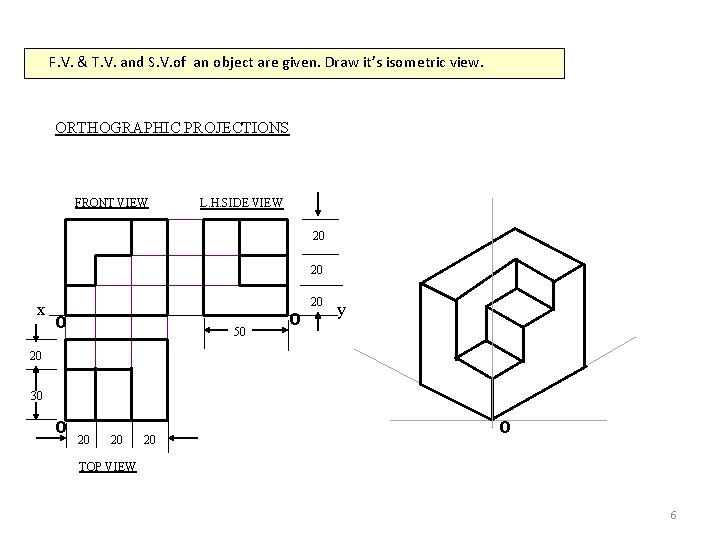
F. V. & T. V. and S. V. of an object are given. Draw it’s isometric view. ORTHOGRAPHIC PROJECTIONS FRONT VIEW L. H. SIDE VIEW 20 20 x O 50 O 20 y 20 30 O 20 20 20 O TOP VIEW 6

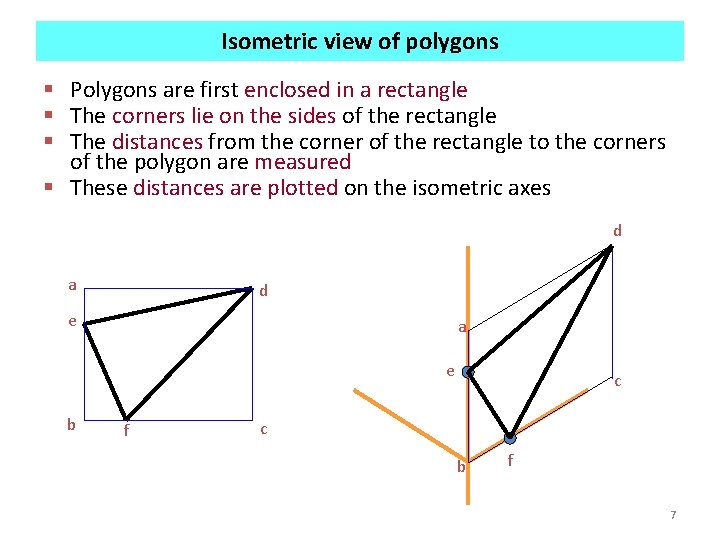
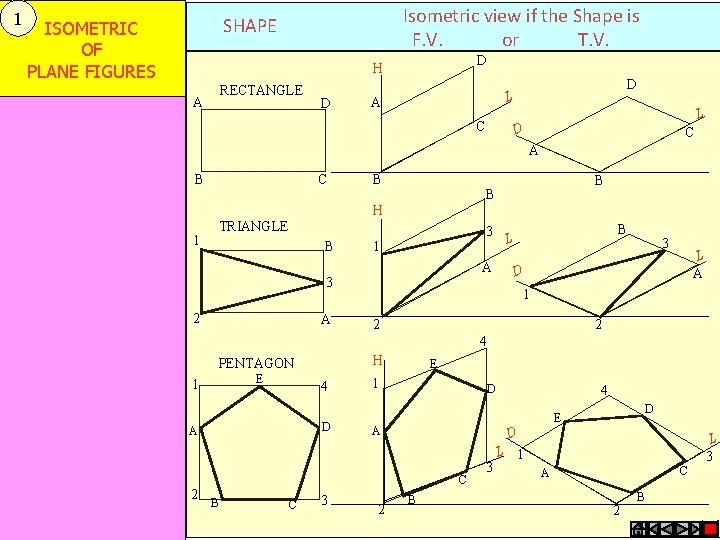
Isometric view of polygons § Polygons are first enclosed in a rectangle § The corners lie on the sides of the rectangle § The distances from the corner of the rectangle to the corners of the polygon are measured § These distances are plotted on the isometric axes d a d e a e b f c c b f 7

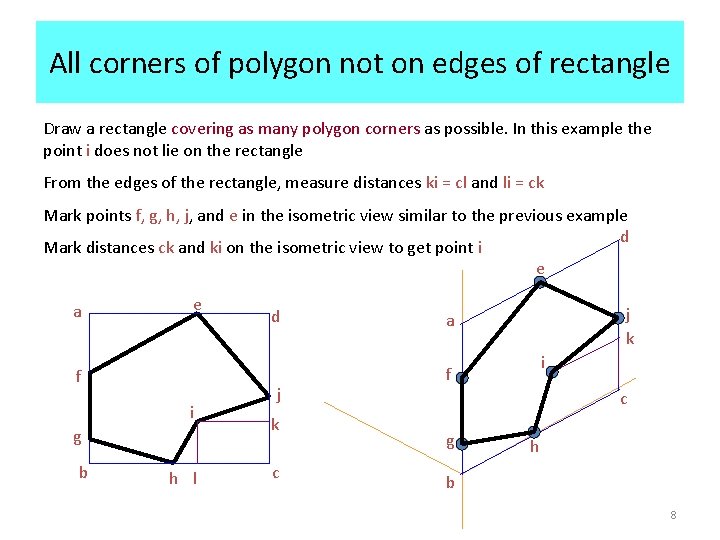
All corners of polygon not on edges of rectangle Draw a rectangle covering as many polygon corners as possible. In this example the point i does not lie on the rectangle From the edges of the rectangle, measure distances ki = cl and li = ck Mark points f, g, h, j, and e in the isometric view similar to the previous example d Mark distances ck and ki on the isometric view to get point i e a e f i g b h l d j k c j k a i f c g h b 8

1 Isometric view if the Shape is F. V. or T. V. SHAPE ISOMETRIC OF PLANE FIGURES D H RECTANGLE A D D L A L C D C A B C B B B H 1 TRIANGLE B 3 1 A 3 2 A B L 3 L A D 1 2 2 4 H PENTAGON E 1 4 D A E 1 D B C 3 D E A D C 2 4 2 B 3 L 1 C A 2 B 9

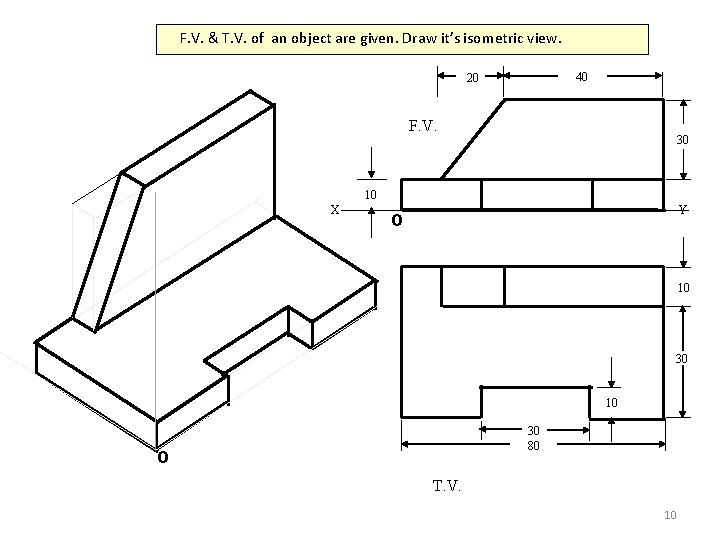
F. V. & T. V. of an object are given. Draw it’s isometric view. 40 20 F. V. 30 10 X Y O 10 30 80 O T. V. 10

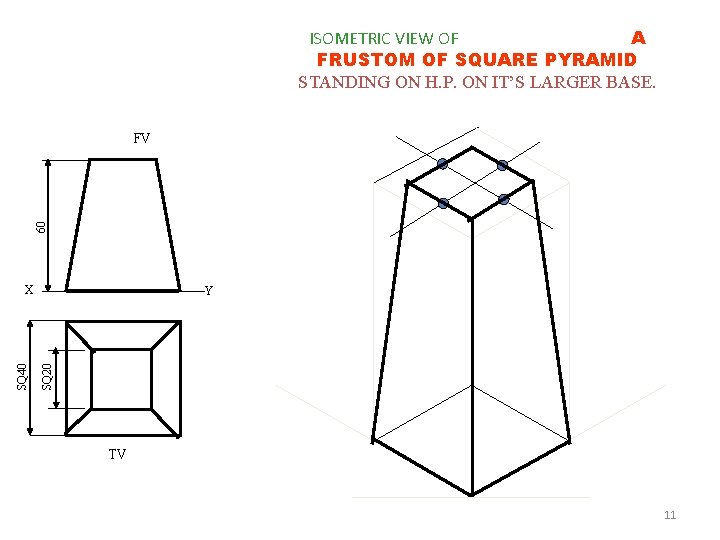
ISOMETRIC VIEW OF A FRUSTOM OF SQUARE PYRAMID STANDING ON H. P. ON IT’S LARGER BASE. 60 FV Y SQ 20 SQ 40 X TV 11