Isometric Pictorials Introduction to Engineering Design 2012 Project
- Slides: 21

Isometric Pictorials Introduction to Engineering Design © 2012 Project Lead The Way, Inc.

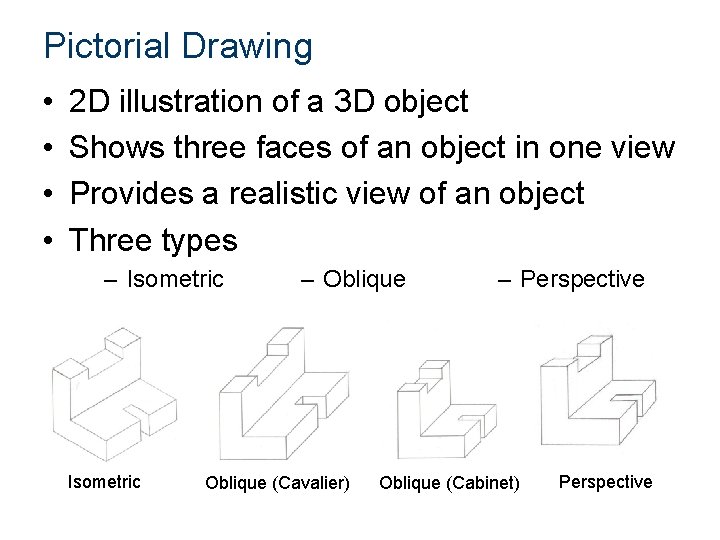
Pictorial Drawing • • 2 D illustration of a 3 D object Shows three faces of an object in one view Provides a realistic view of an object Three types – Isometric – Oblique (Cavalier) – Perspective Oblique (Cabinet) Perspective

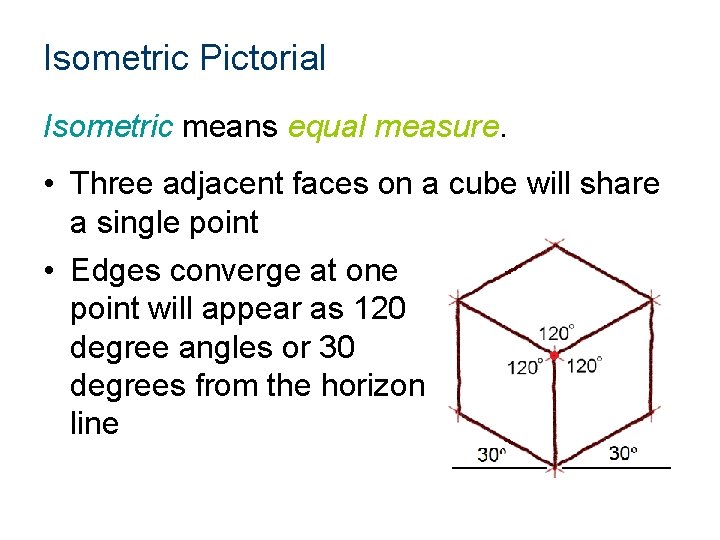
Isometric Pictorial Isometric means equal measure. • Three adjacent faces on a cube will share a single point • Edges converge at one point will appear as 120 degree angles or 30 degrees from the horizon line

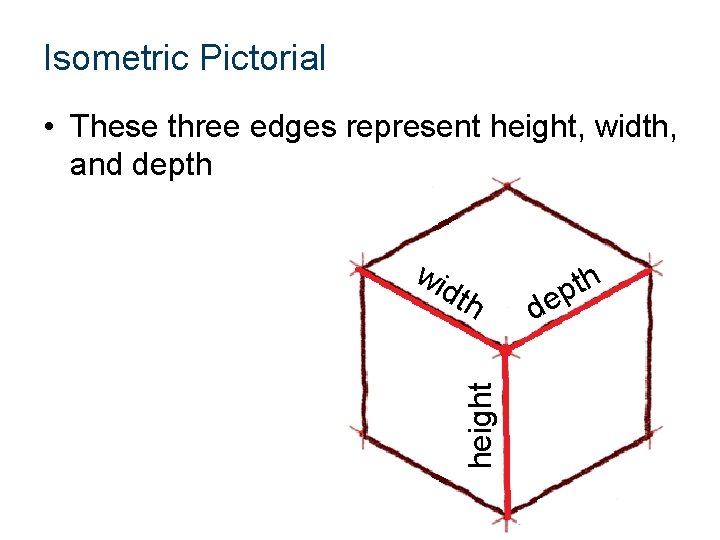
Isometric Pictorial • These three edges represent height, width, and depth height wi dth d th p e

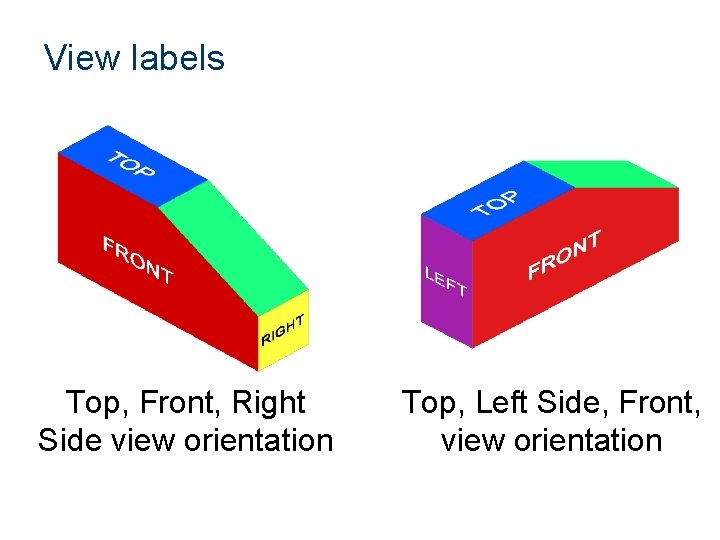
View labels Top, Front, Right Side view orientation Top, Left Side, Front, view orientation

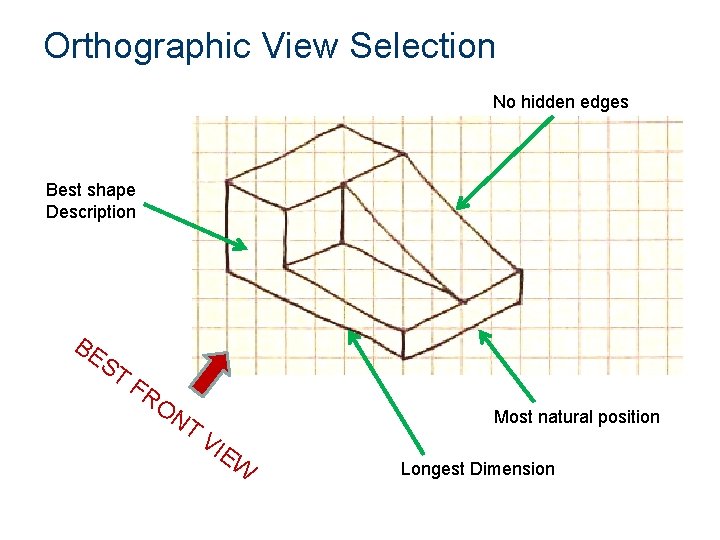
View Selection • Recommendations for how to select the front view – Most natural position or use – Shows best shape and characteristic contours – Longest dimensions – Fewest hidden lines – Most stable and natural position

Orthographic View Selection No hidden edges Best shape Description BE ST FR O NT VI Most natural position EW Longest Dimension

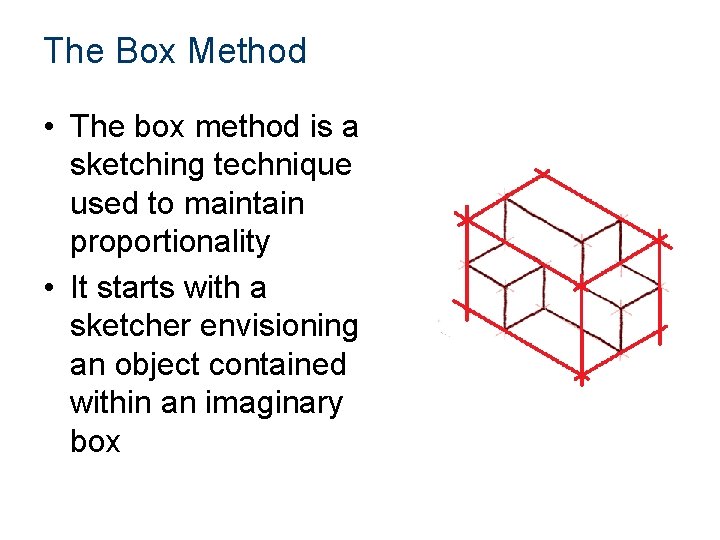
The Box Method • The box method is a sketching technique used to maintain proportionality • It starts with a sketcher envisioning an object contained within an imaginary box

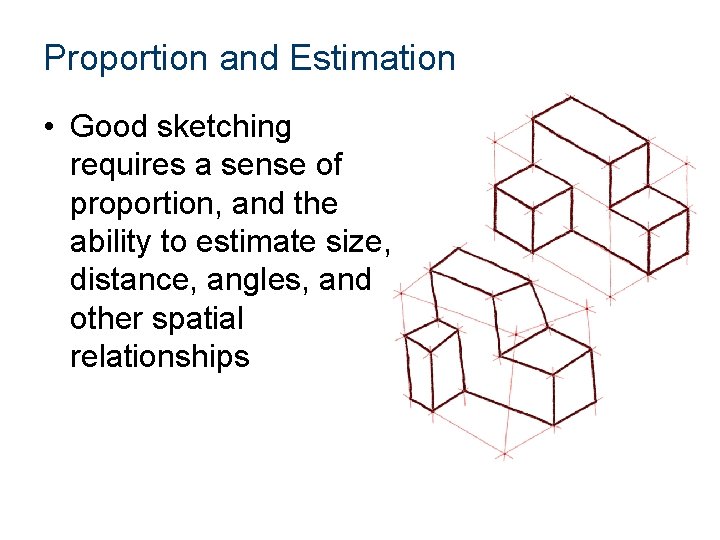
Proportion and Estimation • Good sketching requires a sense of proportion, and the ability to estimate size, distance, angles, and other spatial relationships

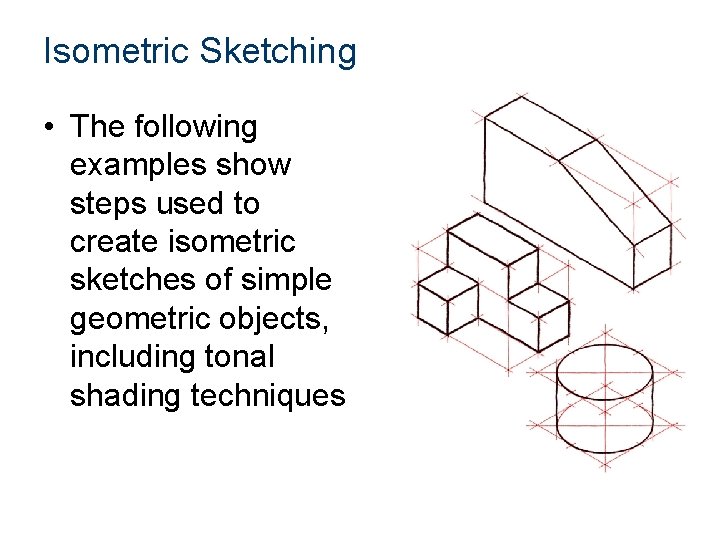
Isometric Sketching • The following examples show steps used to create isometric sketches of simple geometric objects, including tonal shading techniques

EXAMPLE Isometric Sketch

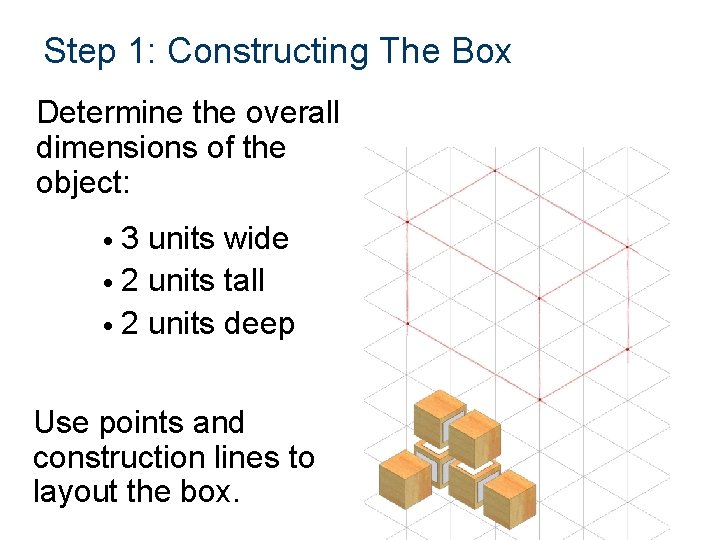
Step 1: Constructing The Box Determine the overall dimensions of the object: • 3 units wide • 2 units tall • 2 units deep Use points and construction lines to layout the box.

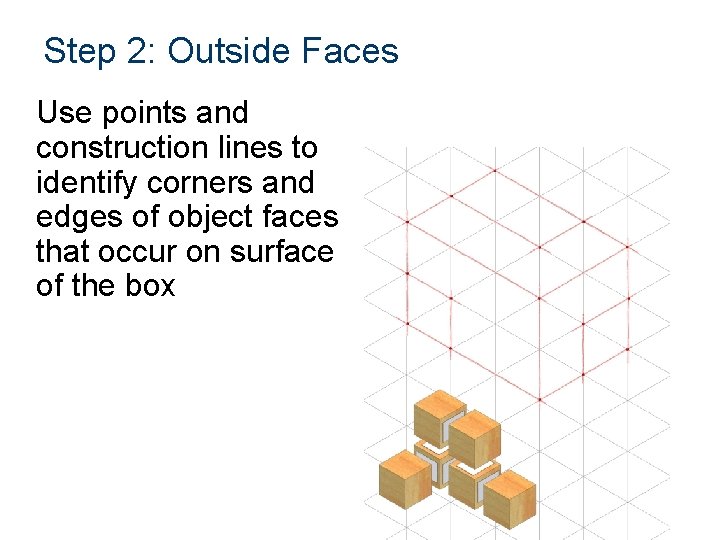
Step 2: Outside Faces Use points and construction lines to identify corners and edges of object faces that occur on surface of the box

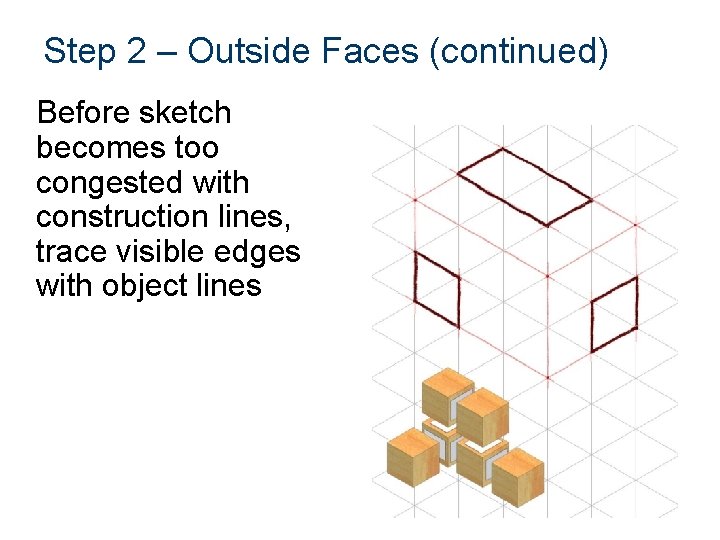
Step 2 – Outside Faces (continued) Before sketch becomes too congested with construction lines, trace visible edges with object lines

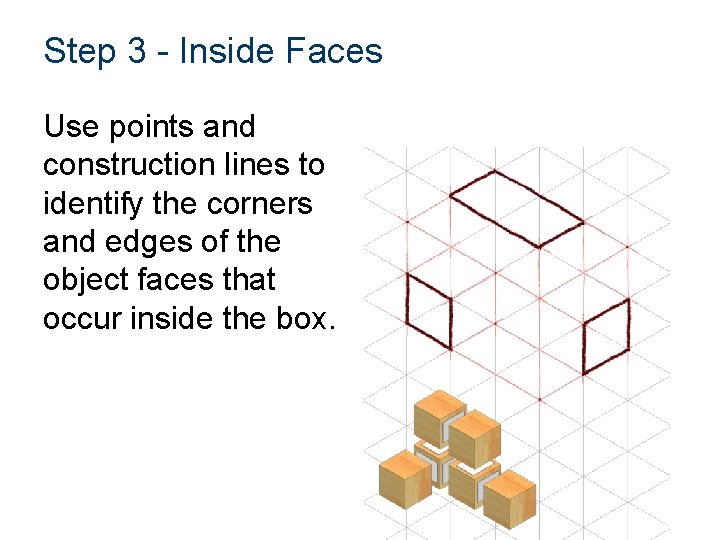
Step 3 - Inside Faces Use points and construction lines to identify the corners and edges of the object faces that occur inside the box.

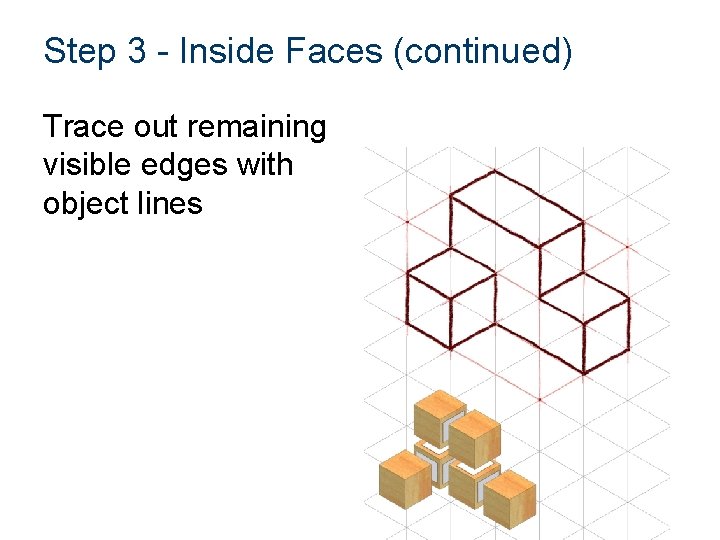
Step 3 - Inside Faces (continued) Trace out remaining visible edges with object lines

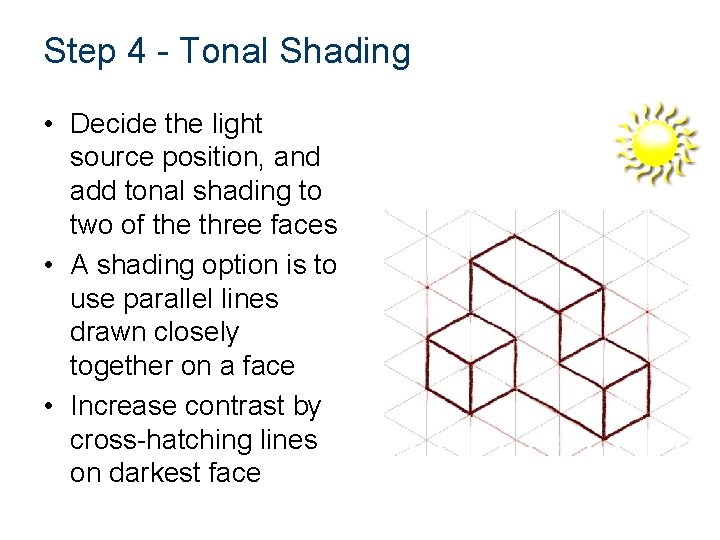
Step 4 - Tonal Shading • Decide the light source position, and add tonal shading to two of the three faces • A shading option is to use parallel lines drawn closely together on a face • Increase contrast by cross-hatching lines on darkest face

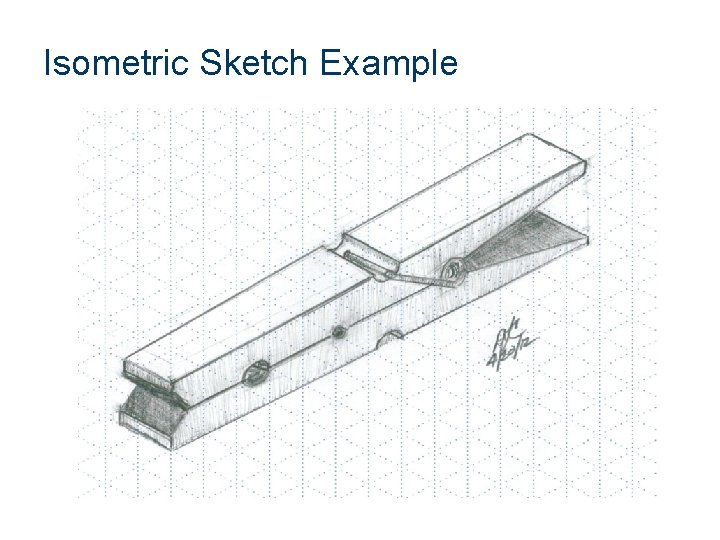
Isometric Sketch Example

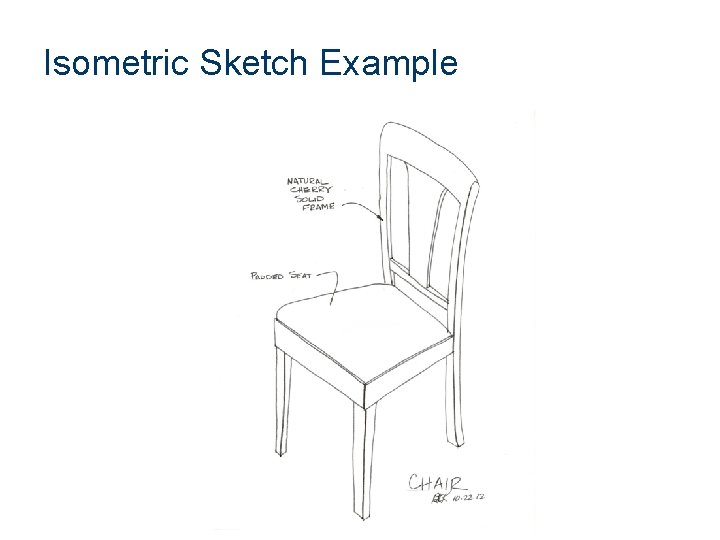
Isometric Sketch Example

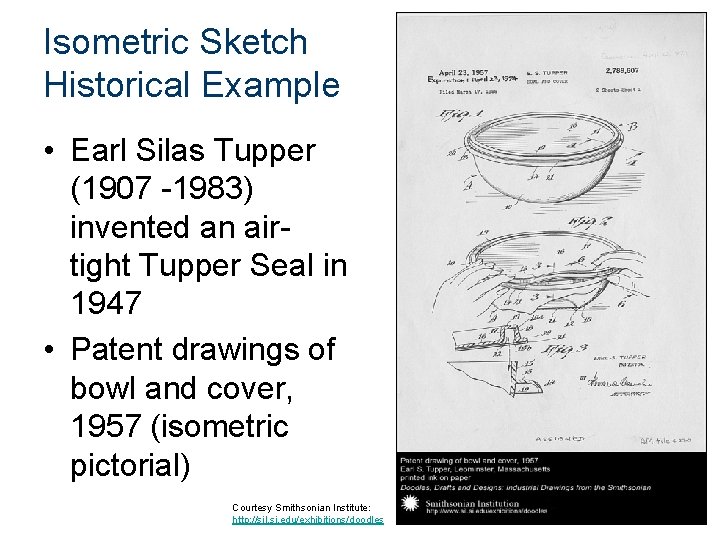
Isometric Sketch Historical Example • Earl Silas Tupper (1907 -1983) invented an airtight Tupper Seal in 1947 • Patent drawings of bowl and cover, 1957 (isometric pictorial) Courtesy Smithsonian Institute: http: //sil. si. edu/exhibitions/doodles

References Tupper, Earl Silas. Patent drawings, 1957. Smithsonian Institute: http: //sil. si. edu. exhibitions/doodles Wikipedia (2011). Three point flexural test. Retrieved from http: //en. wikipedia. org/wiki/File: Threepoint. jpg