Isometric ellipses In an isometric drawing the object
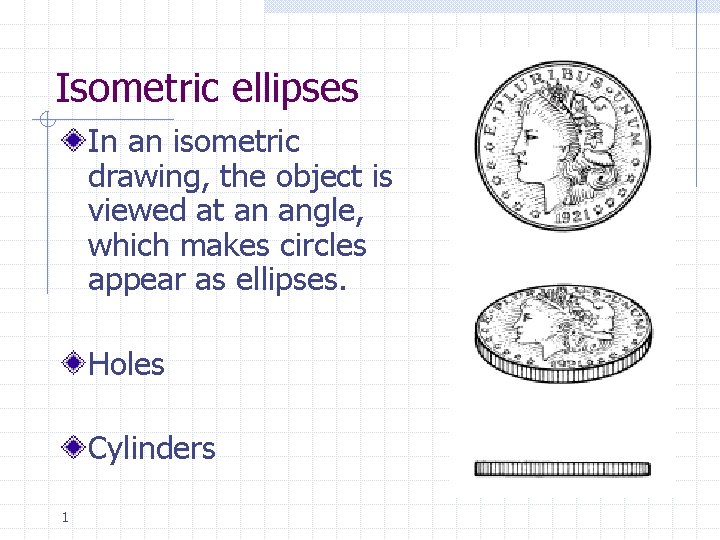
Isometric ellipses In an isometric drawing, the object is viewed at an angle, which makes circles appear as ellipses. Holes Cylinders 1
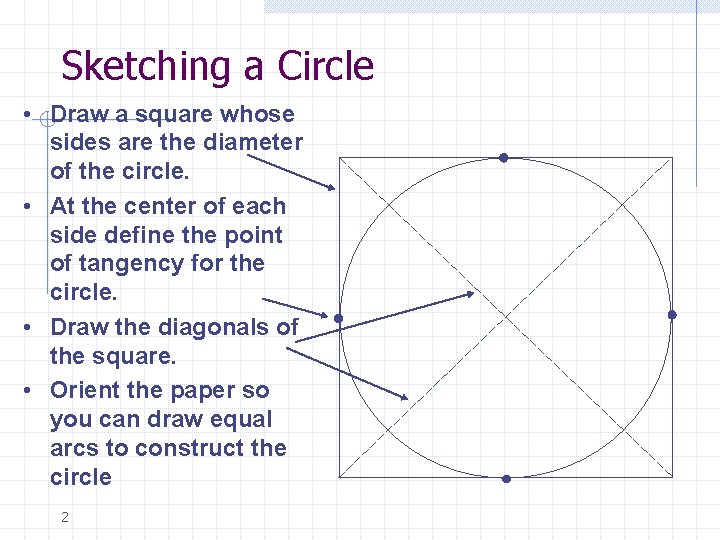
Sketching a Circle • Draw a square whose sides are the diameter of the circle. • At the center of each side define the point of tangency for the circle. • Draw the diagonals of the square. • Orient the paper so you can draw equal arcs to construct the circle 2
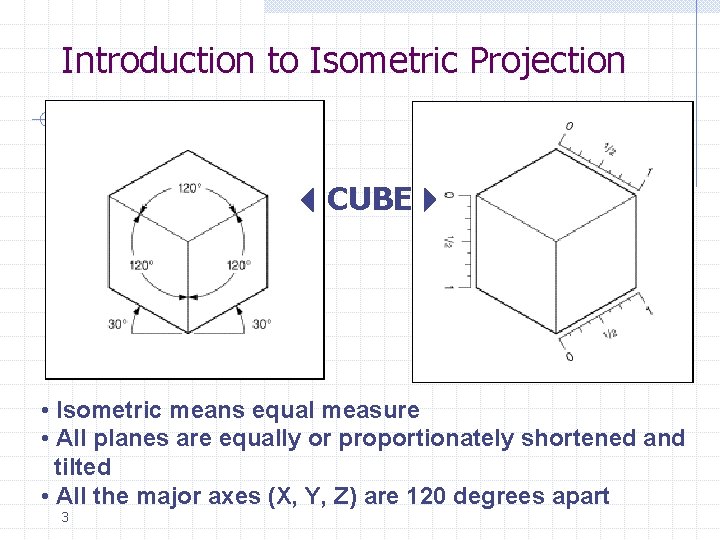
Introduction to Isometric Projection CUBE • Isometric means equal measure • All planes are equally or proportionately shortened and tilted • All the major axes (X, Y, Z) are 120 degrees apart 3
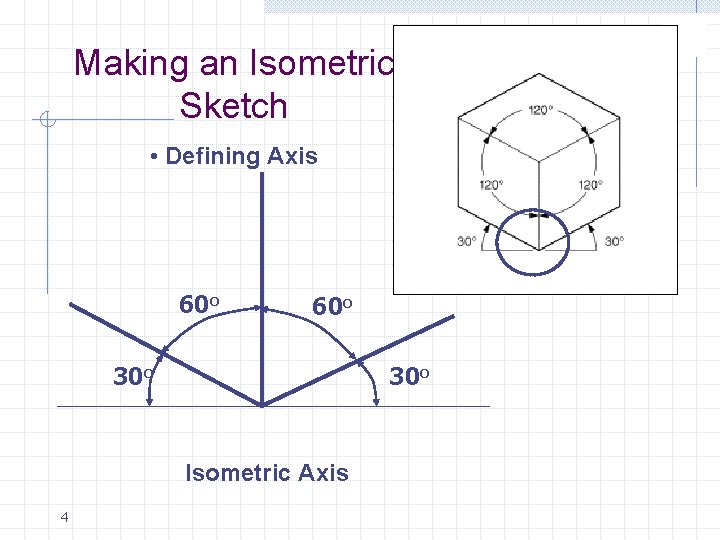
Making an Isometric Sketch • Defining Axis 60 o 30 o Isometric Axis 4
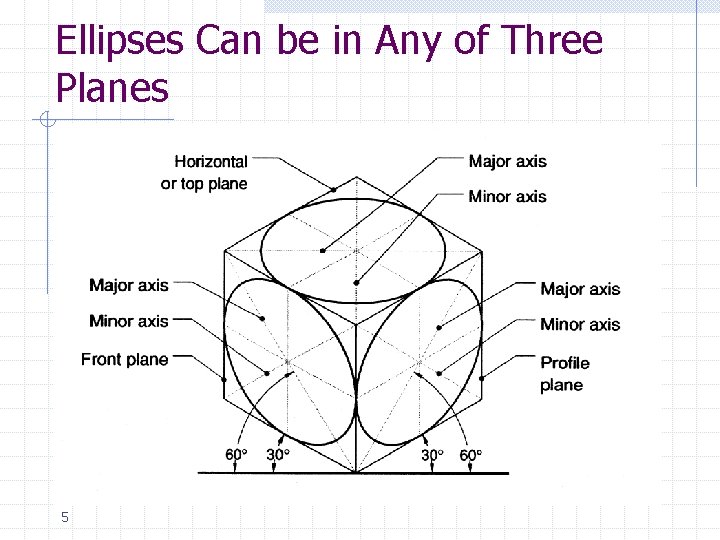
Ellipses Can be in Any of Three Planes 5
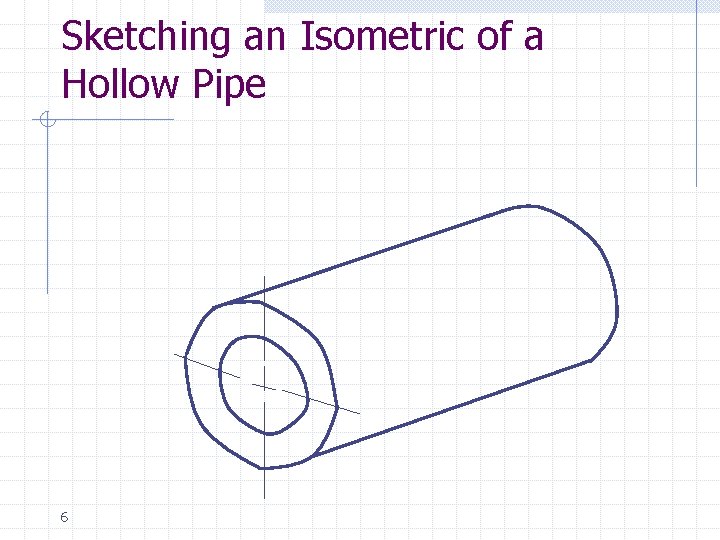
Sketching an Isometric of a Hollow Pipe 6
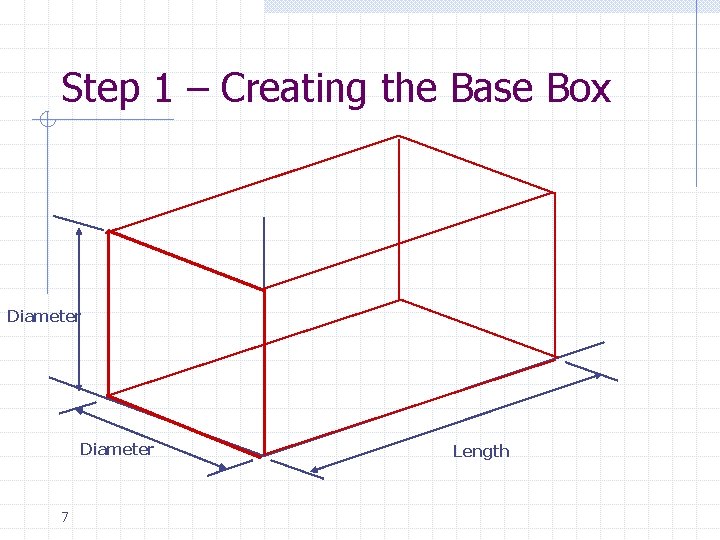
Step 1 – Creating the Base Box Diameter 7 Length
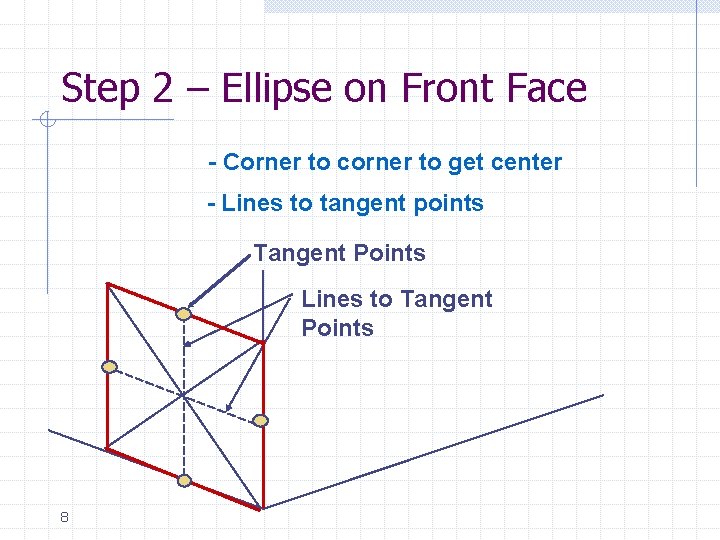
Step 2 – Ellipse on Front Face - Corner to corner to get center - Lines to tangent points Tangent Points Lines to Tangent Points 8
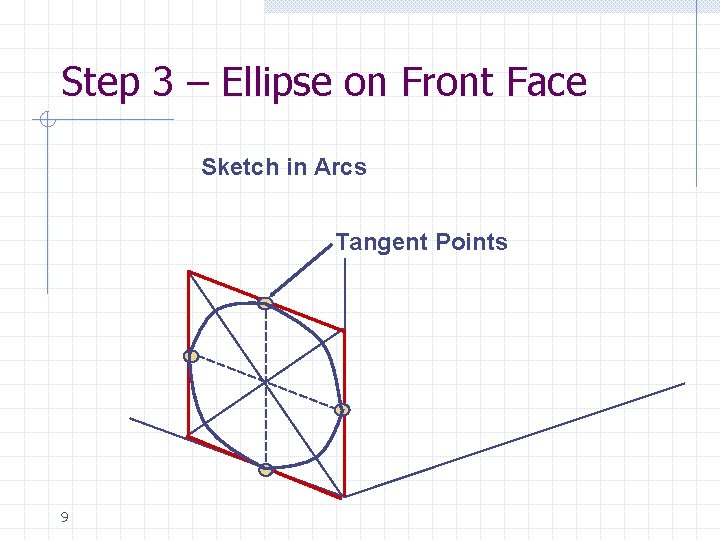
Step 3 – Ellipse on Front Face Sketch in Arcs Tangent Points 9
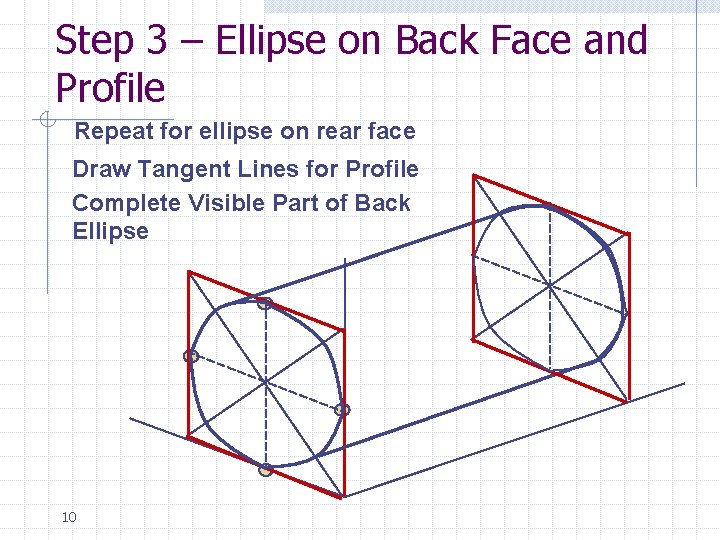
Step 3 – Ellipse on Back Face and Profile Repeat for ellipse on rear face Draw Tangent Lines for Profile Complete Visible Part of Back Ellipse 10
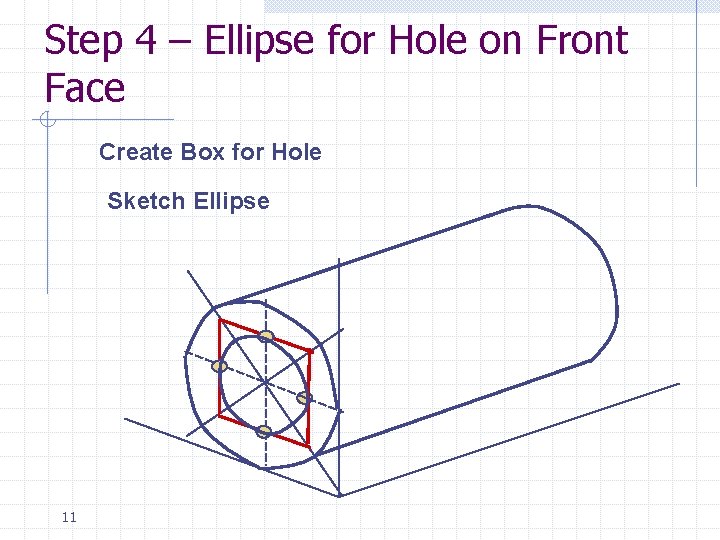
Step 4 – Ellipse for Hole on Front Face Create Box for Hole Sketch Ellipse 11
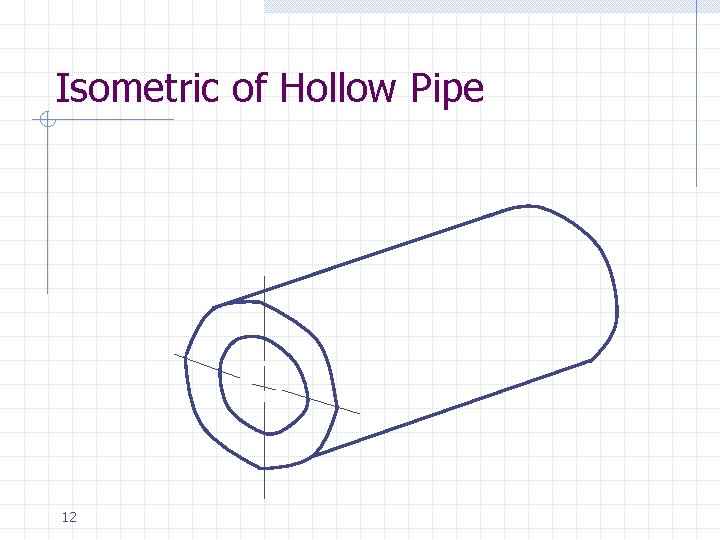
Isometric of Hollow Pipe 12
Summary • Technical drawings are an effective communication media • Projections of various types can be used • Isometric projections and creating isometric sketches has been introduced • Assignments will emphasize simple isometric sketches 13
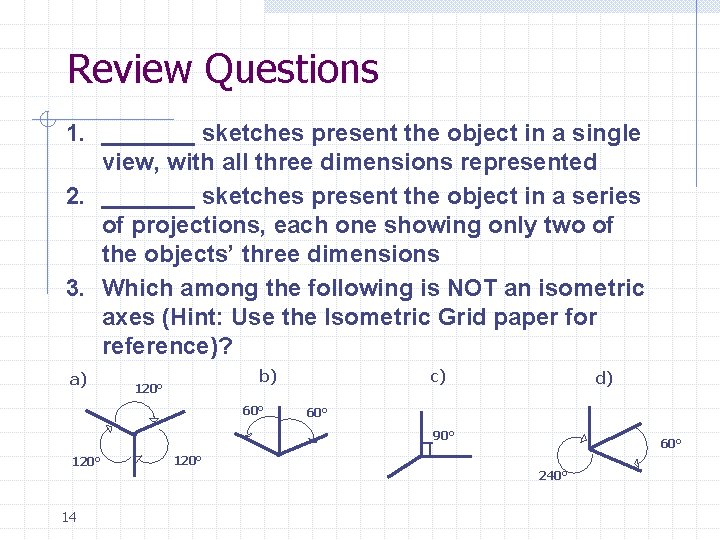
Review Questions 1. _______ sketches present the object in a single view, with all three dimensions represented 2. _______ sketches present the object in a series of projections, each one showing only two of the objects’ three dimensions 3. Which among the following is NOT an isometric axes (Hint: Use the Isometric Grid paper for reference)? a) b) 120° 60° c) d) 60° 90° 120° 14 60° 120° 240°
Tips for Drawing Assignments • Follow Sketching and Text conventions. • Title Information is required. Avoid labels on the sketch. • Leave the construction lines – MUCH lighter and thinner than the finished lines • Include centerlines on isometrics 15
Tips for Drawing Assignments Do not try to shade drawing – this is not a pencil sketching class. Use grid paper. Try to sketch along grid lines. Practice sketching straight lines and curves on a grid sheet. 16
Tips for Pictorial Views In pictorial views, hidden lines are not shown unless absolutely required for clarity, such as; n Non-visible bottom of a blind hole n Important feature of object not in direct view In pictorial views, holes or notches without bottom/end visible should be assumed to go completely through the object. Centerlines are to be shown on all isometric pictorials. 17
In Class Assignment n 18 Use Isometric Sketch Paper (ISP)
- Slides: 18