Introduction to Sketching Section Views Leon R Grant

- Slides: 17

Introduction to Sketching Section Views Leon R. Grant III Hiram High School

Lesson Objectives In this lesson we will learn to Identify and sketch various types of section views. Full & half sections Removed & revolved sections Broken-out & offset sections We will also learn to identify & represent cutting plane & cutting plane lines Part axis and axis of rotation Section lines & hatching patterns

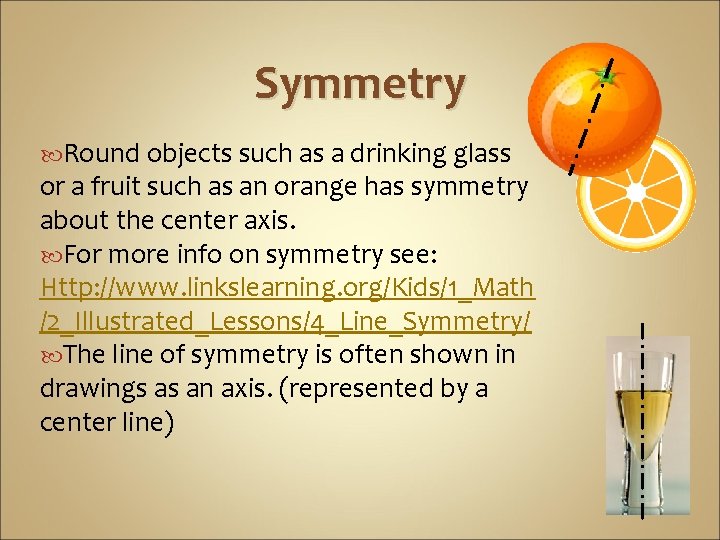
Symmetry Round objects such as a drinking glass or a fruit such as an orange has symmetry about the center axis. For more info on symmetry see: Http: //www. linkslearning. org/Kids/1_Math /2_Illustrated_Lessons/4_Line_Symmetry/ The line of symmetry is often shown in drawings as an axis. (represented by a center line)

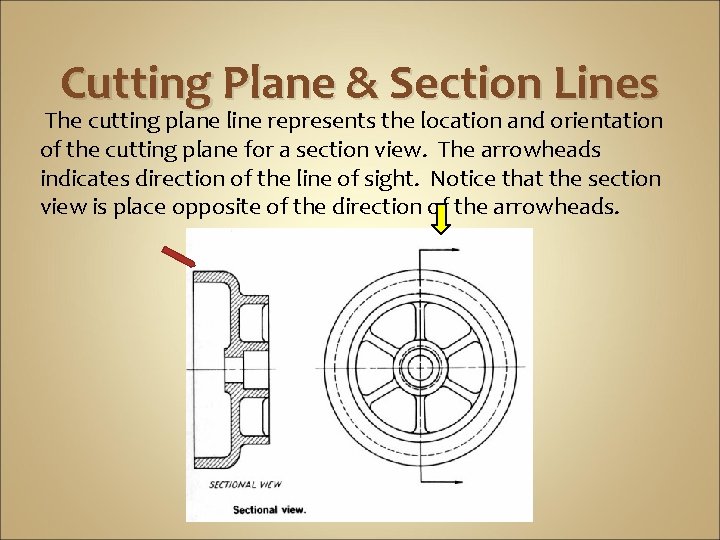
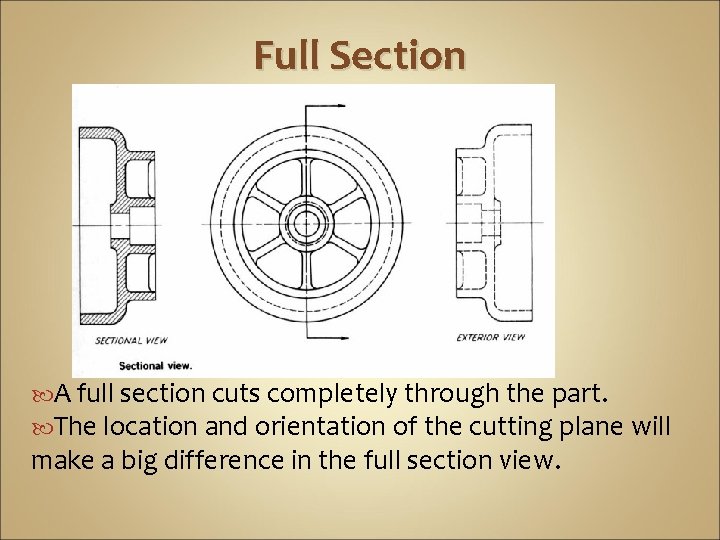
Cutting Plane & Section Lines The cutting plane line represents the location and orientation of the cutting plane for a section view. The arrowheads indicates direction of the line of sight. Notice that the section view is place opposite of the direction of the arrowheads.

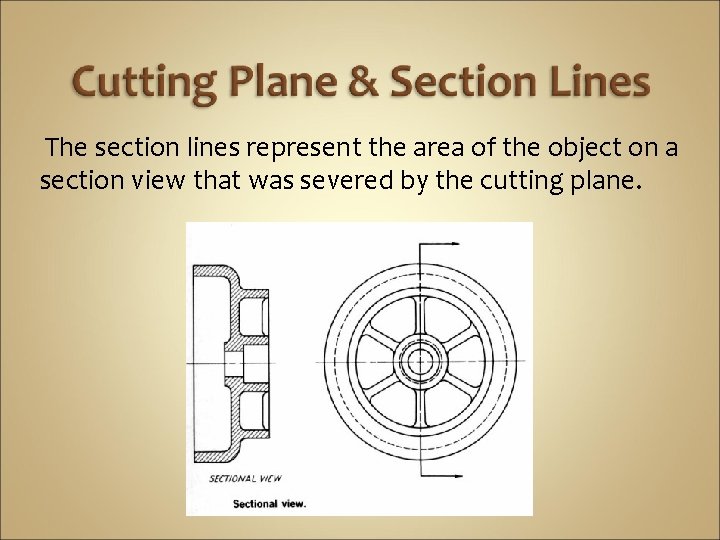
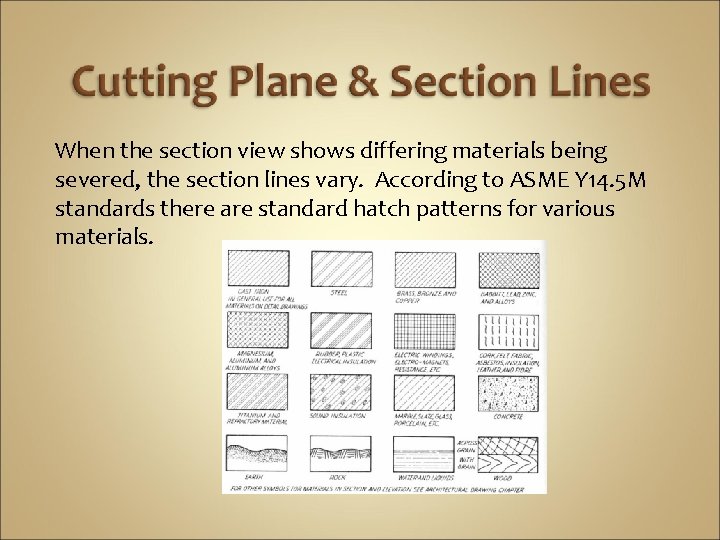
The section lines represent the area of the object on a section view that was severed by the cutting plane.

When the section view shows differing materials being severed, the section lines vary. According to ASME Y 14. 5 M standards there are standard hatch patterns for various materials.

Full Section A full section cuts completely through the part. The location and orientation of the cutting plane will make a big difference in the full section view.

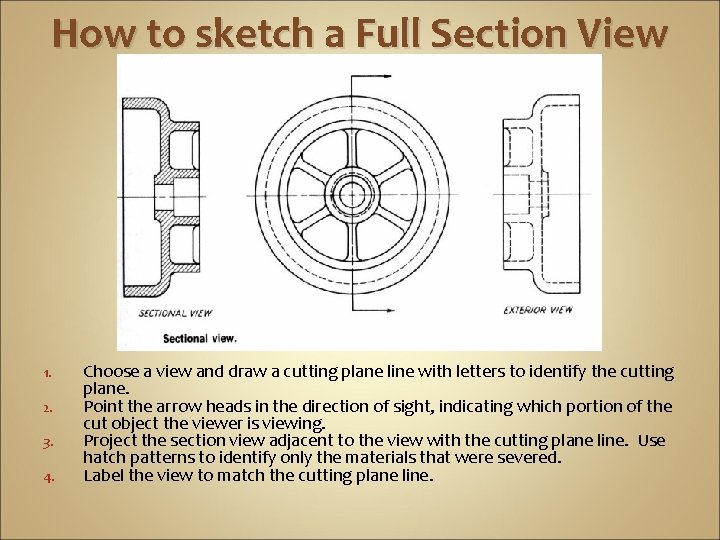
How to sketch a Full Section View 1. 2. 3. 4. Choose a view and draw a cutting plane line with letters to identify the cutting plane. Point the arrow heads in the direction of sight, indicating which portion of the cut object the viewer is viewing. Project the section view adjacent to the view with the cutting plane line. Use hatch patterns to identify only the materials that were severed. Label the view to match the cutting plane line.

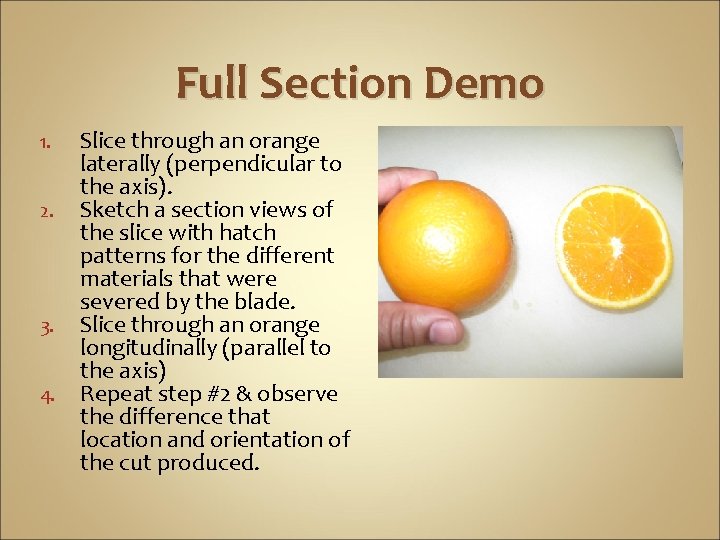
Full Section Demo 1. 2. 3. 4. Slice through an orange laterally (perpendicular to the axis). Sketch a section views of the slice with hatch patterns for the different materials that were severed by the blade. Slice through an orange longitudinally (parallel to the axis) Repeat step #2 & observe the difference that location and orientation of the cut produced.

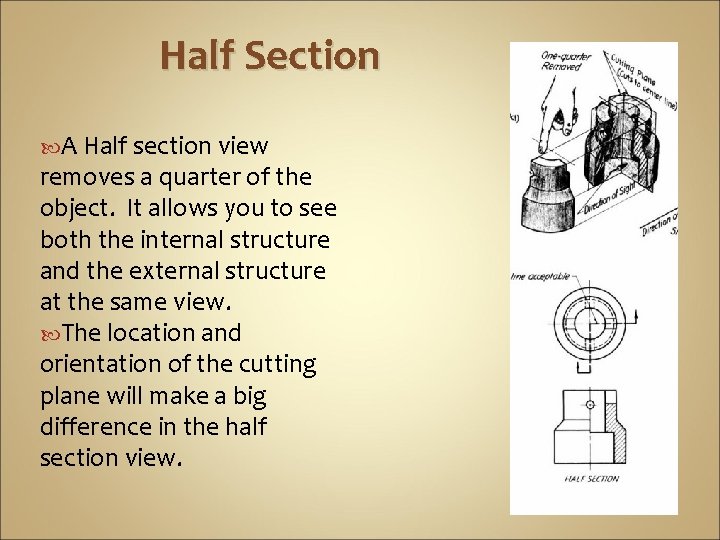
Half Section A Half section view removes a quarter of the object. It allows you to see both the internal structure and the external structure at the same view. The location and orientation of the cutting plane will make a big difference in the half section view.

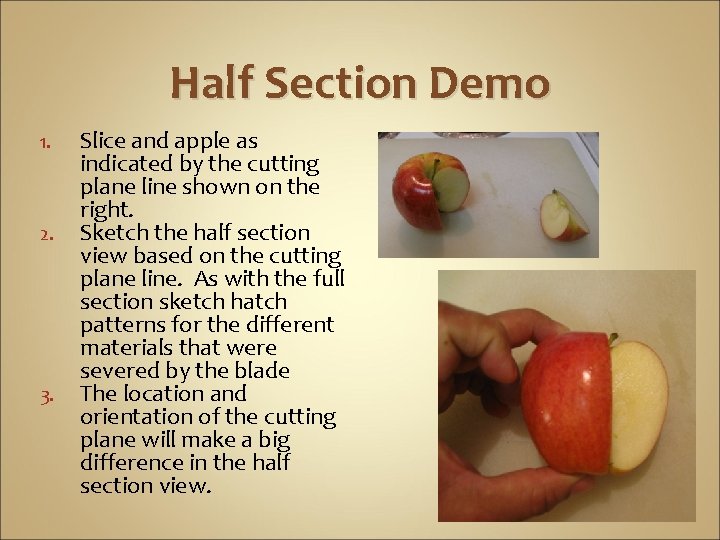
Half Section Demo 1. 2. 3. Slice and apple as indicated by the cutting plane line shown on the right. Sketch the half section view based on the cutting plane line. As with the full section sketch hatch patterns for the different materials that were severed by the blade The location and orientation of the cutting plane will make a big difference in the half section view.

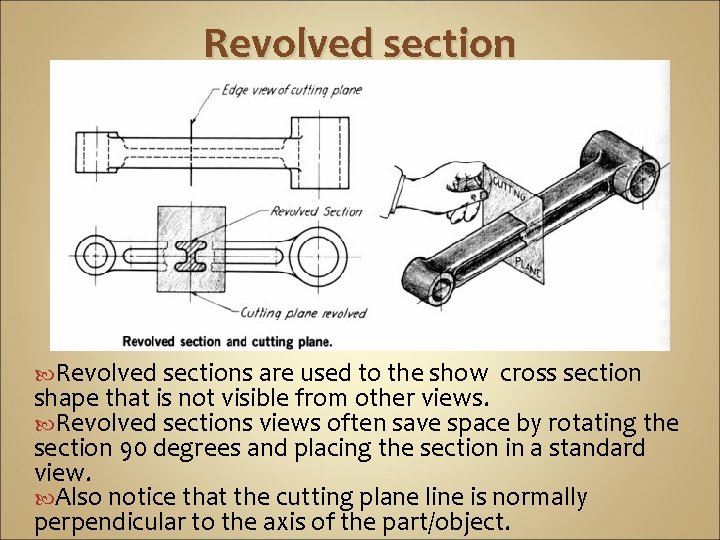
Revolved section Revolved sections are used to the show cross section shape that is not visible from other views. Revolved sections views often save space by rotating the section 90 degrees and placing the section in a standard view. Also notice that the cutting plane line is normally perpendicular to the axis of the part/object.

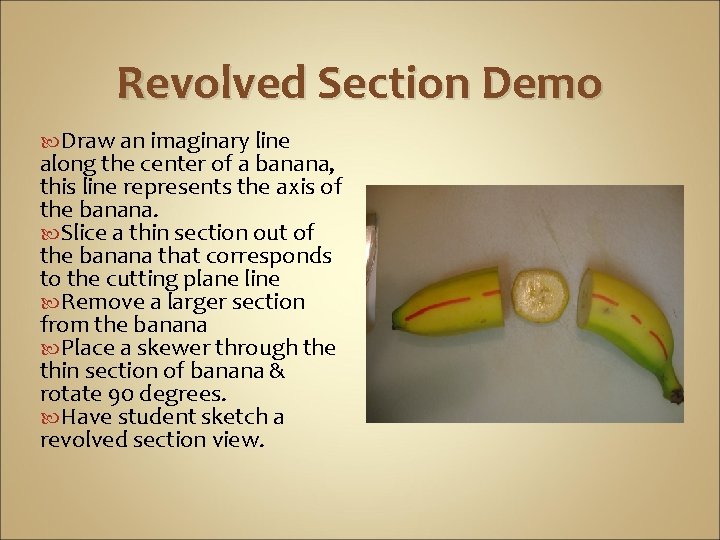
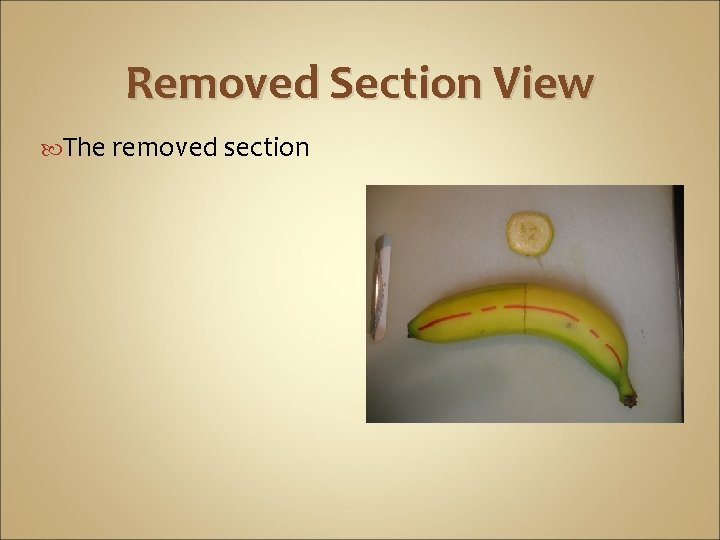
Revolved Section Demo Draw an imaginary line along the center of a banana, this line represents the axis of the banana. Slice a thin section out of the banana that corresponds to the cutting plane line Remove a larger section from the banana Place a skewer through the thin section of banana & rotate 90 degrees. Have student sketch a revolved section view.

Removed Section View The removed section

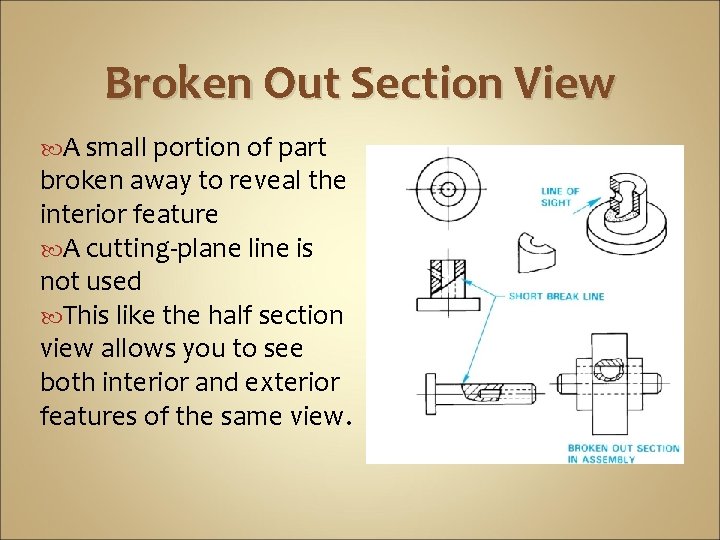
Broken Out Section View A small portion of part broken away to reveal the interior feature A cutting-plane line is not used This like the half section view allows you to see both interior and exterior features of the same view.

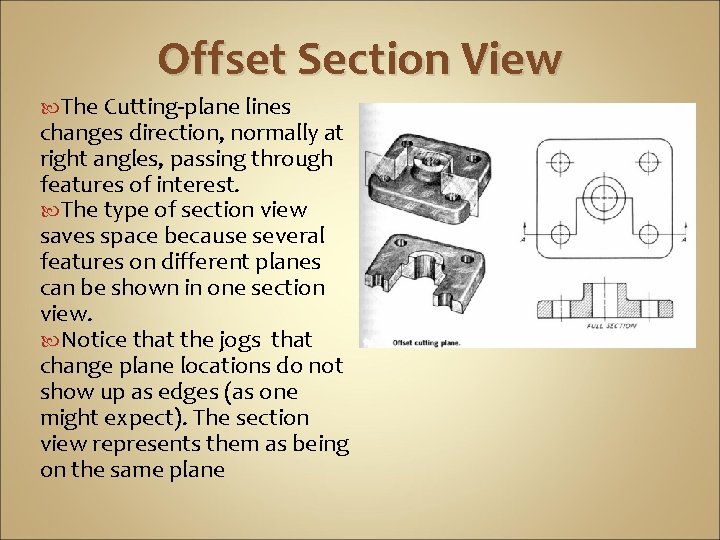
Offset Section View The Cutting-plane lines changes direction, normally at right angles, passing through features of interest. The type of section view saves space because several features on different planes can be shown in one section view. Notice that the jogs that change plane locations do not show up as edges (as one might expect). The section view represents them as being on the same plane

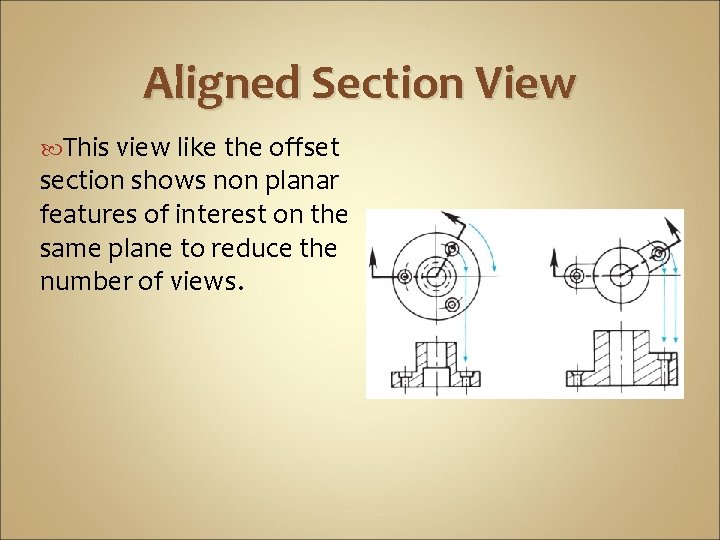
Aligned Section View This view like the offset section shows non planar features of interest on the same plane to reduce the number of views.