INTRODUCTION TO PEOPLESOFT QUERY AGENDA Overview People Soft


)/12")


- Slides: 124
INTRODUCTION TO PEOPLESOFT QUERY
AGENDA • • • Overview People. Soft Query Running Queries Writing Queries Advanced Topics – Multiple Table Queries – Prompted Queries – Writing Expressions
GROUND RULES • Frequently we’ll be navigating together as a class in order to all see the same screens at the same time – Don’t go exploring on your own – Let me know immediately if you are having trouble navigating to the next page • I’ll let you know when you can go ahead on your own
OVERVIEW • People. Soft Query – Basic ad hoc reporting tool – Allows you to write ad hoc queries and run queries shared by others – Allows data to be extracted to Excel or in other formats
BASIC QUERY Six steps to creating a basic query 1. 2. 3. 4. 5. 6. Select the record(s) (data tables) Select the data field(s) Set the query preferences Edit the field properties Save the query (optional) Run the query
SAVED QUERY • You can access and run queries that you or others have saved in the past – Public Queries are queries that you or others have saved – Private Queries are queries that you have saved • When using a Public Query, – Always save the query under a new name before making any changes if you did not create the query – OK to Run a Public Query without saving it under another name
NAVIGATION TO THE REPORTING TOOLS FROM THE MENU Reporting Tools, Query Manager
Using a Saved Query • Follow along with me on this exercise • Navigate to Reporting Tools, Query Manager Enter EM in the Search For box • Click on Search button
• Note: – the list of query names & descriptions – Ownership (Public or Private) – Edit and Run to HTML or Excel hyperlinks
• You can open an existing query by clicking on the Edit name hyperlink • Using the Action drop down box you can delete, move to folder or rename a query • Do not delete or rename a query created by another person • Click on EE_LIST
• This takes us to the Field tab of the query • We’ll take a closer look at this later • Click the Run Tab
Query Results • Click on Excel Spread. Sheet hyperlink
• Wow! • You can now format your report as you normally would with any other Excel spreadsheet, save the report or e-mail it to another person. • Close the window
Create New Query • Follow along with me on this exercise • Navigate to: Reporting Tools, Query Manager Click on Create New Query
Record Selection • The first step is to select a record • Note search options – Search By – Use Drop down box to see other options • Enter Personal in the search box to find the Personal Data record
– – Record name description Add record hyperlink to select the record for this query Show Fields hyperlink to view the fields in the record Locate PERSONAL_DATA, click Add Record
• Note – – Folder icon Alias Record Hierarchy Join – Minus Button • Choose Fields – – Checkbox Key Symbol Field Add Criteria button – Join Record Name
Select the Fields • Select the checkboxes for the following fields: – EMPLID – NAME – SEX – Birthdate Select the Fields tab
• Col • Field • Format • Ord • XLAT • Agg • Heading Text • Add Criteria Button • Edit Button • Minus Button
Edit Field Properties • Locate the SEX field • Select Edit
• Heading – – – No Heading Text RFT Short RFT Long Heading Text Unique Field Name • Aggregate • Translate Value – None – Short – Long
Edit The Data Heading: Text Heading Text: Gender Aggregate: None Translate Value: Short Click OK
Click on Column Order and move Birthdate to col 3 Click the sort Order and select sex as order 1
• The Birthdate field has moved above the Sex field. The sex field designated as the primary sort, will display the short translate value rather than a code and will display the column header as Gender • Edit a few more field properties for practice Edit field EMPLID Heading Text: Employee ID Order By: 1
• Select the View SQL tab • The query tool automatically generates SQL (Structured Query Language) code for you. • SQL will look familiar to those of you who wrote queries in the past using QMF and is useful in troubleshooting problems with a query.
Saving Queries • Once you have created a query, you may want to save it prior to running it. • Click SAVE • Enter – Query Name – Description – Owner • Private • Public
• Enter Query Name: OX_GBLCO_EE_LIST_INITIALS Description: General Info About Employees Owner: Public • Click OK • Then click the Properties tab
• The properties page allows you to maintain information related to the query – Query Name, Description and Owner defaulted from the Save Page – Query Type defaults to User – Distinct checkbox eliminates duplicate rows (current problem in Oxy People. Soft environment) – Query Definition allows further documentation about the query – Status Box displays the history of the last save of the query • Click Run to execute the query
• Examine your data • Note the Download Results options • Close this window by clicking the “X” in the upper right corner
Key Points • There are six steps to creating a query – – – Select the record(s) Select the data field(s) Set the query preferences Edit the field properties Save the query (optional) Run the query • For translate fields, the long or short descriptions can be displayed rather than the code • Queries can be saved as public or private • The SQL statement generated by a query can be viewed by selecting the View SQL tab
Individual Activity #1 You have been asked to produce a query that displays the hire and termination dates of all employees and eliminate duplicates. Record EMPLOYMENT Fields/Headings EMPLID Employee ID HIRE_DT Hire Date TERMINATION_DT Termination Date LAST_DATE_WORKED Last Date Worked SUPERVISOR_ID Supervisor ID Order by TERMINATION_DT descending Query Name HIRE_TERM_QRY
• Did you remember to: – Change field headings – Order by termination date in decending order • When discussion over, click New Query hyperlink
Individual Activity #2 You have been asked to produce an updated list of employees emergency contacts. Record EMERGENCY_CNTCT Fields/Headings EMPLID Employee ID CONTACT_NAME Contact Name RELATIONSHIP Relationship (short translate description) PRIMARY_CONTACT Primary Contact PHONE Phone Order by EMPLID CONTACT_NAME Query Name EMER_CNTCTS
• Did you remember to: – Change headings? – Use short translate value for Relationship? – Order by Empl. ID and Contact Name? • When discussion over, click New Query hyperlink
Selection Criteria • We will add criteria rows to a query to return specific rows of data • Compare fields to find data matching specified conditions
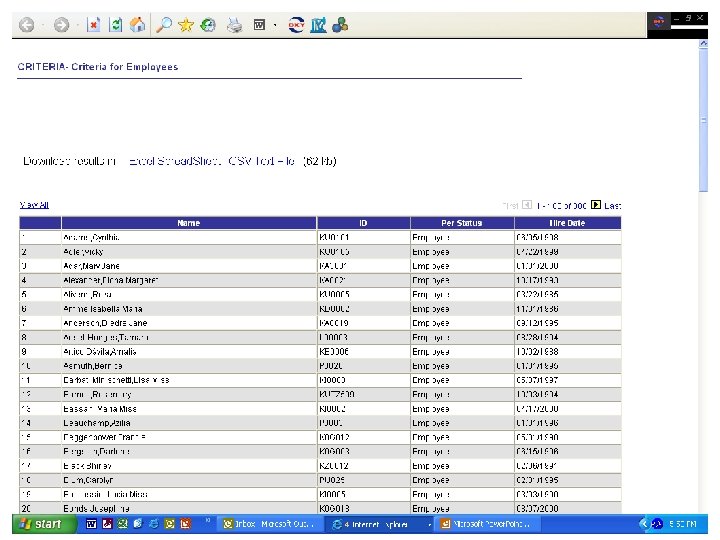
Selection Criteria Create a basic query to capture employee data and save the query without running it. Record PERSONAL_DATA Fields NAME EMPLID MAR_STATUS Order by NAME Query Name/Description CRITERIA (short description) Criteria for Employees
• Did you remember to make the following field edits? – Change Name to the first field and sort by name? – Use the Short Name for the Mar_Status translation type? – Name the query and give it a description? • When we are all ready, click the Criteria tab and then the Add Criteria button.
• Choose Expression 1 Type – Used to specify what you are comparing • Field • Expression • Note that your selection of Expression 1 Type changes the display for Expression 1 • Expression 1 – Select the field or expression you want to compare • Field • Expression • Next we’ll consider Condition Type
Condition Type Between Not between Equal to Not equal to Greater than Not greater than In list Not in list In tree Not in tree Is null Is not null Less than Not less than Like Not like
• Check the different Expression 2 Types – – – Field Expression Constant Prompt Subquery • Click the Cancel button • Click the Query tab
• Find the field: Sex • Click Add Criteria button
• • Select condition type: equal to Expression type: Constant Expression 2: F Click OK
• You can apply criteria to fields that are not in the query output • You need to know how the data is stored in the database to ensure accurate results when the query is run • Click Save then Run to view the output
• In addition to your current criteria, we now want to retrieve just employees who have a first name, middle initial or last name that begins with the capital letter “D”. • From the Criteria page, click the Add Criteria Button
• Select Expression 1 Type: Field • Expression 1 click Find Value prompt button • Select Name field from the list • Condition type: like • Expression 2 Type: Constant • Expression 2: %D% • The Like operator is case sensitive and uses wildcard characters to search for data • Wildcard characters are: % Any string of zero or more characters __ (underscore) Any single character • Click OK
• Click Save • Note the And/Or drop down list • Click Run
You now have a female employees who have a capital “D” in their name
Individual Activity #3 Produce a list of all employees whose Business Title contains the word “Manager”. Also, only show those who were hired after 1989. Record EMPLOYMENT Fields EMPLID BUSINESS_TITLE HIRE_DT Order by HIRE_DT (descending) Query Name/ Description Business_Title Manager Business Title Query
Results
Criteria page
Effective Date • Effective dated records are those records that contain the field Effdt. • The effective date provides a history of changes over time • There are three categories of effective date: History Rows of data where the effective date is less than the effective date of the current row. Current The row of data with the highest effective date/sequence number less than or equal to today’s system date. Future Rows of data where the effective date is greater than today’s system date.
Effective Date • Effective dates are used in a query as criteria. • When you start a new query and select an effectivedated record, a dialog will display informing you that an effective-date criteria row has been created
Effective Date • Click New Query • Record: JOBCODE_TBL • Click Add Record • Click OK in dialog box • Select the Criteria tab
• Click the Edit button
• Four effective dated comparisons – – Effective Date <= Effective Date < Effective Date >= Effective Date > • Do Not Use – First Effective Date – Last Effective Date – Between or Not Between
Individual Activity #4 Create a query that lists the last current job actions as of the current date for your employees. Record JOB Fields/Headings EMPLID ID DEPTID (column 2) Dept ID JOBCODE Job Code ACTION (short description) Action ACTION_REASON Reason EFFDT Effective Date LOCATION Location ANNUAL_RT Annual Rate Order by EMPLID Criteria Annual salary of $50, 000 or more (enter 50000) Compensation Frequency of monthly (Enter M) Query Name CUR_ACTION
Fields tab
Criteria tab
Results
Using Aggregate Functions • Five aggregate functions are available – Avg – Count – Max – Min – Sum
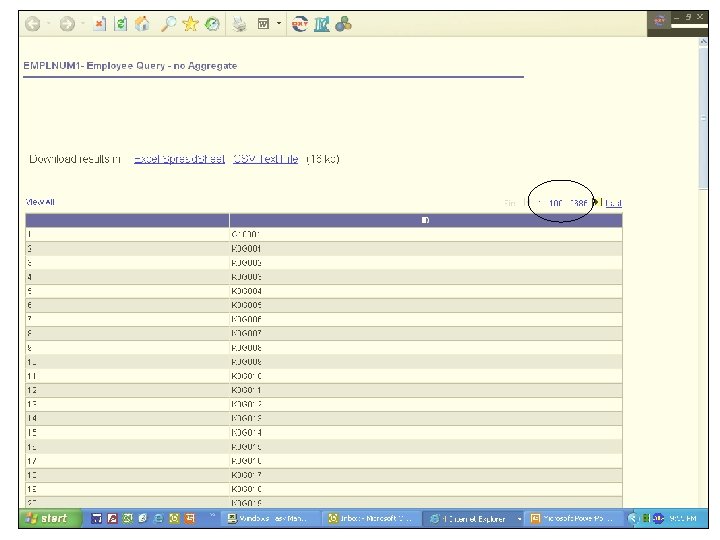
Sample Aggregate Query • Build a query to count the number of employees in the PERSONAL_DATA record – Record: PERSONAL_DATA – Fields: EMPLID – Query Name: EMPLNUM • Save and Run to see how many rows are returned
• Now add the aggregate function to count the number of employees. – – – Click Fields tab Click Edit button Aggregate: Count Click OK Click Save Click Run
Advanced Topics • You can work on these exercises on your own if you are ready for these advanced topics – Multiple Table Queries – Prompted Queries – Writing Expressions
Multiple Table Queries • People. Soft Query Manager allows you to join data from more than one record • You can join multiple records using the web-based Query Manager
Tables and Views • Records listed in the Record Search may represent either a table or a view. – A table physically stores specific data. – A view is a logical representation of data and may consist of data from multiple tables – Some views may already have criteria associated with them – Views can be considered to be pre-joined tables
Joins • A join allows you to retrieve data from two or more records or specify criteria from more than one record • Whenever you perform a join, the records are linked based on common fields. • In Query, predefined joins can be generated as either a Hierarchichal join or a Related Record join. – You do not have to add any criteria for predefined joins in order to link the records.
Types of Joins Record Hierarch Related Record A Hierarchical join uses records that are parents or children of each other. The hierarchical relationship is defined by the Parent Record in the Application Designer An example is joining employee personal data with dependent/beneficiary data. Related Record joins use records from non-hierarchical records that are related by a common field. For example, description tables for common codes are related records. This relationship is determined by the Prompt Table edit defined for a field in the Application Designer.
Join Example Create the following new Query: Record Fields Person_Name Emplid Name
Field Tab Return to Records Tab Type in Job, Select the Join Link next to Job
Click on the A=Person Name link
The Emplid Key in both records are automatically matched together to join the person name record with the job record Click on the Add Criteria because this is the join you want.
The job record has become part of the query joined to the person name record. Note Person is Alias A and Job is Alias B.
Select Fields: EMPL_STATUS, LOCATION, AND BUSINESS_UNIT from the Job record
Joining Base Tables to Control Tables • Control tables are shared by all divisions and sometimes need to be joined using multiple keys or fields. • Many control tables have setid field that is used to match the setid for the division accessing the table. • Most control tables have an effective date that should be considered when joining to another base table.
Many fields that have associated tables may have a link next to them that allows the user to click and automatically join this table to this field. In this example we will join the location control table to the location field in the job record. Click on the Join LOCATION TBL link.
Now the three tables are joined together. Select the Description Field in the Location table and go to the criteria tab in the query.
You can see the base tables have been joined together and the effective dates are set to look at the most current row in the record. Because you used the join link for the location table you do not see the joining of the location field in job with the location field in the control table. However it has been done for you. This can be seen if you look at the SQL tab. Because it is a control table, a manual join of the setid should be done to eliminate the chance of duplicate values for the same field.
Select the criteria to join the setid field in the location table with the setid for location in the job record.
Now we need to go to the fields tab and edit our fields.
Add criteria on the EMPL_STATUS to select only values of A, P, L. Use the short translate for the status code. Move and rename the location description next to the location code.
Prompted Queries • People. Soft Query allows you to build reports that contain runtime prompts. • A runtime prompt allows you or another user to enter a value for a specific field at the time the query is run. • The report will display only those data rows that match the field entered at the prompt. • This makes the query dynamic, allowing it to be used over and over again for changing requirements.
Runtime Prompts Create the following query to retrieve employee disability election information. Record DISABILITY_BEN Fields EMPLID PLAN_TYPE (short description) COVERAGE_BEGIN_DT COVERAGE_ELECT BENEFIT_PLAN Order by EMPLID Query name DISABILITY (short description)
Your Fields tab should look like this. Save the query and run it
Results
• A prompt is simply a row of criteria and can be added from two locations. • Click the Prompts tab • The Prompts tab can be used to add runtime prompts and display a list of all prompts that have been added to the query. • The criteria tab is the most common method of adding criteria and is useful when only adding one runtime prompt. • Click the Fields tab
• For field PLAN_TYPE, click the Add Criteria button. • Expression 2 Type: Prompt • Expression 2: New Prompt
• Select Heading Type: RFT Long • Heading Types are: – RFT Long field name – RFT Short field name – Text Anything you want • Type, Format and Length all default from the field definition in the database. • Edit Types: – – No Table edit Prompt Table Translate Table Yes/No • User Prompt Name is used in translations. No need to change this field. • Click OK
• Note that prompt has been added and is represented as a bind variable. • Click Save • Click Run
• The prompt is displayed directly below the query name and the View Records button has been added. • Select Long-Term Disability • Click View Results
• The query has become dynamic based on the Plan_Type chosen for each run.
• To add a prompt for an additional field, such as coverage election, you simply add another row of criteria. • Click the Fields tab • Click the Add Criteria icon for the COVERAGE_ELECTION field
• • Choose Expression Type 2: select Prompt Examine the Define Prompt section of Expression 2 Prompt Will display the bind variable or prompt name used for this criteria Search Icon Will display all prompts created for this query New Prompt Select this hyperlink to create a new prompt to be used for this row of criteria Edit Prompt Use this hyperlink to edit the existing prompt used for this row of criteria • In Expression 2, select the New Prompt hyperlink
• Heading Type: RFT Long • Click OK
• Examine Criteria Tab for new criteria row • Click Save • Click Run
• Select Plan Type prompt: Long-Term Disability • Select Coverage Election prompt: Elect • Click View Results
• Results
Prompted Queries • People. Soft Query allows you to build reports that contain runtime prompts. • A runtime prompt allows you or another user to enter a value for a specific field at the time the query is run. • The report will display only those data rows that match the field entered at the prompt. • This makes the query dynamic, allowing it to be used over and over again for changing requirements.
Runtime Prompts Record Health_Benefit Fields Emplid Plan_Type Coverage_Begin_Dt Coverage_Elect Benefit_Plan Order By Emplid Query Name OX_GBLCO_MEDICAL Short description
Your Field tab should look like this. Save the query and run it
Results
• A prompt is simply a row of criteria and can be added from two locations. • Click the Prompts tab • The Prompts tab can be used to add runtime prompts and display a list of all prompts that have been added to the query. • The criteria tab is the most common method of adding criteria and is useful when only adding one runtime prompt. • Click the Fields tab
For Plan_Type click the Add Criteria Button Expression 2 Type: Prompt Expression 2 New Prompt
Select Heading Type: RFT Long Heading Types are: RFT Long field name RFT Short field name Text. Anything you want Type, Format and Length all default from the field definition in the database. Edit Types: No Table edit Prompt Table Translate Table Yes/No User Prompt Name is used in translations. No need to change this field. Click OK
Note that prompt has been added and is represented as a bind variable. Click Save Click Run
The prompt is displayed directly below the query name and View Records button has been added. Select Medical Click View Results
The query has become dynamic based on the Plan_type Chosen for each run.
To add a prompt for an additional field, such as coverage election, you simply add another row of criteria. Click the Fields tab Click the Add Criteria icon for the Coverage_Election field
Heading Type: RFT Long Click OK Examine Criteria Tab for new criteria row Click Save Click Run
Select Plan Type Prompt: Medical Select Coverage Election prompt: Elect Click View Results
Prompt Summary • Creating Prompts Tab Useful when adding multiple prompts to one query Criteria Tab Useful when adding one prompt to a query for a specified field • Editing Prompts – once created, you can view them via one of the methods above Prompts Tab Click Edit button for the prompt you wish to edit. Criteria Tab Click Edit Prompt hyperlink to edit the prompt. • Deleting Prompts – To delete a prompt, access the Prompts page and click the delete button (minus sign) for the prompt you wish to delete. If you are using the prompt in a row of criteria, you must remove it from the criteria before deleting it.
Writing Expressions Record Personal Data Field Headings Emplid ID Name Employee Name Sex Gender(short desc) Birthdate
Your field screen should look like this Did you remember to change the description of name and sex Did you add the short description to sex
Select the Expressions tab Click on Add Expression
Change the expression Type to Number Use 3 as the Length Click on the Add Field Link Choose Birthdate from the select list
Enter the following formula Hit OK Datediff(mm, A. BIRTHDATE, getdate())/12
Click on the Use as Field to move this expression to your query fields
Change the Heading Text on the expression Line to Age
Results Hit the Run Tab
Adding and Expression as Criteria in the Query Choose the Fields tab and Add Criteria on the expression line
Expression 1 Type Expression 1 contains Expression Condition Type Greater than Expression Type 2 Constant Expression 2 Value 35 Click OK
The expression is now part of the criteria The query will only select employees over the age of 35 Hit the Run Tab
Results