Introduction to Histology By Martin Inyimili Objectives By

Introduction to Histology By Martin Inyimili.

Objectives • By the end of the lecture, the student should be able to: ØDefine Histology ØOutline the various stages of preparing slides. ØScientific basis of the various stages of preparing slides.

What is Histology. • Is the scientific study of the fine details of cells and tissues using a microscope to look at specimens of tissue that have been carefully prepared using special techniques called Histological techniques. • Is Greek word –”histos= tissue” and “logos=study”. • Histopathology: microscopic examination of biological tissues to observe the appearance of diseased cells and tissues in very fine details. • Histo-chemistry: study of the identification and distribution of chemical compounds within and between biological cells using histological techniques such as staining, indicators and light.
 of cells/tissues/organs/systems. If")
Uses/values of histology • Education- way to understand the function (physiology) of cells/tissues/organs/systems. If one understands the structure then one can deduce the function and vice versa. It also helps students understand the microstructures of biological tissues. • Diagnosis – to inform treatment options • Research – Histology is indispensable in biological research • Forensic investigations (Autopsy)- to determine possible causes of sudden death. • Archeology – for tissues recovered from archeological sites ie bone and teeth, provide insights into history and past events

Steps in slide preparation • Tissue collection and preparation • Fixation • Processing • Embedding • Sectioning • Staining • Mounting • Microscopy.

Sample preparation • Tissues are obtained from closest relatives of man= olive baboon • 3 months Quarantine = observation for zoonoses • Darting/anaesthesia • Perfusion- washing with normal saline and introducing a fixative(mainly formaldehyde) through the carotid artery. • Immersing the animal in 10% formal saline. • Purpose of fixation: üPreserve the tissue in a life-like manner as possible üKills the tissue to avoid postmortem changes= autolysis and putrefaction üCross-linking thus adding strength to the tissue

Cont’d • Tissues are obtained in cubes of 1 cm, some times less • Larger tissues do not fix well as the fixative and embedding media do not penetrate to all the sections. • Trim wit a sharp blade to obtain regular and fine edges • Put tissues in specimen bottles and label them ready for processing

Tissue harvesting and trimming.

Decalcification • The removal of calcium deposits in bone and other tissues that contain calcium for good embedding procedure, carried out between the fixation and processing steps. • Done via the following techniques: Technique Examples Advantage Disadvantage 1 Strong mineral acids Nitric acid Hydrochloric acid For dense cortical bone Removes large quanties of cacium at a rapid rate Damage cellular morphology Not recommended for delicate tissues like bone marrow 2 Organic acids Acetic acid Formic acid For delicate tissues like bone marrow They are not aggressive hence will not damage cellular morphoogy Act more slowly hence rquire more time to decalcfy cortical bone 3 Chelating agents EDTA Not harsh to tissues Penetrates tissue poorly and works slowly Very expensive 4 Electrolysis Slow and not suitable for routine work

Tissue Processing • the purpose is to remove water and replace it with a medium capable of solidifying to allow the sections to be cut. This medium is wax • Has three stages = Dehydration, Clearing and Infiltration. • Dehydration is done using ascending grades of alcohol from 70% to absolute, since water is immiscible with wax. • Clearing is replacing alcohol with a clearing agent like xylene, picric acid, cedar wood oil, etc. • Infiltration is filling the tissue air spaces with molten wax ØDone in the oven at 60 o. C for 8 -14 hours

Typical processing schedule Process Solution Time Dehydration 70% alcohol 60 mins Dehydration 90% alcohol 45 mins Dehydration Absolute alcohol 60 mins Clearing Xylene 60 mins Infiltration Paraffin Wax 30 mins Infiltration Paraffin Wax 60 mins Infiltration Paraffin Wax 90 mins Blocking Out Paraffin Wax n/a

Cont’d • Processing can be done in two way: manually or by an automatic tissue processor. Below is an automatic tissue processor.

Embedding • Tissues are placed into molds along with liquid embedding material such as wax, agar or gelatin which is then hardened. • Hardening is done by cooling for wax and agar while curing(heating) is done for gelatin and resins e. g. epoxy. • Orientation of tissue is done during this process • Cooled blocks now have a tissue and wax and can be stored for longer periods of time- can provide reference in medicine

Embedding station. Notice the tissue orientation on the left

Tissue cassettes: used both for processing and providing tissue support during sectioning.

sectioning • Involves ‘cutting’ and floating • Sectioning is done using a microtome and a ribbon is obtained. • For light microscopy, a steel knife mounted in a microtome is used to cut 4 -micrometre-thick tissue sections which are mounted on a glass • For transmission electron microscopy, a diamond knife mounted in an ultra-microtome is used to cut 50 -nanometer-thick tissue sections which are mounted on a 3 -millimeter-diameter copper grid. • Individual sections are floated on a warm water bath and sections ‘fished out’ on a slide containing an adhesive, probably egg albumin. • Slides are arranged onto racks and allowed to dry in the oven at 50 o. C.

Rotary Microtome.

Left: Microtome showing a ribbon. Right: floating and fishing out technique

staining • Biological tissues have little inherent contrast in both light and electron microscopy. • Staining is required for: üTissue contrast üHighlight particular features of interest. • There are several kinds of stains • Three basic staining methods ü Hematoxylin and Eosin (H/E) ü Masson’s trichrome ü Weigert’s elastic stain. ü Special stains: silver impregnation for reticular fibres in the liver ü Mucin carmine for mucus secreting tissues like nasal cavities and the GIT ü Nissil & Myelin, Golgi stain and Luxol fast blue for nervous tissues
 stain is commonly used. • Cellular architecture • Hematoxylin")
H/E • Hematoxylin and Eosin(H/E) stain is commonly used. • Cellular architecture • Hematoxylin is basic and stains the nuclei blue while Eosin is acidic and stains the cytoplasm red or pink

H/E staining. Nuclei appears dark stained while cytoplasm appears pink.
 üEither")
Masons Trichrome stain • Has three stains üIron Hematoxylin üPonceau de xylidine (ponceau) üEither light green or aniline blue. • Highlights colagenous fibres and muscle • Iron Heamatoxylin = nuclei black/dark blue • Ponceau = muscle, RBCs, fibrin and some cytoplasmic granules • Light green/aniline blue= collagen, mucin and reticulin fibres

Masson’s Trichrome staining. Notice the collagen fibres staining green and muscle red

Weigert’s Elastic stain • Is alcohol based stain. • Mainly for elastic fibers in heart and blood vessels • Nuclei appear brownish black and black • Elastic fibres appear black

Weigert’s elasic staning of blood vessel. Used primarily to stain for elastic fibers. Notice the fibres and nuclei staining dark blue

Mounting • Involves putting a coverslip on the stained tissue. • Requires an adhesive resin-either water based or resin (water insoluble) • Mainly DPX used • Has to have the following characteristics: üSame refractive index as that of glass. üNot easily oxidized by air. üDurable üNote: avoid introducing air bubbles between the slide and the coverslip.

Mounting of a slide. Notice the pressing to remove air bubbles

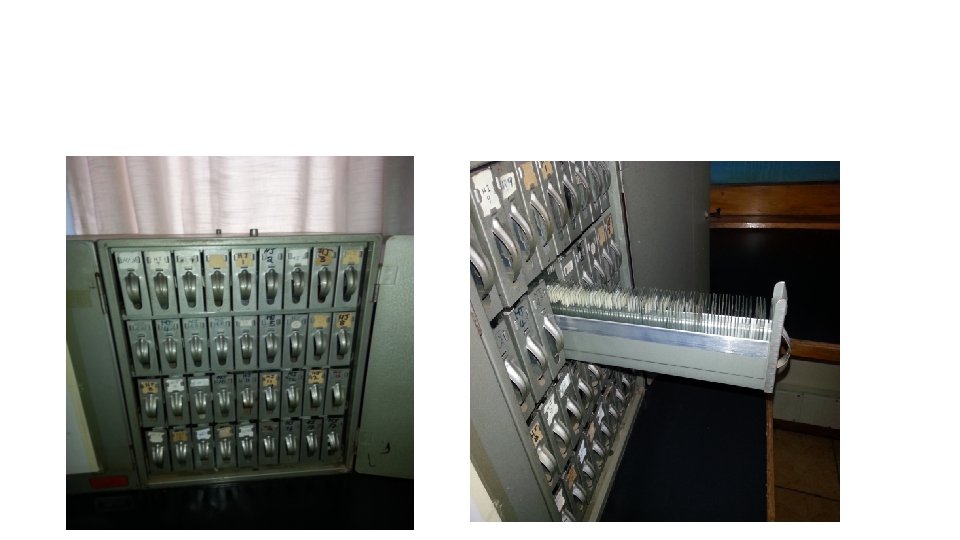
Slide Storage • Slide have to be labelled before storage. • Mainly the tissue name or number. • Storage on cupboards (wooden or metallic)


Caution • The whole process of producing a slide is very costly, thus uttermost care of slides is important to avoid breakages • Respect those who have taken time to prepare slides, take care of the slides.

Thank you !!!! Questions
- Slides: 32