Introduction to CAM 3 D Model to CNC

- Slides: 54

Introduction to CAM

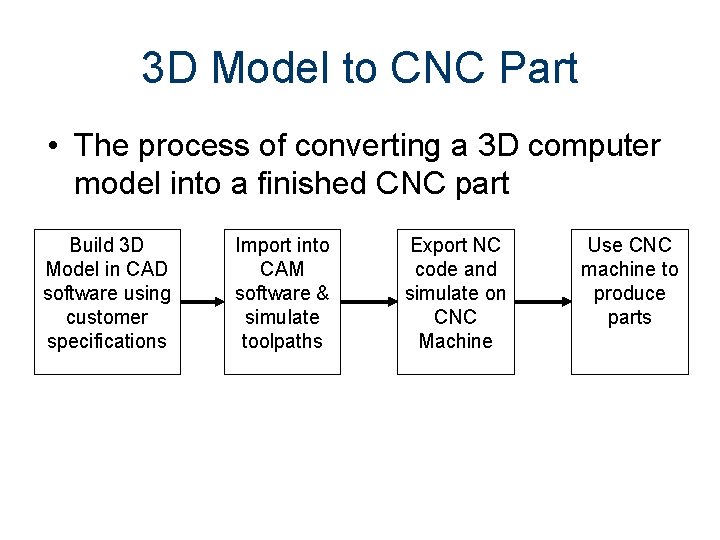
3 D Model to CNC Part • The process of converting a 3 D computer model into a finished CNC part Build 3 D Model in CAD software using customer specifications Import into CAM software & simulate toolpaths Export NC code and simulate on CNC Machine Use CNC machine to produce parts

Edge. CAM Setting up the Edge. CAM work environment

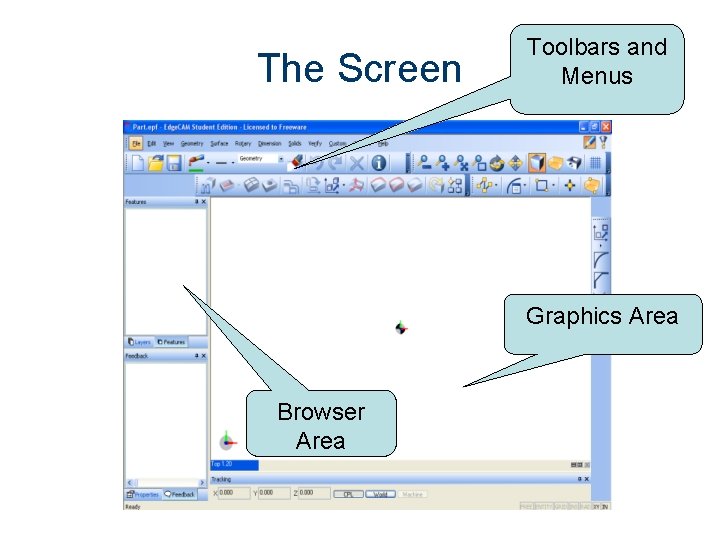
The Screen Toolbars and Menus Graphics Area Browser Area

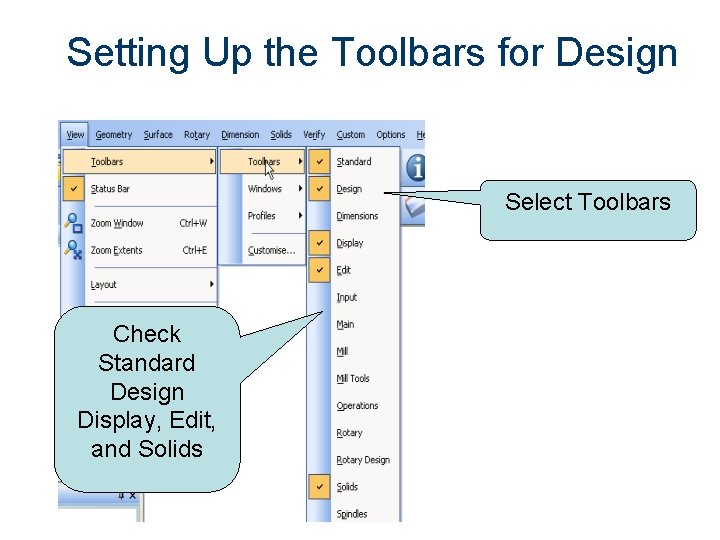
Setting Up the Toolbars for Design Select Toolbars Check Standard Design Display, Edit, and Solids

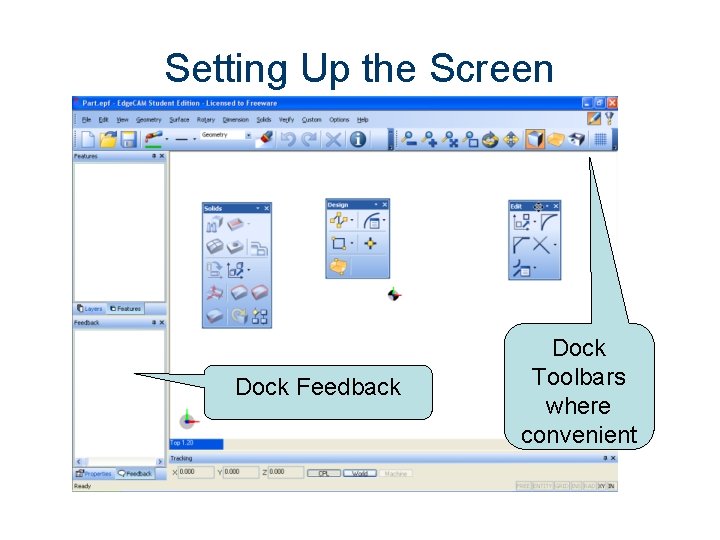
Setting Up the Screen Dock Feedback Dock Toolbars where convenient

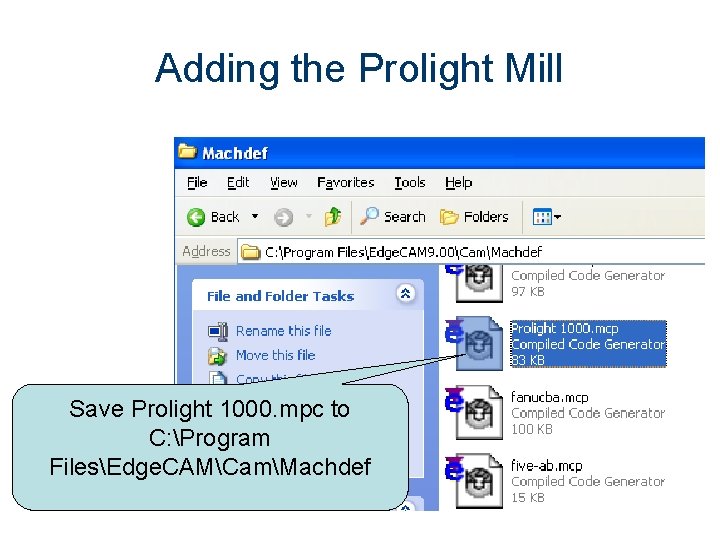
Adding the Prolight Mill Save Prolight 1000. mpc to C: Program FilesEdge. CAMCamMachdef

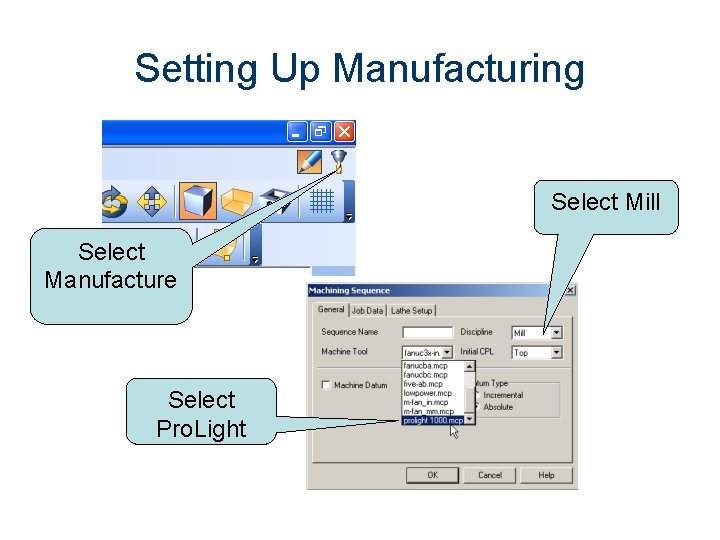
Setting Up Manufacturing Select Mill Select Manufacture Select Pro. Light

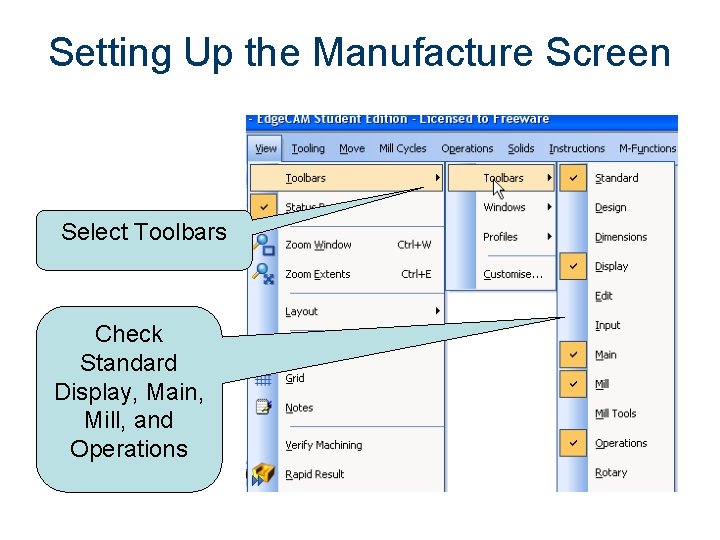
Setting Up the Manufacture Screen Select Toolbars Check Standard Display, Main, Mill, and Operations

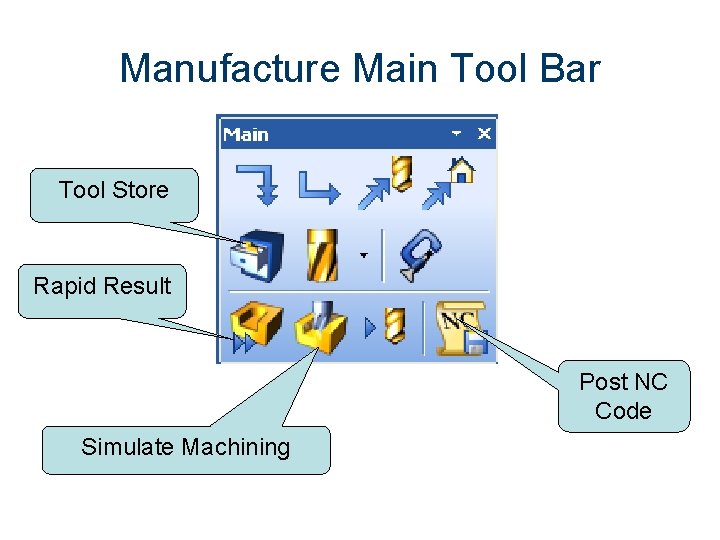
Manufacture Main Tool Bar Tool Store Rapid Result Post NC Code Simulate Machining

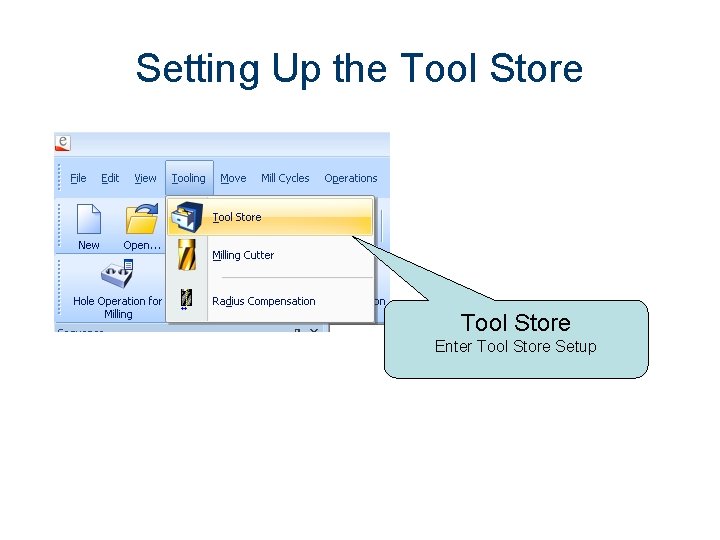
Setting Up the Tool Store Enter Tool Store Setup

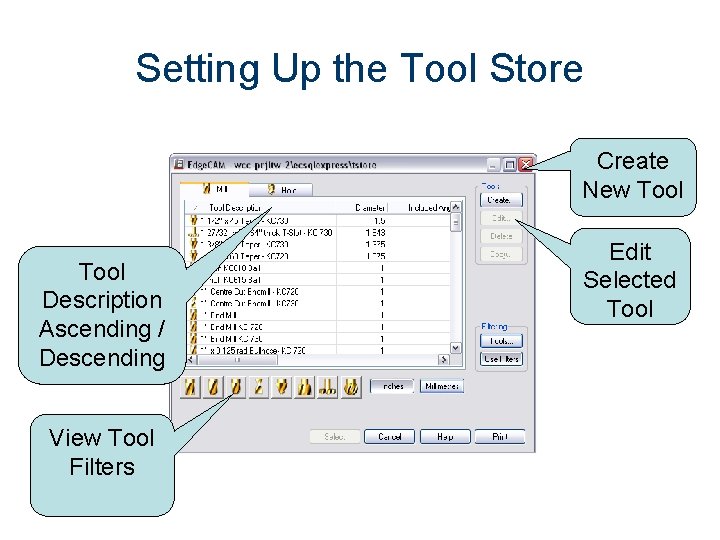
Setting Up the Tool Store Create New Tool Description Ascending / Descending View Tool Filters Edit Selected Tool

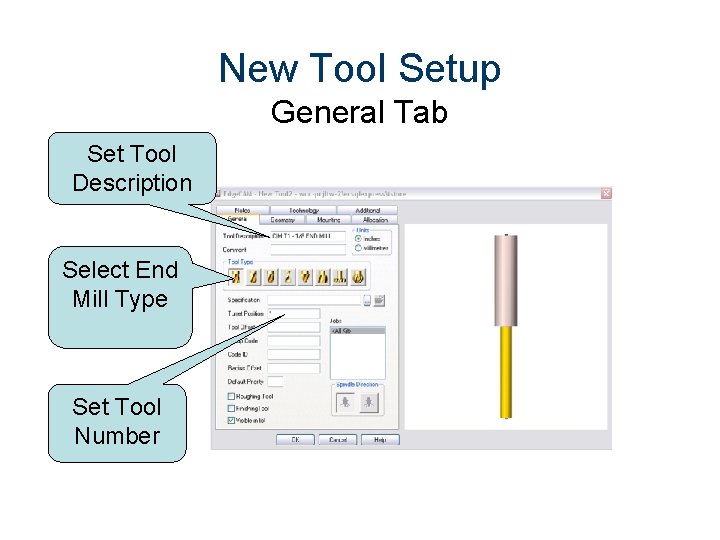
New Tool Setup General Tab Set Tool Description Select End Mill Type Set Tool Number

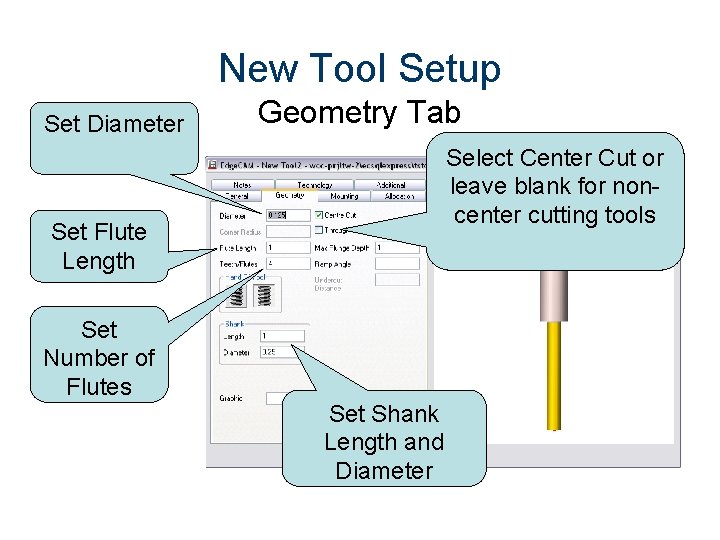
New Tool Setup Set Diameter Geometry Tab Select Center Cut or leave blank for noncenter cutting tools Set Flute Length Set Number of Flutes Set Shank Length and Diameter

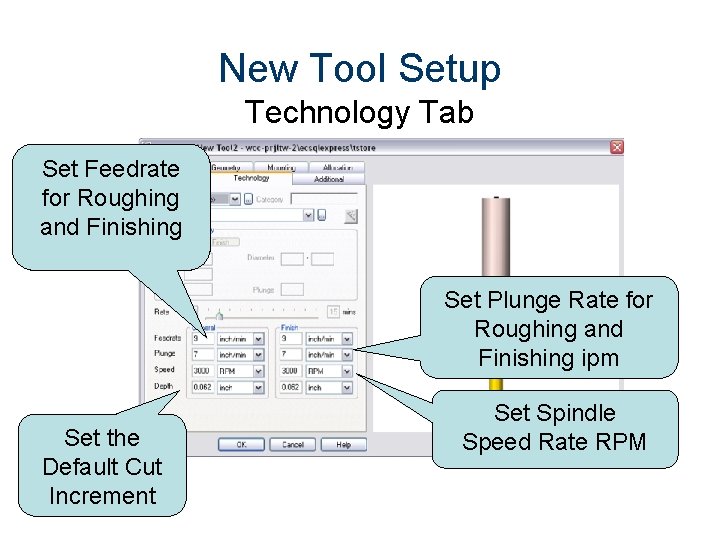
New Tool Setup Technology Tab Set Feedrate for Roughing and Finishing Set Plunge Rate for Roughing and Finishing ipm Set the Default Cut Increment Set Spindle Speed Rate RPM

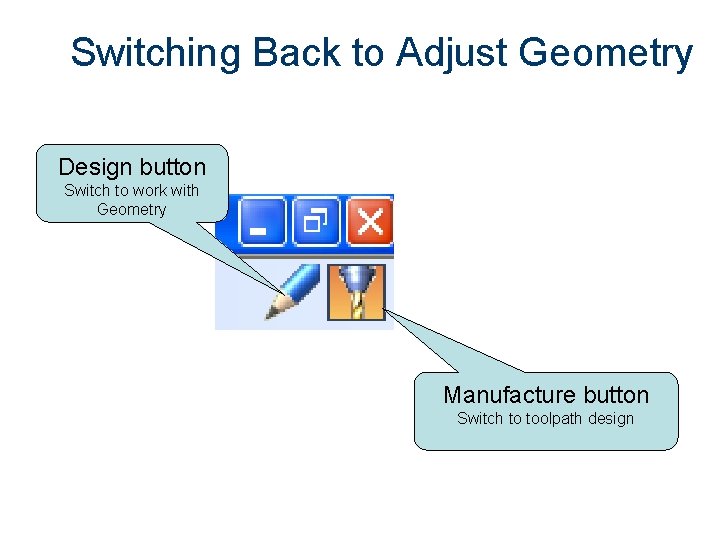
Switching Back to Adjust Geometry Design button Switch to work with Geometry Manufacture button Switch to toolpath design

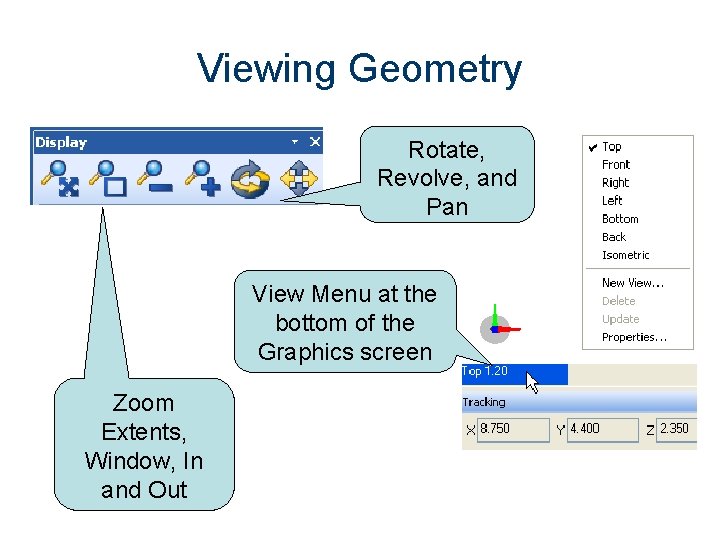
Viewing Geometry Rotate, Revolve, and Pan View Menu at the bottom of the Graphics screen Zoom Extents, Window, In and Out

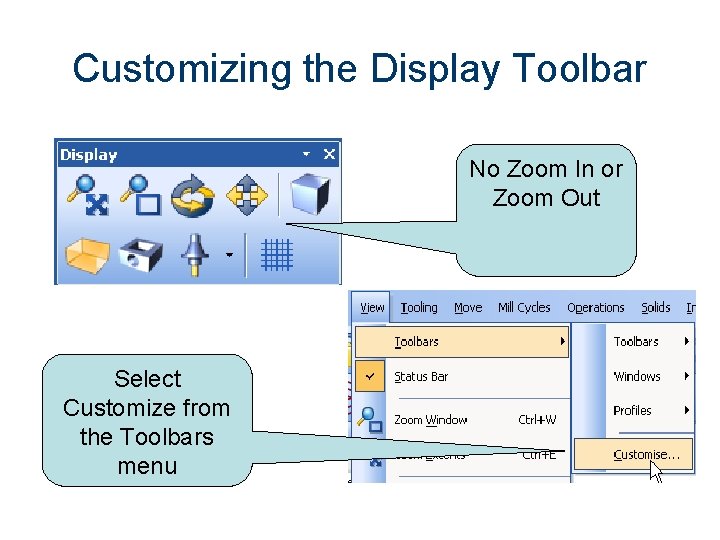
Customizing the Display Toolbar No Zoom In or Zoom Out Select Customize from the Toolbars menu

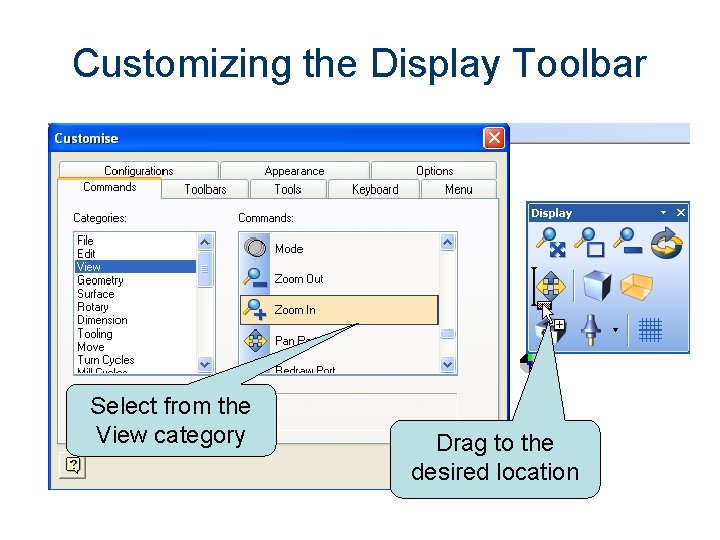
Customizing the Display Toolbar Select from the View category Drag to the desired location

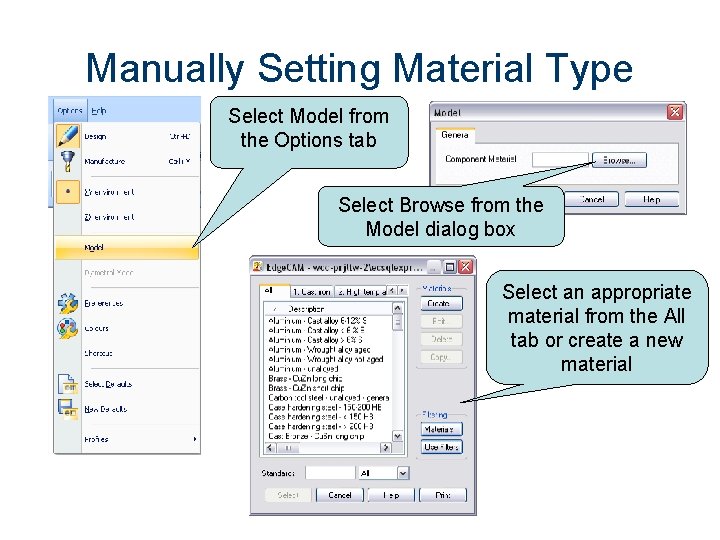
Manually Setting Material Type Select Model from the Options tab Select Browse from the Model dialog box Select an appropriate material from the All tab or create a new material

Edge. CAM Operation Working with Edge. CAM

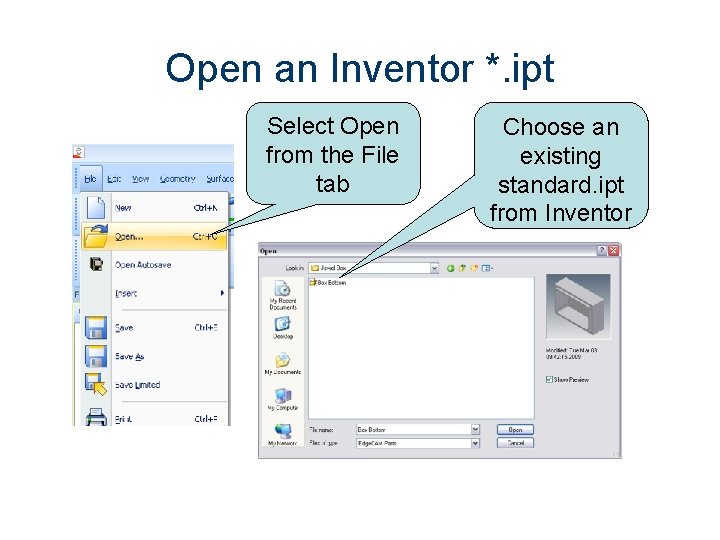
Open an Inventor *. ipt Select Open from the File tab Choose an existing standard. ipt from Inventor

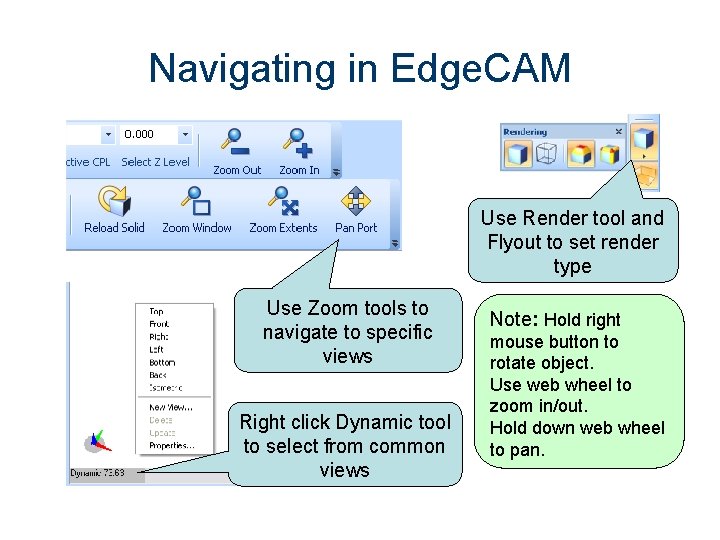
Navigating in Edge. CAM Use Render tool and Flyout to set render type Use Zoom tools to navigate to specific views Right click Dynamic tool to select from common views Note: Hold right mouse button to rotate object. Use web wheel to zoom in/out. Hold down web wheel to pan.

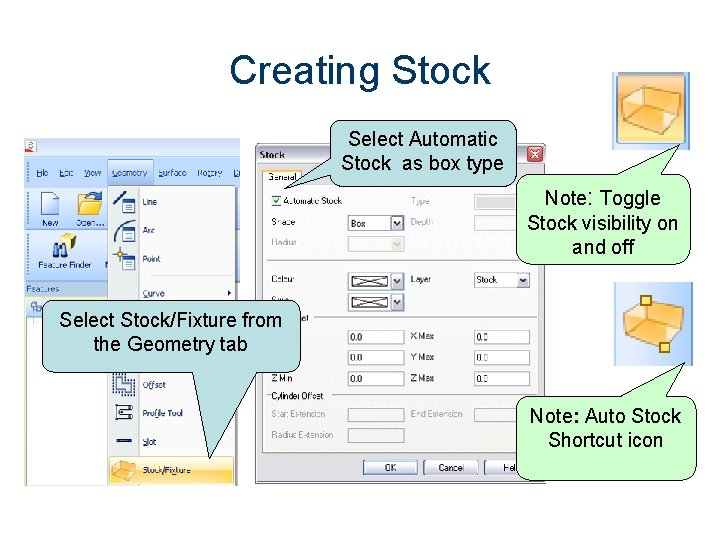
Creating Stock Select Automatic Stock as box type Note: Toggle Stock visibility on and off Select Stock/Fixture from the Geometry tab Note: Auto Stock Shortcut icon

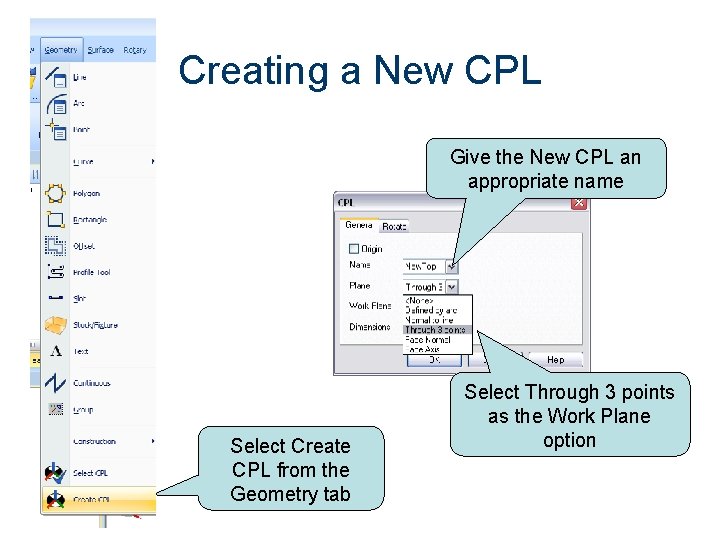
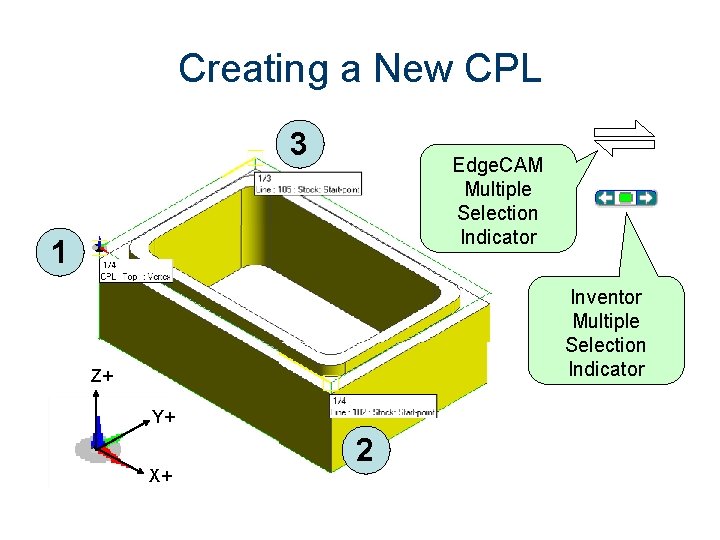
Creating a New CPL Give the New CPL an appropriate name Select Create CPL from the Geometry tab Select Through 3 points as the Work Plane option

Creating a New CPL 3 Edge. CAM Multiple Selection Indicator 1 Inventor Multiple Selection Indicator Z+ Y+ X+ 2

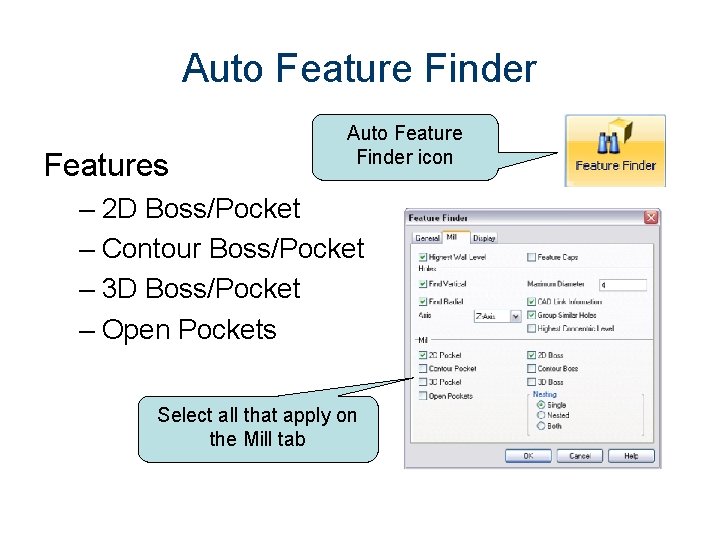
Auto Feature Finder Features Auto Feature Finder icon – 2 D Boss/Pocket – Contour Boss/Pocket – 3 D Boss/Pocket – Open Pockets Select all that apply on the Mill tab

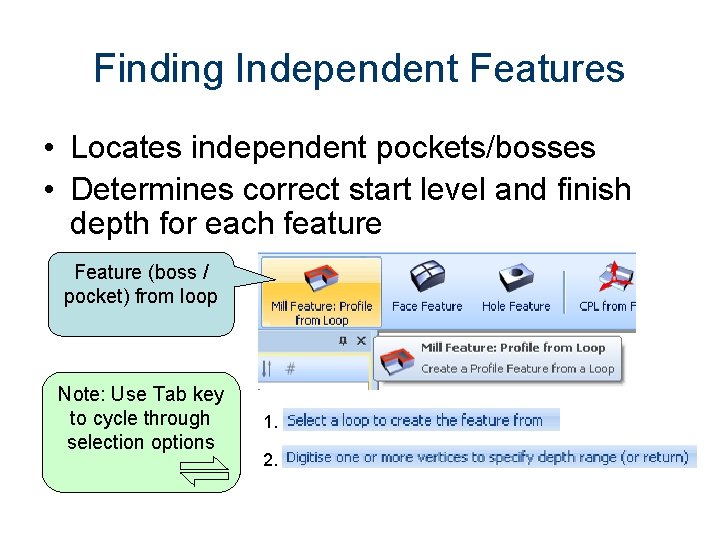
Finding Independent Features • Locates independent pockets/bosses • Determines correct start level and finish depth for each feature Feature (boss / pocket) from loop Note: Use Tab key to cycle through selection options 1. 2.

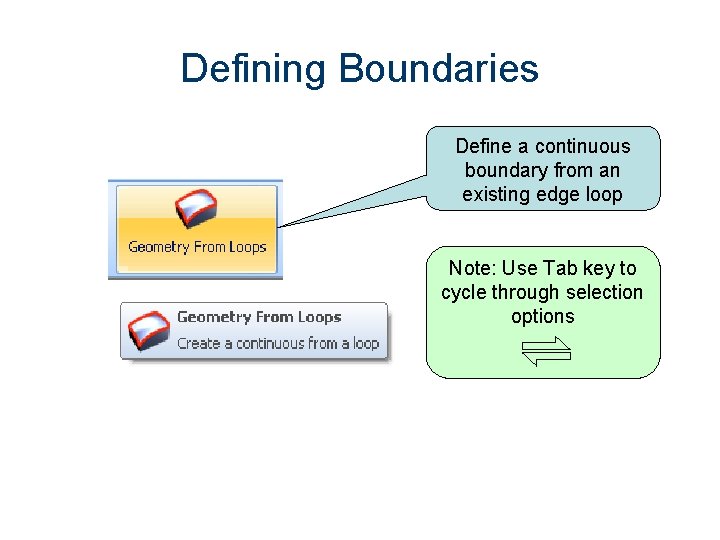
Defining Boundaries Define a continuous boundary from an existing edge loop Note: Use Tab key to cycle through selection options

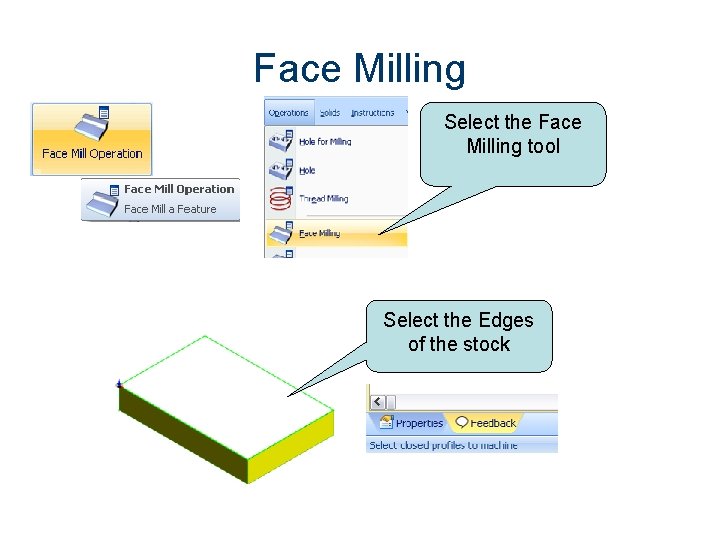
Face Milling Select the Face Milling tool Select the Edges of the stock

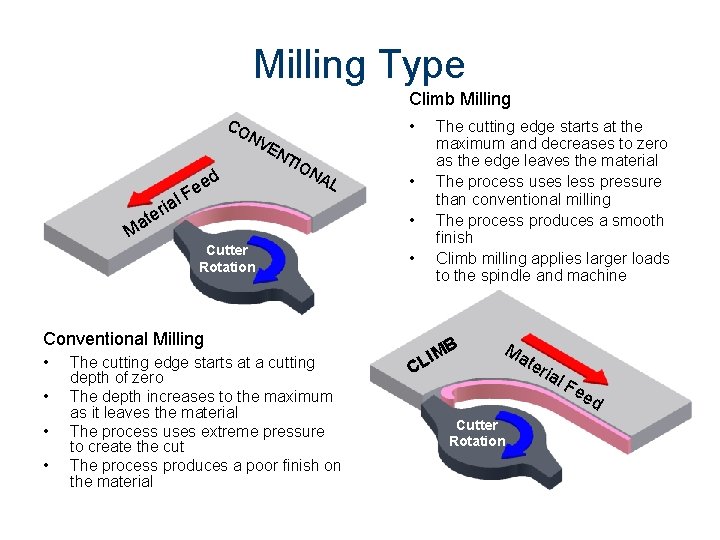
Milling Type Climb Milling CO • NV d ia r e t l e Fe EN TIO NA L • • Ma Cutter Rotation • Conventional Milling • • The cutting edge starts at a cutting depth of zero The depth increases to the maximum as it leaves the material The process uses extreme pressure to create the cut The process produces a poor finish on the material The cutting edge starts at the maximum and decreases to zero as the edge leaves the material The process uses less pressure than conventional milling The process produces a smooth finish Climb milling applies larger loads to the spindle and machine B C LIM Ma Cutter Rotation ter ial Fe ed

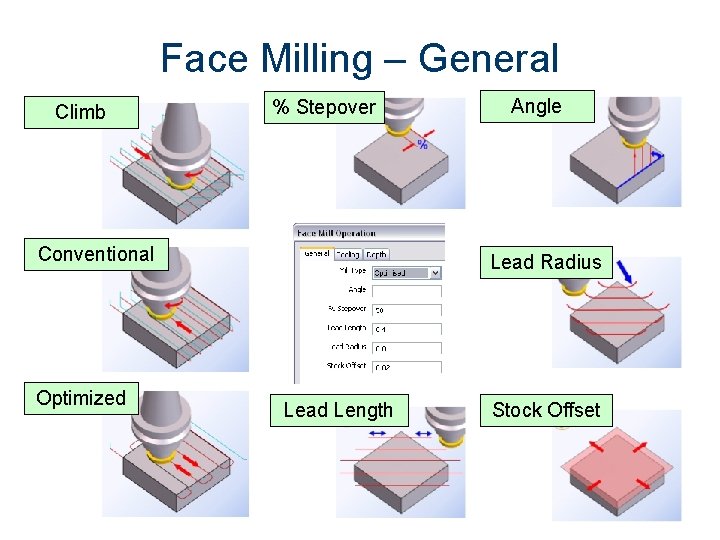
Face Milling – General Climb % Stepover Conventional Optimized Angle Lead Radius Lead Length Stock Offset

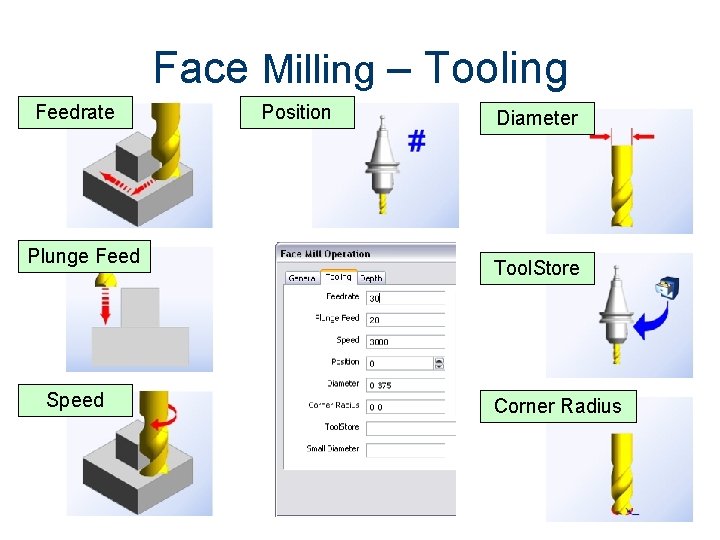
Face Milling – Tooling Feedrate Plunge Feed Speed Position Diameter Tool. Store Corner Radius

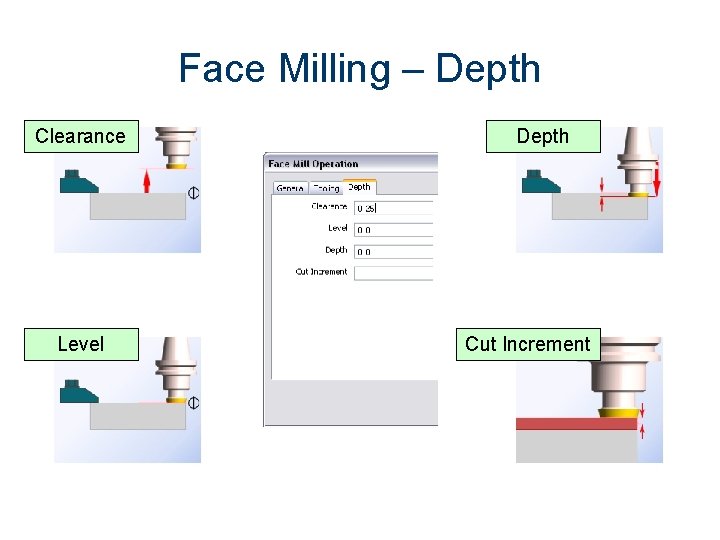
Face Milling – Depth Clearance Level Depth Cut Increment

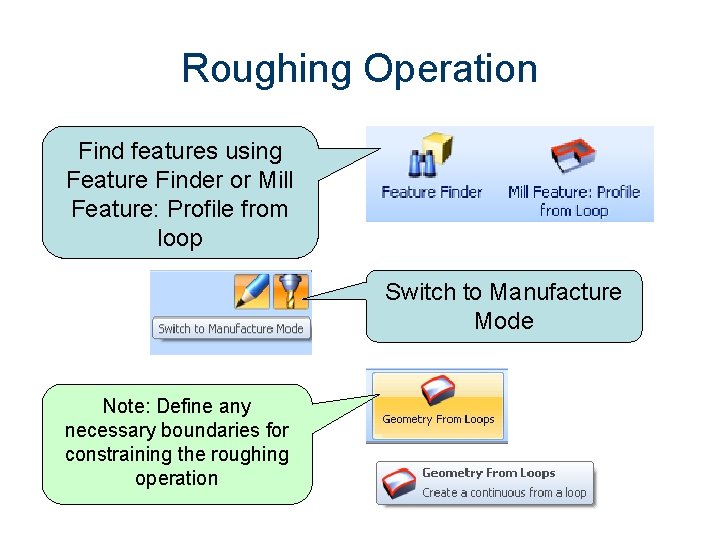
Roughing Operation Find features using Feature Finder or Mill Feature: Profile from loop Switch to Manufacture Mode Note: Define any necessary boundaries for constraining the roughing operation

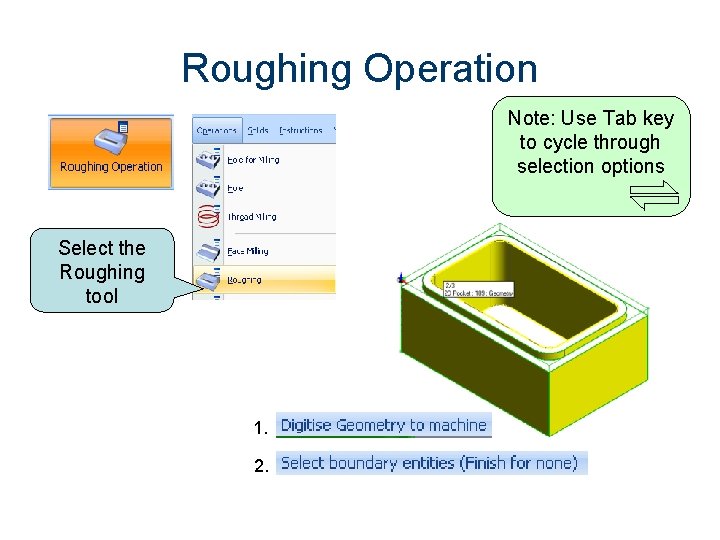
Roughing Operation Note: Use Tab key to cycle through selection options Select the Roughing tool 1. 2.

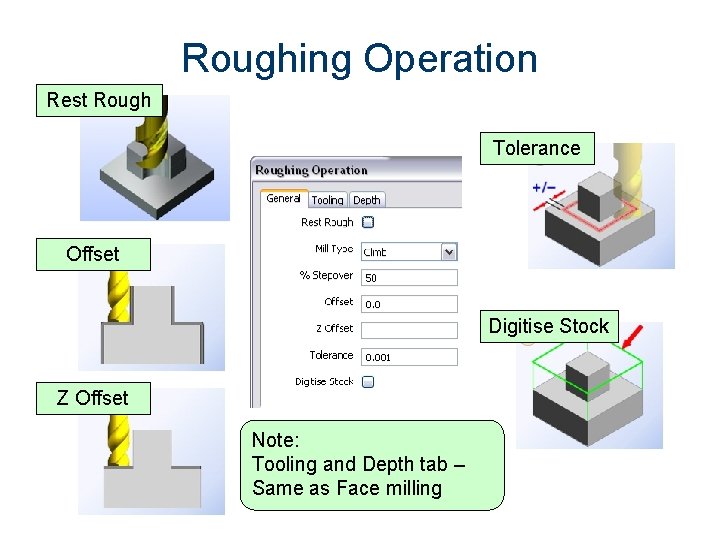
Roughing Operation Rest Rough Tolerance Offset Digitise Stock Z Offset Note: Tooling and Depth tab – Same as Face milling

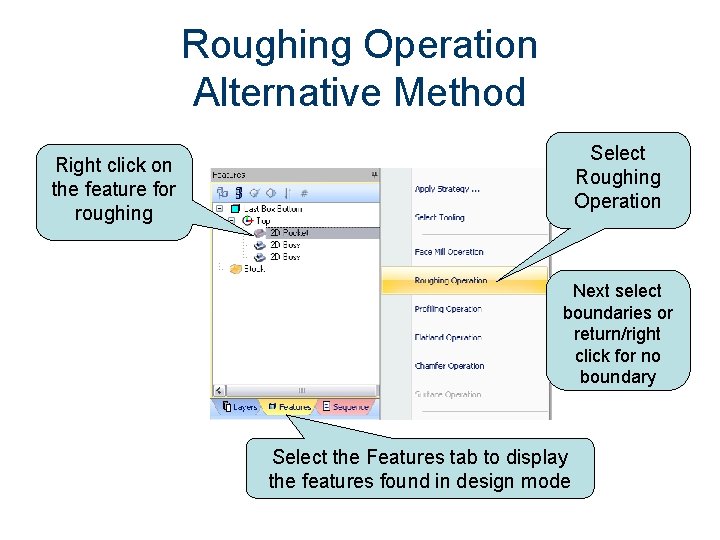
Roughing Operation Alternative Method Select Roughing Operation Right click on the feature for roughing Next select boundaries or return/right click for no boundary Select the Features tab to display the features found in design mode

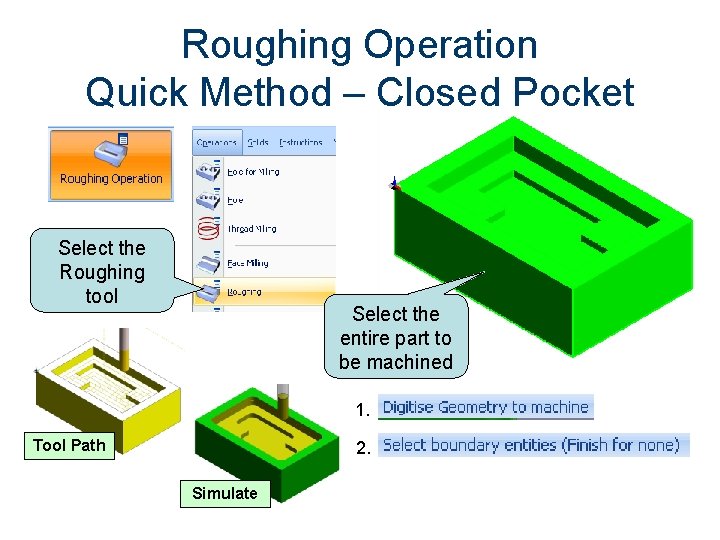
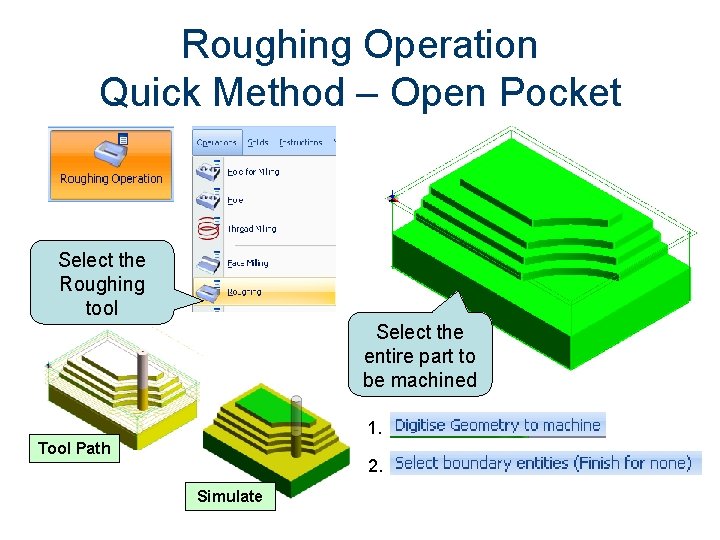
Roughing Operation Quick Method – Closed Pocket Select the Roughing tool Select the entire part to be machined 1. Tool Path 2. Simulate

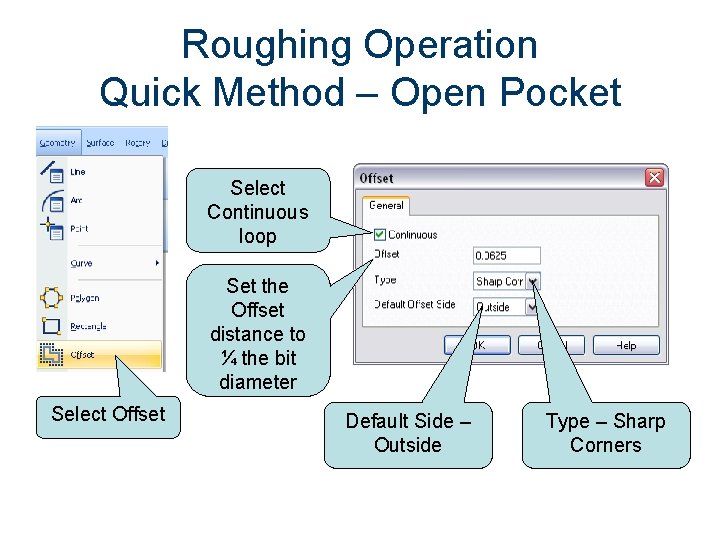
Roughing Operation Quick Method – Open Pocket Select Continuous loop Set the Offset distance to ¼ the bit diameter Select Offset Default Side – Outside Type – Sharp Corners

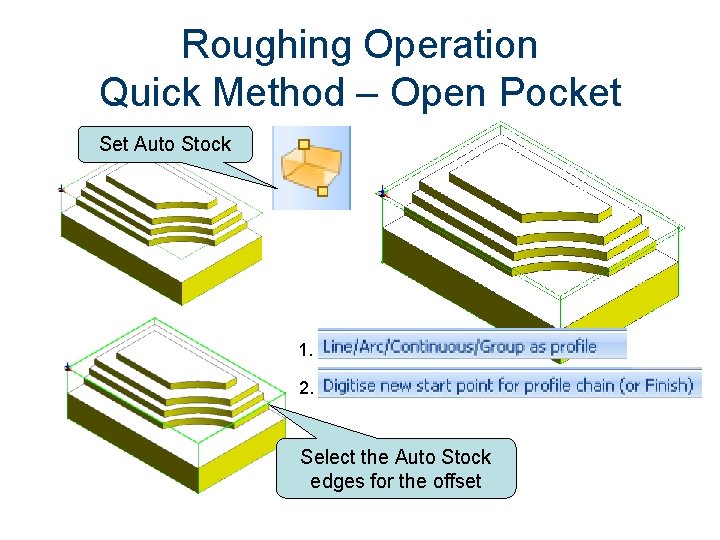
Roughing Operation Quick Method – Open Pocket Set Auto Stock 1. 2. Select the Auto Stock edges for the offset

Roughing Operation Quick Method – Open Pocket Select the Roughing tool Select the entire part to be machined 1. Tool Path 2. Simulate

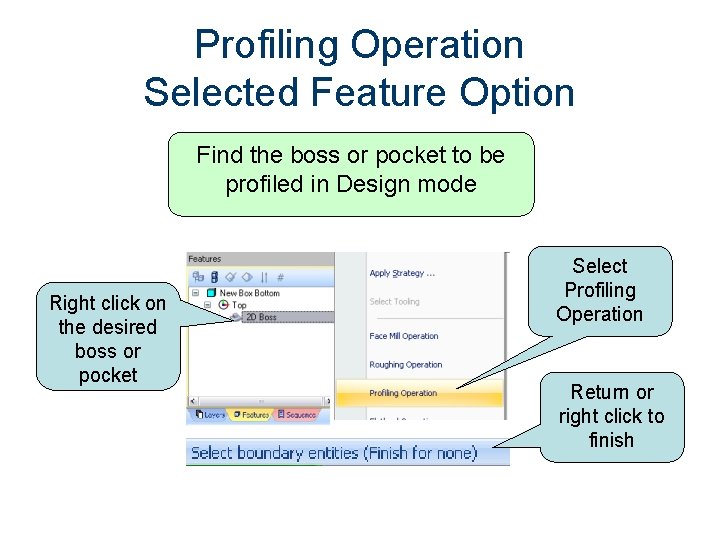
Profiling Operation Selected Feature Option Find the boss or pocket to be profiled in Design mode Right click on the desired boss or pocket Select Profiling Operation Return or right click to finish

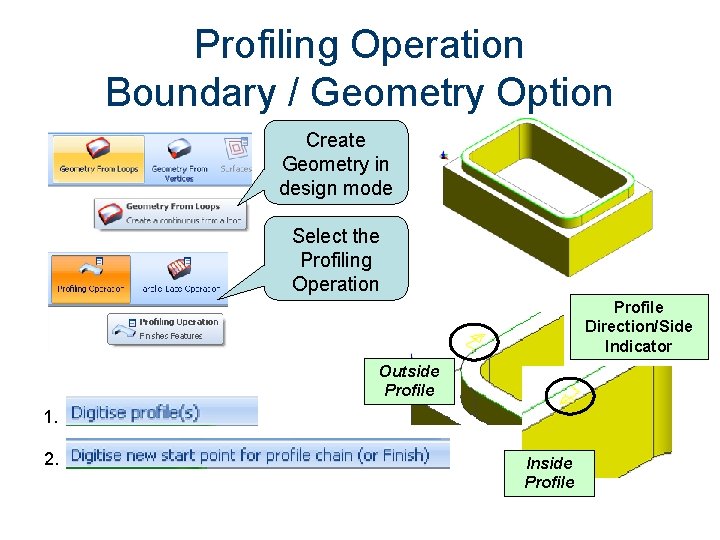
Profiling Operation Boundary / Geometry Option Create Geometry in design mode Select the Profiling Operation Profile Direction/Side Indicator Outside Profile 1. 2. Inside Profile

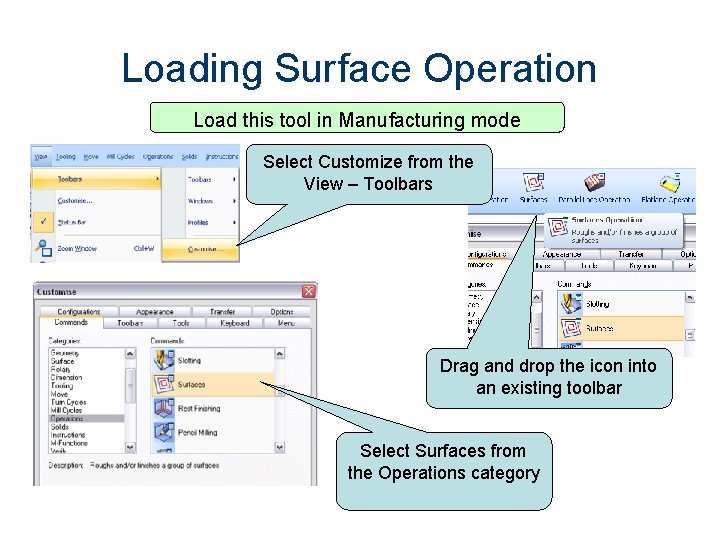
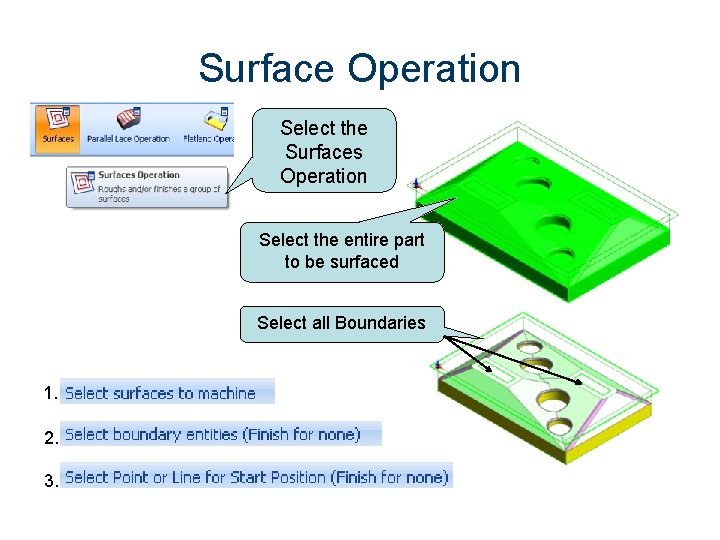
Loading Surface Operation Load this tool in Manufacturing mode Select Customize from the View – Toolbars Drag and drop the icon into an existing toolbar Select Surfaces from the Operations category

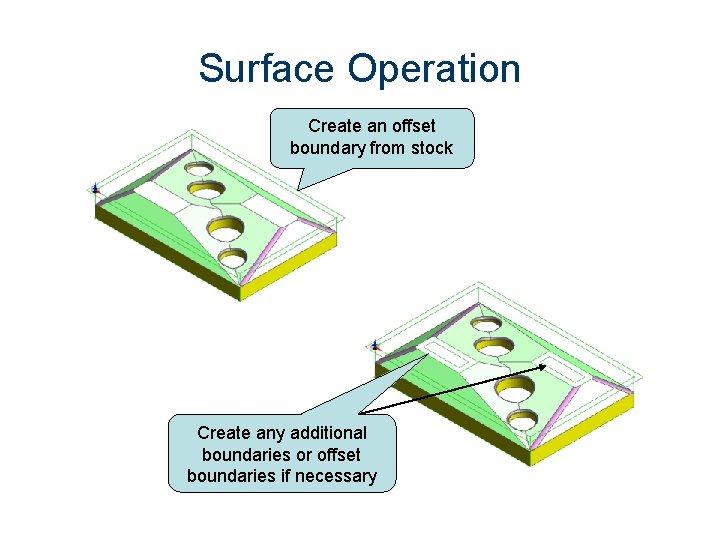
Surface Operation Create an offset boundary from stock Create any additional boundaries or offset boundaries if necessary

Surface Operation Select the Surfaces Operation Select the entire part to be surfaced Select all Boundaries 1. 2. 3.

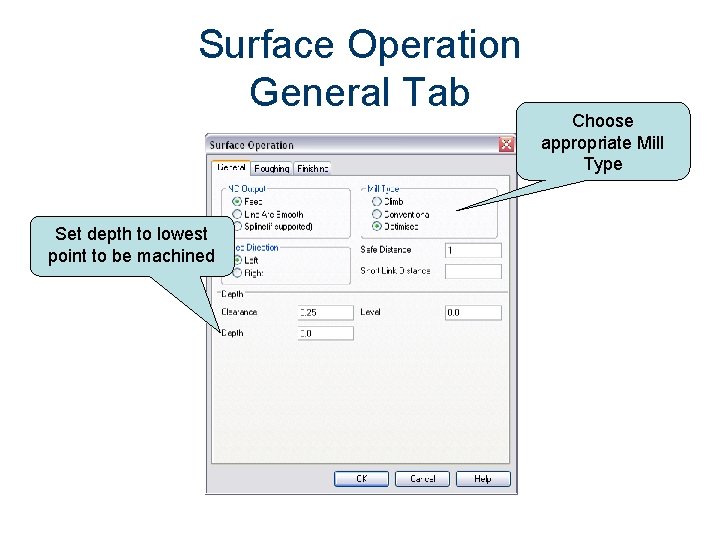
Surface Operation General Tab Set depth to lowest point to be machined Choose appropriate Mill Type

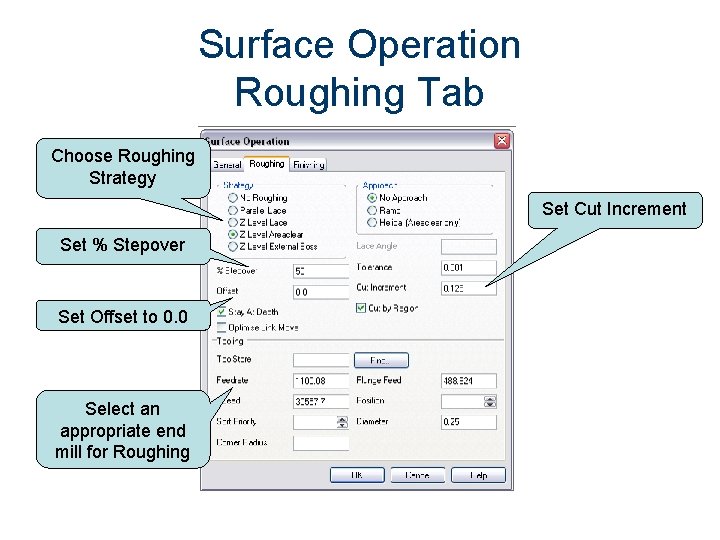
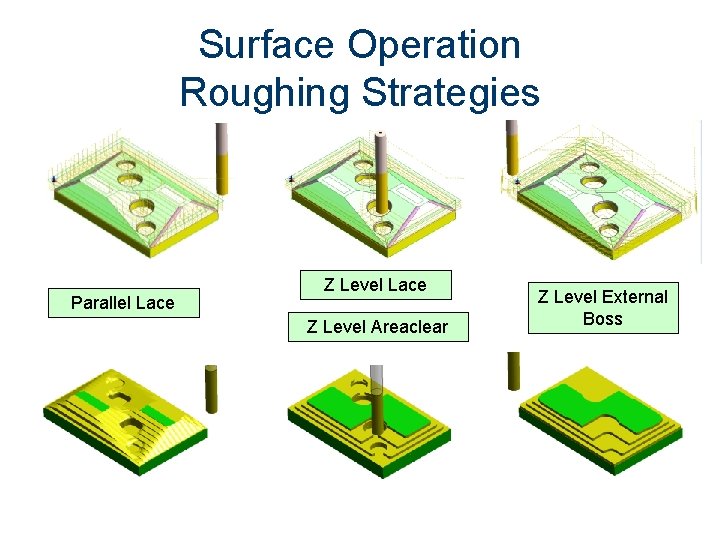
Surface Operation Roughing Tab Choose Roughing Strategy Set Cut Increment Set % Stepover Set Offset to 0. 0 Select an appropriate end mill for Roughing

Surface Operation Roughing Strategies Parallel Lace Z Level Areaclear Z Level External Boss

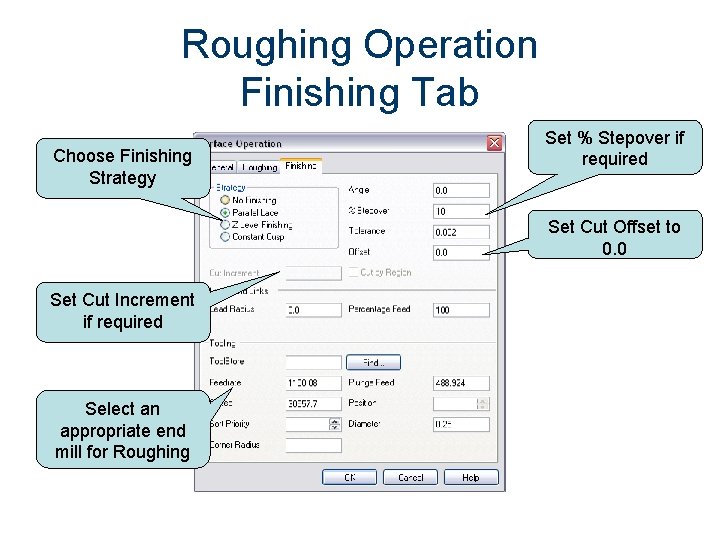
Roughing Operation Finishing Tab Choose Finishing Strategy Set % Stepover if required Set Cut Offset to 0. 0 Set Cut Increment if required Select an appropriate end mill for Roughing

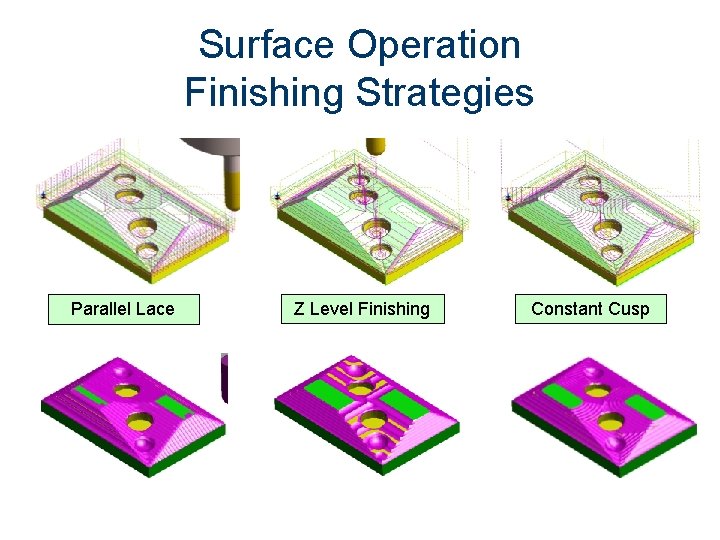
Surface Operation Finishing Strategies Parallel Lace Z Level Finishing Constant Cusp

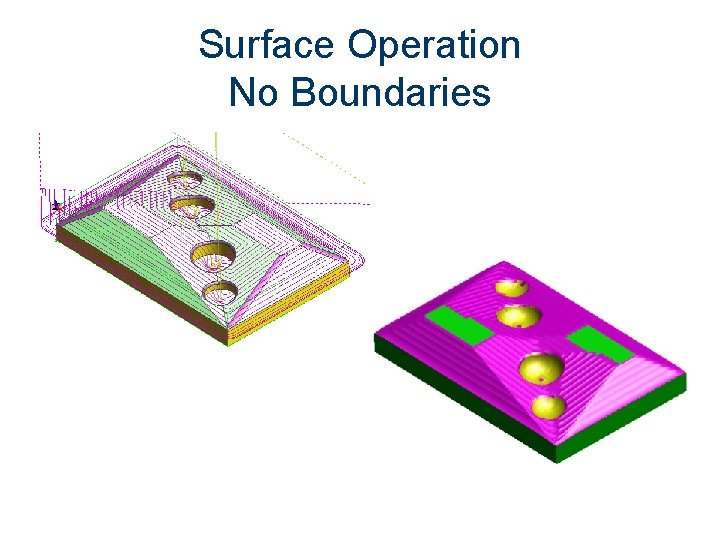
Surface Operation No Boundaries

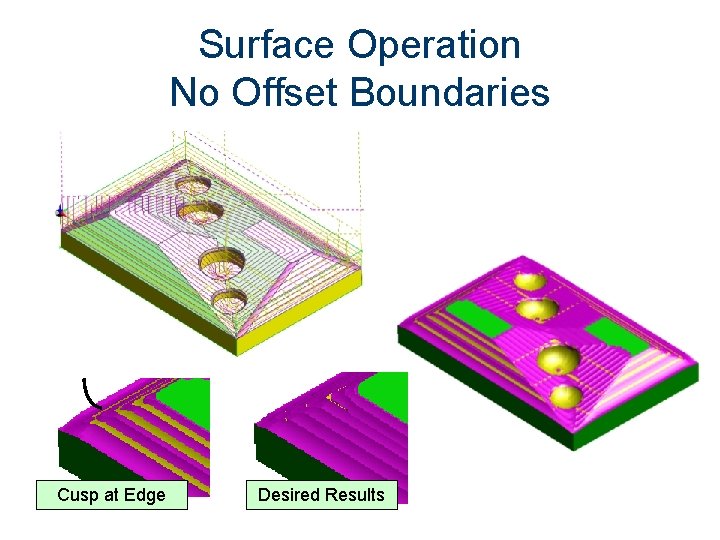
Surface Operation No Offset Boundaries Cusp at Edge Desired Results