INTRODUCTION I Whats histology II Why we study


: histo-tissue logia-study of , or knowledge of So,")


 Operate")


- Slides: 29
INTRODUCTION
I. What’s histology? II. Why we study it ? III. How to study it ? -Histological study methods.
I. What’s histology? Histology (Greek words): histo-tissue logia-study of , or knowledge of So, histology means the knowledge of tissue, is a branch of Anatomy. Structures related to function. So, exactly, Histology is a science which study the microstructure and the relationship between the structure and function of human being.
Cell: smallest unit of structure and function of body tissue: group of cell & extracellular ground substance four basic tissue: ---epithelium ---connective tissue ---muscular tissue ---nervous tissue organ: made up of tissue, have special shape, structure and function system: organs Which have related function get together.
n It is the bases of other subject in medicine ? . YES It intertwines the disciplines of cell biology, biochemistry, physiology, and pathology. Students will recognize the importance of this subject as they refer to the text later in your careers.
Microscope Dr. Nabil khouri
MICROSCOPE v. A microscope is an instrument used to see objects that are too small for the naked eye. v. The science of investigating small objects using such an instrument is called microscopy. v. Microscopic means invisible to the eye unless aided by a microscope.
Parts and Functions of a Compound Microscope
Light Microscope SIMPLE COMPOUND Uses single lens Uses set lenses or a lens system
Compound Microscope Mechanical Parts Magnifying Parts Illuminating Parts Adjustme nts and Support Enlarge the specimen Provide the light
Mechanical Parts o Base – Bottommost portion that supports the entire/lower microscope o Pillar – Part above the base that supports the other Inclination Joint parts Pillar o Inclination Joint Base – Allows for tilting of the microscope for convenience of the user
Mechanical Parts o Arm/Neck – Curved/slanted part which is held while carrying the Arm / Neck microscope o Stage – Platform where object to be examined is placed o Stage Clips – Secures the specimen to the stage Draw Tube Body Tube Stage
Mechanical Parts o Stage Opening o Body Tube – Attached to the arm and bears the lenses o Draw Tube – Cylindrical structure on top of the body tube that holds the ocular lenses
Mechanical Parts o Revolving/Rotating Nosepiece – Rotating disc where the objectives are attached o Dust Shield – Lies atop the nosepiece and keeps dust from settling on the objectives Dust Shield Revolving Nosepiece
Coarse Adjustment Knob Fine Adjustme nt Knob o Coarse Adjustment Knob – Geared to the body tube which elevates or lowers when rotated bringing the object into approximate focus o Fine Adjustment Knob – A smaller knob for delicate focusing bringing the object into perfect focus
Mechanical Parts • Condenser Adjustment Knob – Elevates and lowers the condenser to regulate the intensity of light • Iris Diaphragm Lever Iris – Lever in front of the Diaphragm Lever condenser and which is moved horizontally Condenser Adjustment Knob to open/close the diaphragm
Illuminating Parts o Mirror – Located beneath the stage and has concave and plane surfaces to gather and direct light in order to illuminate the object o Electric Lamp – A built-in illuminator beneath the stage that Mirror / may eb used if sunlight Electric Lamp is not preferred or is not available
MAGNIFYING PARTS • Ocular / Eyepiece – Another set of lens found on top of the body tube which functions to further magnify the image produced by the objective lenses. It usually ranges from 5 x to 15 x. Ocular/ Eyepiece Objectives
MAGNIFYING PARTS • Objectives – Metal cylinders attached below the nosepiece and contains especially ground and polished lenses • LPO / Low Power Objective – Gives the lowest magnification, usually 10 x • HPO / High Power Objective – Gives higher magnification usually 40 x or 43 x • OIO / Oil Immersion Objective – Gives the highest magnification, usually 97 x or 100 x, and is used wet either with cedar wood oil or synthetic oil
Total Magnification = Objective lens X Eyepiece lens e. g. What is the total magnification if the objective lens is twenty times (X 20) and the eyepiece lens five times (X 5)? Magnification = 20 X 5 = X 100
As magnification increases, detail increases but Onion cell 40 x Onion cell 100 x Onion cell 400 x less of the cell is seen
Caring for the Microscope 1. Do not let any liquids to come in contact with the microscope. 2. Always store the microscope inside a box after use. 3. Return the objective lens onto low power after use. 4. Carry the microscope by the arm. 5. Use a soft clean tissue to wipe the lenses
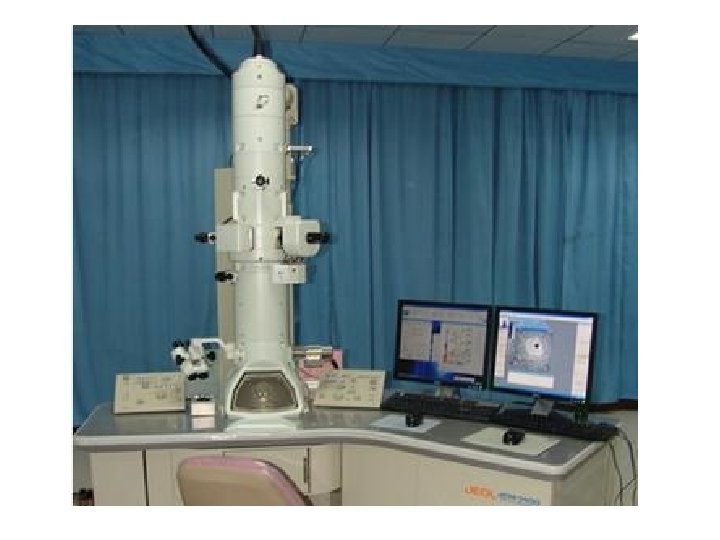
Electron Microscopy • • Electron beam as source (l ~ 0. 005 nm) Operate under vacuum Electromagnets instead of glass lenses Detect by fluorescent screen or photographic emulsion • Destructive • Two major types – Transmission (TEM) and scanning (SEM)
TEM Cellular ultrastructure Bright portion – e- pass through Dark portion – e- absorbed or scattered Sections – 50 – 150 nm Fix – glutaraldehyde Stains (e- dense; heavy metals) Osmium tetroxide (Os. O 4) – lipids Uranyl acetate, Lead citrate – nonspecific (surface adsorbed) Ruthenium red – complex carbohydrates
SEM • Surface ultrastructure • Fixed, dried, coated with gold before imaged • e- reflected from surface – Results in 3 -D like image
1. structure of Microscope LM EM ---useful magnification: 1500 X 800, 000 X ---resolution: 0. 2 um 0. 2 nm
SEM image TEM image
Problems & Pitfalls • Shrinkage – fixation and embedding – Appearance of empty spaces • Empty spaces due to loss of material – Improper fixation and dehydration • Wrinkling • Precipitation of stains (may appear as dark spots all over the section) • Do not memorize images - learn morphological criteria • Do not rely on color