INTERMEDIATE CRIME SCENE SEARCH TCOLE Course 2106 32


. Continued: 1. Occurs when the entire")


 These items should first be allowed")


 iodine, (2) ninhydrin,")


")


")


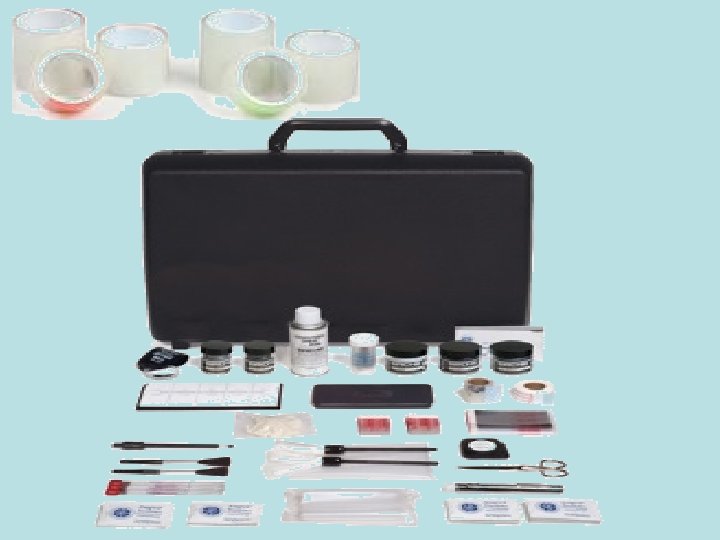
- Slides: 124
INTERMEDIATE CRIME SCENE SEARCH TCOLE Course # 2106 32 to 40 hours AND BCCO PCT #4 Power. Point UNIT FIVE
Learning Objectives Learning Objective 5. 1. 1 The student will be able to explain the value of fingerprints as physical evidence. Learning Objective 5. 1. 2 The student will be able to identify the methods of classifying fingerprints. Learning Objective 5. 1. 3 The student will be able to identify the methods for identifying fingerprints. Learning Objective 5. 1. 4 The student will be able to describe the differences between "visible", "plastic", and "latent" impressions. Learning Objective 5. 1. 5 The student will be able to explain the process of producing latent impressions.
Learning Objective 5. 1. 6 The student will be able to name the different types of methods for developing latent impressions. Learning Objective 5. 1. 7 The student will be able to understand the use of computerized fingerprinting, known as the AFIS system. Learning Objective 5. 1. 8 The student will be able to explain the methods of rolling a full set of legible fingerprints on a standard DPS/FBI fingerprint card. Learning Objective 5. 1. 9 The student will be able to demonstrate how to produce fingerprint evidence during a crime scene search.
5. 0 Fingerprinting
5. 1. 1 Fingerprints as Physical Evidence A. Fingerprints as evidence 1. Relate directly to the ultimate directly objective of every criminal investigation, the positive identification of the offender 2. Prove person's presence at crime presence scene.
Continued: 5. 1. 1 A. Fingerprints as evidence 3. Frequently present at a crime Frequently scene.
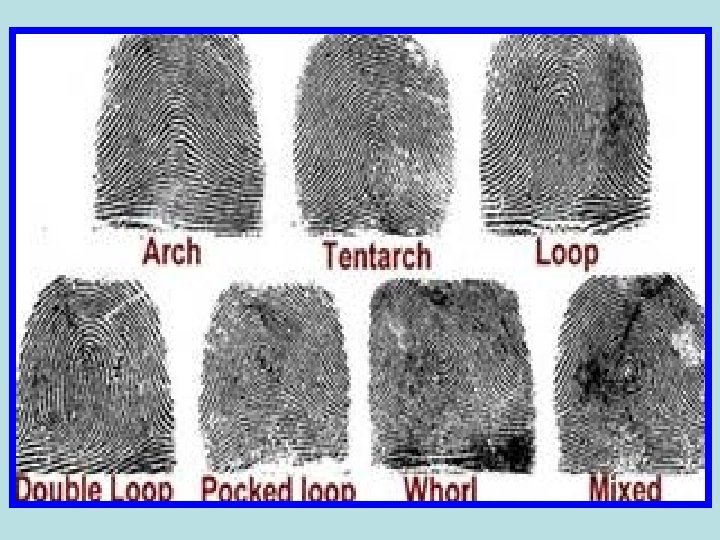
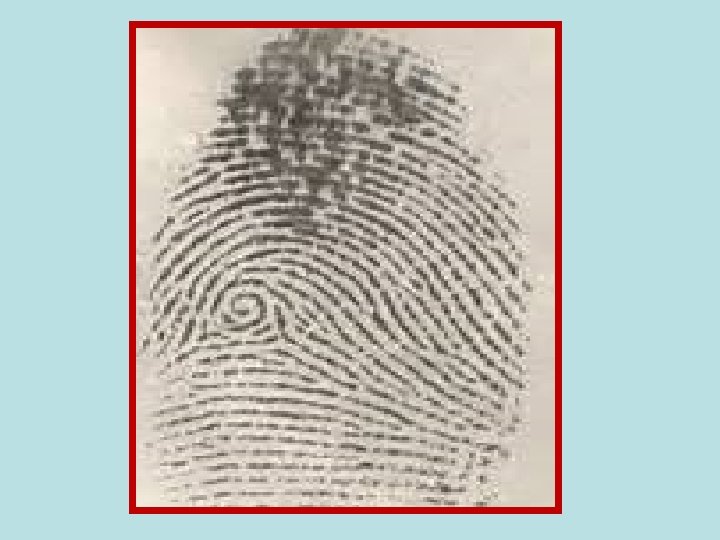
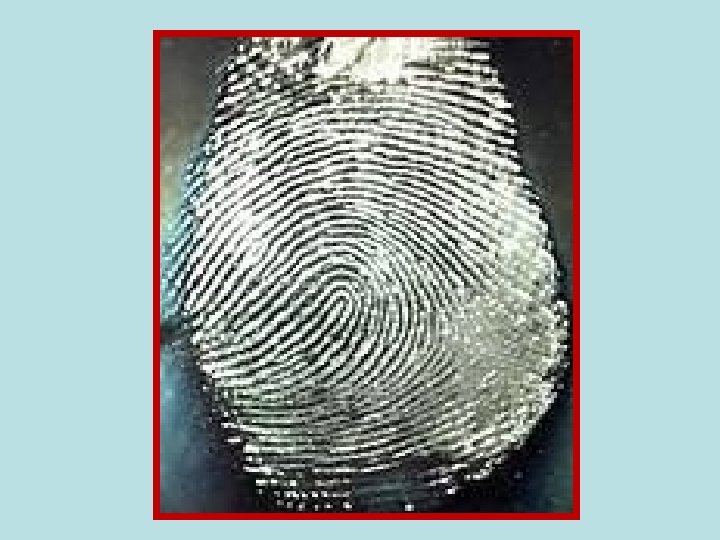
5. 1. 2 Methods for classifying fingerprints 1. A fingerprint classification is a formula given to all ten fingers on a formula fingerprint card based on a pattern type, ridge count, or ridge tracing. Anything less cannot be classified and searched.
Continued: 5. 1. 2 2. The fingerprint classification could be referred to as the alphabet by which fingerprint cards alphabet are filed where, at some future time, they can be located.
Continued: 5. 1. 2 3. The only patterns usually used to define pattern areas for classification purposes are loops and whorls. The pattern area whorls consists of the part of a loop or whorl in which appear the cores, deltas, and ridges with which is the focus when classifying.
Fingerprint Patterns 5. 1. 2
Continued: 5. 1. 2 4. Despite such factors as aging and a variety of environmental influences, a person's fingerprints have never been known to change. The unchanging pattern thus provides a permanent record of the individual throughout life.
5. 1. 3 Fingerprint Identification A. Fingerprint identification.
1. Scientific basis of fingerprint identification 5. 1. 3 a. Based on distinctive ridge outlines that appear on the bulks on the inside of the end joints of the fingers and thumbs.
Continued: 5. 1. 3 b. The ridge outlines have definite contours and appear in several contours general pattern types. Each type has general and specific variations of the pattern, depending on the shape and relationship of the ridges. c. The ridge arrangement on every ridge finger of every person is different.
Continued: 5. 1. 3 d. The ridge arrangement is permanent throughout the person's life; that is, the ridge arrangement never changes from birth to death. never
Continued: 5. 1. 3 e. These statements are true also of the ridges on the palms of the hands ridges and the soles of the feet. Identifications in those areas have the same technical and legal validity as fingerprints.
Continued: 5. 1. 3 B. An identification is made by comparing the ridge details in two prints to determine whether or not they match
5. 1. 3 C. Types of patterns. 1. Fingerprints may be resolved into three large general groups of patterns: the arch, the loop, and the arch loop whorl. Each group bears whorl the same general characteristics. 2. Patterns can be further subdivided Patterns by means of the smaller differences existing between patterns in the same general group
5. 1. 3 C. Types of patterns. 3. Patterns are divided as follows: a. Arch loop. Arch b. Whorl c. Plain radial d. Plain tented e. Ulnar f. Accidental double g. Central pocket
Continued: 5. 1. 3 D. Identification points are as follows: 1. Bifurcation - ridge forks and Bifurcation becomes two or more ridges. 2. Ending ridge - ridge makes a Ending sudden stop. 3. Ridge island – ridge bifurcates island then forks into a ridge. 4. Dot - self-explanatory. Dot
Continued: 5. 1. 3 D. Identification points are as follows: 5. Short ridge – no longer than the Short width of the corresponding ridges. 6. Divergence - spreading apart of Divergence two ridges that have been running parallel or nearly parallel.
Continued: 5. 1. 3 E. There is no specific number of specific comparison points required for a positive ID. F. Only enough points are necessary to form an opinion in the mind of the opinion expert who is making the comparison.
5. 1. 4 Difference between visible, plastic and latent fingerprint impressions A. Visible impressions (dust prints). 1. Print that has been detected with foreign matter.
5. 1. 4 A. Continued: 2. If a finger is placed in a thin layer of dust, the dust may cover the friction ridges. If the finger friction subsequently touches a clean surface, a visible fingerprint may result.
5. 1. 4 A. Continued: 3. A visible fingerprint may also fingerprint develop as a result of touching other substances such as blood, wood, flour, ink or oil.
5. 1. 4 A. Continued: 4. Impressions are usually distinct and visible without the use of visible additional light. 5. Should be a caution sign to an sign officer that there are probably some good prints available.
Continued: 5. 1. 4 B. Plastic impressions. 1. The result of the fingers being pressed into a soft substance, such pressed as putty, wet paint, soap, grease, tar or wax, and are visually distinct. 2. They are also found on recently painted surfaces, in the gum on painted stamps or envelopes, and on adhesive tapes.
5. 1. 4 C. Latent Impressions (patent fingerprint). Continued: 1. Occurs when the entire pattern of whorls on the finger, which contain whorls small amounts of grease, oil, perspiration, or dirt, is transferred to an object when it is touched.
C. Latent Impressions. Continued: 5. 1. 4 2. The grease and oil are usually grease oil neutral and are transferred to the transferred finger when the person touches other finger areas of his or her body containing various bodily excretions 3. Latent prints are usually not visible (“hidden”) to the naked eye and eye require the use of special techniques and equipment in order to examine properly.
Continued: 5. 1. 4 C. Latent Impressions 4. Is a reproduction of the ridges of ridges fingers, soles of the fingers palms, palms toes, or toes soles feet on any surface touched.
5. 1. 5 Producing Latent Print Impressions A. Techniques for locating latent A. impressions. 1. The beam from a flashlight held 1. at an acute angle with a surface angle may reveal impressions that are impressions not otherwise visible.
Continued: 5. 1. 5 A. Techniques for locating latent A. impressions. Continued: 2. The examination of a surface 2. examination from different angles may produce angles a similar effect. 3. Breathing on a surface may Breathing cause fingerprints to be visible on fingerprints certain types of materials.
Continued: 5. 1. 5 B. Conditions which affect latent impressions. 1. The quality of quality latent impressions is latent affected by such conditions as: a. The manner in which the impression was transferred. impression b. The nature and quantity of the nature quantity substance (perspiration, oils, blood, and other), which cover the ridge surfaces.
Continued: 5. 1. 5 B. 1. c. Weather conditions. d. Any physical or physical occupational defects of the person transferring the print.
Continued: 5. 1. 5 B. 1. e. Occasionally, wet items, such as beer cans or glasses that have condensation on the outside of them, condensation or automobiles which have been covered with dew, must be processed dew for prints.
Continued: 5. 1. 5 B. 1. e. (1) These items should first be allowed to dry under natural conditions in a sheltered area. (2) Under no circumstances should heat lamps or artificial heat of any kind be used to dry heat dry an object.
5. 1. 5 C. Prints at the crime scene. 1. Preventing contamination 1. a. Protect all areas, as best you Protect areas can, where you think the criminal has had his hands and/or feet. b. Let the latent print examiner decide whether or not there are latent prints on the objects touched.
Continued: 5. 1. 5 C. 1. c. Only the latent print examiner should handle the object. d. Any surface, that has been surface touched, is a potential place to lift touched latent impressions. 2. Points of entry and exit should be 2. carefully examined.
Continued: 5. 1. 5 C. 2. Points of entry and exit should be carefully examined. 3. The use of powders and chemicals may interfere with physical chemicals and chemical analysis, particularly in the case of blood, fabrics, and documents
Continued: 5. 1. 5 C. 4. In cases involving items with material adhering to their surfaces and/or which will require further laboratory examinations, fingerprint processing should not be not performed at the crime scene performed
Continued: 5. 1. 5 C. 5. Rather, the items should be submitted to a laboratory where they laboratory can be processed for fingerprints in conjunction with other examinations that have to be undertaken.
Continued: 5. 1. 5 D. Dusting latent impressions 1. Powder is recommended for the Powder development of latent impressions on a hard, dry, and smooth surface. 2. The purpose of dusting or "developing" a latent impression is to make it it visible so it may be visible preserved and compared.
Continued: 5. 1. 5 D. Dusting latent impressions 3. No attempt should be made to brush or brush apply powder to prints in apply dust, obviously greasy prints or bloody prints, as this will usually destroy them. This type of impression should be photographed
Continued: 5. 1. 5 D. Dusting latent impressions 4. Before developing the print, the fingerprint brush should be cleaned and the bristles separated by rolling separated the handle rapidly between the palms of the hands and letting the bristles spread out naturally. 5. A gray powder should be used on powder dark-colored surfaces, mirrors, and polished metal surfaces.
Continued: 5. 1. 5 D. Dusting latent impressions 6. A black powder should be applied black to white or light colored surfaces. 7. Black or Black gray powder can be used gray on clear transparent glass. transparent 8. Other colors of powder used, but powder black or gray are the most common.
Continued: 5. 1. 5 E. Application of powder. 1. Avoid haste and haphazard techniques. 2. A good brush is needed. 3. Powder should be used sparingly 4. Distribute the powder lightly across the fingerprint until the characteristic outlines of the ridge become visible. .
Continued: 5. 1. 5 E. 4. a. Care should be taken to brush the latent print with the tips of the tips bristles by using short, bristles short quick strokes 5. After the latent has become visible, it should be "dressed" by gently dressed gently brushing away all of the excess powder adhering between the ridges.
Continued: 5. 1. 5 5. a. This step is extremely important because any excess powder may destroy the clarity of the ridge detail destroy ridge and render it useless for identification purposes. b. In some cases, it is not possible to remove the excess powder by means of a brush. .
Continued: 5. 1. 5 5. c. When this condition occurs, an attempt should be made to remove the excess powder with lifting tape. d. The latent remaining on the object will be sufficiently clear and distinct clear distinct to permit identification.
5. 1. 5 F. Lifting latent impressions 1. Prints should be photographed before they are lifted. a. The use of a fingerprint camera, which photographs one-toone one (exact size), is the most ideal. b. A small tab of paper on which is paper inscribed appropriate identifying data, should be placed in the field of view in a manner that will insure its inclusion in the photograph.
3 x 5 Card Print lifted off glass evidence Tag# 5 02/16/2014 at 2: 30 pm Case #: 14 -00000319
F. Lifting latent impressions 5. 1. 5 2. The lifting of prints is most usually accomplished by using transparent lifting tape. 3. Method for lifting impressions. a. Use lifting tape large enough to large cover the entire latent impressions. b. Press the sticky side of the plate sticky against the powdered impression(s), carefully avoiding the production of air
Continued: 5. 1. 5 F. Lifting latent impressions 3. Method for lifting impressions. c. Insure completed adhesion by adhesion rubbing the entire surface starting in the center and working toward the edges. d. Beginning at one edge or edge corner, corner peel the tape gently from the surface and place on a 3 x 5 card
Continued: 5. 1. 5 F. Lifting latent impressions 3. d. Beginning at one edge or corner, peel the tape gently from the surface and place on a 3 x 5 card e. Identifying data can be written on data the 3 x 5 card to indicate the location, date, case number, examiner's name, or any other pertinent information.
5. 1. 6 Types/Methods for developing latent impressions A. Chemical development of latent impressions 1. Used to develop latent finger impressions on paper, cardboard, unpainted wood, or other absorbent surfaces.
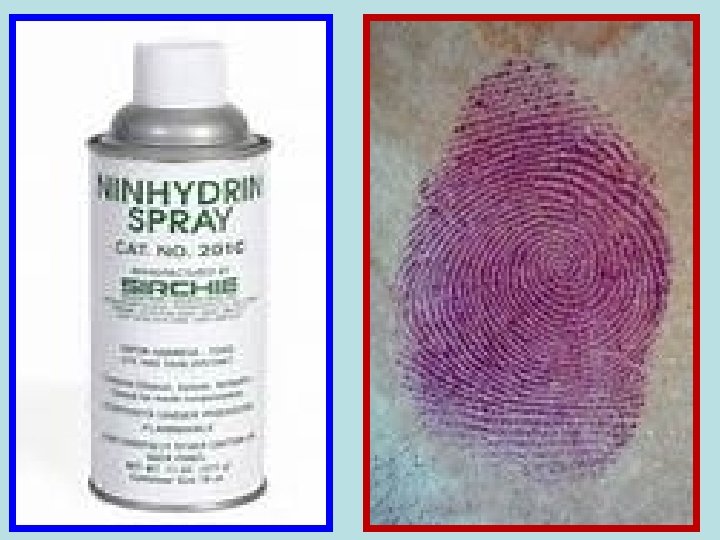
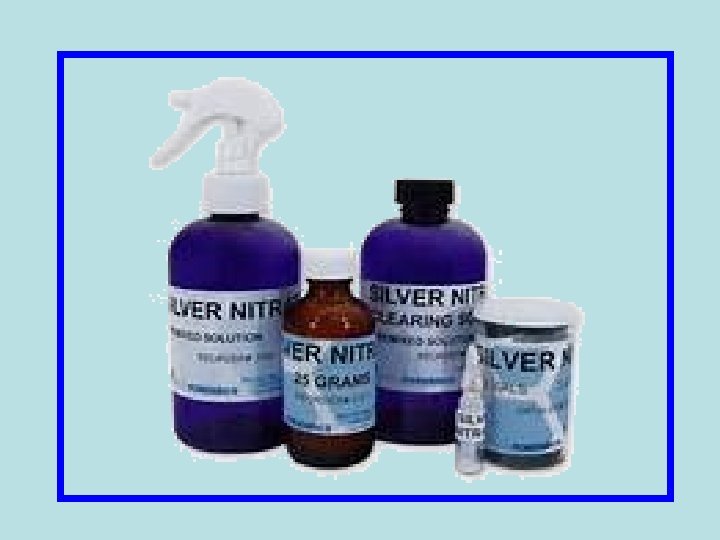
Continued: 5. 1. 6 A. 2. Three chemicals commonly used: a. Iodine b. Ninhydrin c. Silver nitrate
Continued: 5. 1. 6 3. Each of the chemicals reacts with a reacts different substance, which may be substance present in the latent print. 4. Sometimes, it may be desirable to use all three processes. three
Continued: 5. 1. 6 5. The sequence used must be: (1) iodine, (2) ninhydrin, (3) silver iodine ninhydrin nitrate 6. Cyanoacrylate is another Cyanoacrylate chemical used, which is found in Super Glue
5. 1. 6 B. Types of chemical methods used in developing latent impressions. 1. Iodine method a. Iodine crystals when exposed to slight heat will vaporize, producing heat violet fumes. b. , The grease and oils naturally grease oils produced by the skin discolor very easily and naturally become a good candidate for development with iodine
Continued: 5. 1. 6 B. Types of chemical methods used in developing latent impressions. c. The violet fumes are absorbed by violet fatty or oily matter, as they come into contact. d. Sweat exuded from the fingers Sweat contains no oil or fat.
e. The fingers become contaminated with oil and fat from contact with oil fat portions of the body where these substances are found, such as the face and hair. face hair f. Consequently, if the specimen treated bears latent impressions containing these oils or fats, the print is made visible by the absorption of visible iodine vapor and the prints appear 5. 1. 6 yellowish brown.
g. control of the fumes is achieved by fumes using the crystals in an iodine gun or fuming cabinet. h. Iodine prints begin to fade once fade the fuming is stopped. i. The prints must be photographed immediately. j. For practical reasons the iodine process is used only on relatively small specimens 5. 1. 6
IDOINE FUMING KITS
Continued: 5. 1. 6 k. Iodine prints, generally used on paper and wood, are temporary and will begin to fade once the fuming has stopped. Therefore, it is fuming necessary for the investigator to be prepared to photograph the prints photograph immediately.
5. 1. 6 2. Ninhydrin method. a. The actual chemical name is triketohydrindene hydrate. triketohydrindene b. This chemical acts as a dye on dye amino acids that are present in perspiration. c. The amino acids are dyed into a amino light purple color. d. Ninhydrin may be obtained in aerosol cans or white powder form. aerosol white
Continued: 5. 1. 6 2. e. The powder form must be made into a liquid solution before it liquid can be used on paper. f. Solvents, such as ethyl alcohol or ethyl acetone, can be used to make this acetone solution. g. The solution may be applied to the specimens by spraying, specimen spraying dipping, or brushing.
2. h. After the application, prints will begin to appear spontaneously within 1 to 2 hours. i. Most latent prints develop within 24 hours. 24 j. Heat speeds up the development. Heat k. Prints will eventually lose contrast, so they should be contrast photographed with a green filter after Continued: they are developed.
Continued: 5. 1. 6 3. Silver nitrate method. a. Silver nitrate crystals are mixed crystals with either distilled water or alcohol to alcohol form a solution. b. This solution reacts with sodium chloride (salt) present in the chloride perspiration (which forms the ridges in most latent impressions) to form silver chloride.
5. 1. 6 3. Silver nitrate method: c. Specimens may be immersed in immersed the solution, taken out, blotted, and dried. d. Items too large to be dipped may dipped be treated by brushing the solution brushing onto the time. e. In treating extremely thin types of paper, the solution is best applied with a cotton swab Continued:
Continued: 5. 1. 6 3. Silver nitrate method: f. Fingerprints developed with the silver nitrate solution appear reddish brown g. Immersion in silver nitrate solution nitrate washes away any traces of fat, oil, and amino acids, so the iodine fuming and the ninhydrin process must take place prior to silver nitrate treatment
Continued: 5. 1. 6 3. Silver nitrate method: h. Print development by this method depends on the exposure to light. exposure i. Sunlight works well. As soon as Sunlight the ridge detail of the prints is clearly visible, the paper should be removed from the light. Continued exposure will darken the paper; the contrast will be lost.
Continued: 5. 1. 6 3. Silver nitrate method: j. Photographs should be taken after Photographs development. k. Store specimens in absolute darkness
Continued: 5. 1. 6 4. Super-glue fuming method. a. The chemical name is cyanoacrylate resin. cyanoacrylate b. Used to develop latent impressions on plastic, glass, impressions glossy or waxed paper, metal, leather, lacquered wood, and almost all hard surfaces.
Continued: 5. 1. 6 4. Super-glue fuming method. c. Three to glue are Three four drops of four glue placed in a fuming chamber with the suspect items. d. In order to speed up the development process, add ½ a drop of normal sodium hydroxide to the glue hydroxide
Continued: 5. 1. 6 4. Super-glue fuming method. e. Development occurs when fumes from drying glue adhere to a latent glue impression through the friction ridges, then harden as ridge detail is built up on the print.
Continued: 5. 1. 6 4. Super-glue fuming method. f. The result is a latent impression, which appears white in color. white g. The item may be dusted in the dusted regular manner after this process and the latent impression is lifted.
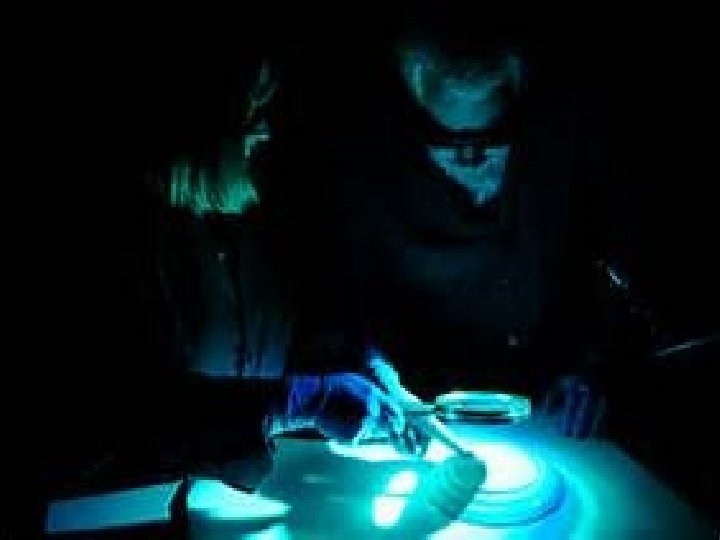
5. 1. 6 5. Lasers. a. Technique used to develop prints Technique prints that could not have been developed through the use of powder, iodine, ninhydrin solution, silver nitrate, or super glue fuming.
5. 1. 6 5. Lasers. Continued: b. The laser procedure is a clean, laser relatively easy method to develop prints, and pretreatment of the specimen is not required. c. Unlike with the ninhydrin method, the age of the print is not important. age d. It is generally used before other methods are employed because no alteration of the evidence is required. alteration
Continued: 5. 1. 6 5. Lasers. e. In this process, an expanded laser beam, which is used to luminesce beam certain properties of perspiration, body oils, or other foreign substances found on a latent print. f. These types of lasers are currently used: argon ion laser, copper argon copper vapor laser, and neo dynium. (Yag lasex).
Continued: 5. 1. 6 5. Lasers. g. Special eye protection must be eye worn, due to the intensity of the laser light.
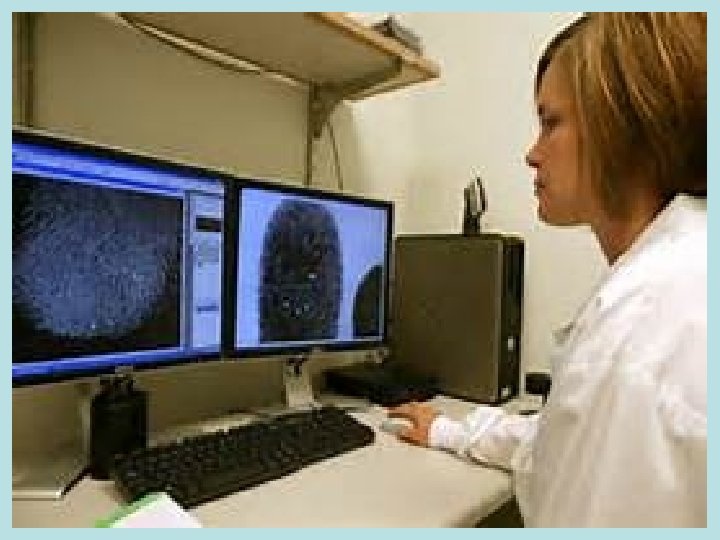
5. 1. 7 Computerized Fingerprinting (AFIS)
5. 1. 7 A. How AFIS works. 1. AFIS technology uses a computer to scan and digitize fingerprints, digitize translating the unique ridge patterns of the prints into a binary code for the computer’s searching algorithm.
5. 1. 7 A. How AFIS works. 2. In a matter of minutes, an AFIS computer can compare a new fingerprint with vast files of prints and make identifications that previously identifications were possible only through a timeconsuming and error-prone process of manual comparison. .
5. 1. 7 A. How AFIS works. 3. This technology has greatly increased both the speed and increased speed accuracy of fingerprint processing and accuracy has made it possible to conduct cold searches, where there are no suspects or other identifying information other than crime scene prints.
5. 1. 7 A. How AFIS works. 4. The search time for a search of about 500, 000 prints ranges from a 500, 000 half-hour to a matter of minutes.
5. 1. 8 Obtaining Legible Fingerprints on standard DPS/FBI Fingerprint Cards
5. 1. 8 A. Condition of a person's hands prior to fingerprinting. 1. Visually examine the person's hands and fingers hands
A. 1: Condition of a person's hands prior to fingerprinting. 5. 1. 8 a. There are temporary disabilities affecting an individual's hand, which are sometimes beyond the control of the identification officer. Example: fresh cuts or cuts wounds, bandaged wounds fingers, occupation (carpenter, bricklayer, and other), blisters, excessive perspiration, or any other disability.
A. 1: Condition of a person's hands prior to fingerprinting. 5. 1. 8 b. Considerations: Considerations (1) Fingerprint cards bearing these notations cannot be properly cannot classified and filed.
A. 1: Condition of a person's hands prior to fingerprinting. b. Considerations: Considerations (2) Excessive perspiration causes the inked impressions to be indistinct. In this case, wipe the finger with a cloth and then immediately ink the finger and roll it on the fingerprint card. This process should be followed with each finger. Fingerprints should then be wiped 5. 1. 8 with alcohol.
5. 1. 8 A. 1: Condition of a person's hands prior to fingerprinting. b. Considerations: Considerations (3) When an injury is temporary, temporary the prints, if at all possible, should not be taken until after the injury has healed
5. 1. 8 A. 1: Condition of a person's hands prior to fingerprinting. b. Considerations: Considerations (4) Different fingerprinting techniques must be used when physical problems so indicate. The most common equipment includes: spatulas, small rubber roller, curved holder for individual finger, block or strip cardstock.
A. 1: Condition of a person's hands prior to fingerprinting. 5. 1. 8 2. Have the person clean their hands clean and fingers with soap and water or a soap water good waterless hand cleaner.
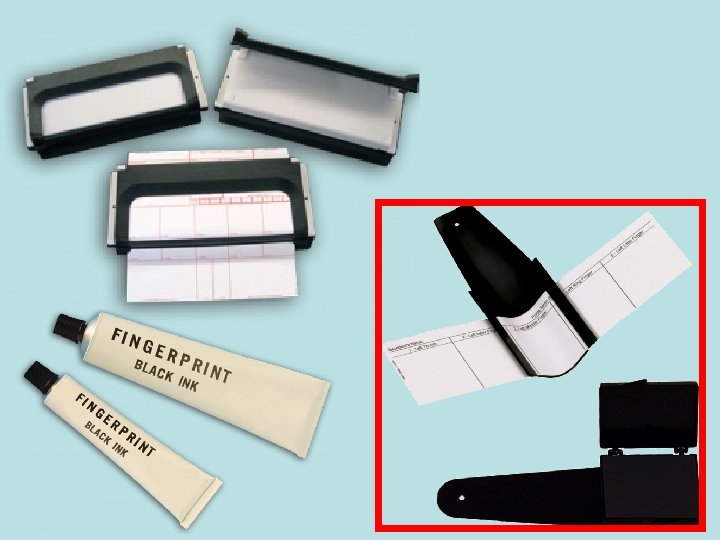
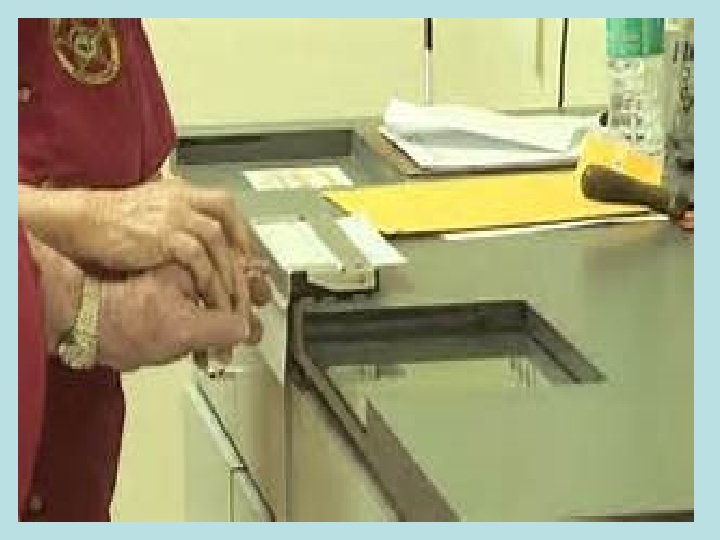
5. 1. 8 B. Techniques for rolling fingerprints 1. Use the following recommended equipment: a. Inking plate b. Cardholder c. Printer's ink (paste type). ink d. Roller
5. 1. 8 B. Techniques for rolling fingerprints 2. To obtain clear and distinct fingerprints, practice the following: a. Use a thin coating of ink thin. . b. The inked surface should be at a height where the person's forearm can assume a horizontal forearm position when the fingers are being inked.
5. 1. 8 B. Techniques for rolling fingerprints 2. c. Use standard 8" x 8" 8" fingerprint 8" cards and card holder(s). 3. Person should stand in front of and stand at forearm's length from the inking plate.
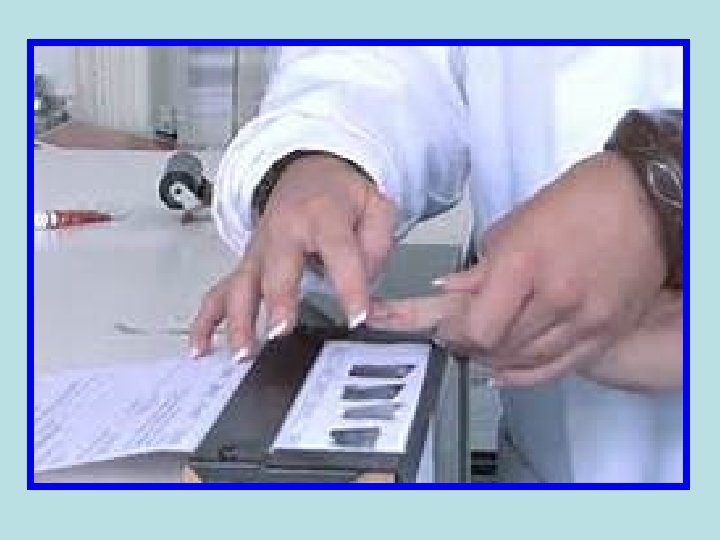
5. 1. 8 B. Techniques for rolling fingerprints 4. In order to take advantage of the natural movement in making finger natural impressions, the hand should be rotated from the more difficult to the easiest position as follows: a. This requires that the thumbs be rolled toward the center of the center person's body.
5. 1. 8 B. Techniques for rolling fingerprints 4. b. This requires that the finger be rolled from the center of the center persons body. c. The thumbs and fingers should be rolled from end to end, end respectively. The hand should be rotated almost to 180 o angle.
5. 1. 8 B. Techniques for rolling fingerprints 4. d. This process relieves strain on the body. It also leaves the fingers relaxed once they are rolled, so relaxed that they may be lifted easily from the card without danger of slipping, which can smudge and blur the prints.
5. 1. 8 B. Techniques for rolling fingerprints 5. The degree of pressure to be pressure exerted in inking and taking rolled impressions is important, & this may be determined through experience and observation. a. It is important that the subject be cautioned to relax & refrain from relax trying to help by exerting pressure
5. 1. 8 B. Techniques for rolling fingerprints 5. b. This prevents the technician from gauging the amount of gauging pressure needed. 6. Rolled impressions are taken Rolled individually rolling each finger from left to right (right hand) and right to left on (left Hand)
5. 1. 8 B. Techniques for rolling fingerprints 6. a. In taking rolled impressions, the side of the bulb of the finger is placed upon the inking plate, and the finger is rolled to the other side until it faces the opposite direction (i. e. , fingernail to fingernail).
5. 1. 8 B. Techniques for rolling fingerprints 6. b. Care should be exercised so the bulb of each finger is inked evenly from the tip to below the evenly first joint. c. By pressing the finger lightly on lightly the card and rolling in exactly the same manner, a clear rolled impression of the finger surface may be obtained.
5. 1. 8 B. Techniques for rolling fingerprints 6. d. It is better to ink and print each ink print finger separately, beginning with the right thumb and then, in order, right the index, middle, ring, and little finger.
5. 1. 8 B. Techniques for rolling fingerprints NOTE: Stamp pad ink, printing ink, ordinary writing ink, or other colored inks do not produce a suitable fingerprint, are too light, too thin, and do not dry quickly.
5. 1. 9 Fingerprint Practical Exercise • Participant will demonstrate how to obtain a latent fingerprints from crime scene. • Participant will demonstrate how to obtain fingerprints from a suspect using DPS Fingerprint Card. http: //www. bing. com/videos/search? q=How+to+Take+Fingerprints&Form=VQF RVP#view=detail&mid=D 46157 F 67 F 7 BF 509 A 19 F
5. 1. 9
RESOURCES Intermediate Crime Scene Search Participant Handout TEXAS COMMISSION ON LAW ENFORCEMENT Course # 2106 TRAINING SUPPLEMENT Hosted By: Bexar County Constable Office PCT#4
Questions?
SOURCES U. S. Federal Government: Biometrics. gov Includes biometrics reference room, recommended biometric standards, and Subcommittee on Biometrics and Identity Management info. National Institute of Standards and Technology: Matching Up Fingerprints Includes NIST fingerprint interactive "Solving Crimes, Improving Security" and suspect fingerprint matching game. U. S National Institute of Justice: Fast Capture Fingerprinting NIJ has funded researchers to develop, evaluate, and improve the way fingerprints are taken. FBI. gov: Taking Legible Fingerprints Information on the nature of fingerprints and an outline on the techniques for taking legible fingerprints.
THANK YOU STAY SAFE & STAY VILIGANT This Power. Point and all associated lesson materials herein are the property of BCCO PCT#4