Instructors Guide to Teaching Solid Works Software Lesson
- Slides: 27

Instructor’s Guide to Teaching Solid. Works Software Lesson 10 Troy Jr. /Sr. High School Mc. Fall – Physics 3 rd December 6, 2011 Image courtesy of National Optical Astronomy Observatory, operated by the Association of Universities for Research in Astronomy, under cooperative agreement with the National Science Foundation.

Loft Feature Overview § Blends multiple profiles together. § A Loft feature can be a base, boss, or cut. To Create a Simple Loft Feature: 1. Create the planes required for the profile sketches. Each sketch should be on a different plane. 2. Sketch a profile on the first plane. 2

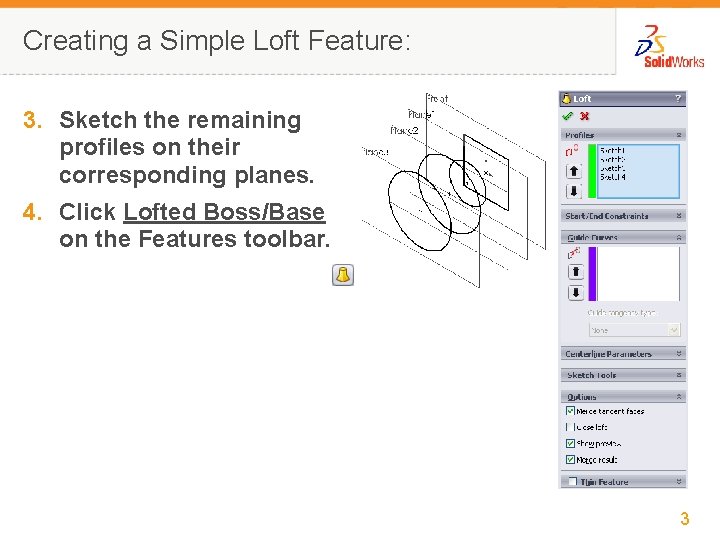
Creating a Simple Loft Feature: 3. Sketch the remaining profiles on their corresponding planes. 4. Click Lofted Boss/Base on the Features toolbar. 3

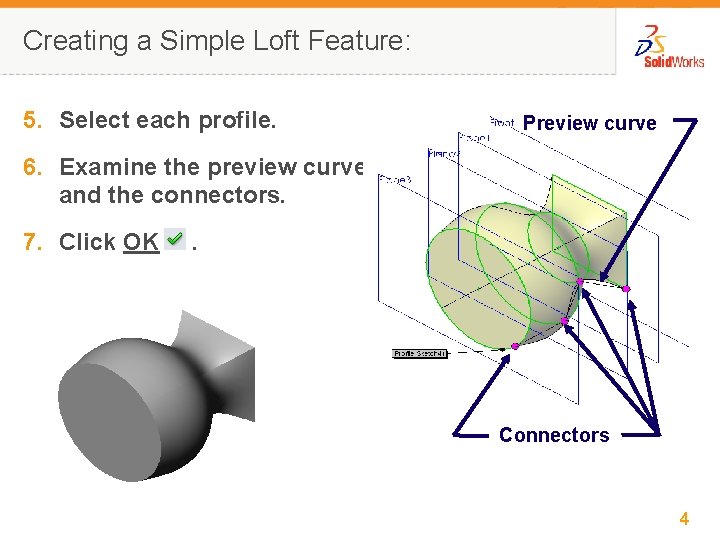
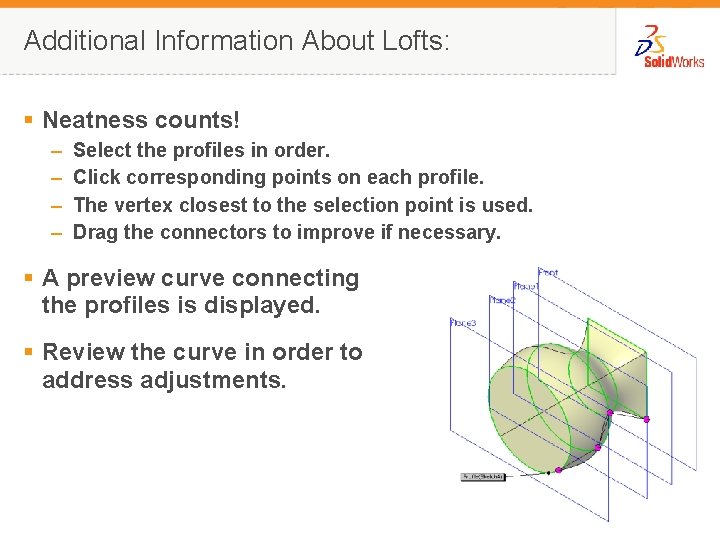
Creating a Simple Loft Feature: 5. Select each profile. Preview curve 6. Examine the preview curve and the connectors. 7. Click OK . Connectors 4

Additional Information About Lofts: § Neatness counts! – – Select the profiles in order. Click corresponding points on each profile. The vertex closest to the selection point is used. Drag the connectors to improve if necessary. § A preview curve connecting the profiles is displayed. § Review the curve in order to address adjustments. 5

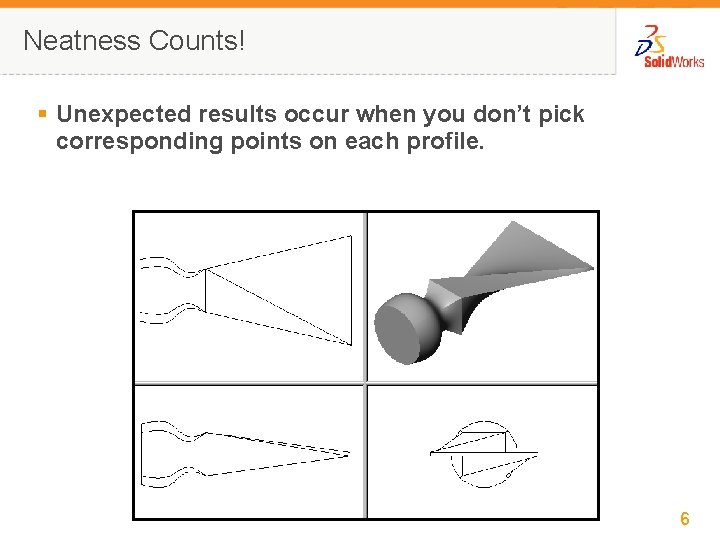
Neatness Counts! § Unexpected results occur when you don’t pick corresponding points on each profile. 6

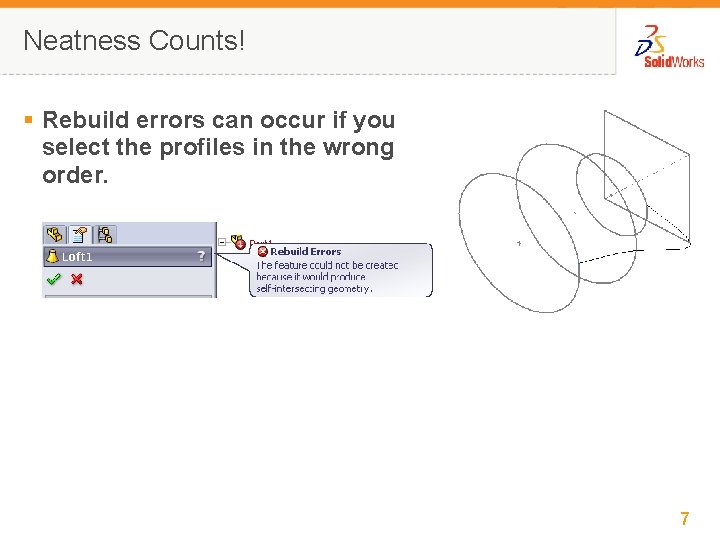
Neatness Counts! § Rebuild errors can occur if you select the profiles in the wrong order. 7

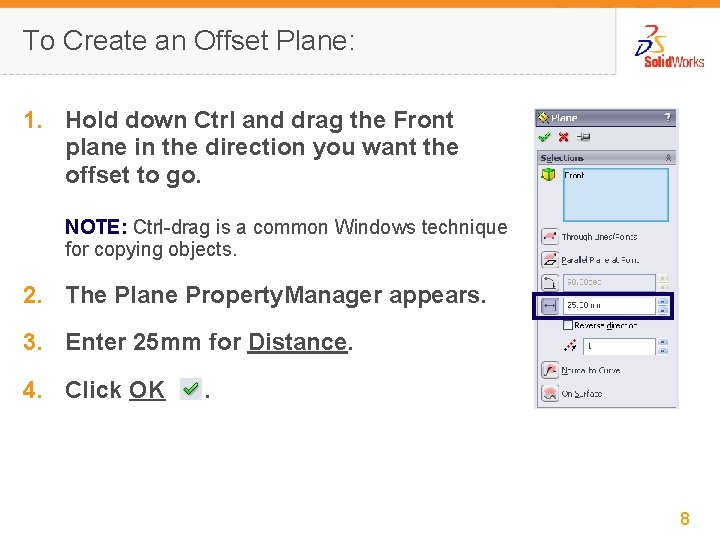
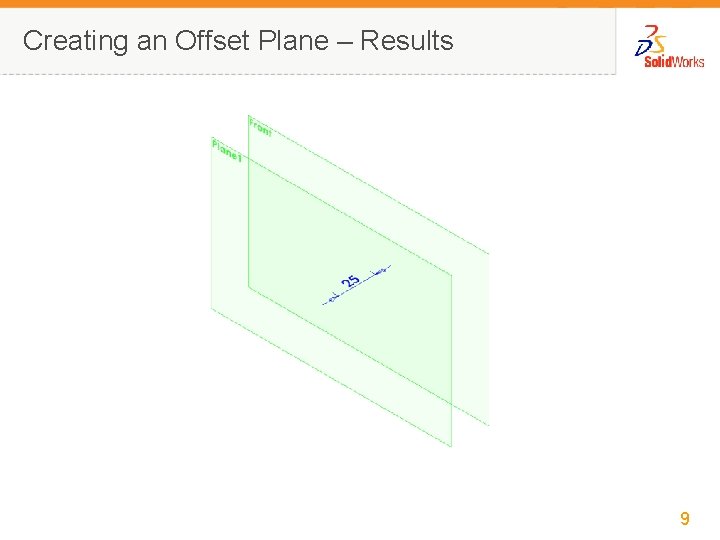
To Create an Offset Plane: 1. Hold down Ctrl and drag the Front plane in the direction you want the offset to go. NOTE: Ctrl-drag is a common Windows technique for copying objects. 2. The Plane Property. Manager appears. 3. Enter 25 mm for Distance. 4. Click OK . 8

Creating an Offset Plane – Results 9

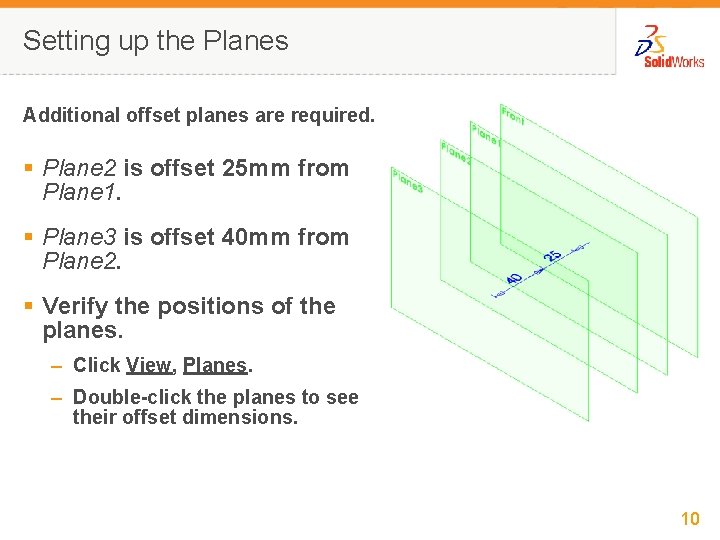
Setting up the Planes Additional offset planes are required. § Plane 2 is offset 25 mm from Plane 1. § Plane 3 is offset 40 mm from Plane 2. § Verify the positions of the planes. – Click View, Planes. – Double-click the planes to see their offset dimensions. 10

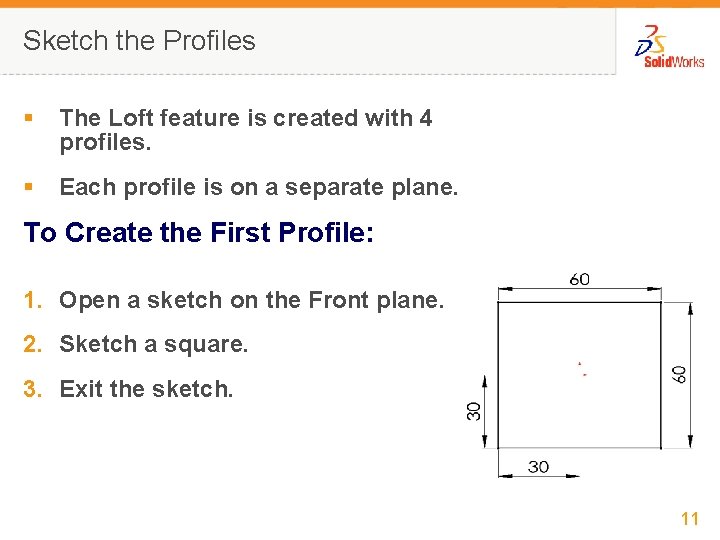
Sketch the Profiles § The Loft feature is created with 4 profiles. § Each profile is on a separate plane. To Create the First Profile: 1. Open a sketch on the Front plane. 2. Sketch a square. 3. Exit the sketch. 11

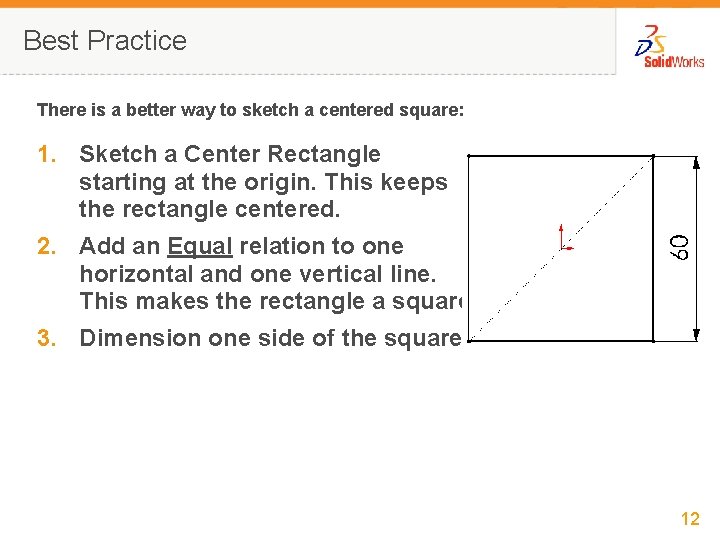
Best Practice There is a better way to sketch a centered square: 1. Sketch a Center Rectangle starting at the origin. This keeps the rectangle centered. 2. Add an Equal relation to one horizontal and one vertical line. This makes the rectangle a square. 3. Dimension one side of the square. 12

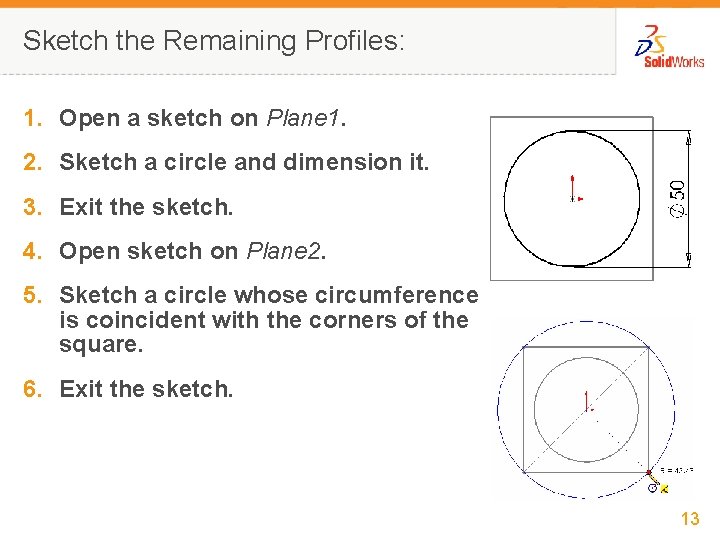
Sketch the Remaining Profiles: 1. Open a sketch on Plane 1. 2. Sketch a circle and dimension it. 3. Exit the sketch. 4. Open sketch on Plane 2. 5. Sketch a circle whose circumference is coincident with the corners of the square. 6. Exit the sketch. 13

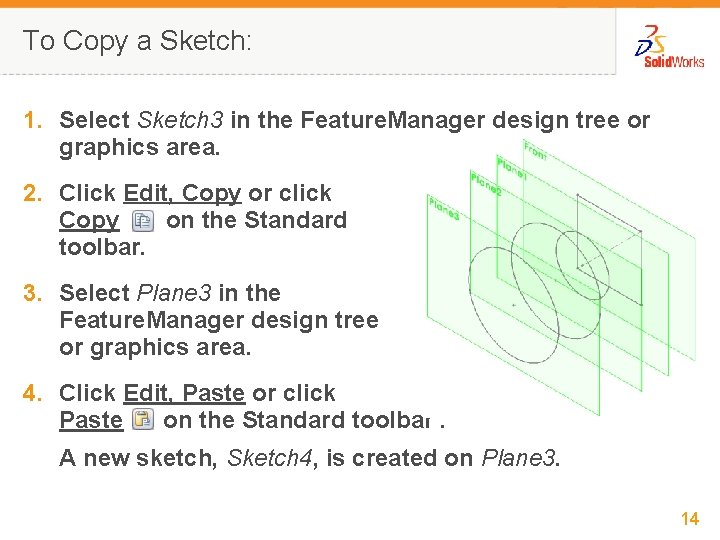
To Copy a Sketch: 1. Select Sketch 3 in the Feature. Manager design tree or graphics area. 2. Click Edit, Copy or click Copy on the Standard toolbar. 3. Select Plane 3 in the Feature. Manager design tree or graphics area. 4. Click Edit, Paste or click Paste on the Standard toolbar. A new sketch, Sketch 4, is created on Plane 3. 14

More About Copying Sketches § External relations are deleted. § For example, when you copied Sketch 3, the geometric relations locating the center and defining the circumference were deleted. § Therefore, Sketch 4 is underdefined. § To fully define Sketch 4, add a Coradial relation between the copied circle and the original. § If you sketch a profile on the wrong plane, move it to the correct plane using Edit Sketch Plane. Do not copy it. 15

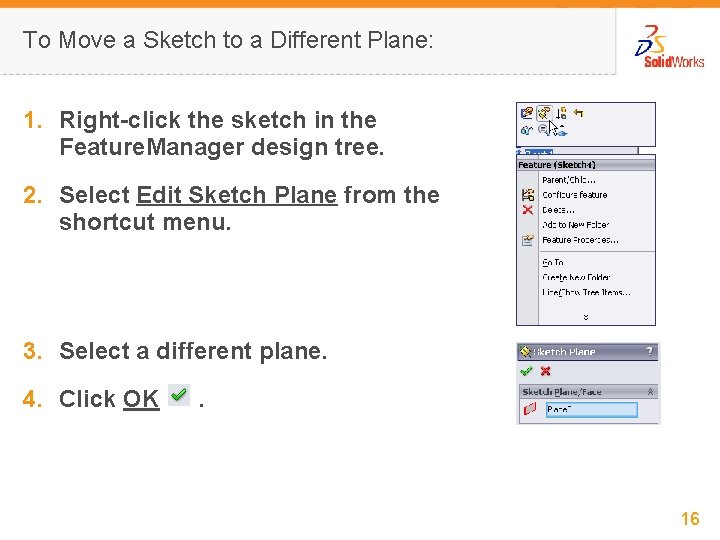
To Move a Sketch to a Different Plane: 1. Right-click the sketch in the Feature. Manager design tree. 2. Select Edit Sketch Plane from the shortcut menu. 3. Select a different plane. 4. Click OK . 16

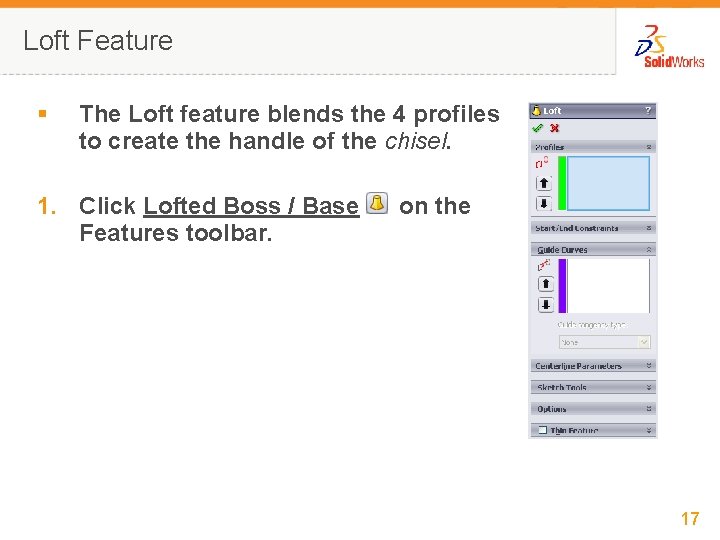
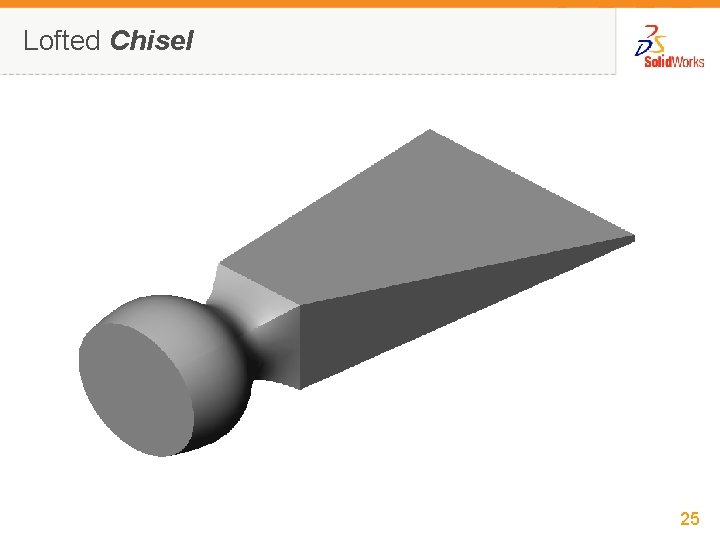
Loft Feature § The Loft feature blends the 4 profiles to create the handle of the chisel. 1. Click Lofted Boss / Base Features toolbar. on the 17

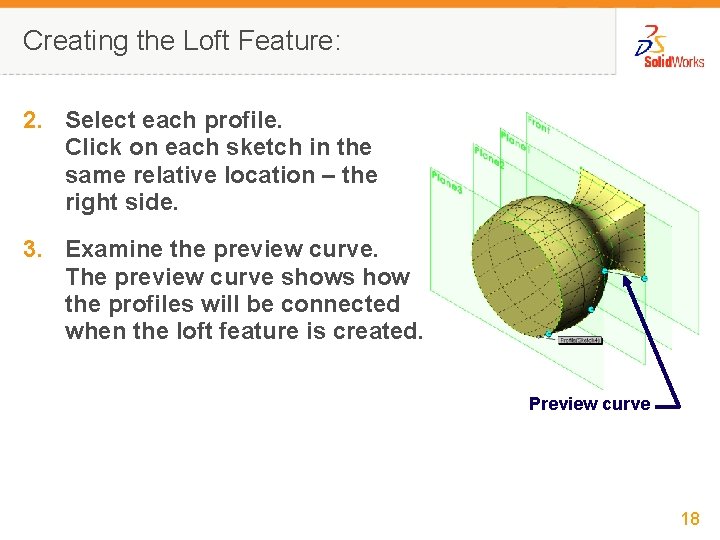
Creating the Loft Feature: 2. Select each profile. Click on each sketch in the same relative location – the right side. 3. Examine the preview curve. The preview curve shows how the profiles will be connected when the loft feature is created. Preview curve 18

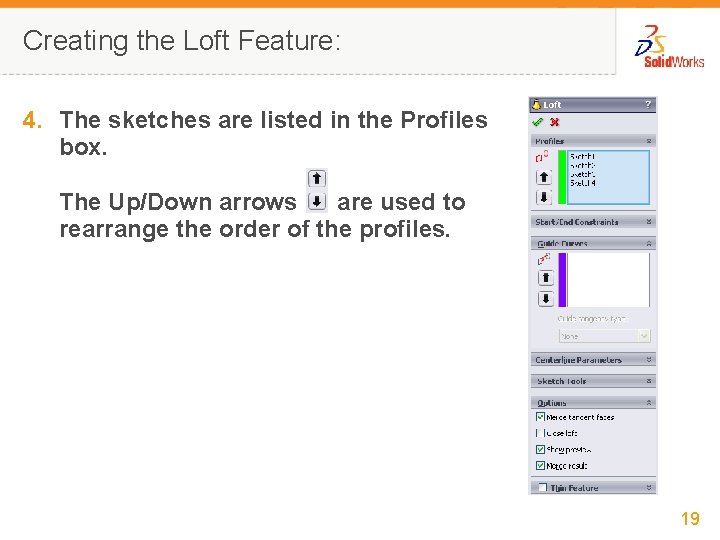
Creating the Loft Feature: 4. The sketches are listed in the Profiles box. The Up/Down arrows are used to rearrange the order of the profiles. 19

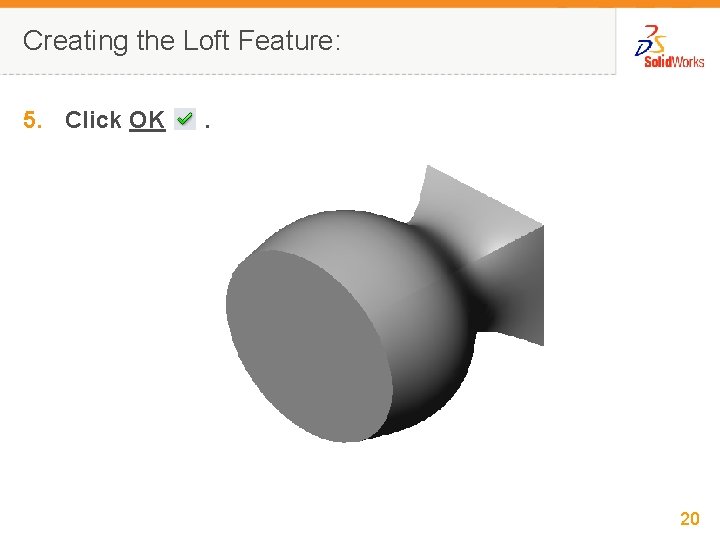
Creating the Loft Feature: 5. Click OK . 20

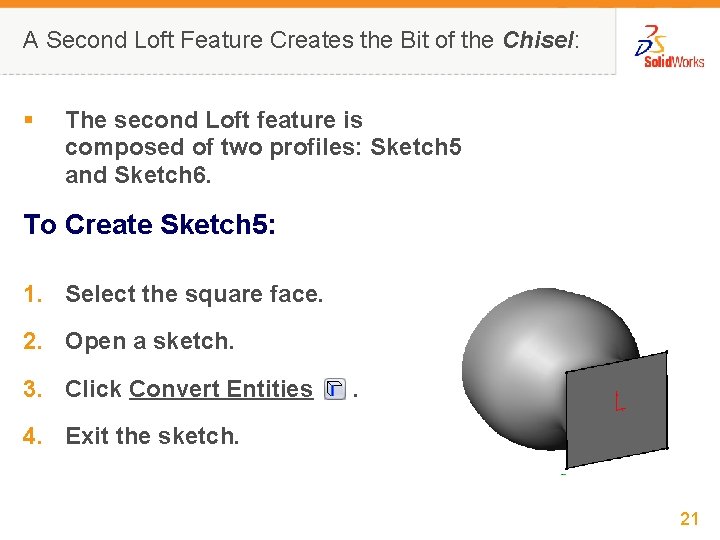
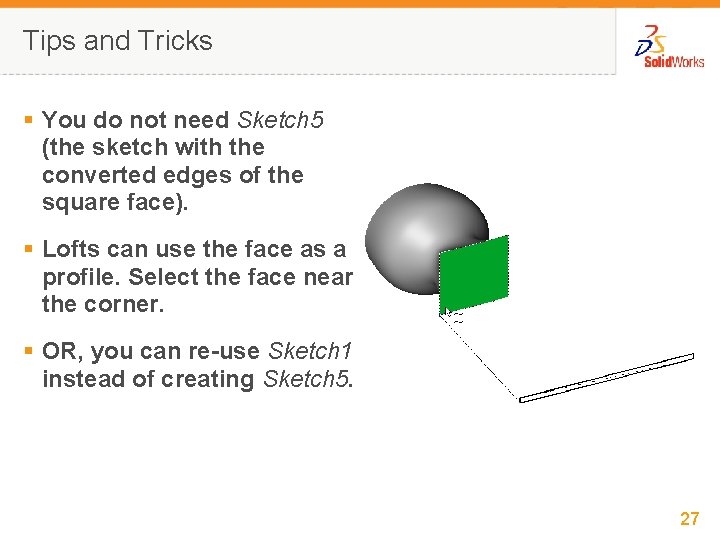
A Second Loft Feature Creates the Bit of the Chisel: § The second Loft feature is composed of two profiles: Sketch 5 and Sketch 6. To Create Sketch 5: 1. Select the square face. 2. Open a sketch. 3. Click Convert Entities . 4. Exit the sketch. 21

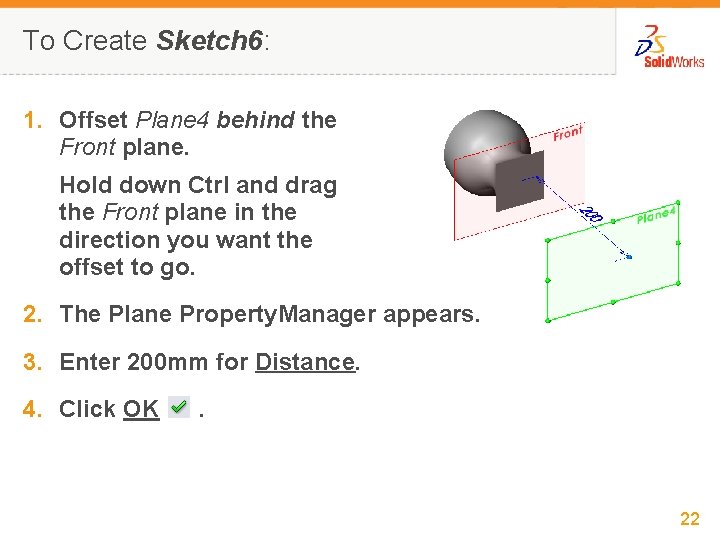
To Create Sketch 6: 1. Offset Plane 4 behind the Front plane. Hold down Ctrl and drag the Front plane in the direction you want the offset to go. 2. The Plane Property. Manager appears. 3. Enter 200 mm for Distance. 4. Click OK . 22

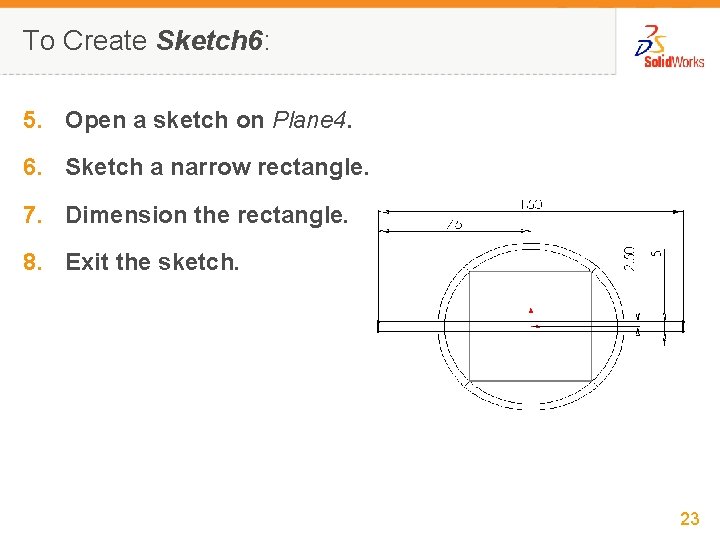
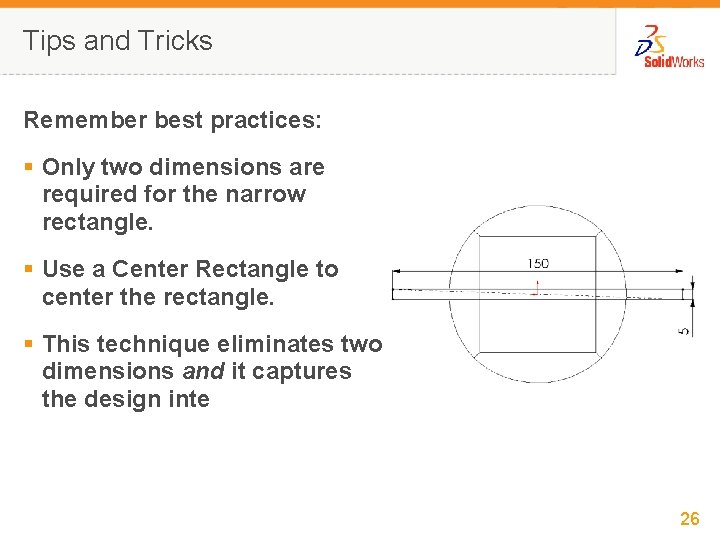
To Create Sketch 6: 5. Open a sketch on Plane 4. 6. Sketch a narrow rectangle. 7. Dimension the rectangle. 8. Exit the sketch. 23

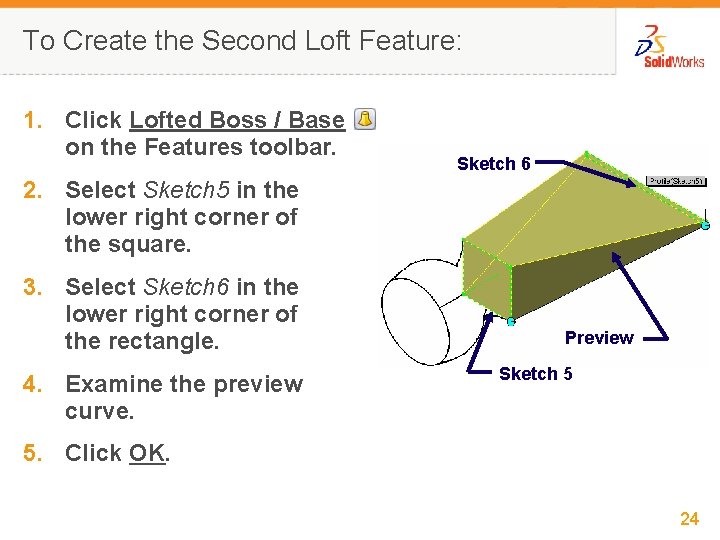
To Create the Second Loft Feature: 1. Click Lofted Boss / Base on the Features toolbar. Sketch 6 2. Select Sketch 5 in the lower right corner of the square. 3. Select Sketch 6 in the lower right corner of the rectangle. 4. Examine the preview curve. Preview Sketch 5 5. Click OK. 24

Lofted Chisel 25

Tips and Tricks Remember best practices: § Only two dimensions are required for the narrow rectangle. § Use a Center Rectangle to center the rectangle. § This technique eliminates two dimensions and it captures the design inte 26

Tips and Tricks § You do not need Sketch 5 (the sketch with the converted edges of the square face). § Lofts can use the face as a profile. Select the face near the corner. § OR, you can re-use Sketch 1 instead of creating Sketch 5. 27