Insert update delete and select using asp net


- Slides: 10
Insert, update, delete and select using asp. net c# code with ado. net objects.
Step 1: Create a web forms application
Step 2: Create a Database After creating a new website, create a new database from server explorer of visual studio or SQL server.
After creating a new database, let's add new data tables with columns. To create tables just click on your database name go to tables folder, when you choose to create a table it will ask you add columns. You can add your custom name column names along with data type. (Data Type : For string data choose - varchar(50) or above, for integer data choose - int)
Step 3: Adding connection string First Right click on the database name then click on the properties (Alt + Enter). Find the connection string then copy that connection string Once we have copied the connection string we have to go to our asp. net web site solution explorer. Find the web. config file open that web. config file.
Replace the above connection string with your copied connection string.
Step 4: Add new aspx file to web project Add new aspx file i. e. default. aspx file to the web project & then Drag and drop a gridview to the page from the tool box then do the following as shown in below. i. e. Add - Edit Delete buttons from the command field and check on the auto generate fields. Edit link is for to choose which record to edit and delete link is for to delete the selected record. Create a form to update and insert records into database from website as shown above i. e. Name, Address and Salary then add one hidden field and two submit buttons, name it.
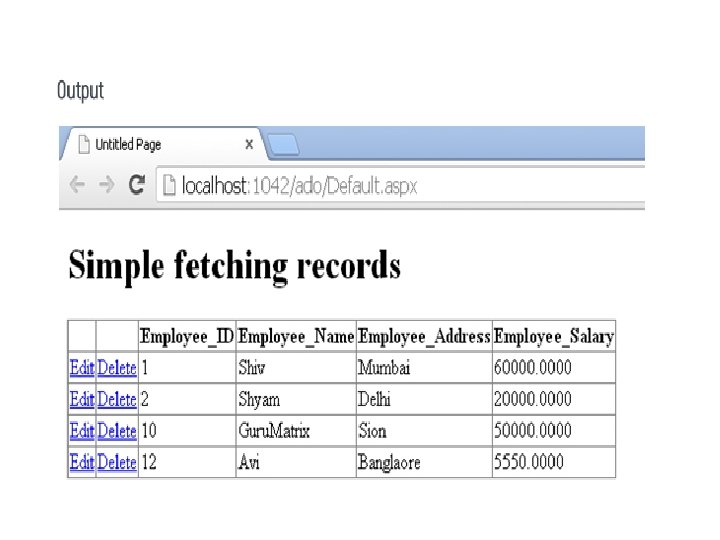
Step 5: Displaying records using select statement • We will be display the records on grid view. So let’s display the records using select statement. • • First thing we need to open up a connection to a database. So let’s do that step by step In default. aspx. cs file import the SQL namespaces on top. using System. Data. Sql. Client; Now in a page load write the connection string and open up the sql connection as shown below. string conn = ""; conn = Configuration. Manager. Connection. Strings["Conn"]. To. String(); Sql. Connection objsqlconn = new Sql. Connection(conn); objsqlconn. Open(); • • After opening up the sql connection, Let's write the Select statement in the sql command the execute the sql query using sql command execute reader and append it to grid view data source as shown below. objsqlconn. Open(); Sql. Command objcmd = new Sql. Command("Select * from Employee", objsqlconn); grd_dataset. Data. Source = objcmd. Execute. Reader(); grd_dataset. Data. Bind();
Step 6: Inserting a new record using Insert Statement To add new record to the database we will use the following form that we have created in our default. aspx file. We will write insert statement in the button click event. So double click on a button, a button click event opens up. First we need to open up the sql connection as same as previously we did it for select statement then in a sql command write the following insert statement as shown below. So just run the website by holding Ctrl + F 5 and add input data in the text box finally click on add new record button to add new record to the database.