
IMPRESSION PROCEDURES BY SYED MUKHTARUNNISAR ANDRABI ASSISTANT PROFESSOR
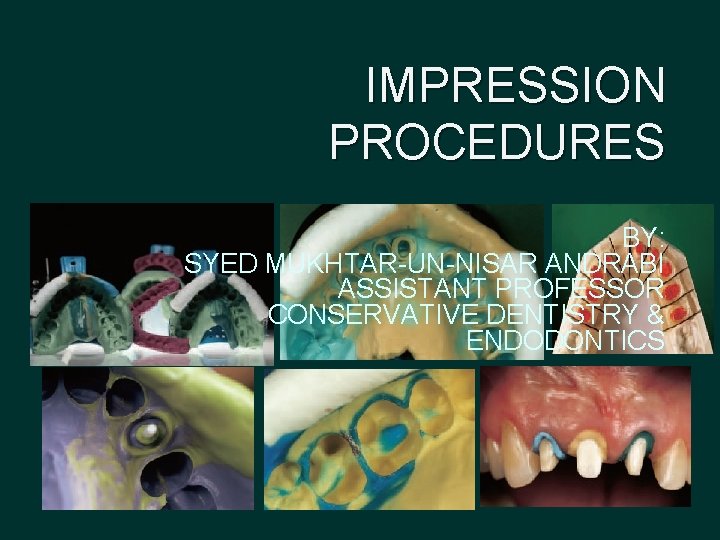
IMPRESSION PROCEDURES BY: SYED MUKHTAR-UN-NISAR ANDRABI ASSISTANT PROFESSOR CONSERVATIVE DENTISTRY & ENDODONTICS

Introduction
An impression is an imprint or negative likeness. A good impression is invaluable in the fabrication of a functionally and esthetically pleasing prosthesis The indirect technique for fabricating inlays, crowns, fixed partial denture has been a boon to the practice of dentistry
The materials currently available easily fulfill all the requirements that the practitioner may place on his impression material. However, the fact that these requirements are met collectively and not by any single impression material is the rub and is the reason why the dentist must be knowledgeable about the properties of impression materials and impression techniques.
Definition �An impression is an “imprint” or negative likeness of the teeth and/or edentulous areas, made in plastic material which becomes hardened or set while in contact with the tissue -Heartwell 1992
�An impression is the perpetual preservation of what already exists and not the meticulous replacement of what is missing - M. M. Devan 1995

HISTORY
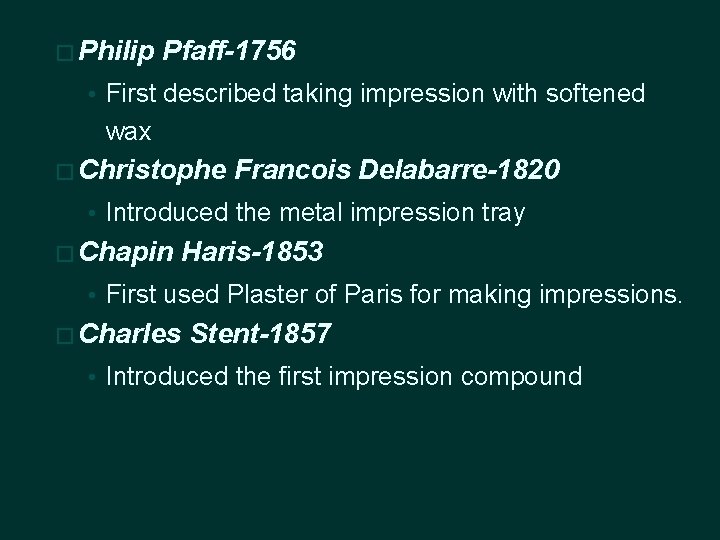
� Philip Pfaff-1756 • First described taking impression with softened wax � Christophe Francois Delabarre-1820 • Introduced the metal impression tray � Chapin Haris-1853 • First used Plaster of Paris for making impressions. � Charles Stent-1857 • Introduced the first impression compound
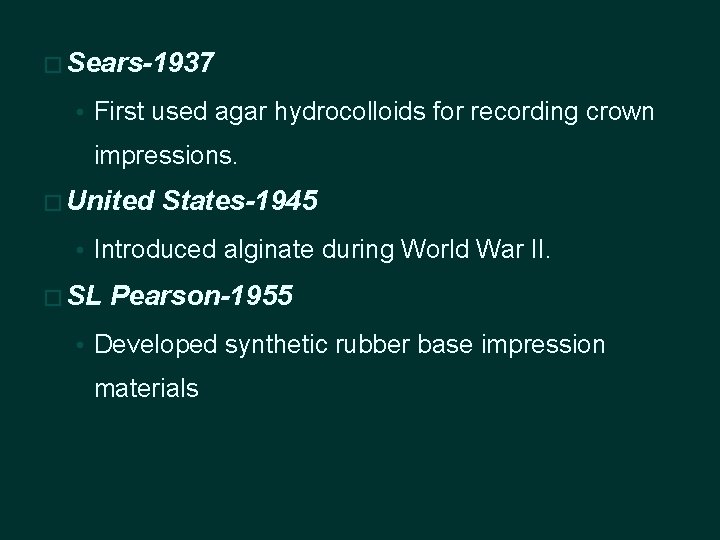
� Sears-1937 • First used agar hydrocolloids for recording crown impressions. � United States-1945 • Introduced alginate during World War II. � SL Pearson-1955 • Developed synthetic rubber base impression materials
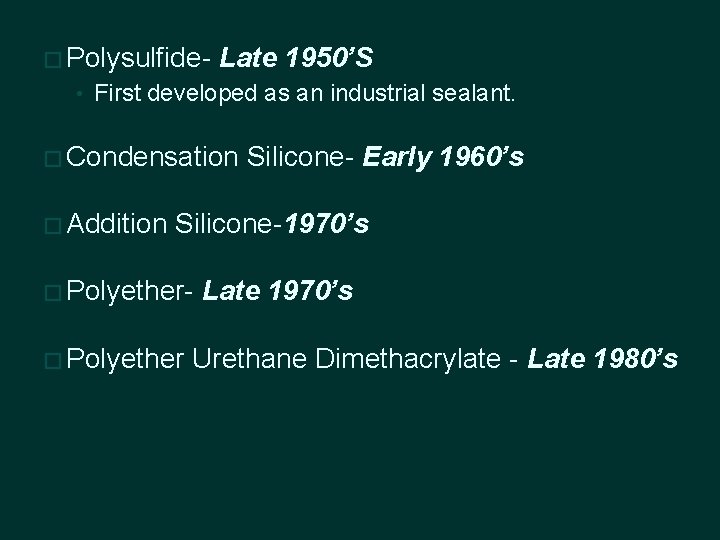
� Polysulfide- Late 1950’S • First developed as an industrial sealant. � Condensation � Addition Silicone- Early 1960’s Silicone-1970’s � Polyether Late 1970’s Urethane Dimethacrylate - Late 1980’s

IDEAL REQUIREMENTS TO OBTAIN AN ACCURATE IMPRESSION
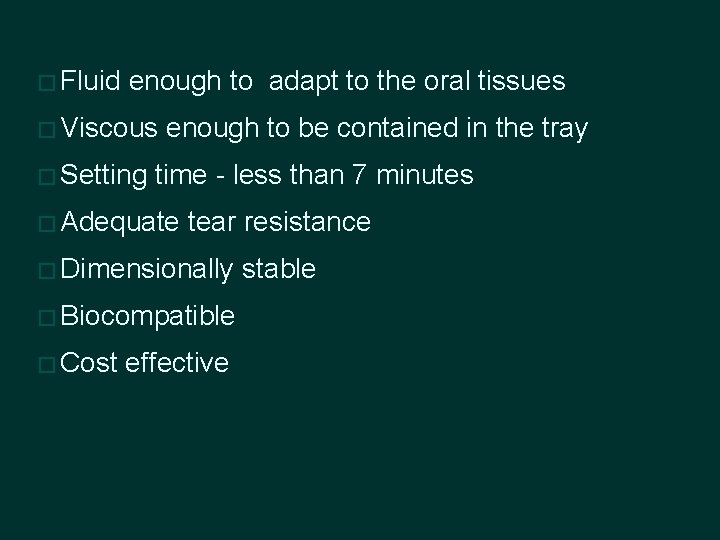
� Fluid enough to adapt to the oral tissues � Viscous � Setting enough to be contained in the tray time - less than 7 minutes � Adequate tear resistance � Dimensionally � Biocompatible � Cost effective stable

Classification
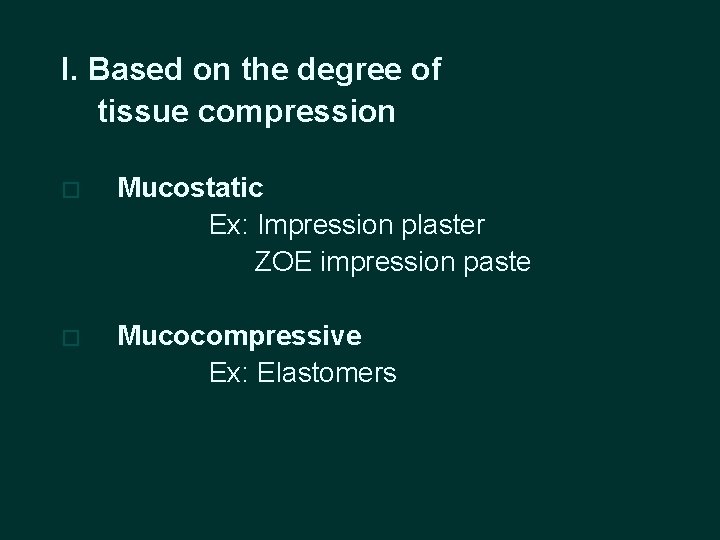
I. Based on the degree of tissue compression � Mucostatic Ex: Impression plaster ZOE impression paste � Mucocompressive Ex: Elastomers
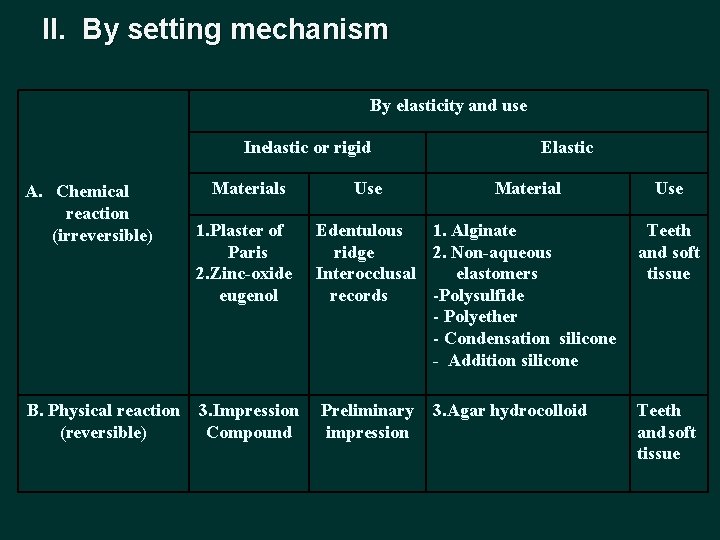
II. By setting mechanism By elasticity and use Inelastic or rigid A. Chemical reaction (irreversible) B. Physical reaction (reversible) Materials Use Elastic Material Use 1. Plaster of Paris 2. Zinc-oxide eugenol Edentulous 1. Alginate ridge 2. Non-aqueous Interocclusal elastomers records -Polysulfide - Polyether - Condensation silicone - Addition silicone Teeth and soft tissue 3. Impression Compound Preliminary impression Teeth and soft tissue 3. Agar hydrocolloid
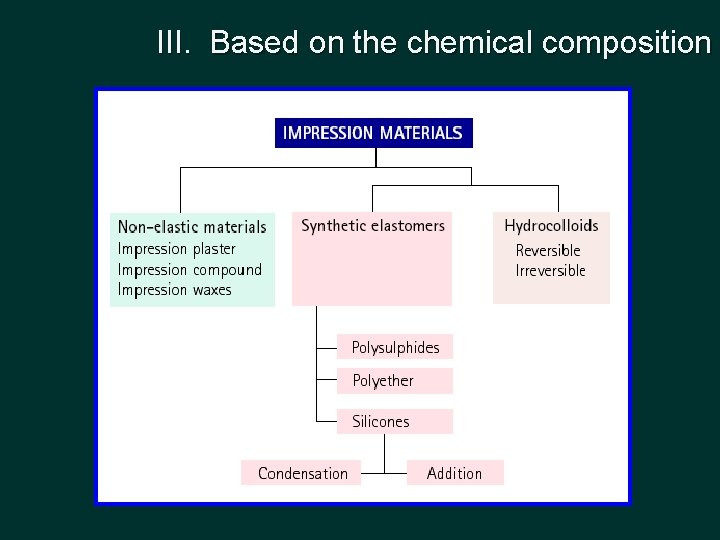
III. Based on the chemical composition
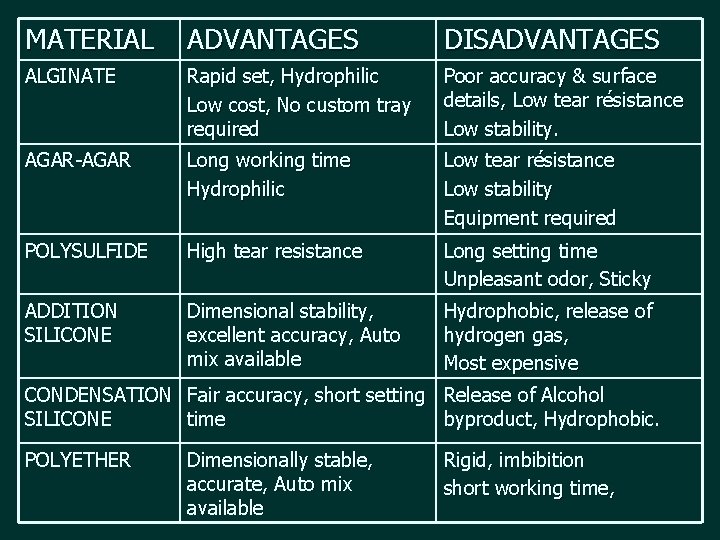
MATERIAL ADVANTAGES DISADVANTAGES ALGINATE Rapid set, Hydrophilic Low cost, No custom tray required Poor accuracy & surface details, Low tear résistance Low stability. AGAR-AGAR Long working time Hydrophilic Low tear résistance Low stability Equipment required POLYSULFIDE High tear resistance Long setting time Unpleasant odor, Sticky ADDITION SILICONE Dimensional stability, excellent accuracy, Auto mix available Hydrophobic, release of hydrogen gas, Most expensive CONDENSATION Fair accuracy, short setting Release of Alcohol SILICONE time byproduct, Hydrophobic. POLYETHER Dimensionally stable, accurate, Auto mix available Rigid, imbibition short working time,
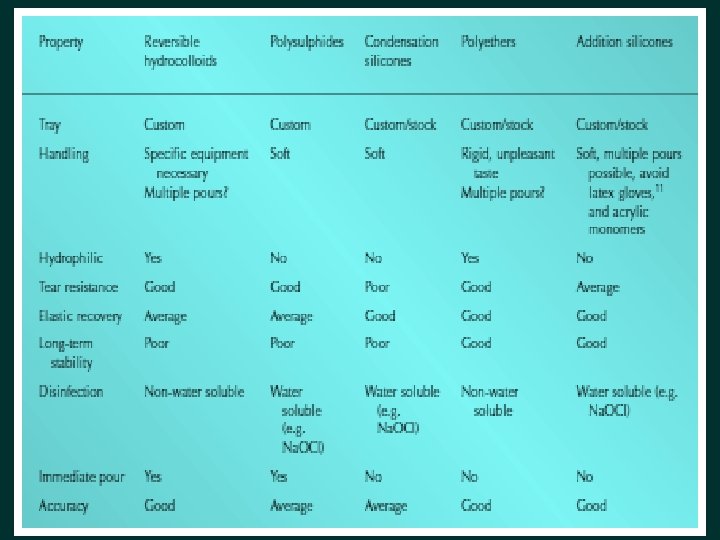

IMPRESSION TECHNIQUES
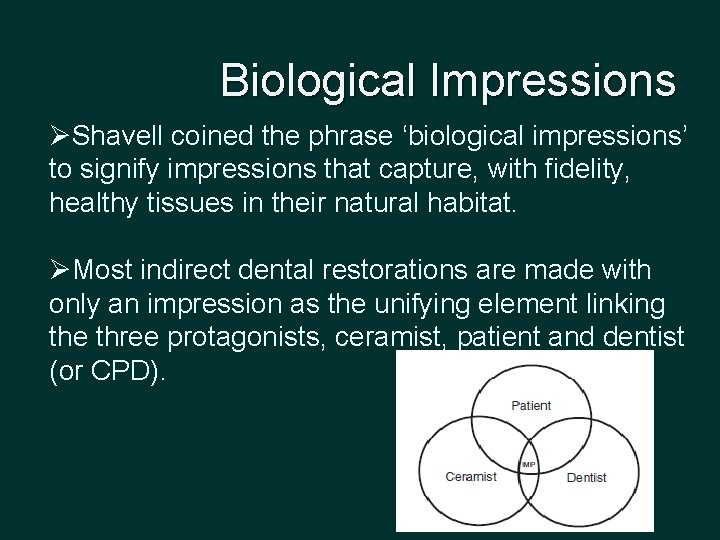
Biological Impressions ØShavell coined the phrase ‘biological impressions’ to signify impressions that capture, with fidelity, healthy tissues in their natural habitat. ØMost indirect dental restorations are made with only an impression as the unifying element linking the three protagonists, ceramist, patient and dentist (or CPD).
Biological Impressions Ø Whether an impression is for a laminate, inlay, crown, bridge, denture or implant, the objective is to reproduce accurately a facsimile of anatomical structures as a morphological platform for fabricating the proposed restoration. This implies that the tissues are neither escharotic nor necrotic. Ø Two types of biological impressions are required: dental and gingival. � dental biological impression replicates abutment teeth following preparation. � gingival biological impression records the periodontium in a non-deflected state.
Classification � Based on the position of the mouth • Open mouth technique • Closed mouth technique (functional impression ) � Based on the pressure applied • Positive pressure • Negative pressure • Selective pressure technique
� Based on the mixing technique • Double mix �Heavy-light body technique �Putty wash technique �One stage – simultaneous �Two stage – relief channel - 2 mm spacer technique • Single mix or monophase technique � According to the tray used • Custom tray impressions • Stock tray impressions
Double mix technique (Multiple mix technique) � The light body material is injected from the filled syringe within and around the tooth preparation � The tray filled with heavy body material is inserted in the mouth and seated over the syringe material. � The two materials bond together on setting � Most commonly used with custom tray
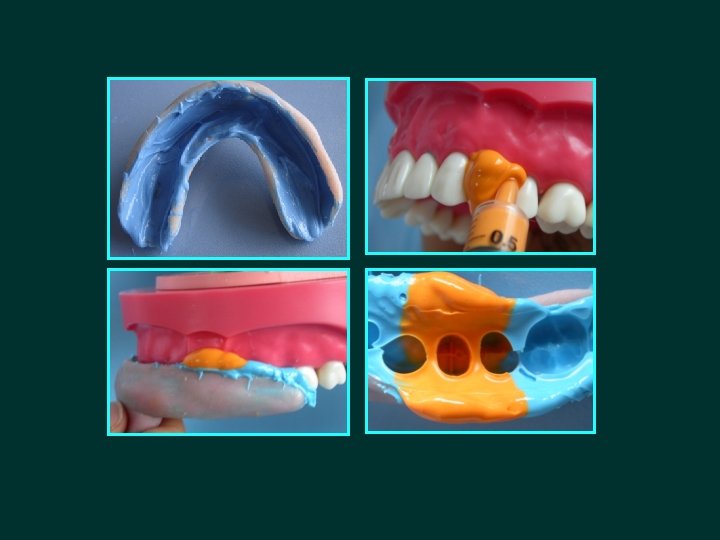
�Advantages • Over comes the polymerization shrinkage of the light body material • Margins duplicated in light body � Disadvantages • Use of custom tray • An assistant required for mixing the material - tray/syringe simultaneously • Margins duplicated in heavy body in case of excess pressure
Single mix technique (Single viscosity technique, monophase technique) • Medium viscosity of polyether and addition silicones used in a stock tray • Only one mix is made, part of the material placed in the tray and another portion placed in the syringe for injection in the cavity preparation or on prepared teeth • Success of this technique depends on the pseudoplastic behavior of these two materials
• Advantages �Reduced wastage of the material �Less time consumption �Avoids the time involved in fabrication of custom tray • Disadvantages �Relatively high viscosity and reduced flow of the monophase materials, makes their injection onto the preparation more difficult to control -increased incidence of surface voids - Stephen M. Dunne et al 1998

PUTTY – WASH TECHNIQUE
Putty wash simultaneously technique (One stage) �Light body material syringed on to the preparation while the putty material loaded in a stock tray is simultaneously inserted into the mouth
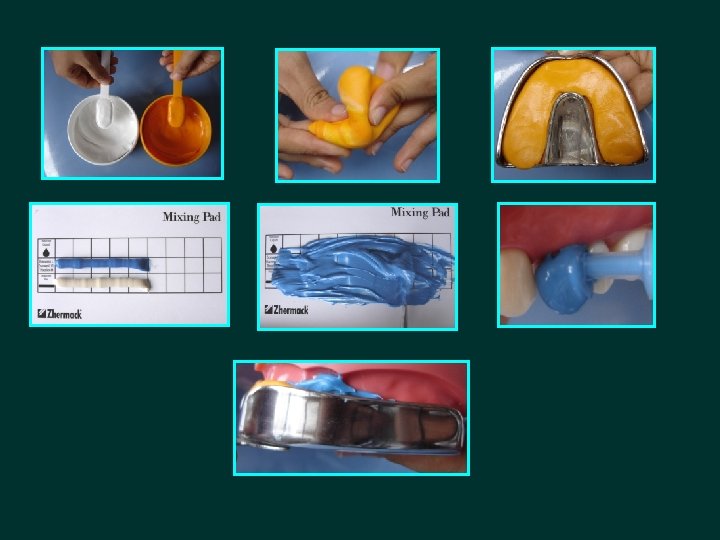
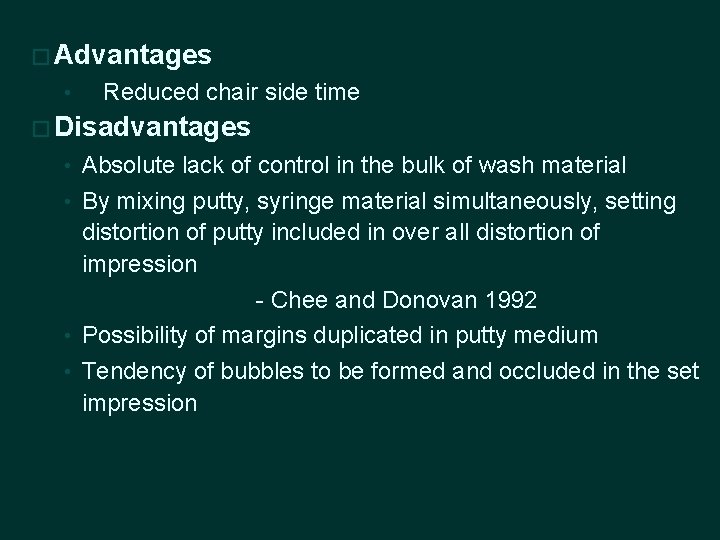
� Advantages • Reduced chair side time � Disadvantages • Absolute lack of control in the bulk of wash material • By mixing putty, syringe material simultaneously, setting distortion of putty included in over all distortion of impression - Chee and Donovan 1992 • Possibility of margins duplicated in putty medium • Tendency of bubbles to be formed and occluded in the set impression
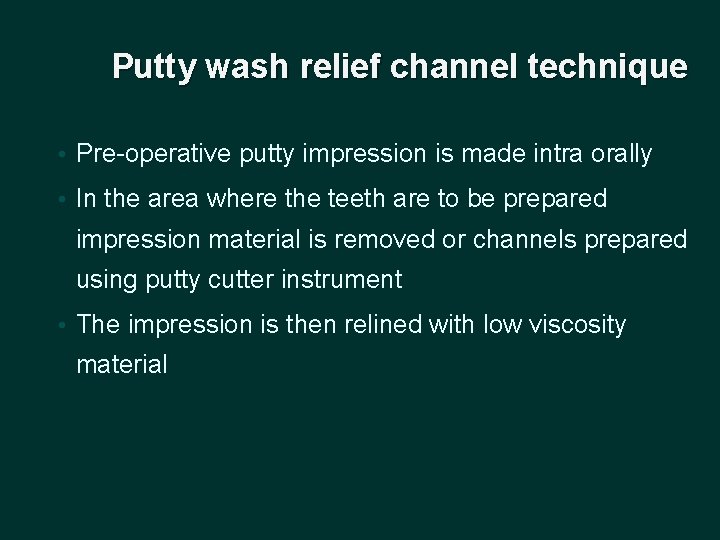
Putty wash relief channel technique • Pre-operative putty impression is made intra orally • In the area where the teeth are to be prepared impression material is removed or channels prepared using putty cutter instrument • The impression is then relined with low viscosity material
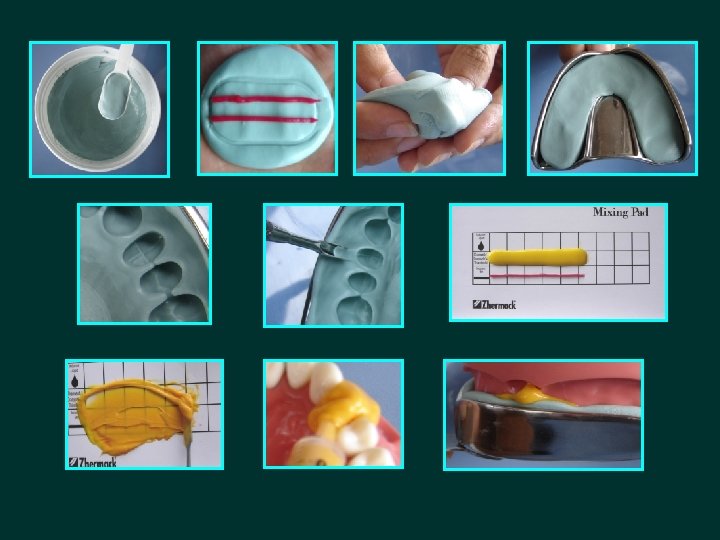
�Advantages �Impression can be captured with the wash materials �Disadvantages �To confine the wash material to area of relieved impression �If entire area is washed - creates hydraulic displacement of putty impression resulting in smaller dies - Donovan TE 2004
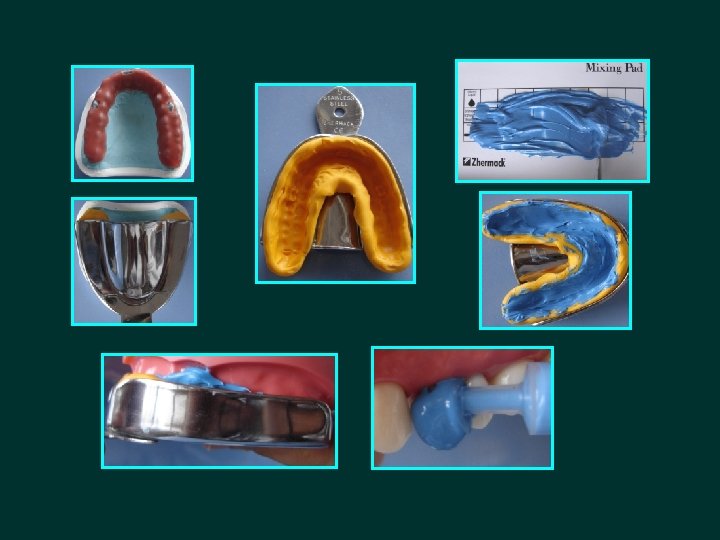
Putty wash 2 mm spacer technique • 2 mm thickness wax spacer is prepared on a diagnostic cast, occlusal stops are provided on nonfunctional cusps • A putty impression is made with a stock tray resulting in a putty custom tray with 2 mm space for the wash material • Putty custom tray is then washed with light body material
�Advantages �Wash stage carried out after the putty has set and contracted �Controlled wash bulk compensates for this contraction with minimal dimensional change �Disadvantages �Extra chair side time �Extra material
Copper band technique • This technique was used to salvage an impression of multiple preparations when there were only vague margins on one or two preparations that were not adequately replicated in the impression • Copper tube is prepared that extends 1 mm beyond the finish line
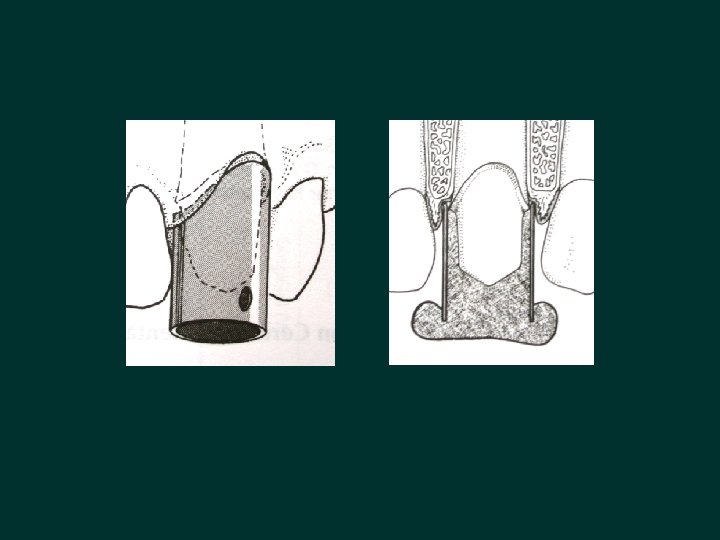
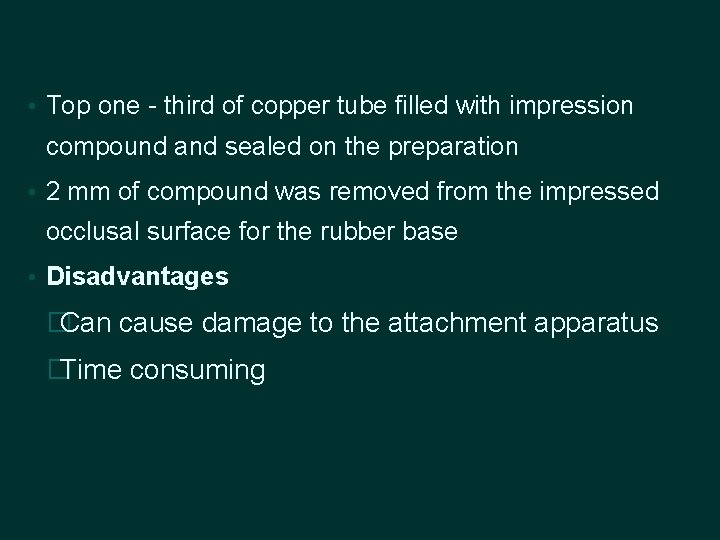
• Top one - third of copper tube filled with impression compound and sealed on the preparation • 2 mm of compound was removed from the impressed occlusal surface for the rubber base • Disadvantages �Can cause damage to the attachment apparatus �Time consuming
DUAL ARCH IMPRESSION TECHNIQUE (TRIPLE TRAY TECHNIQUE , CLOSED MOUTH TECHNIQUE) • This technique captures the prepared teeth, the opposing arch and the occlusal articulation in maximum intercuspation (MIP) simultaneously
• Indications �Used with a maximum of two prepared teeth �Unprepared stops anterior and posterior to the prepared teeth should be present �Used only with patients that have existing anterior guidance �Must be able to close completely in maximum intercuspation position with the impression tray in place
� Contraindications �Presence of third molars �Rapidly ascending ramus �Excess soft tissue distal to the molars
�Advantages �Accurate recording of the MIP �Eliminates any mandibular flexure that might be associated with opening � Disadvantages �Complicated laboratory procedure
Segmental impression technique • Impressions of multiple prepared teeth due to inherent limits in working time and difficulties maintaining moisture control • Arch is broken down into segments of two prepared teeth • Custom tray prepared for each segment with 1 mm of wax relief, trays should extend 3 mm past the gingival margin
• Low viscosity material is loaded into the syringe as well as the segmental tray, and then an impression made • Procedure repeated with each segment • Finally an over impression is made using a stock tray • Uses �When moisture control is difficult in specific patients �When making simultaneously impressions of implants and prepared teeth
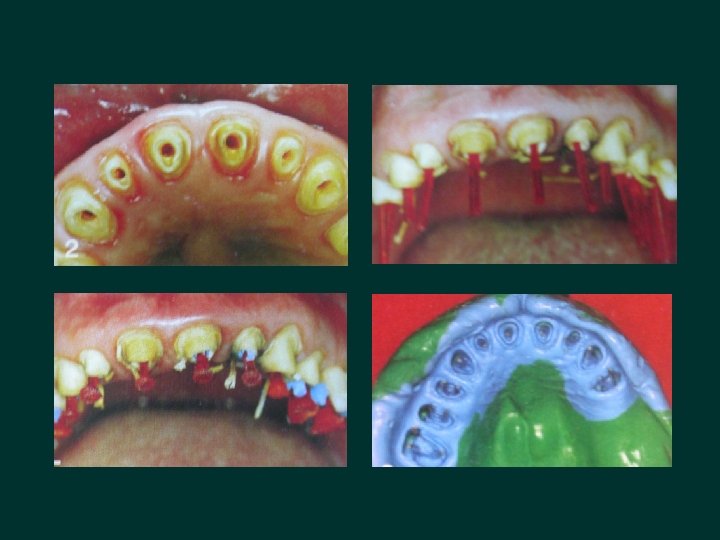
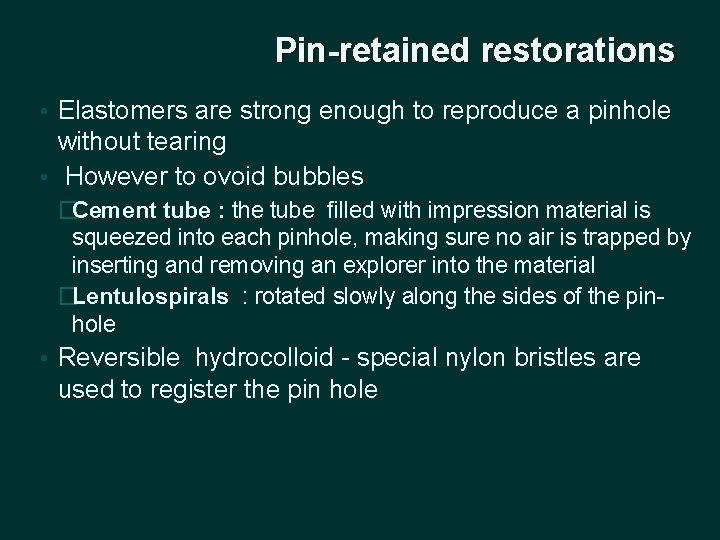
Indirect dowel, cores Indicated when multiple dowel cores are required or when radicular attachments are to be used � A 25 gauge local anaesthetic needles - vent to allow air to escape as the impression material is injected into the canal space � Needle is gradually removed while the low viscosity materials is injected into the canal � Plastic impression dowel coated with adhesive is inserted into the canal � Procedure is repeated with multiple dowels and finally an over impression is made �
Pin-retained restorations • Elastomers are strong enough to reproduce a pinhole without tearing • However to ovoid bubbles �Cement tube : the tube filled with impression material is squeezed into each pinhole, making sure no air is trapped by inserting and removing an explorer into the material �Lentulospirals : rotated slowly along the sides of the pinhole • Reversible hydrocolloid - special nylon bristles are used to register the pin hole
Electroplating It is the electro deposition of metals (silver, copper) on the surface of the impression to improve the abrasion resistance of gypsum � Advantages � • Increased hardness of the die • Excellent abrasion resistance • Die is so strong that wax patterns & gold castings can be burnished with little distortion or damage to the die � Disadvantages • Toxicity of cyanide baths • Time required to prepare the die • Expense of labor and materials • Limited control of die accuracy
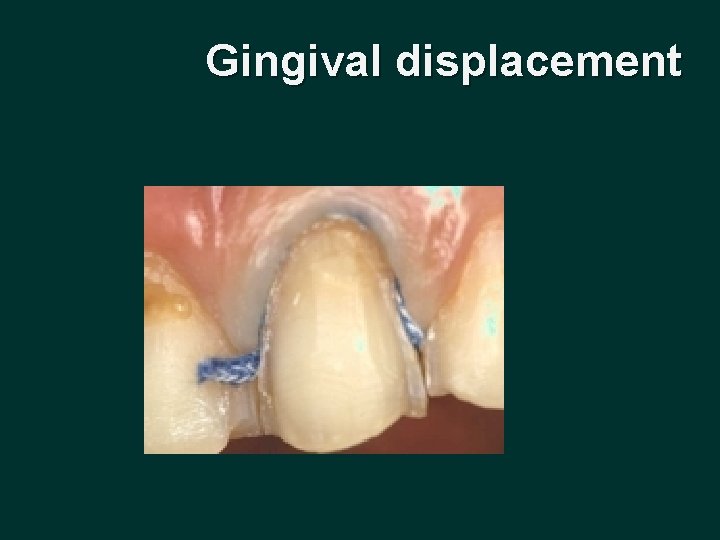
Gingival displacement
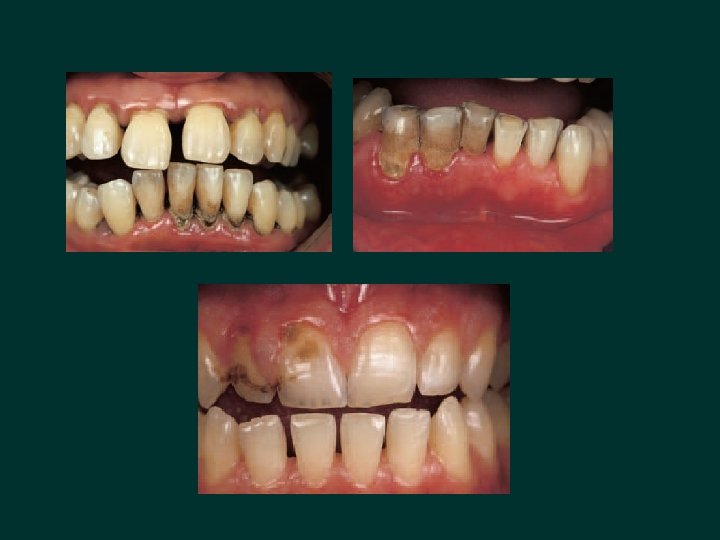
• Indirect restorations frequently have cervical margins that are intentionally placed in the gingival sulcus for esthetic or functional reasons • Procedure used to facilitate effective impression making with intra crevicular margins – “gingival displacement ”
• Goal - reversibly displace the gingival tissue in a lateral direction, so that a bulk of low-viscosity impression material can be introduced into the widened sulcus and capture the marginal detail • A critical sulcular width of 0. 2 mm is required for maximum accuracy of the impression, and to improve the tear strength of the material
• One of the prime requisites to successful tissue management is to begin the restorative procedure only after the gingival tissues are deemed healthy • This is not always possible in the clinical setting, but nonetheless it should be a constant goal
• According to Bensen Bomberg (1986) gingival tissue can be displaced laterally or vertically �Lateral retraction: It displaces the tissues so that an adequate bulk of impression material can be interfaced with the prepared tooth (gingival displacement) �Vertical retraction : Exposes the uncut portion of the tooth apical to the finish line
Techniques for gingival displacement • Mechanical • Chemical • Surgical • Combination of the three
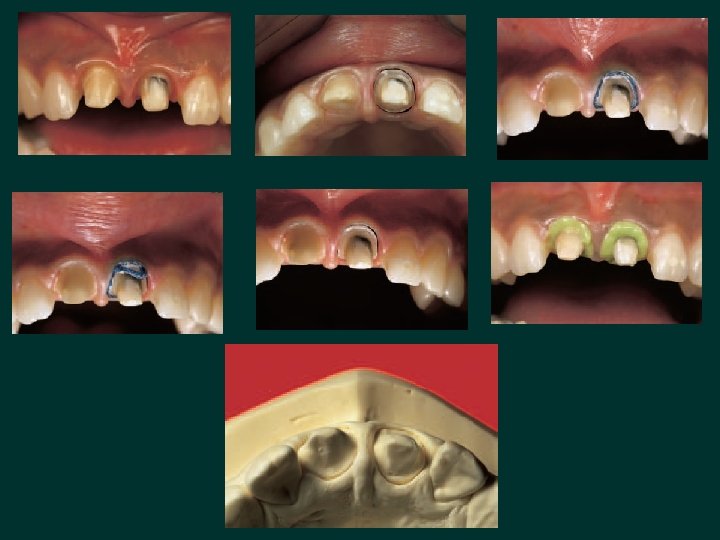
• Majority clinicians use a combination of mechanical - chemical displacement , using retraction cords along with specific hemostatic medicaments • 3 main variations of mechanical chemical method �Single cord technique �Double cord technique �Infusion method of gingival displacement
• Retraction cords designs �twisted cord �knitted cord �braided cord • The key to effective displacement - largest cord that can be atraumatically placed in the sulcus
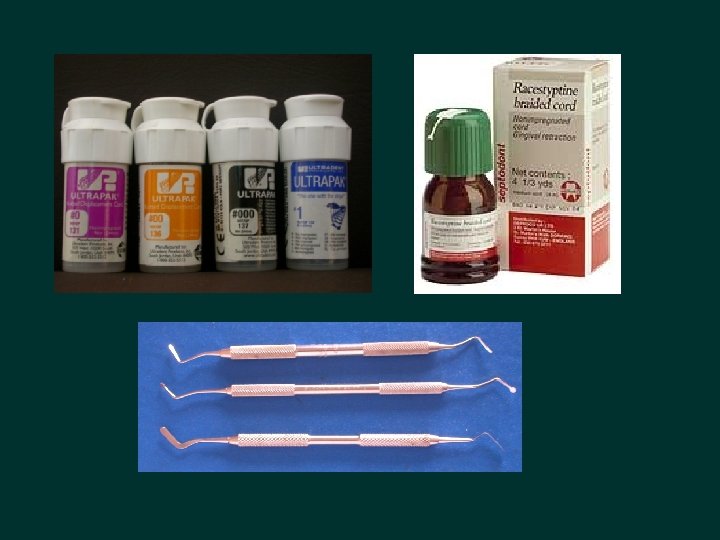
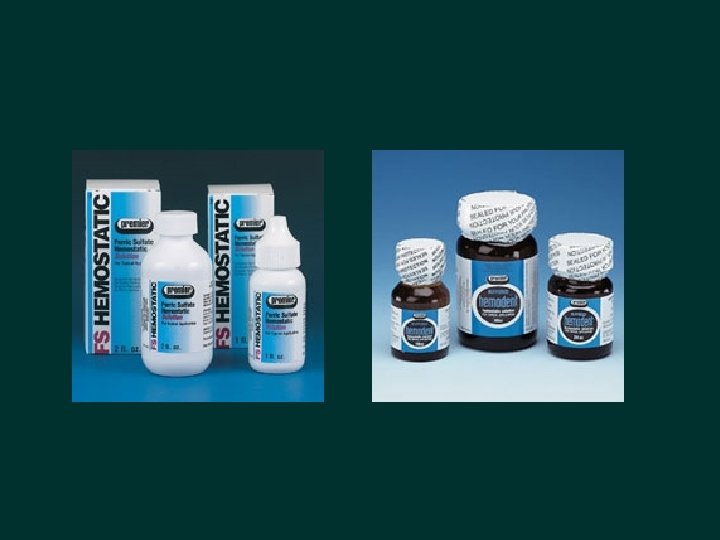
Haemostatic medicaments • Aluminium potassium sulfate • Aluminium chloride • Epinephrine �Use of epinephrine as a gingival displacement medicament has the potential to cause systemic side effects, if used inappropriately
Single cord technique • Indicated - impressions of one or three prepared teeth with healthy gingival tissues • The largest diameter braided or knitted cord that fits in the sulcus is selected • Soaked in the medicament of choice • Excess is blotted from the soaked cord with sterile cotton sponge
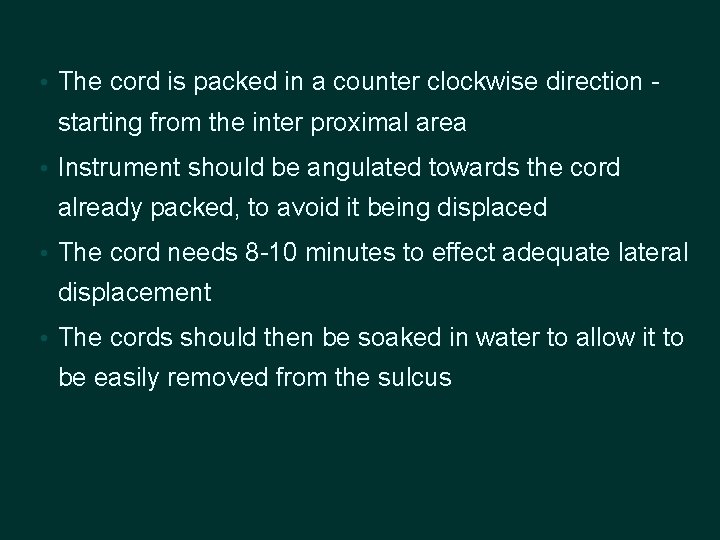
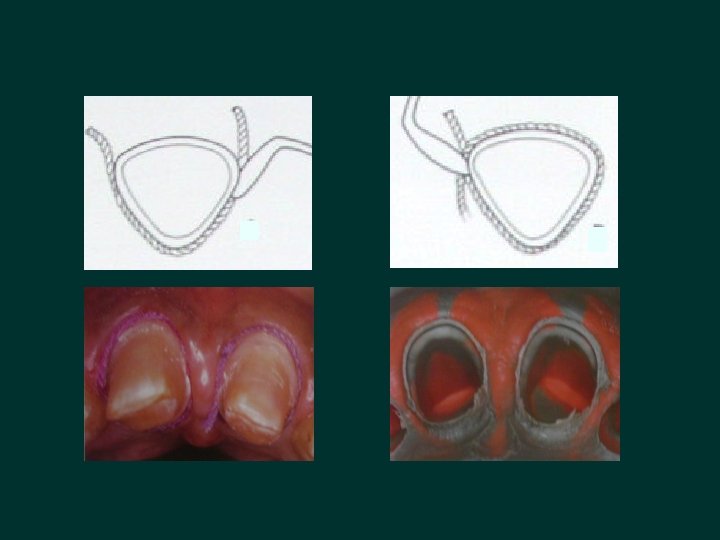
• The cord is packed in a counter clockwise direction - starting from the inter proximal area • Instrument should be angulated towards the cord already packed, to avoid it being displaced • The cord needs 8 -10 minutes to effect adequate lateral displacement • The cords should then be soaked in water to allow it to be easily removed from the sulcus
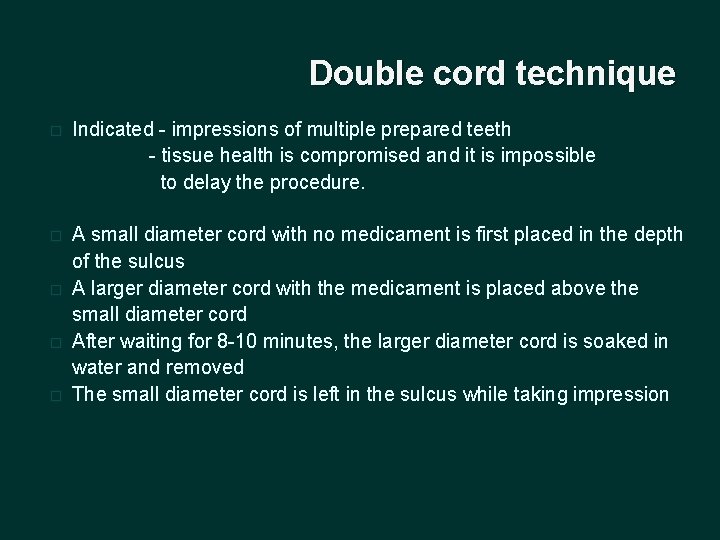
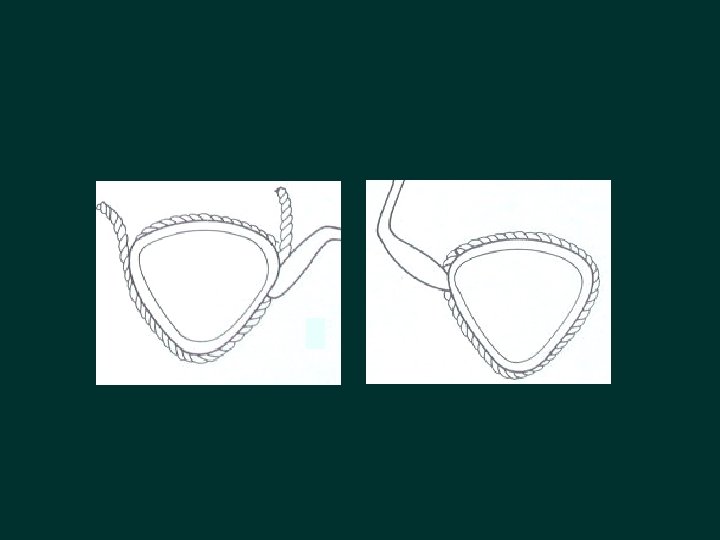
Double cord technique � Indicated - impressions of multiple prepared teeth - tissue health is compromised and it is impossible to delay the procedure. � A small diameter cord with no medicament is first placed in the depth of the sulcus A larger diameter cord with the medicament is placed above the small diameter cord After waiting for 8 -10 minutes, the larger diameter cord is soaked in water and removed The small diameter cord is left in the sulcus while taking impression � � �
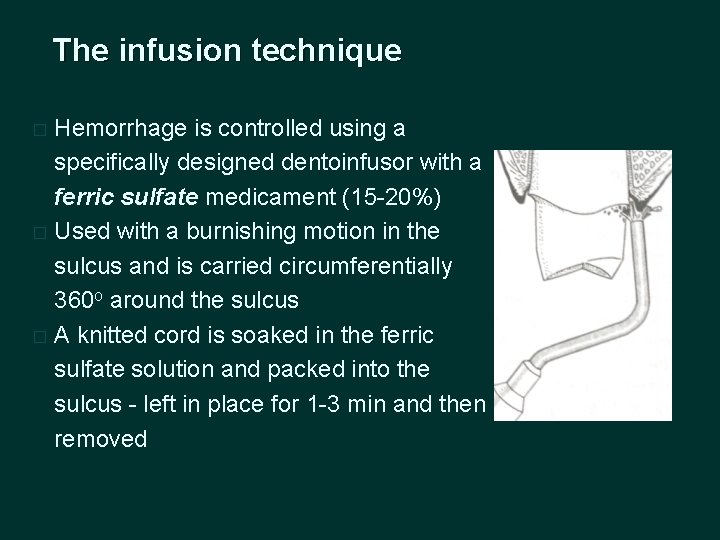
The infusion technique Hemorrhage is controlled using a specifically designed dentoinfusor with a ferric sulfate medicament (15 -20%) � Used with a burnishing motion in the sulcus and is carried circumferentially 360 o around the sulcus � A knitted cord is soaked in the ferric sulfate solution and packed into the sulcus - left in place for 1 -3 min and then removed �
Every other tooth technique Placing retraction cord simultaneously around all prepared teeth (especially anterior) may result in strangulation of gingival papillae and eventual loss of papillae - resulting in unaesthetic black triangles in the gingival embrassures
• Single or double cord technique can be used, retraction cord placed around the alternate prepared tooth - impression made • Then gingival retraction accomplished on remaining teeth and second impression made • Finally a pick up impression allows fabrication of a master cast with die for all the prepared teeth
NEWER MATERIALS • Merocel : Synthetic material that is chemically extracted from a bio-compatible polymer (hydroxylate polyvinyl acetate) that creates a net like strip - capable of atraumatic gingival retraction • Used in strips of 2 mm thickness that expand with absorption of selected oral fluids
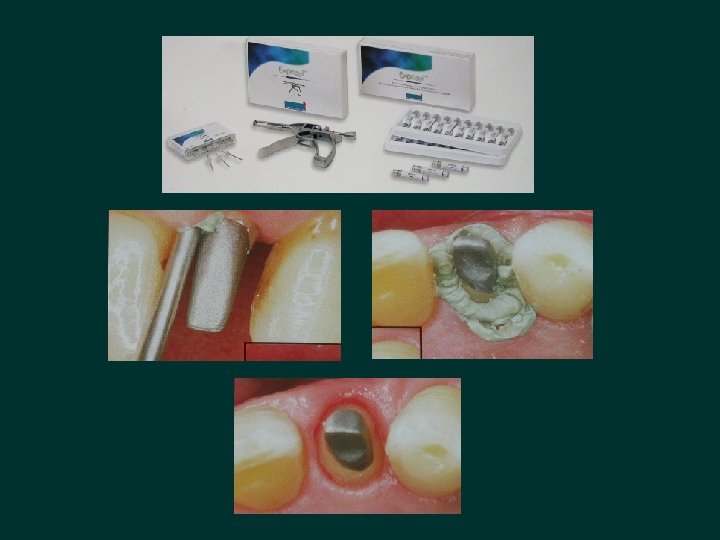
Expa- syl • Paste supplied in a syringe, that is designed to be injected into the unretracted sulcus which then becomes rigid and creates space between the tooth and the tissue • Takes about 2 min 30 seconds to achieve sulcular exposure. • It contains haemostatic astringent - kaolin, aluminium chloride • Safe, exerts moderate and calculated pressure on gingival margin, 0. 1 N/mm 2, attachment safe guarded
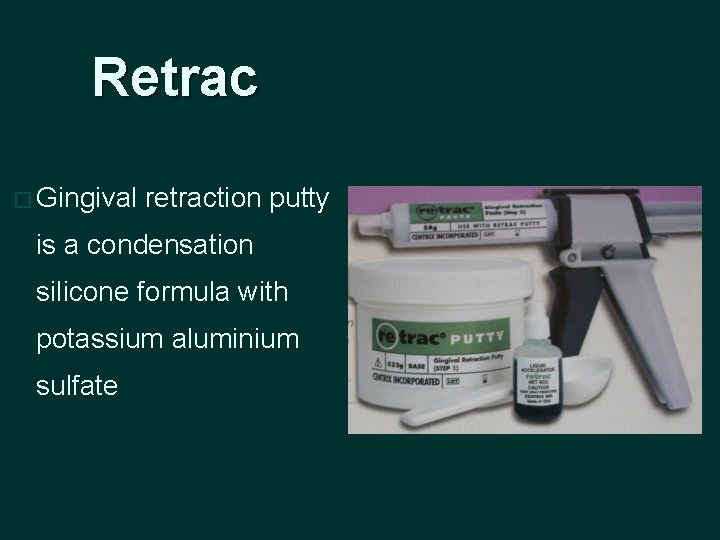
Retrac � Gingival retraction putty is a condensation silicone formula with potassium aluminium sulfate
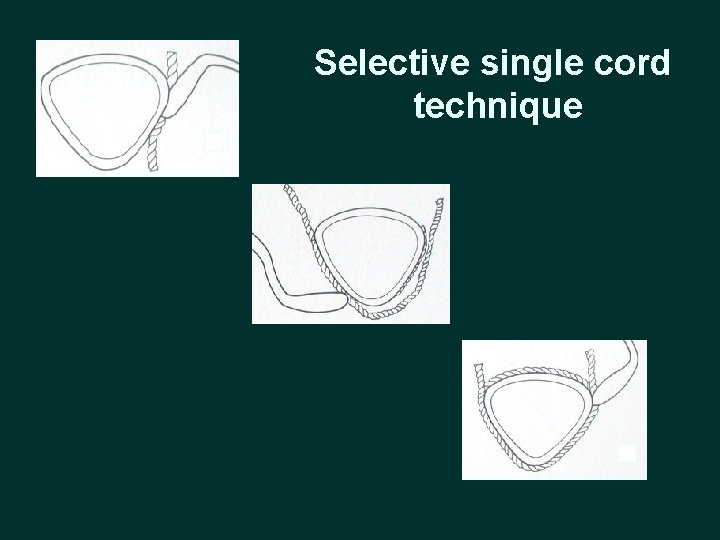
Selective single cord technique
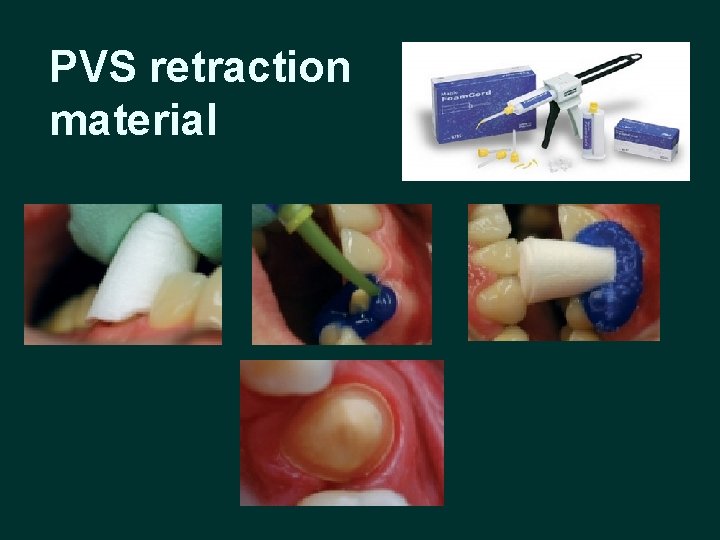
PVS retraction material
Surgical methods • Rotary curettage • Electro surgery
Rotary curettage � Is a “troughing” technique - limited removal of epithelial tissue in the sulcus while a chamfer finish line is being created in tooth structure - Amsterdam 1954 � Also called “gingettage” used with the sub gingival placement of restoration margins � Should always be done on healthy, inflammation free tissue to avoid the tissue shrinkage that occurs when diseased tissue heals
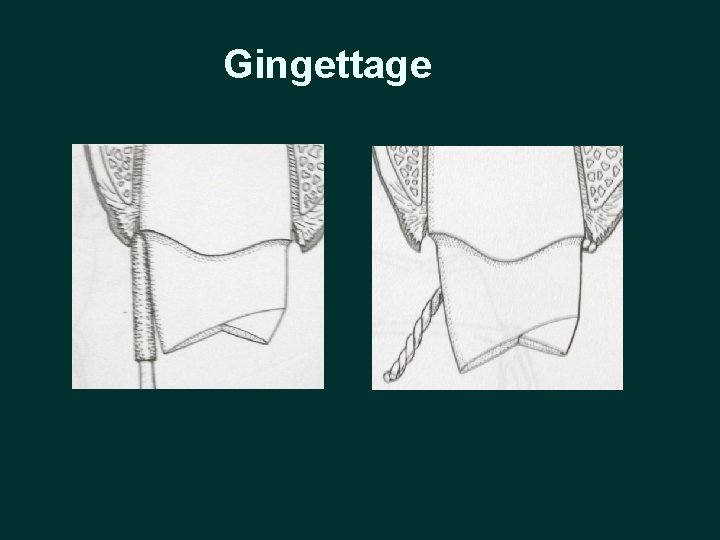
Gingettage
Electro surgery (D’Arsonval 1891) • Indications �For the removal of irritated tissue that has proliferated over preparation finish lines �For enlargement of the gingival sulcus �Control of hemorrhage to facilitates impression making • Current flows from a small cutting electrode that produces a high current density and a rapid temperature rise at its point of contact with the tissue • The cells directly adjacent to the electrode are destroyed by this temperature increase
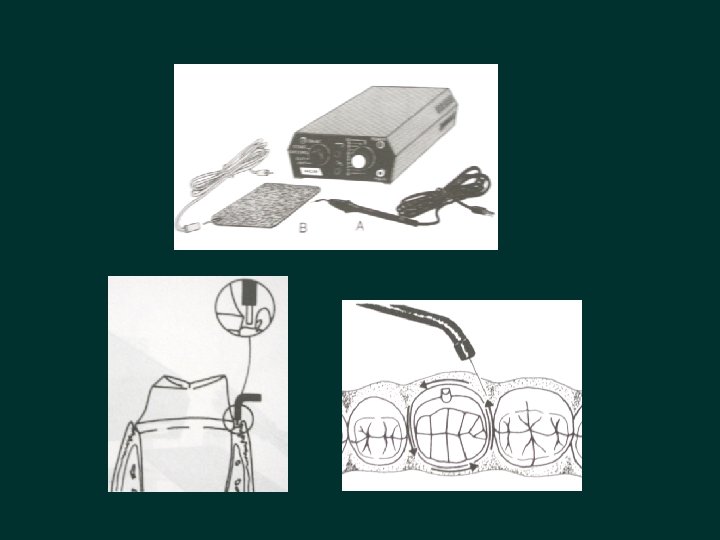
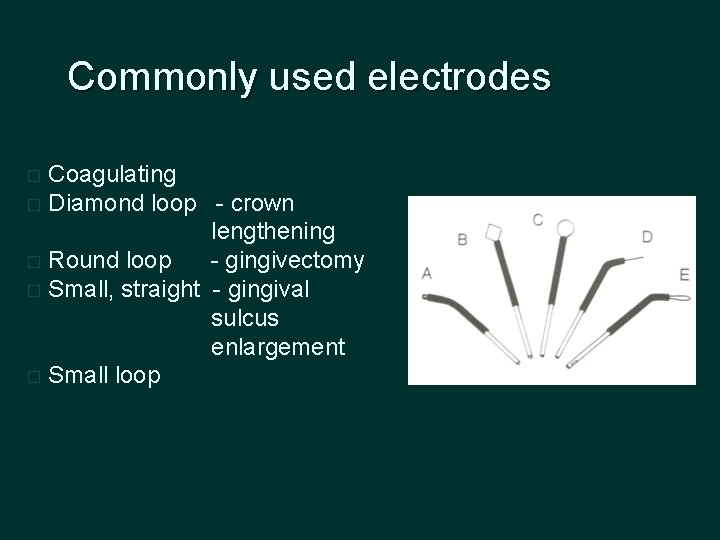
Commonly used electrodes Coagulating � Diamond loop - crown lengthening � Round loop - gingivectomy � Small, straight - gingival sulcus enlargement � Small loop �
l. Contraindications �Cardiac pacemakers �Not to be used in presence of flammable agents �Not in the presence of nitrous-oxide-oxygen analgesia
Biologic width • Defined as the dimension of the soft tissue, which is attached to the portion of the tooth coronal to crest of the alveolar bone (Gargiulo et al 1961) • Biologic width=Junctional epithelium + Connective tissue 2. 04 mm 0. 97 mm 1. 07 mm
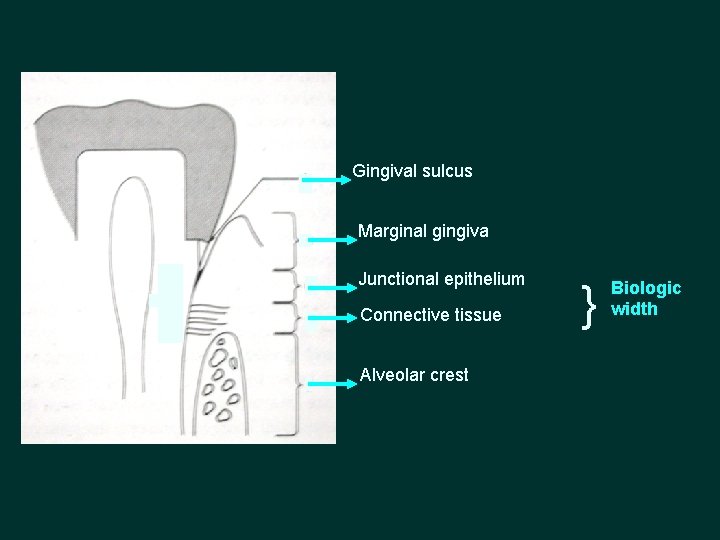
Gingival sulcus Marginal gingiva Junctional epithelium Connective tissue Alveolar crest } Biologic width
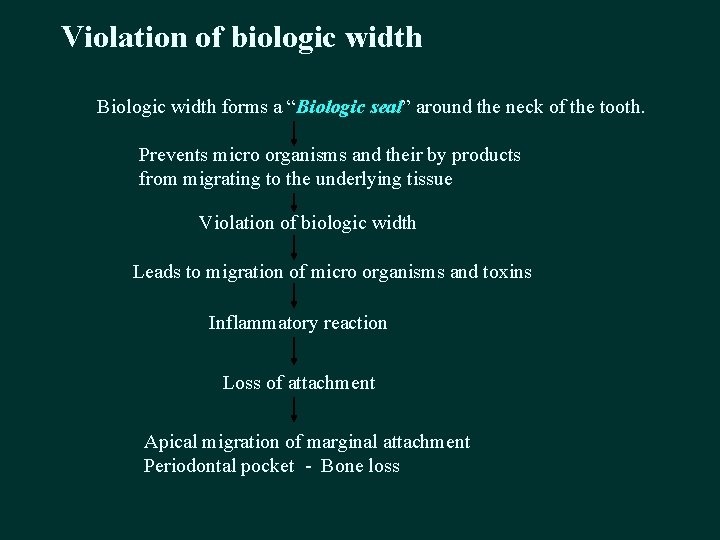
Violation of biologic width Biologic width forms a “Biologic seal” around the neck of the tooth. Prevents micro organisms and their by products from migrating to the underlying tissue Violation of biologic width Leads to migration of micro organisms and toxins Inflammatory reaction Loss of attachment Apical migration of marginal attachment Periodontal pocket - Bone loss
�Location of prepared cervical margin – • 0. 5 mm from the healthy free gingival margin or • 2 -3 mm from the crest of the alveolar bone and must follow the natural scalloped form of the attachment and alveolar housing
Factors affecting impression precision � Making precise impressions depends on two variables, the primary and secondary determinants. � Primary determinant – only one i. e tissue or gingival health. � Secondary determinants- many factors Ø Stock vs. custom trays Ø Inter- vs. intra-arch Ø Closed vs. open tray Ø One vs. two stages Ø Passive vs. non-passive Ø Warm vs. cold environment Ø Manual vs. automated mixing Ø Impression material used
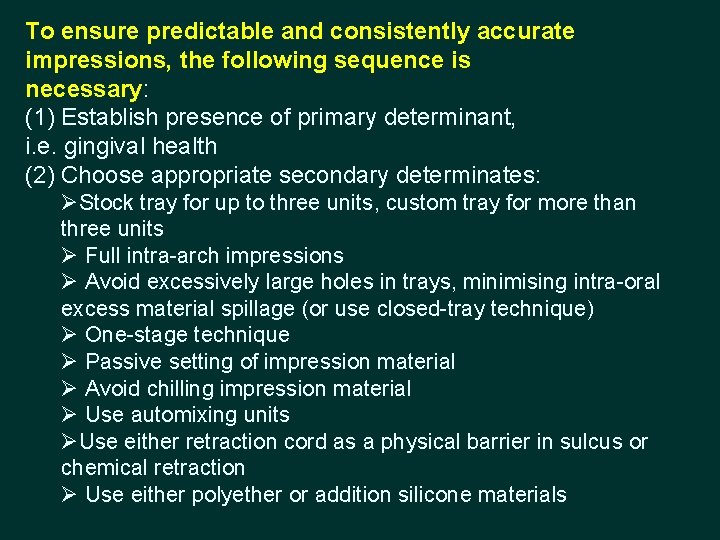
To ensure predictable and consistently accurate impressions, the following sequence is necessary: (1) Establish presence of primary determinant, i. e. gingival health (2) Choose appropriate secondary determinates: ØStock tray for up to three units, custom tray for more than three units Ø Full intra-arch impressions Ø Avoid excessively large holes in trays, minimising intra-oral excess material spillage (or use closed-tray technique) Ø One-stage technique Ø Passive setting of impression material Ø Avoid chilling impression material Ø Use automixing units ØUse either retraction cord as a physical barrier in sulcus or chemical retraction Ø Use either polyether or addition silicone materials

DISINFECTION OF IMPRESSIONS
�The dental impression is one of the ways by which pathogens can leave the operatory and spread their risk abroad � The impression must be rendered harmless before being passed on to another person who will work with it or with the gypsum cast made from it, outside the dental operatory
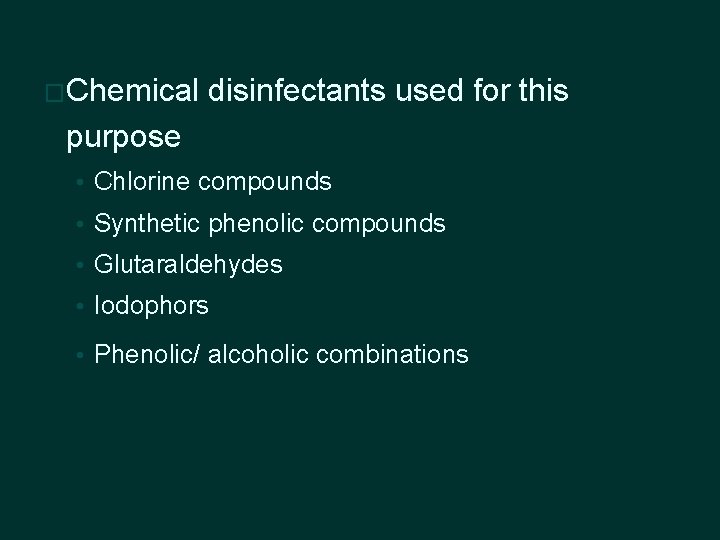
�Chemical disinfectants used for this purpose • Chlorine compounds • Synthetic phenolic compounds • Glutaraldehydes • Iodophors • Phenolic/ alcoholic combinations
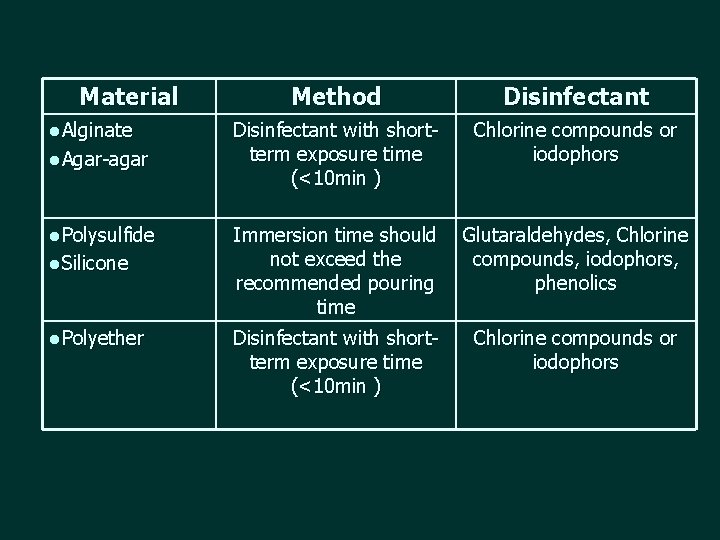
Material l. Alginate l. Agar-agar l. Polysulfide l. Silicone l. Polyether Method Disinfectant with shortterm exposure time (<10 min ) Chlorine compounds or iodophors Immersion time should not exceed the recommended pouring time Glutaraldehydes, Chlorine compounds, iodophors, phenolics Disinfectant with shortterm exposure time (<10 min ) Chlorine compounds or iodophors
• An alternative method for the hydrophilic materials: �Disinfectant can be sprayed on the impression - wrapped in a disinfectant soaked paper towel and placed in sealed plastic bag for 10 min • Long immersion time may cause the surfactant in hydrophilic PVS to leach out and render the impression less hydrophilic
� Ultraviolet treatment - effective against Candida organisms, and there was no adverse effect on either dimensional change or surface roughness of impression materials � Disadvantages - cannot kill micro organisms that are shadowed from the emission � UV light unit should be designed in such a way, that the impression rotates on the table and unit surrounded by mirror - Hiroshi Ishida 1991
Argon radiofrequency glow discharge � Simultaneously : disinfects the impression : improves surface wettability � Plasma treatment produces high energy surface on the material � Creates surface microashing that removes hydrocarbon contaminants – ultracleaned surface � Disadvantage : prolonged exposure results in surface degeneration - Haganman et al 1997
• Disinfection • Current protocol - recommended by Center for Disease Control - household bleach (1: 10 dilution) - iodophors - synthetic phenols • Sprayed on exposed surface - wrapped in disinfectant soaked paper towel - sealed plastic bag for 10 min or • Immersion - not exceeding 10 mins

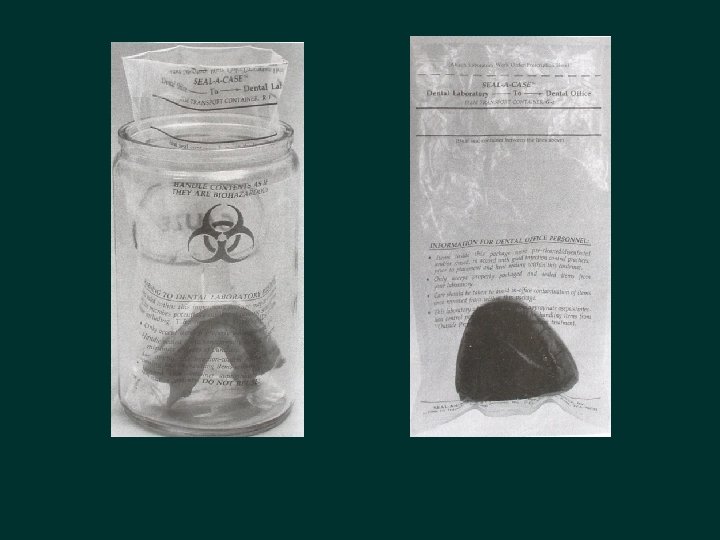
Concepts for transporting impressions to the Laboratory � Sent well cleaned (rinsed) and undisinfected in a biohazard-labeled, heat sealed plastic bag OR � Debride, clean (rinse) and adequately disinfect it, place it in a sealed transport bag labeled with the precautions taken
THANK YOU
- Slides: 102