IENG 248 Lecture 04 Interpreting and Depicting Geometry
- Slides: 14

IENG 248 Lecture 04 Interpreting and Depicting Geometry in Orthogonal Projections 2/26/2021 Engineering Graphics & 3 -D Modeling D. H. Jensen 1

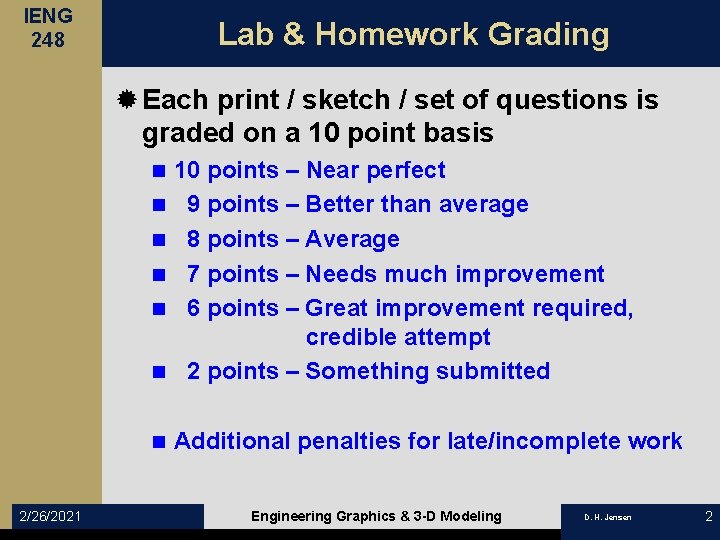
IENG 248 Lab & Homework Grading ® Each print / sketch / set of questions is graded on a 10 point basis n 10 points – Near perfect 9 points – Better than average 8 points – Average 7 points – Needs much improvement 6 points – Great improvement required, credible attempt 2 points – Something submitted n Additional penalties for late/incomplete work n n n 2/26/2021 Engineering Graphics & 3 -D Modeling D. H. Jensen 2

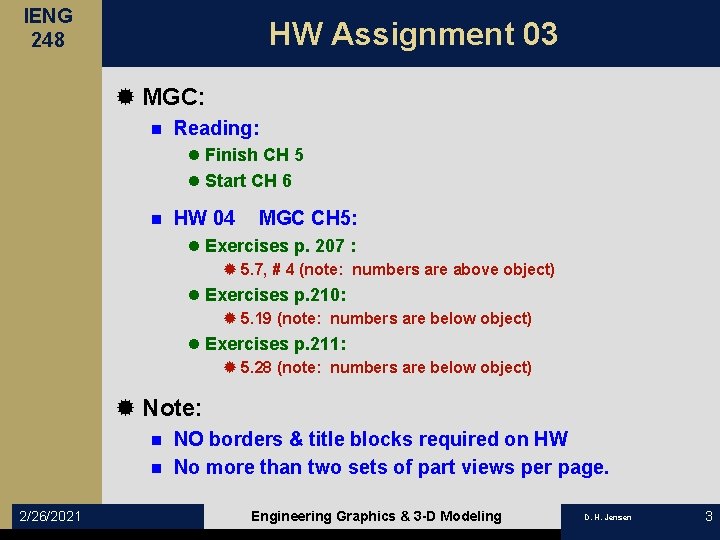
IENG 248 HW Assignment 03 ® MGC: n Reading: l Finish CH 5 l Start CH 6 n HW 04 MGC CH 5: l Exercises p. 207 : ® 5. 7, # 4 (note: numbers are above object) l Exercises p. 210: ® 5. 19 (note: numbers are below object) l Exercises p. 211: ® 5. 28 (note: numbers are below object) ® Note: NO borders & title blocks required on HW n No more than two sets of part views per page. n 2/26/2021 Engineering Graphics & 3 -D Modeling D. H. Jensen 3

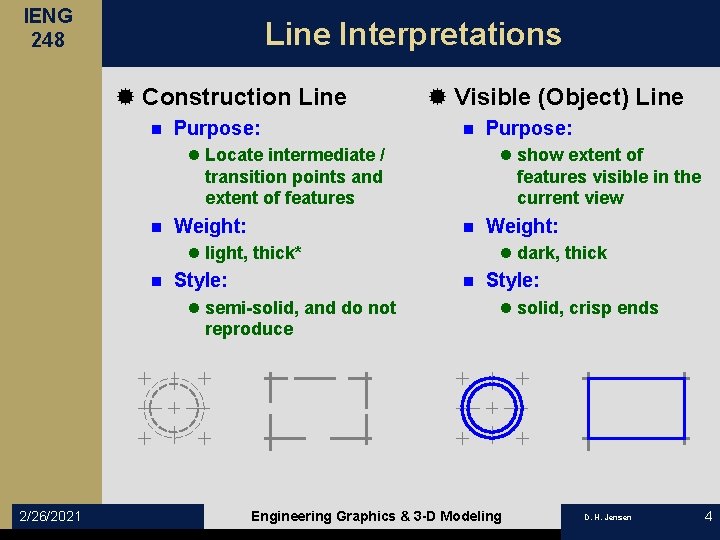
IENG 248 Line Interpretations ® Construction Line n Purpose: ® Visible (Object) Line n l Locate intermediate / transition points and extent of features n Weight: l show extent of features visible in the current view n l light, thick* n Style: 2/26/2021 Weight: l dark, thick n l semi-solid, and do not reproduce Purpose: Style: l solid, crisp ends Engineering Graphics & 3 -D Modeling D. H. Jensen 4

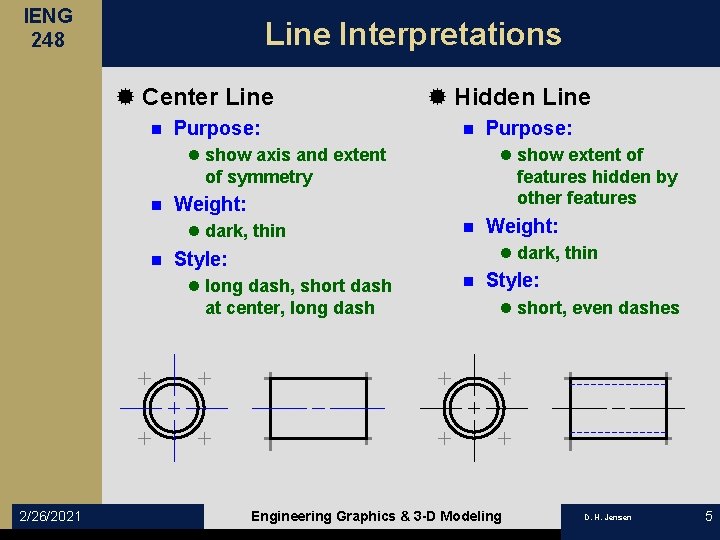
IENG 248 Line Interpretations ® Center Line n Purpose: ® Hidden Line n l show axis and extent of symmetry n n n Weight: l dark, thin Style: l long dash, short dash at center, long dash 2/26/2021 l show extent of features hidden by other features Weight: l dark, thin Purpose: n Style: l short, even dashes Engineering Graphics & 3 -D Modeling D. H. Jensen 5

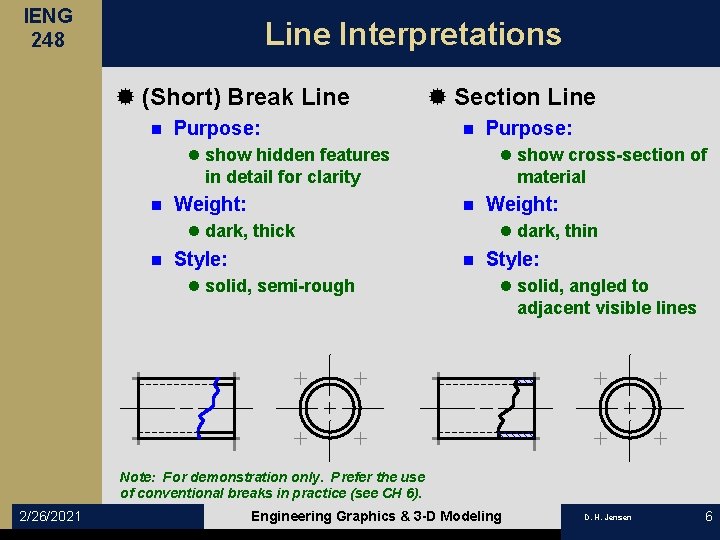
IENG 248 Line Interpretations ® (Short) Break Line n Purpose: ® Section Line n l show hidden features in detail for clarity n Weight: l show cross-section of material n l dark, thick n Style: Weight: l dark, thin n l solid, semi-rough Purpose: Style: l solid, angled to adjacent visible lines Note: For demonstration only. Prefer the use of conventional breaks in practice (see CH 6). 2/26/2021 Engineering Graphics & 3 -D Modeling D. H. Jensen 6

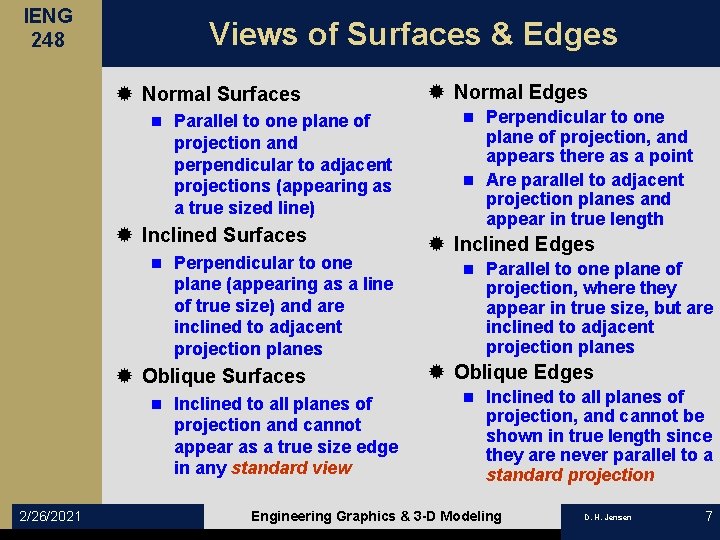
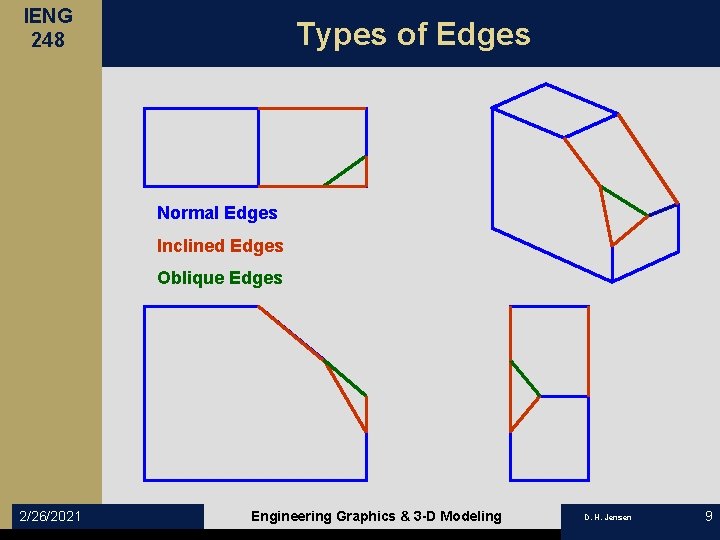
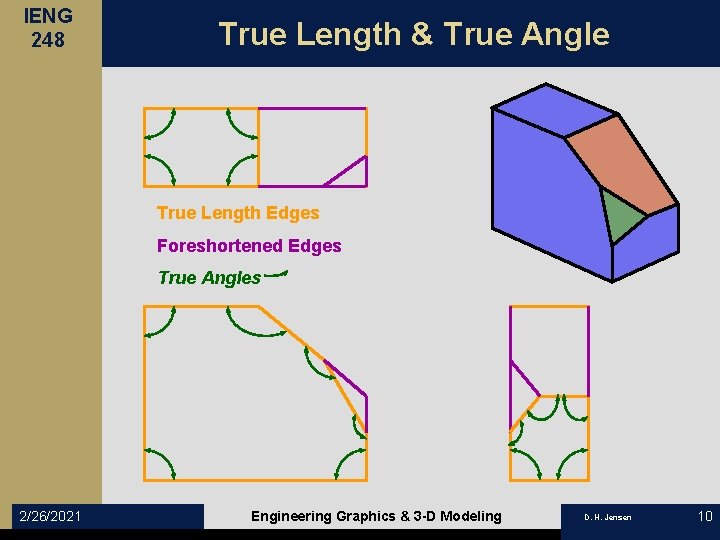
IENG 248 Views of Surfaces & Edges ® Normal Surfaces n Parallel to one plane of projection and perpendicular to adjacent projections (appearing as a true sized line) ® Inclined Surfaces n Perpendicular to one plane (appearing as a line of true size) and are inclined to adjacent projection planes ® Oblique Surfaces n 2/26/2021 Inclined to all planes of projection and cannot appear as a true size edge in any standard view ® Normal Edges Perpendicular to one plane of projection, and appears there as a point n Are parallel to adjacent projection planes and appear in true length n ® Inclined Edges n Parallel to one plane of projection, where they appear in true size, but are inclined to adjacent projection planes ® Oblique Edges n Inclined to all planes of projection, and cannot be shown in true length since they are never parallel to a standard projection Engineering Graphics & 3 -D Modeling D. H. Jensen 7

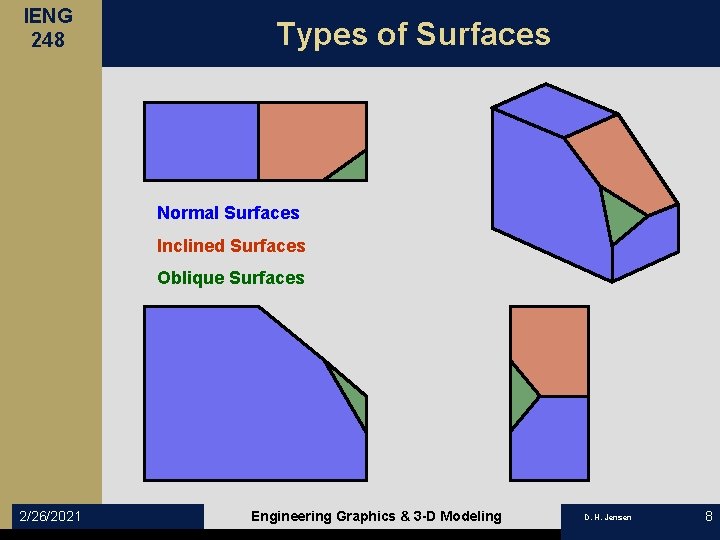
IENG 248 Types of Surfaces Normal Surfaces Inclined Surfaces Oblique Surfaces 2/26/2021 Engineering Graphics & 3 -D Modeling D. H. Jensen 8

IENG 248 Types of Edges Normal Edges Inclined Edges Oblique Edges 2/26/2021 Engineering Graphics & 3 -D Modeling D. H. Jensen 9

IENG 248 True Length & True Angle True Length Edges Foreshortened Edges True Angles 2/26/2021 Engineering Graphics & 3 -D Modeling D. H. Jensen 10

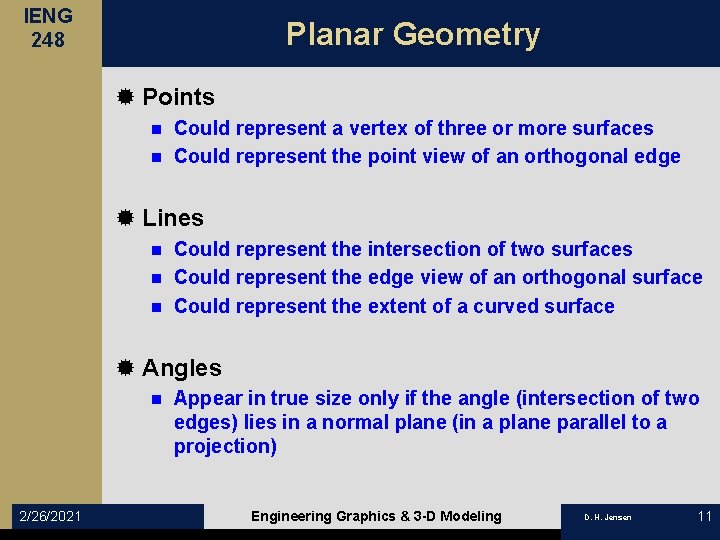
IENG 248 Planar Geometry ® Points Could represent a vertex of three or more surfaces n Could represent the point view of an orthogonal edge n ® Lines Could represent the intersection of two surfaces n Could represent the edge view of an orthogonal surface n Could represent the extent of a curved surface n ® Angles n 2/26/2021 Appear in true size only if the angle (intersection of two edges) lies in a normal plane (in a plane parallel to a projection) Engineering Graphics & 3 -D Modeling D. H. Jensen 11

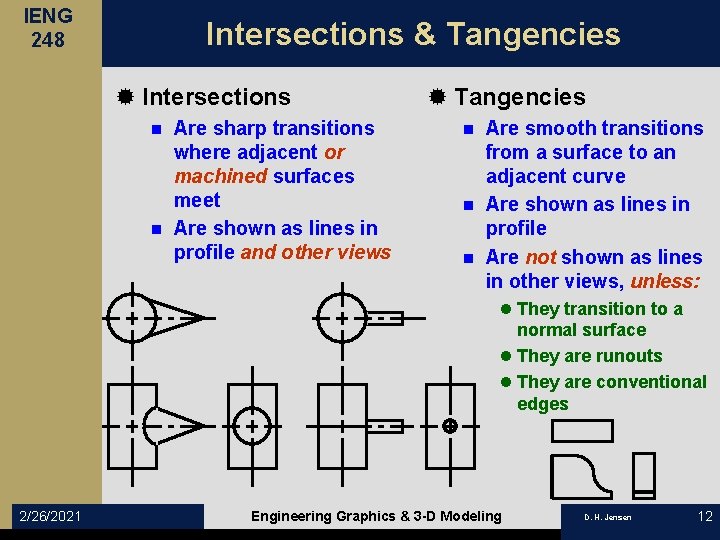
IENG 248 Intersections & Tangencies ® Intersections Are sharp transitions where adjacent or machined surfaces meet n Are shown as lines in profile and other views n ® Tangencies Are smooth transitions from a surface to an adjacent curve n Are shown as lines in profile n Are not shown as lines in other views, unless: n l They transition to a normal surface l They are runouts l They are conventional edges 2/26/2021 Engineering Graphics & 3 -D Modeling D. H. Jensen 12

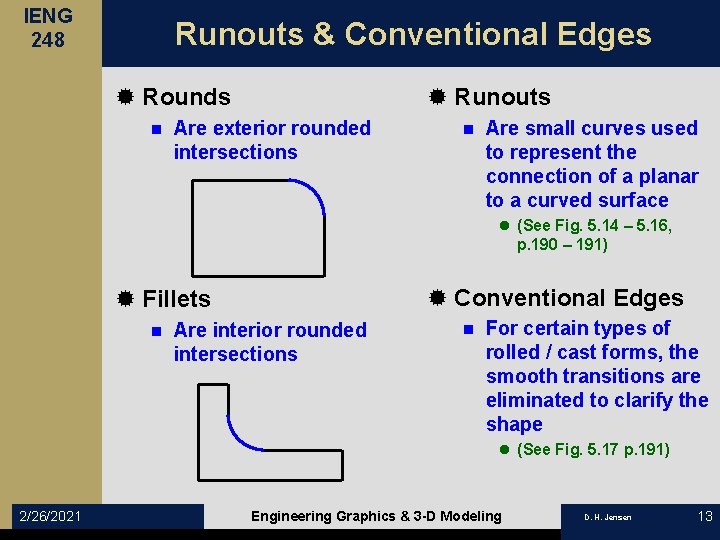
IENG 248 Runouts & Conventional Edges ® Rounds n ® Runouts Are exterior rounded intersections n Are small curves used to represent the connection of a planar to a curved surface l (See Fig. 5. 14 – 5. 16, p. 190 – 191) ® Conventional Edges ® Fillets n Are interior rounded intersections n For certain types of rolled / cast forms, the smooth transitions are eliminated to clarify the shape l (See Fig. 5. 17 p. 191) 2/26/2021 Engineering Graphics & 3 -D Modeling D. H. Jensen 13

IENG 248 Scales ® Revolution Conventions n Odd, rotational symmetry is depicted, not projected ® Measuring Scales n l (See Figs. 5. 34, and 5. 35, pp. 198) l Metric Scales l Inch-Foot Scales l Engineer’s Scales l Architect’s Scales l Mechanical Engineer’s Scales l Patternmaker’s Scales ® Drawing Scale n Specify drawing scale in the title block, i. e. : Scale 1 : 5 l Left side of colon are local drawing units l Right side of colon are real life units 2/26/2021 n Never measure a drawing to obtain a dimension n Never omit a required dimension from a drawing Types of Measuring Scales n Measuring Scales are only used for taking measurements l Never use a scale as a straight edge for drawing Engineering Graphics & 3 -D Modeling D. H. Jensen 14