I Getting Started with the Interface Microsoft Windows


- Slides: 23
I. Getting Started with the Interface Microsoft ® Windows ® Movie Maker
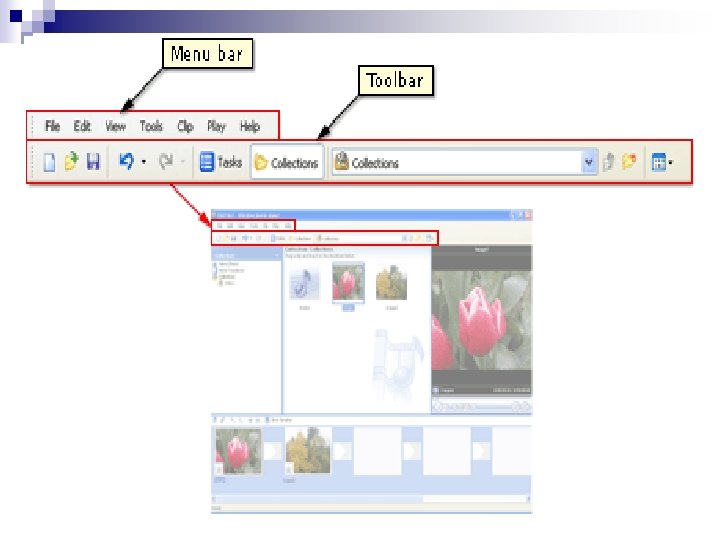
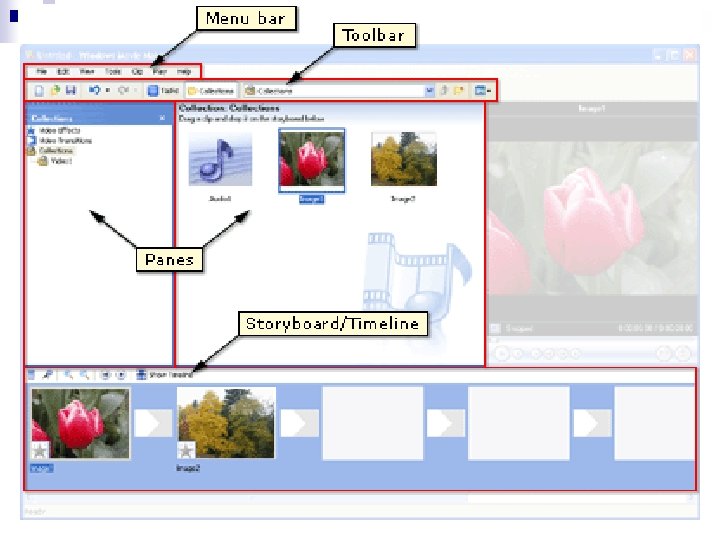
Menu & Toolbar n n n You can use the commands in the menu bar to perform tasks in Windows Movie Maker. The procedures for completing tasks are described throughout Help by using the menu commands. The toolbar provides an alternative to selecting commands on the menus. You can use the toolbar to perform common tasks quickly. To show or hide the toolbar, on the View menu, click Toolbar. A check mark appears next to the Toolbar command on the menu when the toolbar is displayed.
To import existing digital media files n n On the File menu, click Import into Collections. –or. Do one of the following, depending on what type of digital media file you want to import: In the Movie Tasks pane, under Capture Video, click Import video. ¨ In the Movie Tasks pane, under Capture Video, click Import pictures. ¨ In the Movie Tasks pane, under Capture Video, click Import audio or music. ¨ n n In File name, enter the path and file name of the file you want to import, and then click Import. If you want selected video files to be separated into smaller clips, select the Create clips for video files check box.
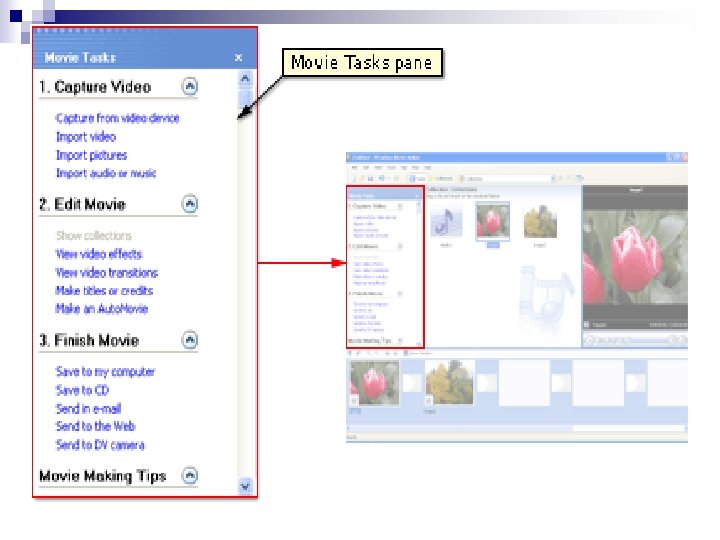
Movie Task Pane n n n The Movie Tasks pane lists the common tasks that you may need to perform when making a movie. The Movie Tasks pane lets you perform the following common tasks, according to the point you are at in the process of making a movie. Capture Video. Provides options to begin making a movie, such as capturing video and importing existing video, pictures, or audio. Edit Movie. Provides options for making a movie, such as viewing existing video, pictures, audio, video effects, or adding movie titles and credits. You can also start Auto. Movie to begin making a movie automatically. Finish Movie. Provides options for saving your final movie, such as to your computer, to a recordable CD, to send as an attachment in an e-mail message, to the Web, or to a tape in a DV camera. Movie Making Tips. Provides help for completing common tasks in Windows Movie Maker.
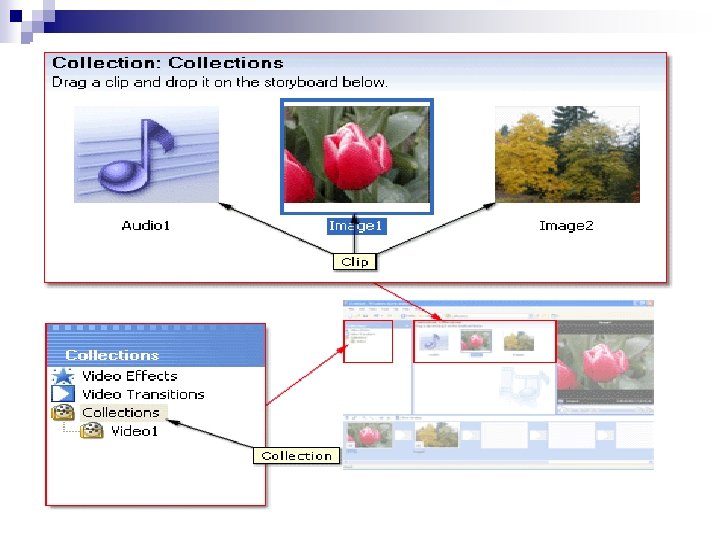
Collections Pane The Collections pane displays your collections, which contain clips. n The collections are listed by name in the Collections pane on the left, and the clips in the selected collection are displayed in the Contents pane on the right as shown in the following illustration. n
The Contents pane n n n The Contents pane displays the clips that are contained in the collection that is selected in the Collections pane. The Contents pane displays all of the video, audio, pictures, video transitions, and video effects that can be added to the storyboard/timeline to include in your movie. You can display clips in the Contents pane in two views: Details and Thumbnails.
Content Views n n n Details. Displays information about the clips displayed in the Contents pane. The specific details depend on the type of clip that is displayed. In this view, you can sort items by clicking the column you want to sort by. Thumbnails. Displays a small image of the selected clips based on the selected collection and the type of clips that are stored in it. ¨ n n For example, if the collection contains captured or imported video, the thumbnail displays an image from the selected video clip. If the collection contains imported or captured pictures, the thumbnail displays the picture. Small images representing the individual video transitions or video effects are displayed in the Contents pane when you select the Video Transitions or Video Effects folder in the Collections pane.
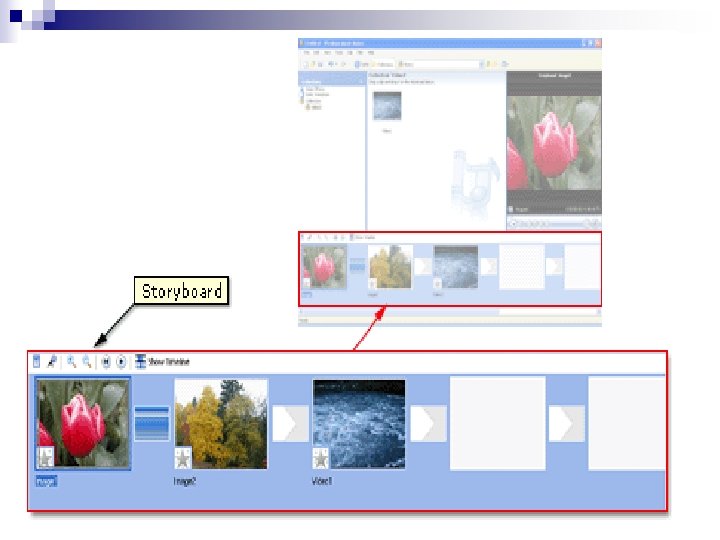
The Storyboard n n n The storyboard is the default view in Windows Movie Maker. You can use the storyboard to look at the sequence or ordering of the clips in your project and easily rearrange them, if necessary. This view also lets you see any video effects or video transitions that have been added. You can also preview all of the clips in your current project. Audio clips that you have added to a project are not displayed on the storyboard; however, they are displayed in the timeline.
Timeline Tracks n n Video The Video track lets you see what video clips, pictures, or titles you have added to the project. You can expand the Video track to show the corresponding audio accompanying the video, as well as any video transitions you have added. After a clip is added to the timeline, the name of the source file appears on that clip. If you add any video effects to the picture, video, or title, a small icon appears on the clips to indicate that a video effect has been added to that clip. Transition The Transition track lets you see any video transitions you have added to the timeline. This track only appears if you have expanded the Video track. Any video transitions you add from the Video Transitions folder appear on this track. When a transition is added to the timeline, the name of the transition is shown in the timeline. You can drag the start trim handle that appears when the transition is selected to increase or decrease its duration.
Timeline Tracks n n Audio The Audio track lets you see the audio that is included in any video clips you have added to the project. Like the Transition track, you can only see the Audio track if you have expanded the Video track. If you select the audio clip on this track and delete it, the video portion is also removed from the Video track. Audio/Music The Audio/Music track lets you see any audio clips that you have added to the project. The name of the audio clip appears on the clip. You can also add video clips to this track if you want the audio, but not the video, to play in your project and final movie. Title Overlay The Title Overlay track lets you see any titles or credits that you have added to the timeline. You can add multiple titles to this track at different points in your movie. The titles overlay the video that is displayed. You can drag the start or end trim handle that appears when the title is selected to increase or decrease its duration.
About the timeline
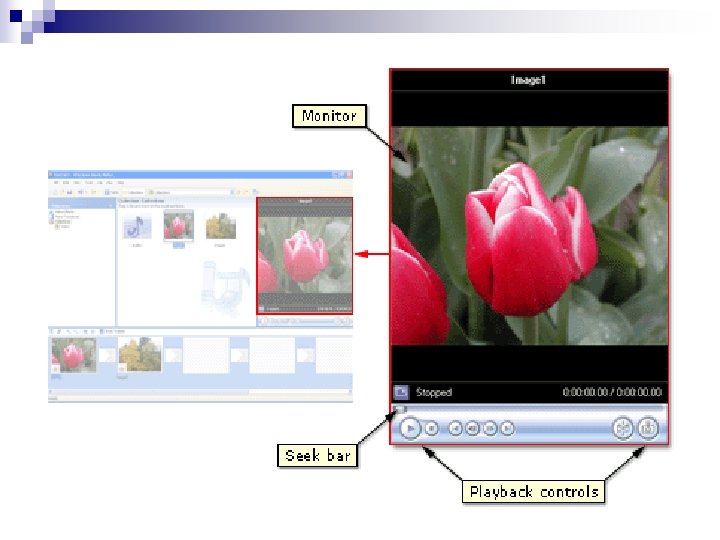
The Monitor n n n Use the monitor to view individual clips or an entire project. By using the monitor, you can preview your project before saving it as a movie. You can use the playback controls to navigate through an individual clip or an entire project. You can also use the buttons on the monitor to perform functions such as splitting a video or audio clip into two smaller clips or taking a picture of the current frame that is displayed in the monitor. The following illustration shows the monitor and its associated buttons.
About the timeline