
Hydraulic Claw Stepbystep assembly instructions c 2013 Mechanical
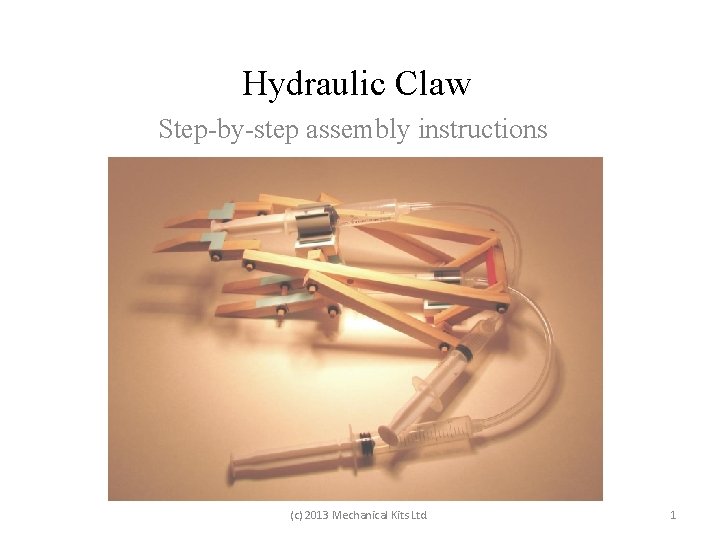
Hydraulic Claw Step-by-step assembly instructions (c) 2013 Mechanical Kits Ltd. 1
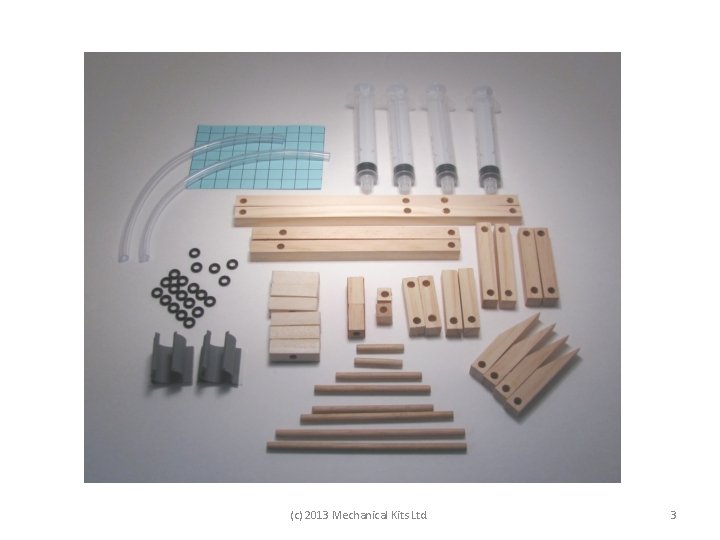
Contents of Claw Kit Wooden pieces (⅜” cross-section): 2 X 20 cm (7. 87”); 2 X 14 cm (5. 51”); 2 X 6. 5 cm (2. 56”); 2 X 6 cm (2. 36”); 2 X 4. 5 cm (1. 77”); 3 X 4 cm (1. 58”); 2 X 1 cm (0. 39”) 4 X forks 2 X 3²cm Block (1. 81²”) Syringes, 10 cc: 4 (2 have a hole in the plunger) Plastic Tubing: 2 lengths Wooden dowel, 3/16” diam. : 1 X 11. 5 cm (4. 53”); 1 X 11 cm (4. 33”); 1 X 9 cm (3. 54”); 2 X 7 cm (2. 76”); 1 X 5 cm (1. 97”); 2 X 3 cm (1. 18”) Syringe Holders: 2 Mini-washers: 30 1 piece thin card Plus a small piece of sandpaper (c) 2013 Mechanical Kits Ltd. 2
(c) 2013 Mechanical Kits Ltd. 3
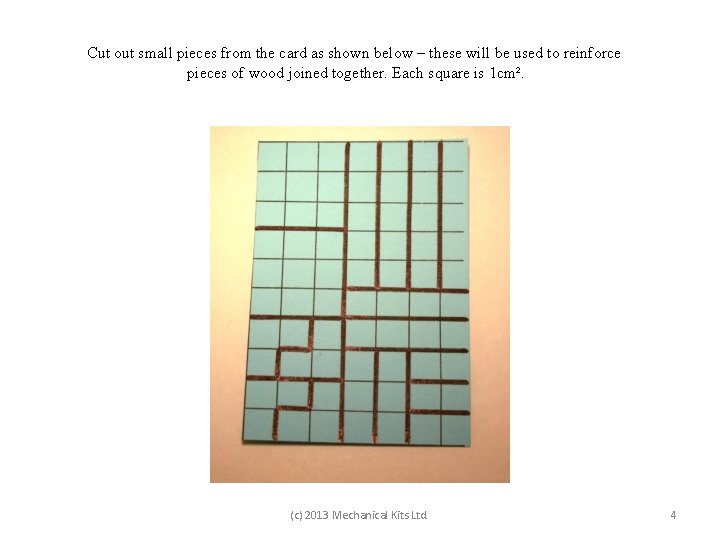
Cut out small pieces from the card as shown below – these will be used to reinforce pieces of wood joined together. Each square is 1 cm². (c) 2013 Mechanical Kits Ltd. 4
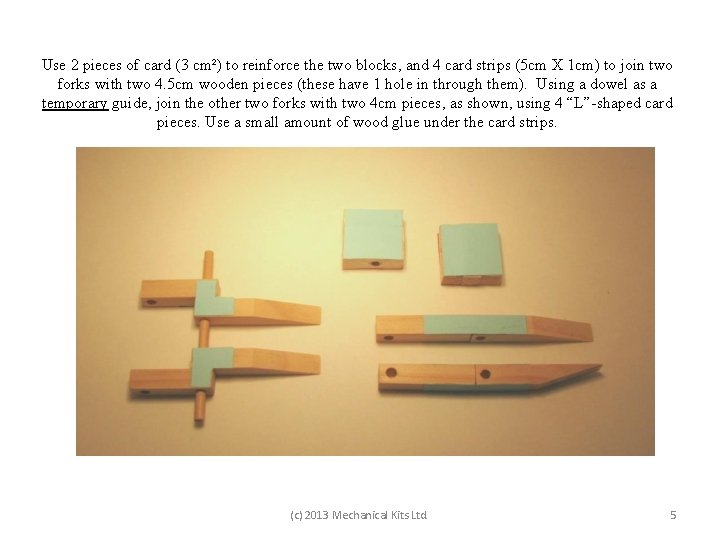
Use 2 pieces of card (3 cm²) to reinforce the two blocks, and 4 card strips (5 cm X 1 cm) to join two forks with two 4. 5 cm wooden pieces (these have 1 hole in through them). Using a dowel as a temporary guide, join the other two forks with two 4 cm pieces, as shown, using 4 “L”-shaped card pieces. Use a small amount of wood glue under the card strips. (c) 2013 Mechanical Kits Ltd. 5
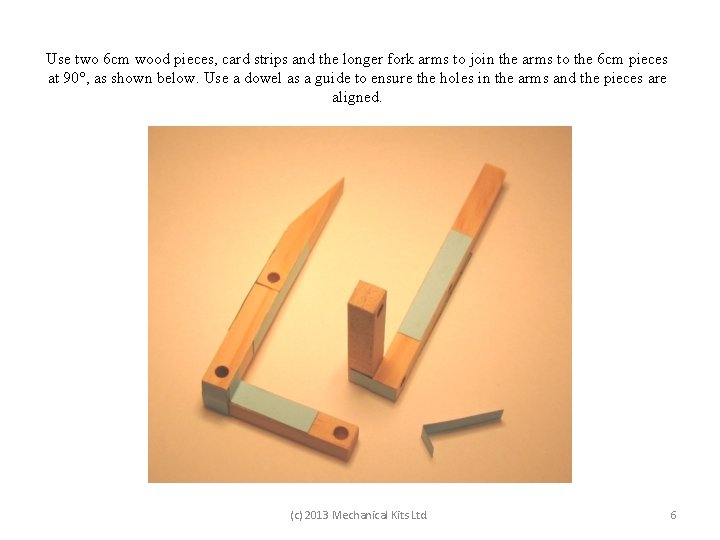
Use two 6 cm wood pieces, card strips and the longer fork arms to join the arms to the 6 cm pieces at 90°, as shown below. Use a dowel as a guide to ensure the holes in the arms and the pieces are aligned. (c) 2013 Mechanical Kits Ltd. 6
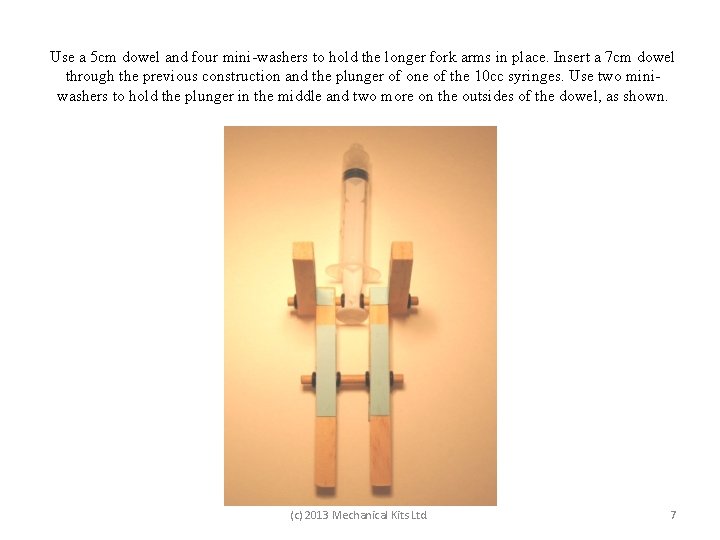
Use a 5 cm dowel and four mini-washers to hold the longer fork arms in place. Insert a 7 cm dowel through the previous construction and the plunger of one of the 10 cc syringes. Use two miniwashers to hold the plunger in the middle and two more on the outsides of the dowel, as shown. (c) 2013 Mechanical Kits Ltd. 7
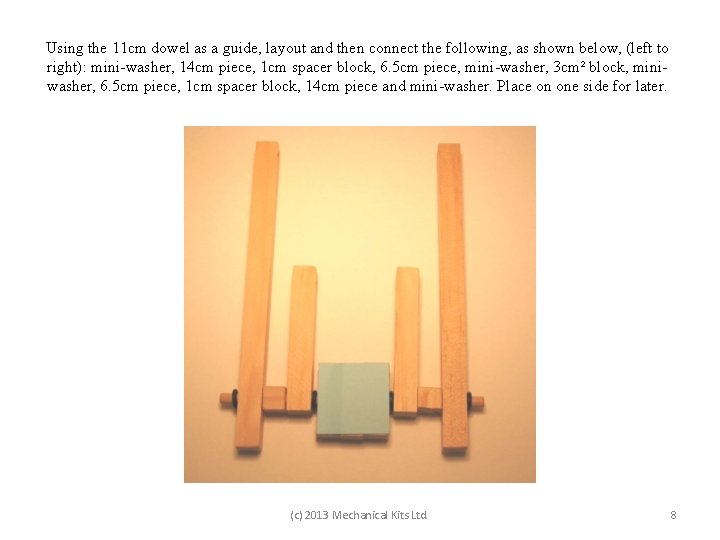
Using the 11 cm dowel as a guide, layout and then connect the following, as shown below, (left to right): mini-washer, 14 cm piece, 1 cm spacer block, 6. 5 cm piece, mini-washer, 3 cm² block, miniwasher, 6. 5 cm piece, 1 cm spacer block, 14 cm piece and mini-washer. Place on one side for later. (c) 2013 Mechanical Kits Ltd. 8
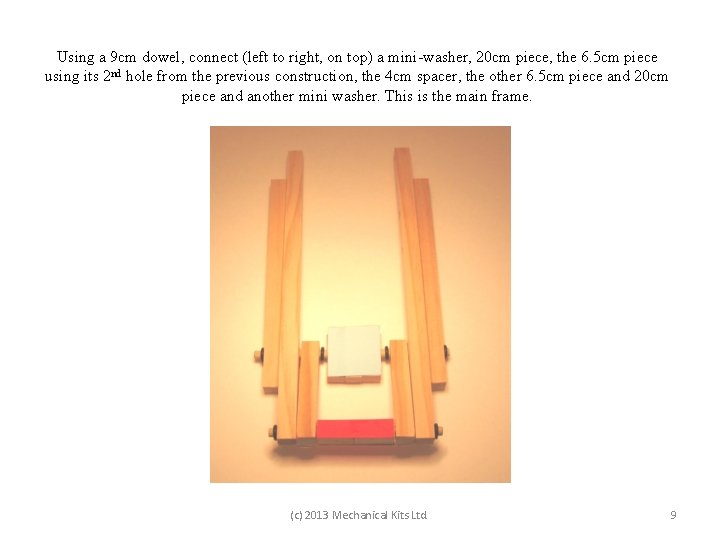
Using a 9 cm dowel, connect (left to right, on top) a mini-washer, 20 cm piece, the 6. 5 cm piece using its 2 nd hole from the previous construction, the 4 cm spacer, the other 6. 5 cm piece and 20 cm piece and another mini washer. This is the main frame. (c) 2013 Mechanical Kits Ltd. 9
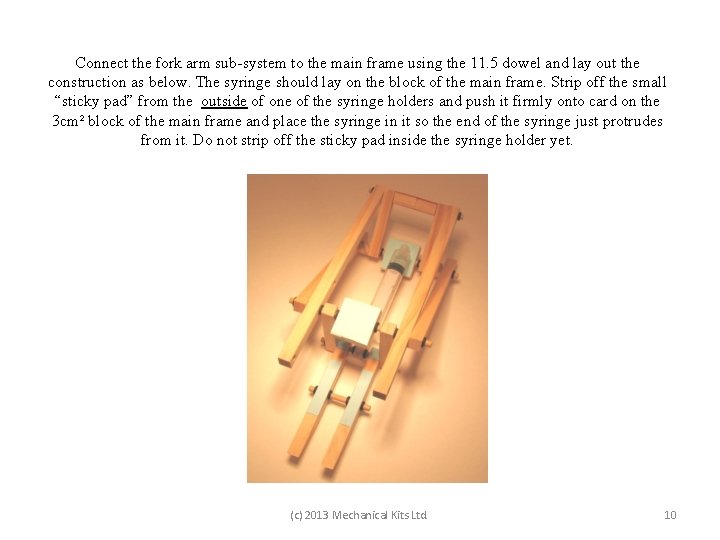
Connect the fork arm sub-system to the main frame using the 11. 5 dowel and lay out the construction as below. The syringe should lay on the block of the main frame. Strip off the small “sticky pad” from the outside of one of the syringe holders and push it firmly onto card on the 3 cm² block of the main frame and place the syringe in it so the end of the syringe just protrudes from it. Do not strip off the sticky pad inside the syringe holder yet. (c) 2013 Mechanical Kits Ltd. 10
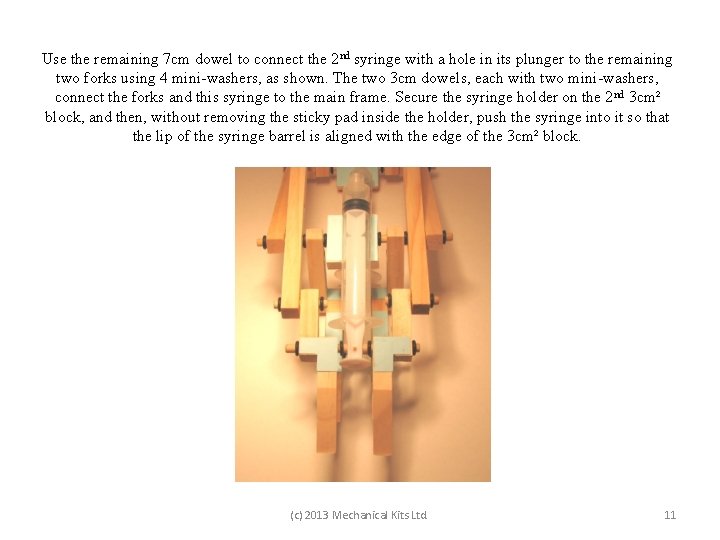
Use the remaining 7 cm dowel to connect the 2 nd syringe with a hole in its plunger to the remaining two forks using 4 mini-washers, as shown. The two 3 cm dowels, each with two mini-washers, connect the forks and this syringe to the main frame. Secure the syringe holder on the 2 nd 3 cm² block, and then, without removing the sticky pad inside the holder, push the syringe into it so that the lip of the syringe barrel is aligned with the edge of the 3 cm² block. (c) 2013 Mechanical Kits Ltd. 11
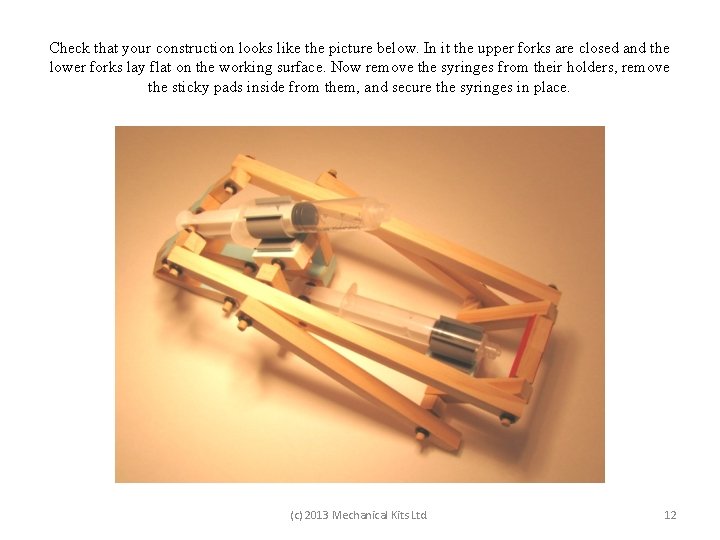
Check that your construction looks like the picture below. In it the upper forks are closed and the lower forks lay flat on the working surface. Now remove the syringes from their holders, remove the sticky pads inside from them, and secure the syringes in place. (c) 2013 Mechanical Kits Ltd. 12
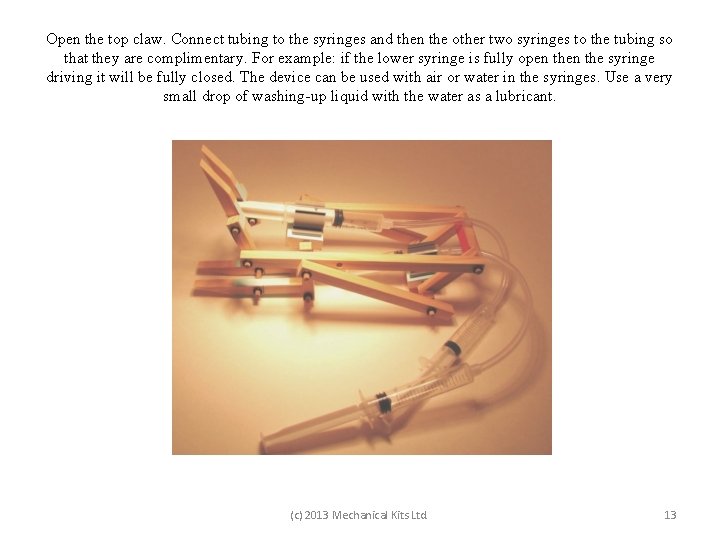
Open the top claw. Connect tubing to the syringes and then the other two syringes to the tubing so that they are complimentary. For example: if the lower syringe is fully open the syringe driving it will be fully closed. The device can be used with air or water in the syringes. Use a very small drop of washing-up liquid with the water as a lubricant. (c) 2013 Mechanical Kits Ltd. 13
- Slides: 13