http tinyurl comseikac Image J DocumentationTutorial Wiki Image
 Image. J Documentationサイト(Tutorial, 応用 例, Wikiなど) Image. J User Guide")

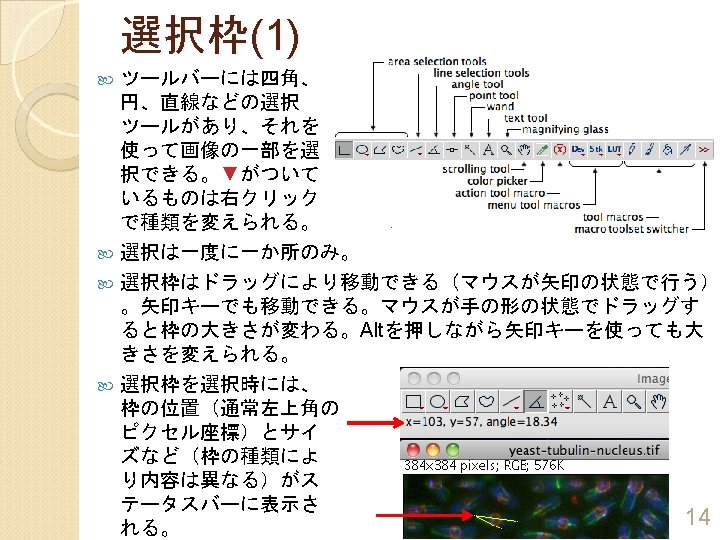
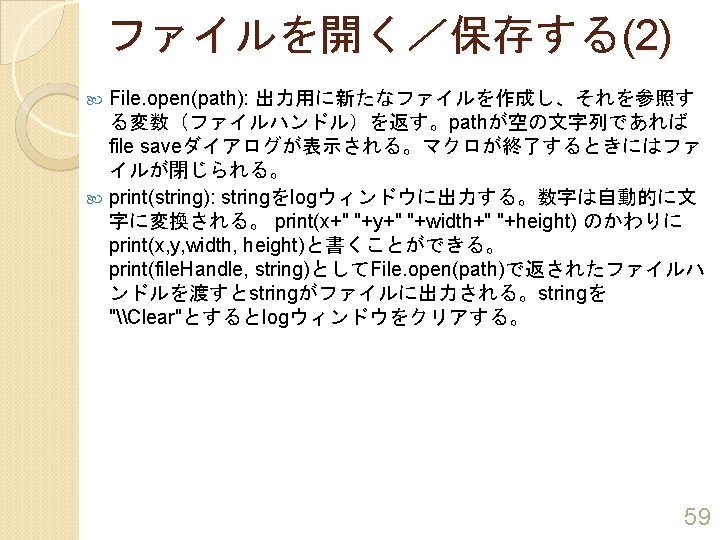
 As>Selectionで保存できる。 選択枠を別の画像に移すには移動先の画像をアクティ ブにし、Edit>Selection>Restore Selection 選択枠を消すときにはEdit>Selection>Select None (Ctrl-Shift-A) 複数の選択枠で作業するときにはAnalyze>Tools>ROI Manager 選択枠はFile>Save 16")
")


 { VBAでは statement(s) If condition Then } statement(s) if (condition)")
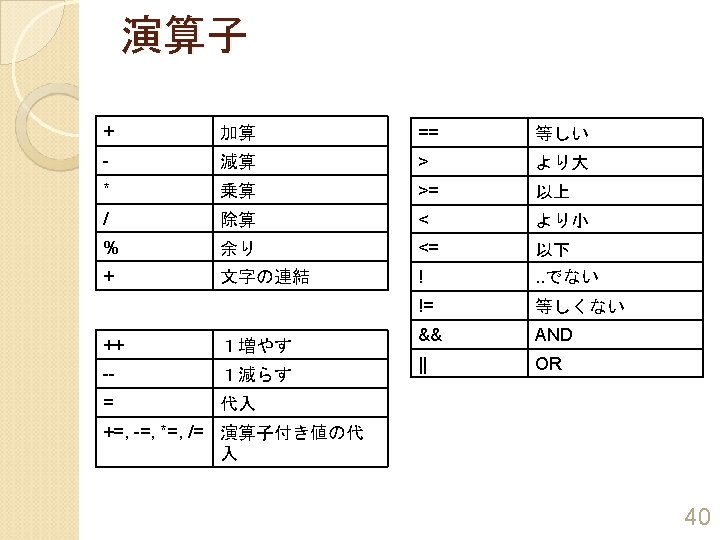
: 文字列(または配列)の長さ starts. With(string, prefix): stringがprefixで始まれば True(1)を返す。 ends. With(string, suffix): stringがsuffixで終われば True(1)を返す。")
 title = \"Untitled\"; width=512; height=512; Dialog. create(\"New Image\"); Dialog. add. String(\"Title:")

; draw. Rect(x, y, w, h); Foreground color (x,")

- Slides: 71
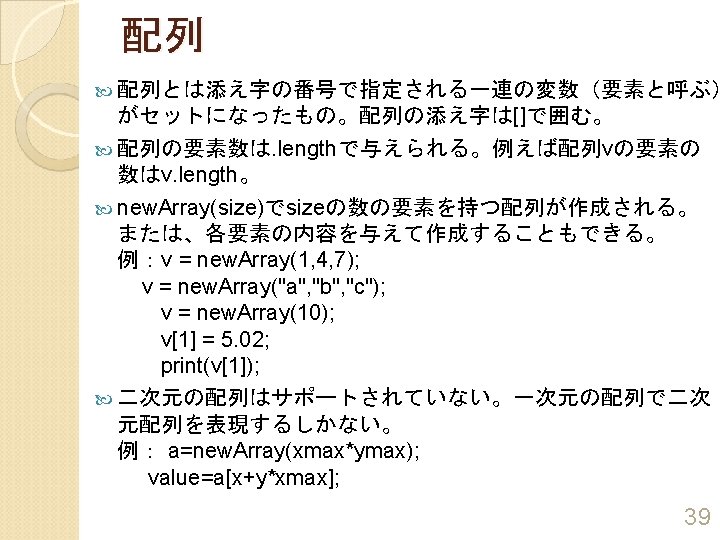
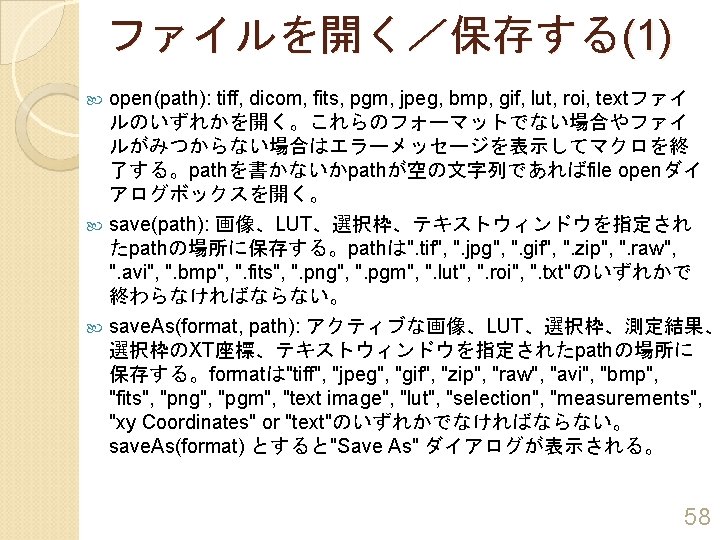
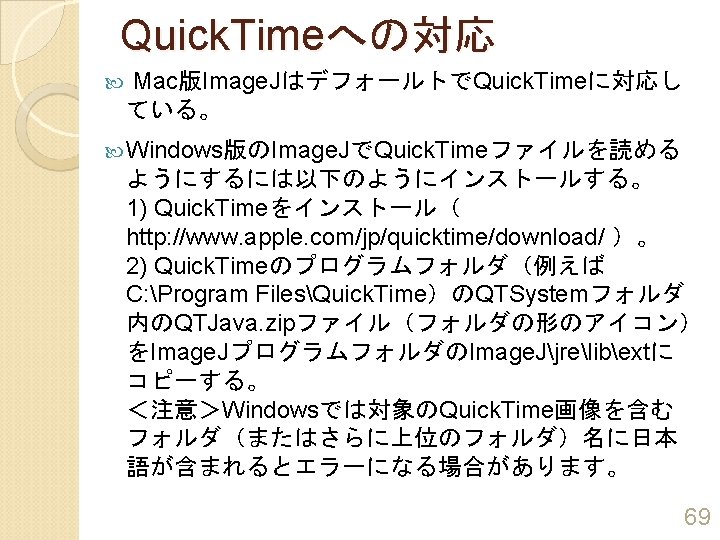
ユーザーマニュアル等 (http: //tinyurl. com/seika-cにリンクがあります) Image. J Documentationサイト(Tutorial, 応用 例, Wikiなど) Image. J User Guide Image. J Macro Language マニュアルの日本語訳 概要の日本語訳 3
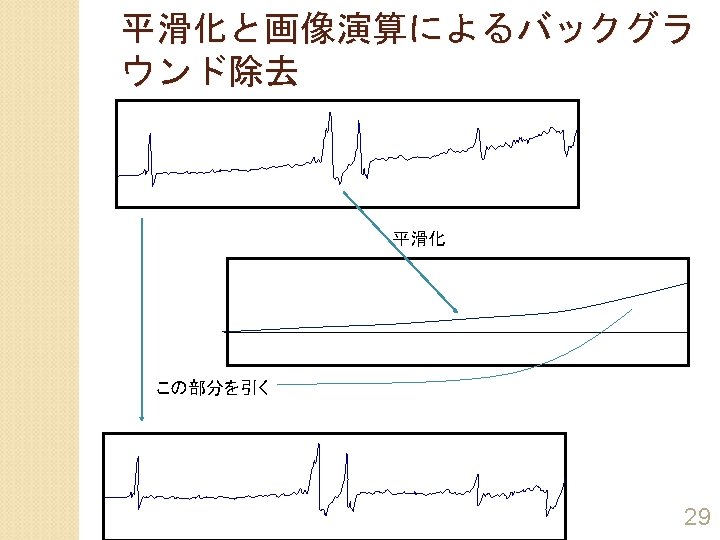
選択枠(3) As>Selectionで保存できる。 選択枠を別の画像に移すには移動先の画像をアクティ ブにし、Edit>Selection>Restore Selection 選択枠を消すときにはEdit>Selection>Select None (Ctrl-Shift-A) 複数の選択枠で作業するときにはAnalyze>Tools>ROI Manager 選択枠はFile>Save 16
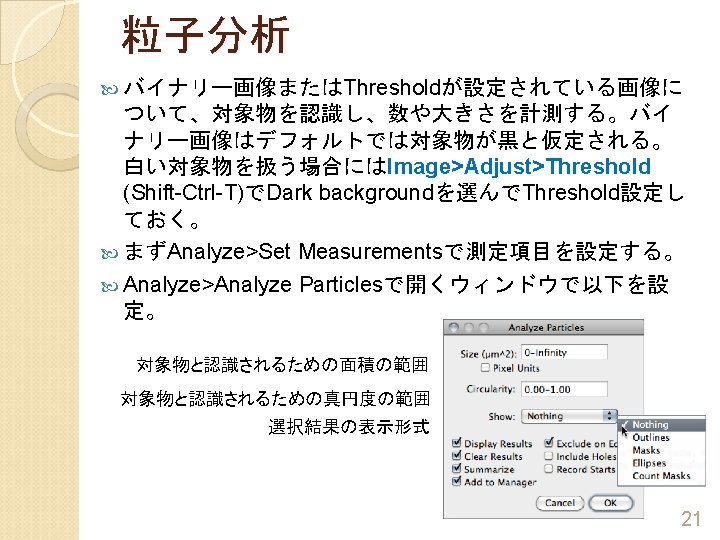
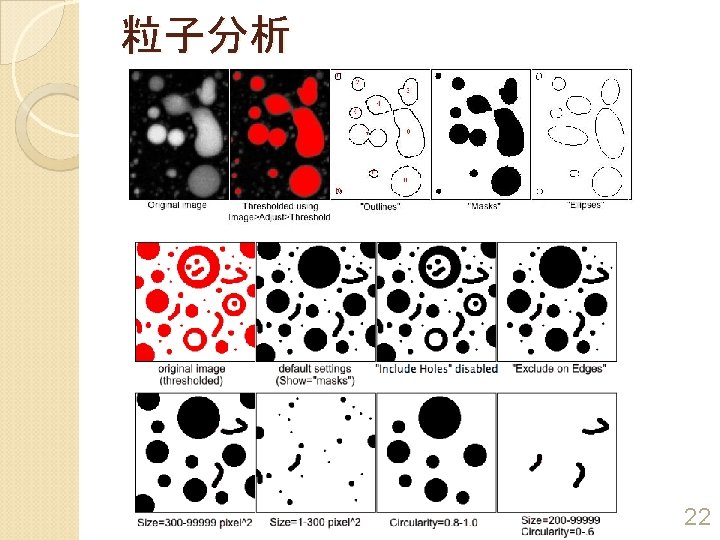
二値化画像のプロセシング Process>Binaryの下のコマンドで二値化画像のプロセシングができ る。 Process>Binary>OptionsのBlack backgroundをチェックすると対象 物は白、そうでないと対象物は黒とみなされる。 Process>Binary>Dilate: 対象物を 1ピクセル太らせる。 Process>Binary>Erode: 対象物を 1ピクセル痩せさせる。 Process>Binary>Open: Erode→Dilate(細いところがなくなる) Process>Binary>Close: Dilate→Erode(小さい隙間がなくなる) Dilate, Erode, Open, CloseはProcess>Binary>OptionsのIterationsで 繰り返し回数を設定できる。 Process>Binary>Fill Holes: 穴を埋める。 Process>Binary>Skeletonize: 線になるまで痩せさせる Process>Repeat Command(Shift-Ctrl-R): 前回操作の繰り返し 20
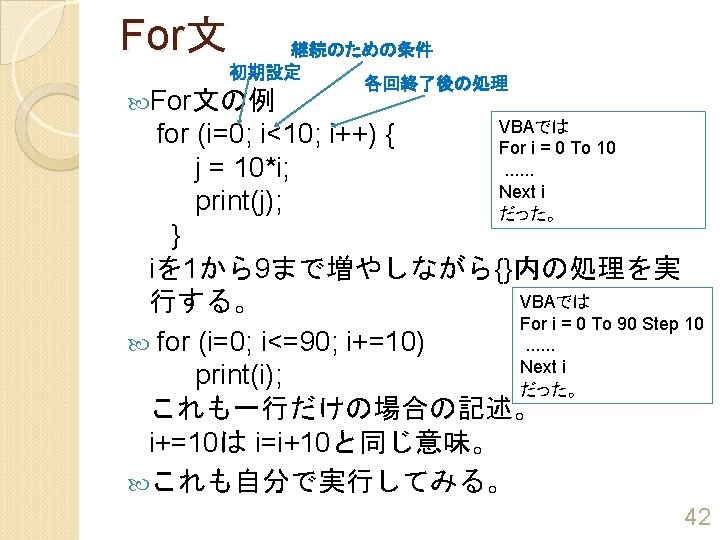
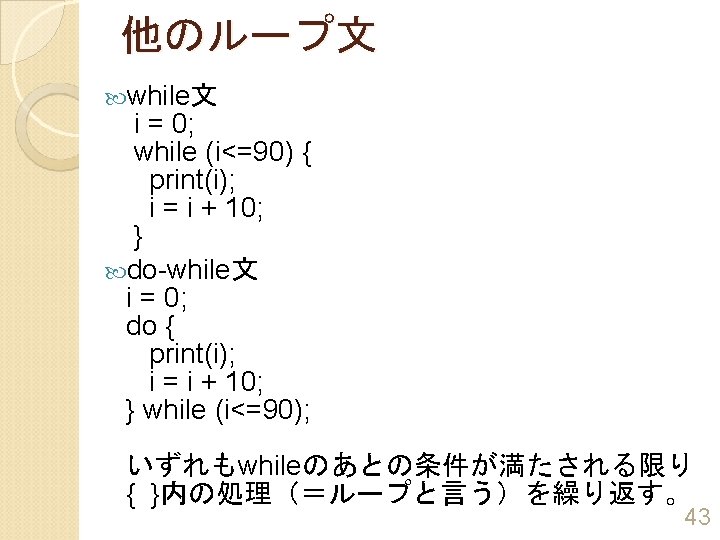
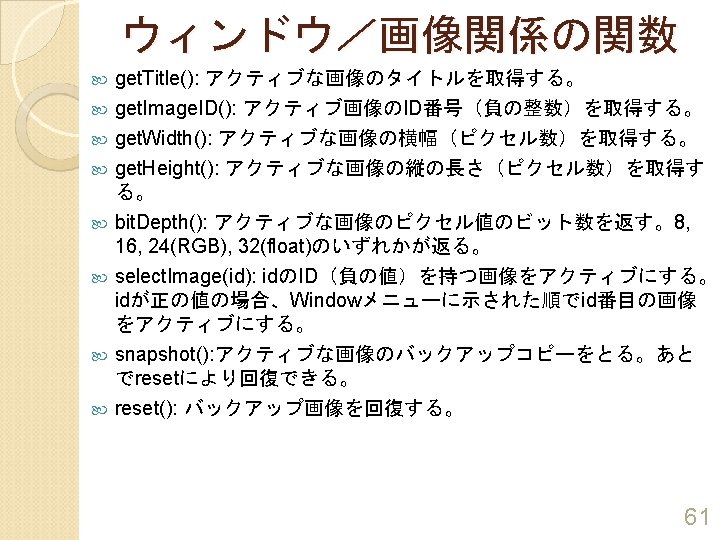
If文 ある条件が満たされたときのみ一定の処理をする、という命令の書き方。 if (condition) { VBAでは statement(s) If condition Then } statement(s) if (condition) { End If statement(s) } else { If condition Then statement(s) } Else statement(s) if (condition) { End If statement(s) } else if (condition){ If condition Then statement(s) } else { Else. If condition Then statement(s) } Else if (n. Images==0) statement(s) print("No images are open"); End If else だった。 print("The image title is " + get. Title); ({}がないことに注意。{ }内に書くべき命令が一行ならこういう書き方もで きる。; にも注意。get. Title()はアクティブな画像のタイトルを取得する既定 関数。) 41 例を手入力して実行してみること。いろいろ変えてみる。
文字列操作関数 length. Of(str): 文字列(または配列)の長さ starts. With(string, prefix): stringがprefixで始まれば True(1)を返す。 ends. With(string, suffix): stringがsuffixで終われば True(1)を返す。 index. Of(string, substring[, from. Index]): stringの中で from. Indexの位置以降、最初にsubstringが出てくる位 置を返す。from. Indexを指定しないと先頭(左端)か ら探す。 last. Index. Of(string, substring): stringの中で最も最後( 右)にsubstringが出てくる位置を返す。 to. Lower. Case(string): すべて小文字になおす。 to. Upper. Case(string): すべて大文字になおす。 52
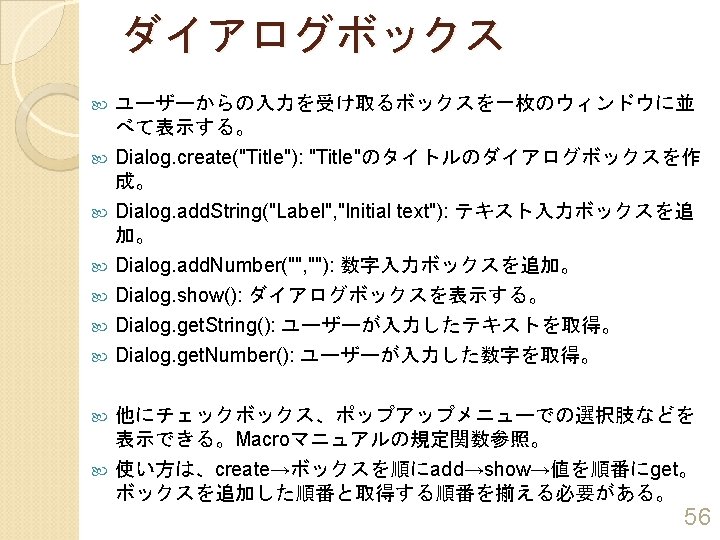
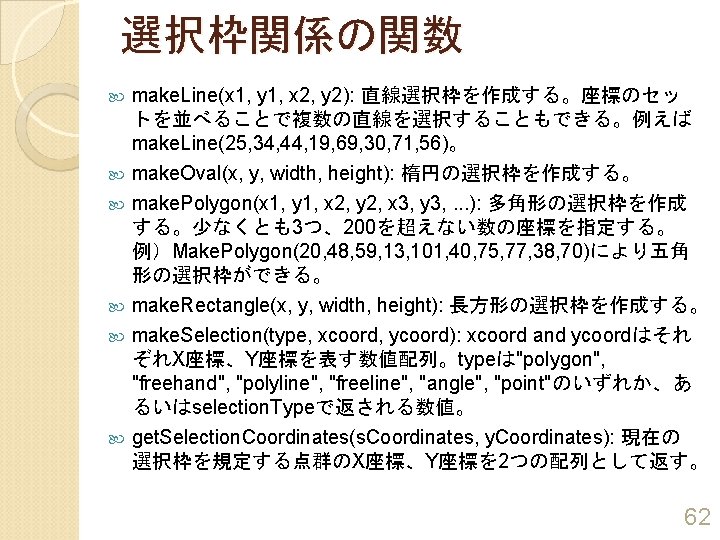
ダイアログボックスの作成例 (Dialog. Demoより) title = "Untitled"; width=512; height=512; Dialog. create("New Image"); Dialog. add. String("Title: ", title); Dialog. add. Choice("Type: ", new. Array("8 -bit", "16 -bit", "32 -bit", "RGB")); Dialog. add. Number("Width: ", 512); Dialog. add. Number("Height: ", 512); Dialog. add. Checkbox("Ramp", true); Dialog. show(); title = Dialog. get. String(); width = Dialog. get. Number(); height = Dialog. get. Number(); ; type = Dialog. get. Choice(); ramp = Dialog. get. Checkbox(); if (ramp==true) type = type + " ramp"; new. Image(title, type, width, height, 1); 57
描画関係の関数-位置関係 draw. Oval(x, y, w, h); draw. Rect(x, y, w, h); Foreground color (x, y) h h w Background color draw. String("TEXT", x, y); TEXT (x, y) fill. Rect(x, y, w, h); w set. Justification("right"); draw. String("TEXT", x, y); TEXT (x, y) 65