Hardware Shade Presenting Your Designs Hardware and Software
- Slides: 23

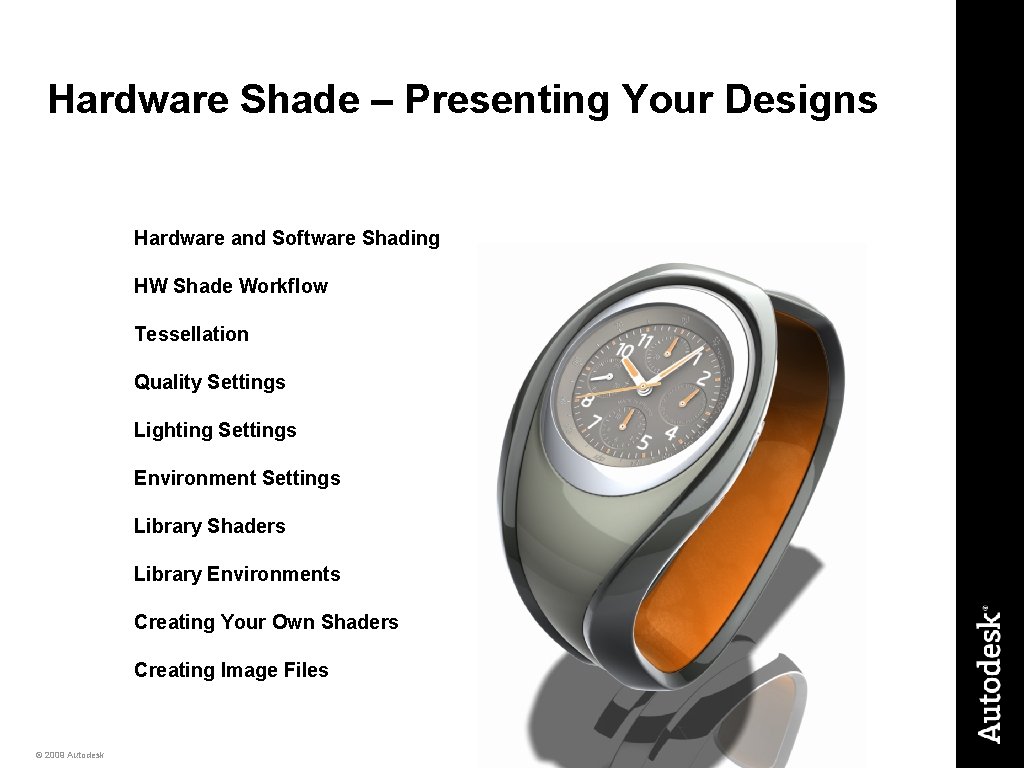
Hardware Shade – Presenting Your Designs Hardware and Software Shading HW Shade Workflow Tessellation Quality Settings Lighting Settings Environment Settings Library Shaders Library Environments Creating Your Own Shaders Creating Image Files © 2009 Autodesk 1

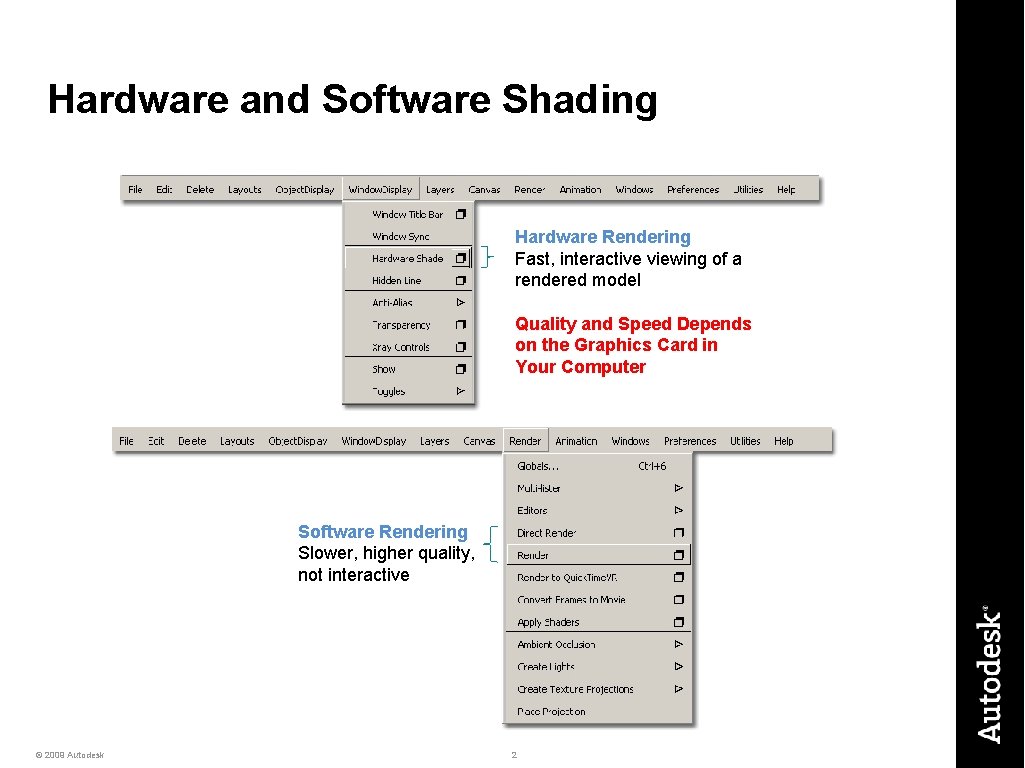
Hardware and Software Shading Hardware Rendering Fast, interactive viewing of a rendered model Quality and Speed Depends on the Graphics Card in Your Computer Software Rendering Slower, higher quality, not interactive © 2009 Autodesk 2

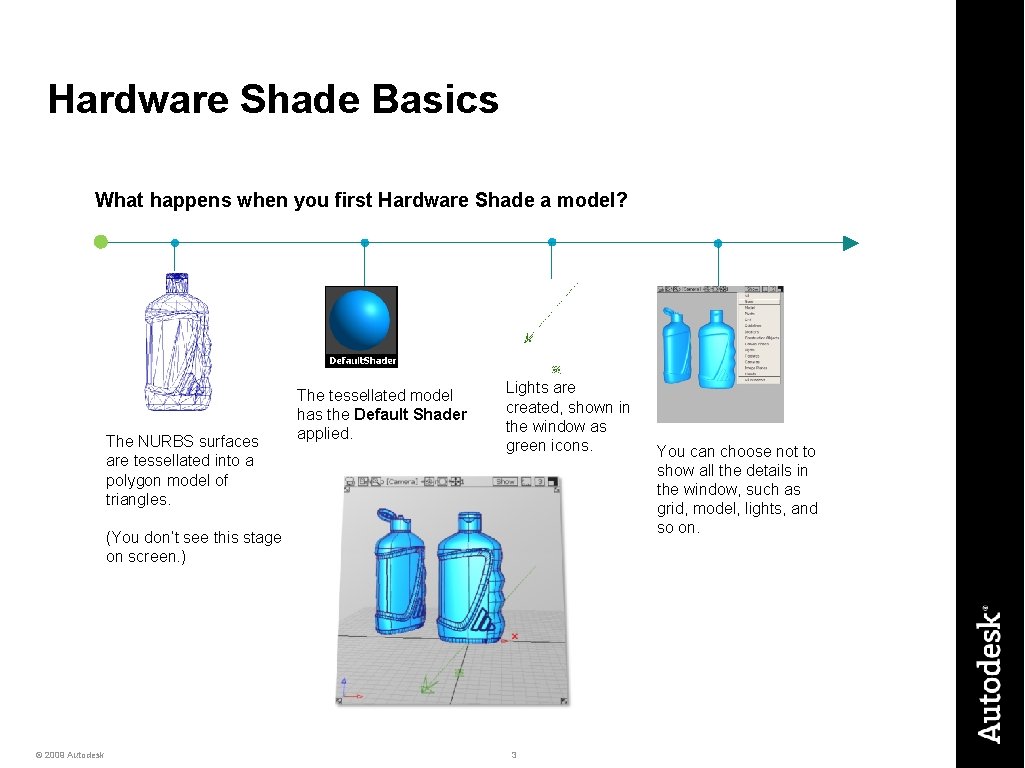
Hardware Shade Basics What happens when you first Hardware Shade a model? The NURBS surfaces are tessellated into a polygon model of triangles. The tessellated model has the Default Shader applied. Lights are created, shown in the window as green icons. (You don’t see this stage on screen. ) © 2009 Autodesk 3 You can choose not to show all the details in the window, such as grid, model, lights, and so on.

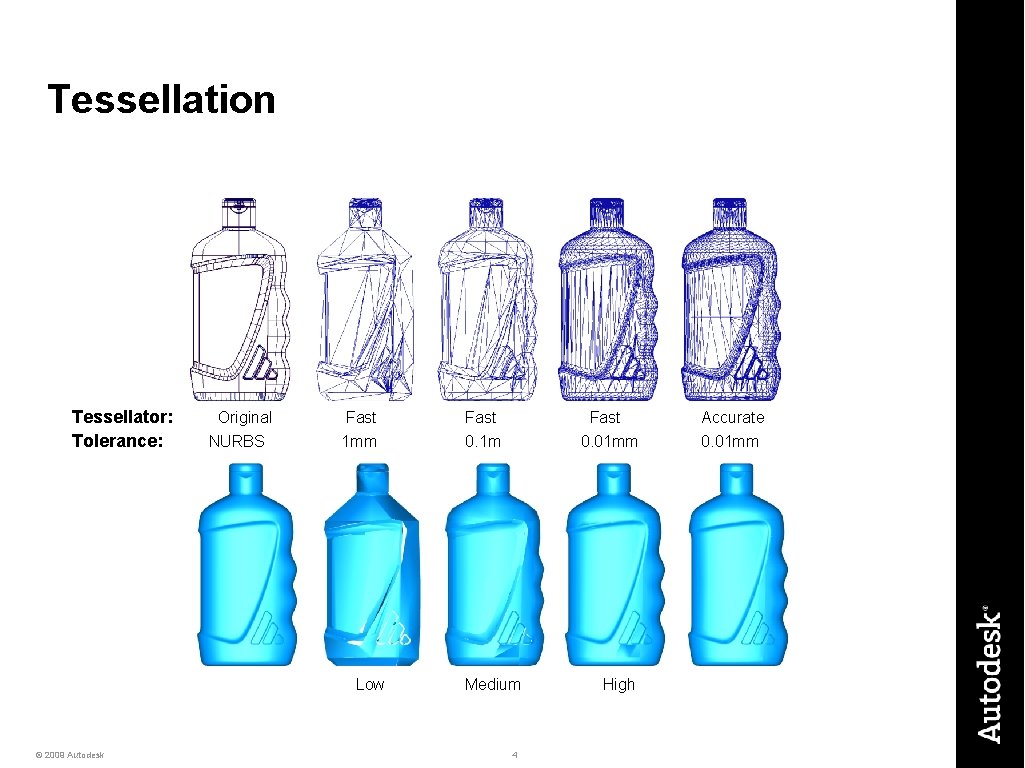
Tessellation Tessellator: Tolerance: Original NURBS Fast 1 mm Low © 2009 Autodesk Fast 0. 1 m Fast 0. 01 mm Medium 4 High Accurate 0. 01 mm

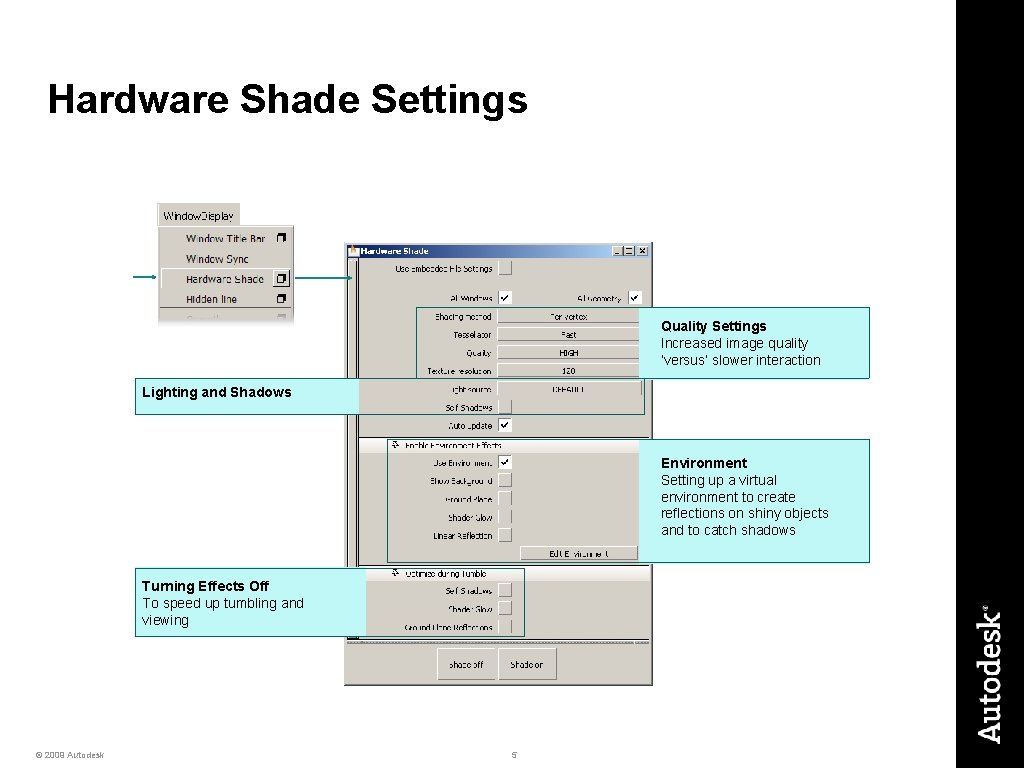
Hardware Shade Settings Quality Settings Increased image quality ‘versus’ slower interaction Lighting and Shadows Environment Setting up a virtual environment to create reflections on shiny objects and to catch shadows Turning Effects Off To speed up tumbling and viewing © 2009 Autodesk 5

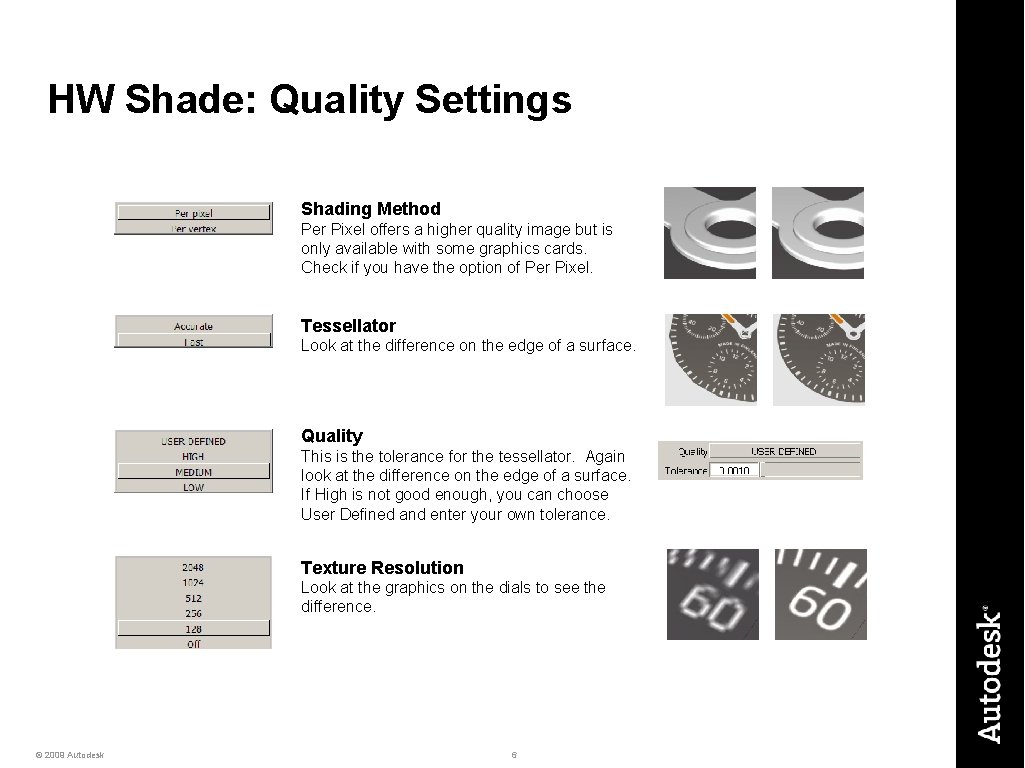
HW Shade: Quality Settings Shading Method Per Pixel offers a higher quality image but is only available with some graphics cards. Check if you have the option of Per Pixel. Tessellator Look at the difference on the edge of a surface. Quality This is the tolerance for the tessellator. Again look at the difference on the edge of a surface. If High is not good enough, you can choose User Defined and enter your own tolerance. Texture Resolution Look at the graphics on the dials to see the difference. © 2009 Autodesk 6

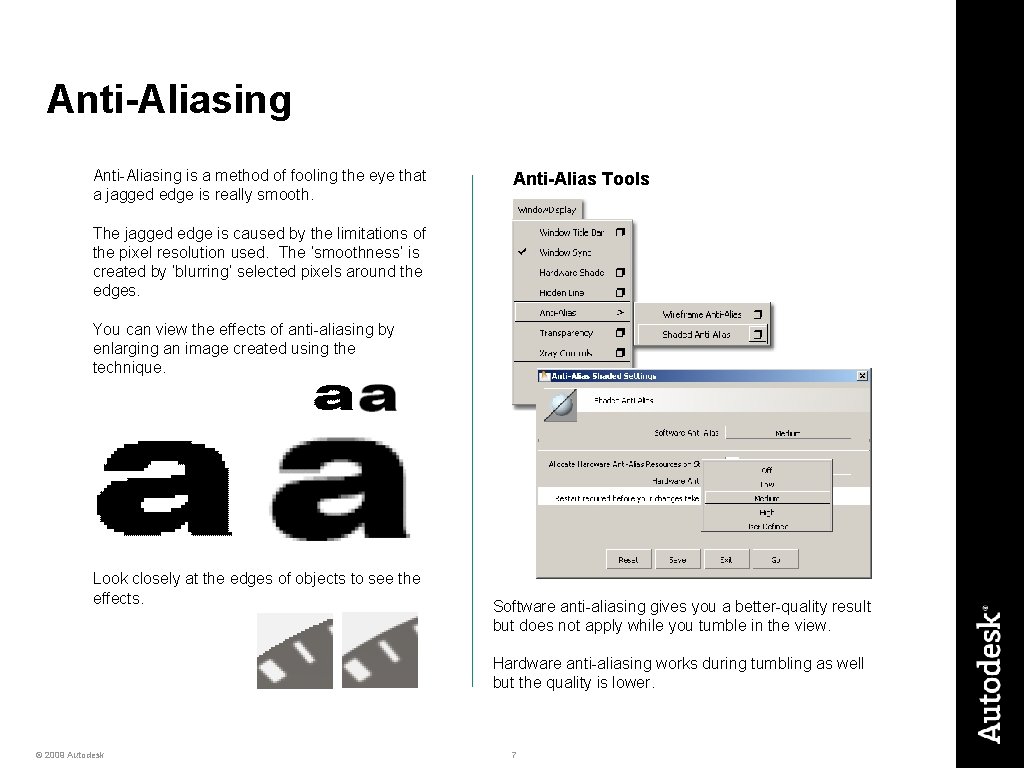
Anti-Aliasing is a method of fooling the eye that a jagged edge is really smooth. Anti-Alias Tools The jagged edge is caused by the limitations of the pixel resolution used. The ‘smoothness’ is created by ‘blurring’ selected pixels around the edges. You can view the effects of anti-aliasing by enlarging an image created using the technique. Look closely at the edges of objects to see the effects. Software anti-aliasing gives you a better-quality result but does not apply while you tumble in the view. Hardware anti-aliasing works during tumbling as well but the quality is lower. © 2009 Autodesk 7

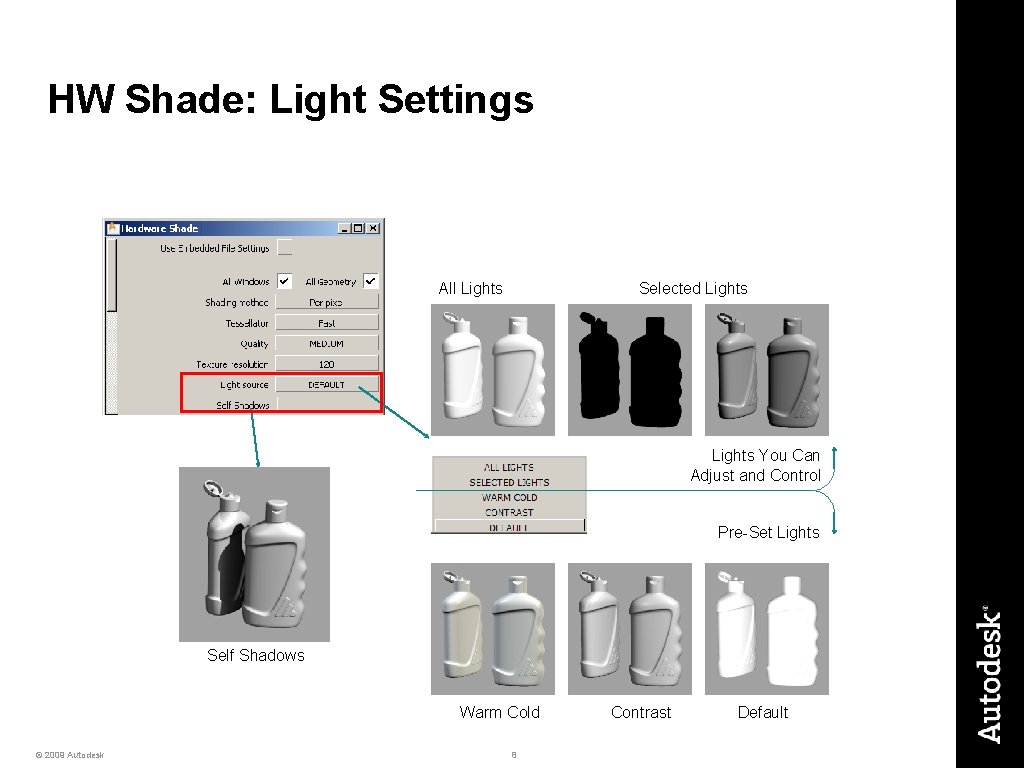
HW Shade: Light Settings All Lights Selected Lights You Can Adjust and Control Pre-Set Lights Self Shadows Warm Cold © 2009 Autodesk 8 Contrast Default

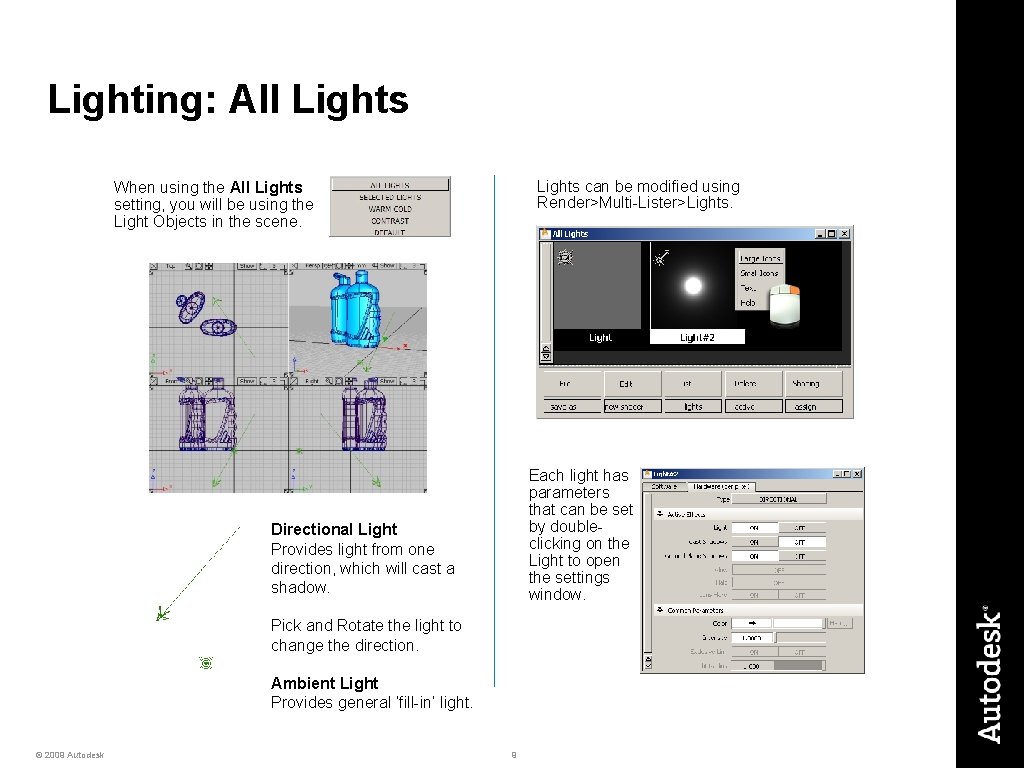
Lighting: All Lights can be modified using Render>Multi-Lister>Lights. When using the All Lights setting, you will be using the Light Objects in the scene. Each light has parameters that can be set by doubleclicking on the Light to open the settings window. Directional Light Provides light from one direction, which will cast a shadow. Pick and Rotate the light to change the direction. Ambient Light Provides general ‘fill-in’ light. © 2009 Autodesk 9

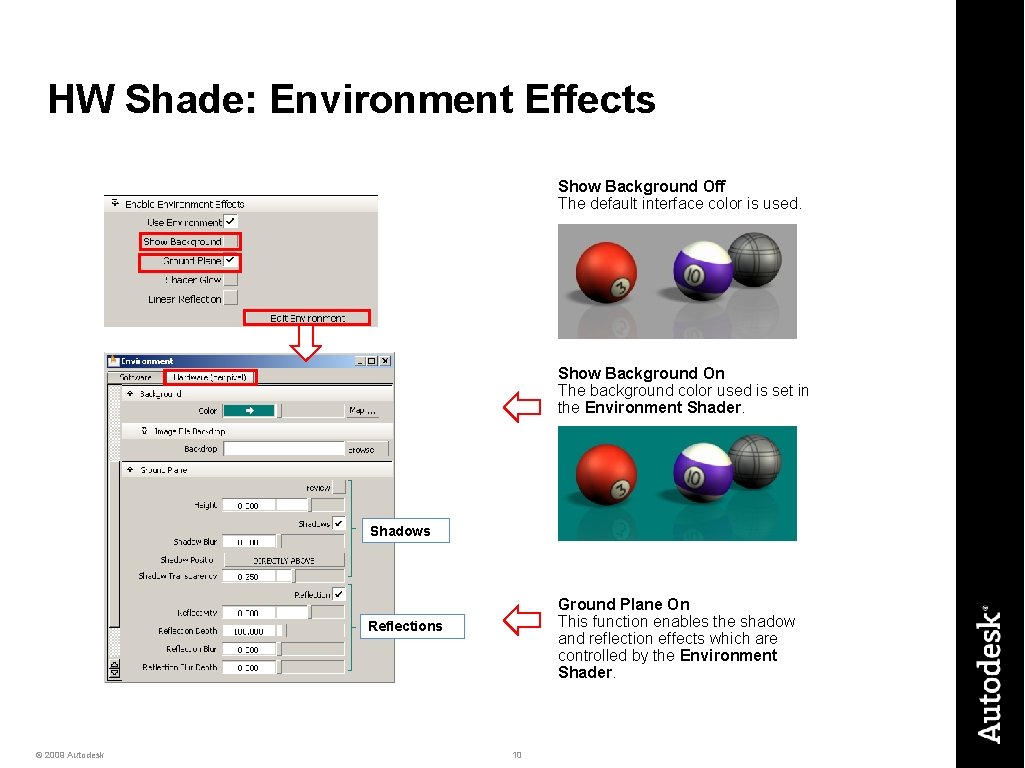
HW Shade: Environment Effects Show Background Off The default interface color is used. Show Background On The background color used is set in the Environment Shader. Shadows Ground Plane On This function enables the shadow and reflection effects which are controlled by the Environment Shader. Reflections © 2009 Autodesk 10

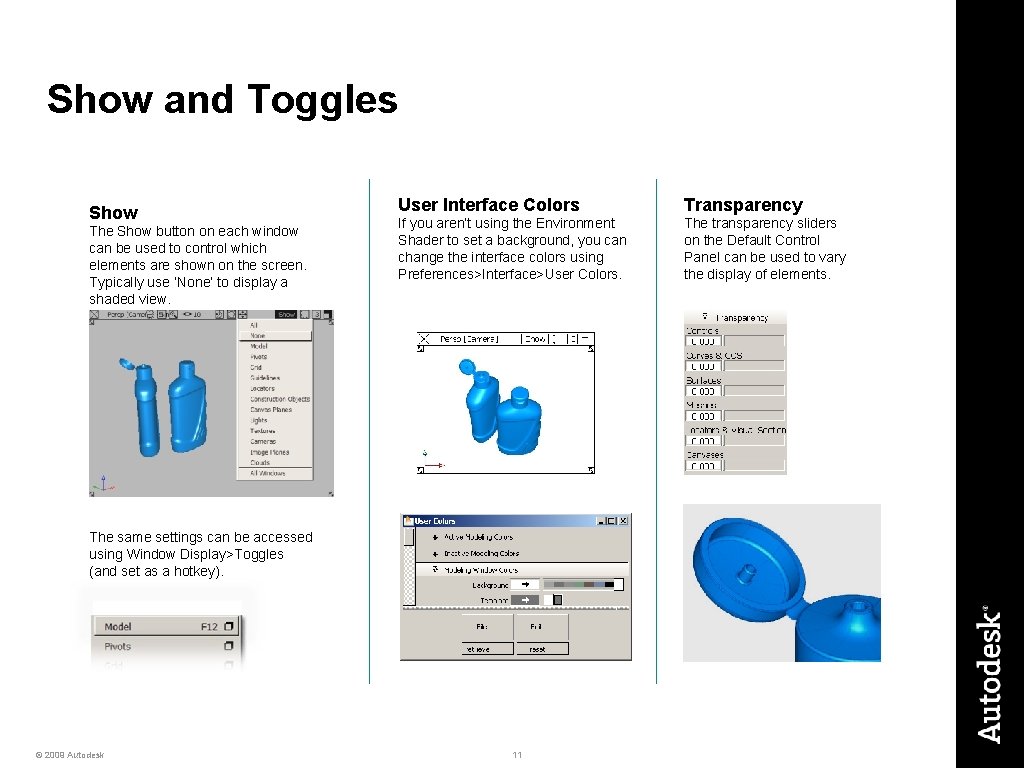
Show and Toggles Show The Show button on each window can be used to control which elements are shown on the screen. Typically use ‘None’ to display a shaded view. User Interface Colors Transparency If you aren’t using the Environment Shader to set a background, you can change the interface colors using Preferences>Interface>User Colors. The transparency sliders on the Default Control Panel can be used to vary the display of elements. The same settings can be accessed using Window Display>Toggles (and set as a hotkey). © 2009 Autodesk 11

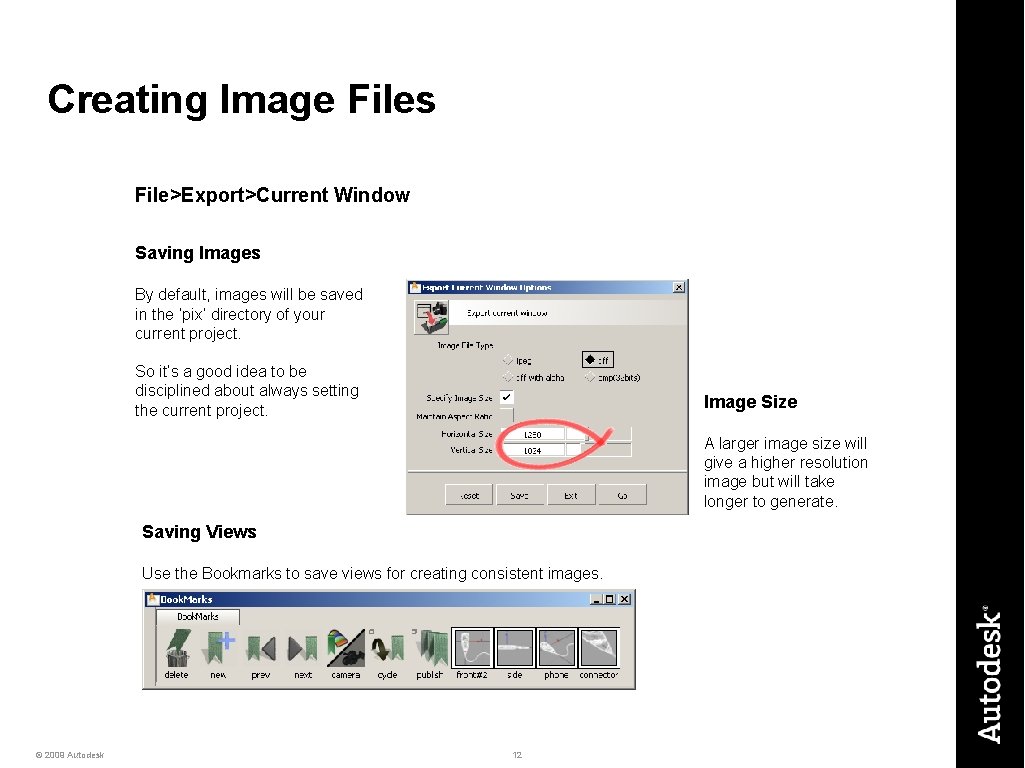
Creating Image Files File>Export>Current Window Saving Images By default, images will be saved in the ‘pix’ directory of your current project. So it’s a good idea to be disciplined about always setting the current project. Image Size A larger image size will give a higher resolution image but will take longer to generate. Saving Views Use the Bookmarks to save views for creating consistent images. © 2009 Autodesk 12

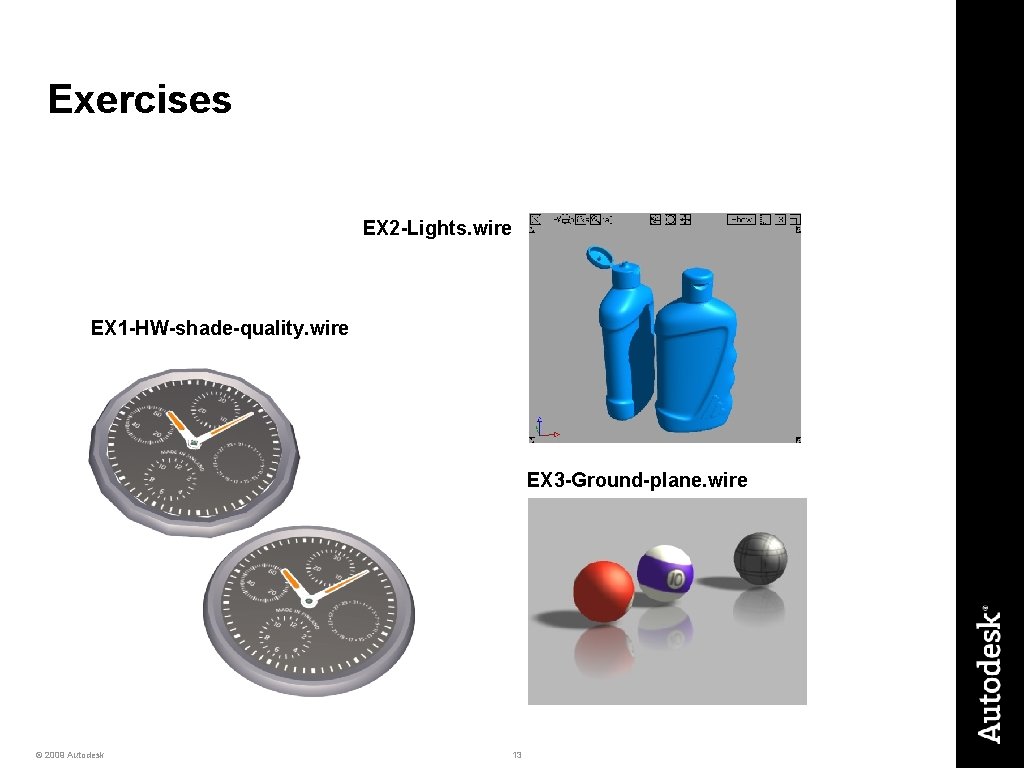
Exercises EX 2 -Lights. wire EX 1 -HW-shade-quality. wire EX 3 -Ground-plane. wire © 2009 Autodesk 13

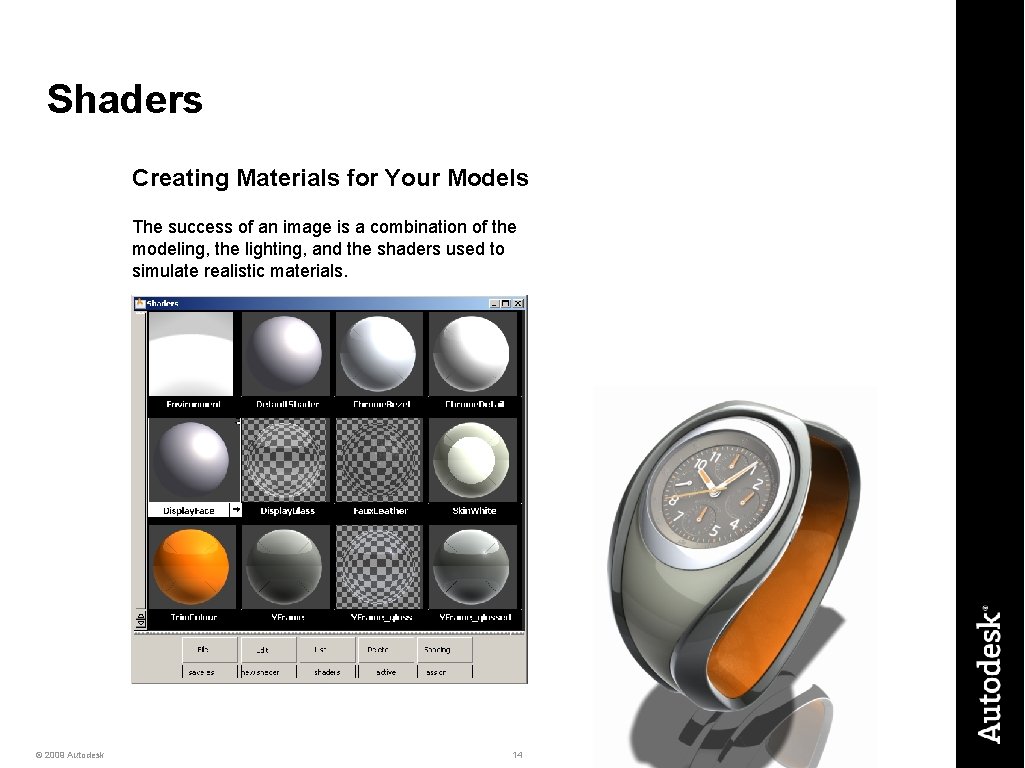
Shaders Creating Materials for Your Models The success of an image is a combination of the modeling, the lighting, and the shaders used to simulate realistic materials. © 2009 Autodesk 14

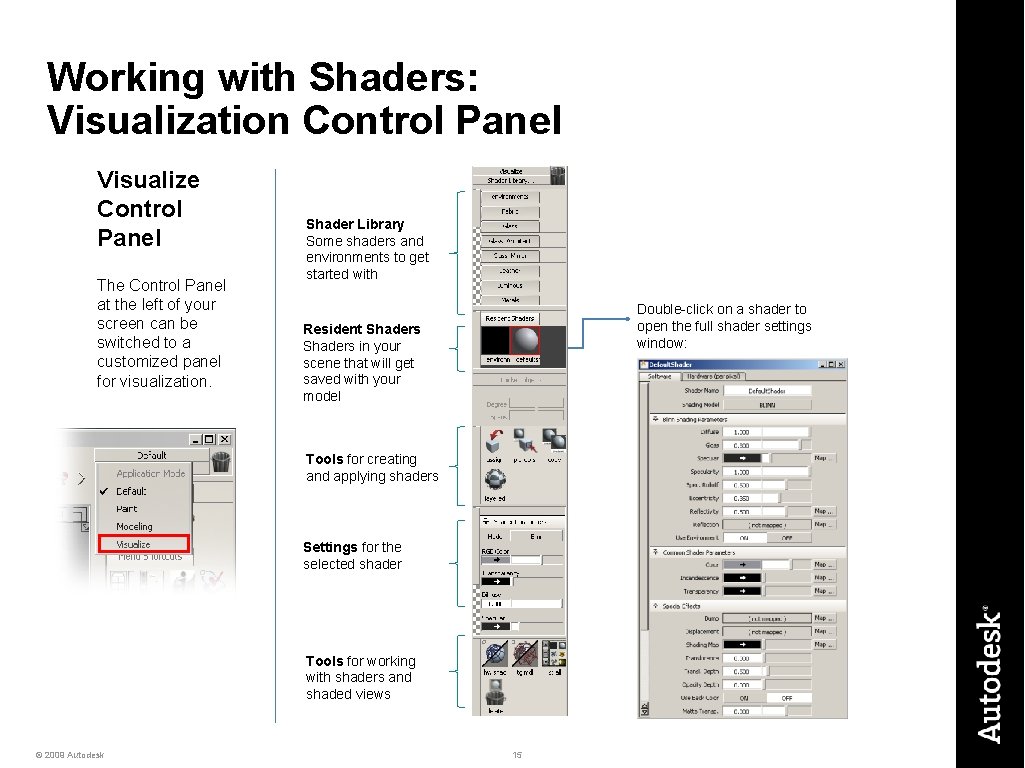
Working with Shaders: Visualization Control Panel Visualize Control Panel The Control Panel at the left of your screen can be switched to a customized panel for visualization. Shader Library Some shaders and environments to get started with Double-click on a shader to open the full shader settings window: Resident Shaders in your scene that will get saved with your model Tools for creating and applying shaders Settings for the selected shader Tools for working with shaders and shaded views © 2009 Autodesk 15

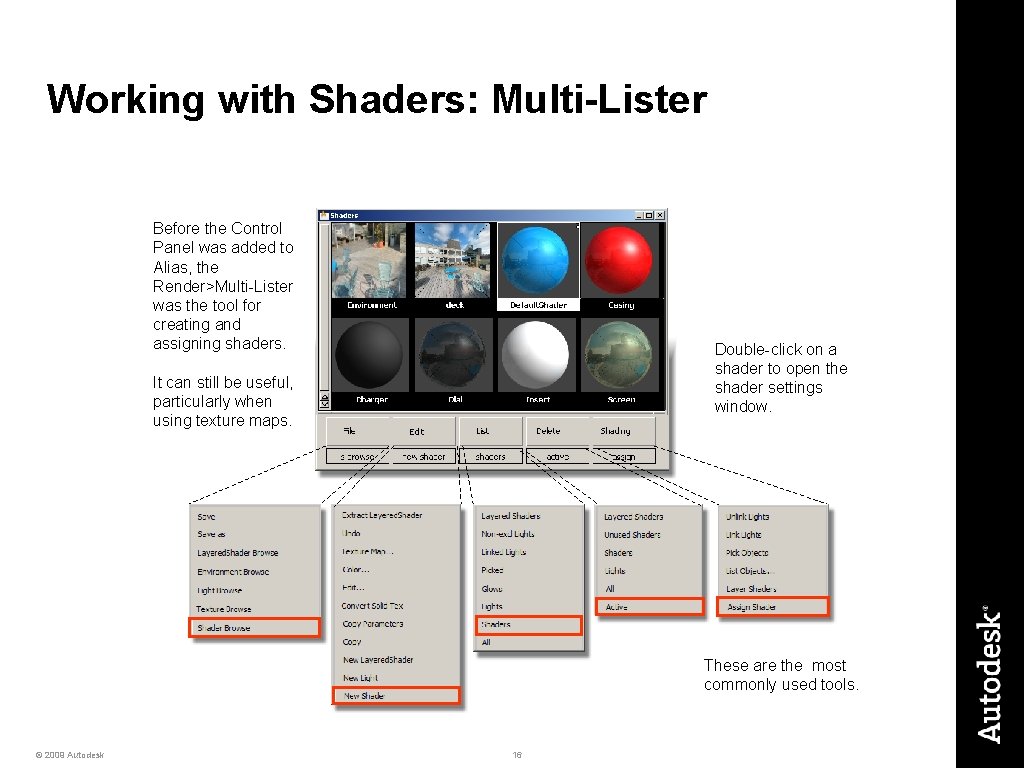
Working with Shaders: Multi-Lister Before the Control Panel was added to Alias, the Render>Multi-Lister was the tool for creating and assigning shaders. Double-click on a shader to open the shader settings window. It can still be useful, particularly when using texture maps. These are the most commonly used tools. © 2009 Autodesk 16

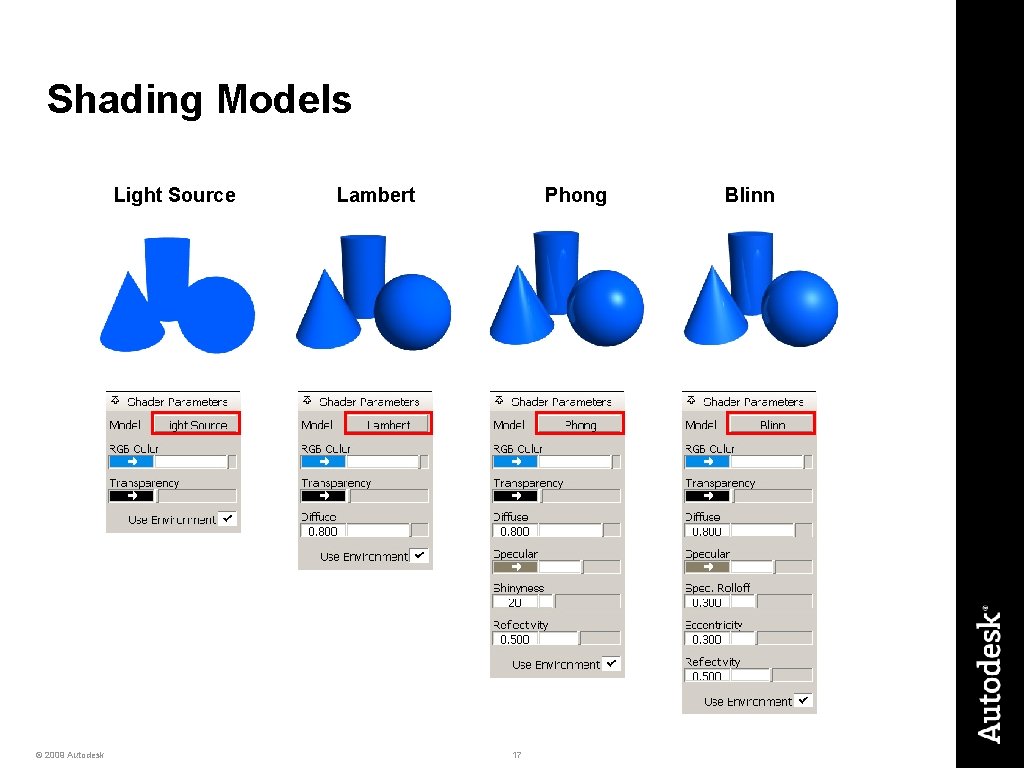
Shading Models Light Source © 2009 Autodesk Lambert Phong 17 Blinn

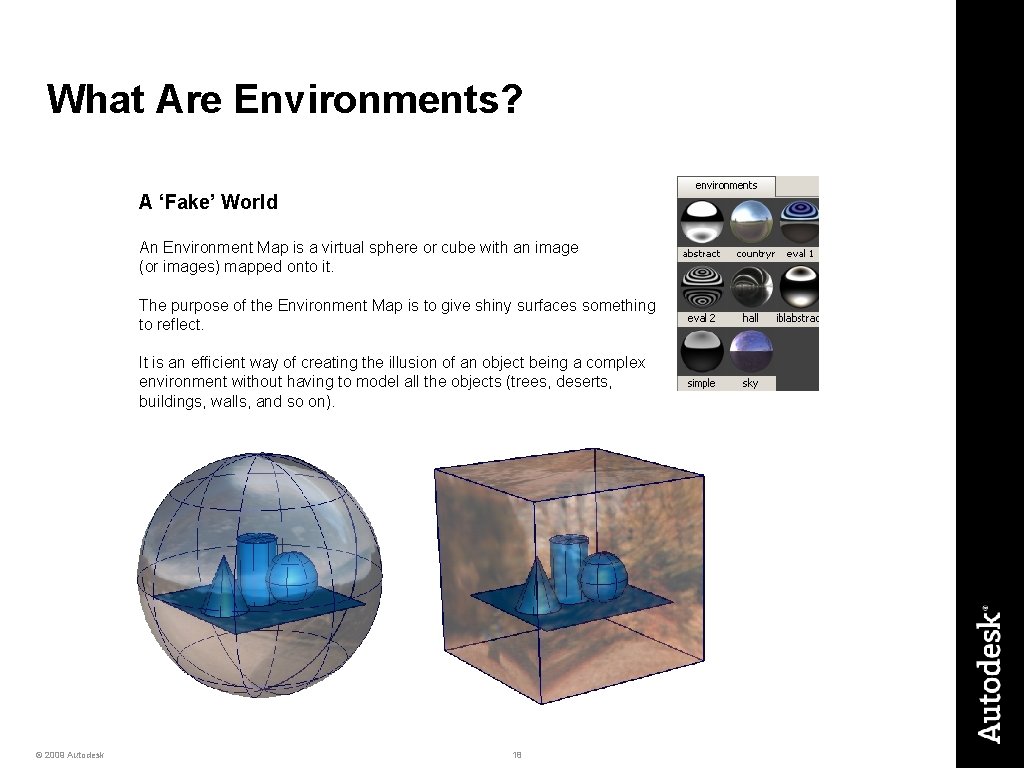
What Are Environments? A ‘Fake’ World An Environment Map is a virtual sphere or cube with an image (or images) mapped onto it. The purpose of the Environment Map is to give shiny surfaces something to reflect. It is an efficient way of creating the illusion of an object being a complex environment without having to model all the objects (trees, deserts, buildings, walls, and so on). © 2009 Autodesk 18

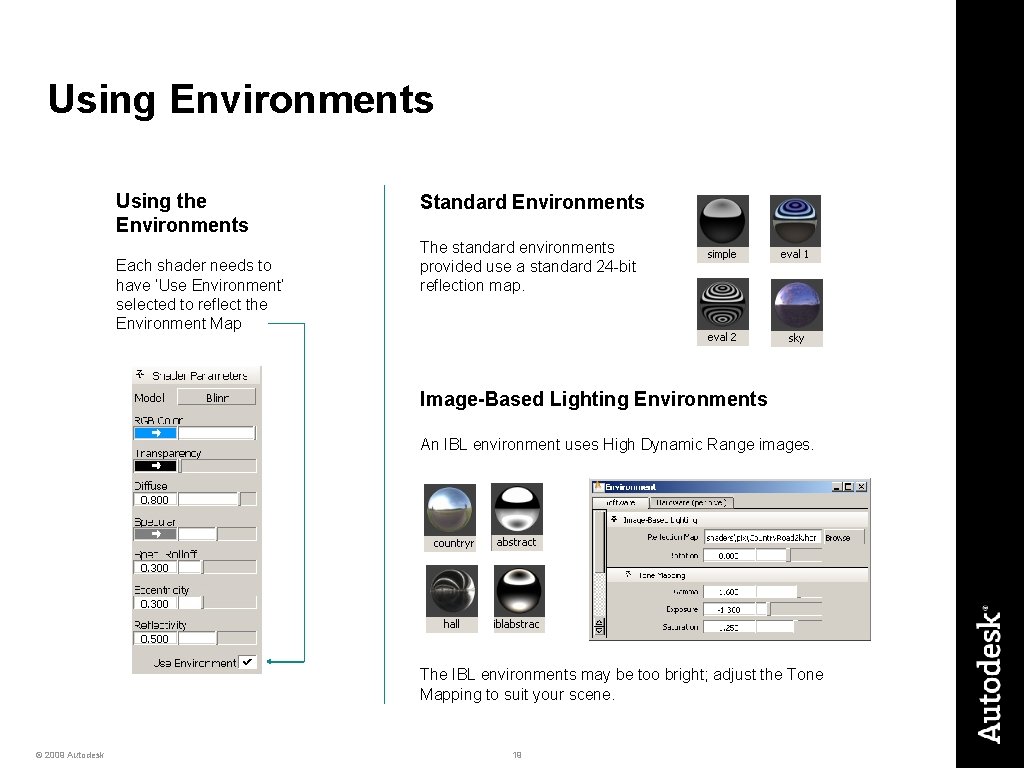
Using Environments Using the Environments Each shader needs to have ‘Use Environment’ selected to reflect the Environment Map Standard Environments The standard environments provided use a standard 24 -bit reflection map. Image-Based Lighting Environments An IBL environment uses High Dynamic Range images. The IBL environments may be too bright; adjust the Tone Mapping to suit your scene. © 2009 Autodesk 19

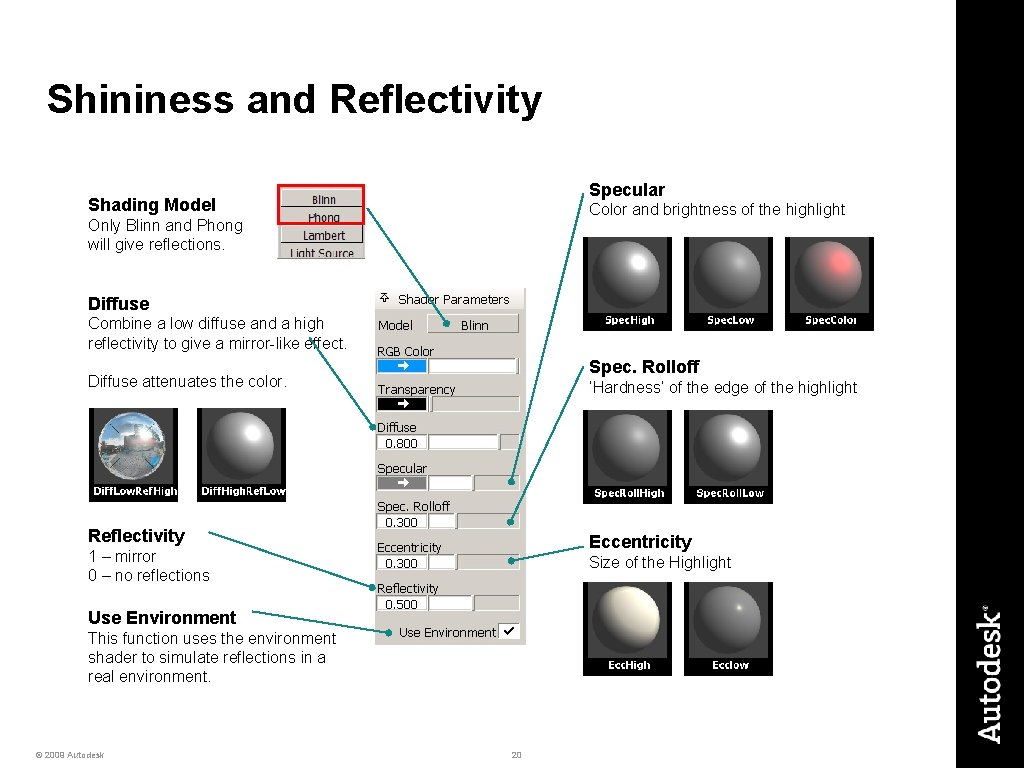
Shininess and Reflectivity Specular Shading Model Color and brightness of the highlight Only Blinn and Phong will give reflections. Diffuse Combine a low diffuse and a high reflectivity to give a mirror-like effect. Spec. Rolloff Diffuse attenuates the color. ‘Hardness’ of the edge of the highlight Reflectivity Eccentricity 1 – mirror 0 – no reflections Size of the Highlight Use Environment This function uses the environment shader to simulate reflections in a real environment. © 2009 Autodesk 20

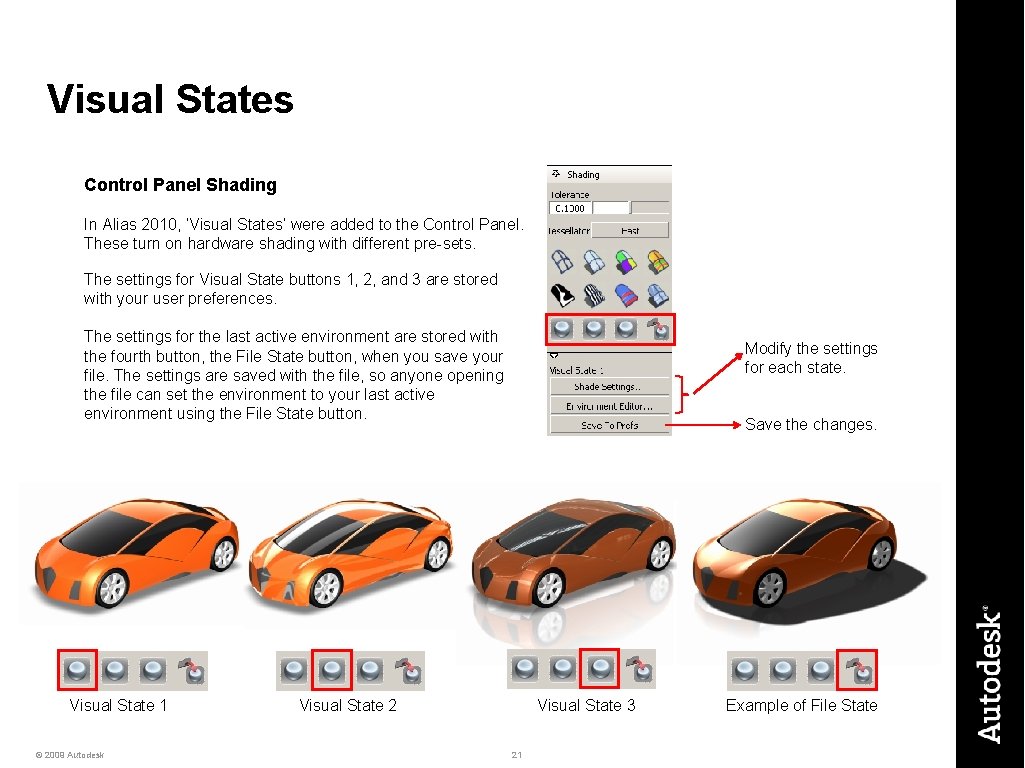
Visual States Control Panel Shading In Alias 2010, ‘Visual States’ were added to the Control Panel. These turn on hardware shading with different pre-sets. The settings for Visual State buttons 1, 2, and 3 are stored with your user preferences. The settings for the last active environment are stored with the fourth button, the File State button, when you save your file. The settings are saved with the file, so anyone opening the file can set the environment to your last active environment using the File State button. Visual State 1 © 2009 Autodesk Modify the settings for each state. Save the changes. Visual State 2 Visual State 3 21 Example of File State

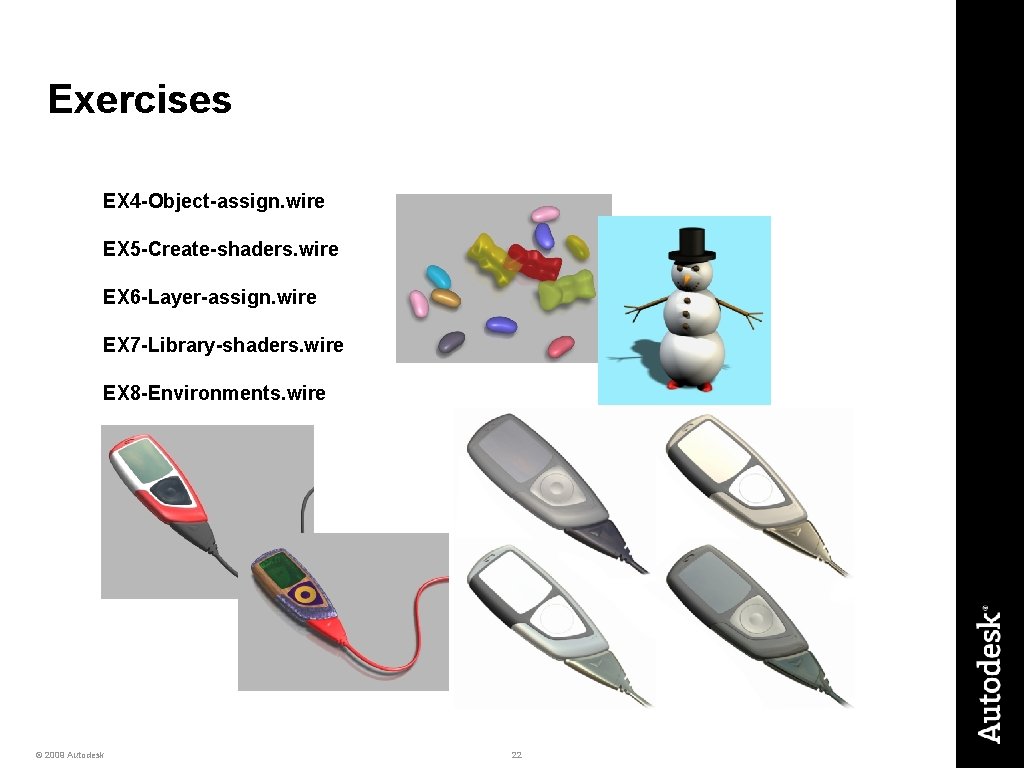
Exercises EX 4 -Object-assign. wire EX 5 -Create-shaders. wire EX 6 -Layer-assign. wire EX 7 -Library-shaders. wire EX 8 -Environments. wire © 2009 Autodesk 22

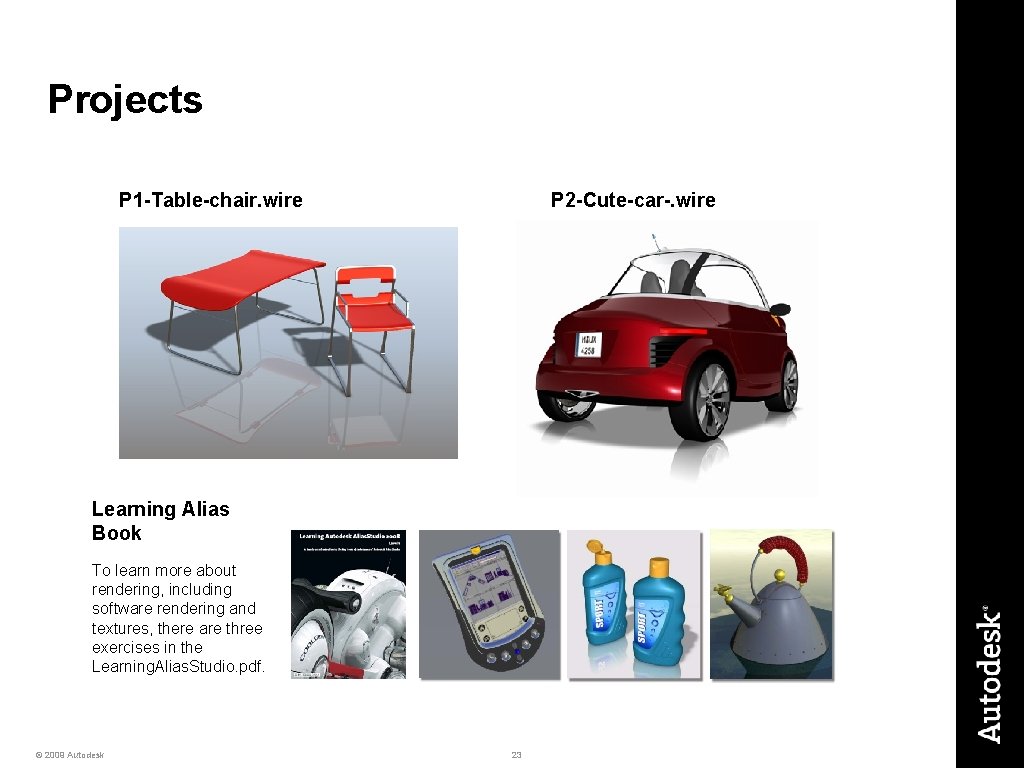
Projects P 1 -Table-chair. wire P 2 -Cute-car-. wire Learning Alias Book To learn more about rendering, including software rendering and textures, there are three exercises in the Learning. Alias. Studio. pdf. © 2009 Autodesk 23