GESTURE DRAWING Unit Figure Drawing Lesson Gesture VOCABULARY

GESTURE DRAWING Unit: Figure Drawing Lesson: Gesture

VOCABULARY: Classic Contrapposto Gesture Sketch Proportion

WHAT IS GESTURE: o. Gesture drawing is energetic and expressive showing the form with quick lines that explore the subject. o. There are no details. o. There are no outlines. o. Drawings are done in a short period of time (30 seconds to 2 minutes is common) o. Drawings show action poses.
 using")
EXAMPLES: Here a hand is drawn showing quick movement of the media (pen/pencil) using lines to capture the form and pose.

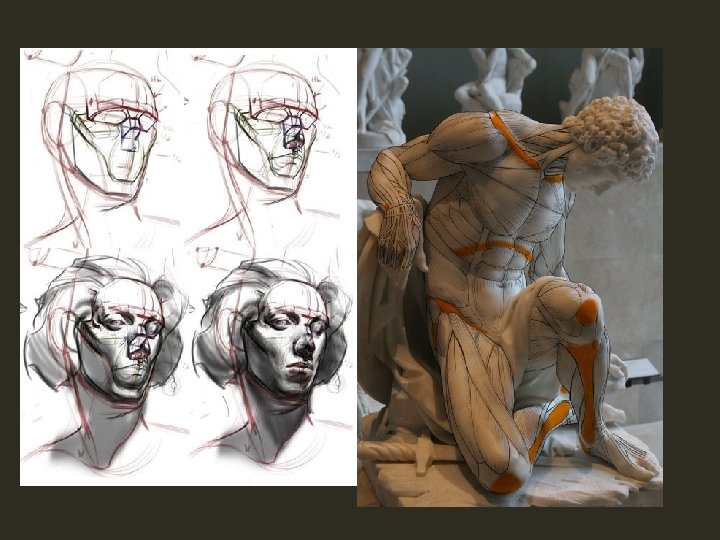
FIGURE EXAMPLES:

CLASSIC CONTRAPPOSTO Italian for “Counter balance” Weight is shifted to one foot The hips are offset from shoulders Spine has gentle “S” curve Head is over the foot that is supporting the body weight

CONTRAPPOS TO!

DEFINITION OF PROPORTION: Proportion - A principle of design, proportion refers to the comparative, proper, or harmonious relationship of one part to another or to the whole with respect to size

Proportion - An average person, is generally 7 -and-a-half heads tall (including the head). - An "ideal figure", is drawn at 8 heads tall. Draw line down the paper (the height of the figure) Find the midpoint of the line (hips) Divide top section (bottom of the chest) Divide top section (bottom of the chin) Divide mid-section (belly button) Divide bottom area (knee) Draw an oval for the head Second line down (chest height) Collar bone halfway between chest and chin

SO LET’S TRY GESTURE DRAWINGS! o. Begin with the head –scribble in the mass (no hollow circles!) o. Draw the spine o. Draw the hip line and shoulder line o. Add the legs o. Go back and add MASS –scribble to build up the shape of the figure o. Add arms, feet, hands (don’t forget knees and elbows) o. Keep feet and hands simple o. Play with simple perspective, it will bring your poses to another level. o. A few simple lines are often more direct than trying to make it look realistic. o. Don’t overthink it, if it “reads” it works, move on to the next one. o. Look for ways to squash and stretch the body o. A simple suggestion of shadow or ground can help give visual weight

GESTURE DRAWING GUIDELINES: Never stop moving your hand as you draw Work quickly with your eye on the subject No outlining! No erasing! Hold your pencil/pen/crayon “like an artist” or higher up (not close to the point) Use circular motions to suggest mass

SCALE 4 - The student can create a finished painting combining their series of gesture drawings that are energetic and expressive showing the form with quick lines that explore the subject. 3 -The student can create a series of gesture drawings that are energetic and expressive showing the form with quick lines that explore the subject. 2 - The student can create some effective gesture drawings that are energetic and expressive showing the form with quick lines that explore the subject. 1 – The student can create some effective gesture drawings that are energetic and expressive showing the form with quick lines that explore the subject with help.

LET’S GET STARTED: Supplies: Sketchbook & pen Assignment: Fill your page with 20 gesture drawings Work quickly!
 Look for the angle of")
HOW TO GET STARTED… Draw the head (note angle!) Look for the angle of the spine Add shoulder line and hip line Begin adding mass of torso, legs, arms DO NOT FORGET the neck and feet Arms and legs should have two segments Remember: 6 -7 heads tall!

WHAT A QUICK GESTUR E DRAWIN G SHOULD LOOK LIKE

NOT THIS…
 LOOK FOR THE ANGLE OF THE SPINE ADD SHOULDER")
DRAW THE HEAD (NOTE ANGLE!) LOOK FOR THE ANGLE OF THE SPINE ADD SHOULDER LINE AND HIP LINE BEGIN ADDING MASS OF TORSO, LEGS, ARMS DO NOT FORGET THE NECK AND FEET ARMS AND LEGS SHOULD HAVE TWO SEGMENTS REMEMBER: 6 -7 HEADS TALL!

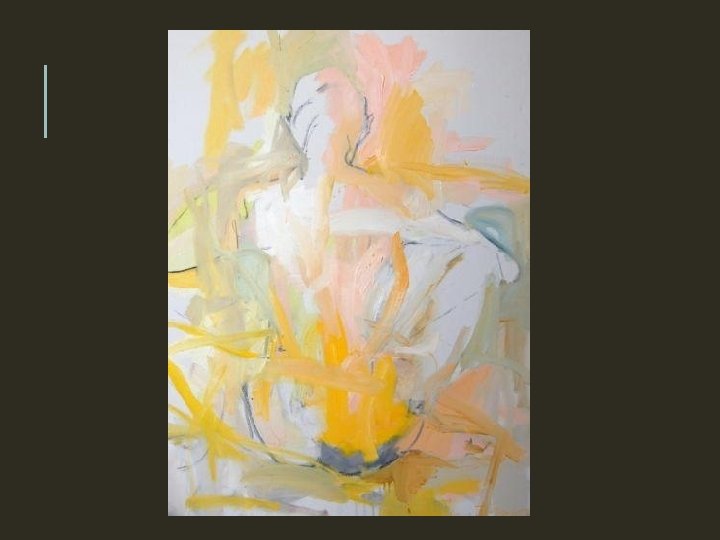
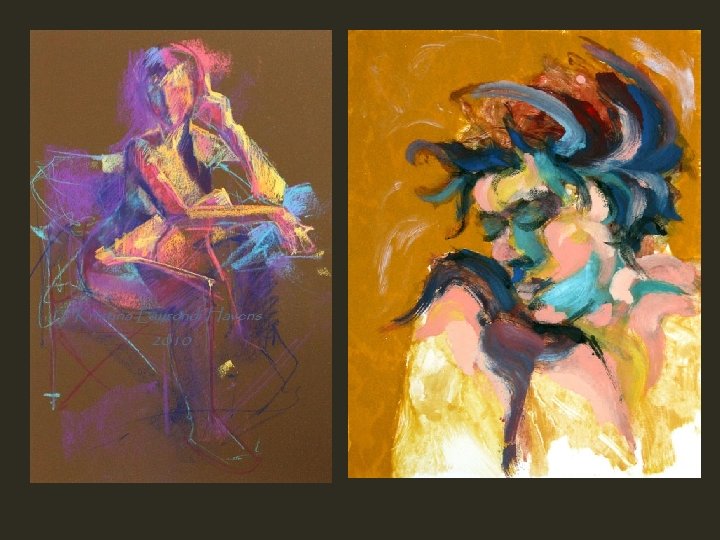
We will begin today by trying our hand at painting the gesture figure. We will complete a series of 2, 5, 10 minute poses. We will spend the rest of Monday-Wednesday deconstructing and then constructing a finished series of works using our gesture drawings and paintings. You will combine them anyway you see fit. You can draw on and off your figures, you can cut them out and place them together on a paper, your imagination is your only limitation here.

MAJOR PROJECT KEY TERMS Proportion - the relative size of parts of a whole (elements within an object). We often think of proportion in terms of size relationships within the human body Scale - refers to the size of an object (a whole) in relationship to another object (another whole). In art the size relationship between an object and the human body is significant. In experiencing the scale of an artwork we tend to compare its size to the size of our own bodies. Rhythm - A visual tempo or beat. The principle of design that refers to a regular repetition of elements of art to produce the look and feel of movement. It is often achieved through the careful placement of repeated components which invite the viewer's eye to jump rapidly or glide smoothly from one to the next.

GESTURE DRAWING MAJOR PROJECT The student is able to complete a gesture drawing that shows their understanding of Scale Proportion Rhythm Student has shown a light source. Student has combined more than one view point into a single composition. Student has used a complementary color scheme.
- Slides: 23