Game Design LESSON 4 Workplace Games and Intro
![EXERCISE 2 b: Shape Modeling: Dino [Part 2] Extrude into a 3 D object: EXERCISE 2 b: Shape Modeling: Dino [Part 2] Extrude into a 3 D object:](https://slidetodoc.com/presentation_image_h2/7d5a5efb64819f45b54ac49493c46830/image-34.jpg)
![EXERCISE 2 c: Shape Modeling: Dino [Part 3] Apply Texture: a) Open the Hypershade EXERCISE 2 c: Shape Modeling: Dino [Part 3] Apply Texture: a) Open the Hypershade](https://slidetodoc.com/presentation_image_h2/7d5a5efb64819f45b54ac49493c46830/image-35.jpg)
![EXERCISE 3 a: Combine Modeling: Tree [Part 1] SET UNITS: Unity uses Meters, but EXERCISE 3 a: Combine Modeling: Tree [Part 1] SET UNITS: Unity uses Meters, but](https://slidetodoc.com/presentation_image_h2/7d5a5efb64819f45b54ac49493c46830/image-36.jpg)
![EXERCISE 3 b: Combine Modeling: Tree [Part 3] Apply the Texture and adjust UVs: EXERCISE 3 b: Combine Modeling: Tree [Part 3] Apply the Texture and adjust UVs:](https://slidetodoc.com/presentation_image_h2/7d5a5efb64819f45b54ac49493c46830/image-37.jpg)
![EXERCISE 2 c: Animation Hierarchy: Duck [Modeling Part 3] Duplicate Body for Legs & EXERCISE 2 c: Animation Hierarchy: Duck [Modeling Part 3] Duplicate Body for Legs &](https://slidetodoc.com/presentation_image_h2/7d5a5efb64819f45b54ac49493c46830/image-40.jpg)
![EXERCISE 2 b: Animation Hierarchy: Duck [Texturing Part 1] Apply Texture: a) Open the EXERCISE 2 b: Animation Hierarchy: Duck [Texturing Part 1] Apply Texture: a) Open the](https://slidetodoc.com/presentation_image_h2/7d5a5efb64819f45b54ac49493c46830/image-41.jpg)
![EXERCISE 2 b: Animation Hierarchy: Duck [Texturing Part 2] Adjust UVs: a) Open UV EXERCISE 2 b: Animation Hierarchy: Duck [Texturing Part 2] Adjust UVs: a) Open UV](https://slidetodoc.com/presentation_image_h2/7d5a5efb64819f45b54ac49493c46830/image-42.jpg)
![EXERCISE 2 d: Animation Hierarchy: Duck [Rigging Part 2] Parenting Hierarchies: a) Parenting: Select EXERCISE 2 d: Animation Hierarchy: Duck [Rigging Part 2] Parenting Hierarchies: a) Parenting: Select](https://slidetodoc.com/presentation_image_h2/7d5a5efb64819f45b54ac49493c46830/image-44.jpg)
![EXERCISE 2 e: Animation Hierarchy: Duck [Animation 1] Basics: Now that we have the EXERCISE 2 e: Animation Hierarchy: Duck [Animation 1] Basics: Now that we have the](https://slidetodoc.com/presentation_image_h2/7d5a5efb64819f45b54ac49493c46830/image-45.jpg)
![EXERCISE 2 e: Animation Hierarchy: Duck [Animation 2] Notes: Consider these animation sequences: An EXERCISE 2 e: Animation Hierarchy: Duck [Animation 2] Notes: Consider these animation sequences: An](https://slidetodoc.com/presentation_image_h2/7d5a5efb64819f45b54ac49493c46830/image-46.jpg)
![EXERCISE 2 f: Animation Hierarchy: Duck [Exporting] MAYA EXPORT Animated FBX: a) Set your EXERCISE 2 f: Animation Hierarchy: Duck [Exporting] MAYA EXPORT Animated FBX: a) Set your](https://slidetodoc.com/presentation_image_h2/7d5a5efb64819f45b54ac49493c46830/image-47.jpg)
![EXERCISE 2 f: Animation Hierarchy: Duck [Importing] UNITY IMPORT FBX: a) Right. Click the EXERCISE 2 f: Animation Hierarchy: Duck [Importing] UNITY IMPORT FBX: a) Right. Click the](https://slidetodoc.com/presentation_image_h2/7d5a5efb64819f45b54ac49493c46830/image-48.jpg)
- Slides: 50

Game Design LESSON #4: Workplace Games and Intro to 3 D Assets in Maya and Unity Mecanim

TODAY: 1. Playtesting Disruption Games. 2. Design Method #5: Workplace Games Examples and methodology 2. Introduction to Maya interface and basic asset creation, and importing 3 D assets into Unity. 3. Unity Prefabs

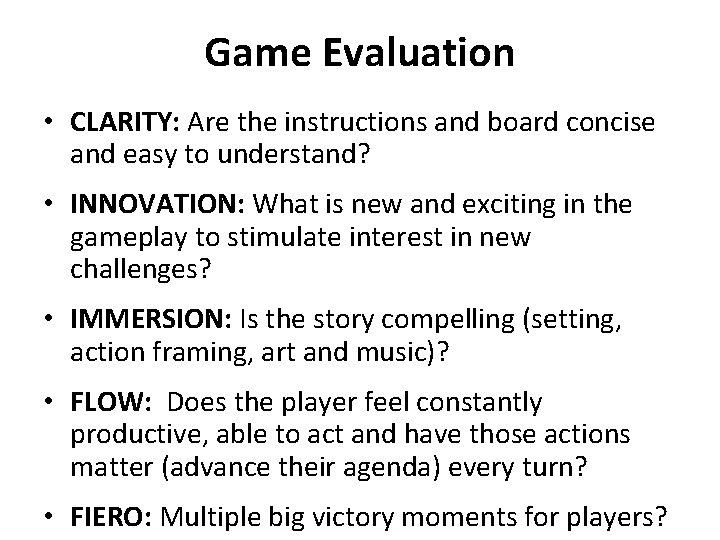
Game Evaluation • CLARITY: Are the instructions and board concise and easy to understand? • INNOVATION: What is new and exciting in the gameplay to stimulate interest in new challenges? • IMMERSION: Is the story compelling (setting, action framing, art and music)? • FLOW: Does the player feel constantly productive, able to act and have those actions matter (advance their agenda) every turn? • FIERO: Multiple big victory moments for players?

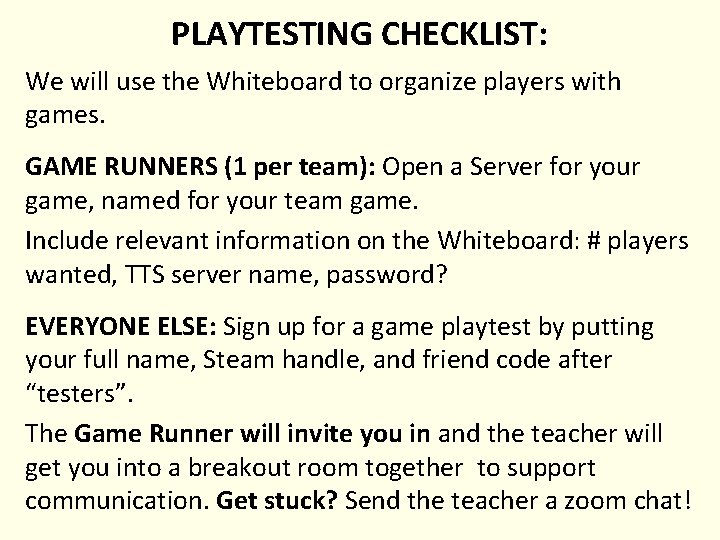
PLAYTESTING CHECKLIST: We will use the Whiteboard to organize players with games. GAME RUNNERS (1 per team): Open a Server for your game, named for your team game. Include relevant information on the Whiteboard: # players wanted, TTS server name, password? EVERYONE ELSE: Sign up for a game playtest by putting your full name, Steam handle, and friend code after “testers”. The Game Runner will invite you in and the teacher will get you into a breakout room together to support communication. Get stuck? Send the teacher a zoom chat!

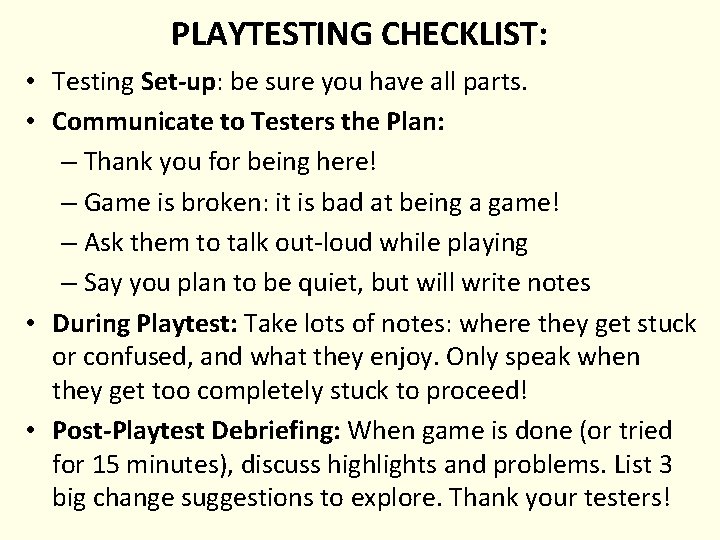
PLAYTESTING CHECKLIST: • Testing Set-up: be sure you have all parts. • Communicate to Testers the Plan: – Thank you for being here! – Game is broken: it is bad at being a game! – Ask them to talk out-loud while playing – Say you plan to be quiet, but will write notes • During Playtest: Take lots of notes: where they get stuck or confused, and what they enjoy. Only speak when they get too completely stuck to proceed! • Post-Playtest Debriefing: When game is done (or tried for 15 minutes), discuss highlights and problems. List 3 big change suggestions to explore. Thank your testers!

Design: Why Make a Game about a Job?

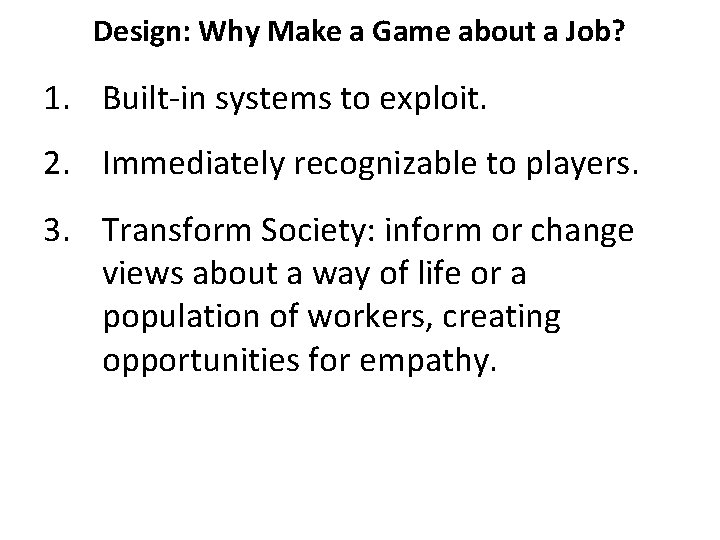
Design: Why Make a Game about a Job? 1. Built-in systems to exploit. 2. Immediately recognizable to players. 3. Transform Society: inform or change views about a way of life or a population of workers, creating opportunities for empathy.

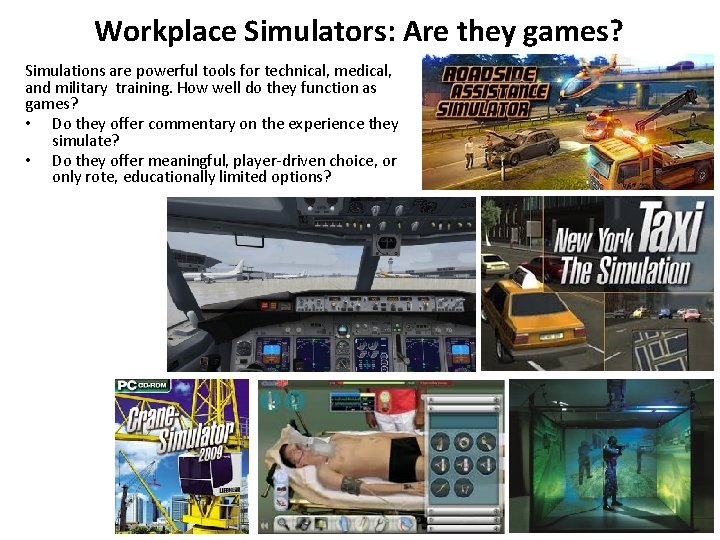
Workplace Simulators: Are they games? Simulations are powerful tools for technical, medical, and military training. How well do they function as games? • Do they offer commentary on the experience they simulate? • Do they offer meaningful, player-driven choice, or only rote, educationally limited options?

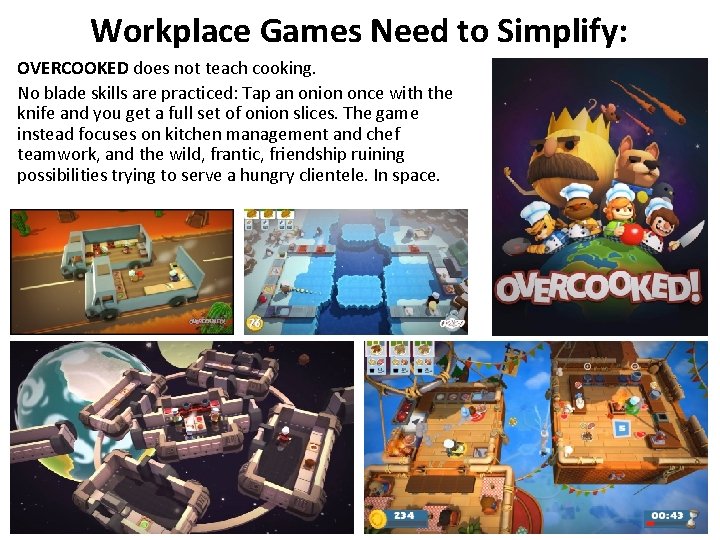
Workplace Games Need to Simplify: OVERCOOKED does not teach cooking. No blade skills are practiced: Tap an onion once with the knife and you get a full set of onion slices. The game instead focuses on kitchen management and chef teamwork, and the wild, frantic, friendship ruining possibilities trying to serve a hungry clientele. In space.

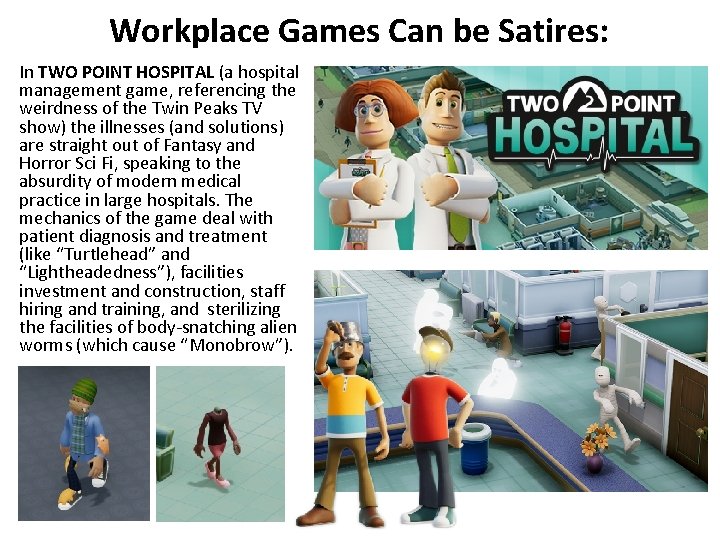
Workplace Games Can be Satires: In TWO POINT HOSPITAL (a hospital management game, referencing the weirdness of the Twin Peaks TV show) the illnesses (and solutions) are straight out of Fantasy and Horror Sci Fi, speaking to the absurdity of modern medical practice in large hospitals. The mechanics of the game deal with patient diagnosis and treatment (like “Turtlehead” and “Lightheadedness”), facilities investment and construction, staff hiring and training, and sterilizing the facilities of body-snatching alien worms (which cause “Monobrow”).

Workplace Games: The Breakdown Each game you create this week should answer the following questions: 1. What is the player ROLE? What job are they fulfilling, and what is the setting? 2. What is the primary GAMEPLAY, and what are the main work TASKS the player will attempt? 3. What are the main FEEDBACK systems? Customer happiness, survival, payment? How does the player know if they are doing well throughout the game? 4. What are the critical CHOICES the player will need to make, and what are the STAKES of success and failure?

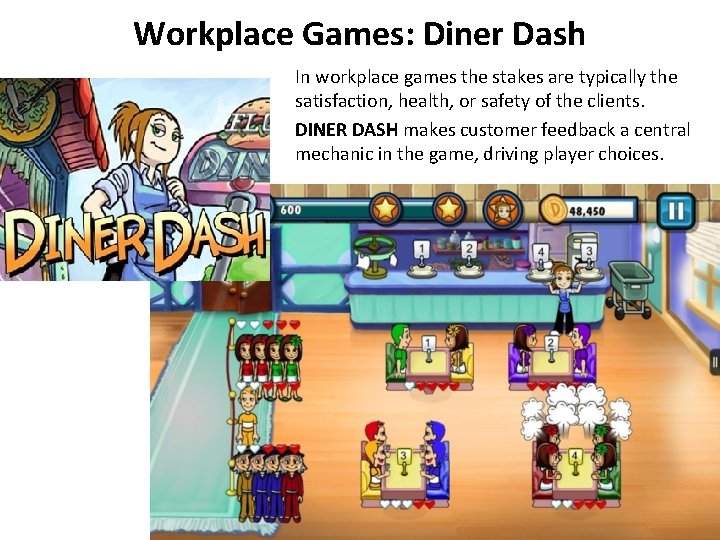
Workplace Games: Diner Dash In workplace games the stakes are typically the satisfaction, health, or safety of the clients. DINER DASH makes customer feedback a central mechanic in the game, driving player choices.

Workplace Games: Diner Dash 1. ROLE: You are a waitress managing meals for a small diner crowd. 2. GAMEPLAY: Casual/Resource Gathering Game: Seat customers, take food orders, deliver orders to chef, deliver coffee and food, take money, clear tables. 3. FEEDBACK: Customers get cranky if made to wait. 4. CHOICES/STAKES: Make decisions on who gets fed first: Try not to get overwhelmed by multiple tasks/complaints.

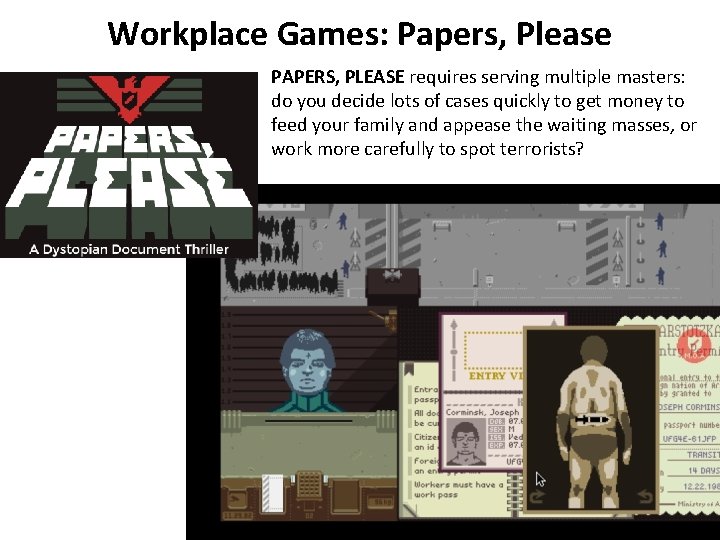
Workplace Games: Papers, Please PAPERS, PLEASE requires serving multiple masters: do you decide lots of cases quickly to get money to feed your family and appease the waiting masses, or work more carefully to spot terrorists?

Workplace Games: Papers, Please 1. ROLE: Manage a border checkpoint. 2. GAMEPLAY: Puzzle Game: Compare documents, look for discrepancies/ criminals. Ask for more information. Arrest people. 3. FEEDBACK: Applicants can attempt to plead or bribe, and waiting masses can act against your state. 4. CHOICES/STAKES: Make decisions on who passes through. Try not to be weighed down by those decisions.

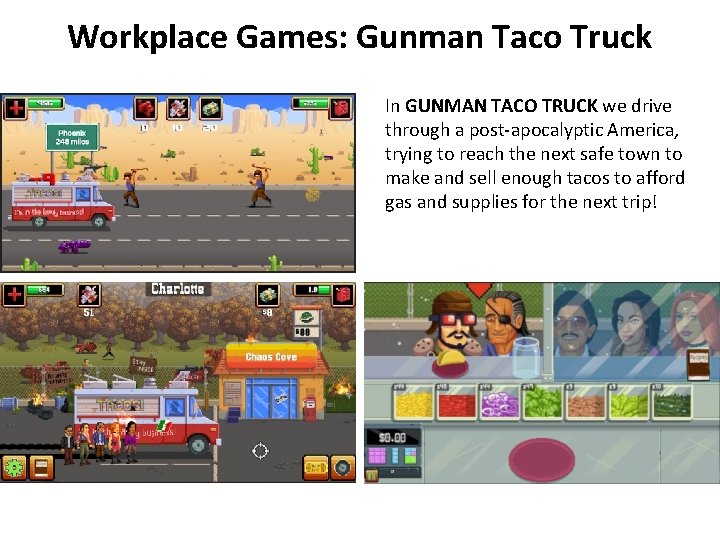
Workplace Games: Gunman Taco Truck In GUNMAN TACO TRUCK we drive through a post-apocalyptic America, trying to reach the next safe town to make and sell enough tacos to afford gas and supplies for the next trip!

Workplace Games: Gunman Taco Truck 1. ROLE: Food Truck driver and cook. 2. GAMEPLAY: Memory game: remember ingredients to fulfil orders under time limits. Driving game: navigate roads filled with zombies and other monsters (and collect meat for tacos!). 3. FEEDBACK: Supplies and money limits, tip-sizes from customers. 4. CHOICES/STAKES: Make decisions on driving routes and money management to survive to the next town.

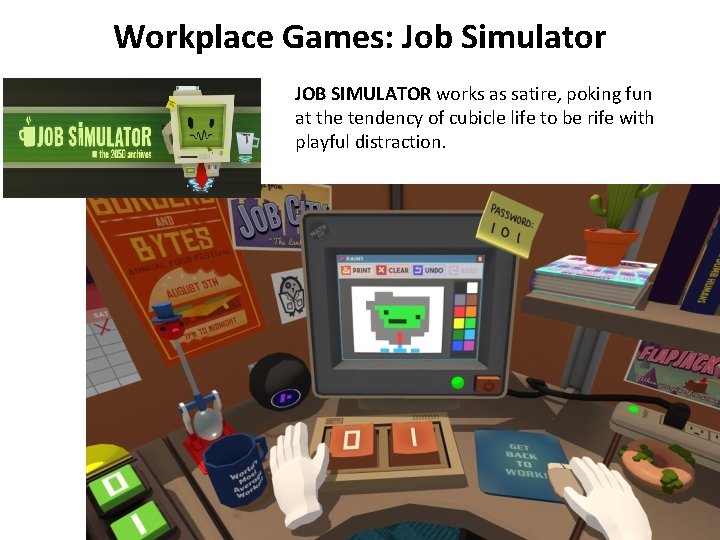
Workplace Games: Job Simulator JOB SIMULATOR works as satire, poking fun at the tendency of cubicle life to be rife with playful distraction.

Workplace Games: Job Simulator 1. 2. 3. 4. ROLE: Work an office cubicle job (in VR). GAMEPLAY: Exploration game: Fulfill tasks/missions assigned by robot boss. Explore distractions in cubicle. FEEDBACK: Responses from Robot Boss and signs. CHOICES/STAKES: Make decisions on how to spend time. Additional Game Modes: Auto Mechanic, Convenience Store Clerk, etc.

Workplace Games: Create! Choose a new team to design a tabletop or digital Workplace game, and produce a paper prototype for next week 1. 2. 3. 4. 5. THEME: Brainstorm multiple jobs with clear routines. MECHANICS/FLOW: List the routines and consider which lend themselves to interesting choices and playable mechanics. FEEDBACK: Consider potential actions by the customers of the workplace, and how they can provide meaningful stakes and feedback to the player. GOAL: Determine the components of a successful day/job completion. FIERO: Consider the critical choices the player can make to achieve the goal, and the emotional impact of those choices, to adjust mechanics and feedback for greater impact.

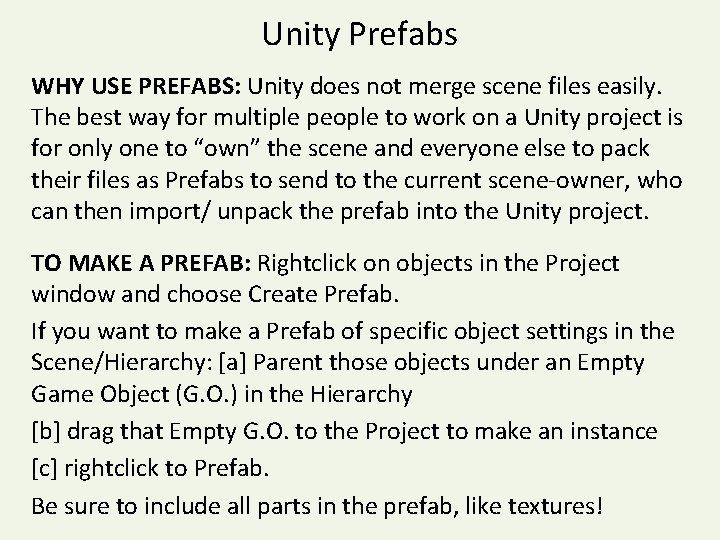
Unity Prefabs WHY USE PREFABS: Unity does not merge scene files easily. The best way for multiple people to work on a Unity project is for only one to “own” the scene and everyone else to pack their files as Prefabs to send to the current scene-owner, who can then import/ unpack the prefab into the Unity project. TO MAKE A PREFAB: Rightclick on objects in the Project window and choose Create Prefab. If you want to make a Prefab of specific object settings in the Scene/Hierarchy: [a] Parent those objects under an Empty Game Object (G. O. ) in the Hierarchy [b] drag that Empty G. O. to the Project to make an instance [c] rightclick to Prefab. Be sure to include all parts in the prefab, like textures!

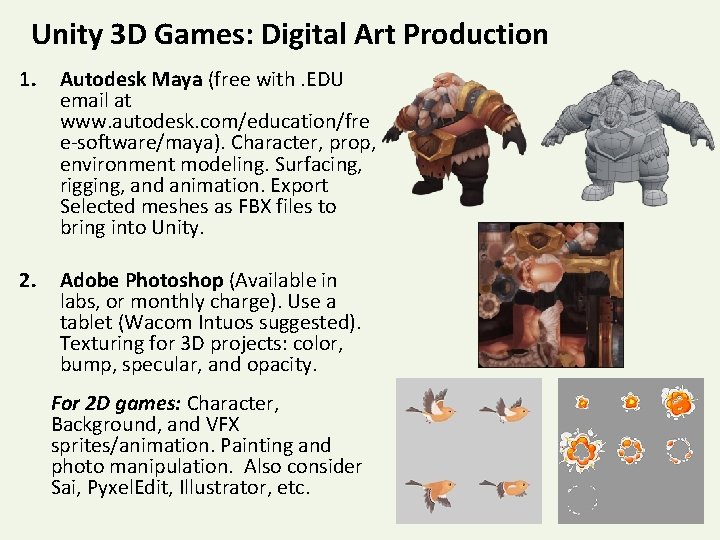
Unity 3 D Games: Digital Art Production 1. Autodesk Maya (free with. EDU email at www. autodesk. com/education/fre e-software/maya). Character, prop, environment modeling. Surfacing, rigging, and animation. Export Selected meshes as FBX files to bring into Unity. 2. Adobe Photoshop (Available in labs, or monthly charge). Use a tablet (Wacom Intuos suggested). Texturing for 3 D projects: color, bump, specular, and opacity. For 2 D games: Character, Background, and VFX sprites/animation. Painting and photo manipulation. Also consider Sai, Pyxel. Edit, Illustrator, etc.

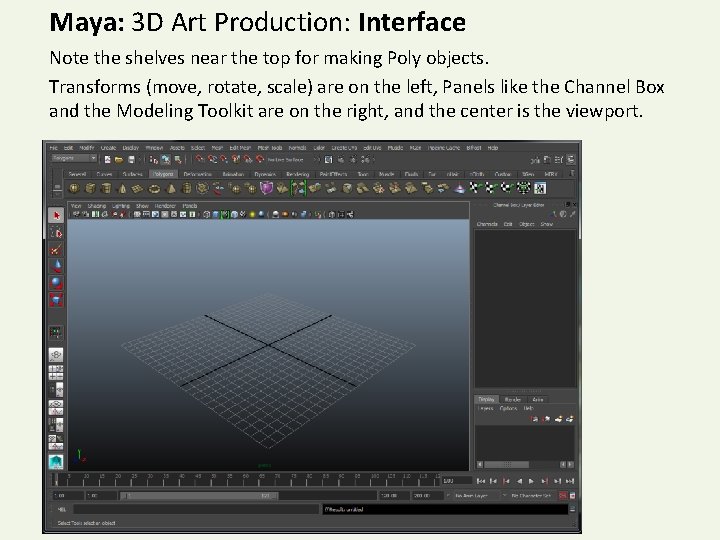
Maya: 3 D Art Production: Interface Note the shelves near the top for making Poly objects. Transforms (move, rotate, scale) are on the left, Panels like the Channel Box and the Modeling Toolkit are on the right, and the center is the viewport.

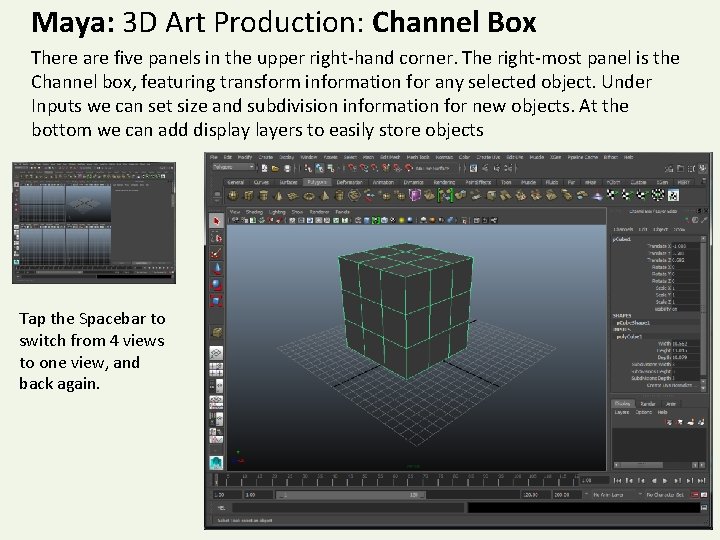
Maya: 3 D Art Production: Channel Box There are five panels in the upper right-hand corner. The right-most panel is the Channel box, featuring transform information for any selected object. Under Inputs we can set size and subdivision information for new objects. At the bottom we can add display layers to easily store objects Tap the Spacebar to switch from 4 views to one view, and back again.

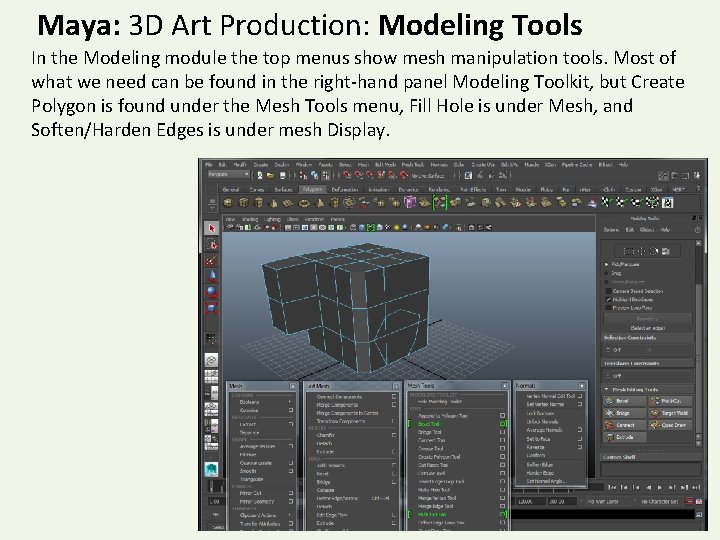
Maya: 3 D Art Production: Modeling Tools In the Modeling module the top menus show mesh manipulation tools. Most of what we need can be found in the right-hand panel Modeling Toolkit, but Create Polygon is found under the Mesh Tools menu, Fill Hole is under Mesh, and Soften/Harden Edges is under mesh Display.

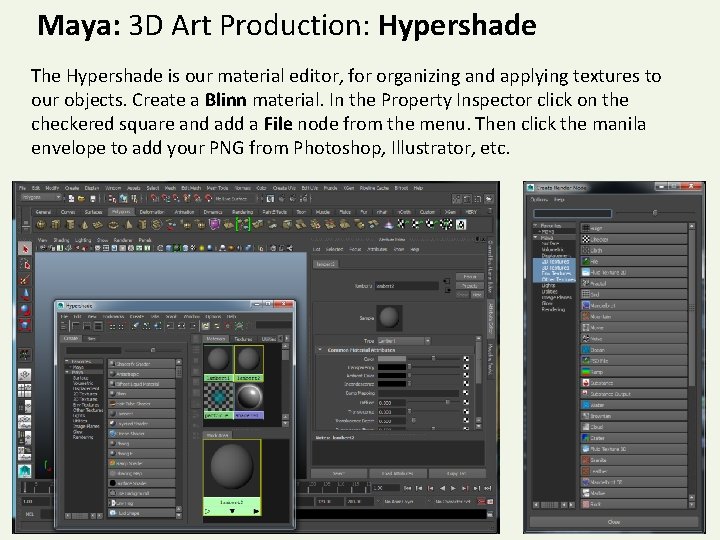
Maya: 3 D Art Production: Hypershade The Hypershade is our material editor, for organizing and applying textures to our objects. Create a Blinn material. In the Property Inspector click on the checkered square and add a File node from the menu. Then click the manila envelope to add your PNG from Photoshop, Illustrator, etc.

Maya: 3 D Art Basics: • • Be sure you are in the Modeling Module! Tap spacebar to switch views. Create a Primitive from the Polygon shelf or Mesh Tools > Create Poly Set Channel Box inputs parameters for initial dimensions and divisions Apply modeling Transforms and Tools to get desired shape: – Transforms ([w]=move, [e]=rotate, [r]=scale or [q] select in Left. Side column) in both Object Mode and Component levels (Vertices, Edges, Faces). Gizmos, Uniform vs Non-uniform scale. – Right. Click. Hold on object to choose Component Mode or Object Mode. – Modeling Toolkit panel: Multi. Cut, Extrude, Connect, Bevel, Bridge, Target Weld. See parameters below and hit [Enter] to commit a change. – Mesh menu: Extract, Combine, Fill Hole, Boolean – Edit Mesh menu: Merge Components, Edge/Collapse – Selecting: Double. Click an edge for a Loop, [Shift]+click an adjacent face for a Ring, [Shift]+[>]/[<] to increase or decrease a face selection.

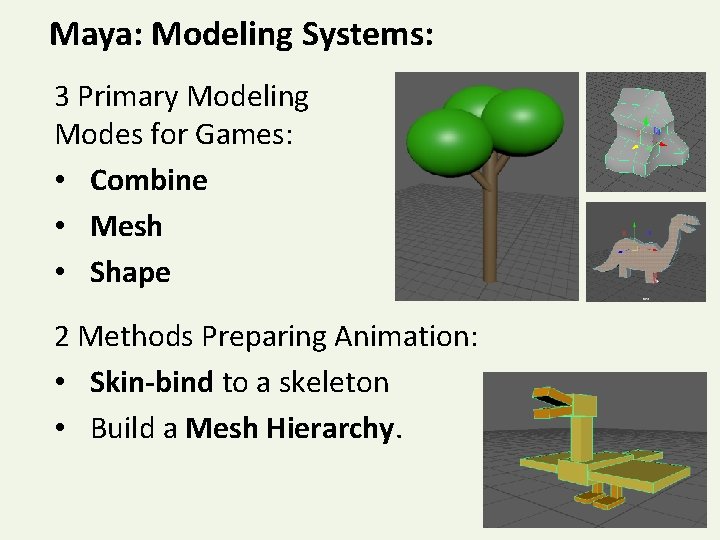
Maya: Modeling Systems: 3 Primary Modeling Modes for Games: • Combine • Mesh • Shape 2 Methods Preparing Animation: • Skin-bind to a skeleton • Build a Mesh Hierarchy.

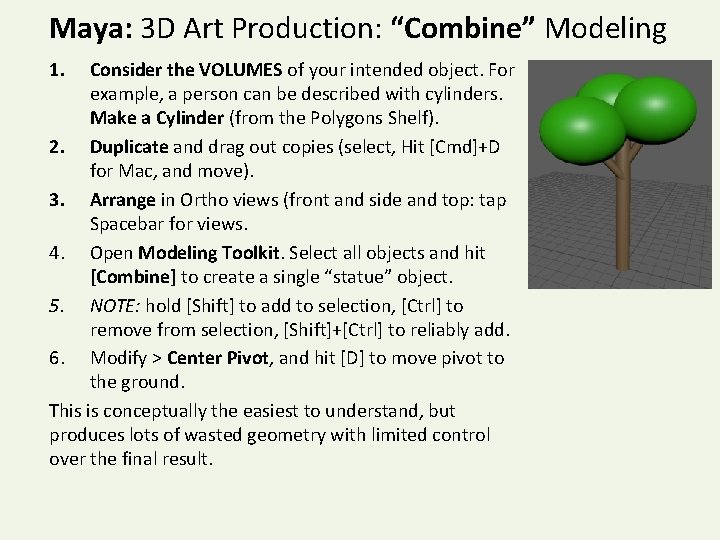
Maya: 3 D Art Production: “Combine” Modeling 1. Consider the VOLUMES of your intended object. For example, a person can be described with cylinders. Make a Cylinder (from the Polygons Shelf). 2. Duplicate and drag out copies (select, Hit [Cmd]+D for Mac, and move). 3. Arrange in Ortho views (front and side and top: tap Spacebar for views. 4. Open Modeling Toolkit. Select all objects and hit [Combine] to create a single “statue” object. 5. NOTE: hold [Shift] to add to selection, [Ctrl] to remove from selection, [Shift]+[Ctrl] to reliably add. 6. Modify > Center Pivot, and hit [D] to move pivot to the ground. This is conceptually the easiest to understand, but produces lots of wasted geometry with limited control over the final result.

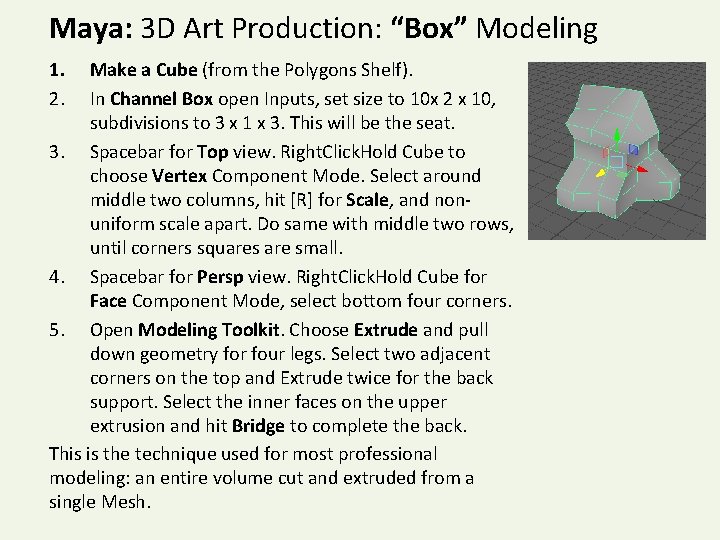
Maya: 3 D Art Production: “Box” Modeling 1. 2. Make a Cube (from the Polygons Shelf). In Channel Box open Inputs, set size to 10 x 2 x 10, subdivisions to 3 x 1 x 3. This will be the seat. 3. Spacebar for Top view. Right. Click. Hold Cube to choose Vertex Component Mode. Select around middle two columns, hit [R] for Scale, and nonuniform scale apart. Do same with middle two rows, until corners squares are small. 4. Spacebar for Persp view. Right. Click. Hold Cube for Face Component Mode, select bottom four corners. 5. Open Modeling Toolkit. Choose Extrude and pull down geometry for four legs. Select two adjacent corners on the top and Extrude twice for the back support. Select the inner faces on the upper extrusion and hit Bridge to complete the back. This is the technique used for most professional modeling: an entire volume cut and extruded from a single Mesh.

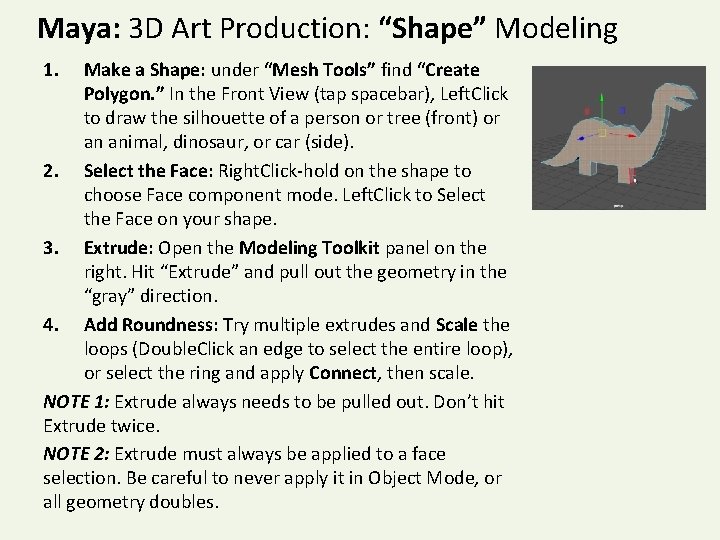
Maya: 3 D Art Production: “Shape” Modeling 1. Make a Shape: under “Mesh Tools” find “Create Polygon. ” In the Front View (tap spacebar), Left. Click to draw the silhouette of a person or tree (front) or an animal, dinosaur, or car (side). 2. Select the Face: Right. Click-hold on the shape to choose Face component mode. Left. Click to Select the Face on your shape. 3. Extrude: Open the Modeling Toolkit panel on the right. Hit “Extrude” and pull out the geometry in the “gray” direction. 4. Add Roundness: Try multiple extrudes and Scale the loops (Double. Click an edge to select the entire loop), or select the ring and apply Connect, then scale. NOTE 1: Extrude always needs to be pulled out. Don’t hit Extrude twice. NOTE 2: Extrude must always be applied to a face selection. Be careful to never apply it in Object Mode, or all geometry doubles.

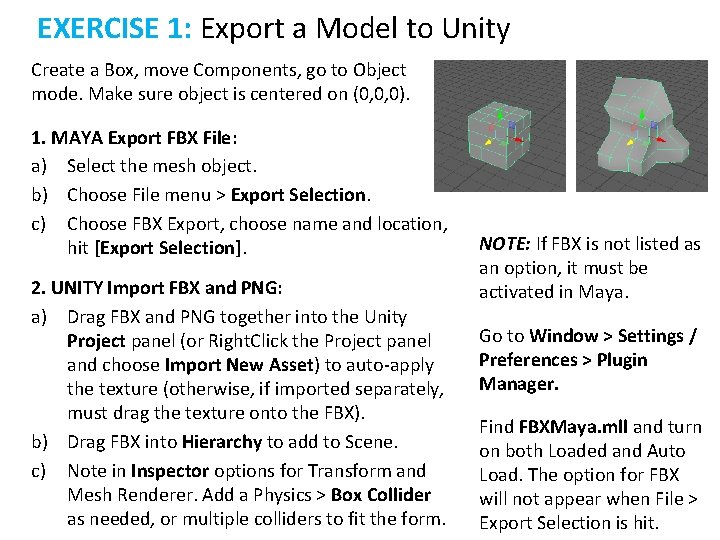
EXERCISE 1: Export a Model to Unity Create a Box, move Components, go to Object mode. Make sure object is centered on (0, 0, 0). 1. MAYA Export FBX File: a) Select the mesh object. b) Choose File menu > Export Selection. c) Choose FBX Export, choose name and location, hit [Export Selection]. 2. UNITY Import FBX and PNG: a) Drag FBX and PNG together into the Unity Project panel (or Right. Click the Project panel and choose Import New Asset) to auto-apply the texture (otherwise, if imported separately, must drag the texture onto the FBX). b) Drag FBX into Hierarchy to add to Scene. c) Note in Inspector options for Transform and Mesh Renderer. Add a Physics > Box Collider as needed, or multiple colliders to fit the form. NOTE: If FBX is not listed as an option, it must be activated in Maya. Go to Window > Settings / Preferences > Plugin Manager. Find FBXMaya. mll and turn on both Loaded and Auto Load. The option for FBX will not appear when File > Export Selection is hit.

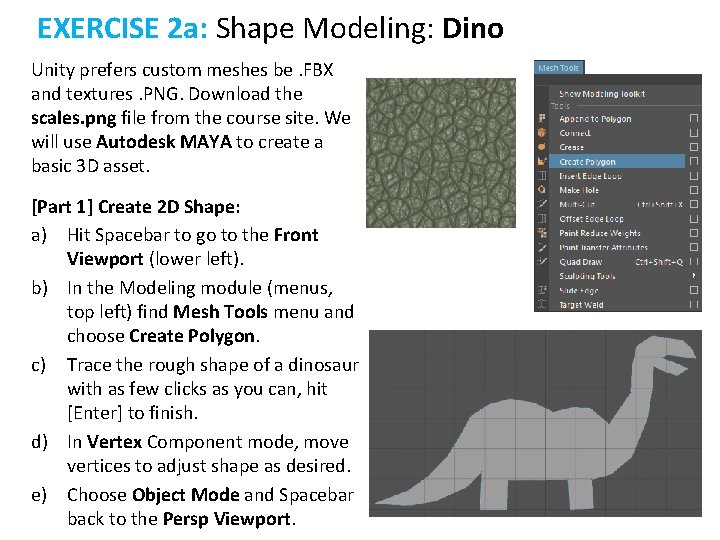
EXERCISE 2 a: Shape Modeling: Dino Unity prefers custom meshes be. FBX and textures. PNG. Download the scales. png file from the course site. We will use Autodesk MAYA to create a basic 3 D asset. [Part 1] Create 2 D Shape: a) Hit Spacebar to go to the Front Viewport (lower left). b) In the Modeling module (menus, top left) find Mesh Tools menu and choose Create Polygon. c) Trace the rough shape of a dinosaur with as few clicks as you can, hit [Enter] to finish. d) In Vertex Component mode, move vertices to adjust shape as desired. e) Choose Object Mode and Spacebar back to the Persp Viewport.
![EXERCISE 2 b Shape Modeling Dino Part 2 Extrude into a 3 D object EXERCISE 2 b: Shape Modeling: Dino [Part 2] Extrude into a 3 D object:](https://slidetodoc.com/presentation_image_h2/7d5a5efb64819f45b54ac49493c46830/image-34.jpg)
EXERCISE 2 b: Shape Modeling: Dino [Part 2] Extrude into a 3 D object: a) In the Modeling Toolkit (Right panel) choose the Face component Mode (top), select the dino shape face. b) Click the Extrude tool button and pull out the 3 D form (now looks like a wood block of the dino). c) Choose Object Mode (Modeling Toolkit top). d) Hit [W] for the Move tool, move your dino model to the world center, standing on the Persp grid. e) Hit [D] to put pivot at base.
![EXERCISE 2 c Shape Modeling Dino Part 3 Apply Texture a Open the Hypershade EXERCISE 2 c: Shape Modeling: Dino [Part 3] Apply Texture: a) Open the Hypershade](https://slidetodoc.com/presentation_image_h2/7d5a5efb64819f45b54ac49493c46830/image-35.jpg)
EXERCISE 2 c: Shape Modeling: Dino [Part 3] Apply Texture: a) Open the Hypershade (blue olive). b) Create a Blinn material from the leftside library. c) In the Properties Editor (right side) find Color and click on the checkered square to add a “File” node. d) Click on the File node and click on the manila envelope icon to add the provided scales. png file. e) Middle-mouse drag the Blinn material onto your 3 D Dino mesh and hit [6] to view the texture in the viewport. f) To change the tiling, click on the Place 2 D node and adjust the tiling settings for U (horizontal) and V (vertical). Try 5 x 5.
![EXERCISE 3 a Combine Modeling Tree Part 1 SET UNITS Unity uses Meters but EXERCISE 3 a: Combine Modeling: Tree [Part 1] SET UNITS: Unity uses Meters, but](https://slidetodoc.com/presentation_image_h2/7d5a5efb64819f45b54ac49493c46830/image-36.jpg)
EXERCISE 3 a: Combine Modeling: Tree [Part 1] SET UNITS: Unity uses Meters, but Maya by default is Centimeters. • In the Maya Preferences Panel (lower-right corner) set Settings > Working Units > Linear to Meters. • Set Timeslider > Playback Speed to 24 fps x 1. [Part 2] Create a Cylinder: a) In the Poly Modeling shelf, create a Cylinder. This will be the trunk of the tree. b) In the Channel Box (Right-side panel), under Inputs, set height to 20 and division axis to 8. c) Select the Cylinder and hit [w] to Move it up on the green Yaxis, to above the Persp grid. d) Hit [Cmd]+[d], Move/Scale/Rotate copies for branches. e) Create a Sphere. Set both divisions to 12. Move [w] and Scale [r] to make a big ball of leaves at the top. f) Hit [Cmd]+[d], Move/Scale/Rotate copies for more leaves. NOTE: To give copies Input nodes: Edit > Duplicate Special > Options, choose “copy” and “Duplicate Input Graph”. g) Select all objects, hit Mesh > Combine to make one object. h) Mesh Display > Soften Edges for a smooth result.
![EXERCISE 3 b Combine Modeling Tree Part 3 Apply the Texture and adjust UVs EXERCISE 3 b: Combine Modeling: Tree [Part 3] Apply the Texture and adjust UVs:](https://slidetodoc.com/presentation_image_h2/7d5a5efb64819f45b54ac49493c46830/image-37.jpg)
EXERCISE 3 b: Combine Modeling: Tree [Part 3] Apply the Texture and adjust UVs: a) Open the Hypershade (blue olive). b) Create a Blinn material from the library. c) In the Property Inspector click the Checkered Square next to Color to add a File node. d) Click the Manila envelope to add the tree texture (grid colors). e) Middle-Mouse click and drag this material onto the tree mesh, and hit [6] to view it. Note the object now has brown and green parts. f) Open UV menu > UV Editor. With tree selected we see default UVW coordinates for the cylinder and spheres. g) Right. Click. Hold to choose UV mode. Doubleclick a UV to select the entire shell, Move [w] and Shrink [r] into the correct color. h) Right. Click. Hold the mesh in the Persp view to choose Object mode. [Part 4] Clean up and Export: a) Hit [w] and [d] to move the Pivot on the y-axis to the tree base. b) Modify > Freeze Transforms c) Edit > Delete by Type > History. d) File > Export Selection, choose location, name (tree), type (. FBX).

Notes on Production Expectations: Work fast, work simple, every week submit new content Everyone is responsible for contributing to the weekly build every week. Programmers are expected to have new or improved features, and artists and audio designers are expected to contribute new assets every week. For the first couple of weeks these assets SHOULD be the correct SIZE, but otherwise simple, functional, even crappy. Assets should allow playtesters to understand where they are and what they are doing, but otherwise not distract from whether the gameplay is fun. We call this Greyboxing or Zero Drafting. Get the game FULL of art and audio to text proportions and features, but don’t spend time making assets that are likely to be changed or cut as you continue designing the basic game, and don’t let pretty assets distract your testers from issues with the gameplay. SO, PRODUCTION WEEK #1: 3 D characters can just be cylinders with simple textures. Trees can be green spheres on top of a brown cylinder. Later, you can make more detailed Meshes for the final game.

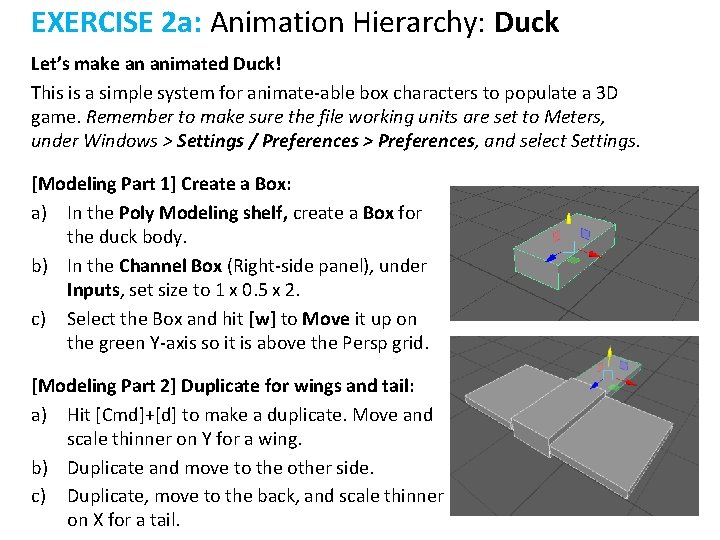
EXERCISE 2 a: Animation Hierarchy: Duck Let’s make an animated Duck! This is a simple system for animate-able box characters to populate a 3 D game. Remember to make sure the file working units are set to Meters, under Windows > Settings / Preferences > Preferences, and select Settings. [Modeling Part 1] Create a Box: a) In the Poly Modeling shelf, create a Box for the duck body. b) In the Channel Box (Right-side panel), under Inputs, set size to 1 x 0. 5 x 2. c) Select the Box and hit [w] to Move it up on the green Y-axis so it is above the Persp grid. [Modeling Part 2] Duplicate for wings and tail: a) Hit [Cmd]+[d] to make a duplicate. Move and scale thinner on Y for a wing. b) Duplicate and move to the other side. c) Duplicate, move to the back, and scale thinner on X for a tail.
![EXERCISE 2 c Animation Hierarchy Duck Modeling Part 3 Duplicate Body for Legs EXERCISE 2 c: Animation Hierarchy: Duck [Modeling Part 3] Duplicate Body for Legs &](https://slidetodoc.com/presentation_image_h2/7d5a5efb64819f45b54ac49493c46830/image-40.jpg)
EXERCISE 2 c: Animation Hierarchy: Duck [Modeling Part 3] Duplicate Body for Legs & Feet: a) Select the body and hit [Cmd/Ctrl]+[d]. Move below the body and scale thinner on X and Z axes to make a leg. b) Select the body again, hit [Cmd]+[d]. Position at base of leg to make a foot. c) Select leg, [Shift] + select foot. Hit [Cmd]+[d] to copy and move for other leg/foot. [Modeling Part 4] Make Neck, Head, and Beak: a) Select the body, [Cmd/Ctrl]+[d], drag up and scale larger to make the neck. b) Select the body, [Cmd/Ctrl]+[d], drag up and scale smaller to make the head. c) Make a copy of the head for the upper beak, (scale thinner on Y). Make a copy and move that down to be the lower beak. Rotate both outward for an open mouth.
![EXERCISE 2 b Animation Hierarchy Duck Texturing Part 1 Apply Texture a Open the EXERCISE 2 b: Animation Hierarchy: Duck [Texturing Part 1] Apply Texture: a) Open the](https://slidetodoc.com/presentation_image_h2/7d5a5efb64819f45b54ac49493c46830/image-41.jpg)
EXERCISE 2 b: Animation Hierarchy: Duck [Texturing Part 1] Apply Texture: a) Open the Hypershade (blue olive). b) Create a new Blinn material from the library. c) In the Property Inspector click the Checkered Square next to Color to add a File node. d) Click Manila envelope to add duck texture (duck 3 D. png). e) Select all boxes, Right. Click on the Blinn Material and choose Assign Material to Selection (or Middle-Mouse click and drag the material onto the meshes directly). f) Hit [6] to view the yellow and orange texture on the boxes. Note the boxes each have both colors, and we want each box to be just yellow (all but legs and beak) or just orange.
![EXERCISE 2 b Animation Hierarchy Duck Texturing Part 2 Adjust UVs a Open UV EXERCISE 2 b: Animation Hierarchy: Duck [Texturing Part 2] Adjust UVs: a) Open UV](https://slidetodoc.com/presentation_image_h2/7d5a5efb64819f45b54ac49493c46830/image-42.jpg)
EXERCISE 2 b: Animation Hierarchy: Duck [Texturing Part 2] Adjust UVs: a) Open UV menu > UV Editor. With the boxes selected we see the default UVW coordinates for them: upsidedown T (all stacked on top of each other so it looks like just one). b) Right. Click. Hold to choose Face mode. Select around the faces. Hit [r] to Scale smaller and [w] to move left, so all are inside the yellow. c) Right. Click. Hold the mesh in the Persp view to choose Object mode. Make the beak and legs a different color: f) Select the beak and leg boxes. In UV > UV Editor Right. Click. Hold to choose Face mode, select around those faces and drag to be fully in the orange side. g) Right. Click. Hold the mesh in the Persp view to choose Object mode.

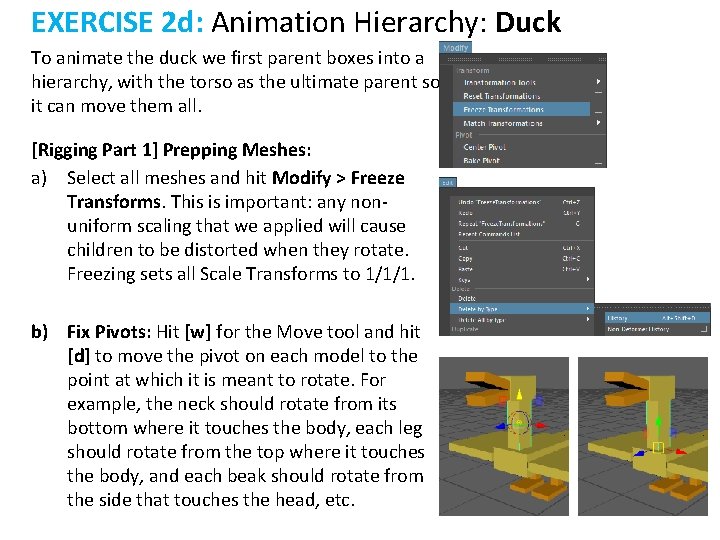
EXERCISE 2 d: Animation Hierarchy: Duck To animate the duck we first parent boxes into a hierarchy, with the torso as the ultimate parent so it can move them all. [Rigging Part 1] Prepping Meshes: a) Select all meshes and hit Modify > Freeze Transforms. This is important: any nonuniform scaling that we applied will cause children to be distorted when they rotate. Freezing sets all Scale Transforms to 1/1/1. b) Fix Pivots: Hit [w] for the Move tool and hit [d] to move the pivot on each model to the point at which it is meant to rotate. For example, the neck should rotate from its bottom where it touches the body, each leg should rotate from the top where it touches the body, and each beak should rotate from the side that touches the head, etc.
![EXERCISE 2 d Animation Hierarchy Duck Rigging Part 2 Parenting Hierarchies a Parenting Select EXERCISE 2 d: Animation Hierarchy: Duck [Rigging Part 2] Parenting Hierarchies: a) Parenting: Select](https://slidetodoc.com/presentation_image_h2/7d5a5efb64819f45b54ac49493c46830/image-44.jpg)
EXERCISE 2 d: Animation Hierarchy: Duck [Rigging Part 2] Parenting Hierarchies: a) Parenting: Select an object (like the head), [Shift]+ select its intended parent (the neck), and hit [p] to parent. Now, when the neck is rotated, the head inherits that motion and moves also. b) Repeat parenting for all forms: • The wings, tail, legs, and neck all get parented to the original body Box. • Both beaks get parented to the head. • The feet get parented to the legs. NOTE: unparent by selecting a child and hitting [Shift]+[p].
![EXERCISE 2 e Animation Hierarchy Duck Animation 1 Basics Now that we have the EXERCISE 2 e: Animation Hierarchy: Duck [Animation 1] Basics: Now that we have the](https://slidetodoc.com/presentation_image_h2/7d5a5efb64819f45b54ac49493c46830/image-45.jpg)
EXERCISE 2 e: Animation Hierarchy: Duck [Animation 1] Basics: Now that we have the full model and rig, let’s add some animations so we can export to Unity. a) Select all the objects. At frame 1 in the Timeslider, hit [s] to set keyframes for them all. This is the Bind Pose: actual animation will start at frame 10. b) In the lower right corner, next to the settings button, turn Auto Keymode Toggle. This will automatically set a keyframe on already keyframed tracks when we change the object at a new frame. c) Make a looping animation: select all objects, at frame 200 hit [s] and at frame 230 hit [s]. These are bookends: we can make a change between them and not change the timeline outside of them. Now go to frame 215 and rotate the neck down/forward, so the beak pecks the ground. Because Auto. Key. Mode. Toggle is turned on, this sets a keyframe. Play the animation to see the pecking!
![EXERCISE 2 e Animation Hierarchy Duck Animation 2 Notes Consider these animation sequences An EXERCISE 2 e: Animation Hierarchy: Duck [Animation 2] Notes: Consider these animation sequences: An](https://slidetodoc.com/presentation_image_h2/7d5a5efb64819f45b54ac49493c46830/image-46.jpg)
EXERCISE 2 e: Animation Hierarchy: Duck [Animation 2] Notes: Consider these animation sequences: An Idle animation frames 10 -60: • At 200 and 230 lower/rest the wings. • At frames 25 and 45 rotate joints a bit for small movement. A Flying animation frames 100 -130: • At 100 and 130 raise the legs. • At 110 raise the wings and at 120 lower the wings for a flap. A Pecking animation frames 200 -230: • At 200 and 230 lower/rest the wings. • At frame 215, rotate the neck down/forward so the beak pecks the ground. Always start by selecting all objects and hitting [s] at those frames. Keyframes can be copied and pasted from one frame to another by Right. Clicking just in front of the red Keyframe line in the Timeline. To move or scale a range of keyframes, hold [Shift] and select around them in the Timeline, then click and drag on the internal or external arrows.
![EXERCISE 2 f Animation Hierarchy Duck Exporting MAYA EXPORT Animated FBX a Set your EXERCISE 2 f: Animation Hierarchy: Duck [Exporting] MAYA EXPORT Animated FBX: a) Set your](https://slidetodoc.com/presentation_image_h2/7d5a5efb64819f45b54ac49493c46830/image-47.jpg)
EXERCISE 2 f: Animation Hierarchy: Duck [Exporting] MAYA EXPORT Animated FBX: a) Set your Timeline range to the extent of your keyframes (all must be displayed). b) Select all the objects. File > Export Selected. c) Choose the FBX format and check animations settings on the right: be sure animation is checked on, and bake animation is also checked on. Check that the range is at least as long as your total animations. Hit [OK]
![EXERCISE 2 f Animation Hierarchy Duck Importing UNITY IMPORT FBX a Right Click the EXERCISE 2 f: Animation Hierarchy: Duck [Importing] UNITY IMPORT FBX: a) Right. Click the](https://slidetodoc.com/presentation_image_h2/7d5a5efb64819f45b54ac49493c46830/image-48.jpg)
EXERCISE 2 f: Animation Hierarchy: Duck [Importing] UNITY IMPORT FBX: a) Right. Click the Project panel to import both the FBX and Texture PNG at the same time, so the texture is automatically applied (otherwise, just drag the texture on afterwards). b) Note the twirly on the FBX. Open to see the parts. Note all animation is currently just one clip called Take 01. We want each animation you created to be its own clip, to be used in a Mecanim State machine. c) In the Inspector, open the Animation tab for your character. Next to Take 01 click [+] for as many other clips you made. Select take 01 in the list, change its name to Pecking, turn off Clamp and set the range to 10 -30. Turn on Loop and hit [Apply] at bottom. d) Repeat for the other clips!

Due Next Week: • HOMEWORK #5: With your new team, meet outside of class to revise/discuss the Workplace Game design from class. Create and test the tabletop game, and then begin planning a Unity implementation. EACH TEAM WILL TYPE AND SUBMIT 1 WORKPLACE GAME PAPER PROTOTYPE: Description of workplace routines, gameplay rules, board image, photos of initial setup and key moments. ALSO: See course site for assigned reading, and reference reading in Workplace game write-up.

Have an Excellent Week! And don’t forget to email with questions: Instructor: JASON WISER Jason. Wiser. Art@gmail. com Available daily.