Game Design LESSON 10 Introduction to Character Animation
![PART 5 b: Maya Animation Production: ANIMATE MEEPLE: Select object and hit [s] to PART 5 b: Maya Animation Production: ANIMATE MEEPLE: Select object and hit [s] to](https://slidetodoc.com/presentation_image_h/1125e39ad838aff5250e59b04754a244/image-27.jpg)
![PART 6 a: Unity Animation Pipeline: [A] SET-UP: 1. Create Ground Plane or Box. PART 6 a: Unity Animation Pipeline: [A] SET-UP: 1. Create Ground Plane or Box.](https://slidetodoc.com/presentation_image_h/1125e39ad838aff5250e59b04754a244/image-31.jpg)
- Slides: 46

Game Design LESSON #10: Introduction to Character Animation with Mecanim

TODAY: 1. Digital Prototype Testing/Sharing 2. Team Meetings 3. Unity 3 D Animation Pipeline: Animation Clips, State Machine, Components, and Game. Object -parenting.

PART 1 a: DIGITAL PLAYTESTING SET UP (10 minutes): 1. Teams Choose Tables 2. Set up game digital prototype on 3 laptops. 3. Decide initial Observers (1 -2) and Players. 4. Discuss: 1 -3 points/instructions to share with visiting players? Write them down!

PART 1 b: DIGITAL PLAYTESTING PLAYTEST ROUND #1 (20 minutes): 1. Observers stay to manage playtest, Players find other games to play. 2. If team chose 1 -3 instructions, give them. 3. Players attempt to play prototype (5 -10 min). Observers take notes! 4. Players fill out questionnaire (5 minutes). 5. Time permitting, discuss answers.

PART 1 c: TEAM MEETING (10 minutes): 1. Convene at your team table to discuss observations and questionnaire answers. 2. Discuss Production goals for the next week (next top priority Backlog items, potentially influenced by tester experience/ observations) and divide work equitably.

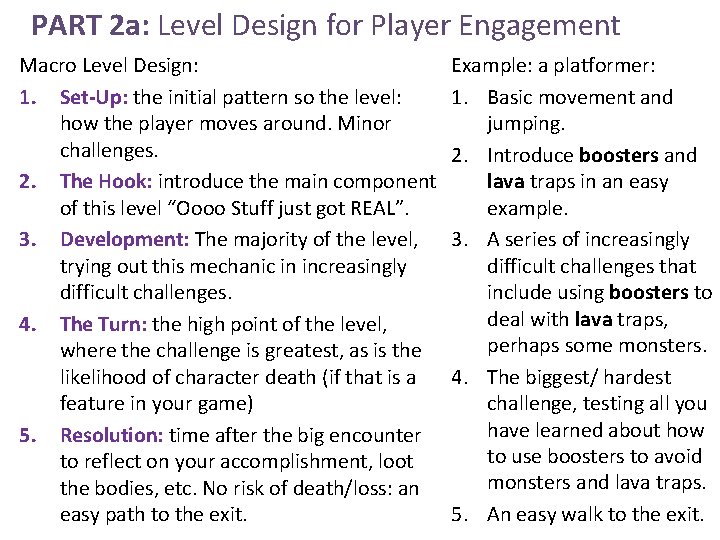
PART 2 a: Level Design for Player Engagement Macro Level Design: 1. Set-Up: the initial pattern so the level: how the player moves around. Minor challenges. 2. The Hook: introduce the main component of this level “Oooo Stuff just got REAL”. 3. Development: The majority of the level, trying out this mechanic in increasingly difficult challenges. 4. The Turn: the high point of the level, where the challenge is greatest, as is the likelihood of character death (if that is a feature in your game) 5. Resolution: time after the big encounter to reflect on your accomplishment, loot the bodies, etc. No risk of death/loss: an easy path to the exit. Example: a platformer: 1. Basic movement and jumping. 2. Introduce boosters and lava traps in an easy example. 3. A series of increasingly difficult challenges that include using boosters to deal with lava traps, perhaps some monsters. 4. The biggest/ hardest challenge, testing all you have learned about how to use boosters to avoid monsters and lava traps. 5. An easy walk to the exit.

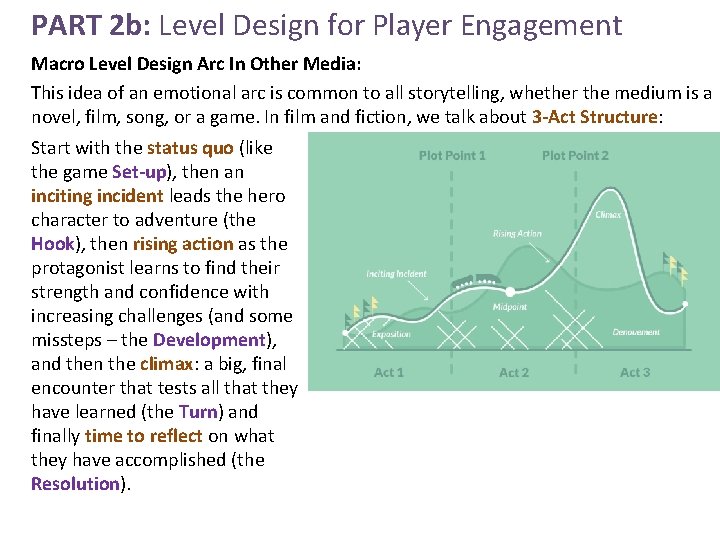
PART 2 b: Level Design for Player Engagement Macro Level Design Arc In Other Media: This idea of an emotional arc is common to all storytelling, whether the medium is a novel, film, song, or a game. In film and fiction, we talk about 3 -Act Structure: Start with the status quo (like the game Set-up), then an inciting incident leads the hero character to adventure (the Hook), then rising action as the protagonist learns to find their strength and confidence with increasing challenges (and some missteps – the Development), and then the climax: a big, final encounter that tests all that they have learned (the Turn) and finally time to reflect on what they have accomplished (the Resolution).

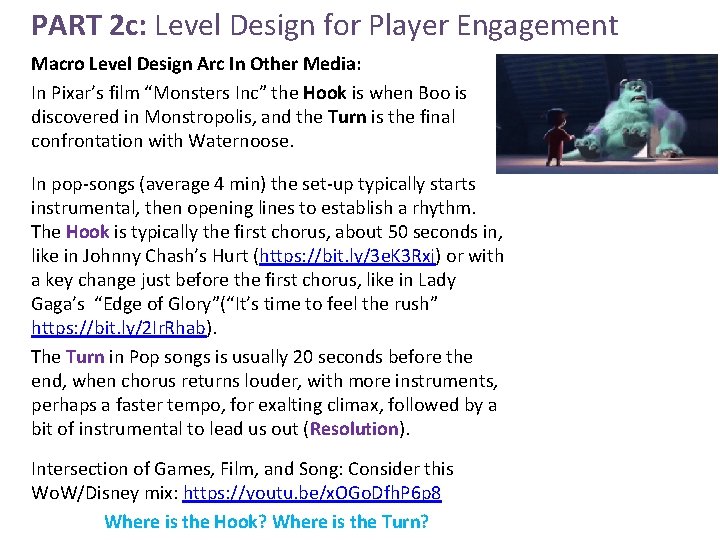
PART 2 c: Level Design for Player Engagement Macro Level Design Arc In Other Media: In Pixar’s film “Monsters Inc” the Hook is when Boo is discovered in Monstropolis, and the Turn is the final confrontation with Waternoose. In pop-songs (average 4 min) the set-up typically starts instrumental, then opening lines to establish a rhythm. The Hook is typically the first chorus, about 50 seconds in, like in Johnny Chash’s Hurt (https: //bit. ly/3 e. K 3 Rxj) or with a key change just before the first chorus, like in Lady Gaga’s “Edge of Glory”(“It’s time to feel the rush” https: //bit. ly/2 Ir. Rhab). The Turn in Pop songs is usually 20 seconds before the end, when chorus returns louder, with more instruments, perhaps a faster tempo, for exalting climax, followed by a bit of instrumental to lead us out (Resolution). Intersection of Games, Film, and Song: Consider this Wo. W/Disney mix: https: //youtu. be/x. OGo. Dfh. P 6 p 8 Where is the Hook? Where is the Turn?

PART 2 d: Level Design for Player Engagement Micro Level Design Arc In Other Media: How do we fill these MACRO structures with gameplay? We consider MICRO structures: patterns for players to learn and variations to make them interesting. Since games are a relatively, new medium, it is helpful to discuss how to create player movement patterns and variations using a medium that has done so for millennia: music.

PART 2 e: Level Design for Player Engagement Micro Level Design Arc In Other Media: Consider again a platformer: • The player character has a base speed to run and jump. This is the TEMPO. • A single challenge element, like a Platform + a Gap, is a NOTE. Other notes can include a Wall to jump, Steps to climb, a gap in a wall to jump through and a Leap-of-faith Fall, as well as Boosters, Teleporter, walljumping, keys and locks, etc. A long flat platform would in music terms be a “rest” – not action – but put a single note together repeatedly and we get aaaa. • RHYTHM is created when we alternate these notes in repeating pattern: platform-gap, platform-wall, etc: abab • MELODY is when we add a surprise variation, like ababac, where “c” is a new note (suddenly we have Steps) or a smaller variation (a higher wall). • HARMONY is repeating these melody patterns in a row, with variation. In v 1 of the melody the gaps are small and the walls are low. In v 2, the gaps and walls are medium, and in v 3 they are large and tall.

PART 2 f: Level Design for Player Engagement Micro Level Design Arc In Other Media: Importantly, designing with the Tempo could mean that all of these variations require the same player motion: just hold down the right -arrow key and hit jump at the start and at every landing, so that all aps and all heights are mechanically identical (the work with the same jump height) but FEEL increasingly hard to at least surprising and different to the player. The player FEELS like we are giving them less room for error now that they have the rhythm, but it can be the same!

PART 3 a: Game Dev for USER CLARITY This week your team is expected to develop the CLARITY of your game; to improve how your game communicates to the player: 1. What the player can do (what choices they can make – the verbs) 2. their status in the game (health, assets, location, cooldown progress, etc) 3. the fact that they did something (feedback #1) 4. the result of their actions (feedback #2). 5. Final Win/Lose states. What are ways to communicate with your player/s?

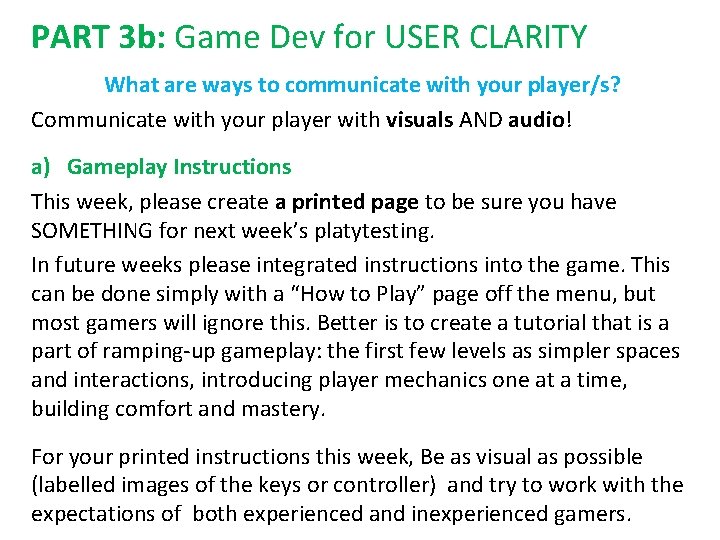
PART 3 b: Game Dev for USER CLARITY What are ways to communicate with your player/s? Communicate with your player with visuals AND audio! a) Gameplay Instructions This week, please create a printed page to be sure you have SOMETHING for next week’s platytesting. In future weeks please integrated instructions into the game. This can be done simply with a “How to Play” page off the menu, but most gamers will ignore this. Better is to create a tutorial that is a part of ramping-up gameplay: the first few levels as simpler spaces and interactions, introducing player mechanics one at a time, building comfort and mastery. For your printed instructions this week, Be as visual as possible (labelled images of the keys or controller) and try to work with the expectations of both experienced and inexperienced gamers.

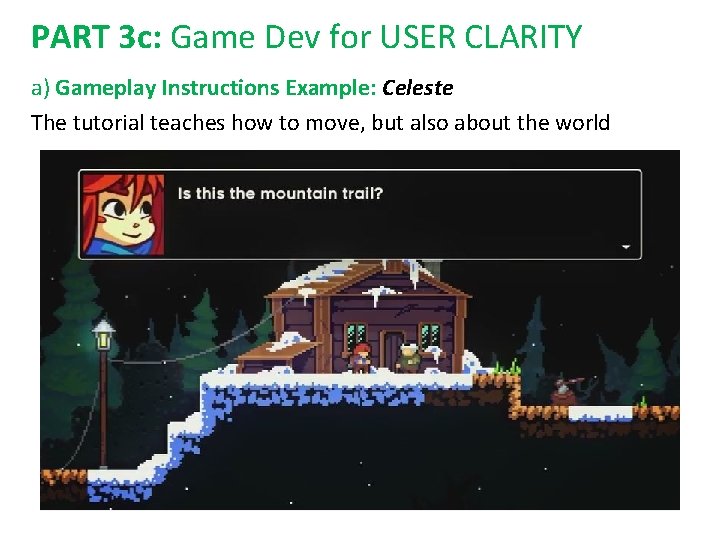
PART 3 c: Game Dev for USER CLARITY a) Gameplay Instructions Example: Celeste The tutorial teaches how to move, but also about the world

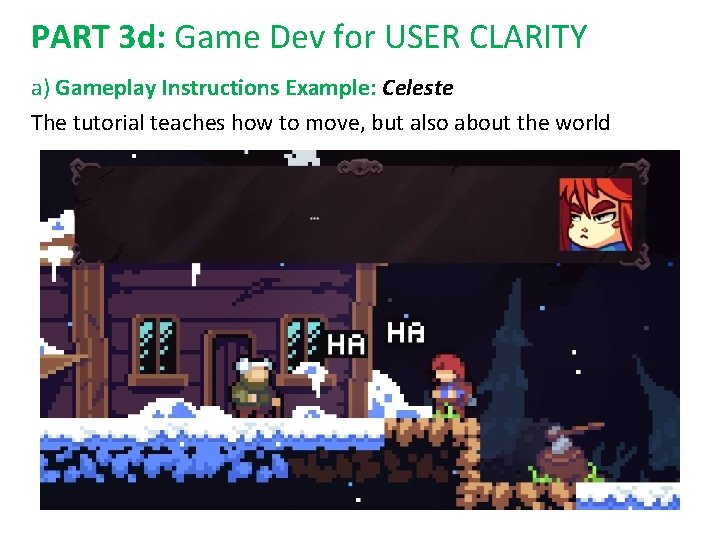
PART 3 d: Game Dev for USER CLARITY a) Gameplay Instructions Example: Celeste The tutorial teaches how to move, but also about the world

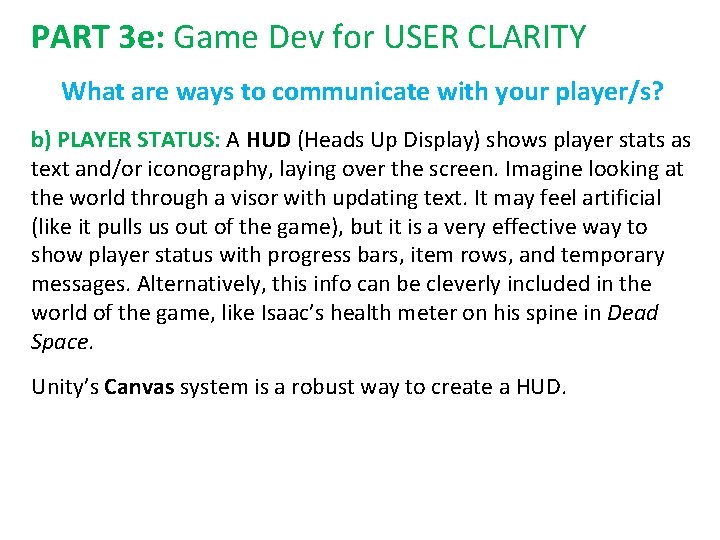
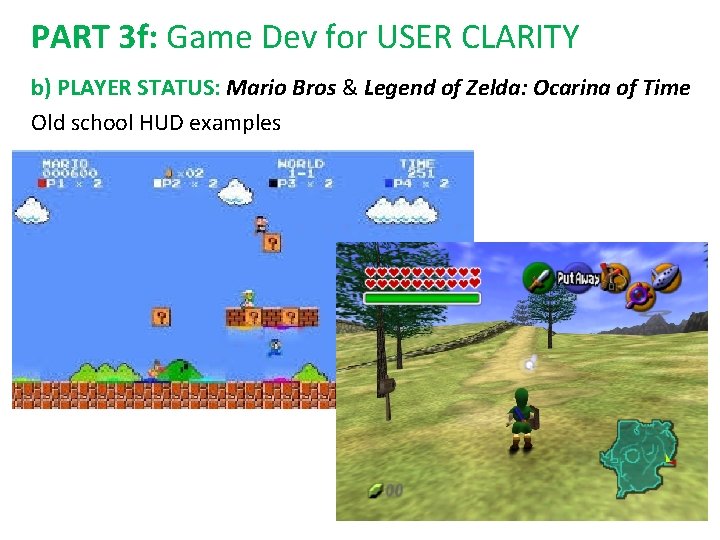
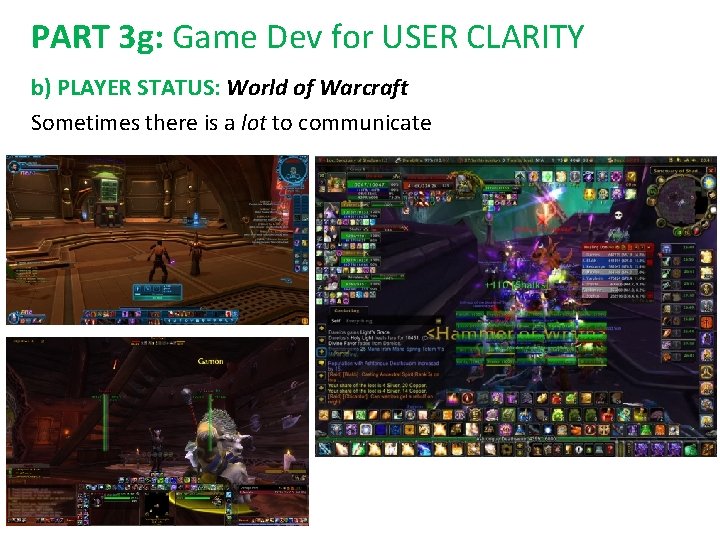
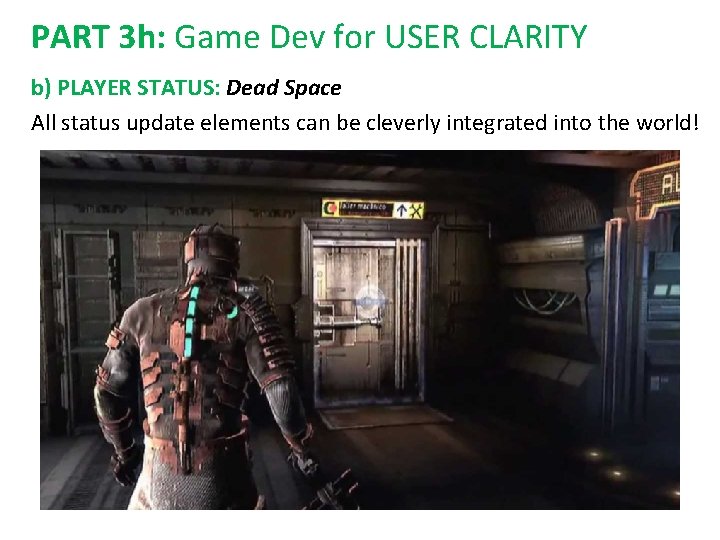
PART 3 e: Game Dev for USER CLARITY What are ways to communicate with your player/s? b) PLAYER STATUS: A HUD (Heads Up Display) shows player stats as text and/or iconography, laying over the screen. Imagine looking at the world through a visor with updating text. It may feel artificial (like it pulls us out of the game), but it is a very effective way to show player status with progress bars, item rows, and temporary messages. Alternatively, this info can be cleverly included in the world of the game, like Isaac’s health meter on his spine in Dead Space. Unity’s Canvas system is a robust way to create a HUD.

PART 3 f: Game Dev for USER CLARITY b) PLAYER STATUS: Mario Bros & Legend of Zelda: Ocarina of Time Old school HUD examples

PART 3 g: Game Dev for USER CLARITY b) PLAYER STATUS: World of Warcraft Sometimes there is a lot to communicate

PART 3 h: Game Dev for USER CLARITY b) PLAYER STATUS: Dead Space All status update elements can be cleverly integrated into the world!

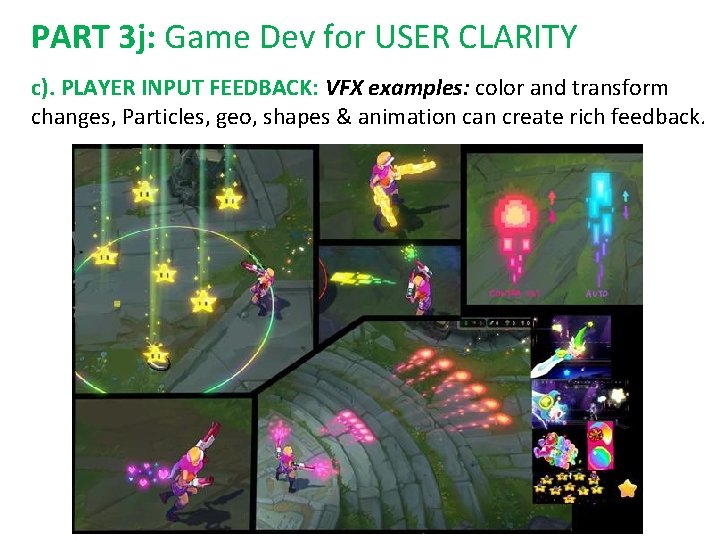
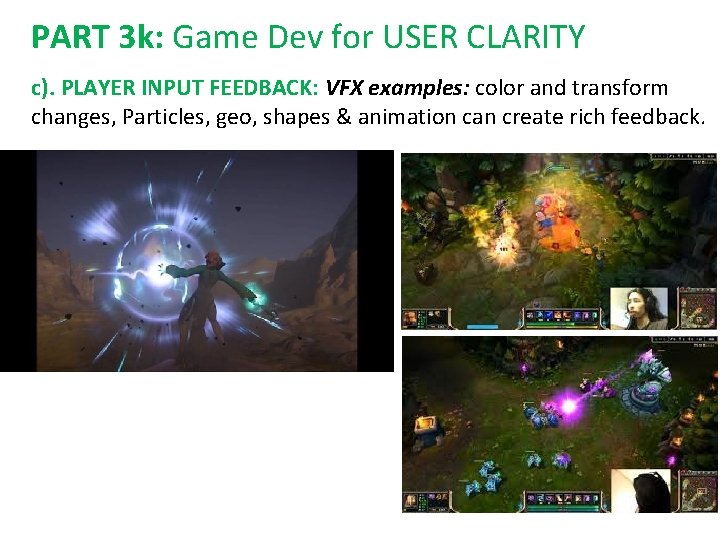
PART 3 i: Game Dev for USER CLARITY What are ways to communicate with your player/s? c). PLAYER INPUT FEEDBACK: When a player acts, indicate this action by making the representation of the player change: move/rotate/scale, change color, surround it with VFX like temporary particles, rays, 2 D shapes or 3 D geometry. Similarly, when a player acts on something in the world, whether they are hitting another player, breaking a wall, or giving a hug, the character or thing that the player acts on must temporarily or permanently change. These FEEDBACK changes should start quickly (within a few tics of the player action, like a button press), should last long enough to be seen by the player, and be accompanied by corresponding sound effects (SFX)

PART 3 j: Game Dev for USER CLARITY c). PLAYER INPUT FEEDBACK: VFX examples: color and transform changes, Particles, geo, shapes & animation can create rich feedback.

PART 3 k: Game Dev for USER CLARITY c). PLAYER INPUT FEEDBACK: VFX examples: color and transform changes, Particles, geo, shapes & animation can create rich feedback.

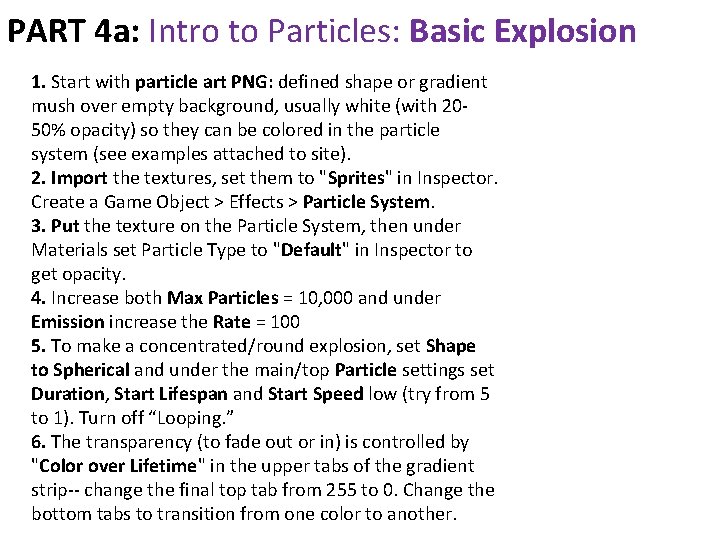
PART 4 a: Intro to Particles: Basic Explosion 1. Start with particle art PNG: defined shape or gradient mush over empty background, usually white (with 2050% opacity) so they can be colored in the particle system (see examples attached to site). 2. Import the textures, set them to "Sprites" in Inspector. Create a Game Object > Effects > Particle System. 3. Put the texture on the Particle System, then under Materials set Particle Type to "Default" in Inspector to get opacity. 4. Increase both Max Particles = 10, 000 and under Emission increase the Rate = 100 5. To make a concentrated/round explosion, set Shape to Spherical and under the main/top Particle settings set Duration, Start Lifespan and Start Speed low (try from 5 to 1). Turn off “Looping. ” 6. The transparency (to fade out or in) is controlled by "Color over Lifetime" in the upper tabs of the gradient strip-- change the final top tab from 255 to 0. Change the bottom tabs to transition from one color to another.

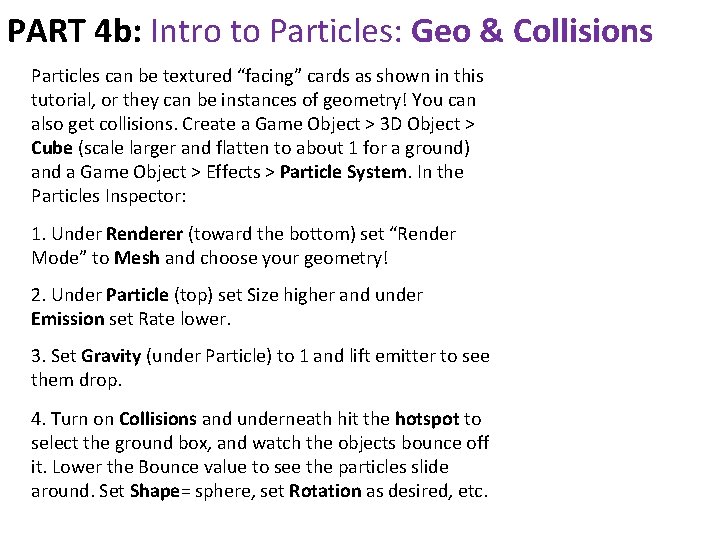
PART 4 b: Intro to Particles: Geo & Collisions Particles can be textured “facing” cards as shown in this tutorial, or they can be instances of geometry! You can also get collisions. Create a Game Object > 3 D Object > Cube (scale larger and flatten to about 1 for a ground) and a Game Object > Effects > Particle System. In the Particles Inspector: 1. Under Renderer (toward the bottom) set “Render Mode” to Mesh and choose your geometry! 2. Under Particle (top) set Size higher and under Emission set Rate lower. 3. Set Gravity (under Particle) to 1 and lift emitter to see them drop. 4. Turn on Collisions and underneath hit the hotspot to select the ground box, and watch the objects bounce off it. Lower the Bounce value to see the particles slide around. Set Shape= sphere, set Rotation as desired, etc.

PART 4 c: Intro to Particles: Other Notes Most good particle effects are built from multiple particle systems-- one for smoke, one for sparks, one for large debris, one for small debris, etc. , and can be combined with animated textures on planes to further enrich the result. In code, Particle Systems can by Instantiated and parented under objects and set inactive/active (if the object is being made to disappear, turn off its Renderer rather than deleting the object to play the entire Particle System). If you want to delve deeply into Particles and other Visual Effects for games, there is an excellent online community to join for resources and mentorship: Real Time VFX (https: //realtimevfx. com/)

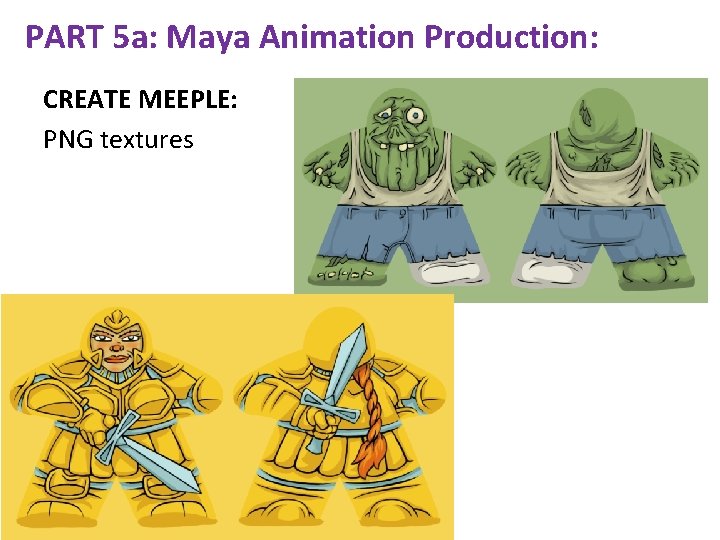
PART 5 a: Maya Animation Production: CREATE MEEPLE: PNG textures
![PART 5 b Maya Animation Production ANIMATE MEEPLE Select object and hit s to PART 5 b: Maya Animation Production: ANIMATE MEEPLE: Select object and hit [s] to](https://slidetodoc.com/presentation_image_h/1125e39ad838aff5250e59b04754a244/image-27.jpg)
PART 5 b: Maya Animation Production: ANIMATE MEEPLE: Select object and hit [s] to add keyframes. Turn on Auto Keymode Toggle, change time and transform object to set more frames.

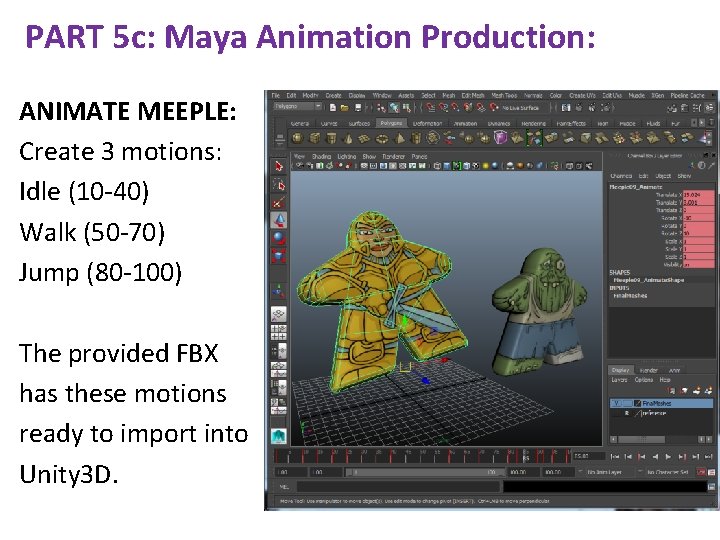
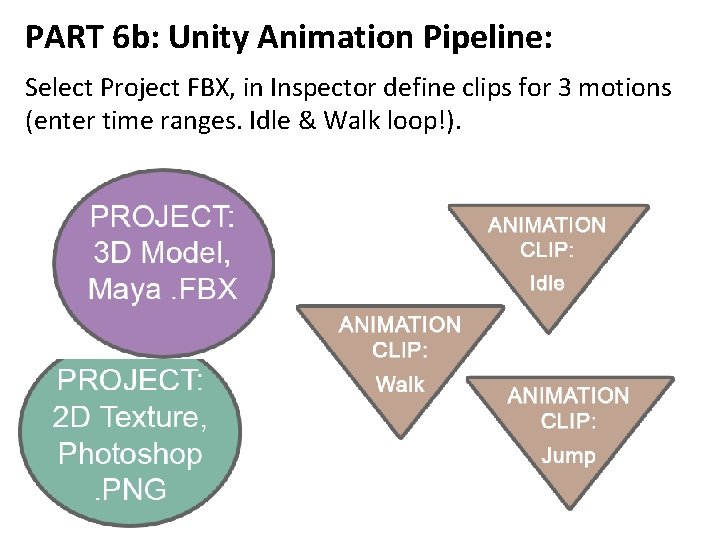
PART 5 c: Maya Animation Production: ANIMATE MEEPLE: Create 3 motions: Idle (10 -40) Walk (50 -70) Jump (80 -100) The provided FBX has these motions ready to import into Unity 3 D.

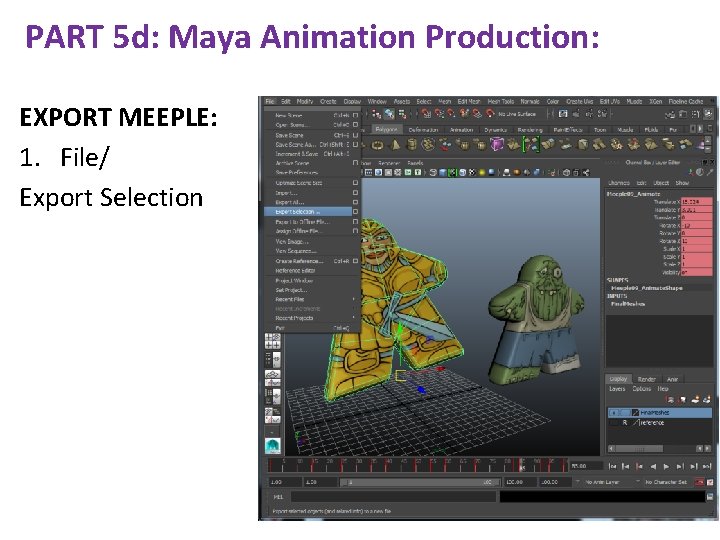
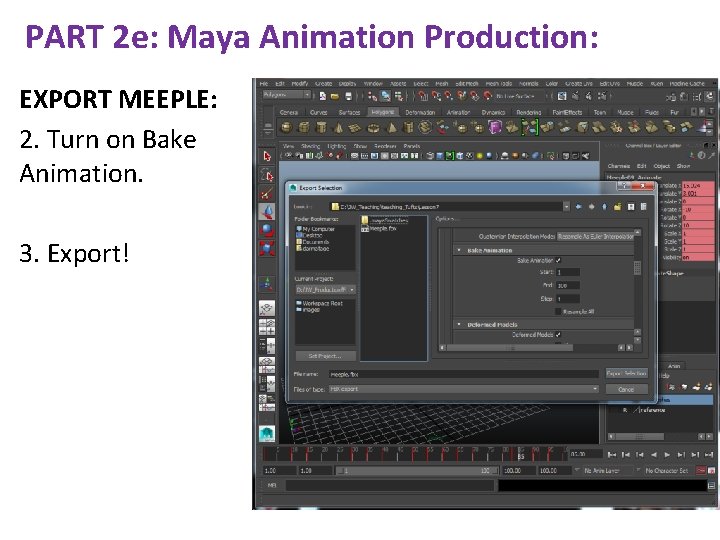
PART 5 d: Maya Animation Production: EXPORT MEEPLE: 1. File/ Export Selection

PART 2 e: Maya Animation Production: EXPORT MEEPLE: 2. Turn on Bake Animation. 3. Export!
![PART 6 a Unity Animation Pipeline A SETUP 1 Create Ground Plane or Box PART 6 a: Unity Animation Pipeline: [A] SET-UP: 1. Create Ground Plane or Box.](https://slidetodoc.com/presentation_image_h/1125e39ad838aff5250e59b04754a244/image-31.jpg)
PART 6 a: Unity Animation Pipeline: [A] SET-UP: 1. Create Ground Plane or Box. [B] IMPORT MEEPLE: 1. Add the FBX and PNG to the Project. 2. Add Directional Light (with shadows) and Point Light to illuminate from the opposite direction. 2. Add the Mesh to the Hierarchy

PART 6 b: Unity Animation Pipeline: Select Project FBX, in Inspector define clips for 3 motions (enter time ranges. Idle & Walk loop!).

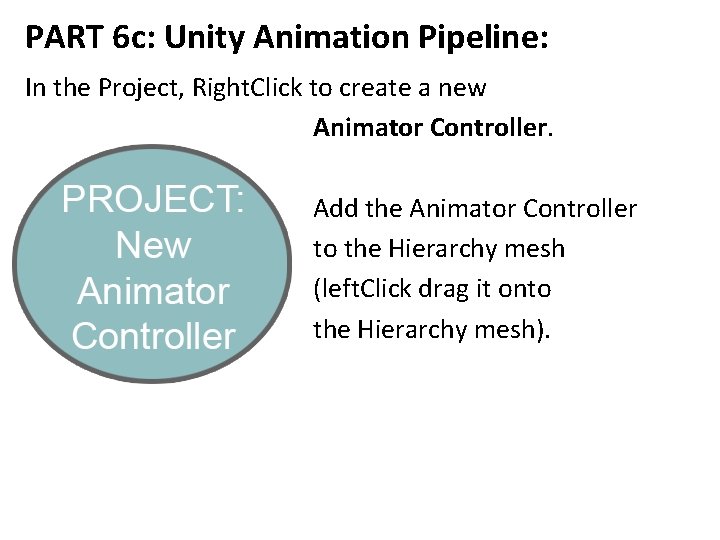
PART 6 c: Unity Animation Pipeline: In the Project, Right. Click to create a new Animator Controller. Add the Animator Controller to the Hierarchy mesh (left. Click drag it onto the Hierarchy mesh).

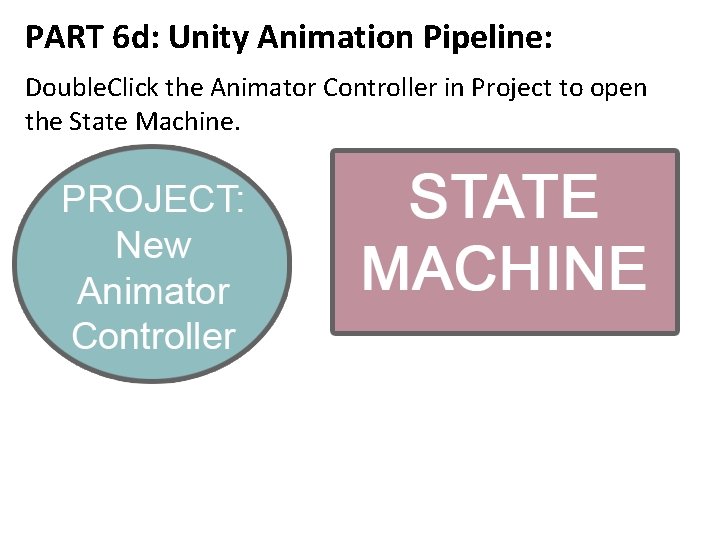
PART 6 d: Unity Animation Pipeline: Double. Click the Animator Controller in Project to open the State Machine.

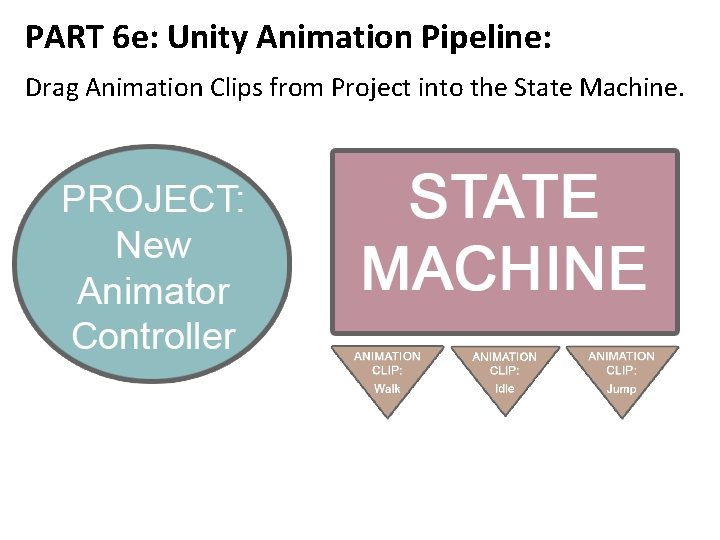
PART 6 e: Unity Animation Pipeline: Drag Animation Clips from Project into the State Machine.

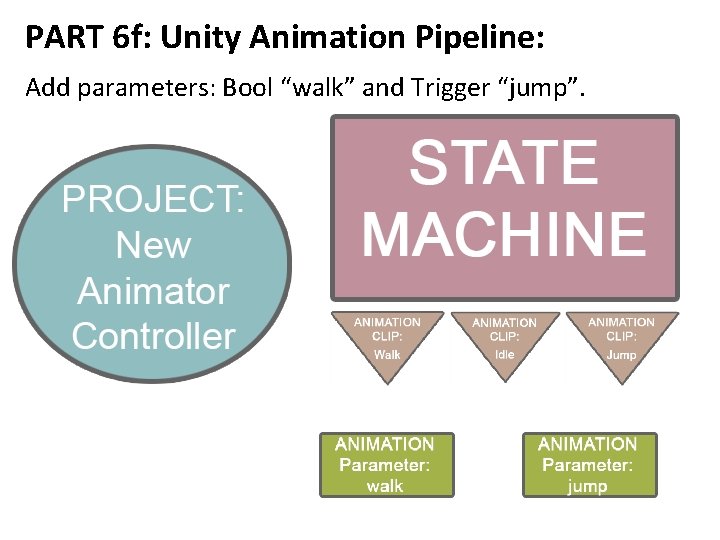
PART 6 f: Unity Animation Pipeline: Add parameters: Bool “walk” and Trigger “jump”.

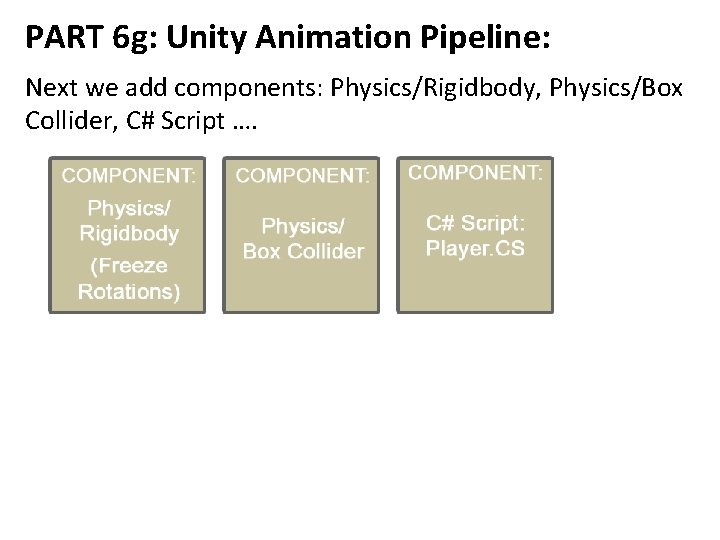
PART 6 g: Unity Animation Pipeline: Next we add components: Physics/Rigidbody, Physics/Box Collider, C# Script ….

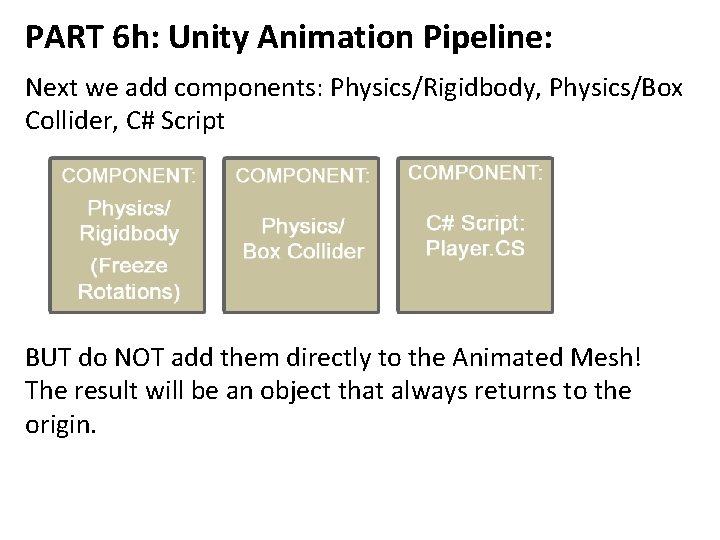
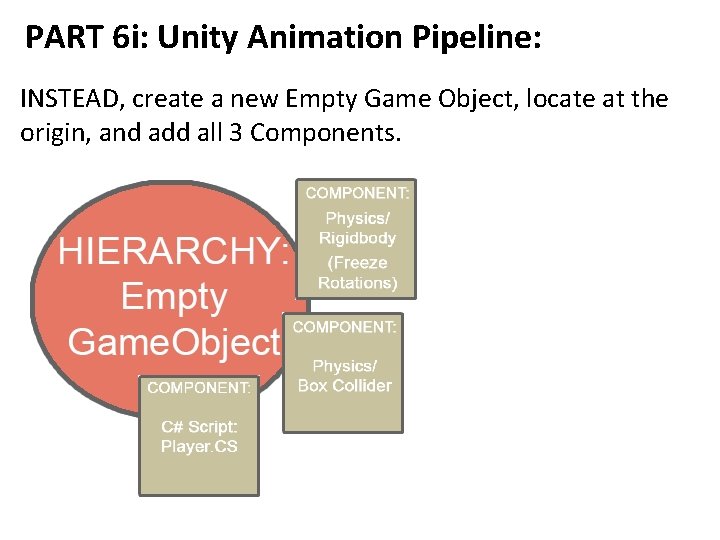
PART 6 h: Unity Animation Pipeline: Next we add components: Physics/Rigidbody, Physics/Box Collider, C# Script BUT do NOT add them directly to the Animated Mesh! The result will be an object that always returns to the origin.

PART 6 i: Unity Animation Pipeline: INSTEAD, create a new Empty Game Object, locate at the origin, and add all 3 Components.

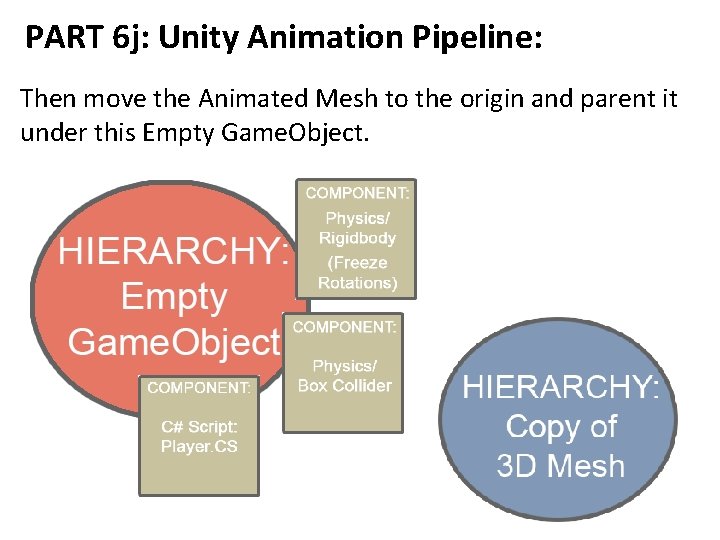
PART 6 j: Unity Animation Pipeline: Then move the Animated Mesh to the origin and parent it under this Empty Game. Object.

PART 6 k: Unity Animation Pipeline: Be sure that the script reference to the Animator in the script refers to the child!: void Start(){ anim = game. Object. Get. Component. In. Children<Animator>(); }

PART 6 l: Unity Animation Pipeline: To play the animation, use If Statements and refer to the animator’s parameters: if (Input. Get. Key ("w")) { anim. Set. Bool ("walk", true); rigidbody. velocity += transform. forward * speed; } else if (Input. Get. Key("space")){ anim. Set. Trigger("jump"); rigidbody. Add. Force (Vector 3. up * Jump. Speed); }

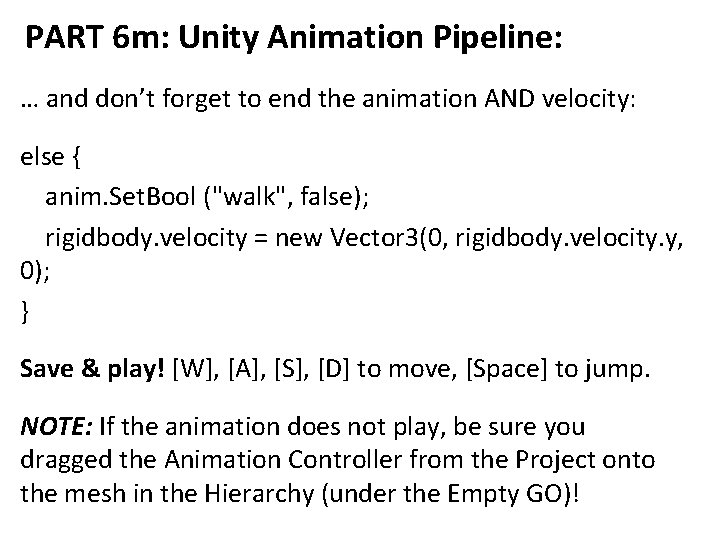
PART 6 m: Unity Animation Pipeline: … and don’t forget to end the animation AND velocity: else { anim. Set. Bool ("walk", false); rigidbody. velocity = new Vector 3(0, rigidbody. velocity. y, 0); } Save & play! [W], [A], [S], [D] to move, [Space] to jump. NOTE: If the animation does not play, be sure you dragged the Animation Controller from the Project onto the mesh in the Hierarchy (under the Empty GO)!

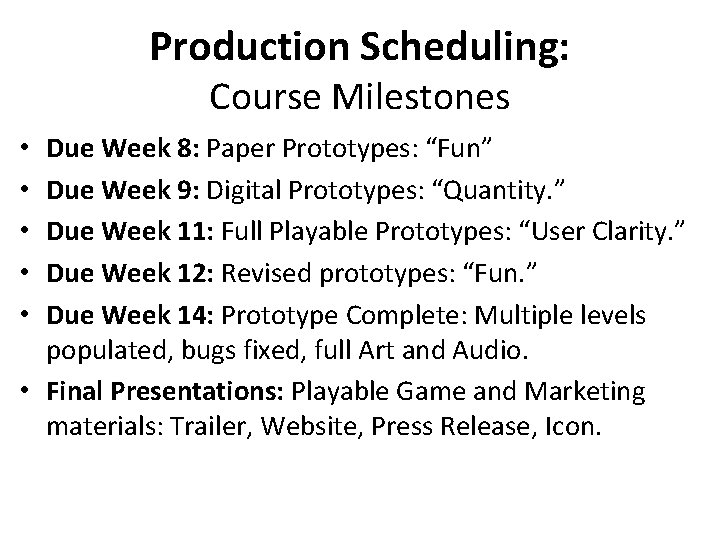
Production Scheduling: Course Milestones Due Week 8: Paper Prototypes: “Fun” Due Week 9: Digital Prototypes: “Quantity. ” Due Week 11: Full Playable Prototypes: “User Clarity. ” Due Week 12: Revised prototypes: “Fun. ” Due Week 14: Prototype Complete: Multiple levels populated, bugs fixed, full Art and Audio. • Final Presentations: Playable Game and Marketing materials: Trailer, Website, Press Release, Icon. • • •

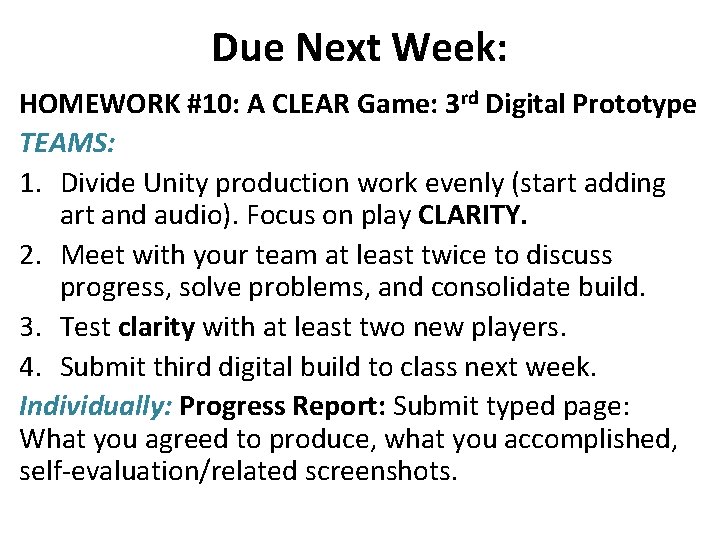
Due Next Week: HOMEWORK #10: A CLEAR Game: 3 rd Digital Prototype TEAMS: 1. Divide Unity production work evenly (start adding art and audio). Focus on play CLARITY. 2. Meet with your team at least twice to discuss progress, solve problems, and consolidate build. 3. Test clarity with at least two new players. 4. Submit third digital build to class next week. Individually: Progress Report: Submit typed page: What you agreed to produce, what you accomplished, self-evaluation/related screenshots.

Have an Splendid Week! And don’t forget to email us with questions: Instructor: JASON WISER Jason. Wiser. Art@gmail. com Available an hour after class and daily email.