Fundamentals of Descriptive Geometry Text Chapter 26 UAA
- Slides: 32

Fundamentals of Descriptive Geometry (Text Chapter 26) UAA ES A 103 Week #12 Lecture Many of the materials provided in this lecture are provided by Copyright © The Mc. Graw-Hill Companies, Inc. Permission required for reproduction or display.

Introduction • Most of the concepts of this chapter have already been touched on in prior lectures and exercises. • The intent of this lecture to provide another view of the principles and concepts from an analytical standpoint.

Descriptive Geometry • Descriptive geometry is the graphic representation of plane, solid, and analytical geometry used to describe real or imagined technical devices and objects. • It is the science of graphic representation in engineering design. • Students of technical or engineering graphics need to study plane, solid, analytical, and descriptive geometry because it forms the foundation or grammar of technical drawings.

Uses of Descriptive Geometry • Descriptive geometry principles are used to describe any problem that has spatial aspects to it. • For example the application of descriptive geometry is used in: – The design of chemical plants. For the plant to function safely, pipes must be placed to intersect correctly, and to clear each other by a specified distance, and they must correctly intersect the walls of the buildings. – The design of buildings – The design of road systems – The design of mechanical systems

Methods of Descriptive Geometry • There are three basic methods – Direct View – Fold Line – Revolution • The differences is in how information is transferred to adjacent views.

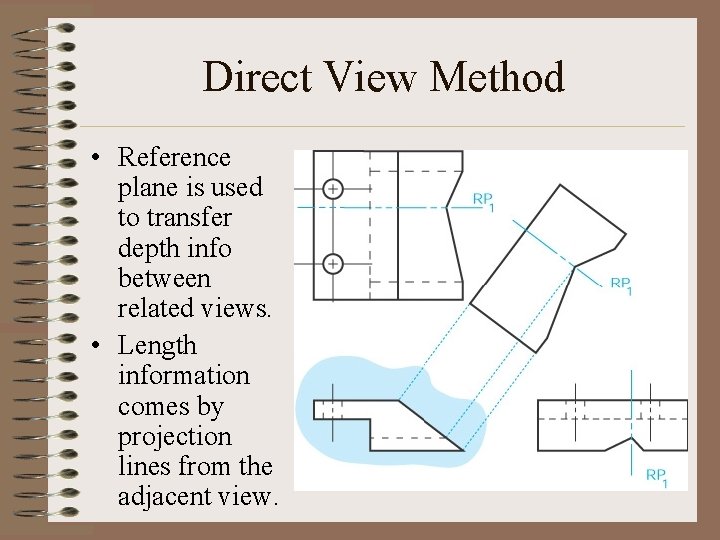
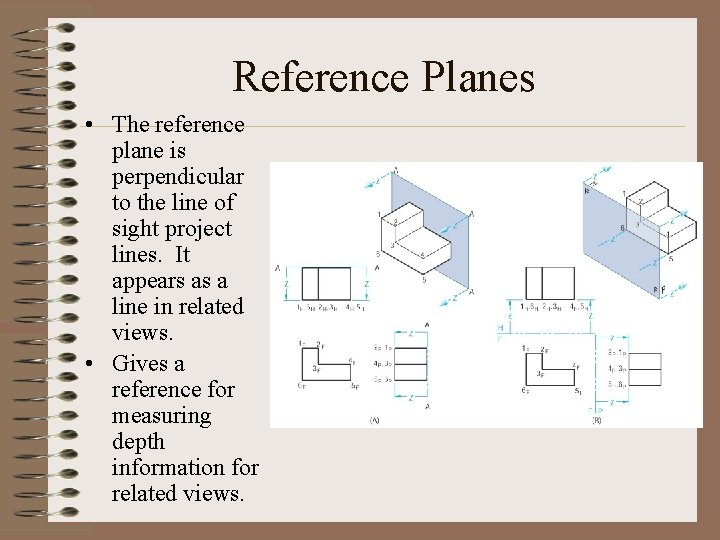
Direct View Method • Reference plane is used to transfer depth info between related views. • Length information comes by projection lines from the adjacent view.

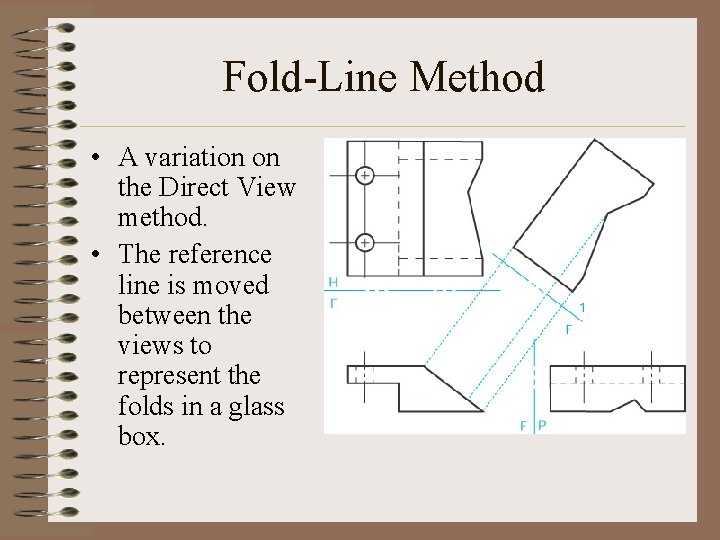
Fold-Line Method • A variation on the Direct View method. • The reference line is moved between the views to represent the folds in a glass box.

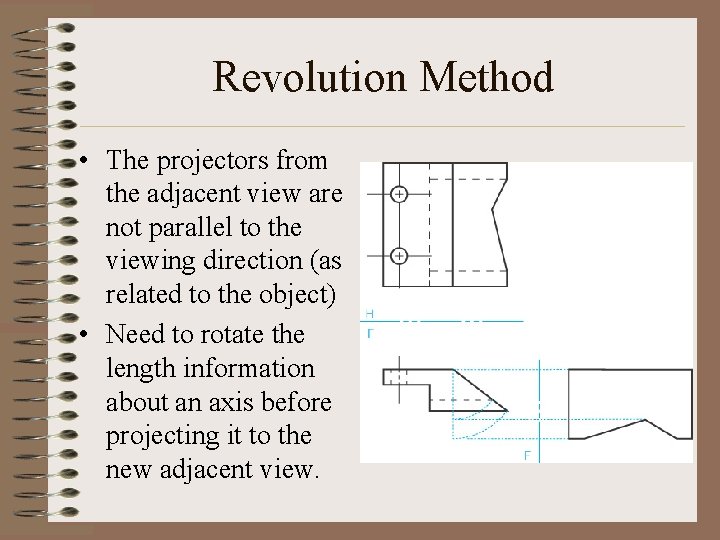
Revolution Method • The projectors from the adjacent view are not parallel to the viewing direction (as related to the object) • Need to rotate the length information about an axis before projecting it to the new adjacent view.

Reference Planes • The reference plane is perpendicular to the line of sight project lines. It appears as a line in related views. • Gives a reference for measuring depth information for related views.

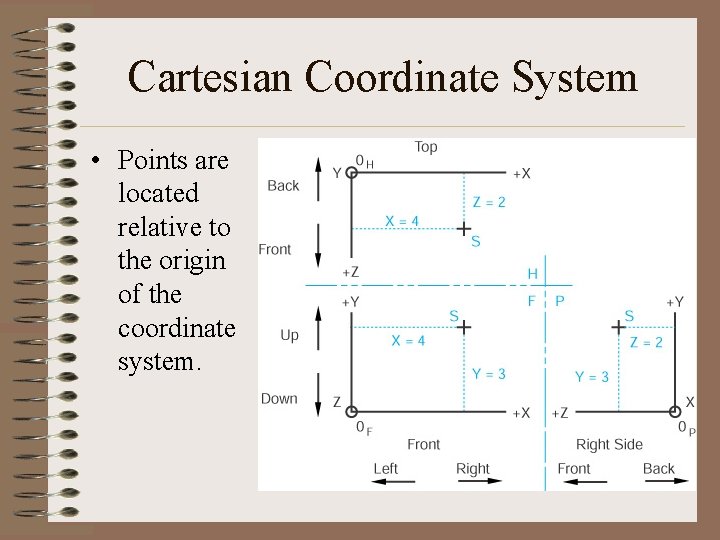
Basic Elements • The basic elements used in descriptive geometry include: – Points – Lines – Planes • Coordinate systems are mathematical tools useful in describing spatial information – Cartesian coordinate systems are the most commonly used.

Cartesian Coordinate System • Points are located relative to the origin of the coordinate system.

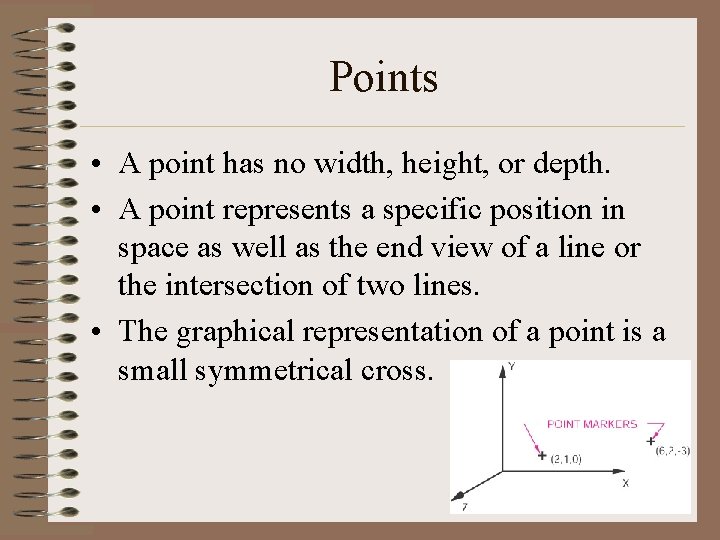
Points • A point has no width, height, or depth. • A point represents a specific position in space as well as the end view of a line or the intersection of two lines. • The graphical representation of a point is a small symmetrical cross.

Lines • Lines represents the locus of points that are directly between two points. • A line is a geometric primitive that has no thickness, only length and direction. • A line can graphically represent the intersection of two surfaces, the edge view of a surface, or the limiting element of a surface. • Lines are either vertical, horizontal, or inclined. A vertical line is defined as a line that is perpendicular to the plane of the earth (horizontal plane).

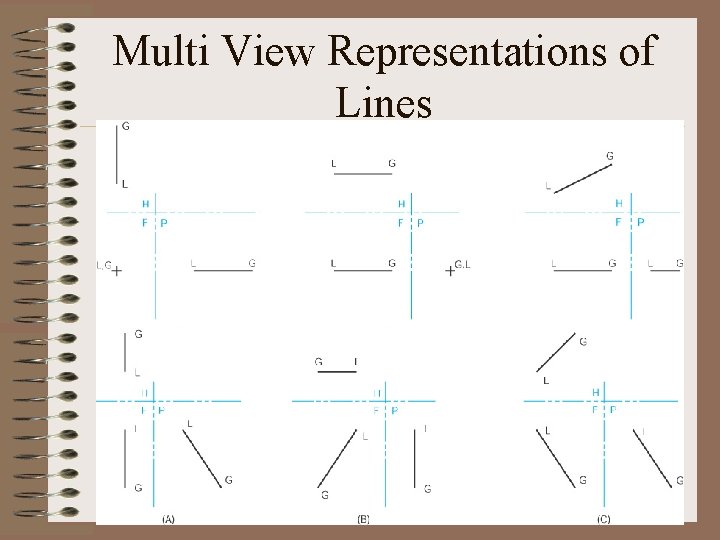
Multi View Representations of Lines

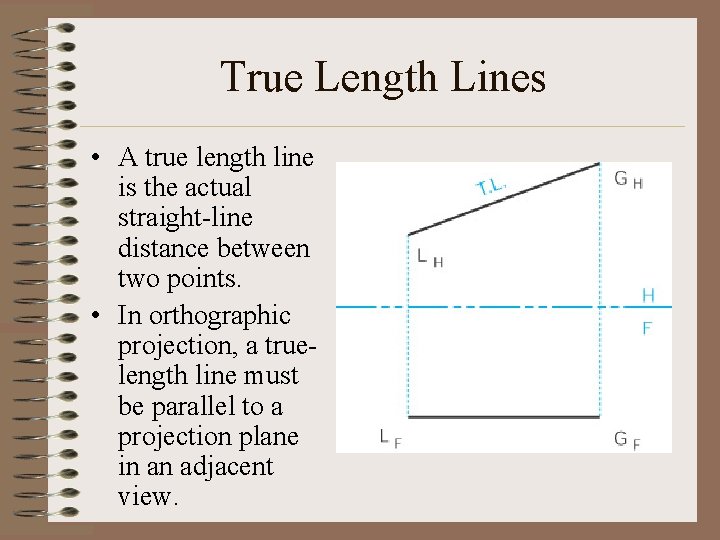
True Length Lines • A true length line is the actual straight-line distance between two points. • In orthographic projection, a truelength line must be parallel to a projection plane in an adjacent view.

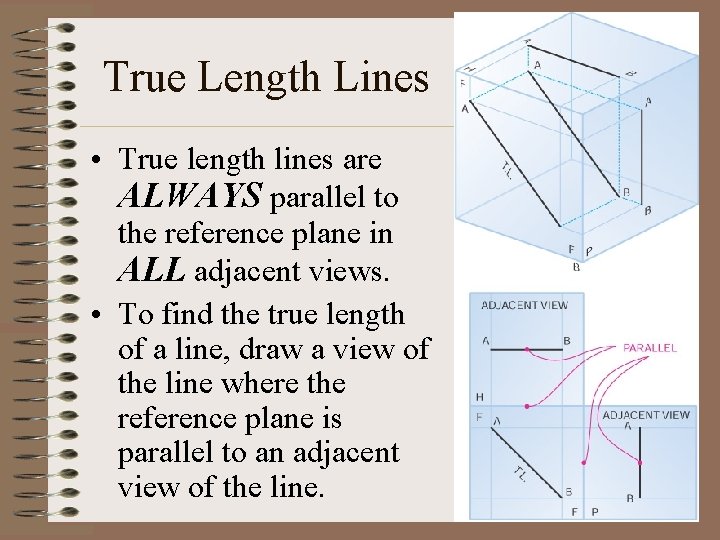
True Length Lines • True length lines are ALWAYS parallel to the reference plane in ALL adjacent views. • To find the true length of a line, draw a view of the line where the reference plane is parallel to an adjacent view of the line.

Principles of Descriptive Geometry Rule #1 If a line is positioned parallel to a projection plane and the line of sight is perpendicular to that projection plane, then the line will appear as true length

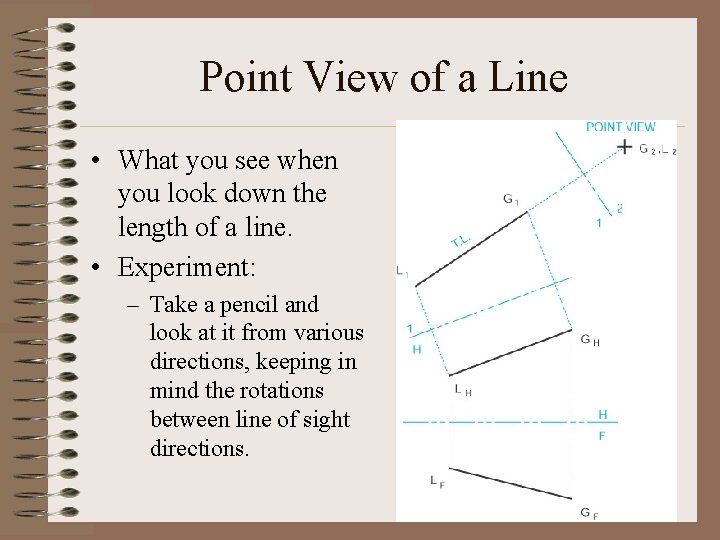
Point View of a Line • What you see when you look down the length of a line. • Experiment: – Take a pencil and look at it from various directions, keeping in mind the rotations between line of sight directions.

Principles of Descriptive Geometry Rule #2 If the line of sight is parallel to a truelength line, the line will appear as a point view in the adjacent view. Corollary Any adjacent view of a point of view of a line will show the true length of the line.

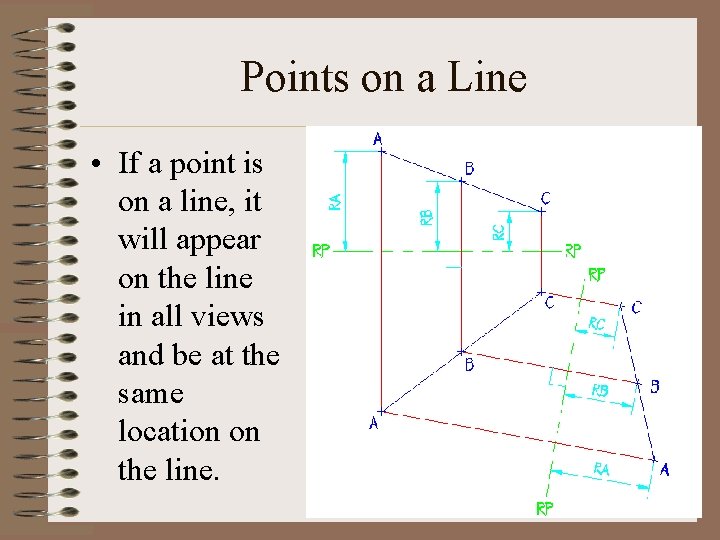
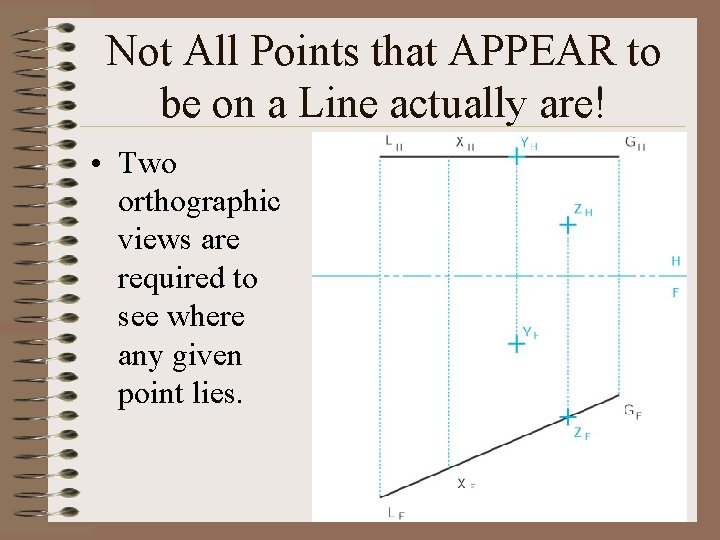
Points on a Line • If a point is on a line, it will appear on the line in all views and be at the same location on the line.

Not All Points that APPEAR to be on a Line actually are! • Two orthographic views are required to see where any given point lies.

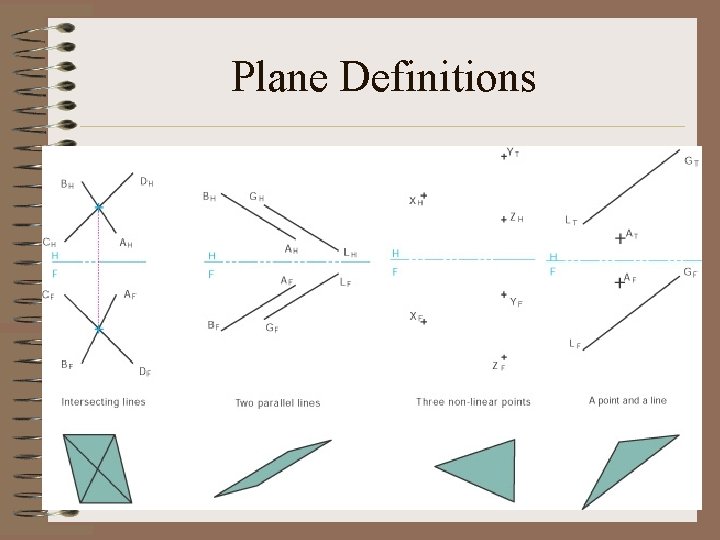
Planes • Planes are surfaces that can be uniquely defined by: – Three non-linear points in space, – Two non-parallel intersecting vectors, – Two parallel vectors, or – A line and point not on the line.

Plane Definitions

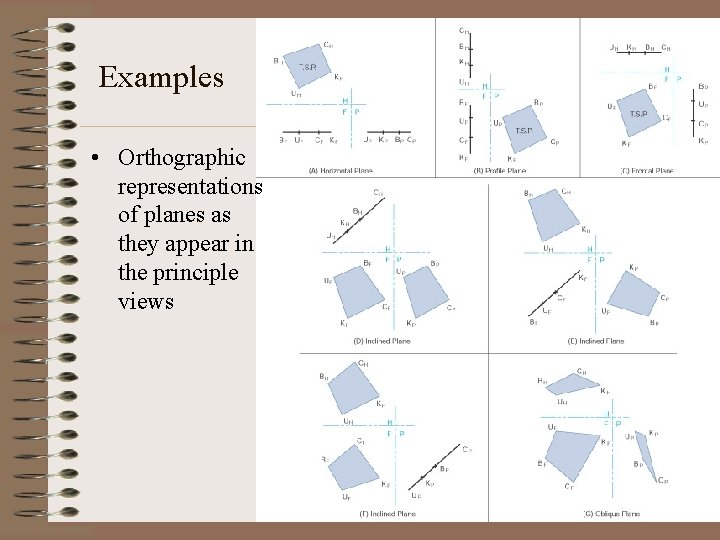
Plane Classifications • Planes are classified as – Horizontal – Vertical • Profile • Frontal – Inclined (perpendicular to a principle plane) – Oblique (not perpendicular to a principle plane) • Horizontal and Vertical planes are principle planes.

Examples • Orthographic representations of planes as they appear in the principle views

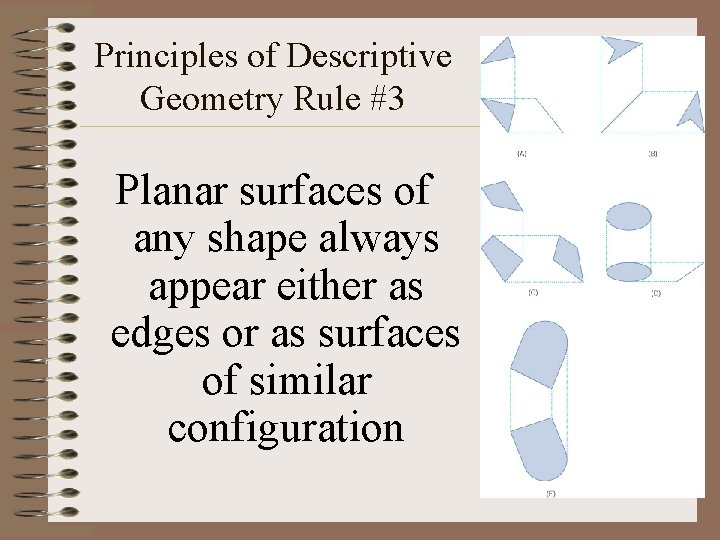
Principles of Descriptive Geometry Rule #3 Planar surfaces of any shape always appear either as edges or as surfaces of similar configuration

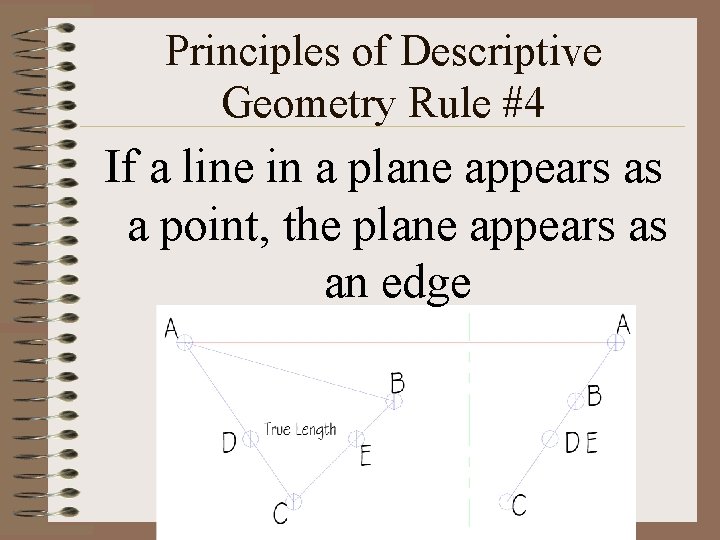
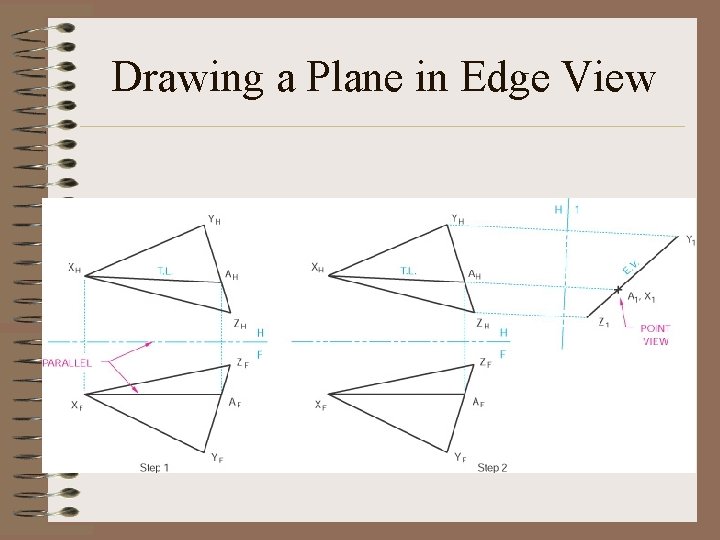
Principles of Descriptive Geometry Rule #4 If a line in a plane appears as a point, the plane appears as an edge

Principles of Descriptive Geometry Rule #5 A true-size plane must be perpendicular to the line of sight and must appear as an edge in all adjacent views.

Drawing a Plane in Edge View

A Corollary to Rule #5 If a plane is true-size then all lines in the plane are true length and all angles are true.

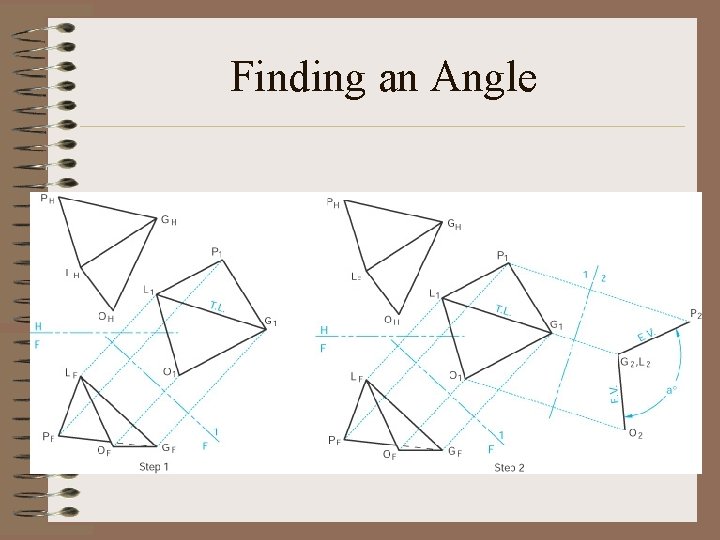
Finding the Angle Between Two Intersecting Planes • The key is to create a view where BOTH planes are in edge view. – The common line between the planes is the intersecting line. – Create a view where the intersecting line appears as a point. • Start by drawing a view of the line in true length • Then draw the desired view.

Finding an Angle