FOS monitoring for Offbeam infrastructure AIDA 2 nd
FOS monitoring for Off-beam infrastructure AIDA 2 nd Annual meeting WP 9. 3 Iván Vila Álvarez Instituto de Física de Cantabria (CSIC-UC)

Outline — Off-beam infrastructure: Initial proposal — Fiber Optical Sensors (FOS) Thermomechanical monitor. — Application to Belle II pixel detector. — Summary ivan. vila@csic. es, AIDA 2 nd Annual meeting 2
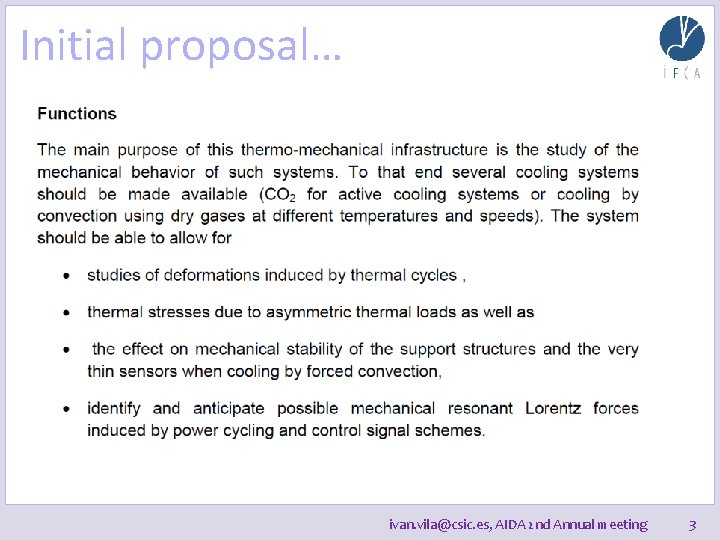
Initial proposal… ivan. vila@csic. es, AIDA 2 nd Annual meeting 3
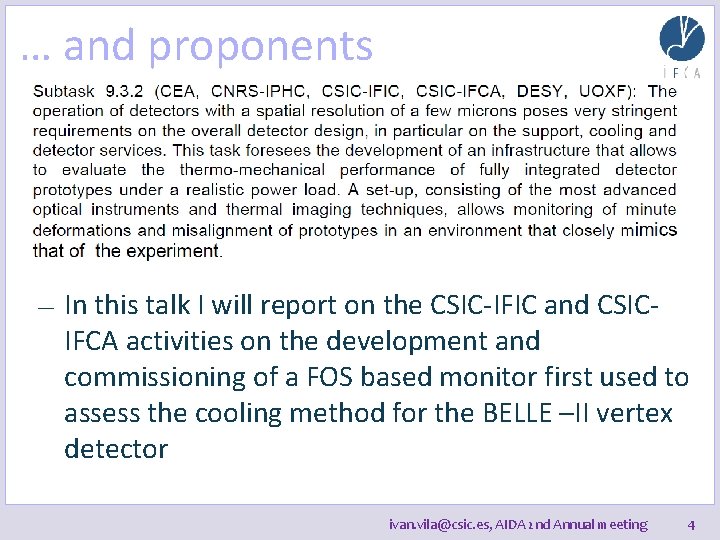
… and proponents — In this talk I will report on the CSIC-IFIC and CSICIFCA activities on the development and commissioning of a FOS based monitor first used to assess the cooling method for the BELLE –II vertex detector ivan. vila@csic. es, AIDA 2 nd Annual meeting 4
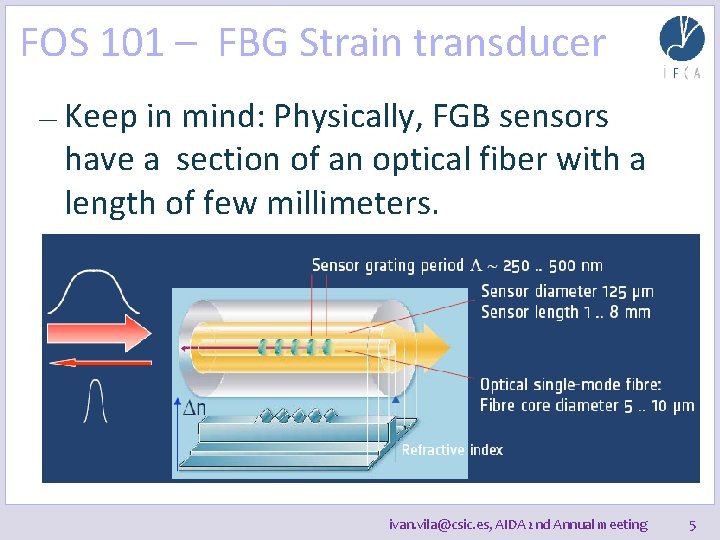
FOS 101 – FBG Strain transducer — Keep in mind: Physically, FGB sensors have a section of an optical fiber with a length of few millimeters. ivan. vila@csic. es, AIDA 2 nd Annual meeting 5
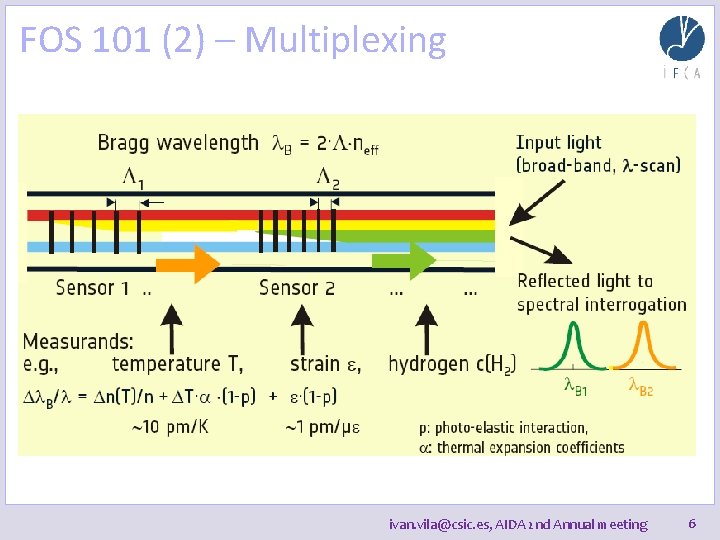
FOS 101 (2) – Multiplexing ivan. vila@csic. es, AIDA 2 nd Annual meeting 6
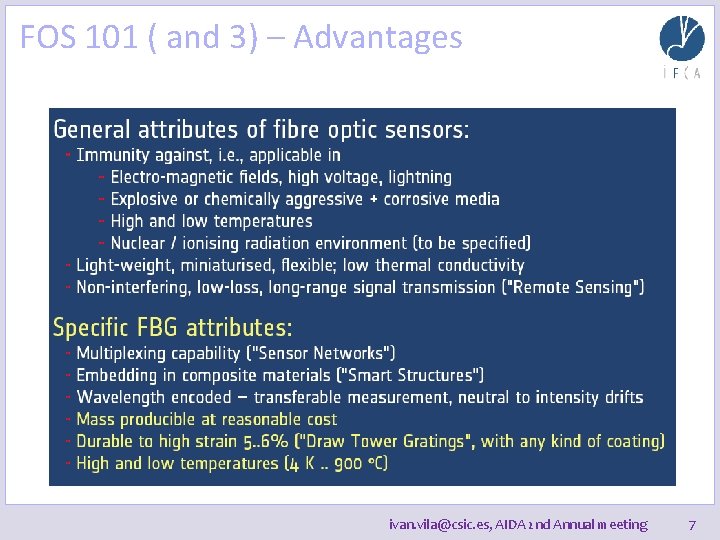
FOS 101 ( and 3) – Advantages ivan. vila@csic. es, AIDA 2 nd Annual meeting 7
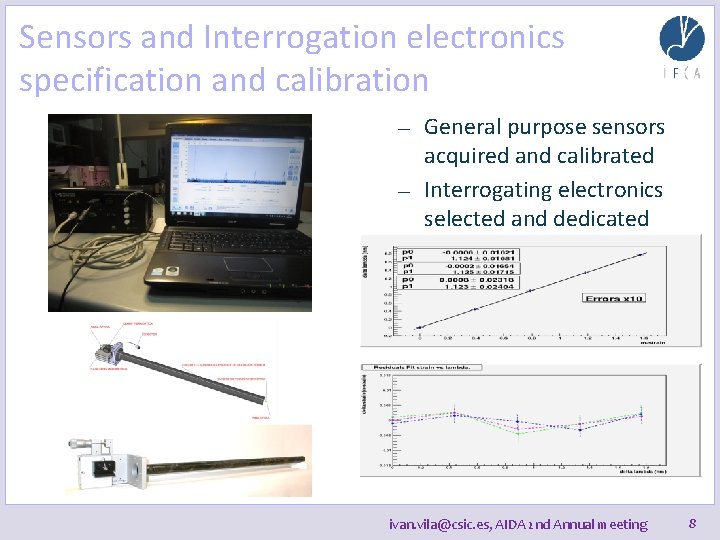
Sensors and Interrogation electronics specification and calibration — — General purpose sensors acquired and calibrated Interrogating electronics selected and dedicated software developed. ivan. vila@csic. es, AIDA 2 nd Annual meeting 8
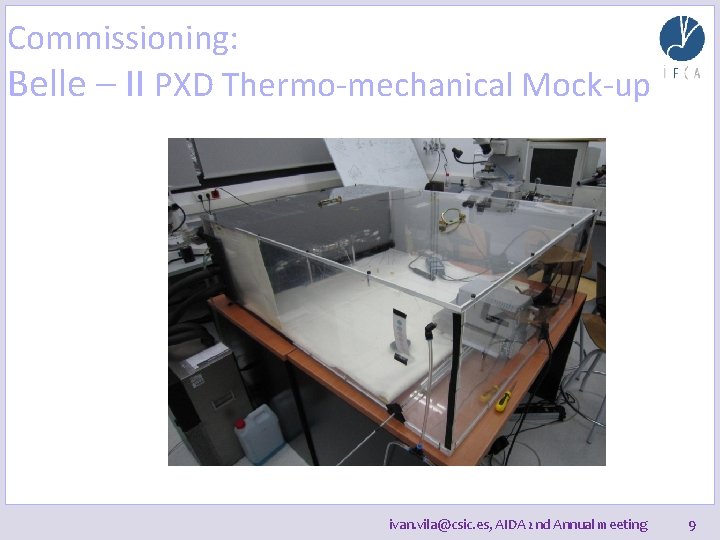
Commissioning: Belle – II PXD Thermo-mechanical Mock-up ivan. vila@csic. es, AIDA 2 nd Annual meeting 9
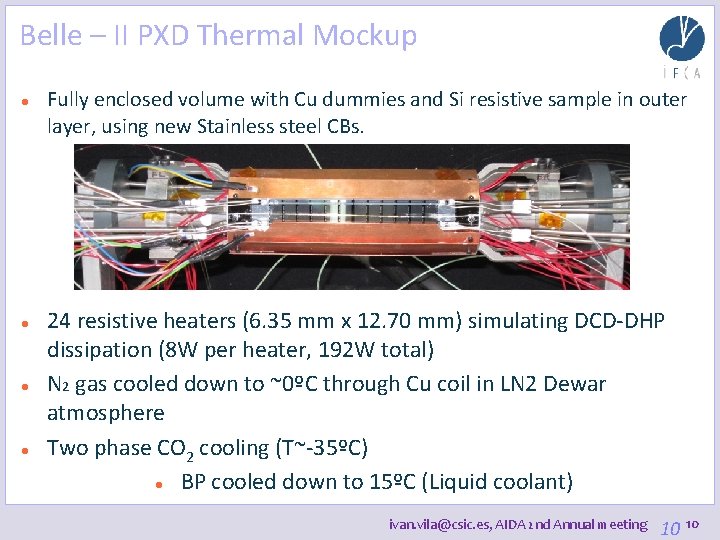
Belle – II PXD Thermal Mockup Fully enclosed volume with Cu dummies and Si resistive sample in outer layer, using new Stainless steel CBs. 24 resistive heaters (6. 35 mm x 12. 70 mm) simulating DCD-DHP dissipation (8 W per heater, 192 W total) N 2 gas cooled down to ~0ºC through Cu coil in LN 2 Dewar atmosphere Two phase CO 2 cooling (T~-35ºC) BP cooled down to 15ºC (Liquid coolant) ivan. vila@csic. es, AIDA 2 nd Annual meeting 10 10
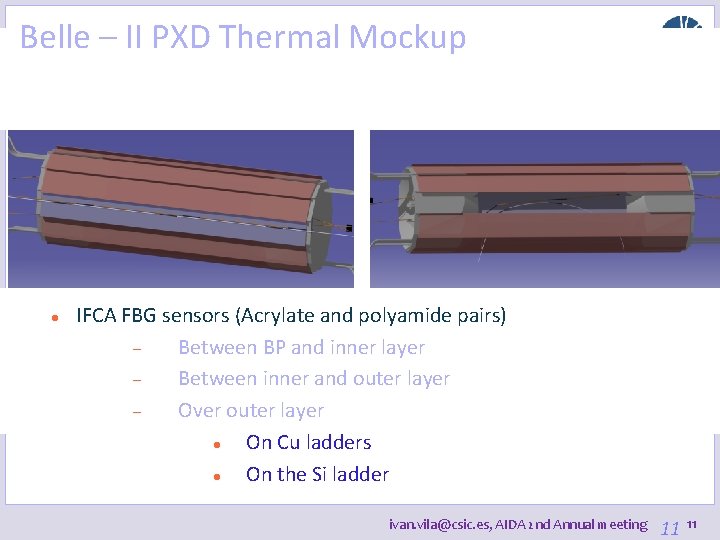
Belle – II PXD Thermal Mockup IFCA FBG sensors (Acrylate and polyamide pairs) Between BP and inner layer Between inner and outer layer Over outer layer On Cu ladders On the Si ladder ivan. vila@csic. es, AIDA 2 nd Annual meeting 11 11
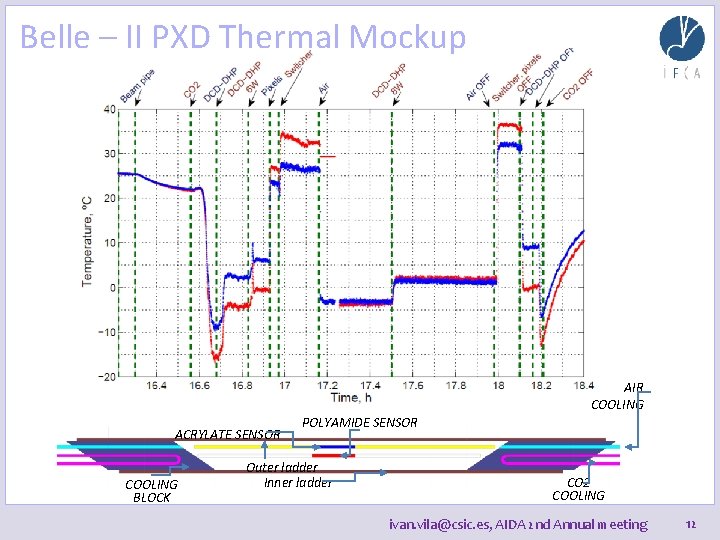
Belle – II PXD Thermal Mockup AIR COOLING ACRYLATE SENSOR COOLING BLOCK POLYAMIDE SENSOR Outer ladder Inner ladder CO 2 COOLING ivan. vila@csic. es, AIDA 2 nd Annual meeting 12
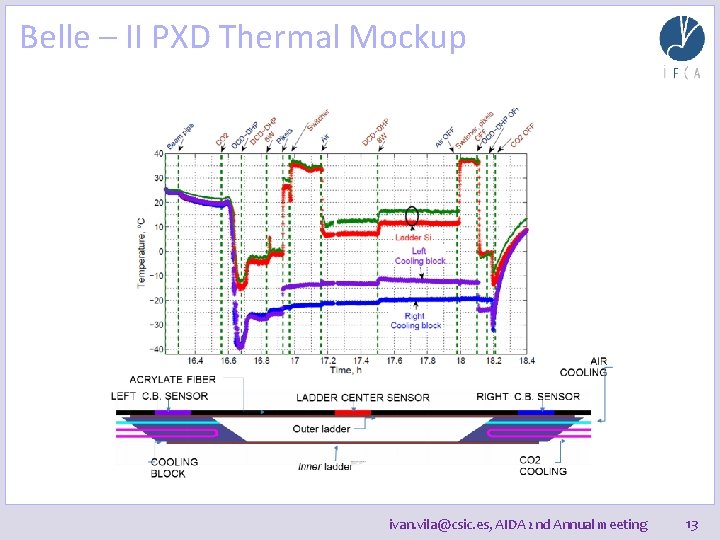
Belle – II PXD Thermal Mockup ivan. vila@csic. es, AIDA 2 nd Annual meeting 13
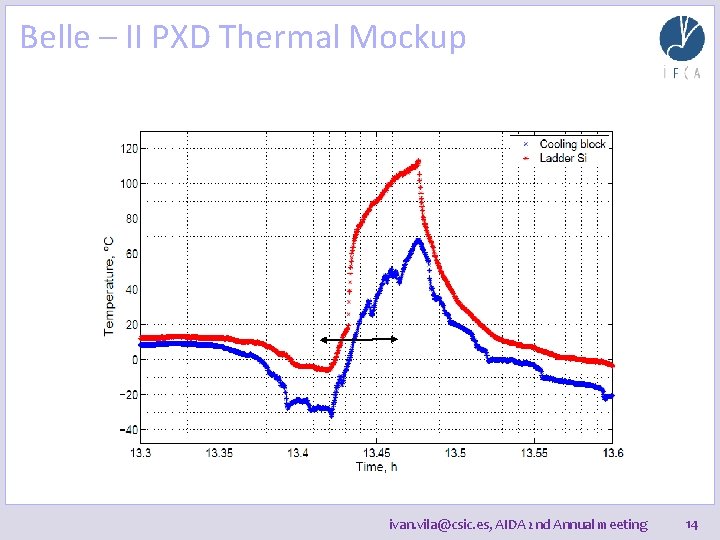
Belle – II PXD Thermal Mockup ivan. vila@csic. es, AIDA 2 nd Annual meeting 14
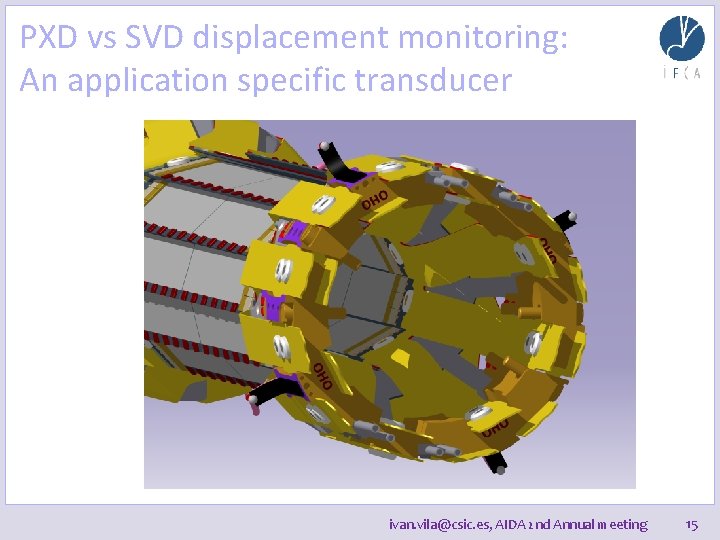
PXD vs SVD displacement monitoring: An application specific transducer ivan. vila@csic. es, AIDA 2 nd Annual meeting 15
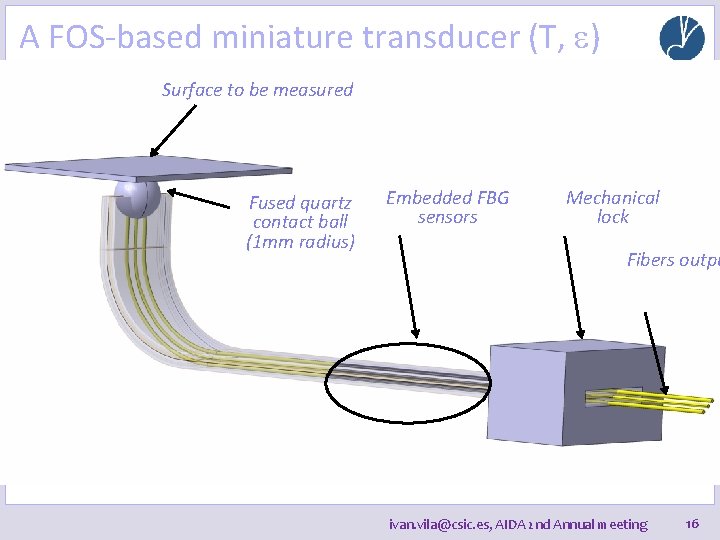
A FOS-based miniature transducer (T, e) Surface to be measured Fused quartz contact ball (1 mm radius) Embedded FBG sensors Mechanical lock Fibers outpu ivan. vila@csic. es, AIDA 2 nd Annual meeting 16
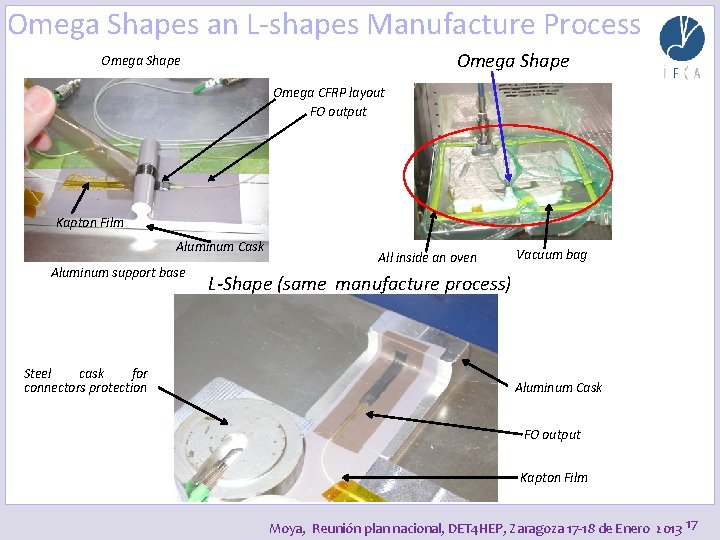
Omega Shapes an L-shapes Manufacture Process Omega Shape Omega CFRP layout FO output Kapton Film Aluminum Cask Aluminum support base Steel cask for connectors protection All inside an oven Vacuum bag L-Shape (same manufacture process) Aluminum Cask FO output Kapton Film Moya, Reunión plan nacional, DET 4 HEP, Zaragoza 17 -18 de Enero 2013 17
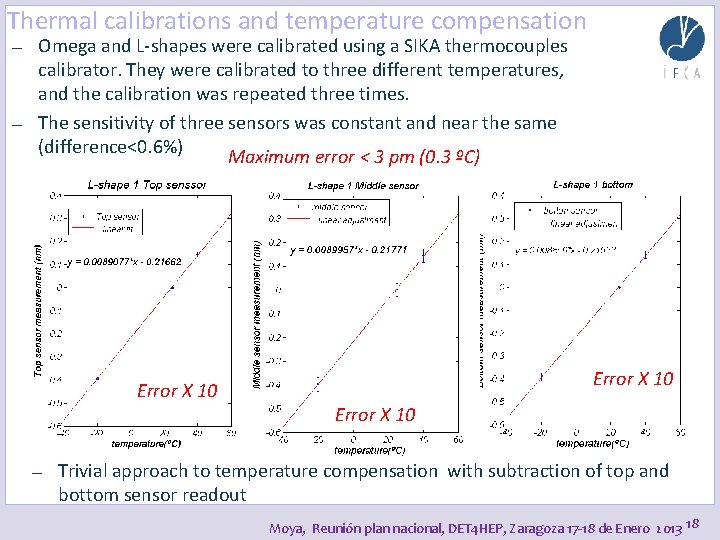
Thermal calibrations and temperature compensation — — Omega and L-shapes were calibrated using a SIKA thermocouples calibrator. They were calibrated to three different temperatures, and the calibration was repeated three times. The sensitivity of three sensors was constant and near the same (difference<0. 6%) Maximum error < 3 pm (0. 3 ºC) Error X 10 — Error X 10 Trivial approach to temperature compensation with subtraction of top and bottom sensor readout Moya, Reunión plan nacional, DET 4 HEP, Zaragoza 17 -18 de Enero 2013 18
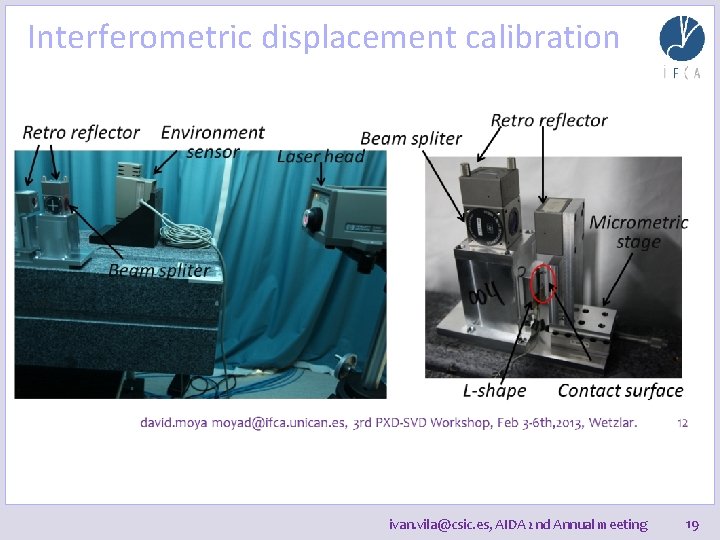
Interferometric displacement calibration ivan. vila@csic. es, AIDA 2 nd Annual meeting 19
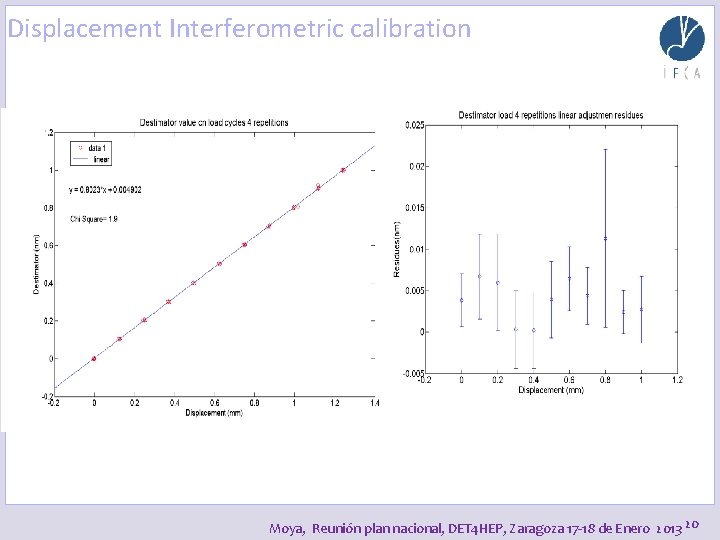
Displacement Interferometric calibration Moya, Reunión plan nacional, DET 4 HEP, Zaragoza 17 -18 de Enero 2013 20
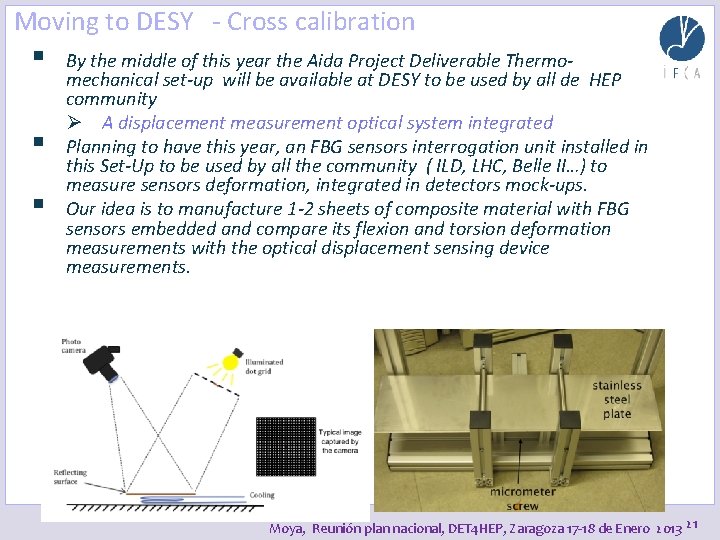
Moving to DESY - Cross calibration § § § By the middle of this year the Aida Project Deliverable Thermomechanical set-up will be available at DESY to be used by all de HEP community Ø A displacement measurement optical system integrated Planning to have this year, an FBG sensors interrogation unit installed in this Set-Up to be used by all the community ( ILD, LHC, Belle II…) to measure sensors deformation, integrated in detectors mock-ups. Our idea is to manufacture 1 -2 sheets of composite material with FBG sensors embedded and compare its flexion and torsion deformation measurements with the optical displacement sensing device measurements. Moya, Reunión plan nacional, DET 4 HEP, Zaragoza 17 -18 de Enero 2013 21
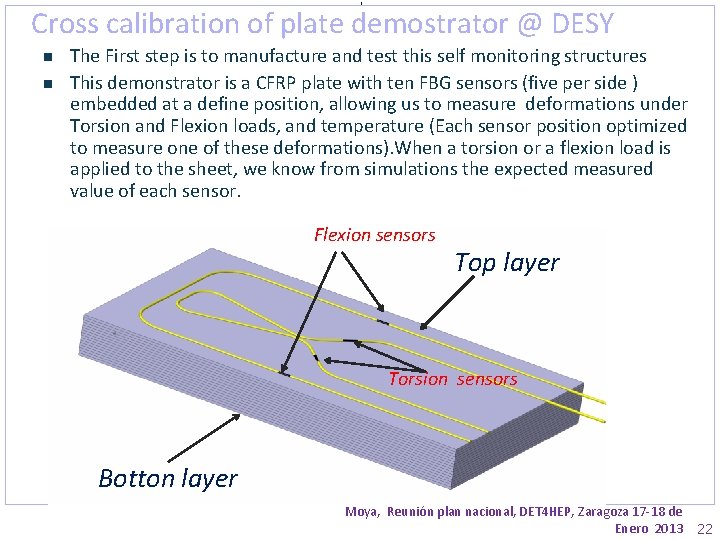
, Cross calibration of plate demostrator @ DESY n n The First step is to manufacture and test this self monitoring structures This demonstrator is a CFRP plate with ten FBG sensors (five per side ) embedded at a define position, allowing us to measure deformations under Torsion and Flexion loads, and temperature (Each sensor position optimized to measure one of these deformations). When a torsion or a flexion load is applied to the sheet, we know from simulations the expected measured value of each sensor. Flexion sensors Top layer Torsion sensors Botton layer Moya, Reunión plan nacional, DET 4 HEP, Zaragoza 17 -18 de Enero 2013 22
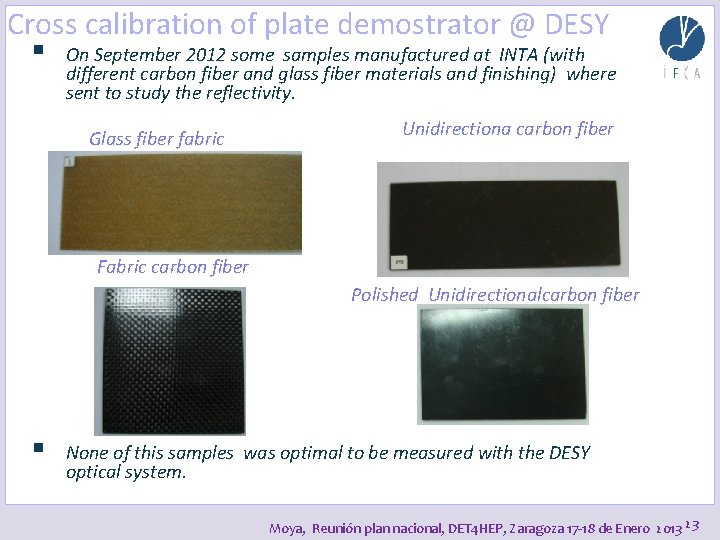
Cross calibration of plate demostrator @ DESY § On September 2012 some samples manufactured at INTA (with different carbon fiber and glass fiber materials and finishing) where sent to study the reflectivity. Glass fiber fabric Unidirectiona carbon fiber Fabric carbon fiber Polished Unidirectionalcarbon fiber § None of this samples was optimal to be measured with the DESY optical system. Moya, Reunión plan nacional, DET 4 HEP, Zaragoza 17 -18 de Enero 2013 23
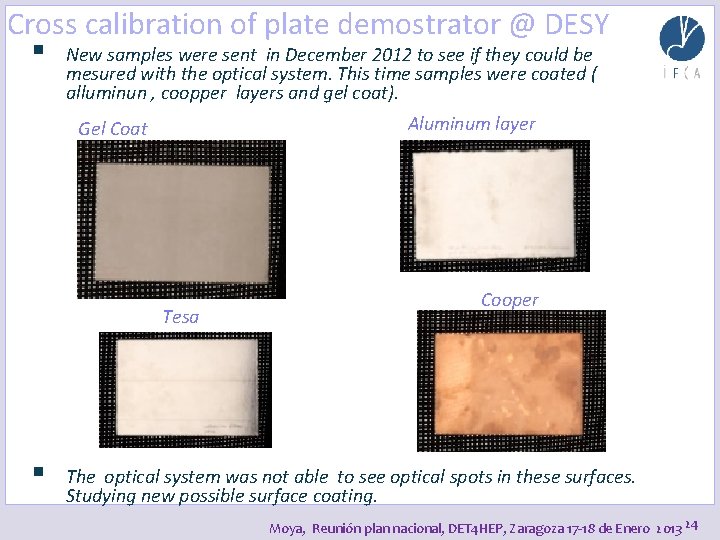
Cross calibration of plate demostrator @ DESY § New samples were sent in December 2012 to see if they could be mesured with the optical system. This time samples were coated ( alluminun , coopper layers and gel coat). Aluminum layer Gel Coat Tesa § Cooper The optical system was not able to see optical spots in these surfaces. Studying new possible surface coating. Moya, Reunión plan nacional, DET 4 HEP, Zaragoza 17 -18 de Enero 2013 24
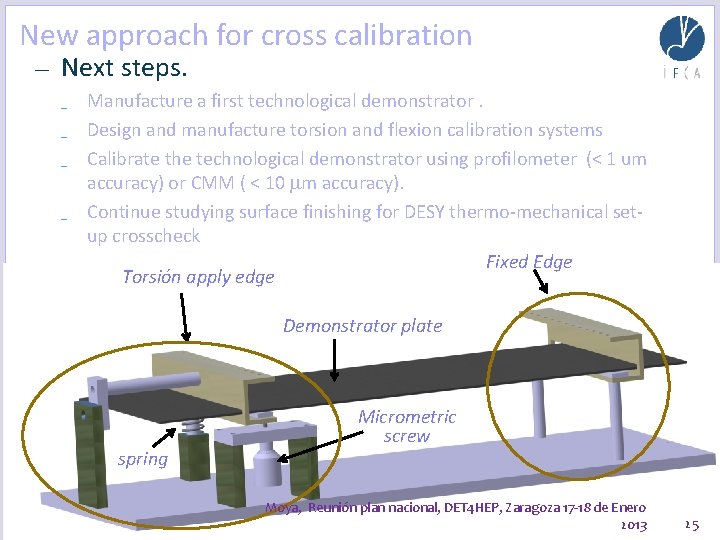
New approach for cross calibration — Next steps. _ _ Manufacture a first technological demonstrator. Design and manufacture torsion and flexion calibration systems Calibrate the technological demonstrator using profilometer (< 1 um accuracy) or CMM ( < 10 mm accuracy). Continue studying surface finishing for DESY thermo-mechanical setup crosscheck Fixed Edge Torsión apply edge Demonstrator plate spring Micrometric screw Moya, Reunión plan nacional, DET 4 HEP, Zaragoza 17 -18 de Enero 2013 25
Summary A FOS-based structural and environmental monitor system as part of the AIDA’s offline infrastructure is already available. — First application cases: Belle-II thermal mockup, displacement sensors, cross –calibration optical setup at DESY. — System ready for installation at DESY to be part of the Belle-II integrated test beam. — Welcome other interested groups to workout a dedicated solution to their monitoring needs. — ivan. vila@csic. es, AIDA 2 nd Annual meeting 26
THANK YOU ivan. vila@csic. es, AIDA 2 nd Annual meeting 27
- Slides: 27