Form button 1 button 2 Click C private


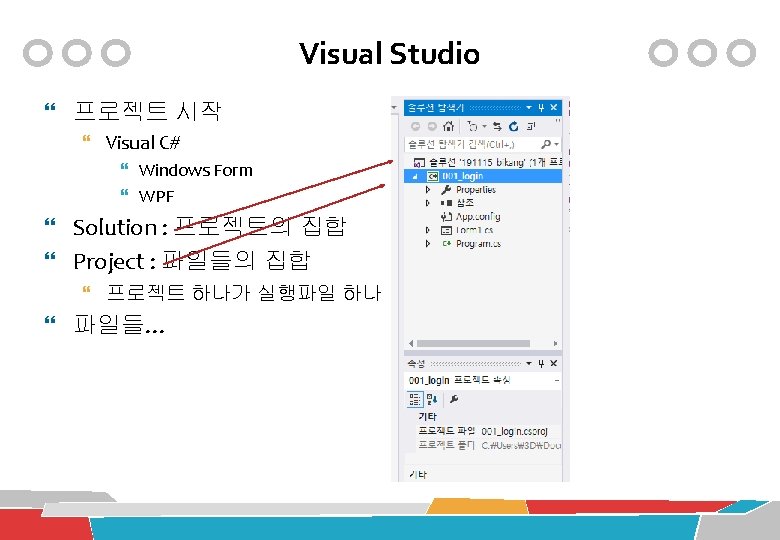
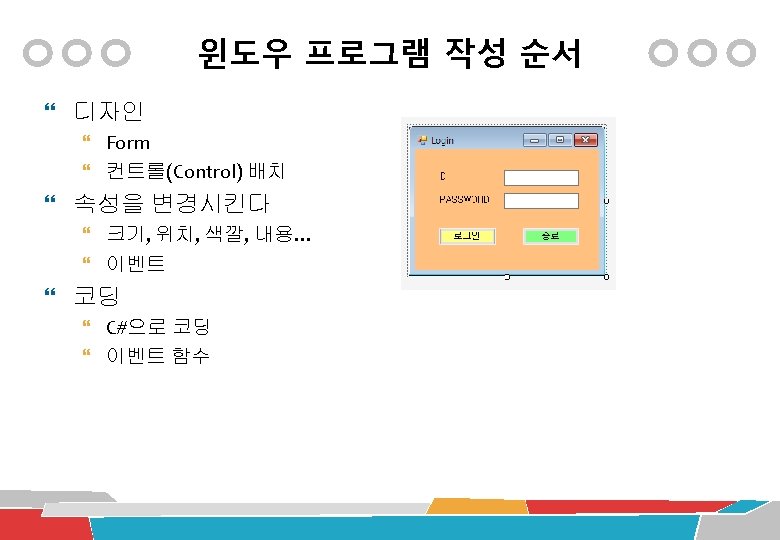

Form 이벤트처리 button 1, button 2에 Click 이벤트 설정 디자인 창에서 버튼을 더블클릭하여 이벤트 함수 생성 C#으로 private void button 1_Click(object sender, Event. Args e) { if (text. Box 1. Text == "의료IT" && text. Box 2. Text == "1234") Message. Box. Show("성공"); else Message. Box. Show("실패"); } private void button 2_Click(object sender, Event. Args e) { // 끝내라 Close(); }


이 연동되어 있다 <Grid> <Label x: Name=\"label\" Content=\"Label\" Horizontal. Alignment=\"Left\" Margin=\"60, 52,")
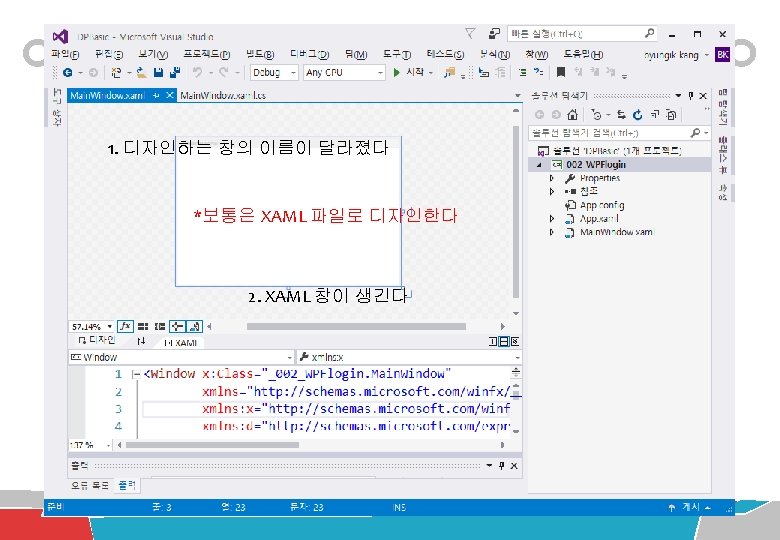
Design과 XAML(자멜이라고 읽는다)이 연동되어 있다 <Grid> <Label x: Name="label" Content="Label" Horizontal. Alignment="Left" Margin="60, 52, 0, 0" Vertical. Alignment="Top“ /> <Text. Box x: Name="text. Box" Horizontal. Alignment="Left" Height="23" Margin="157, 52, 0, 0" Text. Wrapping="Wrap" Text="Text. Box" Vertical. Alignment="Top" Width="120"/> <Text. Box x: Name="text. Box 2" Horizontal. Alignment="Left" Height="23" Margin="157, 152, 0, 0" Text. Wrapping="Wrap" Text="Text. Box" Vertical. Alignment="Top" Width="120"/> </Grid>

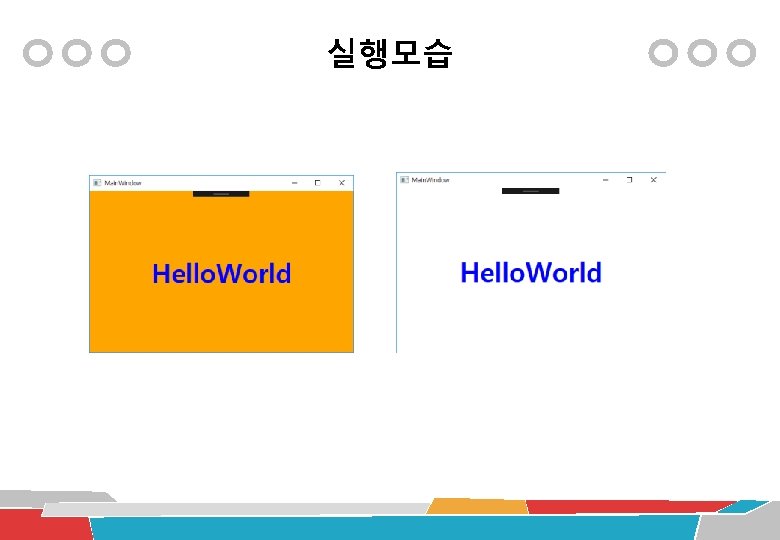
Xaml 코딩이 좋다 <Grid Background="Orange"> <Text. Block Font. Size="50" Font. Weight="Bold" Foreground="Blue" Horizontal. Alignment="Center" Vertical. Alignment="Center">Hello. World </Text. Block> </Grid> Tag : <>로 시작하고 </>로 끝 Control을 사용할 때 <> 안에 속성을 넣는다 반드시 자동완성기능을 사용한다

Main. Window. xaml <Grid Name="grid 1" Background="Orange"> <Text. Block Font. Size="50" Font. Weight="Bold" Foreground="Blue" Horizontal. Alignment="Center" Vertical. Alignment="Center" Mouse. Down="Text. Block_Mouse. Down">Hello. World</Text. Block> </Grid> Main. Window. xaml. cs // Text. Block이 눌렸을 때의 이벤트 함수 private void Text. Block_Mouse. Down(object sender, Mouse. Button. Event. Args e) { grid 1. Background = Brushes. White; }

WPF login <Grid> <Text. Block>ID</Text. Block> <Text. Box></Text. Box> <Text. Block>PASSWORD</Text. Block> <Text. Box></Text. Box> </Grid> Container를 써야 한다

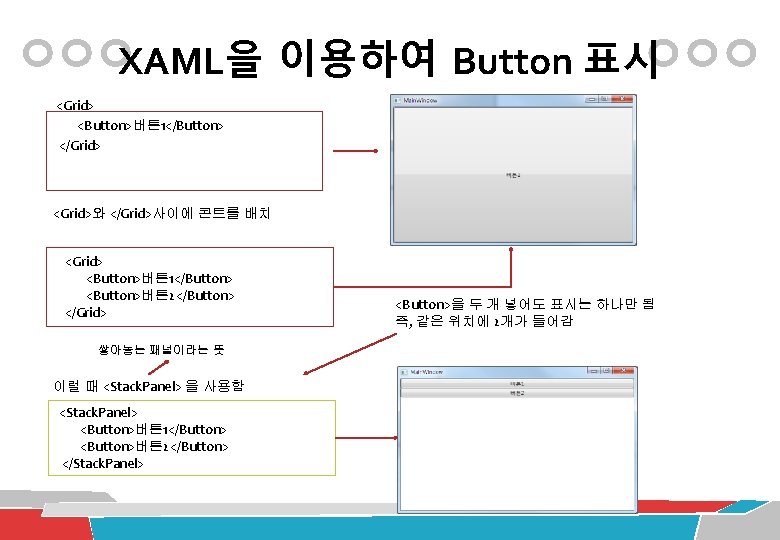
<Grid> <Button Margin="30">Button</Button> </Grid>

Stack. Panel – 가로로 쌓기 <Grid> <Stack. Panel Orientation="Horizontal"> <Button Margin="10" Height="40" Width="150"> Button 1</Button> <Button Margin="10" Height="40" Width="150"> Button 2</Button> <Button Margin="10" Height="40" Width="150"> Button 3</Button> </Stack. Panel> </Grid>

세로로 쌓기 <Grid> <Stack. Panel > <Button Margin="10" Height="40" Width="150"> Button 1</Button> <Button Margin="10" Height="40" Width="150"> Button 2</Button> <Button Margin="10" Height="40" Width="150"> Button 3</Button> </Stack. Panel> </Grid>

프로젝트만 압축해서 학번_이름. zip <Stack. Panel> bikang@konyang. ac. kr <Stack. Panel Orientation=“Horizontal”> <Text. Block/> <Text. Box /> </Stack. Panel> <Stack. Panel Orientation=“Horizontal”> <Text. Block/> <Text. Box/> </Stack. Panel> <Stack. Panel Orientation=“Horizontal”> <Button Name=btn 1/> <Button name=btn 2/> </Stack. Panel> </Stackpanel> m 2 속성 m 1 Button m 4 m 3 Margin Width Height Margin=“m 1, m 2, m 3, m 4”

디자인 – Main. Window. xaml <Grid Background="Orange"> <Stack. Panel Horizontal. Alignment="Center" Vertical. Alignment="Center" > <Stack. Panel Orientation="Horizontal" Margin="10"> <Text. Block Width="100">ID</Text. Block> <Text. Box Name="txt. ID" Width="150"/> </Stack. Panel> <Stack. Panel Orientation="Horizontal" Margin="10"> <Text. Block Width="100" Text="PASSWORD"/> <Text. Box Name="txt. Password" Width="150"/> </Stack. Panel> <Stack. Panel Orientation="Horizontal" Horizontal. Alignment="Center" Margin="10"> <Button Width="100" Name="btn. Login" Click="btn. Login_Click">로그인</Button> <Button Width="100" Name="btn. Close" Margin="50, 0, 0, 0">종료</Button> </Stack. Panel> </Grid>

Code behind – Main. Window. xaml. cs public partial class Main. Window : Window { public Main. Window() { Initialize. Component(); } // Login Button 이벤트 함수 private void btn. Login_Click(object sender, Routed. Event. Args e) { if (txt. ID. Text == "의료IT" && txt. Password. Text == "1234") Message. Box. Show("성공했습니다"); else Message. Box. Show("실패했습니다"); } // Close Button 이벤트 함수 private void btn. Close_Click(object sender, Routed. Event. Args e) { Close(); } } Xaml 파일 // XAML 코드에서 패스워드 입력창에 // Text. Box 대신 Password. Box 사용하면 글자를 숨겨준다 <Stack. Panel Orientation="Horizontal" Margin="10"> <Text. Block Width="100" Text="PASSWORD"/> <Password. Box Name="txt. Password" Width="150"/> </Stack. Panel> cs 파일 // Login Button 이벤트 함수 private void btn. Login_Click(object sender, Routed. Event. Args e) { if (txt. ID. Text == "의료IT" && txt. Password == "1234") Message. Box. Show("성공했습니다"); else Message. Box. Show("실패했습니다"); }


간단한 계산기 Form WPF Title Text. Box Button

Button의 속성 = Height, Margin <Stack. Panel> <Button Height=“ 100”>버튼 1</Button> <Button Height=“ 150”>버튼 2</Button> </Stack. Panel> Button의 크기를 키우려면 Height 속성을 준다 Button이 너무 붙어있어서 여백을 주고 싶으면 Margin 속성을 준다. 40 50 10 버튼 1 20 <Button Height="100" Margin="10">버튼 1</Button> <Button Height="150" Margin="10">버튼 2</Button> Margin=“ 10” 과 같이 숫자 하나만 쓰면 사방이 같은 Margin을 갖는다. 네 방향 모두 다른 값을 줄 수 있다. Margin=“ 50, 40, 10, 20” 처럼…

수업 중에 한 프로그램 XAML 구조 -> 올려놓은 소스를 보면서 공부할 것 <Stack. Panel> <Grid> 첫번째 <Text. Box Name=“txt. Result”>0</Text. Box> Grid </Grid> <Grid. Row. Definitions> <Row. Definition/> … 6줄을 정의함 </Grid. Row. Definitions> 두번째 <Grid. Column. Definitions> Grid <Column. Definition/> … 5칸을 정의함 </Grid. Column. Definitions> <Button Grid. Row=“ 0” Grid. Column=“ 0”>MC</Button> … 여러 개의 버튼들을 이곳에… </Grid> </Stack. Panel> 두번째 <Grid>와 </Grid> 사이에 버튼이 놓이고 버튼은 몇번째 Row, Column 에 들어가는 지를 표시한다.

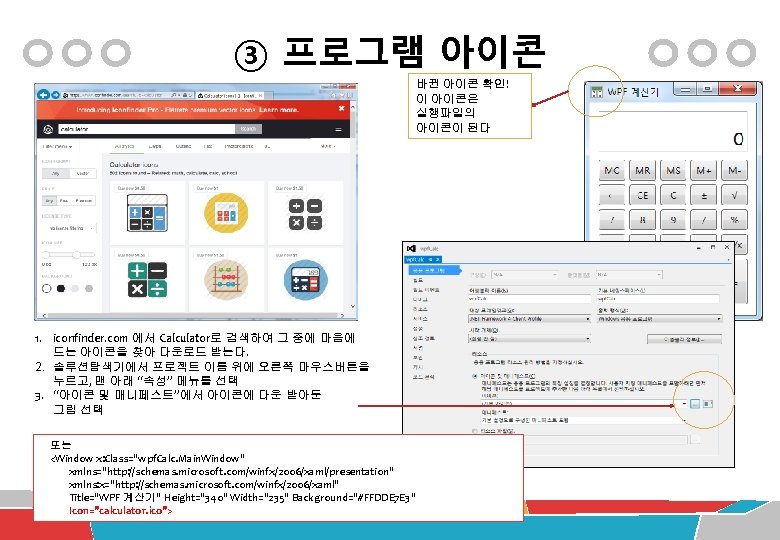
윈도우 계산기와 비교 - 초기화면 ③ 프로그램 아이콘 ① 프로그램의 이름 ④ 메뉴 ② Text. Box의 숫자가 오른쪽 아래 큰 글씨로… ⑤ 컬러추가 ① XAML 맨 윗줄에서 Title 속성 변경… <Window x: Class="wpf. Calc. Main. Window" …. . Title="WPF 계산기" Height="320" Width="220"> ② 첫번째 <Grid>의 속성 변경… <Text. Box Name="txt. Result" Height="55" Margin="10" Font. Size="20" Font. Weight="Bold" Horizontal. Content. Alignment="Right" Vertical. Content. Alignment="Bottom">0</Text. Box> </Grid>
\"> <Menu. Item")
④ Menu in WPF http: //www. wpf-tutorial. com/common-interface-controls/menu-control/ <Menu> <Menu. Item Header="_보기(V)"> <Menu. Item Header="일반용" /> <Menu. Item Header="공학용" Is. Enabled="False" /> <Menu. Item Header="프로그래머용" Is. Enabled="False" /> <Menu. Item Header="통계용" Is. Enabled="False"/> <Separator/> <Menu. Item Header="끝내기" Click="Exit_Click"/> </Menu. Item> <Menu. Item Header="편집(E)"> <Menu. Item Header="복사(C)"/> <Menu. Item Header="붙여넣기(P)" /> <Separator /> <Menu. Item Header="기록" > <Menu. Item Header="기록복사"/> <Menu. Item Header="기록 지우기"/> </Menu. Item> <Menu. Item Header="도움말(H)"> <Menu. Item Header="WPF계산기 정보" Click="About_Click" /> <Menu. Item Header="_Version 정보" Click="Version_Click" /> </Menu. Item> </Menu>

⑤ Color <Window x: Class="wpf. Calc. Main. Window" xmlns="http: //schemas. microsoft. com/winfx/2006/xaml/presentation" xmlns: x="http: //schemas. microsoft. com/winfx/2006/xaml" Title="WPF Calc v. 1. 10" Height="340" Width="235" Background="#FFDDE 7 E 3“> <Text. Box Name="txt. Result" Height="55" Margin="10" Font. Size="20" Font. Weight="Normal" Horizontal. Content. Alignment="Right" Vertical. Content. Alignment="Bottom" Border. Brush="#FF 93 A 5 B 1" Foreground="Black"> <Text. Box. Background> <Linear. Gradient. Brush End. Point="0. 5, 1" Start. Point="0. 5, 0"> <Gradient. Stop Color="#FFD 2 DEE 8" Offset="0. 152"/> <Gradient. Stop Color="#FFE 6 F 5 F 7" Offset="0. 561"/> </Linear. Gradient. Brush> </Text. Box. Background> 0 </Text. Box>
. aspx http: //tech. pro/tutorial/850/wpf-tutorial-using-the-clipboard")
⑥ Clipboard Class http: //msdn. microsoft. com/ko-kr/library/system. windows. clipboard(v=vs. 110). aspx http: //tech. pro/tutorial/850/wpf-tutorial-using-the-clipboard System. Object -> System. Windows. Clipboard. Set. Text() Method Clipboard. Get. Text() Method // 메뉴: 편집->복사 private void Copy_Click(object sender, Routed. Event. Args e) { Clipboard. Set. Text(txt. Result. Text, Text. Data. Format. Text); } // 메뉴: 편집->붙여넣기 private void Paste_Click(object sender, Routed. Event. Args e) { txt. Result. Text = Clipboard. Get. Text(); }

⑦ No Resize <Window x: Class="wpf. Calc. Main. Window" xmlns="http: //schemas. microsoft. com/winfx/2006/xaml/presentation" xmlns: x="http: //schemas. microsoft. com/winfx/2006/xaml" Title="WPF Calc v. 1. 10" Height="340" Width="235" Background="#FFDDE 7 E 3" Icon="calculator. ico" Resize. Mode="No. Resize">
- Slides: 36