Forging new generations of engineers Auxiliary Views Auxiliary

- Slides: 18

Forging new generations of engineers

Auxiliary Views

Auxiliary Views An auxiliary view is an orthographic projection of an angled surface on an object, which appears foreshortened in a typical multiview drawing. Auxiliary views are used to show the true size and shape of an angled surface and its features.

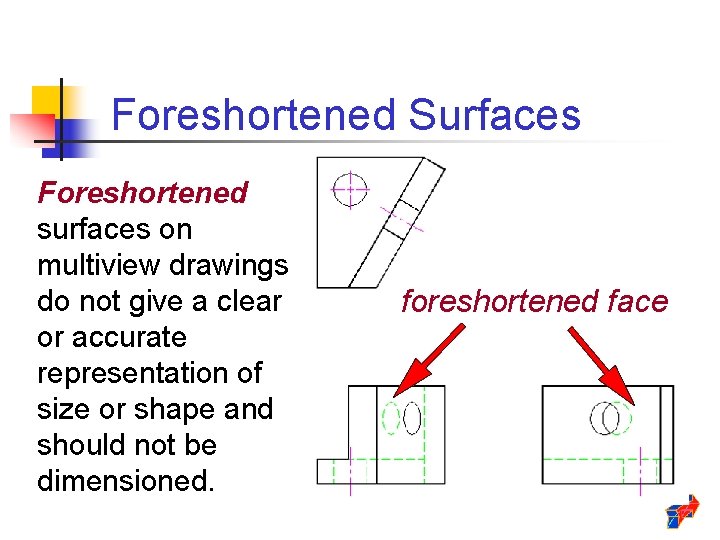
Foreshortened Surfaces Foreshortened surfaces on multiview drawings do not give a clear or accurate representation of size or shape and should not be dimensioned. foreshortened face

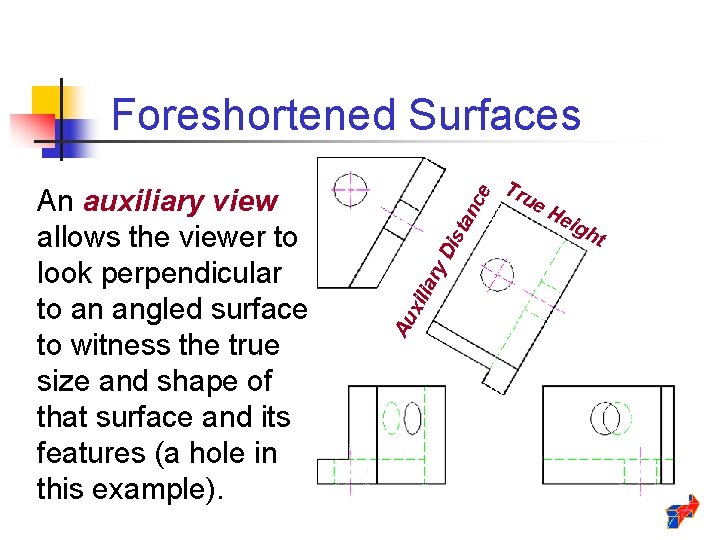
ist y. D iar Au xil An auxiliary view allows the viewer to look perpendicular to an angled surface to witness the true size and shape of that surface and its features (a hole in this example). an ce Foreshortened Surfaces Tru e. H eig ht

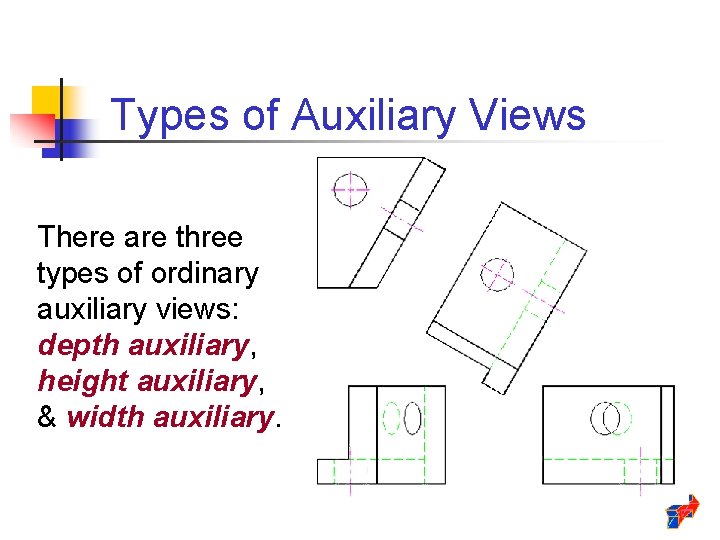
Types of Auxiliary Views There are three types of ordinary auxiliary views: depth auxiliary, height auxiliary, & width auxiliary.

Types of Auxiliary Views A depth auxiliary view is derived from a front or back view of an object and will show true depth. A width auxiliary view is derived from a side view of an object and will show true width. A height auxiliary view is derived from the top or bottom view of an object and will show true height.

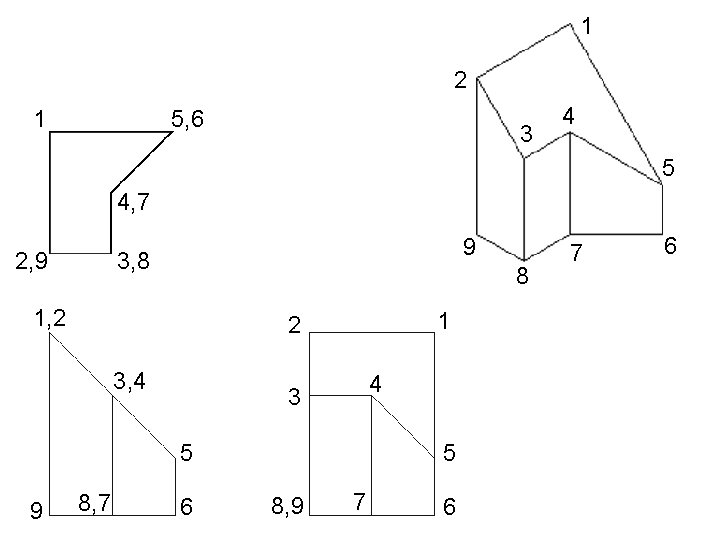
Creating Auxiliary Views Step #1: Start with a multiview drawing of an object that contains a canted surface. In this case, the canted surface for which the auxiliary view will be created is shown as an angled edge in the front view.

1 2 1 5, 6 3 4 5 4, 7 2, 9 9 3, 8 8 1, 2 1 2 3, 4 4 3 5 9 8, 7 6 5 8, 9 7 6

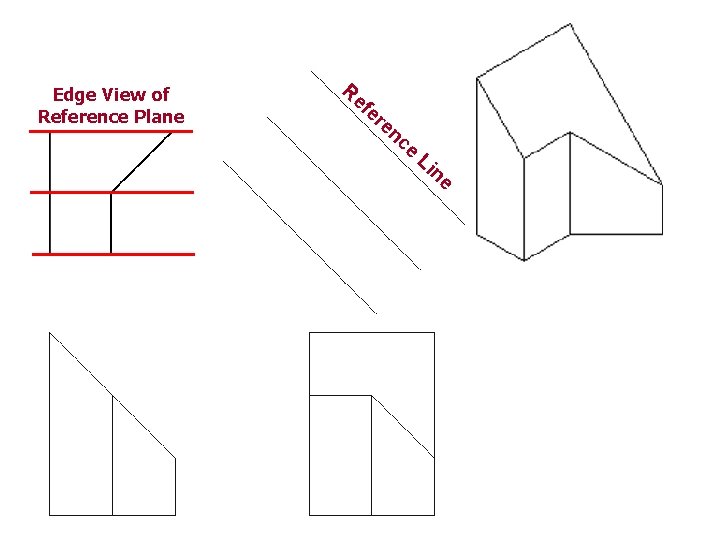
Creating Auxiliary Views Step #2: Determine which true dimension will be shown by the auxiliary view and identify reference edges on the proper existing view. Draw appropriately spaced construction lines where the auxiliary view will occur. These construction lines will serve as reference lines and must be parallel to the angled edge in question.

Edge View of Reference Plane Re f er en c e Li ne

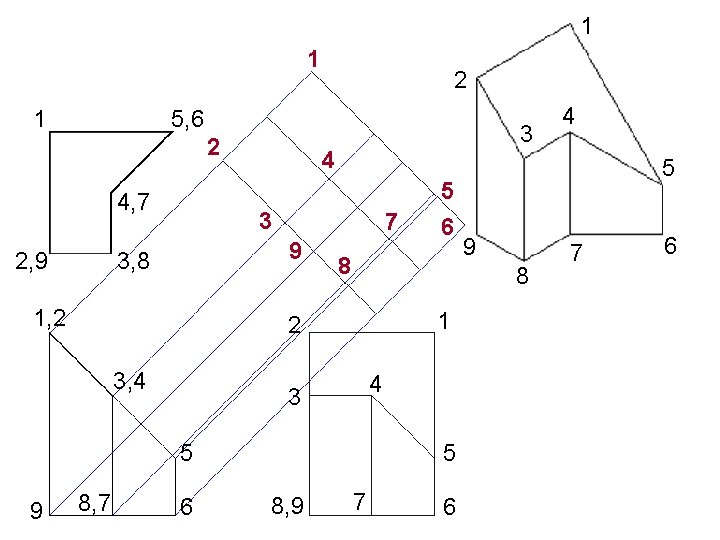
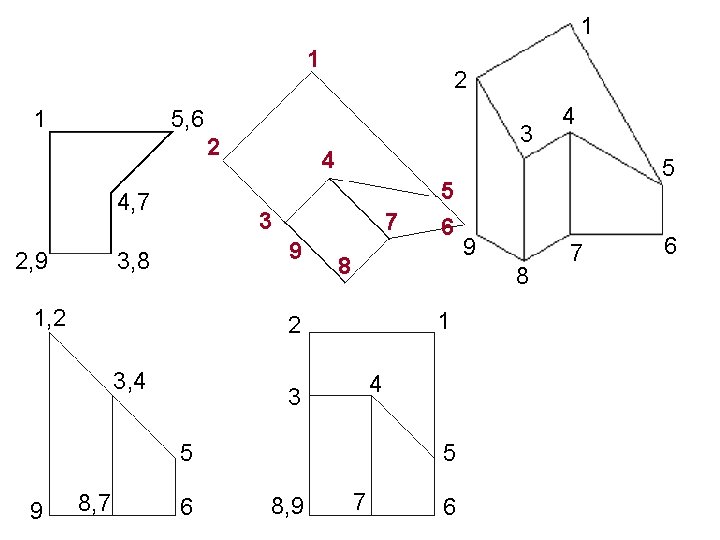
Creating Auxiliary Views Step #3: Draw construction lines outward from each corner on the view from which the auxiliary view will be a 90° rotation. The lines must be perpendicular to the angled edge in question. Identify the relationship between the corners of the object and the intersections of the construction lines.

1 1 1 2 5, 6 2 4, 7 2, 9 3 4 3 7 9 3, 8 1, 2 8 1 4 3 5 9 8, 7 6 5 8, 9 5 9 8 2 3, 4 5 6 7 6 4 7 6

Creating Auxiliary Views Step #4: Draw object lines to connect corners that share a visible edge.

1 1 1 2 5, 6 2 4, 7 2, 9 3 4 3 7 9 3, 8 1, 2 8 1 4 3 5 9 8, 7 6 5 8, 9 5 9 8 2 3, 4 5 6 7 6 4 7 6

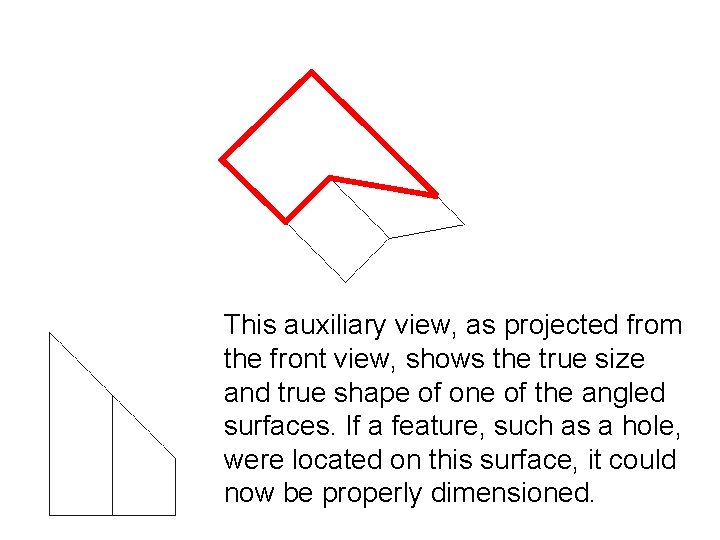
This auxiliary view, as projected from the front view, shows the true size and true shape of one of the angled surfaces. If a feature, such as a hole, were located on this surface, it could now be properly dimensioned.

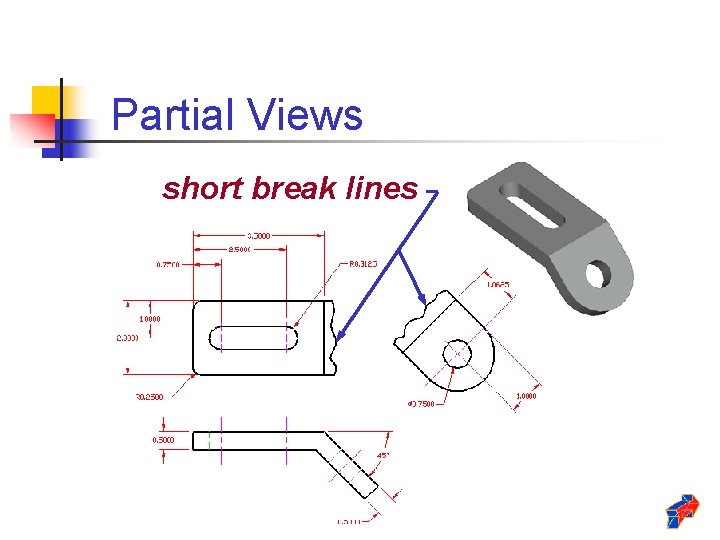
Partial Views Foreshortened object faces may have complex shapes or curves that can be difficult to draw. Short break lines and partial views may be used to remove the need to draw difficult curves on foreshortened faces, while still maintaining complete shape description within a multiview drawing.

Partial Views short break lines