First Aid Skills Welcome to First Aid Skills


- Slides: 97

First Aid Skills Welcome to First Aid Skills Discovery Ranger Workbook Pages 195 -209 Leaders Red Merit Reference Pages 169 - 199 Lesson Two Lesson Three Lesson Four Lesson Five 1

First Aid Skills Lesson One 2

First Aid Skills Lesson One – Objectives Fundamentals of First Aid 1. Define the meaning of First Aid. 2. Explain how to use the 911 system. 3. Explain the first concern when giving first aid. 4. Explain when to move and when not to move an injured person. 5. List the four steps of victim assessment. 3

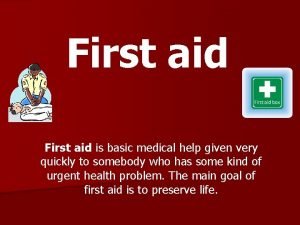
First Aid Skills Fundamentals of First Aid 1. What is the purpose of first aid: DR Workbook Pg 199, Question 1 Ø First Aid is care given to an injured person to stabilize and keep him / her safe until he / she can receive professional medical attention. 4

First Aid Skills MWS 2: RAP ABCH Page 200 5

First Aid Skills Fundamentals of First Aid Scenario: A man has been hit by a car and thrown into the street. He is wearing shorts, and blood is flowing, but not spurting, from his leg. What looks like a bone is sticking out of his leg. What are the two major concerns when giving first aid to this victim? 6

First Aid Skills Fundamentals of First Aid Answer: First, safety of the rescuer from traffic and the safety of the victim. Second, unless the victim is in a lifethreatening situation, he should not be moved. 7

First Aid Skills Fundamentals of First Aid 2. List the Two Major Concerns When Giving First Aid: Pg. 199 a. The first rule of first aid and the primary concern is: Safety b. The second concern is, unless the victim is in a life-threatening situation, he or she should: Not Be Moved 8

First Aid Skills MWS 2: RAP ABCH Page 200 9

First Aid Skills Giving First Aid RAP ABCH R is for Responsiveness Is the victim conscious? Touch their shoulder, ask if they are alright. Ask if they need help. If they say no, then proceed no further If yes, or no response, then proceed to A 10

First Aid Skills Giving First Aid RAP ABCH A is for Activate EMS or 911 11

First Aid Skills How to Use the 911 System 4. What are the four things you need to remember when making a 911 call? Pg. 199 Ø Your name Ø The emergency Ø The location of the emergency Ø Condition of the victim Stay on the line with the operator until help arrives. 12

First Aid Skills How To Use the 911 System When should EMS / 911 be called? Page 195, Question 2 b Ø Check the victim for responsiveness. If they do not respond or if they tell you that they need help, then contact EMS. 13

First Aid Skills When To Move An Injured Person MWS 2, page 200 P is for Position Only re-position the victim if the victim is in further danger in their present location. And / or there does not seem to be spinal injury and additional care requires moving them. 14

First Aid Skills Explain when an injured person should and should not be moved? Requirement 4, Pg. 195 Ø If there are suspected spinal injuries, do not move the victim (except when the victim is in a life threatening situation). Seek immediate medical attention. Follow the flowchart and care for the victim in any form that does not require moving the victim. 15

First Aid Skills Four Steps of Victim Assessment Use the mnemonic “ABCH” MWS 2, Page 200 Ø A is for airway -check to see if the airway is blocked. Use your finger to sweep the mouth to remove any seen object. If this fails, then perform the Heimlich maneuver or abdominal thrusts. We will learn these techniques in later lessons. 16

First Aid Skills Four Steps of Victim Assessment Ø B is for breathing Look, listen and feel by watching the chest and placing your cheek a few inches above the mouth of the victim to sense any movement of air. If the victim is not breathing, they may need their head repositioned. If they are still not breathing they need rescue breathing, do not give unless you are trained, instead, find an adult. 17

First Aid Skills Four Steps of Victim Assessment Ø C is for circulation If there is not a pulse, then this person needs CPR. The best place to check for a pulse is the carotid artery along the side of the neck along the windpipe. If you are not trained in CPR, then find someone who is. 18

First Aid Skills Four Steps of Victim Assessment Ø H is for Hemorrhaging If the victim is bleeding, then provide the necessary care. If not, then begin a secondary assessment. Complete filling in MWS 2 RAP ABCH Flowchart 19

First Aid Skills Lesson One Review First aid is a first-response activity, nothing more. It’s sole goal is to maintain the injured person until they get professional help. First priority – Safety for all! Blood from a cut or torn vein will flow, a cut artery will spurt. Fill out the True-False Questions on Page 199. 20

First Aid Skills Lesson One True-False Questions MWS 1, Pg. 199 T F 5. Checking the victim, calling for help, and giving care three steps in treating someone who has been seriously hurt or ill. T F 6. It is ok to move someone who is seriously hurt to make them feel better. T F 7. Knowing first aid could save a life, and applying first aid should be accompanied with prayer. 21

First Aid Skills Lesson One True-False Questions MWS 1, Pg. 199 T F 8. The groove to the side of the neck (carotid artery) is a good place to check the pulse. T F 9. Calling for help may be the most important thing that you do to help the victim. T F 10. First aid is the temporary care that you give until professional help arrives. Complete requirements 1, 2, 3 and 4 if you have not done so already - (Page 195) 22

First Aid Skills Lesson Two 23

First Aid Skills Lesson Two – Objectives Choking, Shock and Weather. Related Ailments 1. Review Victim Assessment from lesson 1 2. Explain and Demonstrate how to treat for shock. 3. Explain and Demonstrate the Heimlich maneuver and abdominal thrusts. 4. Explain the treatment for hot- and cold-weatherrelated injuries or ailments. 24

First Aid Skills RAP ABCH Review DR Workbook MWS 3, Pg. 201 1. Safety is the primary concern. 2. R = Responsiveness (Is the victim conscious? ) 3. A = Activate EMS or 911 4. P = Position (no spinal injury, position according to injury) 5. A = Airway (is it blocked? Check head position) 25

First Aid Skills RAP ABCH Review DR Workbook MWS 3, Pg. 201 6. B = Breathing (is the victim breathing? Check!) 7. C = Circulation (Is there a pulse? Check!) 8. H = Hemorrhaging (Is the victim bleeding? ) 9. Perform secondary survey. Examine the victim for other injuries and wait for medical attention to arrive. 26

First Aid Skills Heimlich Maneuver Ø Used only when the victim is conscious and is unable to breath or cough. Ø Victim coughing, encourage to continue. Ø If the victim goes unconscious, use Abdominal Thrusts 27

First Aid Skills Heimlich Maneuver DR Workbook Requirement 7 a, Page 196 1. Stand behind victim. 2. Wrap arms around victim’s waist and not around the ribs. 3. Make a fist and place thumb side of your fist just slightly above the navel. 4. Grab your fist with your other hand. 28

First Aid Skills Heimlich Maneuver DR Workbook Requirement 7 a, Page 196 5. Press into the victim’s stomach with five quick upward thrusts. Each thrust should have a pause in between. 6. After every five thrusts, recheck the victim. Repeat until the object has been dislodged of until the victim loses consciousness. Time To Practice! 29

First Aid Skills Abdominal Thrusts DR Workbook Requirement 7 b, Page 196 1. Place victim on his or her back. 2. Straddle the victim by sitting on their thighs. 3. Place the heel of one hand just slightly above their navel. Your fingers should be angled slightly upward, pointed toward the victim’s head. 30

First Aid Skills Abdominal Thrusts DR Workbook Requirement 7 b, Page 196 4. Grasp your hand by placing your other hand on top and lacing your fingers into the first hand. 5. Press inward and upward with five quick thrusts. Each thrust should have a pause in between. 31

First Aid Skills Abdominal Thrusts DR Workbook Requirement 7 b, Page 196 6. After every five thrusts, recheck the victim. Repeat until the object has been dislodged or until you are relieved by another person or an EMT. 7. Perform finger sweep after each set of five thrusts. Time To Practice! 32

First Aid Skills Preserve Body Heat Eight to Twelve Small Water Head and Shoulders Page 202 Left Fluids Conscious Burned 33

First Aid Skills Shock - Treatment DR Workbook, Question 5 a, Page 195 & Question 11, Page 201 Ø Preserve body heat by placing a blanket or cover the victim. Provide insulation, or move the victim, if possible, to a warmer environment. 34

First Aid Skills Shock - Treatment 35

First Aid Skills Shock - Treatment DR Workbook, Requirement 5 b, Page 196 Allergic Reaction First Question: Is shock the result of an allergic reaction? If the shock is the result of an allergic reaction, then follow victim's instructions for treating allergy and monitor the "ABCH’s" until medical attention arrives. 36

First Aid Skills Shock - Treatment DR Workbook, Requirement 5 b, Page 196 Ø Spinal injury – do not move the victim. Ø If result of a head injury or if victim has difficulty breathing, elevate head and shoulders by placing a pillow or blanket under head. Ø If the victim is unconscious or vomiting, then turn the victim on their left side so the stomach is on the left side of the body. 37

First Aid Skills Shock - Treatment DR Workbook, Question 5 b, Page 196 Ø If no, elevate legs eight to twelve inches off the ground. Ø If less then two hours from medical care, then do not give fluids (except to those who are conscious and are severely burned). Ø If no, give small and periodic amounts of water (only if conscious). Ø Wait for medical attention to arrive. 38

First Aid Skills Weather Related Emergencies Weather related emergencies include: ØHyperthermia: Heat related, body unable to cool itself ØHeat Exhaustion: Skin cold & clammy, person alert ØHeatstroke: Skin hot, altered state of awareness ØHypothermia: Cold related, body unable to warm itself ØFrostbite: Freezing of the extremities (fingers & toes) ØFrostnip: First stage of freezing outer layers of skin 39

First Aid Skills Weather Related Emergencies Treatment for Hyperthermia Question 13. Pg. 201 “The body is unable to COOL itself. ” List below on page 196, Requirement 6 a. Ø Move person into a cool place; remove any excess clothing; cool victim with either water, fanning, or cool packs under the armpits or groin; wait for medical attention, in the case of heatstroke. 40

First Aid Skills Weather Related Emergencies Treatment for Hypothermia DR Workbook Question 14, pg. 201 “The core body temperature drops below Ninety-five degrees. ” 41

First Aid Skills Weather Related Emergencies Treatment for Hypothermia DR Workbook Question 6 b, Pg. 196 Ø Move the victim out of the cold; handle the victim carefully; replace wet clothes with dry clothes. Ø You may need to be forceful verbally to get the individual to comply; Ø Insulate from the cold with layered clothing and/or an insulated sleeping bag. 42

First Aid Skills Lesson 2 Review Questions True-False Questions MWS 3, Pg. 201 T F 15. Hyperthermia occurs when the body loses the ability to cool itself and overheats. T F 16. When you have frostbite, rub the hands together slowly to warm them up. T F 17. Hypothermia occurs when the body loses its ability to keep itself warm. T F 18. Shock may occur with any injury, illness, or trauma. 43

First Aid Skills Lesson 2 Review Questions True-False Questions MWS 3, Pg. 201 T F 19. Itching eyes is a sign of hypothermia. T F 20. Clammy skin is a sign of heat exhaustion. 21. Describe the treatment needed for the following scenario: You have come to an accident scene, and the victim is sitting on the curb. He of she seems a little upset, is shivering, and there is some discoloration of the skin. How do you treat this person? Check “RAP ABCH”. Cover with blanket. Ask if it is an allergic reaction. Seek medical attention. 44

First Aid Skills Lesson Three 45

First Aid Skills Lesson Three – Objectives 1. Explain and demonstrate first aid for a cut. 2. Explain how to treat a blister. 3. Explain and demonstrate first aid for a puncture wound. 4. Explain and demonstrate first aid for arterial bleeding of an arm or leg. 5. Explain and demonstrate how to stop bleeding. 46

First Aid Skills Blister Treatment DR Workbook, Requirement 8 b, page 196 Ø Remove the object or clothing that is causing the blister. Ø Wash with warm water and soap. Ø Use a sterile needle to pop the blister at its base and drain. Ø Place a donut-shaped piece of mole foam around it to keep it from further irritation. 47

First Aid Skills Blister Treatment DR Workbook, Page 203 “Bleeding and Wounds” 1. Treating a Blister a. Remove footwear then wash the blister with warm water and soap. b. The best place to pop the blister is at the base. c. Do not tear off the roof of the blister. d. The best way to prevent blisters is to wear properly fitted footwear. 48

First Aid Skills Puncture Wound Treatment Dr Workbook, Requirement 8 c, page 197 Ø Larger wounds - never remove barriers (may cause wound to bleed again). Ø Wash gently with outward strokes to move dirt and bacteria away from wound. Ø Use a stream of water to flush it out. Dry carefully, apply antibacterial ointment (for small wounds) and sterile bandage. 49

First Aid Skills Puncture Wound Treatment DR Workbook, Page 203 Question 2 2. Treating punctures: a. If the object has already been removed, treat the wound based on the type of bleeding that has occurred. b. The object acts as a plug and should not be c. removed. c. The most important thing is to keep the object from moving. 50

First Aid Skills Minor Cut Treatment DR Workbook, Requirement 8 a, page 196 Ø Wash hands with soap and water. Ø Apply direct pressure to the cut until it stops bleeding. Ø Gently wash with soap and water and rinse it for a few minutes. Ø Pat dry and add a bandage with small dab of ointment on it. 51

First Aid Skills Arterial Bleeding DR Workbook Requirement 8 d, page 197 Ø Check RAP ABCH first. Ø Try to stop the bleeding using direct pressure. Ø If the bleeding stops, treat for shock. Ø If not, then: Elevate that part of the body above the victim's heart and continue with direct pressure. 52

First Aid Skills Arterial Bleeding DR Workbook Requirement 8 d, page 197 Ø If the bleeding stops, treat for shock. If not, then: Locate a pressure point and continue to apply direct pressure. Ø The pressure points are located in the upper arm and where the leg joins the hip. 53

First Aid Skills Arterial Bleeding DR Workbook Requirement 8 d, page 197 Ø If the bleeding stops, treat for shock. If not, then: Seek immediate medical assistance. Ø Never use a tourniquet. This is no longer a recommended treatment. 54

First Aid Skills Preventing Infection DR Workbook, Page 203 Question 3 3. How to prevent infection and treat bleeding. a. The best way to prevent infection is to wash the wound. b. Fill out the flow chart (next slide). c. Never use a tourniquet. 55

First Aid Skills Clean Direct Pressure Victim’s Heart Do Not Page 204 Pressure Point Shock Danger 56

First Aid Skills Lesson 3 Review Questions True or False, MWS 5, Page 203 T F 4. A foot blister occurs because of the constant rubbing of clothing of equipment against the skin. T F 5. Most wounds can be card for by applying direct pressure, cleaning, applying medicine, and applying a bandage. T F 6. A tourniquet is a good and safe way to control bleeding at a camp-out. T F 7. Arterial bleeding is considered a simple wound. 57

First Aid Skills Lesson 3 Review Questions True or False, MWS 5, Page 203 T F 8. A deep puncture wound is not serious and does not need to be treated by a doctor. T F 9. Applying ointment is not a method to control bleeding from a large wound. Let’s Practice 58

First Aid Skills Lesson Four 59

First Aid Skills Lesson Four – Objectives 1. Explain and demonstrate how to respond to poisonings. 2. Explain and demonstrate first aid for insect bites. 3. Explain how to remove a splinter from a finger. 4. Explain how to treat poisonings. 60

First Aid Skills Poisons Use MWS 8: “Poisons and Bites Flowchart”, Pg. 206 Poisons can enter the body one of four ways: 1. Inhalation 2. Ingestion 3. Injection 4. Absorption 61

First Aid Skills Page 195 62

First Aid Skills Poisoning Treatment DR Workbook Question 9 c, Page 197 Ø Absorbed, like Poison ivy, Ø Immediately wash the area with soap and water. Ø Then take a cool bath and apply calamine lotion. Ø If it spreads and painful, then seek medical attention. 63

First Aid Skills Poisoning Treatment DR Workbook Question 9 c, Page 197 Ø Poisonous injections: i. e. Snakebites, Ø Identify the snake, if possible. Ø Then clean the bite with soap and water and keep bite below heart level. Ø Seek medical attention. 64

First Aid Skills Poisoning Treatment DR Workbook Question 9 c, Page 197 Ø If the poison is inhaled or swallowed; Ø Check "ABCH" and treat for shock. Ø Seek medical attention and call the Poison Control Center Ø 1 -800 -222 -1222 65

First Aid Skills Insect Bite or Sting Treatment DR Workbook Question 9 a, Pg. 197 Ø If possible, try to catch the spider or insect without risk to you. Ø Check to see if the stinger is in the skin. Ø If not, Clean the area, apply ice to reduce swelling. 66

First Aid Skills Insect Bite or Sting Treatment DR Workbook Question 9 a, Pg. 197 Ø If stinger is found, gently scrape the stinger out of the wound using a plastic card or fingernail, pulling away from the wound to minimize amount of toxin released into the body. Ø Do not squeeze stinger. Treat wound as a minor cut. 67

First Aid Skills Insect Bite or Sting Treatment DR Workbook Question 9 a, Pg. 197 Ø Next, check to see if the victim is allergic to the bite. Ø Look for signs of shock and swelling. Ø If no, then seek medical attention or an adult for assistance. Ø If yes, check “ABCH, ” treat for shock, and immediately seek medical attention. 68

First Aid Skills Splinters and Ticks - Treatment DR Workbook Question 9 b, Pg. 197 Ø Use tweezers to carefully remove. Ø If splinter breaks, use sterilized tweezers. Ø Remove remainder of splinter, and treat wound as a minor cut. 69

First Aid Skills Splinters and Ticks - Treatment DR Workbook MWS 7, Question 1, Pg. 205 1. Treating a splinter. a. Remove as much of the splinter as possible. b. If the splinter breaks off, sterilize the tweezers. c. Do not cut into the skin. 70

First Aid Skills Splinters and Ticks - Treatment DR Workbook MWS 7, Question 2, Pg. 205 2. Treating a tick. a. Do not yank the tick out, but slowly pull it out. b. After removing the tick, clean the area and watch for infection. c. Contact medical attention if swelling, redness, or itching persists. 71

First Aid Skills ABCH Wash Calamine Identify Page 195 Clean Remove Shock 72

First Aid Skills Lesson 4 Review Questions True or False, MWS 7, Page 205 T F 3. To remove a tick, just yank it off of your body. T F 4. Call the Poison Control Center if poison is swallowed or inhaled. T F 5. For a snakebite, slice the wound, suck out the venom, and spit it out. T F 6. To remove the oils that rub onto the body from poison ivy, poison oak, or poison sumac, you should change your clothes and wash thoroughly. 73

First Aid Skills Lesson 4 Review Questions True or False, MWS 7, Page 205 T F 7. Tweezers are needed to remove a splinter. T F 8. A plastic card could be used to remove a stinger from an insect bite. Let’s Play the Progressive Skills Game 74

First Aid Skills Lesson Five 75

First Aid Skills Lesson Five – Objectives 1. Demonstrate and explain first aid for simple burns. 2. Assemble a personal first aid kit. 3. Learn where a first aid kit should be stored. 76

First Aid Skills Degree of Burn Epidermis Dermis First Degree Burn Hypodermis Second Degree Burn Third Degree Burn 77

First Aid Skills Burns – Degrees of Burns DR Workbook MWS 9: Question 1, Pg. 207 1. First-degree burn a. Only the top layer of skin is burned. b. The skin is only mildly discolored. c. There is only a little swelling. d. These burns usually heal within a week. 78

First Aid Skills First-Degree Burn Redness (Erythema) First Degree Burn Epidermis Dermis Hypodermis Damage to the outer layer of skin (epidermis), causing pain, redness, and swelling. 79

First Aid Skills Burns – Degrees of Burns DR Workbook MWS 9: Question 2, Pg. 207 1. Second-degree burn a. Several layers of skin are burned. b. The skin has a spotty or blotchy appearance. c. There is greater swelling, and there are blisters. d. These burns take up to three weeks to heal and should be attended by a physician. 80

First Aid Skills Second-Degree Burn Second Degree Burn Damage to both outer skin and underlying tissue layers (epidermis and dermis), causing pain, redness, swelling, and blistering. Blisters (Bulla) 81

First Aid Skills Burns – Degrees of Burns DR Workbook MWS 9: Question 3, Pg. 207 1. Third-degree burn a. Many layers of skin are burned. b. There is severe discoloration. c. Some skin may be charred. d. These burns can be life threatening. 82

First Aid Skills Third-Degree Burn Full thickness burn with tissue damage Third Degree Burn Damage extends deeper into tissues (epidermis, and hypodermis) causing extensive tissue destruction. The skin may feel numb. 83

First Aid Skills Heat Burn Treatment DR Workbook Question 10 a, Pg. 197 Ø Go through “RAP ABCH” first, then ask if burn was caused by heat. Ø Determine degree and amount of burn. Ø If it is a third-degree burn or large seconddegree burn, use the “ABCH”, then treat for shock. Ø Do not attempt to pull off the clothing because skin may come with it. 84

First Aid Skills Heat Burn Treatment DR Workbook Question 10 a, Pg. 197 Ø Cut it off if attached to the skin. Ø Apply a sterile dressing and elevate. Ø Seek immediate medical attention. Ø Burn is first-degree or small second-degree, apply cold water/compress until pain stops. Ø If you must use ice, provide a barrier. Ø Do not apply an ointment. 85

First Aid Skills Chemical Burn Treatment DR Workbook Question 10 b, Pg. 198 Ø Determine if burn was caused by a dry chemical. Ø If so, brush it off, remove clothing, wash area fifteen to twenty minutes. Ø If not caused by dry chemical, remove clothing and jewelry, wash area for fifteen to twenty minutes. Ø Seek medical attention in both cases. 86

First Aid Skills Electrical Burn Treatment DR Workbook Question 10 c, Pg. 198 Ø If burn is not chemical, then it’s an electrical burn. Ø Is victim in contact with electrical source, are you at risk. Ø If yes, ask adult to turn off power. Ø May entail calling 911 to have then call appropriate person. Ø Treatment same as heat burn. 87

First Aid Skills Electrical Burn Treatment DR Workbook Question 10 c, Pg. 198 Ø In all cases, monitor wound for signs of infection. Ø Large wounds – seek medical attention to reduce risk of infection. Ø Serious burn, monitor for signs of shock. 88

First Aid Skills Safety Wash Before Wash Shock Pg. 209 Cold Power 89

First Aid Skills First Aid Kit DR Workbook MWS 9, Pg. 207 Ø Container – To keep all first aid items in one common container. Ø Gauze Pads -To cover wounds and prevent infection. Ø Roll Bandage -To stabilize strains and sprains and cover wounds. Ø Triangular Bandage -To cover wounds and prevent infection. 90

First Aid Skills First Aid Kit DR Workbook MWS 9, Pg. 207 Ø Bandages -To stop minor bleeding and prevent infection. Ø Adhesive Tape -To secure bandages to wounds. Ø Antibacterial Ointment -To prevent infection on small cuts. 91

First Aid Skills First Aid Kit DR Workbook MWS 9, Pg. 207 Ø Calamine Lotion -To prevent itching. Ø Soap -To clean minor wounds and cuts and to prevent infection. Ø Latex Gloves -To protect the rescuer from infection and blood pathogens. 92

First Aid Skills First Aid Kit DR Workbook MWS 9, Pg. 207 Ø Bandage Scissors -To cut gauze and bandages. Ø Tweezers -To pull splinters. Ø Moleskin -To protect blisters and prevent infection. Now transfer to page 198, Question 11 a 93

First Aid Skills First Aid Kit DR Workbook Question 11 b, Pg. 198 Where should a first aid kit be placed? Ø It should be placed in a visible location near the center of the activities. Everyone should be aware of its location. 94

First Aid Skills Lesson 5 Review Questions True or False, MWS 9, Page 208 T F 17. A first-degree burn should be cooled using ice, not water. T F 18. When helping a victim with a chemical burn, quickly rinse the burn for a few seconds. T F 19. You should remove clothing from a burn, even if it is sticking, so you can treat it more effectively. T F 20. When approaching a victim or electrical burns, you should make sure the power is off. 95

First Aid Skills Lesson 5 Review Questions True or False, MWS 9, Page 208 T F 21. Duck tape is an important item in a first aid kit. T F 22. Large second-degree burns are just as dangerous as third-degree burns. Let’s Play Scenarios 96

First Aid Skills Summary Make sure all work is completed in your Workbook. Have your commander sign off on each completed advancement. God Bless You and let’s pray! 97
 First aid merit badge first aid kit
 Which is an objective of first aid
 Welcome welcome this is our christmas story
 Green hill park medical centre
 Welcome to our first meeting
 Welcome to our first meeting
 Joinmyquiz.cmo
 Translater
 Wilderness first aid patient assessment form
 Army cadet badge placement
 6 vital signs first aid
 Unit 15:3 providing first aid for bleeding and wounds
 Coyne first aid
 Taz hartwick
 First aid angels
 First aid quiz for students
 Srfac singapore
 First aid for falls in the kitchen
 Electricity merit badge powerpoint
 Psychological first aid
 Preserve life in first aid
 Pediatric first aid for teachers
 Emotional first aid kit ideas
 Three ps in first aid
 First aid list quotes
 Injury prevention safety and first aid
 4x4x4 asthma method 26 puffs
 Hltaid
 Sea base first aid kit
 Rice first aid
 What are the objectives of first aid?
 Fainting first aid images
 First aid jeopardy
 First aid in the laboratory
 First aid goals
 Two-person drag
 Secondary assessment first aid
 Llf meaning cpr
 Injuries first aid
 First aid for heat stroke
 Poem of first aid
 Pearson
 Shirt drag first aid
 17:8 providing first aid for cold exposure
 17.10 providing first aid for specific injuries
 16:3 providing first aid for bleeding and wounds
 Chapter 16:11 providing first aid for sudden illness
 Preserve life first aid
 Fundamentals of first aid
 Emergency care first aid and disasters
 First aid definition
 Chapter 28 first aid and emergencies
 Pony club stall card
 Pervent
 Kitchen first aid
 Red cross first aid champions
 Abc in first aid
 First aid for unconsciousness
 First aid jeopardy
 What is first aid answer
 Global first aid reference centre
 First aid theory
 First aid for unconsciousness
 First aid
 Application of first aid
 Crisis management pdhpe
 Rapid body survey first aid
 Outdoor software
 Skill test in totaps is necessary when
 Drsabcd cows
 Chapter 16:5 providing first aid for poisoning
 Bsa first aid log
 First aid anatomy
 Girlguiding first aid kit
 First aid vocabulary words
 Human crutch/two-person drag
 Rice first aid
 The aims of first aid
 Immediate assistance
 Injuries first aid
 First aid foundation
 Trauma first aid
 Rice first aid
 Mhfa manual
 Mhfa algee action plan
 1
1 Family resilience
 First aid conclusion
 Stress first aid for firefighters
 Stress first aid model
 Emergency action plan swimming pool
 Psychological first aid help card
 Dr michael hoenig
 How to heimlich maneuver
 First aid aim
 The aim of first aid is to
 Conclusion of first aid
 Make a creative graphic organizer about first aid
