FASTENERS WELDS AND WORKING DRAWINGS Mainly Chapters 10
- Slides: 23

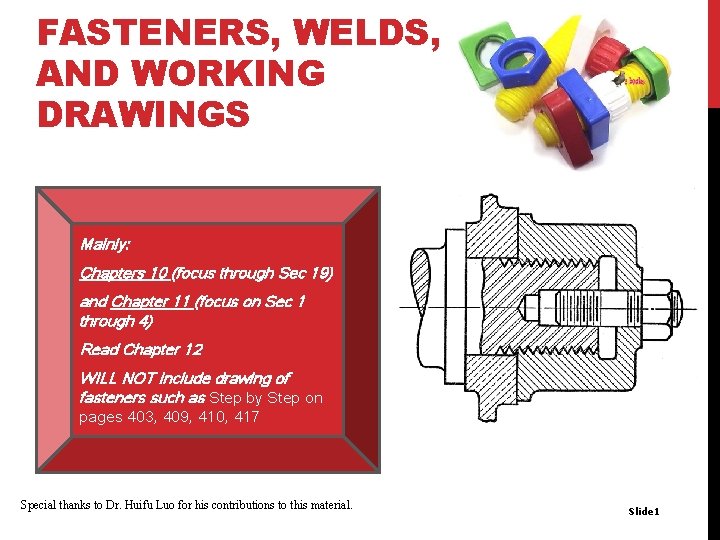
FASTENERS, WELDS, AND WORKING DRAWINGS Mainly: Chapters 10 (focus through Sec 19) and Chapter 11 (focus on Sec 1 through 4) Read Chapter 12 WILL NOT include drawing of fasteners such as Step by Step on pages 403, 409, 410, 417 Special thanks to Dr. Huifu Luo for his contributions to this material. Slide 1

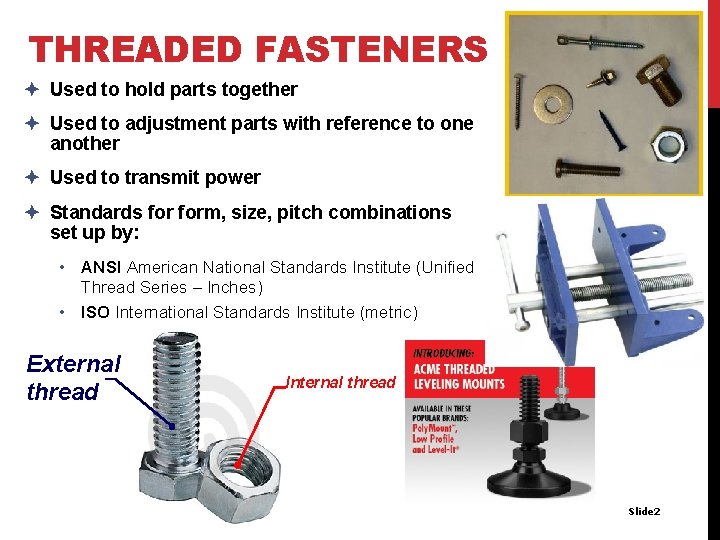
THREADED FASTENERS è Used to hold parts together è Used to adjustment parts with reference to one another è Used to transmit power è Standards form, size, pitch combinations set up by: • ANSI American National Standards Institute (Unified Thread Series – Inches) • ISO International Standards Institute (metric) External thread Internal thread Slide 2

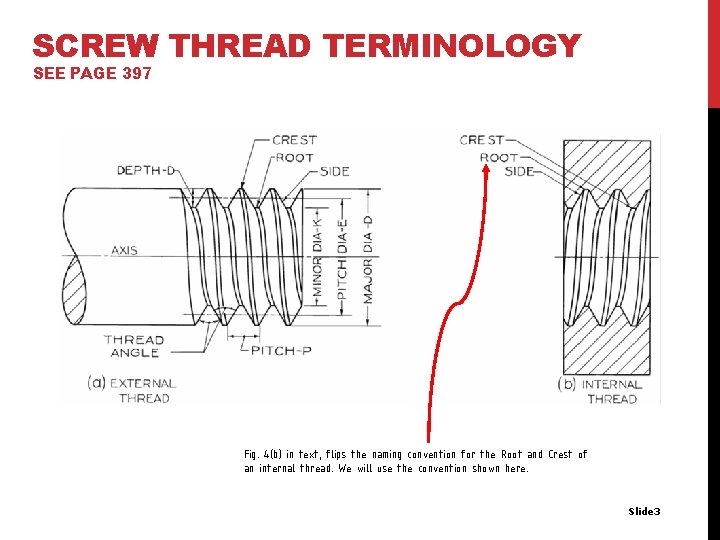
SCREW THREAD TERMINOLOGY SEE PAGE 397 Fig. 4(b) in text, flips the naming convention for the Root and Crest of an internal thread. We will use the convention shown here. Slide 3

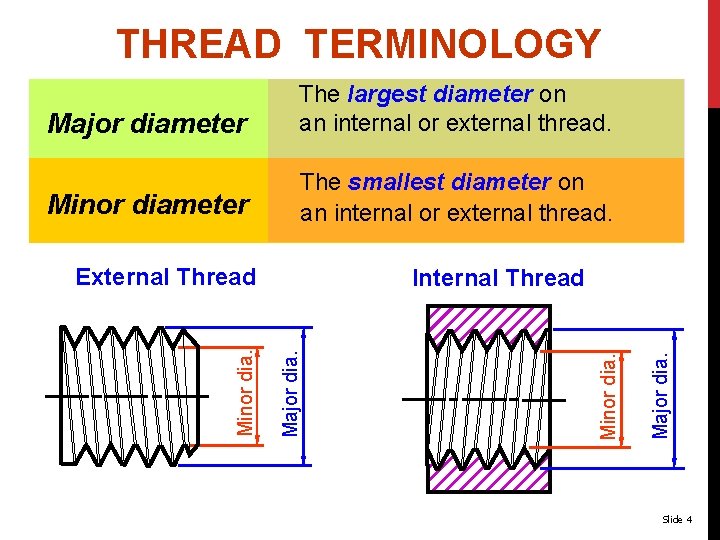
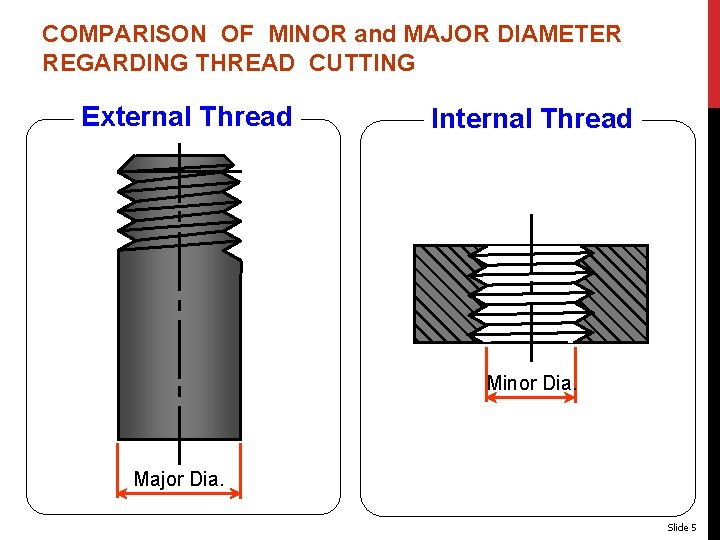
THREAD TERMINOLOGY Major diameter The largest diameter on an internal or external thread. Minor diameter The smallest diameter on an internal or external thread. Major dia. Minor dia. Internal Thread Major dia. Minor dia. External Thread Slide 4

COMPARISON OF MINOR and MAJOR DIAMETER REGARDING THREAD CUTTING External Thread Internal Thread Minor Dia. Major Dia. Slide 5

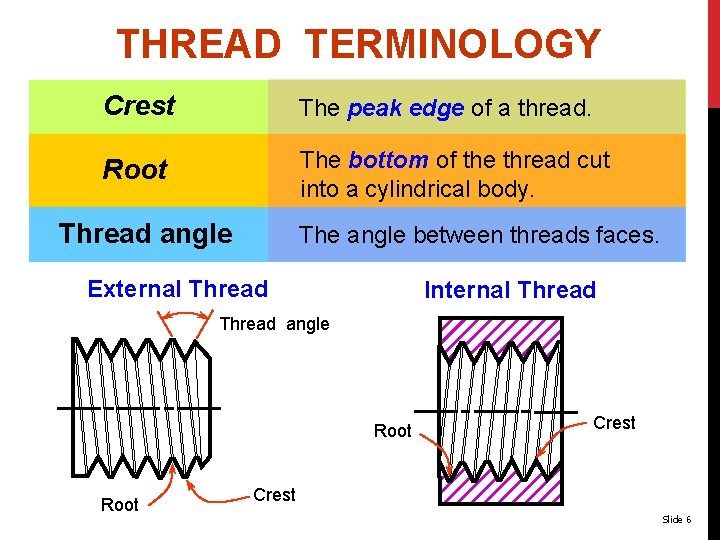
THREAD TERMINOLOGY Crest The peak edge of a thread. Root The bottom of the thread cut into a cylindrical body. Thread angle The angle between threads faces. External Thread Internal Thread angle Root Crest Slide 6

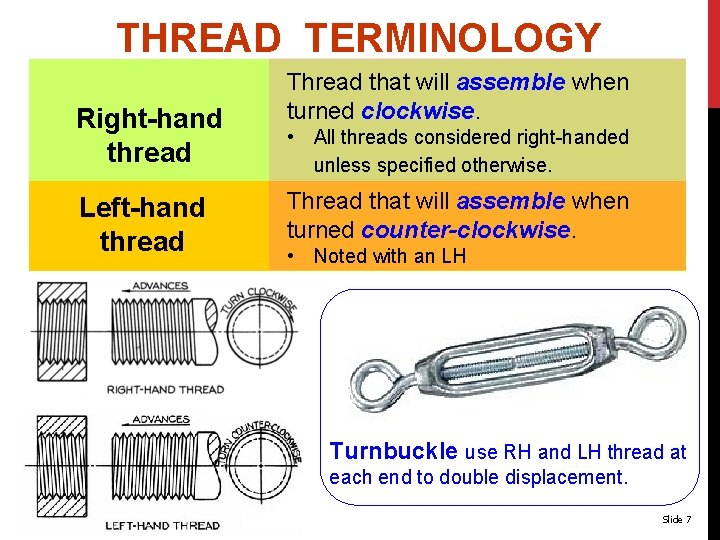
THREAD TERMINOLOGY Right-hand thread Left-hand thread Thread that will assemble when turned clockwise. • All threads considered right-handed unless specified otherwise. Thread that will assemble when turned counter-clockwise. • Noted with an LH Turnbuckle use RH and LH thread at each end to double displacement. Slide 7

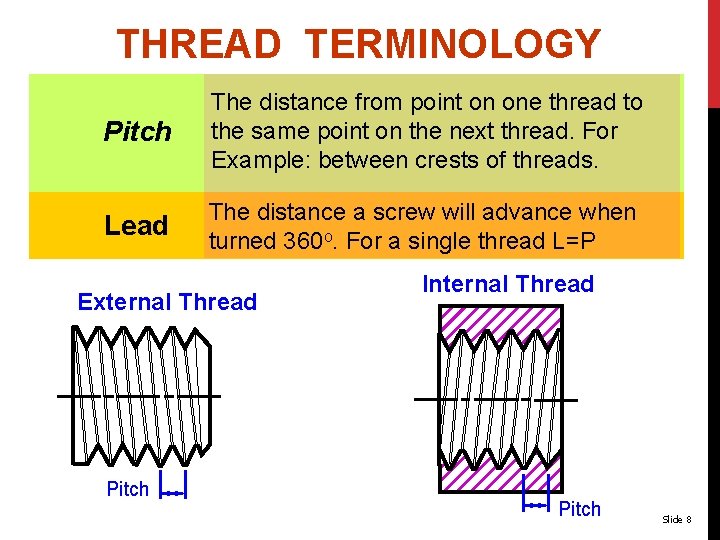
THREAD TERMINOLOGY Pitch The distance from point on one thread to the same point on the next thread. For Example: between crests of threads. Lead The distance a screw will advance when turned 360 o. For a single thread L=P External Thread Pitch Internal Thread Pitch Slide 8

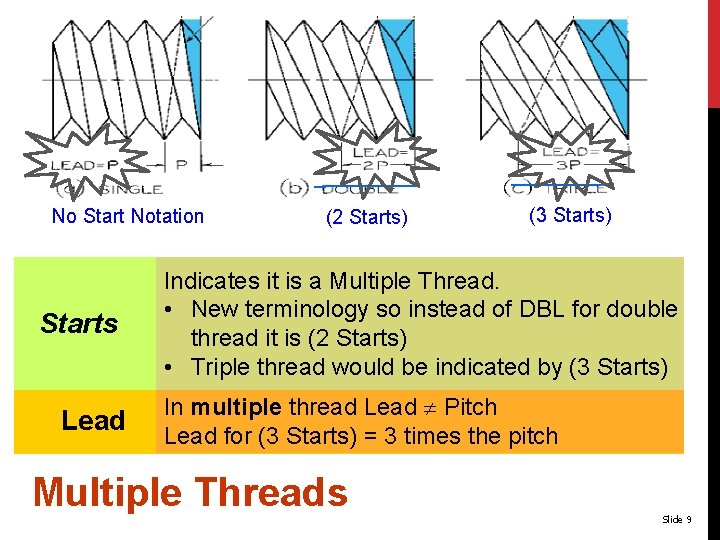
No Start Notation Starts Lead (2 Starts) (3 Starts) Indicates it is a Multiple Thread. • New terminology so instead of DBL for double thread it is (2 Starts) • Triple thread would be indicated by (3 Starts) In multiple thread Lead Pitch Lead for (3 Starts) = 3 times the pitch Multiple Threads Slide 9

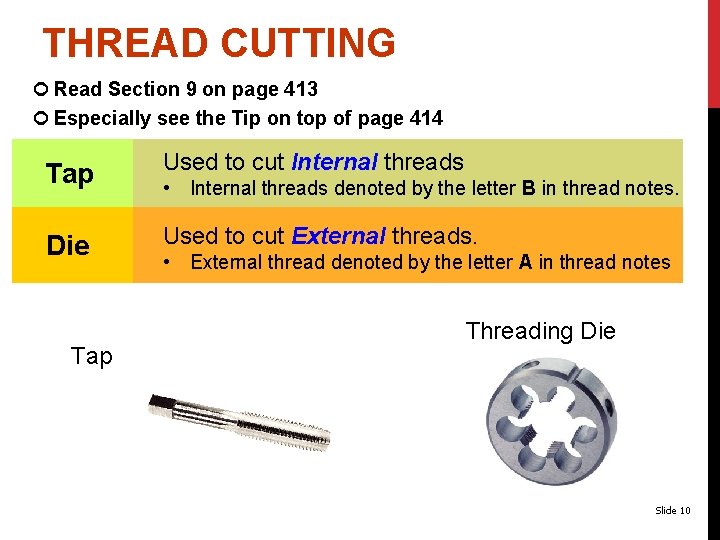
THREAD CUTTING Read Section 9 on page 413 Especially see the Tip on top of page 414 Tap Used to cut Internal threads Die Used to cut External threads. Tap • Internal threads denoted by the letter B in thread notes. • External thread denoted by the letter A in thread notes Threading Die Slide 10

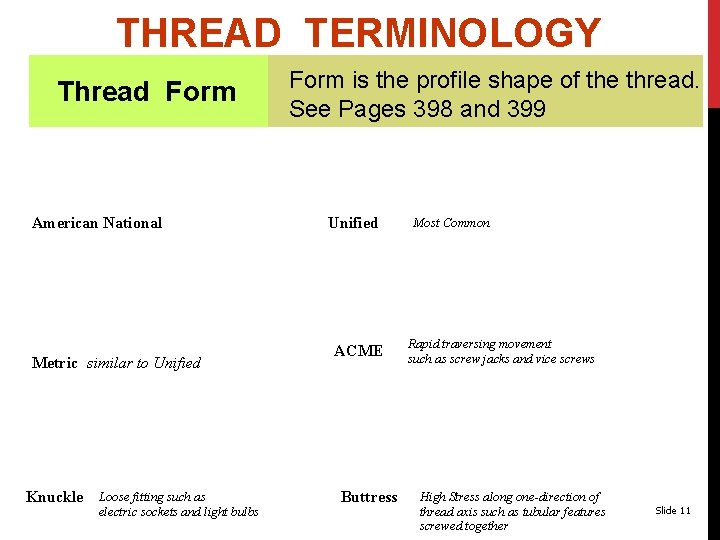
THREAD TERMINOLOGY Thread Form American National Metric similar to Unified Knuckle Loose fitting such as electric sockets and light bulbs Form is the profile shape of the thread. See Pages 398 and 399 Unified ACME Buttress Most Common Rapid traversing movement such as screw jacks and vice screws High Stress along one-direction of thread axis such as tubular features screwed together Slide 11

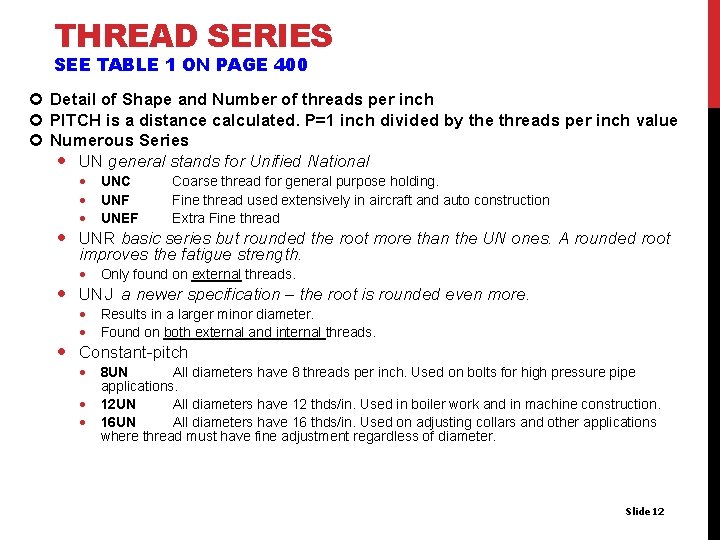
THREAD SERIES SEE TABLE 1 ON PAGE 400 Detail of Shape and Number of threads per inch PITCH is a distance calculated. P=1 inch divided by the threads per inch value Numerous Series UN general stands for Unified National UNC UNF UNEF Coarse thread for general purpose holding. Fine thread used extensively in aircraft and auto construction Extra Fine thread UNR basic series but rounded the root more than the UN ones. A rounded root improves the fatigue strength. Only found on external threads. UNJ a newer specification – the root is rounded even more. Results in a larger minor diameter. Found on both external and internal threads. Constant-pitch 8 UN All diameters have 8 threads per inch. Used on bolts for high pressure pipe applications. 12 UN All diameters have 12 thds/in. Used in boiler work and in machine construction. 16 UN All diameters have 16 thds/in. Used on adjusting collars and other applications where thread must have fine adjustment regardless of diameter. Slide 12

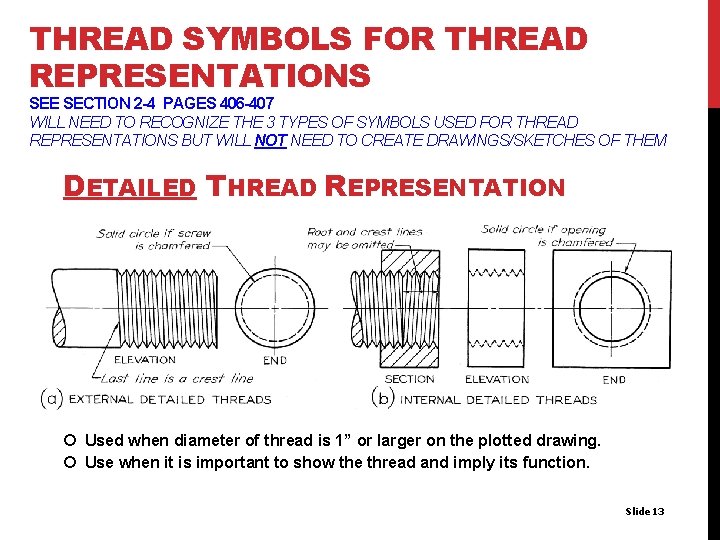
THREAD SYMBOLS FOR THREAD REPRESENTATIONS SEE SECTION 2 -4 PAGES 406 -407 WILL NEED TO RECOGNIZE THE 3 TYPES OF SYMBOLS USED FOR THREAD REPRESENTATIONS BUT WILL NOT NEED TO CREATE DRAWINGS/SKETCHES OF THEM DETAILED THREAD REPRESENTATION Used when diameter of thread is 1” or larger on the plotted drawing. Use when it is important to show the thread and imply its function. Slide 13

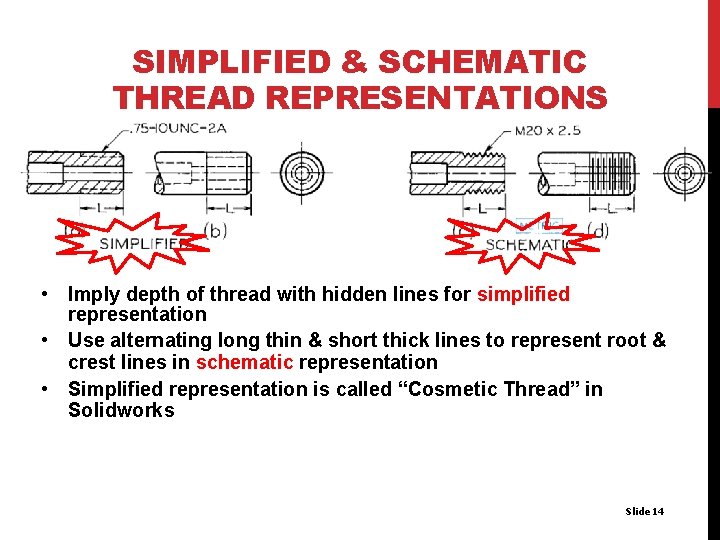
SIMPLIFIED & SCHEMATIC THREAD REPRESENTATIONS • Imply depth of thread with hidden lines for simplified representation • Use alternating long thin & short thick lines to represent root & crest lines in schematic representation • Simplified representation is called “Cosmetic Thread” in Solidworks Slide 14

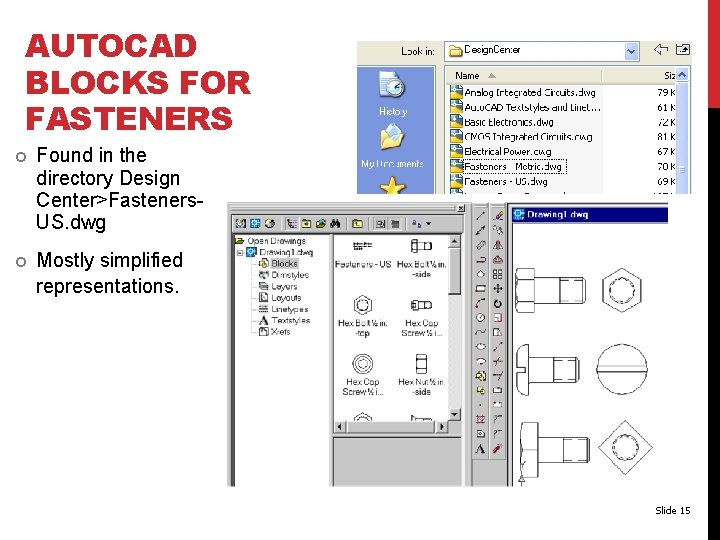
AUTOCAD BLOCKS FOR FASTENERS Found in the directory Design Center>Fasteners. US. dwg Mostly simplified representations. Slide 15

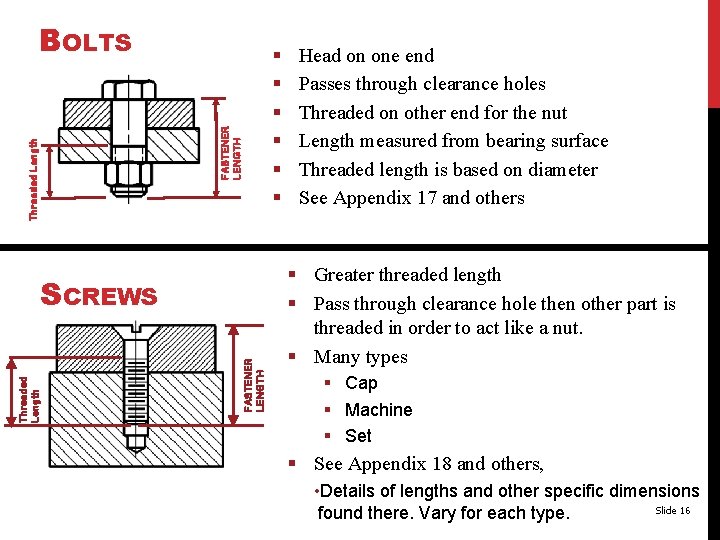
BOLTS Threaded Length FASTENER LENGTH § § § FASTENER LENGTH Threaded Length SCREWS Head on one end Passes through clearance holes Threaded on other end for the nut Length measured from bearing surface Threaded length is based on diameter See Appendix 17 and others § Greater threaded length § Pass through clearance hole then other part is threaded in order to act like a nut. § Many types § Cap § Machine § Set § See Appendix 18 and others, • Details of lengths and other specific dimensions Slide 16 found there. Vary for each type.

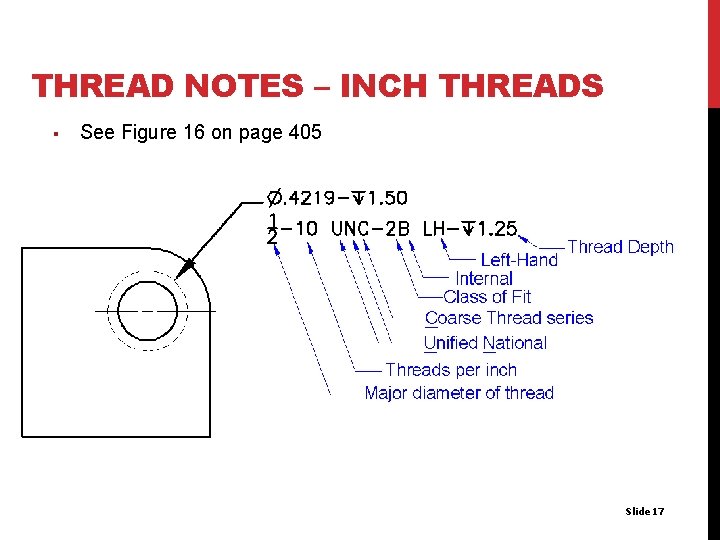
THREAD NOTES – INCH THREADS § See Figure 16 on page 405 INTERNAL THREAD Slide 17

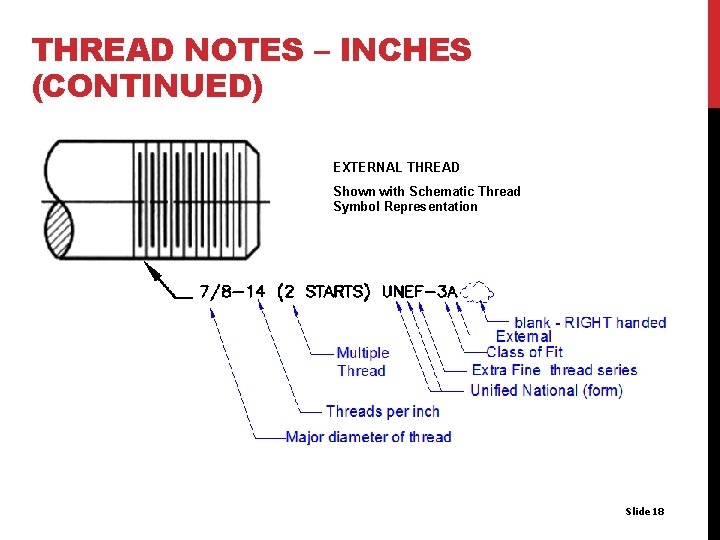
THREAD NOTES – INCHES (CONTINUED) EXTERNAL THREAD Shown with Schematic Thread Symbol Representation Slide 18

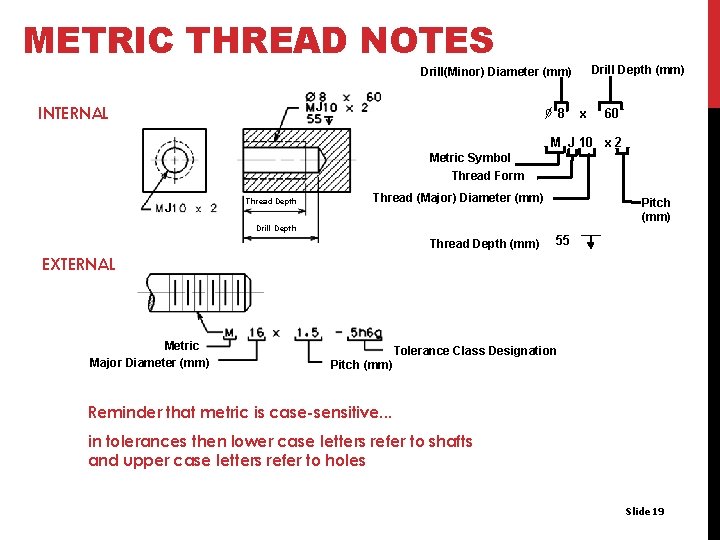
METRIC THREAD NOTES Drill Depth (mm) Drill(Minor) Diameter (mm) J INTERNAL 8 x 60 M J 10 x 2 Metric Symbol Thread Form J Thread Depth Thread (Major) Diameter (mm) Pitch (mm) Drill Depth Thread Depth (mm) 55 EXTERNAL Metric Major Diameter (mm) Tolerance Class Designation Pitch (mm) Reminder that metric is case-sensitive. . . in tolerances then lower case letters refer to shafts and upper case letters refer to holes Slide 19

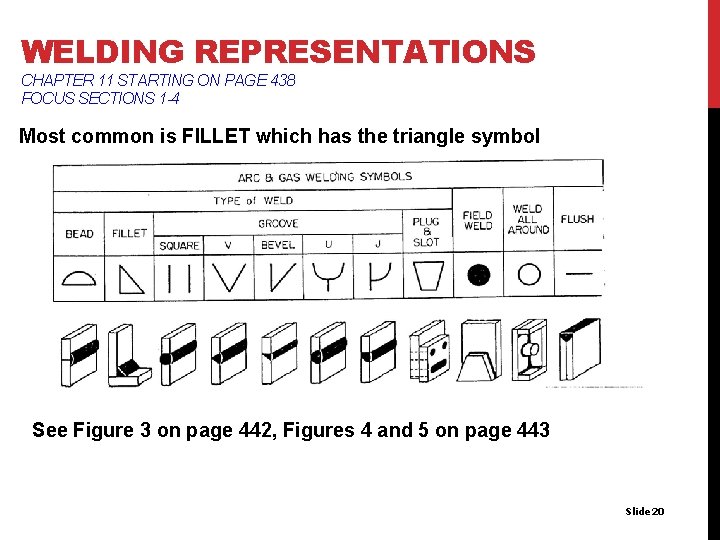
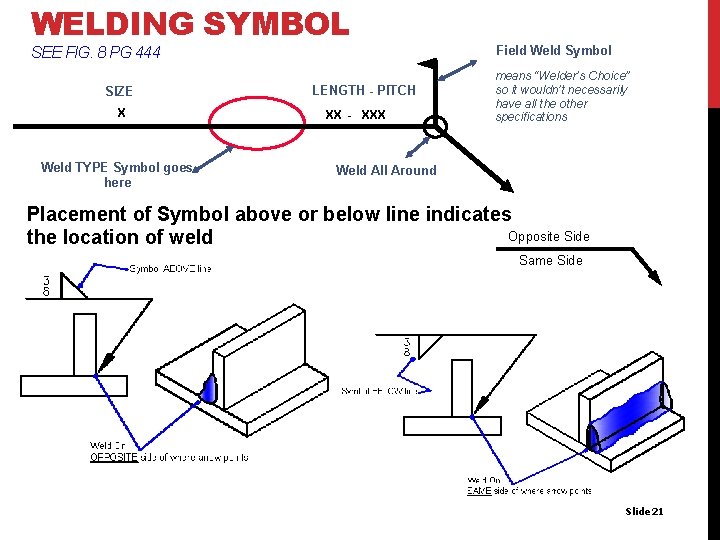
WELDING REPRESENTATIONS CHAPTER 11 STARTING ON PAGE 438 FOCUS SECTIONS 1 -4 Most common is FILLET which has the triangle symbol See Figure 3 on page 442, Figures 4 and 5 on page 443 Slide 20

WELDING SYMBOL SEE FIG. 8 PG 444 SIZE X Weld TYPE Symbol goes here LENGTH - PITCH XX - XXX Field Weld Symbol means “Welder’s Choice” so it wouldn’t necessarily have all the other specifications Weld All Around Placement of Symbol above or below line indicates Opposite Side the location of weld Same Side Slide 21

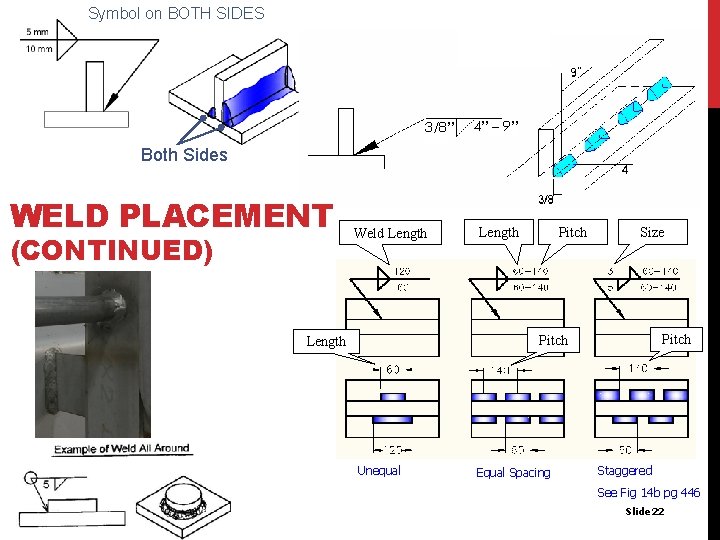
Symbol on BOTH SIDES 3/8” 4” – 9” Both Sides WELD PLACEMENT (CONTINUED) Weld Length Pitch Size Pitch Length Unequal Equal Spacing Staggered See Fig 14 b pg 446 Slide 22

WORKING DRAWINGS READ THROUGH CHAPTER 12 STARTING PAGE 464 § Working drawings provide all information needed to manufacture and assemble a product or system. § Detail drawings show all necessary views, dimensions and notes needed to manufacture a part. § Assembly drawings show enough information to assemble parts. § A parts list identifies item number, part name, material, quantity and sometimes a company part number or other information. BOM STANDS FOR BILL OF MATERIALS. § To get Bill of Materials in Solid. Works use the pulldown menu of INSERT>TABLES>Bill of Materials Slide 23