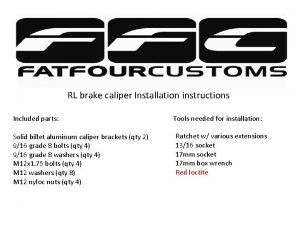
Extended top hats installation instructions Included parts Extended


- Slides: 10

Extended top hats installation instructions Included parts: Extended top hats (qty 2) Spring isolator bushing (qty 2) Energy Suspension top hat bushings (qty 2) M 10 x 1. 5 allen head bolts, pre installed and tq’d to spec (qty 6) M 10 x 1. 5 nuts (qty 6) Tools needed for installation: Ratchet Tq wrench 15 mm deep socket Screwdriver

Disclaimer of these installation instructions These instructions will show you how to install our extended top hats, it will not show you have to remove your suspension. If you aren’t comfortable removing your suspension to replace the top hats please take your car to a professional to have them installed. Our top hats are designed for off road use only.

Step 1 – Remove your current suspension and factory top hat. Step 2 - Remove the bushing sleeve from your factory top hat bushings. You may need a screwdriver to remove the sleeve. It should look like the sleeve below. This part will be used in Step 3.

Step 3 – Take the sleeve you removed in Step 2 and insert into the new bushings on your new extended top hat.

Step 4 – Here you can see the bushing sleeve installed fully into the new top hat bushings.

Step 5 – This step is IMPORTANT, make sure that your bump stops goes into the top hat and also extends past the isolator bushing. Failure to do this may damage your top hat and other suspension components. As you can see below our bump stop is cut in half, we are using the upper part of the bump stop (larger side) and have flipped it to allow the smaller part to enter the top hat. If you use the smaller part of the bump stop you wont need to flip the bump stop.

Step 6 – Here you get a better idea of what we were talking about in Step 5. You can see the smaller side of the bump stop facing up.

Step 7 – When you begin reinstalling the suspension washers it is critical that you install both of the washers pictured. Again, failure to do so will cause damage to your suspension and possibly your car.

Step 8 – Reinstall your coilover spring. Here you can see the bump stop, washers and spring all installed.

Step 9 – Now install your new extended top hat. Here you can see everything back together. Tighten your shock nut. Remove the 3 supplied nuts and install your coilovers back into your car. Tq the top hat nuts to 30 ft lbs *NOTE: should the top hat not go through the chassis smoothly, you may need to clean up the mounting holes. Cleaning the debris out of the chassis to allow for the top hat to be installed easily.
 Top hat installation
 Gps lockbox installation instructions
 Froet roof drain installation instructions
 Ft4z-19a361-a installation instructions
 Remus exhaust installation instructions
 What are the parts of a bar
 Four thinking hats
 Critical thinking hat
 Six thinking hats template
 Costume
 Put your thinking hats on

