Errors in survey measurements Lecture 2 Previous lecture



- Slides: 30

Errors in survey measurements Lecture 2

Previous lecture • • Definition of surveying Plane and geodetic surveying Different types of surveying Principles in surveying – Control – Economy of accuracy – consistency

contents • • Measurements Errors Source of errors Types of errors Quality of measurements Significant figures Error propagation

Measurements • Definition of measurements – The process of estimating the magnitude of some attribute of an object relative to a standard unit – The application of a device or apparatus for the purpose of determining an unknown quantity – An observation made to determine an unknown quantity • Characteristics of measurements – No measurements are exact – True value is never known – All measurements contain errors

Measurements • Types of measurements – Direct • Direct measurement’ refers to measuring exactly the thing that you’re looking to measure • Taping, rope – Indirect • Deducing the measurement from measurements of other quantities. • measuring something by measuring something else • EDM, stadia tacheometry

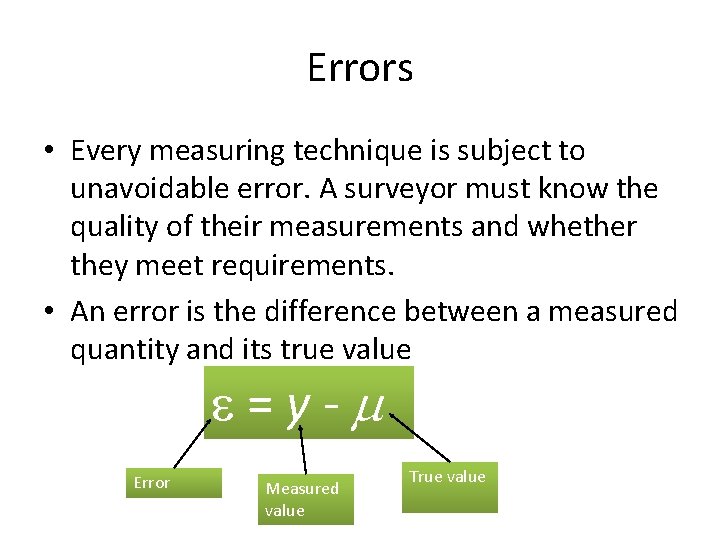
Errors • Every measuring technique is subject to unavoidable error. A surveyor must know the quality of their measurements and whether they meet requirements. • An error is the difference between a measured quantity and its true value =y- Error Measured value True value

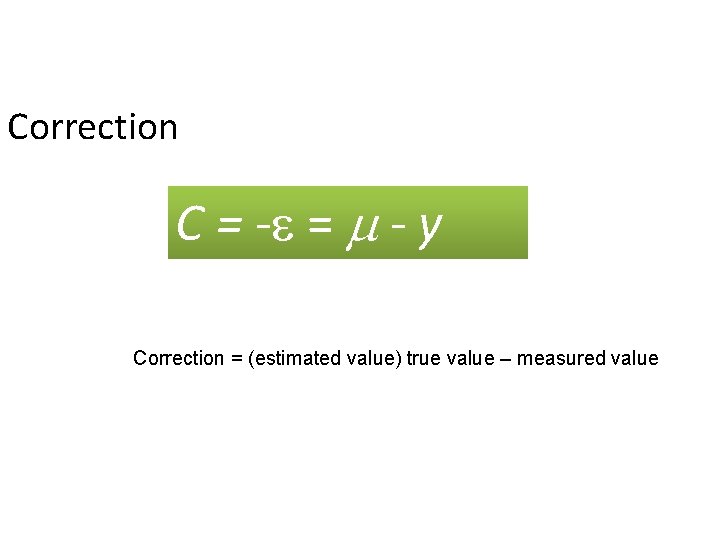
Correction C = - = - y Correction = (estimated value) true value – measured value

Sources of error • Instrumental – Caused by imperfections in instrument construction or adjustment – Wear and tear • Natural errors – caused by changing conditions in the surrounding environment. – Temperature, wind, moisture, etc • Personal errors – Caused by limitations in human sense

Types of errors • Mistakes/blunders/Gross errors – Caused by confusion or carelessness of the observer – Faults in equipment – Use of wrong technique – Misinterpretation – Can be spotted by check measurements and then eliminated – Examples • Wrong booking • Misreading the tape • Miscounting tape lengths

Types of errors • Systematic errors – Follow some physical law – Stays constant in sign and magnitude when repeated under the same condition. – They are cumulative in nature – Corrections: • applying some mathematical corrections. • Can also be removed by calibrating the observing equipment and quantifying the errors • Proper selection of measuring procedure

Types of errors – Examples • Wrong length of tape • Poor ranging • poor straightening • slope • sag • temperature variation • wrong tensioning

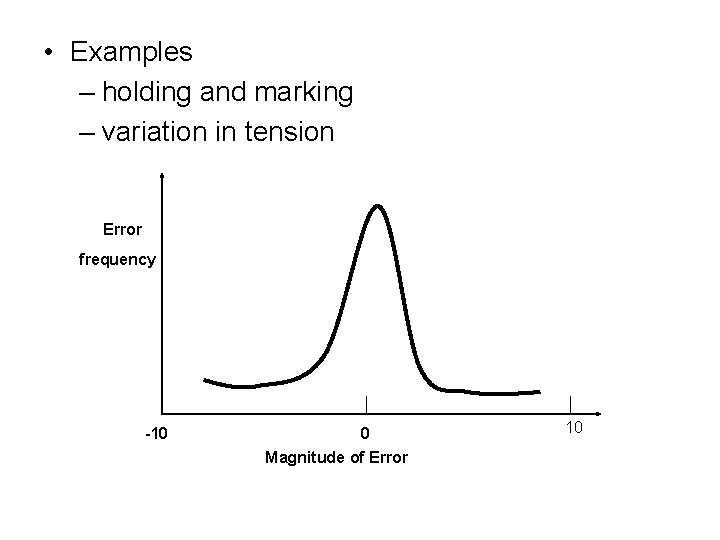
• Random errors – Errors that remain in a measurement after systematic and gross errors have been removed. – Magnitude and direction of the error beyond the control of the surveyor – Compensating – Normally distributed

– Random errors follow general laws of probability and these are: • Small errors occur more frequently and therefore are more frequent than large ones • Large errors happen infrequently and are therefore less probable, very large errors may be mistakes and not random errors • Positive and negative errors of the same size are equally probable and happen with equal frequency.

• Examples – holding and marking – variation in tension Error frequency -10 0 Magnitude of Error 10

Reliability of measurements • Mean • Standard deviation

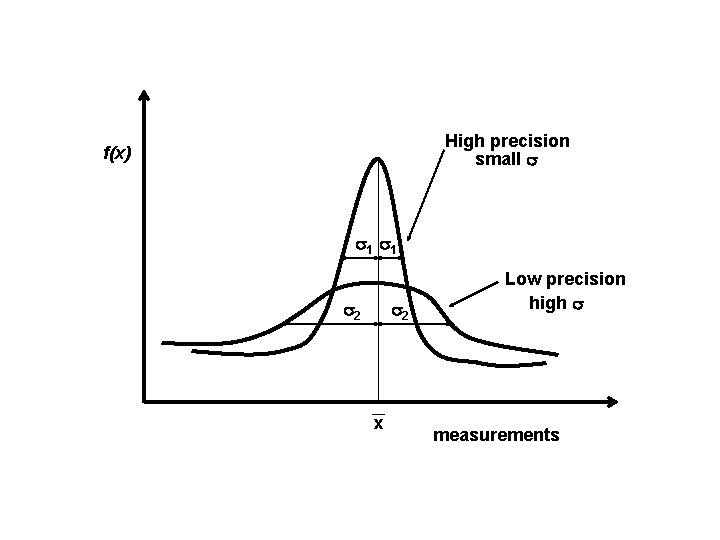
High precision small f(x) 1 1 2 2 x Low precision high measurements

Quality of measurements • Accuracy – Degree of perfection obtained in a measurement – Absolute nearness of a measured quantity to its true value • Precision – The closeness of one measurement to another – Degree of consistency between measurements – Based on the size of discrepancies in a data set

• Accuracy is telling the truth • Precision is repeating the same story over and over again. IN SURVEYING WE WANT OUR MEASUREMENTS TO BE ACCURATE AND PRECISE


Significant Figures • The number of significant digits in a number/value. • Measurements can only be accurate to the degree that the measuring instrument is precise.

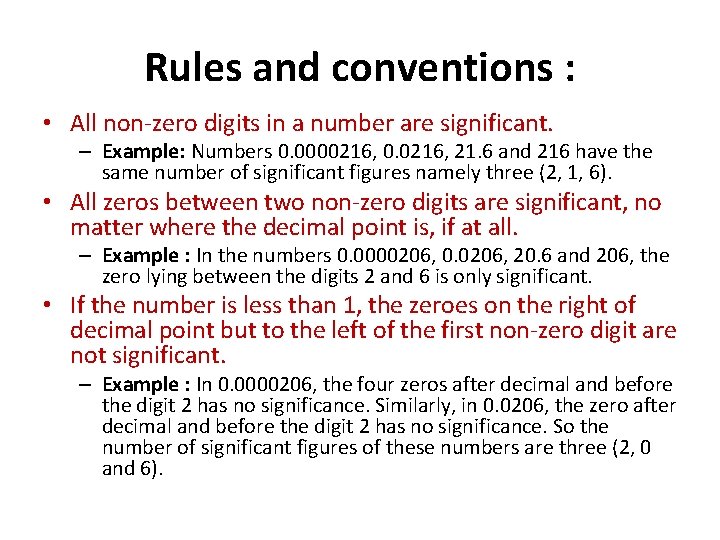
Rules and conventions : • All non-zero digits in a number are significant. – Example: Numbers 0. 0000216, 0. 0216, 21. 6 and 216 have the same number of significant figures namely three (2, 1, 6). • All zeros between two non-zero digits are significant, no matter where the decimal point is, if at all. – Example : In the numbers 0. 0000206, 0. 0206, 20. 6 and 206, the zero lying between the digits 2 and 6 is only significant. • If the number is less than 1, the zeroes on the right of decimal point but to the left of the first non-zero digit are not significant. – Example : In 0. 0000206, the four zeros after decimal and before the digit 2 has no significance. Similarly, in 0. 0206, the zero after decimal and before the digit 2 has no significance. So the number of significant figures of these numbers are three (2, 0 and 6).

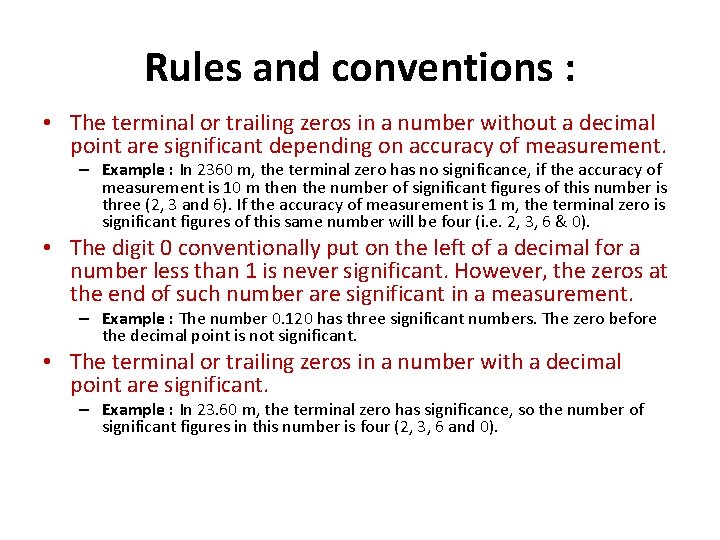
Rules and conventions : • The terminal or trailing zeros in a number without a decimal point are significant depending on accuracy of measurement. – Example : In 2360 m, the terminal zero has no significance, if the accuracy of measurement is 10 m then the number of significant figures of this number is three (2, 3 and 6). If the accuracy of measurement is 1 m, the terminal zero is significant figures of this same number will be four (i. e. 2, 3, 6 & 0). • The digit 0 conventionally put on the left of a decimal for a number less than 1 is never significant. However, the zeros at the end of such number are significant in a measurement. – Example : The number 0. 120 has three significant numbers. The zero before the decimal point is not significant. • The terminal or trailing zeros in a number with a decimal point are significant. – Example : In 23. 60 m, the terminal zero has significance, so the number of significant figures in this number is four (2, 3, 6 and 0).

Error propagation • Propagation of Error – Error Propagation in a Sum or a Difference of Measurments – Error Propagation in a Product of Measurments – Error Propagation in a Division – Error Propagation due to the Power of a Measured Quantity

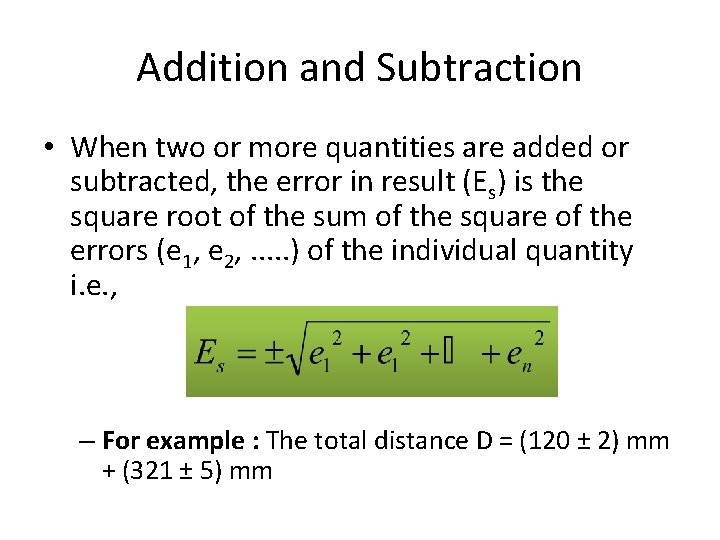
Addition and Subtraction • When two or more quantities are added or subtracted, the error in result (Es) is the square root of the sum of the square of the errors (e 1, e 2, . . . ) of the individual quantity i. e. , – For example : The total distance D = (120 ± 2) mm + (321 ± 5) mm

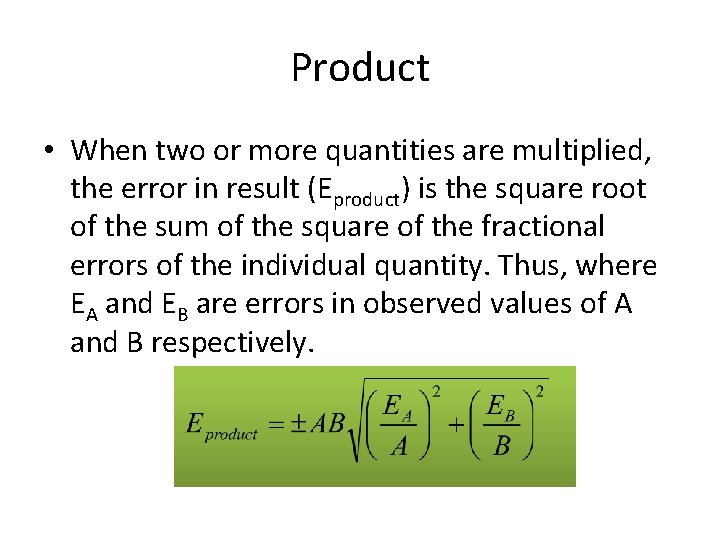
Product • When two or more quantities are multiplied, the error in result (Eproduct) is the square root of the sum of the square of the fractional errors of the individual quantity. Thus, where EA and EB are errors in observed values of A and B respectively.

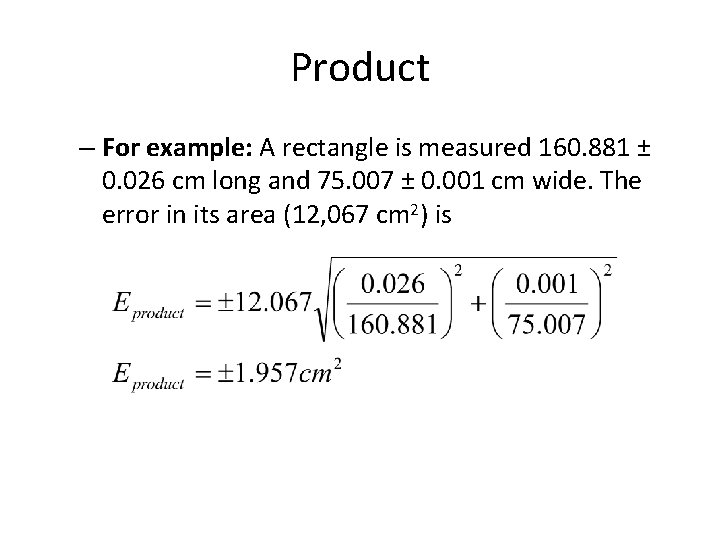
Product – For example: A rectangle is measured 160. 881 ± 0. 026 cm long and 75. 007 ± 0. 001 cm wide. The error in its area (12, 067 cm 2) is

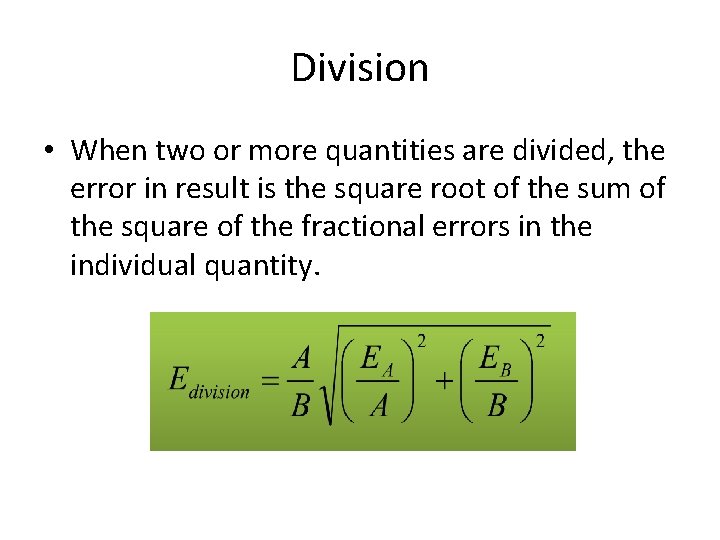
Division • When two or more quantities are divided, the error in result is the square root of the sum of the square of the fractional errors in the individual quantity.

Division • For example: If the area of a rectangular plot is somehow known to be 49, 650 ± 10 m 2 and the width dimension measured several times found to be 175. 66 ± 0. 46 m, the calculated length dimension is

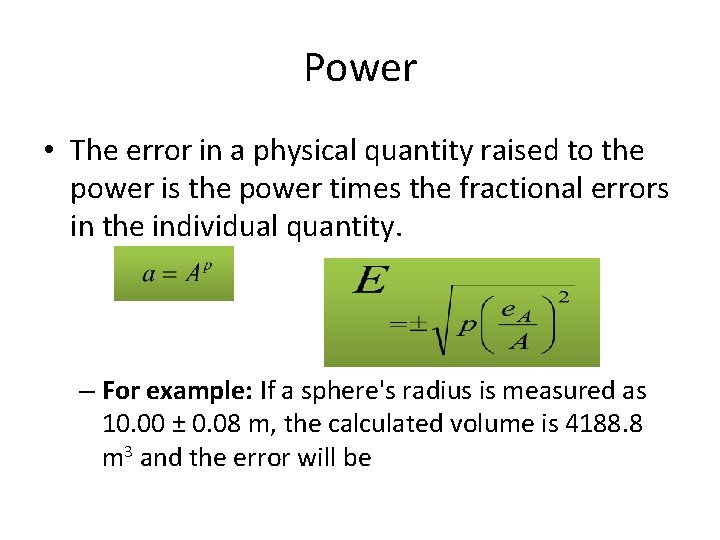
Power • The error in a physical quantity raised to the power is the power times the fractional errors in the individual quantity. – For example: If a sphere's radius is measured as 10. 00 ± 0. 08 m, the calculated volume is 4188. 8 m 3 and the error will be

END