Enhancing Safety of Hydrogen Containment Components Through Materials

- Slides: 19

Enhancing Safety of Hydrogen Containment Components Through Materials Testing Under In -Service Conditions B. P. Somerday, J. A. Campbell, K. L. Lee, J. A. Ronevich, and C. San Marchi Sandia National Laboratories, Livermore CA, USA 6 th International Conference on Hydrogen Safety (ICHS 2015) Yokohama, Japan October 21, 2015 Sandia is a multiprogram laboratory operated by Sandia Corporation, a Lockheed Martin Company, for the United States Department of Energy under contract DE-AC 04 -94 AL 85000

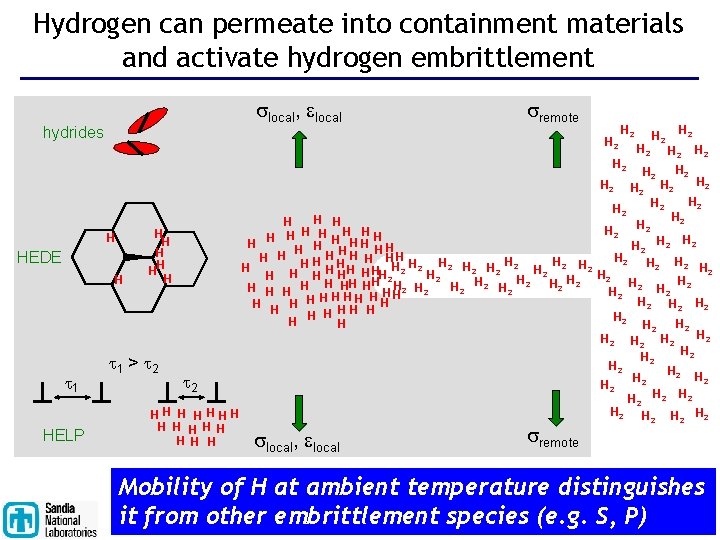
Hydrogen can permeate into containment materials and activate hydrogen embrittlement slocal, elocal hydrides sremote H 2 H 2 H 2 H HEDE H t 1 HELP t 1 > H 2 H 2 H 2 H 2 H H HH H H HH H 2 H 2 H H H H HH H H 2 2 H 2 H 2 H H H H H 2 2 2 H H H H 2 2 H 2 H H HH H 2 H 2 2 2 H H H H 2 H 2 H H H H H 2 H 2 H 2 H 2 t 2 H 2 H 2 HH H H HHH H 2 H 2 H H H H remote local s , e s Mobility of H at ambient temperature distinguishes it from other embrittlement species (e. g. S, P)

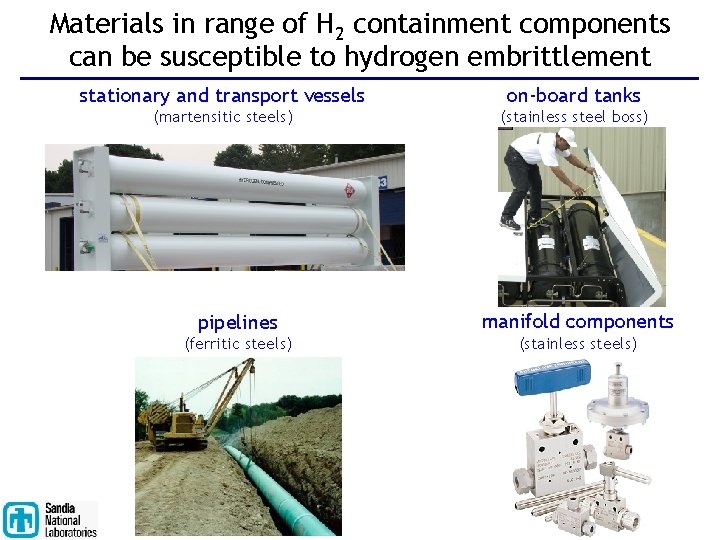
Materials in range of H 2 containment components can be susceptible to hydrogen embrittlement stationary and transport vessels on-board tanks (martensitic steels) (stainless steel boss) pipelines manifold components (ferritic steels) (stainless steels)

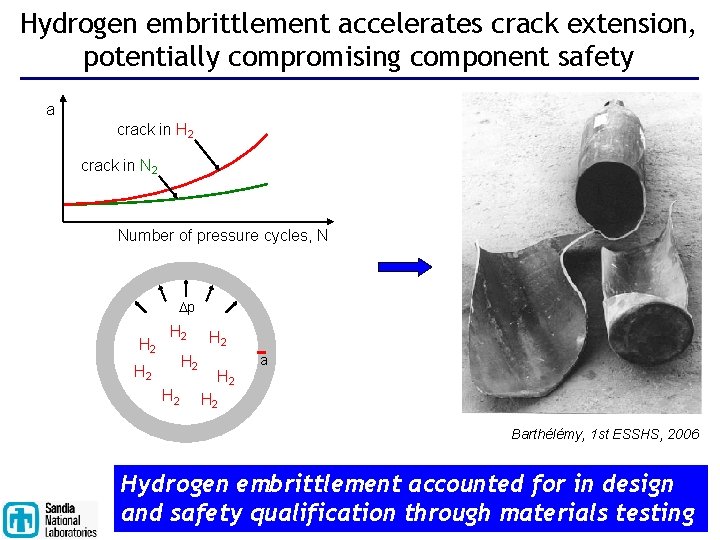
Hydrogen embrittlement accelerates crack extension, potentially compromising component safety a crack in H 2 crack in N 2 Number of pressure cycles, N Dp H 2 H 2 a H 2 Barthélémy, 1 st ESSHS, 2006 Hydrogen embrittlement accounted for in design and safety qualification through materials testing

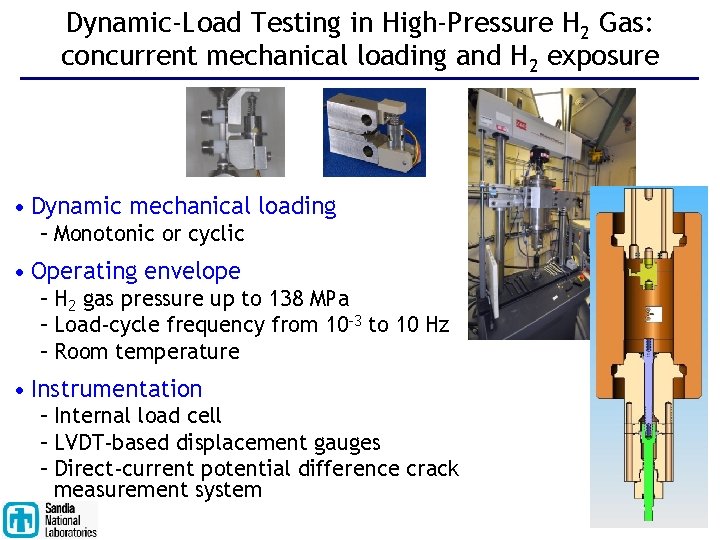
Dynamic-Load Testing in High-Pressure H 2 Gas: concurrent mechanical loading and H 2 exposure • Dynamic mechanical loading – Monotonic or cyclic • Operating envelope – H 2 gas pressure up to 138 MPa – Load-cycle frequency from 10 -3 to 10 Hz – Room temperature • Instrumentation – Internal load cell – LVDT-based displacement gauges – Direct-current potential difference crack measurement system

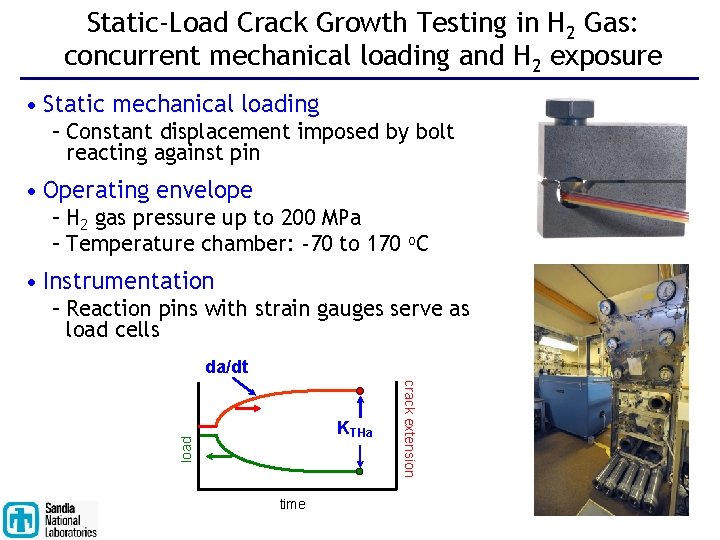
Static-Load Crack Growth Testing in H 2 Gas: concurrent mechanical loading and H 2 exposure • Static mechanical loading – Constant displacement imposed by bolt reacting against pin • Operating envelope – H 2 gas pressure up to 200 MPa – Temperature chamber: -70 to 170 o. C • Instrumentation – Reaction pins with strain gauges serve as load cells da/dt load time crack extension KTHa

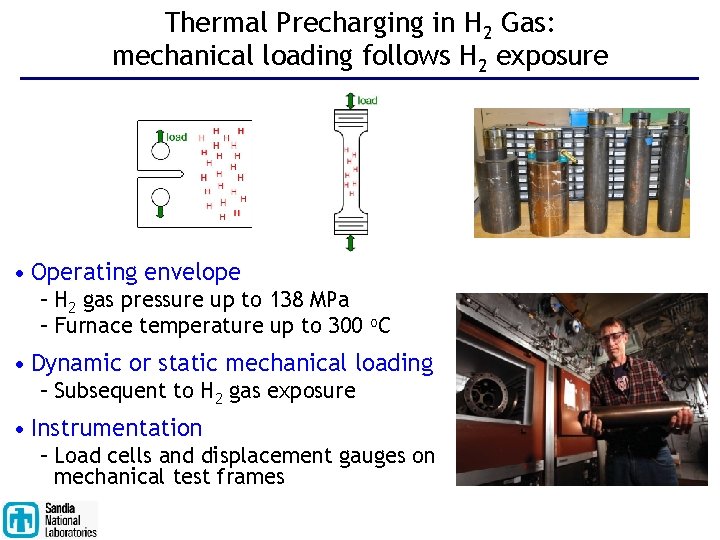
Thermal Precharging in H 2 Gas: mechanical loading follows H 2 exposure • Operating envelope – H 2 gas pressure up to 138 MPa – Furnace temperature up to 300 o. C • Dynamic or static mechanical loading – Subsequent to H 2 gas exposure • Instrumentation – Load cells and displacement gauges on mechanical test frames

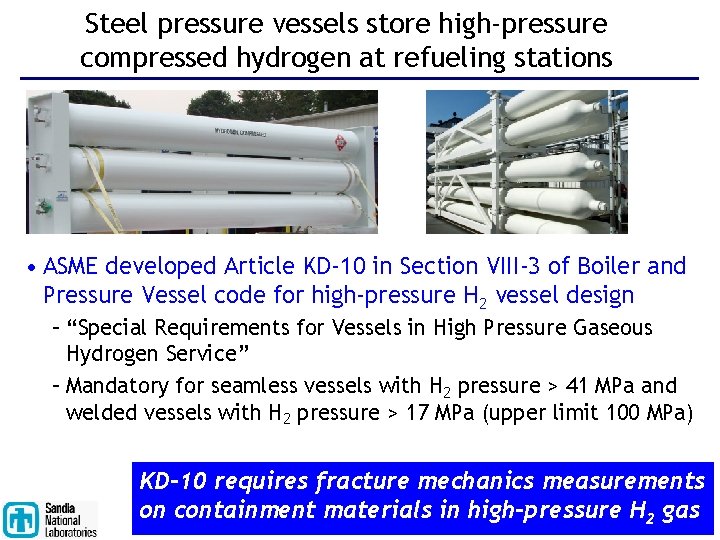
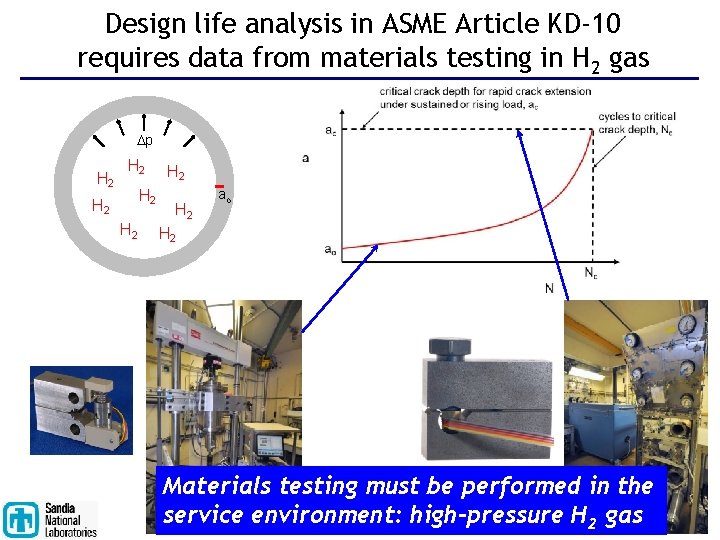
Steel pressure vessels store high-pressure compressed hydrogen at refueling stations • ASME developed Article KD-10 in Section VIII-3 of Boiler and Pressure Vessel code for high-pressure H 2 vessel design – “Special Requirements for Vessels in High Pressure Gaseous Hydrogen Service” – Mandatory for seamless vessels with H 2 pressure > 41 MPa and welded vessels with H 2 pressure > 17 MPa (upper limit 100 MPa) KD-10 requires fracture mechanics measurements on containment materials in high-pressure H 2 gas

Design life analysis in ASME Article KD-10 requires data from materials testing in H 2 gas Dp H 2 H 2 ao H 2 Materials testing must be performed in the service environment: high-pressure H 2 gas

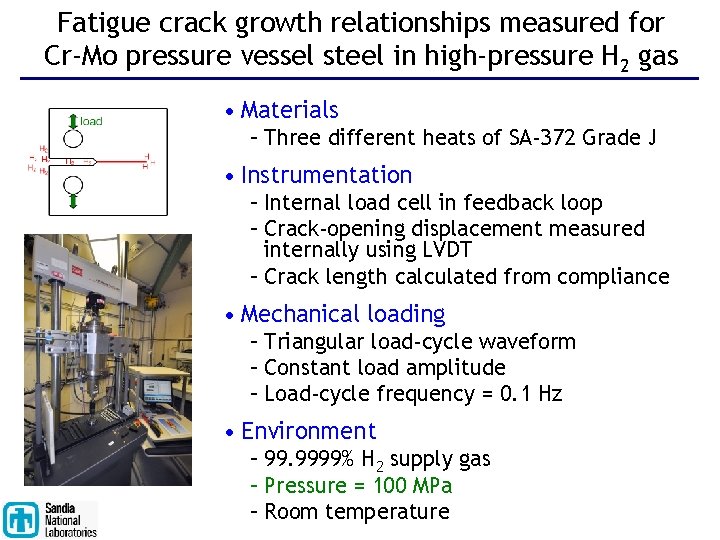
Fatigue crack growth relationships measured for Cr-Mo pressure vessel steel in high-pressure H 2 gas • Materials – Three different heats of SA-372 Grade J • Instrumentation – Internal load cell in feedback loop – Crack-opening displacement measured internally using LVDT – Crack length calculated from compliance • Mechanical loading – Triangular load-cycle waveform – Constant load amplitude – Load-cycle frequency = 0. 1 Hz • Environment – 99. 9999% H 2 supply gas – Pressure = 100 MPa – Room temperature

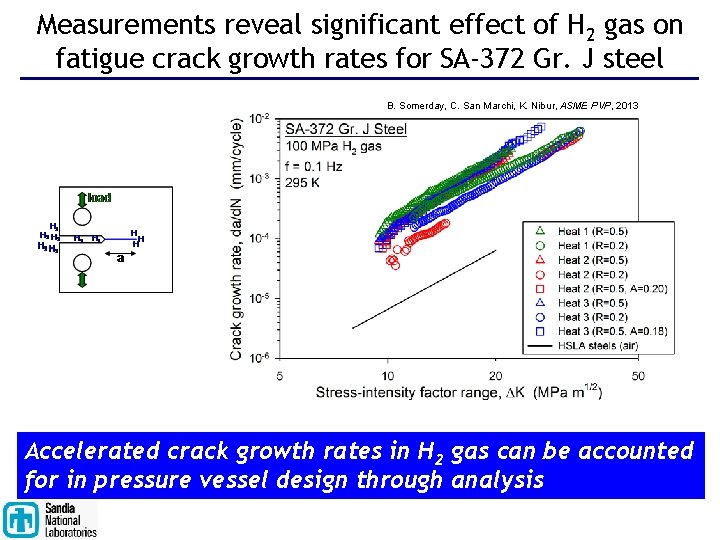
Measurements reveal significant effect of H 2 gas on fatigue crack growth rates for SA-372 Gr. J steel B. Somerday, C. San Marchi, K. Nibur, ASME PVP, 2013 Accelerated crack growth rates in H 2 gas can be accounted for in pressure vessel design through analysis

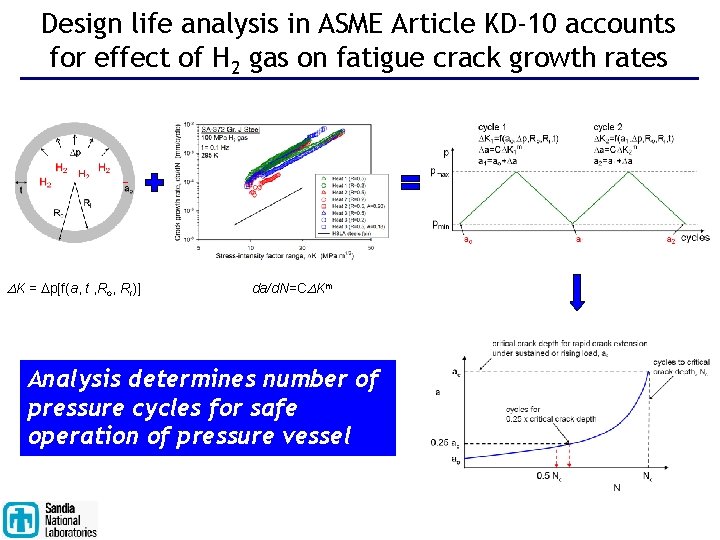
Design life analysis in ASME Article KD-10 accounts for effect of H 2 gas on fatigue crack growth rates DK = Dp[f(a, t , Ro, Ri)] da/d. N=CDKm Analysis determines number of pressure cycles for safe operation of pressure vessel

Summary • Hydrogen embrittlement accounted for in design and safety qualification of components through materials testing • Sandia National Laboratories features three systems for materials testing in H 2 gas: – – Dynamic-Load Testing in High-Pressure H 2 Gas Static-Load Crack Growth Testing in H 2 Gas Thermal Precharging in H 2 Gas Distinguishing feature: high-pressure (>138 MPa) H 2 gas • Materials testing at Sandia National Laboratories motivated by developing and exercising standards – Fatigue crack growth testing of pressure vessel steel in H 2 gas supported design-life calculation prescribed in ASME code

Back-up Slides

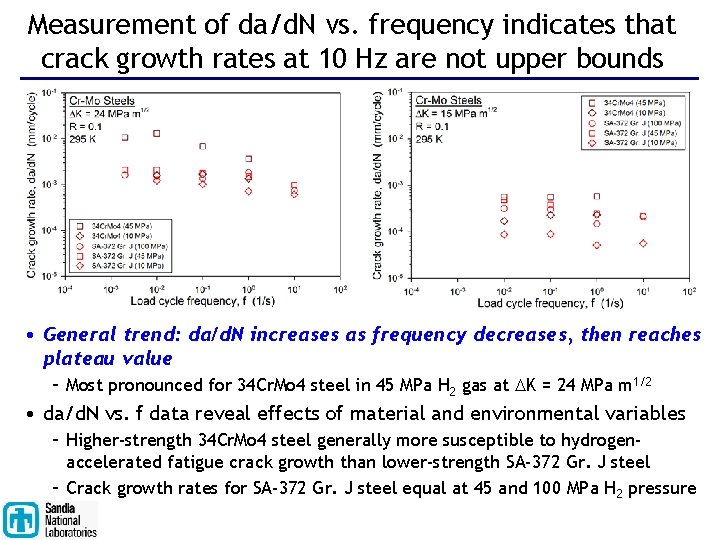
Measurement of da/d. N vs. frequency indicates that crack growth rates at 10 Hz are not upper bounds • General trend: da/d. N increases as frequency decreases, then reaches plateau value – Most pronounced for 34 Cr. Mo 4 steel in 45 MPa H 2 gas at DK = 24 MPa m 1/2 • da/d. N vs. f data reveal effects of material and environmental variables – Higher-strength 34 Cr. Mo 4 steel generally more susceptible to hydrogenaccelerated fatigue crack growth than lower-strength SA-372 Gr. J steel – Crack growth rates for SA-372 Gr. J steel equal at 45 and 100 MPa H 2 pressure

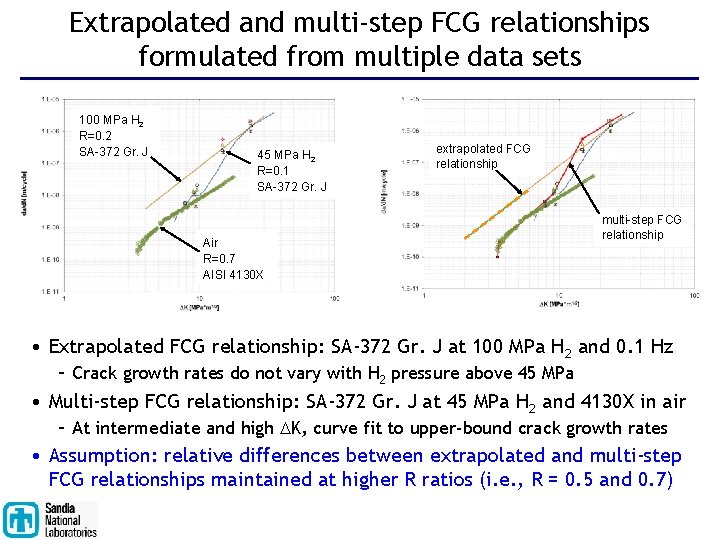
Extrapolated and multi-step FCG relationships formulated from multiple data sets 100 MPa H 2 R=0. 2 SA-372 Gr. J 45 MPa H 2 R=0. 1 SA-372 Gr. J extrapolated FCG relationship Air R=0. 7 AISI 4130 X multi-step FCG relationship • Extrapolated FCG relationship: SA-372 Gr. J at 100 MPa H 2 and 0. 1 Hz – Crack growth rates do not vary with H 2 pressure above 45 MPa • Multi-step FCG relationship: SA-372 Gr. J at 45 MPa H 2 and 4130 X in air – At intermediate and high DK, curve fit to upper-bound crack growth rates • Assumption: relative differences between extrapolated and multi-step FCG relationships maintained at higher R ratios (i. e. , R = 0. 5 and 0. 7)

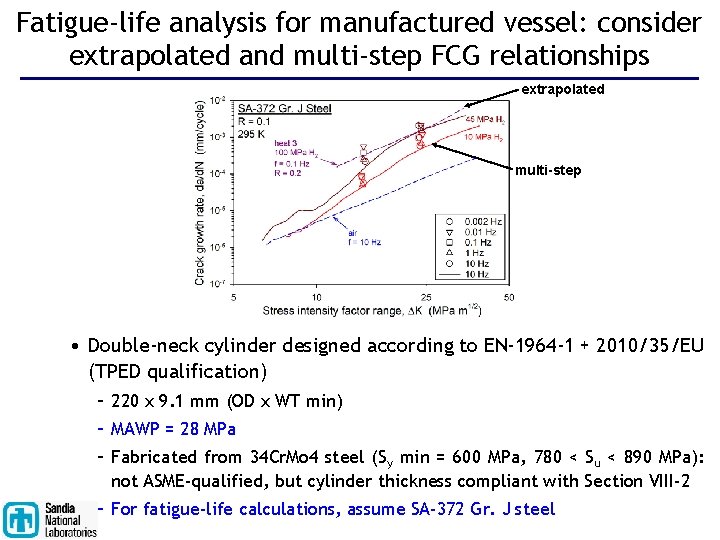
Fatigue-life analysis for manufactured vessel: consider extrapolated and multi-step FCG relationships extrapolated multi-step • Double-neck cylinder designed according to EN-1964 -1 + 2010/35/EU (TPED qualification) – 220 x 9. 1 mm (OD x WT min) – MAWP = 28 MPa – Fabricated from 34 Cr. Mo 4 steel (Sy min = 600 MPa, 780 < Su < 890 MPa): not ASME-qualified, but cylinder thickness compliant with Section VIII-2 – For fatigue-life calculations, assume SA-372 Gr. J steel

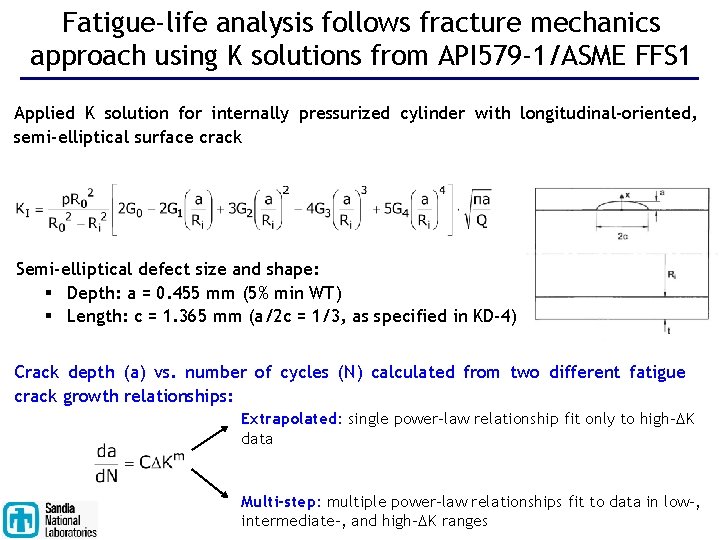
Fatigue-life analysis follows fracture mechanics approach using K solutions from API 579 -1/ASME FFS 1 Applied K solution for internally pressurized cylinder with longitudinal-oriented, semi-elliptical surface crack Semi-elliptical defect size and shape: § Depth: a = 0. 455 mm (5% min WT) § Length: c = 1. 365 mm (a/2 c = 1/3, as specified in KD-4) Crack depth (a) vs. number of cycles (N) calculated from two different fatigue crack growth relationships: Extrapolated: single power-law relationship fit only to high-DK data Multi-step: multiple power-law relationships fit to data in low-, intermediate-, and high-DK ranges

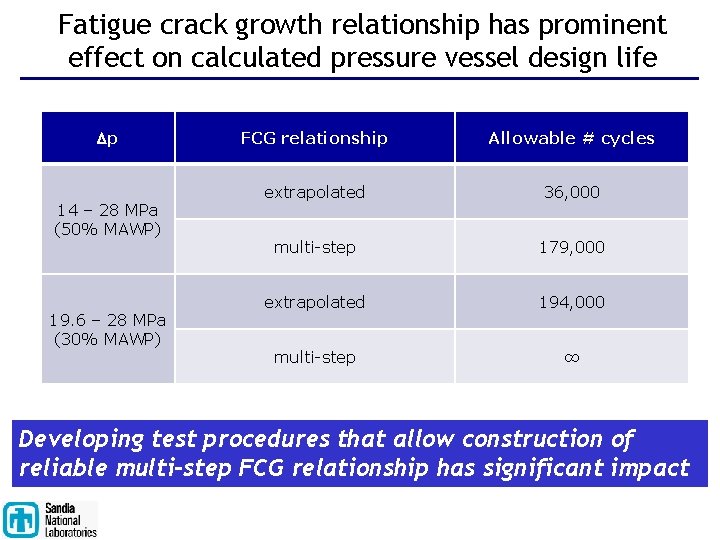
Fatigue crack growth relationship has prominent effect on calculated pressure vessel design life Dp 14 – 28 MPa (50% MAWP) 19. 6 – 28 MPa (30% MAWP) FCG relationship Allowable # cycles extrapolated 36, 000 multi-step 179, 000 extrapolated 194, 000 multi-step ∞ Developing test procedures that allow construction of reliable multi-step FCG relationship has significant impact